

Page 1
MODEL
AR-M208
DIGITAL MULTIFUNCTIONAL
SYSTEM
KEY OPERATOR'S GUIDE
Page
• REGISTERING
THE KEY OPERATOR
CODE NUMBER
• LIST OF KEY OPERATOR
PROGRAMS
• USING THE KEY
OPERATOR PROGRAMS
• KEY OPERATOR
PROGRAMS
2
5
7
9
Page 2

Page 3

This KEY OPERATOR'S GUIDE contains information about all
programs for use by the key operator. The programs allow the key
operator to tailor many functions of this copier for specific modes of
operation. These programs can only be accessed after a key operator
code number has been entered.
Please familiarize yourself with this entire guide. Keep it handy, and
refer to it for the information you need to keep the copier operating
smoothly.
This guide describes the copier features. For description of the other
features, see the separate relevant manuals.
CONTENTS
Page
●
REGISTERING THE KEY OPERATOR CODE NUMBER . . . . . . . 2
●
LIST OF KEY OPERATOR PROGRAMS . . . . . . . . . . . . . . . . . . . . 5
●
USING THE KEY OPERATOR PROGRAMS . . . . . . . . . . . . . . . . . 7
●
KEY OPERATOR PROGRAMS . . . . . . . . . . . . . . . . . . . . . . . . . . . 9
Function setting. . . . . . . . . . . . . . . . . . . . . . . . . . . . . . . . . . . . . . . . . 9
Timer setting . . . . . . . . . . . . . . . . . . . . . . . . . . . . . . . . . . . . . . . . . . 13
Enable/disable . . . . . . . . . . . . . . . . . . . . . . . . . . . . . . . . . . . . . . . . 15
Account control . . . . . . . . . . . . . . . . . . . . . . . . . . . . . . . . . . . . . . . . 17
Other program. . . . . . . . . . . . . . . . . . . . . . . . . . . . . . . . . . . . . . . . . 20
1
Page 4
REGISTERING THE KEY
Enter key operator
code.
KEY OPERATOR CODE:
-----
OPERATOR CODE NUMBER
A key operator code number must be registered before any key operator program can be used. The
key operator must remember this number. Only this registered number will allow access to the key
operator programs.
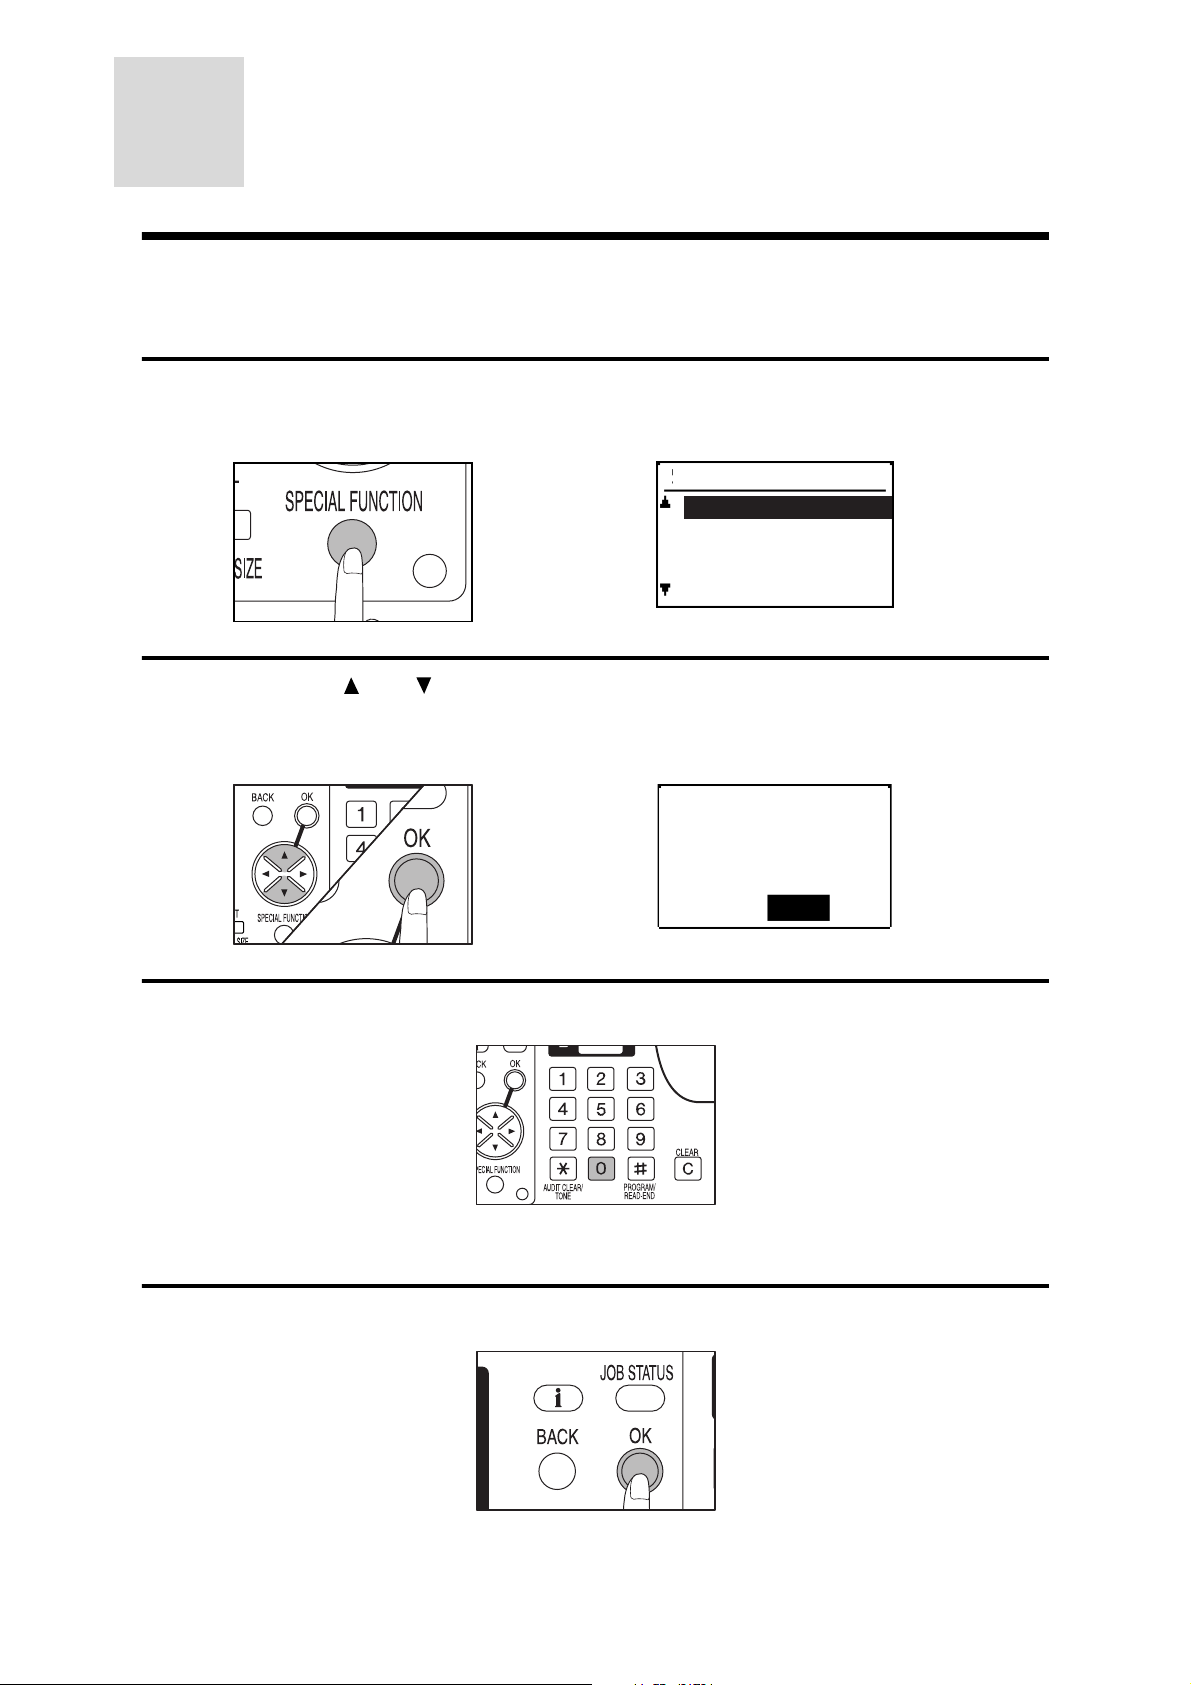
Press the SPECIAL FUNCTION key.
1
●
The SPECIAL FUNCTION screen will appear.
SPECIAL FUNCTION
SPECIAL MODES
ORIG. SIZE ENTER
PAPER SIZE SET
DISPLAY CONTRAST
Use the and keys to select "KEY OPERATOR PRG." and press the
2
OK key.
●
The following display will appear.
Enter 0 five times using the zero key.
3
●
As the code number is entered, the dashes in the display will change to asterisks.
●
The MODE SELECT screen will appear with COPIER highlighted.
Press the OK key.
4
●
The COPIER MODE screen will appear with FUNCTION SETTING highlighted.
2
Page 5
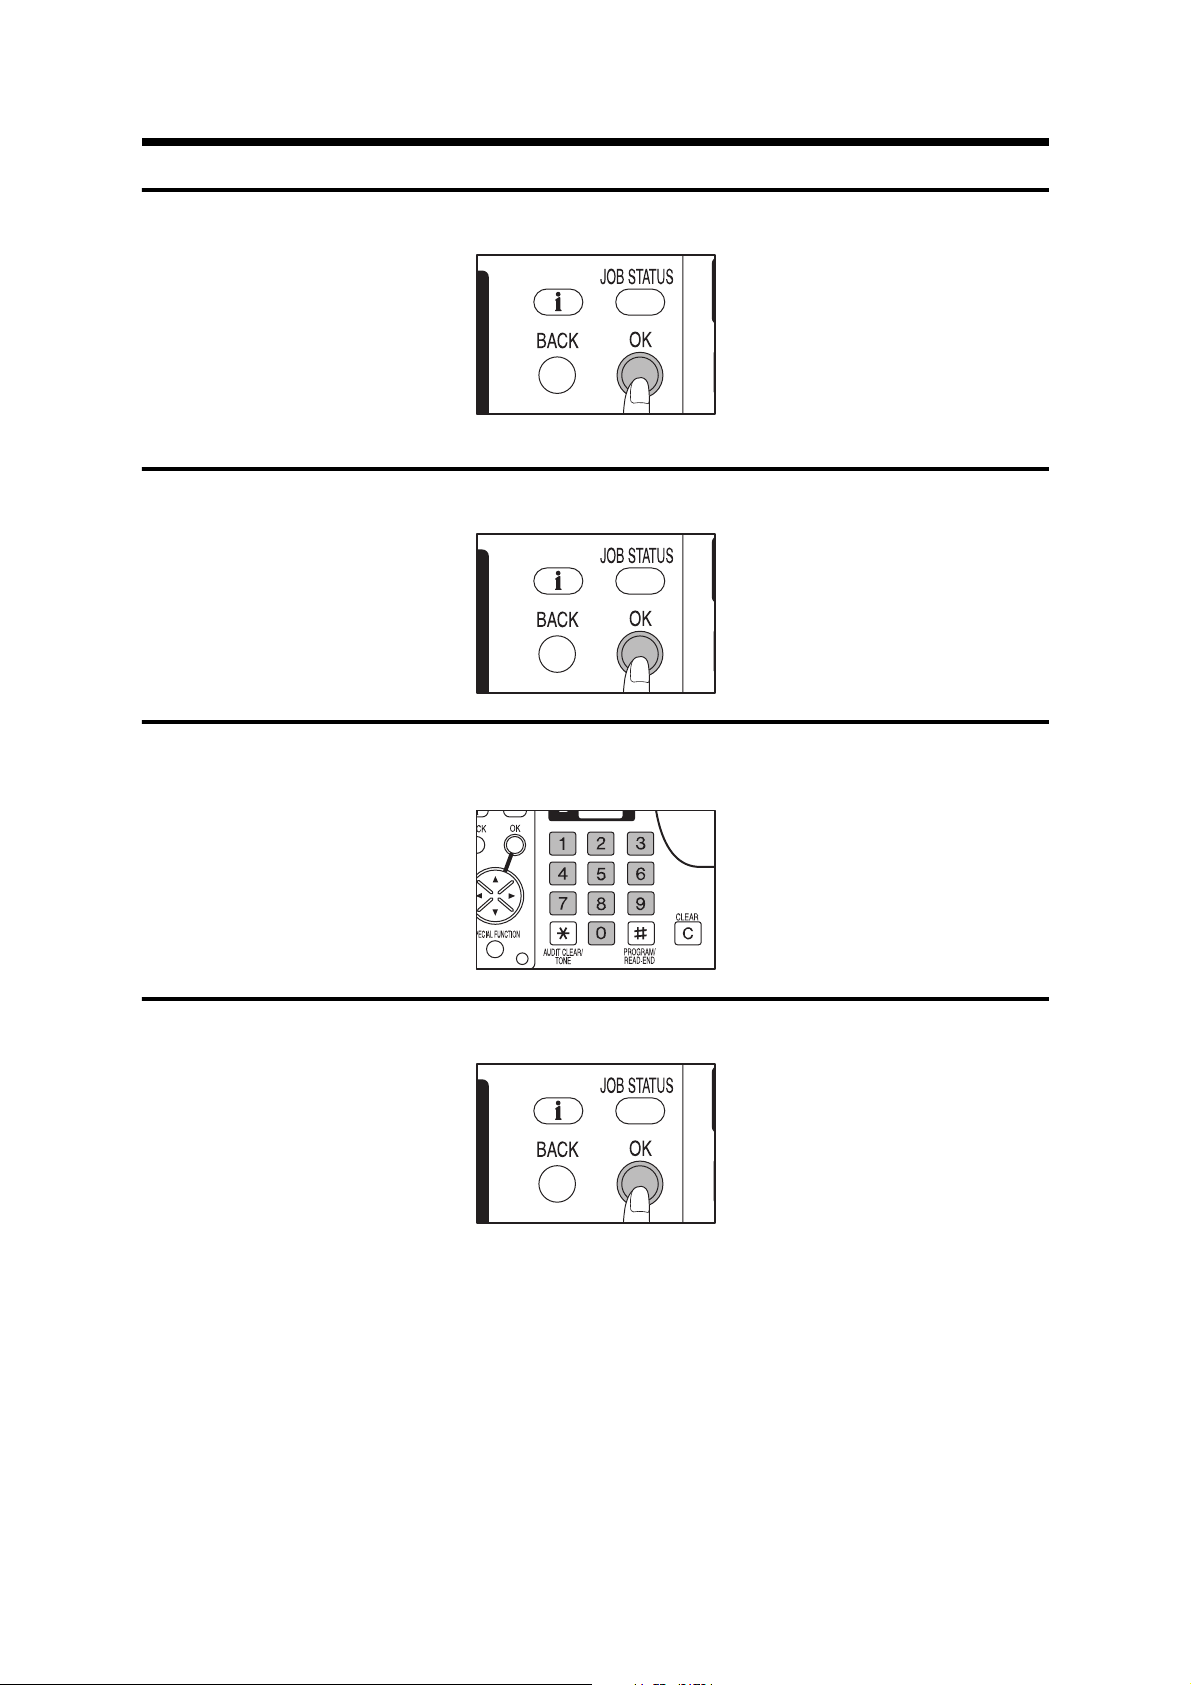
Press the OK key.
5
●
The FUNCTION SETTING screen will appear with KEY OP. # CHANGE highlighted.
Press the OK key.
6
REGISTERING THE KEY OPERATOR CODE
Choose a new 5-digit code number and enter it using the numeric
7
keys.
Press the OK key.
8
●
The code number will change from the factory setting (five zeros) to the new setting. This
new setting will remain in effect until it is changed by the procedure above. To change the
number again, the current registered number must be used in step 3.
3
Page 6

REGISTERING THE KEY OPERATOR CODE NUMBER
To continue with other key operator programs, use the and keys to
9
select another program. To select a program of another category,
press the BACK key and select the desired category. To exit the key
operator program mode, press the CLEAR ALL (CA) key.
4
Page 7
LIST OF KEY OPERATOR
PROGRAMS
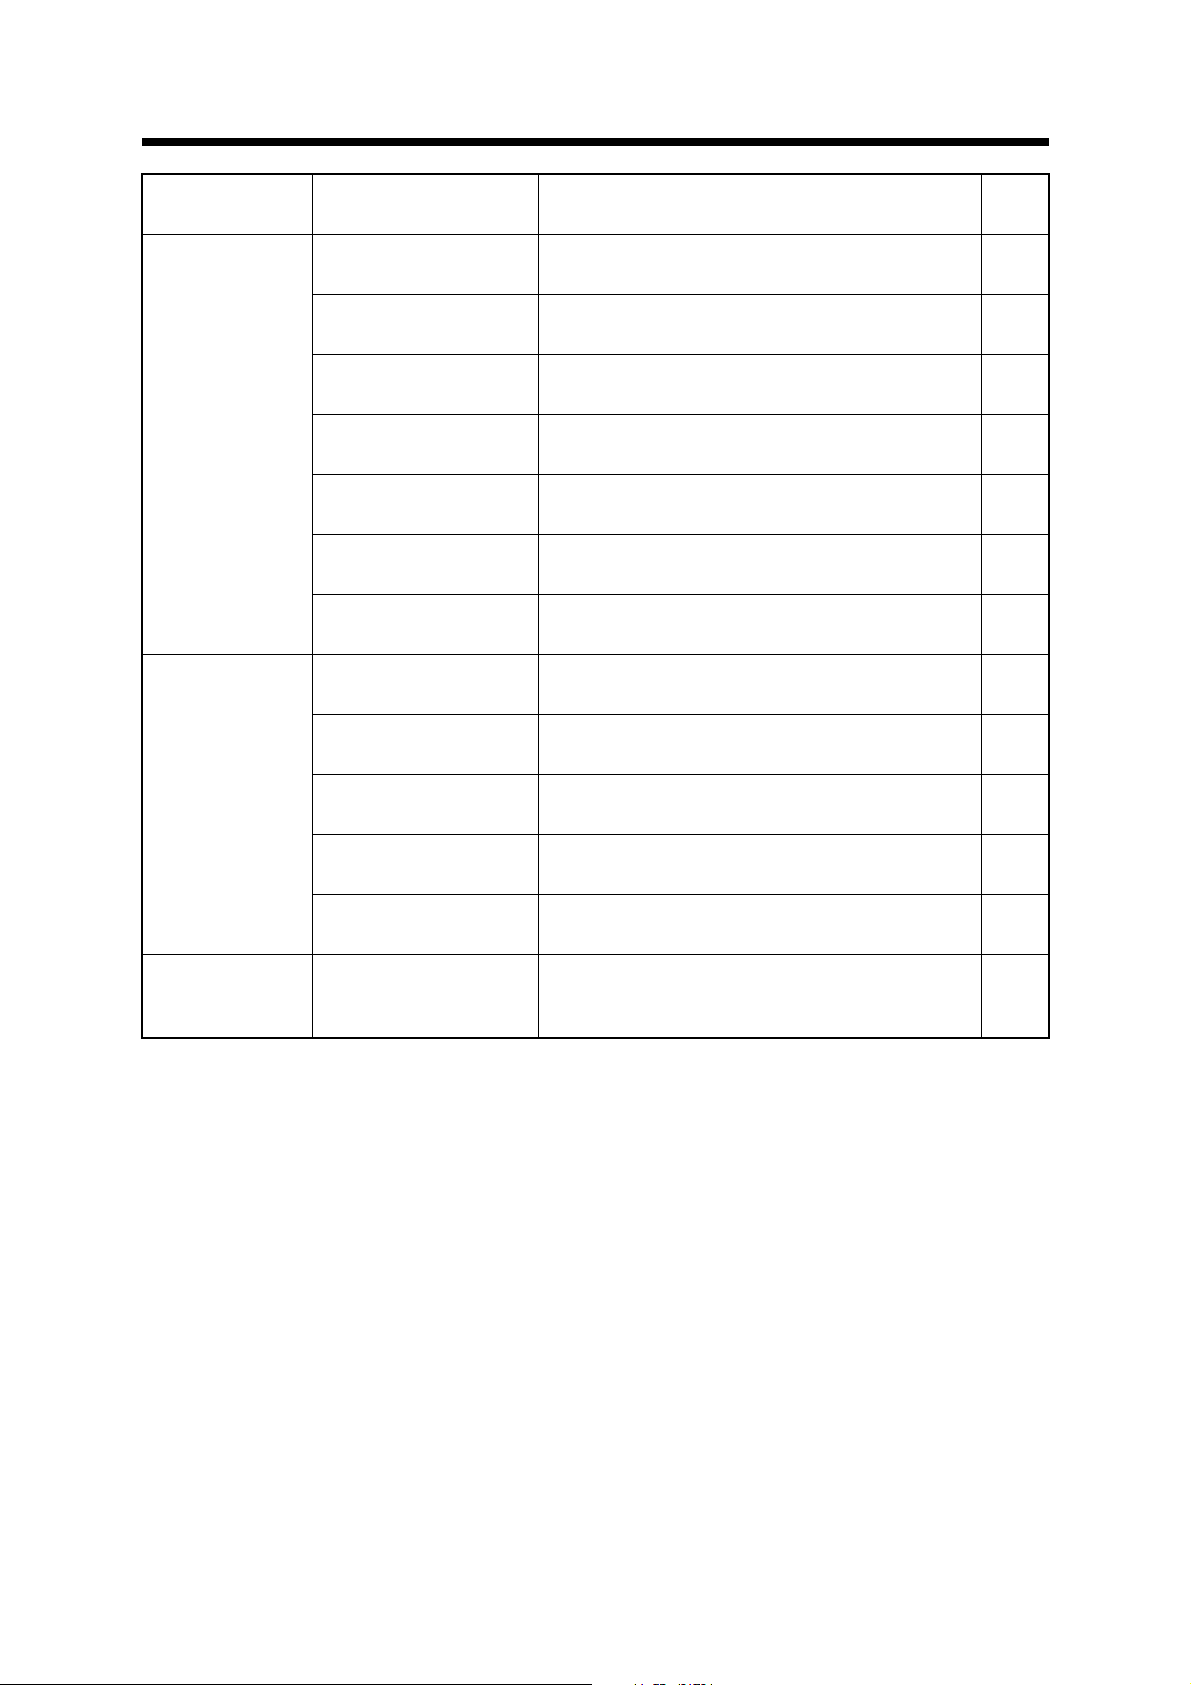
A complete list of all key operator programs is provided below. These programs can only be accessed
by first entering the key operator code number.
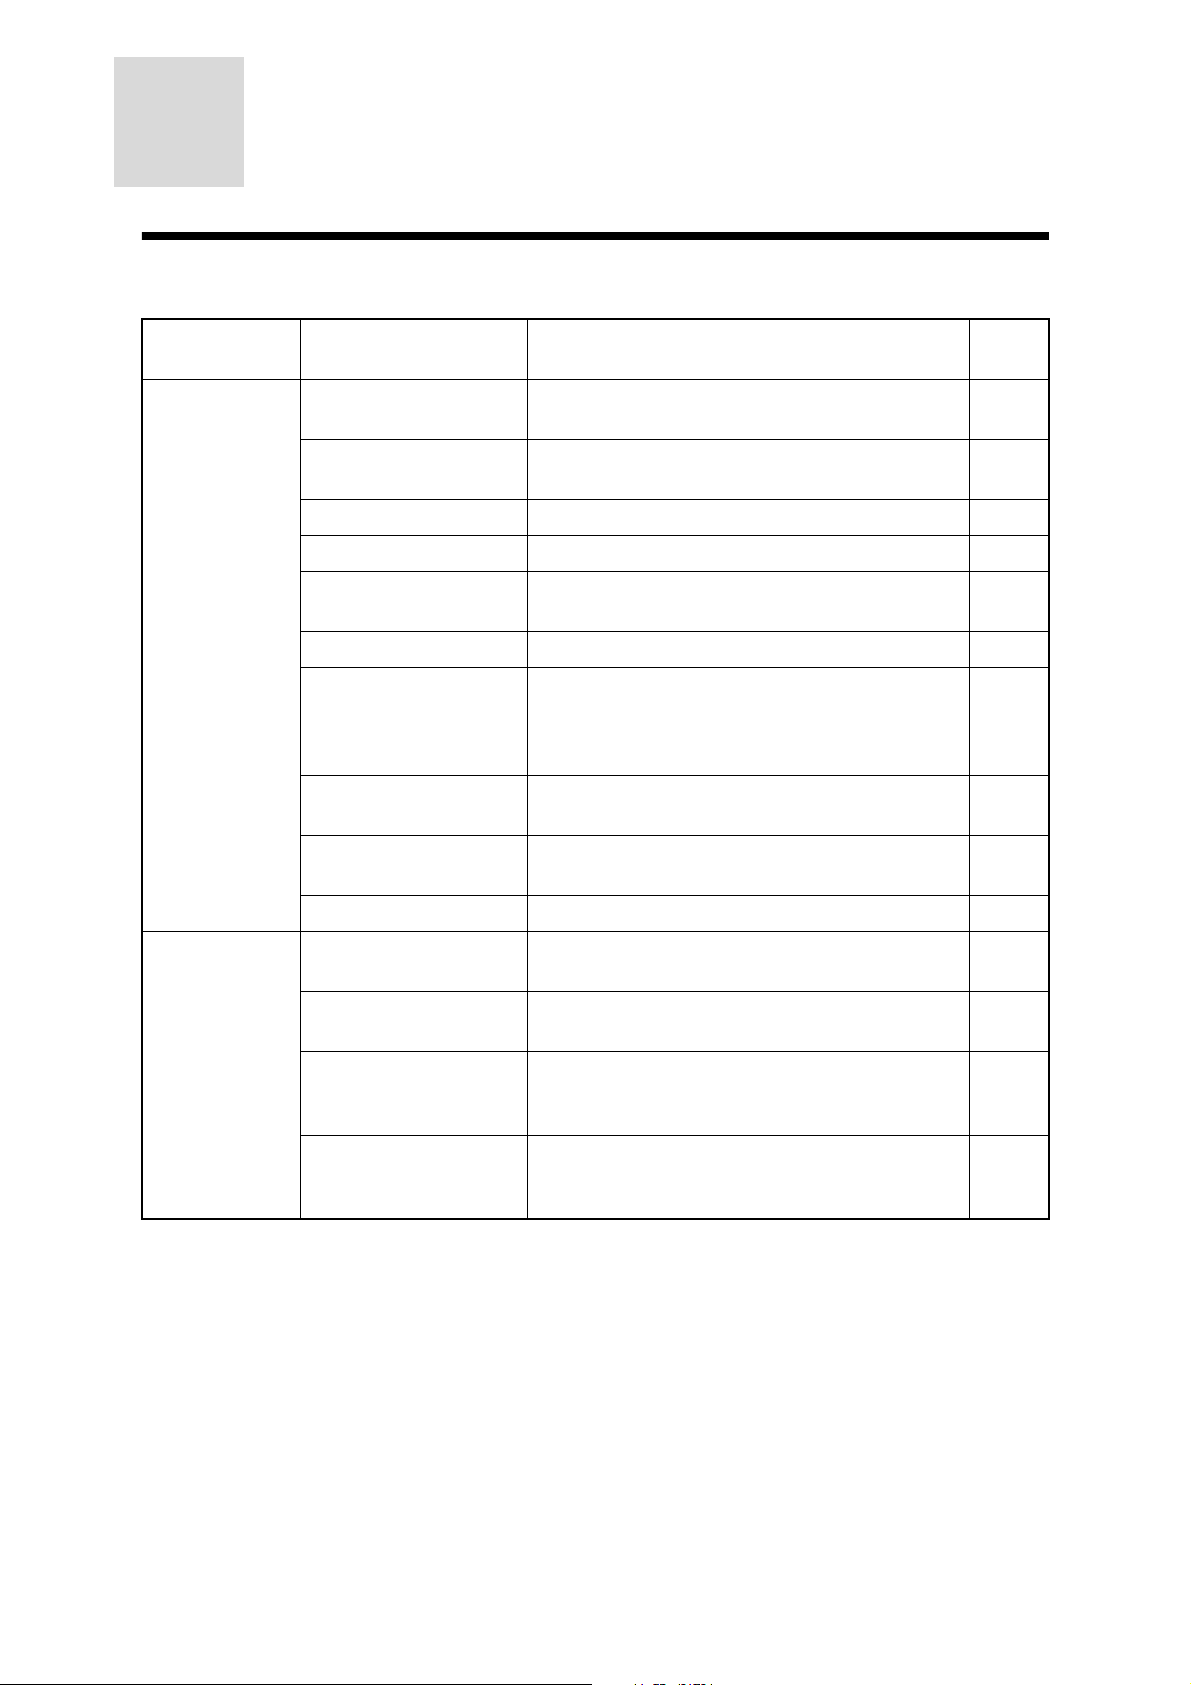
Category Program Name Function Page
No.
Function setting Key Operator Number
Change
Exposure Adjust Lightens or darkens copies in the automatic
Margin Default Sets the initial margin shift values. 9
Erase Adjust Sets the initial amount of the erase area. 10
Stream Feeding Enables the stream feeding mode for copying
Rotation Copy Enables/disables rotation of original images. 10
Output Trays Sets the output trays for the copy and printer
Offset Function Enables/disables the offset function in the output
Memory for Printer Sets the memory assignment used for printer
Toner Save Mode Reduces toner consumption. 12
Timer setting Auto Power Off Sets a time interval after which the copier enters
Changes the key operator code number. 9
exposure mode.
from a RSPF.
modes. (This program can be used only if an
optional finisher or job separator tray kit is
installed.)
tray.
feature.
the auto power shut-off mode.
9
10
11
11
12
13
Auto Clear Sets a time interval after which the copier returns
to the initial settings.
Preheat Mode Sets the time that elapses before the copier
enters the preheat mode after copying is
completed.
Time Out Setting Sets the time after which a print or fax job
resumes. (This program can be used only if an
optional facsimile expansion kit is installed.)
13
14
14
5
Page 8
LIST OF KEY OPERATOR PROGRAMS
Category Program Name Function Page
No.
Enable/disable Disable Auto Paper
Selection
Disable Auto Tray
Switching
Disable Job Program
Changing
Disable Center Tray
Counting
Disable Auto Power
Shut-off
Disable Beep at Key
Touch
Disable Backlight
Change
Account control Auditing Mode Enables or disables the basic auditing mode,
Copies per Account Displays the total number of copies made
Reset Account Resets all audit accounts or selectively resets
Prevents automatic paper selection. 15
Prevents automatic switching between the paper
trays.
Prevents stored programs from being replaced
or deleted.
Disables count of paper output into the copier
center tray.
Disables the auto power shut-off mode. 16
Enables or disables sounding of beep when keys
are touched.
Disables change of the liquid crystal display
(LCD) backlighting color.
which controls access to copier.
against account numbers.
individual accounts.
15
15
15
16
16
17
17
18
Account Number
Control
Account Number
Security
Other program Total Count Recalls the total counts, including counts of the
Registers accounts, deletes accounts or
changes an account number.
Guards against trial and error entering of audit
account numbers.
copier, RSPF, duplex module, stapler, and the
printing counts.
18
19
20
6
Page 9

USING THE KEY OPERATOR
Enter key operator
code.
KEY OPERATOR CODE:
-----
PROGRAMS
Press the SPECIAL FUNCTION key.
1
●
The SPECIAL FUNCTION screen will appear.
SPECIAL FUNCTION
SPECIAL MODES
ORIG. SIZE ENTER
PAPER SIZE SET
DISPLAY CONTRAST
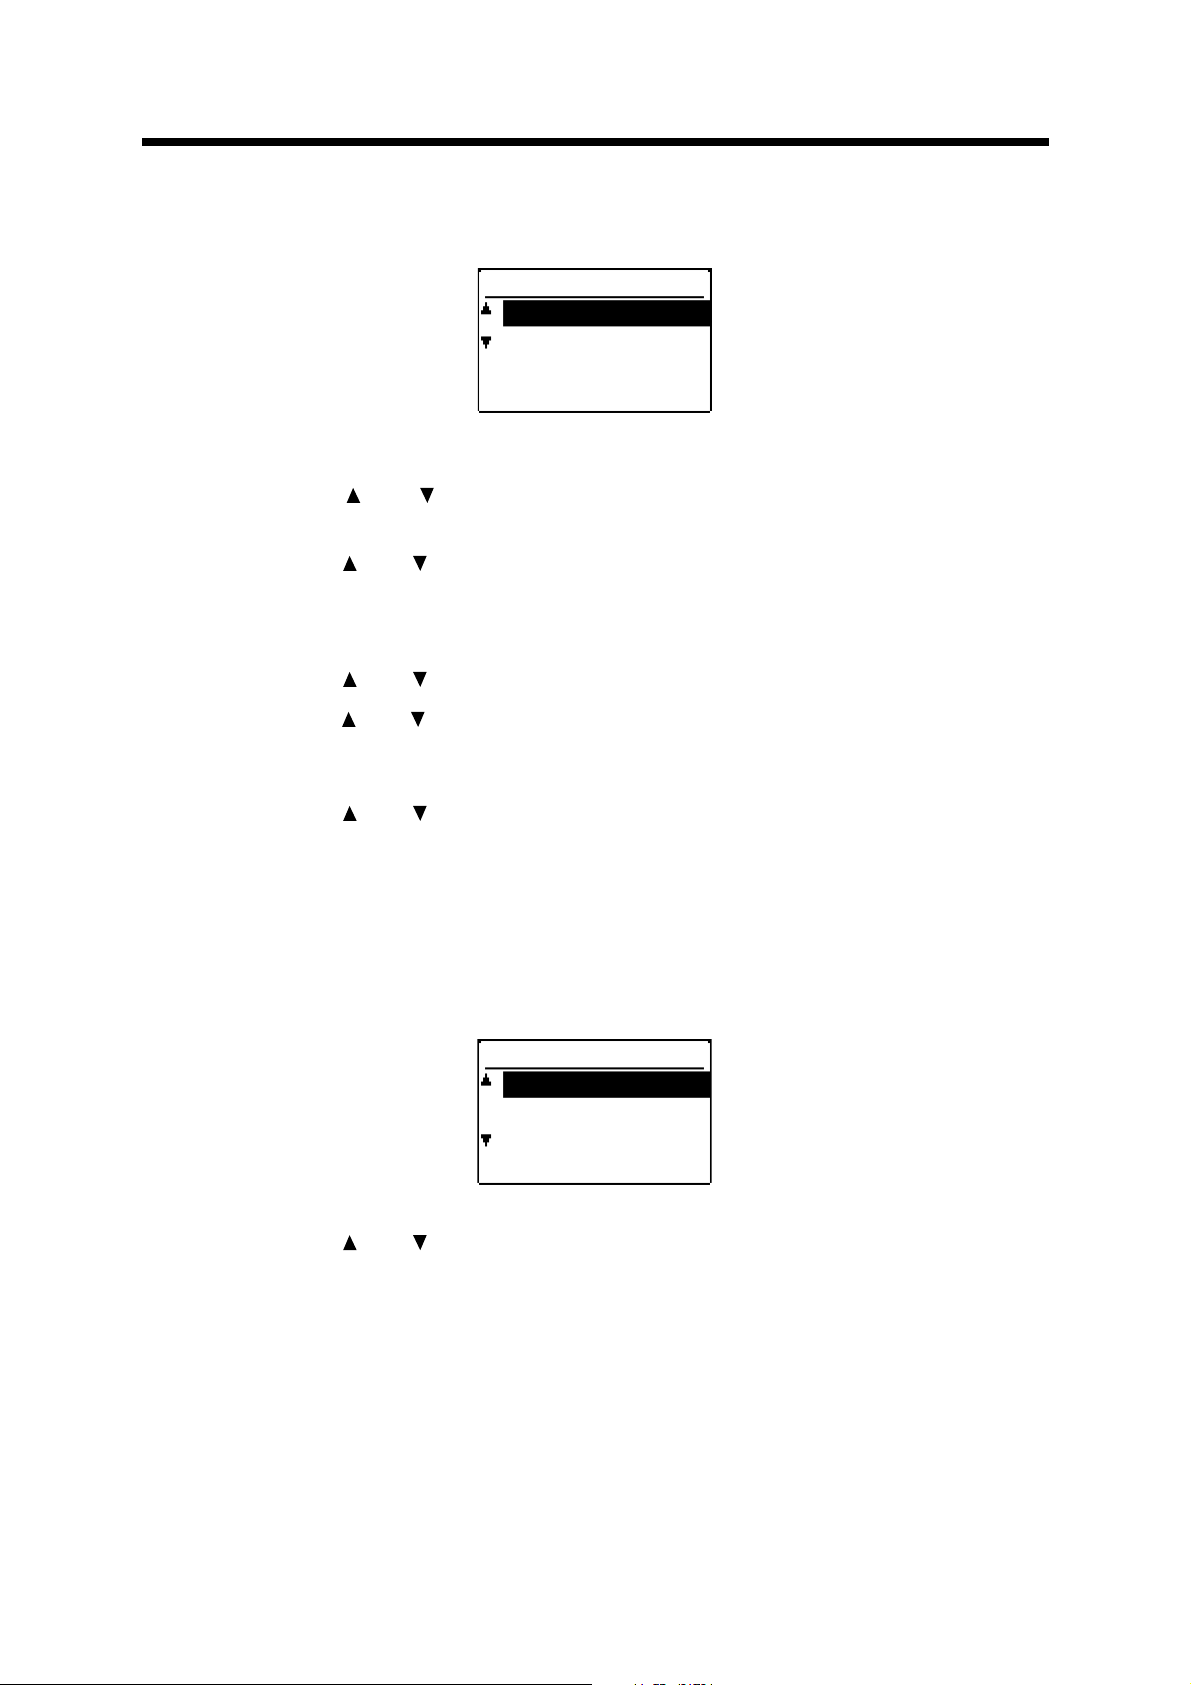
Use the and keys to select "KEY OPERATOR PRG." and press the
2
OK key.
●
The following display will appear.
Enter the key operator code number.
3
●
The dashes in the display will change to asterisks.
●
The MODE SELECT screen will appear with COPIER highlighted.
Press the OK key.
4
●
The COPIER MODE screen will appear.
7
Page 10

USING THE KEY OPERATOR PROGRAMS
Use the and keys to select the desired category and press the OK
5
key.
●
Example: To see the number of copies per account, select "ACCOUNT CONTROL".
Use the and keys to select the desired program and press the OK
6
key.
●
Example: To see the number of copies per account, select "COPIES/ACCOUNT".
●
For some programs, a check box is displayed to the left of the program name. If the OK
key is pressed, a check mark will appear and the program will be set. If the OK key is
pressed again, the check mark will disappear and the program will be canceled. Proceed
to step 8.
●
For other programs, the setting screen of the program will appear when the OK key is
pressed.
Follow instructions for the program.
7
To continue with other key operator programs, use the and keys to
8
select another program. To select a program of another category,
press the BACK key and select the desired category. To exit the key
operator program mode, press the CLEAR ALL (CA) key.
8
Page 11

KEY OPERATOR PROGRAMS
FUNCTION SETTING
The programs of this category are used to adjust various settings of copier functions. These programs
can be selected by using the and keys to highlight "FUNCTION SETTING", pressing the OK key,
highlighting the desired program, and then pressing the OK key.
Key Operator Number Change
See page 2, REGISTERING THE KEY OPERATOR CODE NUMBER.
Exposure Adjust
Use this program to lighten or darken copies in the automatic exposure mode. The exposure level can
be set for copying from the platen glass or copying from either a RSPF. The factory setting is level 3.
When "EXPOSURE ADJUST" is selected and the OK key is pressed, the following display will appear.
EXPOSURE ADJUST
PLATEN
RSPF
1. Use the and keys to select the "PLATEN" (platen glass) or "RSPF".
2. Adjust the exposure using the and keys.
3. Repeat steps 1 and 2 to adjust the other exposure level.
4. Press the OK key.
Margin Default
Set the initial margin shift value with this program.
When "MARGIN DEFAULT" is selected and the OK key is pressed, the following display will appear.
MARGIN DEFAULT
1
/
4 inch
(1/4~1)
1. Adjust the initial margin shift value using the and keys.
●
The value can be set from 1/4" to 1" in 1/4" increments.
2. Press the OK key.
9
Page 12

KEY OPERATOR PROGRAMS
Erase Adjust
Set the initial setting of the amount of the erase area with this program.
When "ERASE ADJUST" is selected and the OK key is pressed, the following display will appear.
ERASE ADJUST
/
4 inch
1
(1/4~1)
1. Adjust the value for the edge erase mode and center erase mode
using the and keys.
●
The value can be set from 1/4" to 1" in 1/4" increments.
2. Press the OK key.
Stream Feeding
This program is used to enable the stream feeding mode of a RSPF. When the stream feeding mode is
enabled, additional originals which are set in the document feeder tray within 5 seconds after the
previous original was fed will be fed and copied automatically.
To enable the stream feeding mode, highlight "STREAM FEEDING" and
press the OK key to display a check mark in the check box.
To disable this function, select this program and press the OK key again to
clear the check mark in the check box.
Rotation Copy
If this program is set, the image of originals will rotate when the orientation of the originals does not
match that of the copy paper.
Rotation copy will function only when the auto paper select or auto image mode has been selected.
NOTE:
If the image is rotated in reduction copying, the position of the image in relation to copy paper will
vary with the orientations of the originals and copy paper.
Original Copy paper Copy
To enable rotation copy, highlight "ROTATION COPY" and press the OK
key to display a check mark in the check box.
To disable this mode, select this program and press the OK key again to
clear the check mark in the check box.
10
Page 13

KEY OPERATOR PROGRAMS
Output Trays
If a job separator tray kit or a finisher is installed along with a facsimile expansion kit, this program can
be used to specify which output tray will be used to receive copies and which will be used to receive
prints.
When "OUTPUT TRAYS" is selected and the OK key is pressed, the following display will appear.
(Example: The following display is shown for a copier equipped with a facsimile expansion kit, and a job
separator tray kit.)
OUTPUT TRAYS
FAX
COPY
PRINT
PATTERN
1. Use the and keys to select the desired pattern of output trays.
2. Press the OK key.
1
Offset Function
If the offset function is enabled, each set of copies will be stacked offset from the previous set in the
sort and group modes in the center tray of the copier or in the offset tray of a finisher. This program is
used to enable or disable the offset function for these trays respectively.
When "OFFSET FUNCTION" is selected and the OK key is pressed, the following display will appear.
OFFSET FUNCTION
CENTER TRAY
OFFSET TRAY
OFFSET
1. Use the or key to enable or disable the offset function for the
center tray of the copier.
2. If a finisher is installed, use the key to select "OFFSET TRAY" and
use the or key to enable or disable the offset function for the offset
tray of the finisher.
ON
3. Press the OK key.
11
Page 14

KEY OPERATOR PROGRAMS
Memory for Printer
This copier has a memory for storing data of scanned originals. Part of this memory will be used for
storing print data. This program is used to set the percentage of the memory used for the printer
feature. The default setting is 50%.
When "MEM. FOR PRINTER" is selected and the OK key is pressed, the following display will appear.
MEM. FOR PRINTER
30%
40%
50%
60%
1. Use the and keys to select the desired percentage.
2. Press the OK key.
NOTE:
The memory capacity for storing original images and print data is 16 MB. The memory can be
extended to a maximum of 272 MB by adding commercially available memory modules.
Toner Save Mode
The toner save mode will reduce toner consumption by approximately 10% in the automatic, text, and
text/photo exposure modes. Copies will be lighter but still adequate for general use. Selection of this
mode has no effect on the photo mode.
To turn on the toner save mode, highlight "TONER SAVE MODE" and press
the OK key to display a check mark in the check box.
To turn off the toner save mode, select this program and press the OK key
again to clear the check mark in the check box.
12
Page 15

KEY OPERATOR PROGRAMS
TIMER SETTING
The programs of this category are used to set the timers for some functions. These programs can be
selected by using the and keys to highlight "TIMER SETTING", pressing the OK key, highlighting
the desired program, and then pressing the OK key.
Auto Power Off
The auto power shut-off mode is a function to turn off the power to the fuser automatically once a
programmed length of time has elapsed without any copier operation after the last copy of a run is
made or power is turned on.
This function will help lower the user's electricity bill, reduce waste of natural resources, and cut down
on environmental pollution.
The programmed time is set to 60 minutes for this function as shipped from the factory. The default time
can be changed optionally within the prescribed range of time. We suggest you set the most
appropriate time according to your usage pattern.
The time until auto power shut-off occurs can be set to 10, 30, 60, 90, 120 or 240 minutes.
When "AUTO POWER OFF" is selected and the OK key is pressed, the following display will appear.
AUTO POWER OFF
60 min
(10~240)
1. Select the desired time interval using the and keys.
2. Press the OK key.
Auto Clear
Use this program to set the time interval to return the copier to the initial settings after the last copy of a
run has been completed. The time can be set to 0, 30, 60, 90, 120 or 240 seconds. The factory setting
is 60 seconds.
When "AUTO CLEAR" is selected and the OK key is pressed, the following display will appear.
AUTO CLEAR
60 sec.
(0~240)
1. Select the desired time interval using the and keys.
●
To disable the auto clear, select 0.
2. Press the OK key.
13
Page 16

KEY OPERATOR PROGRAMS
Preheat Mode
Preheat mode functions to reduce the power consumption by lowering the temperature of the fusing
unit to a programmed level once a programmed length of time has elapsed without any copier operation
after the last copy of a run is made or power is turned on. The preheat mode will help lower the user's
electricity bill, reduce waste of natural resources, and cut down on environmental pollution. The
programmed time is set to the factory default of 15 minutes as shipped from the factory. The default
time can be changed optionally within the prescribed range of time. We suggest you set the most
appropriate time according to your usage pattern.
The interval can be set to 1, 2, 5, 10, 15, 30, 60, 120 or 240 minutes.
When "PREHEAT MODE" is selected and the OK key is pressed, the following display will appear.
PREHEAT MODE
15 min.
(1~240)
1. Select the desired time interval using the and keys.
2. Press the OK key.
Time Out Setting
If a copy job is started while a print or fax job is being run, the print or fax job will be interrupted. This
program is used to adjust the time that elapses before the print or fax job resumes after the copy job is
completed. If a print or fax job is sent to this machine while a copy job is being run, printing of the print
or fax job will start when the programmed time elapses after the copy job is completed. The time can be
set to 0, 10, 30 or 60 seconds. If 0 is set, the print or fax job will resume immediately after a copy run
has finished. (A facsimile expansion kit must be installed to run a fax job.)
When "TIME OUT SETTING" is selected and the OK key is pressed, the following display will appear.
TIME OUT SETTING
30 sec.
(0~60)
1. Select the desired time using the and keys.
2. Press the OK key.
14
Page 17

KEY OPERATOR PROGRAMS
ENABLE/DISABLE
The programs of this category are used to enable or disable some functions. These programs can be
set or canceled by using the and keys to highlight "ENABLE/DISABLE", pressing the OK key,
highlighting the desired program, and then pressing the OK key.
Disable Auto Paper Selection
This program is used to prevent automatic paper selection. When disabled, the copier will not
automatically select a paper tray containing paper that matches the size of the original placed on the
platen glass or in a RSPF.
To disable auto paper selection, highlight "DISABLE AUTO PAPER
SELECTION" and press the OK key to display a check mark in the check
box.
To restore this function, select this program and press the OK key again to
clear the check mark in the check box.
Disable Auto Tray Switching
This program prevents automatic switching between the paper trays. If automatic tray switching is
enabled, when paper runs out during copying, any tray with paper of the same size in the same
orientation will be automatically selected and copying will continue.
To disable auto tray switching, highlight "DISABLE AUTO TRAY
SWITCHING" and press the OK key to display a check mark in the check
box.
To restore this function, select this program and press the OK key again to
clear the check mark in the check box.
Disable Job Program Changing
This program is used to prevent stored programs from being replaced or deleted. If this program is set,
storing of job programs is also disabled.
To prevent job programs stored in memory from being replaced or deleted,
highlight "DISABLE JOB PRG. CHANGING" and press the OK key to
display a check mark in the check box.
To allow replacement/deletion, select this program and press the OK key
again to clear the check mark in the check box.
Disable Center Tray Counting
In the default setting, when copies or printed sheets are delivered to the center tray of the copier, the
number of sheets delivered will be counted. When counting is enabled, the copier will automatically
stop when the count has reached the limit. This program can be used to disable counting in the center
tray of the copier.
To disable counting, highlight "DISABLE CENTER TRAY COUNTING" and
press the OK key to display a check mark in the check box.
To enable counting, select this program and press the OK key again to
clear the check mark in the check box.
15
Page 18

KEY OPERATOR PROGRAMS
Disable Auto Power Shut-off
The auto power shut-off mode is used to turn off the power to the fuser automatically once a
programmed length of time has elapsed without any copier operation after the last copy of a run is
made or power is turned on. This mode lowers the user's electricity bill, reduces waste of natural
resources, and cuts down on environmental pollution.
Depending on how the machine is to be used, you may wish for some reasons to disable this mode.
This can be done using this program.
NOTE:
Since we would like you to fully understand the purpose of this mode, we suggest that you
enable this mode and set the most appropriate time using program "AUTO POWER OFF" (page
13).
To disable the auto power shut-off mode, highlight "DISABLE AUTO
POWER SHUT-OFF" and press the OK key to display a check mark in the
check box.
To restore the mode, select this program and press the OK key again to
clear the check mark in the check box.
Disable Beep at Key Touch
This program is used to enable or disable the beep function. If this function is enabled, a beep sound
will be produced when you press a key on the operation panel.
To disable the beep function, highlight "DISABLE BEEP AT KEY TOUCH"
and press the OK key to display a check mark in the check box.
To enable the beep function, select this program and press the OK key
again to clear the check mark in the check box.
Disable Backlight Change
If backlight color change is enabled, the color of the backlighting of the display varies with the copier
status as shown below:
Green: Normal
Yellow: Toner is low or maintenance will be needed soon
Orange: The copier cannot operate because of a misfeed, no toner or some other malfunction.
This program is used to disable the function that changes backlighting color. (Backlight color change is
disabled in the factory default setting.)
To disable change of the backlight color, highlight "DISABLE BACKLIGHT
CHANGE" and press the OK key to display a check mark in the check box.
To enable the function, select this program and press the OK key again to
clear the check mark in the check box.
16
Page 19

KEY OPERATOR PROGRAMS
ACCOUNT CONTROL
The programs of this category are used to set the internal auditor functions. These programs can be
selected by using the and keys to highlight "ACCOUNT CONTROL", pressing the OK key,
highlighting the desired program, and then pressing the OK key.
Auditing Mode
This program is used to enable or disable the basic auditing mode.
When enabled, the message in the display will be "Enter your account number." Copying in this state is
limited to operators with an assigned 5-digit account number.
When disabled, the message in the display will be "Ready to copy." Access to copying is open to any
operator.
A maximum of 50, 5-digit account numbers can be assigned. Use key operator program "Account
Number Control" (page 18) to assign account numbers.
To enable the auditing mode, highlight "AUDITING MODE" and press the
OK key to display a check mark in the check box.
To disable the auditing mode, select this program and press the OK key
again to clear the check mark in the check box.
Copies per Account
This program is used to display the total number of copies made against each account number.
An 11" x 17" copy is counted as two copies. A two-sided copy is also counted as two copies.
When "COPIES/ACCOUNT" is selected and the OK key is pressed, the following display will appear.
COPIES/ACCOUNT
ACCOUNT #:18114
PRINTS 001,100
COPIES 003,456
COPY LIMIT 600,000
1. Press the key to advance through the accounts.
●
The number of copies made the number of prints made, and the maximum allowable
number of copies per account will be displayed.
●
If "---,---" is displayed for COPY LIMIT, no account limit has been set for the account.
●
Account data is displayed in ascending order of account number.
2. Press the OK key.
-----
17
Page 20
KEY OPERATOR PROGRAMS
Reset Account
This program is used to reset all audit accounts or to selectively reset individual accounts.
When "RESET ACCOUNT" is selected and the OK key is pressed, the following display will appear.
RESET ACCOUNT
RESET 1 ACC.
RESET ALL ACC.
-----
To reset all accounts
1. Use the and keys to select "RESET ALL ACC." and press the OK
key.
2. Use the and keys to select "YES" and press the OK key.
To reset a single account
1. Use the and keys to select "RESET 1 ACC." and press the OK key.
2. Use the and keys to select an account to be reset and press the OK
key.
●
If "000,000" is displayed for COPY LIMIT, no account limit has been set for the account.
3. Use the and keys to select "YES" and press the OK key.
4. Continue with steps 2 and 3 for other account numbers. Press the
BACK key repeatedly to exit the program.
Account Number Control
This program is used to register accounts, delete accounts or change an account number.
When "ACC. # CONTROL" is selected and the OK key is pressed, the following display will appear.
ACC. # CONTROL
ENTER
DELETE
CHANGE
-----
To register accounts
1. Use the and keys to select "ENTER" and press the OK key.
●
If 50 accounts have already been registered, the message "The account register is full.
50 is maximum." will appear.
2. Enter a 5-digit account number (00000 to 99999) using the numeric
keys.
●
Select a number different from the key operator code number.
3. Press the OK key.
●
If a number that is already registered is entered, the message "This number is already
used. Enter another number." will appear.
4. To enter other account numbers, repeat steps 2 and 3. Press the
BACK key repeatedly to exit the program.
18
Page 21

KEY OPERATOR PROGRAMS
To delete accounts
1. Use the and keys to select "DELETE" and press the OK key.
2. To delete all accounts, use the and keys to select "DELETE ALL
ACC." and press the OK key.
●
A message will appear to confirm the selection. Use the and keys to select "YES" and
press the OK key to delete all accounts. If you decide not to delete all accounts, select
"NO" and press the OK key.
3. To delete an individual account, use the and keys to select
"DELETE 1 ACC." and press the OK key.
4. Enter the account number to be deleted using the numeric keys and
press the OK key.
5. Use the and keys to select "YES" and press the OK key.
●
If a number that has not been registered is entered, the display will return to the account
number entry screen.
6. To delete other account numbers, repeat steps 4 and 5. Press the
BACK key repeatedly to exit the program.
To change an account number
1. Use the and keys to select "CHANGE" and press the OK key.
2. Enter the account number to be changed using the numeric keys.
3. Enter a new account number.
4. Press the OK key.
●
If a number that is already registered is entered, the message "This number is already
used. Enter another number." will appear.
5. To change other account numbers, repeat steps 2 to 4. Press the
BACK key repeatedly to exit the program.
NOTES:
●
When entering an account number, be sure to input five digits. If not, the OK key will not be
accepted.
●
If you press the CLEAR (C) key when entering an account number, the account number
display will change to "-----".
Account Number Security
This program is used to make it difficult for users to gain access to accounts by entering code numbers
through trial and error. If this program is selected and an operator enters three successive invalid
account numbers, the copier will not accept another number for one minute and the message "Please
see your key operator for assistance." will appear.
To enable the account number security function, highlight "ACC. #
SECURITY" and press the OK key to display a check mark in the check
box.
To disable this function, select this program and press the OK key again to
clear the check mark in the check box.
19
Page 22

KEY OPERATOR PROGRAMS
OTHER PROGRAM
Total Count
This program can be selected by using the and keys after the key operator program mode is
entered.
This program is used to display the total counts, including counts of the copier, RSPF, duplex module,
stapler and the printing counts. Also, facsimile, and scanning counts will be displayed if the relevant
features are installed.
An 11" x 17" sheet is counted as two sheets. A two-sided copy is also counted as two sheets.
The sheets printed with the self-print function of the printer, facsimile, and scanner features are
included in "OTHERS".
When "TOTAL COUNT" is selected and the OK key is pressed, the following display will appear.
TOTAL COUNT
COPIES :000,155
RSPF :000,050
DUPLEX :000,013
STAPLER :000,000
The total counts for all units in use will be displayed.
Press the OK key to exit the program.
20
Page 23

Page 24

AR-M208
Sharp Plaza, Mahwah, New Jersey 07430-2135.
Printed on Recycled Paper
SHARP ELECTRONICS CORPORATION
www.sharp-usa.com
SHARP CORPORATION
PRINTED IN CHINA
2002H KS
TINSE0813QSZZ
➀
 Loading...