

Page 1

Page 2
■ FAX interface cable and Line cable:
These special accessories must be used with the device.
■ Notice for Users in Europe
This equipment complies with the requirements of Directive 1999/5/EC.
Dieses Gerät entspricht den Anforderungen der EU-Richtlinie 1999/5/EG.
Cet appareil est conforme aux exigences de la directive 1999/5/CE.
Este aparato satisface las exigencias de las Directiva 1999/5/CE.
Quest'apparecchio è conforme ai requisiti delle direttiva 1999/5/CE.
Dit apparaat voldoet aan de eisen van de richtlijn 1999/5/EG.
Este equipamento obedece às exigências da directiva 1999/5/CE.
Denna utrustning uppfyller kraven enligt direktiv 1999/5/EC.
Dette udstyr overholder kravene i direktiv 1999/5/EF.
Dette produktet oppfyller kravene i direktiv 1999/5/EC.
Tämä laite täyttää direktiivi 1999/5/EY.
This equipment has been tested according to the pan-European CTR-21 regulation.
It will operate on all analogue telephone networks which comply with the CTR-21.
Please contact your dealer or network operator , if y ou are not sure whether your network operates according to
CTR-21.
■ Important Notice for New Zealand Users
General
"The grant of a Telepermit for any item of terminal equipment indicates only that Telecom has accepted that the
item complies with minimum conditions for connection to its network. It indicates no endorsement of the product
by Telecom, nor dose it provide any sort of warranty. Above all, it provides no assurance that any item will work
correctly in all respects with another item of Telepermitted equipment of a different make or model, nor does it
imply that any product is compatible with all of Telecom's network services. In particular the higher speeds which
this modem is capable of, can only be achie v ed in ideal conditions ."
"This equipment shall not be used in any manner which could constitute a nuisance to other T elecom customers ."
This equipment shall not be set up to make automatic calls to the Telecom '111' Emergency Service.
T o a void telephone charges for local calls , be sure to store numbers "without" area code in your rapid or speed dial
locations.
This equipment may not provide f or the effective hand-o ver of a call to another device connected to the same line .
Warning:
This is a Class A product. In a domestic en vironment this product ma y cause radio interference in which case
the user may be required to take adequate measures.
Page 3

INTRODUCTION
TEL
LIN
E
Thank you for purchasing this product. This manual only explains the f acsimile functions of the product. F or information
on loading paper, replacing toner cartridges, clearing paper jams, handling peripheral units, and other printer-related
information, please refer to your "Operation man ual (for printer operation and gener al information)".
Additional manuals have been pro vided f or cop y and network scanner f eatures. Please refer to these as necessary.
This manual assumes that sev eral options hav e been installed.
NOTE
In this manual, American spellings are used.
TO USE THIS PRODUCT CORRECTLY AS A F ACSIMILE
Several points m ust be k ept in mind when using this product as a f acsimile.
Please note the following:
■ Settings and programming
Information about settings and programming that are required before the f ax functionality can be used is located in "P oints
to Check and Programming after Installation" on page 1-2 of this manual. Please read this section and perform the
required settings and programming.
■ Battery disposal
THIS PRODUCT CONT AINS A LITHIUM PRIMAR Y MEMOR Y BACK-UP BATTERY THAT MUST BE DISPOSED
OF PROPERLY. PLEASE CONTACT YOUR LOCAL SHARP DEALER OR AUTHORIZED SERVICE
REPRESENTATIVE FOR ASSISTANCE IN DISPOSING OF THIS BATTERY.
• When the battery dies, settings and programmed information will be lost. Be sure to k eep a written record of the
settings and programmed information. (Ref er to page 6-14.)
• The life of the lithium battery is approximately 5 years if the main s witch and fax power s witch are kept continually
off.
■ Other information
• If a thunderstorm occurs, we recommend that you unplug the power cord from the pow er outlet. Information will
be retained in memory even if the power cord is unplugged.
• Keep the fax power switch turned on. (Pa ge 07 of "Operation manual (for printer operation
and general information)".)
Fax functions cannot be used when the power is
turned off.
0-1
Page 4

TABLE OF CONTENTS
Page
INTRODUCTION................................................... 0-1
TO USE THIS PR ODUCT CORRECTLY
AS A F A CSIMILE................................................... 0-1
IMPORTANT SAFETY INFORMATION ................. 0-4
NOTICE FOR USERS IN AUSTRALIA AND
NEW ZEALAND..................................................... 0-4
CHAPTER 1
BEFORE USING THE F AX FEA TURE
LINE CONNECTION ............................................. 1-2
POINTS TO CHECK AND PROGRAMMING
AFTER INSTALLATION ......................................... 1-2
A LOOK AT THE OPERATION PANEL .................. 1-3
●
F AX MODE (CONDITION SETTING SCREEN)
ORIGINALS........................................................... 1-6
●ORIGINALS THAT CAN BE FAXED ................ 1-6
LOADING A DOCUMENT ..................................... 1-7
●USING THE AUTO DOCUMENT FEEDER ..... 1-7
●USING THE DOCUMENT GLASS .................. 1-7
CHECKING THE SIZE OF A LO ADED ORIGINAL
●
MANUALLY SETTING THE SCANNING SIZE
SELECTING RESOLUTION
AND EXPOSURE SETTINGS ............................... 1-9
●SELECTING THE RESOLUTION.................... 1-9
●SELECTING THE EXPOSURE ..................... 1-10
CONVENIENT DIALING METHODS................... 1-11
.. 1-4
.... 1-8
... 1-8
CHAPTER 3
USING CONVENIENT FUNCTIONS 1
ADV ANCED TRANSMISSION METHODS
Page
SENDING THE SAME DOCUMENT
TO MULTIPLE DESTINATIONS IN A SINGLE OPERATION
(BROADCAST TRANSMISSION)......................... 3-2
●USING BROADCAST TRANSMISSION..........3-3
AUT OMATIC TRANSMISSION AT A SPECIFIED TIME
(TIMER TRANSMISSION)..................................... 3-4
●SETTING UP A TIMER TRANSMISSION ....... 3-4
TRANSMISSION AND RECEPTION USING
THE POLLING FUNCTION ................................... 3-5
●USING THE POLLING FUNCTION ................. 3-6
●USING POLLING MEMORY ........................... 3-7
OWN NUMBER SENDING .................................... 3-9
F AXING A DIVIDED ORIGINAL
(DUAL PAGE SCAN) ........................................... 3-10
PROGRAMMING FREQUENTL Y USED OPERATIONS
●USING A PROGRAM.................................... 3-11
TRANSFERRING RECEIVED F AXES
TO ANO THER MA CHINE
WHEN PRINTING IS NOT POSSIBLE ................ 3-12
●USING THE TRANSFER FUNCTION ........... 3-12
.... 3-11
CHAPTER 4
USING CONVENIENT FUNCTIONS 2
CHAPTER 2
BASIC OPERATIONS
SENDING A F AX................................................... 2-2
BASIC PROCEDURE FOR SENDING F AXES
●
●TRANSMISSION BY AUT O-DIALING ............. 2-5
●
TRANSMITTING A TW O-SIDED DOCUMENT
PRIORITY TRANSMISSION OF A STORED JOB
CANCELING A F AX TRANSMISSION................... 2-6
RECEIVING F AXES .............................................. 2-7
●RECEIVING A F AX ......................................... 2-7
.... 2-2
..... 2-5
.... 2-6
0-2
TRANSMISSION USING F-CODES
TRANSMISSION BETWEEN MACHINES
SUPPORTING F-CODES......................................4-2
●MEMORY BOXES AND
SUB-ADDRESSES/PASSCODES
REQUIRED FOR F-CODE TRANSMISSION.. 4-2
●
ENTERING A SUB-ADDRESS AND PASSCODE
FOR A MEMORY BOX IN THE OTHER MACHINE
●CREATING A MEMORY BOX
FOR F-CODE TRANSMISSION...................... 4-3
F-CODE POLLING MEMORY ............................... 4-4
●USING F-CODE POLLING MEMORY............. 4-4
●PROCEDURE FOR F-CODE POLLING.......... 4-5
..... 4-3
Page 5

TABLE OF CONTENTS
Page
F-CODE CONFIDENTIAL TRANSMISSION.......... 4-6
●F-CODE CONFIDENTIAL TRANSMISSION ... 4-6
●PRINTING A DOCUMENT RECEIVED
TO AN F-CODE CONFIDENTIAL
MEMORY BO X................................................ 4-7
F-CODE RELA Y BRO ADCAST TRANSMISSION
●USING THE F-CODE RELAY
BROADCAST FUNCTION
(your machine is the relay machine)................ 4-9
●USING THE F-CODE RELAY
REQUEST FUNCTION
(your machine requests a relay broadcast) ..... 4-9
...... 4-8
CHAPTER 5
USING CONVENIENT FUNCTIONS 3
CONVENIENT METHODS OF USE
CONNECTING AN EXTENSION PHONE ............. 5-2
●CONNECTING AN EXTENSION PHONE....... 5-2
●SENDING A F AX AFTER TALKING ON THE
PHONE (MANUAL TRANSMISSION) ............. 5-2
●USING AN EXTENSION PHONE
TO RECEIVE A FAX........................................ 5-3
●RECEIVING A F AX AFTER TALKING
(MANUAL RECEPTION) ................................. 5-4
Page
PROGRAMMING, EDITING, AND DELETING
F-CODE MEMORY BOXES................................. 6-10
●
PROGRAMMING AN F-CODE MEMORY BOX
SETTING FOR F-CODE POLLING MEMORY
●
BOXES (NUMBER OF TRANSMISSIONS)
SETTING FOR F-CODE CONFIDENTIAL TRANSMISSION
●
MEMORY BOXES (PRINT PIN.)
SETTING FOR F-CODE RELAY BROADCAST
●
MEMORY BO XES (END RECEIVING MACHINES)
EDITING AND DELETING A MEMORY BOX
●
PRINTING PROGRAMMED INFORMATION....... 6-14
ENTERING CHARACTERS ................................ 6-15
......................... 6-12
..... 6-10
........... 6-11
... 6-13
.... 6-13
CHAPTER 7
TROUBLESHOOTING
WHEN A TRANSA CTION REPORT IS PRINTED.......
VIEWING THE COMMUNICA TION
ACTIVITY REPORT............................................... 7-3
WHEN AN ALARM SOUNDS
AND A W ARNING MESSA GE IS DISPLAYED ...... 7-3
PROBLEMS AND SOLUTIONS ............................ 7-4
7-2
CHAPTER 8
1
2
3
4
5
CHAPTER 6
PROGRAMMING
PROGRAMMING................................................... 6-2
STORING, EDITING, AND DELETING
AUTO DIAL KEYS AND PROGRAMS ................... 6-2
●STORING ONE-T OUCH DIAL KEYS.............. 6-3
●
EDITING AND DELETING ONE-TOUCH KEYS
●PROGRAMMING A GROUP KEY...................6-6
●EDITING AND DELETING GROUP KEYS......6-7
●STORING A PROGRAM................................. 6-8
●EDITING AND DELETING PROGRAMS ........ 6-8
STORING A GROUP INDEX................................. 6-9
...... 6-5
KEY OPERATOR PROGRAMS
KEY OPERATOR PROGRAMS ............................. 8-2
●KEY OPERATOR PR OGRAM LIST................. 8-2
●USING THE KEY OPERATOR PROGRAMS... 8-2
●SETTING PROGRAMS...................................8-3
●PRINTING OUT SETTINGS.......................... 8-10
CHAPTER 9
APPENDIX
SPECIFICATIONS ................................................. 9-2
6
7
8
9
0-3
Page 6

IMPORTANT SAFETY INFORMATION
• If any of y our telephone equipment is not operating properly , you should immediately remo ve it from your telephone
line, as it may cause harm to the telephone network.
• The A C pow er outlet shall be installed near the equipment and shall be easily accessib le.
• Ne v er install telephone wiring during a lightning storm.
• Ne v er install telephone jac ks in wet locations unless the jac k is specifically designed for wet locations.
• Never touch uninsulated telephone wires or terminals unless the telephone line has been disconnected at the
network interface.
• Use caution when installing or modifying telephone lines.
• Avoid using a telephone (other than a cordless type) during an electrical storm. There may be a remote risk of
electric shock from lightning.
• Do not use a telephone to report a gas leak in the vicinity of the leak.
• Do not install or use the machine near water , or when y ou are wet. Take care not to spill any liquids on the machine.
NOTICE FOR USERS IN AUSTRALIA AND NEW ZEALAND
Your fax machine and the telephone system
WARNING NO TICE:
NO calls can be made to or from this fax during a mains power f ailure .
• This is a Class A product. In a domestic environment this product may cause radio interference in which case the
user may be required to take adequate measures.
WARNING
Australian Communications A uthority (A CA) regulations state that no unauthorized changes or modifications to this
equipment are permitted.
Note: Complies with the following standards,
ACA TS001-1997, AS/NZS 3260
ACA TS002-1997, NZ TELECOM and AS/NZS 3548.
These limits are designed to provide reasonable protection against interference in an installation. This equipment
generates, uses and can radiate radio frequency energy and, if not installed and used in accordance with the instructions,
may cause interference . Howev er, there is no guarantee that interference will not occur in a particular installation.
If this equipment does cause interference to radio or television reception, which can be determined by turning the
equipment off and on, the user is encouraged to try to correct the interference by one or more of the following
measures:
• Reorient or relocate the receiving antenna.
• Increase the separation betw een the equipment and the receiver.
• Connect the equipment to an outlet on a diff erent circuit to that which the receiv er is connected.
• Consult the dealer or an e xperienced radio/TV technician f or help .
The Ringer Equivalence Number (REN) for this equipment is written on the A-Tick label.
Important safety information
In Australia, installing or modifying telephone lines should only be done by an ACA licensed serviceman. In New
Zealand, installing or modifying telephone lines should be done in accordance with Telecom wiring practices.
0-4
Page 7

CHAPTER 1
BEFORE USING THE FAX
FEATURE
This chapter contains basic information about using the fax features of
this product. Please read this chapter before using the fax features.
Page
LINE CONNECTION .............................................................................. 1-2
POINTS TO CHECK AND PROGRAMMING AFTER INSTALLATION
A LOOK AT THE OPERATION PANEL ................................................. 1-3
●FAX MODE (CONDITION SETTING SCREEN)............................. 1-4
ORIGINALS............................................................................................ 1-6
●ORIGINALS THAT CAN BE FAXED .............................................. 1-6
LOADING A DOCUMENT...................................................................... 1-7
●USING THE AUTO DOCUMENT FEEDER.................................... 1-7
●USING THE DOCUMENT GLASS ................................................. 1-7
CHECKING THE SIZE OF A LOADED ORIGINAL................................ 1-8
●MANUALLY SETTING THE SCANNING SIZE............................... 1-8
SELECTING RESOLUTION AND EXPOSURE SETTINGS.................. 1-9
●SELECTING THE RESOLUTION................................................... 1-9
●SELECTING THE EXPOSURE ...................................................... 1-10
CONVENIENT DIALING METHODS ..................................................... 1-11
....... 1-2
1-1
Page 8
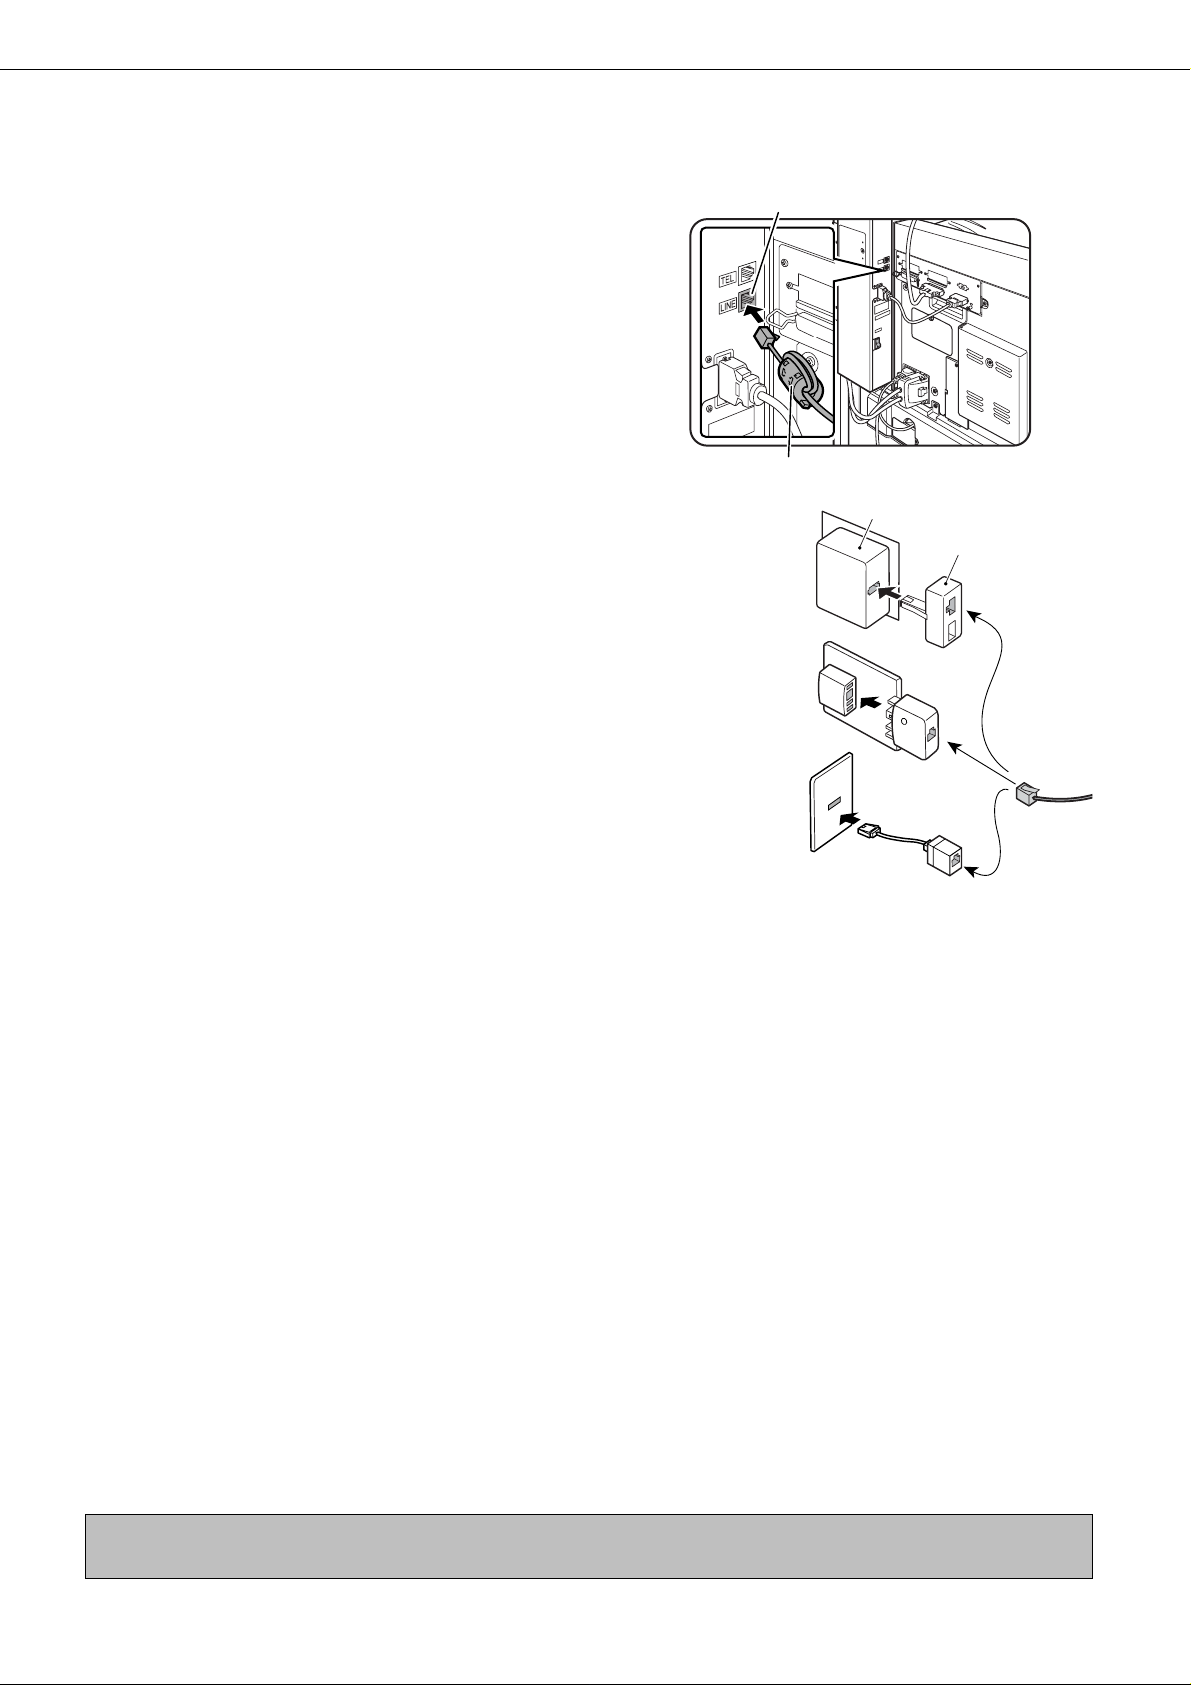
LINE CONNECTION
TEL
LINE
Use the telephone cable supplied with the facsimile e xpansion kit to connect the machine to a telephone line.
Connect the cable so that the connector nearest to the noise
suppression core is inserted into the socket located of the
expansion kit box. Insert the other end into the telephone line
socket.
In some countries, an adapter is required to connect the
telephone line cable to the wall telephone sock et, as shown in
the illustration.
Line connector
Core
For United
Kingdom
For Australia
For New Zealand
Wall socket
Adapter
POINTS T O CHECK AND PR OGRAMMING AFTER INSTALLATION
After installing the unit and before using it as a fax machine, check the following points and program the required
information.
■ Make sure the fax power switch is turned on
In addition to the main power switch, the rear of the unit also has a po wer s witch for f ax functionality. If this power
switch is not turned on, you will not be able to use the unit as a fax machine. Please keep the fax power switch
turned on at all times.
■ Make sure the correct date and time have been set
Make sure the correct date and time have been prog rammed in the unit (refer to page 3-8 of "Operation manual
(for printer operation and general inf ormation)"). If the date and time are wrong, please correct them.
It is important to set the correct date and time because they are used for such features as Timer Transmission
(page 3-6).
■ Program the sender's name and sender's number
Refer to page 8-4 to program the name and f ax number of the user of this product using the key oper ator program.
The programmed name and number are printed at the top of each transmitted fax page . The sender's number is
also used as an identification number when you use the P olling function to request transmission from another fax
machine (refer to page 3-6).
NOTE
You can check your programmed name and number by printing out the Sender List. (Refer to page 8-10.)
1-2
Page 9
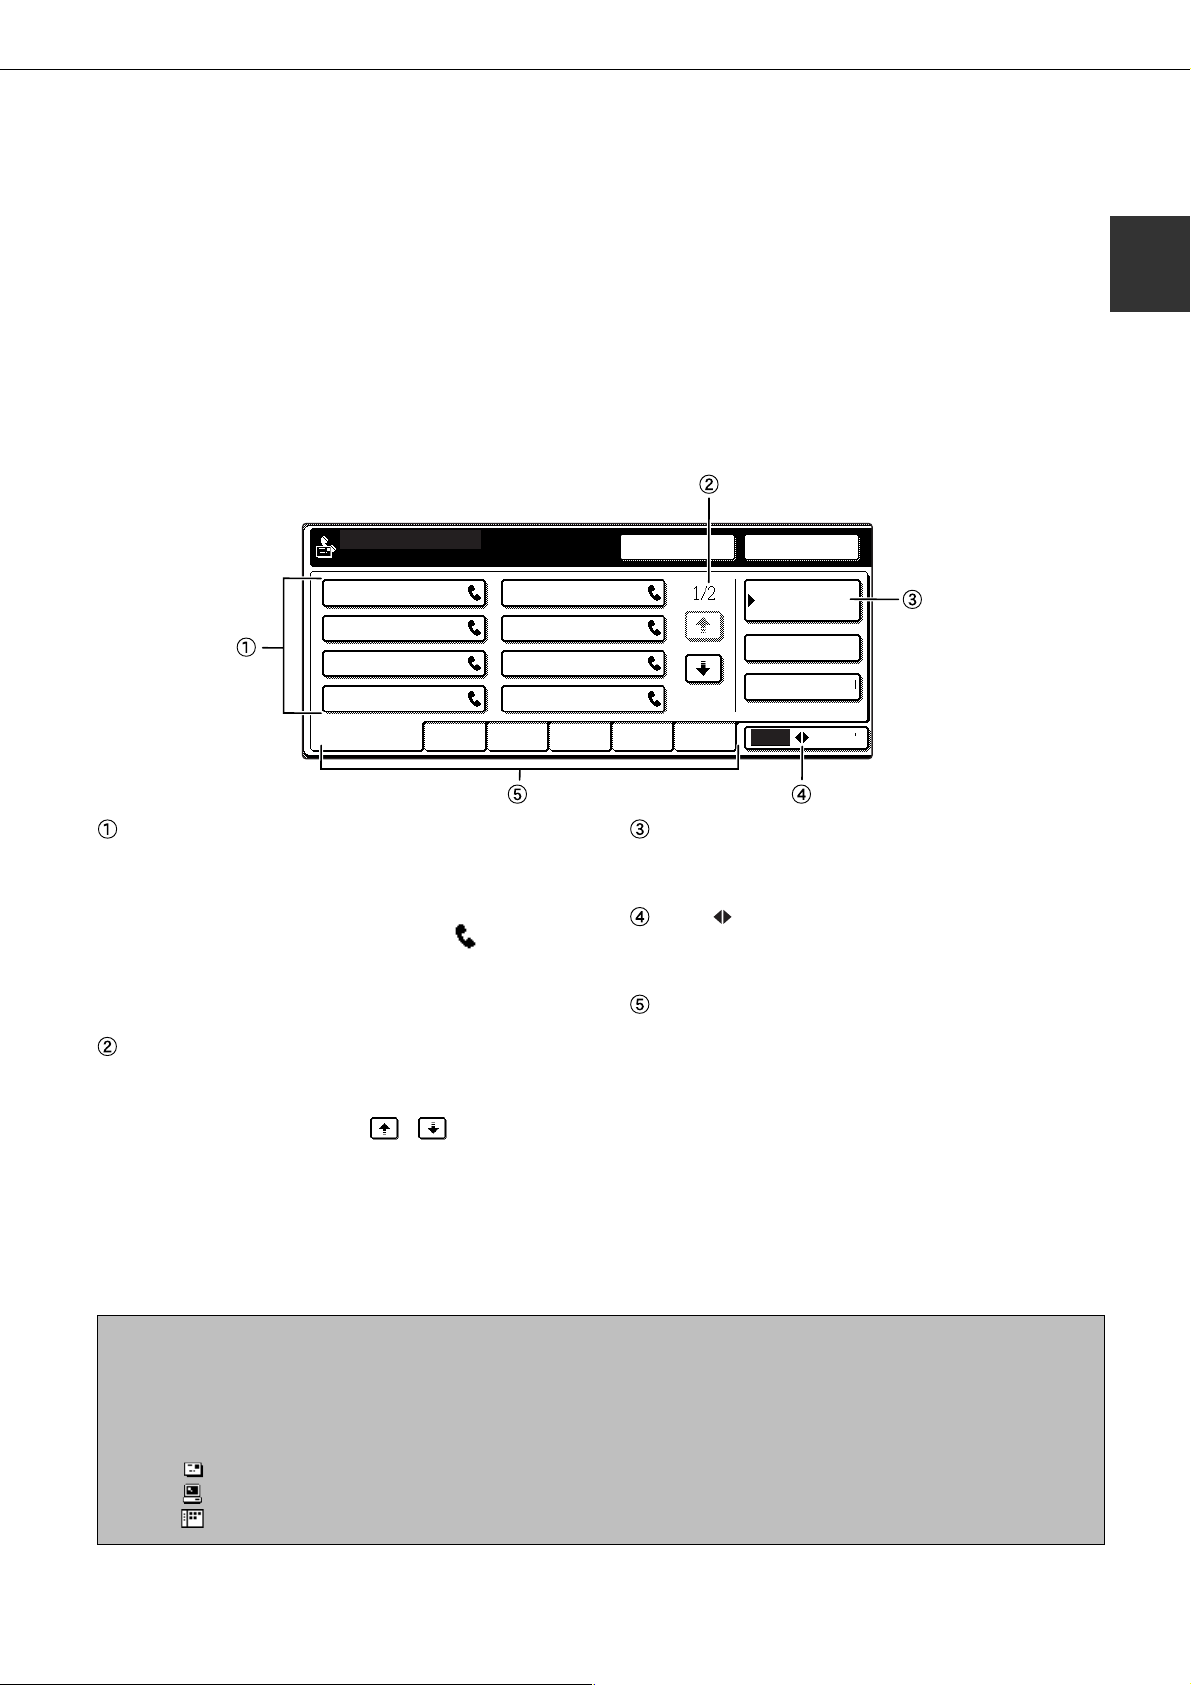
A LOOK AT THE OPERATION PANEL
Operation panel keys used f or f ax and k e ys displa y ed on the touch panel are explained here.
1
T ouch panel (f ollo wing page)
The machine status, messages and touch keys are
displayed on the panel. The display will change to
show the status of print, copy, network scaner or
fax according to which of those modes is selected.
Mode select keys (page 2-2)
Use to select the basic modes of the product.
IMAGE SEND key
Press to select fax mode and display the basic
screen of fax mode.
Numeric keys
Use to enter fax numbers, sub-addresses,
passcodes, and numerical settings.
C key (clear key)
Use to clear a mistake when entering fax numbers,
sub-addresses, passcodes, and numerical settings.
One digit is cleared each time you press the key.
When an original is being scanned, this key can also
be used to cancel scanning.
CA key
Use to cancel a transmission or programming
operation. When the key is pressed, the operation
is canceled and you return to the initial screen (next
page).
When sending a fax, this ke y is also used to cancel
an image setting, paper size setting, or special
function.
key (page 5-4)
This is used to produce tone signals when you are
on a pulse dial line.
Start key (page 2-3)
Press to begin scanning an original for fax
transmission.
NOTE
For information on the parts of the unit that are used for faxing, refer to page 3 of "Oper ation manual (for copier)". F or parts that are
used for both faxing and printing, refer to page 1-4 of "Operation manual (for printer operation and general information)".
1-3
Page 10
A LOOK AT THE OPERATION PANEL
AUTO
READY TO SEND.
ORIGINAL
AUTO
EXPOSURE
STANDARD
RESOLUTION
SUB ADDRESS
ADDRESS REVIEW
REDIALSPEAKER
FAX MEMORY:100%
AUTO RECEPTION
ADDRESS
DIRECTORY
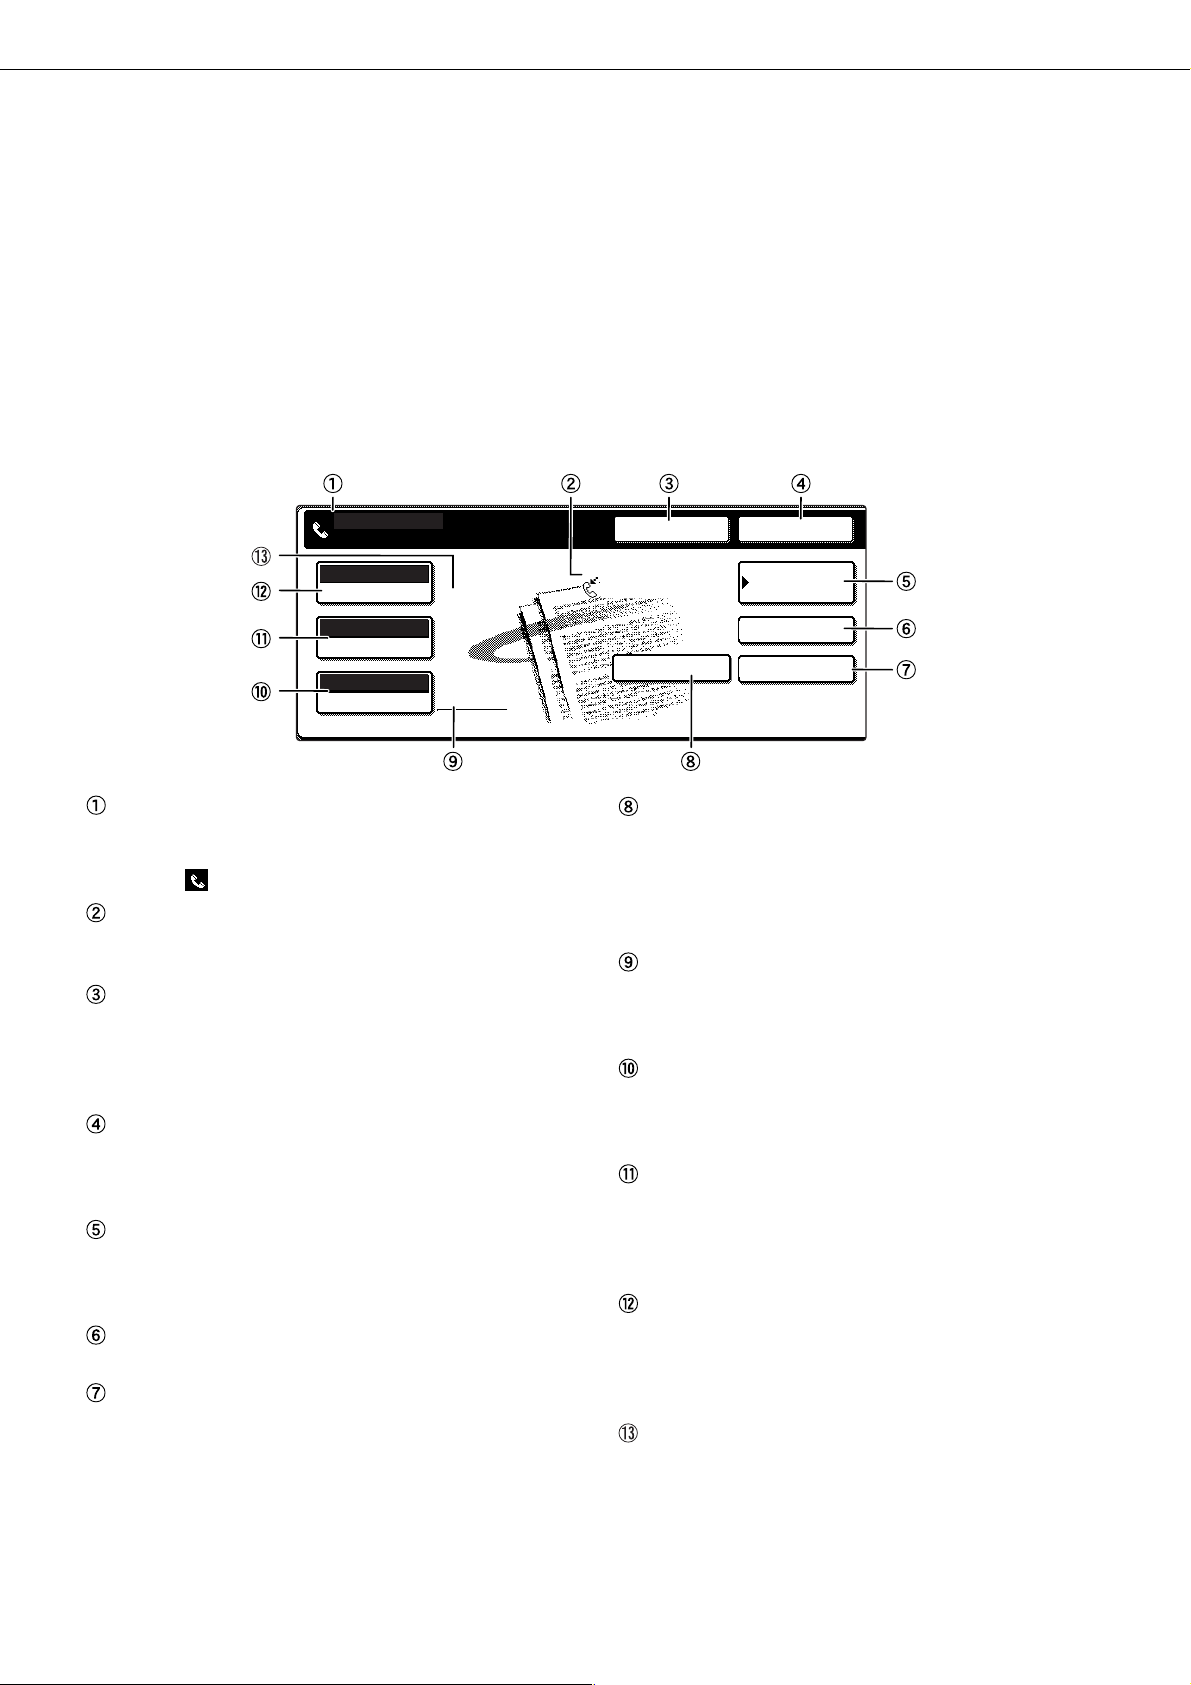
FAX MODE (CONDITION SETTING SCREEN)
The condition setting screen of fax mode is displayed by pressing the IMAGE SEND key while the print mode, copy
mode, or job status screen appears in the touch panel. In the explanations that follow, it is assumed that the initial
screen that appears after pressing the IMAGE SEND key is the condition setting screen (shown below). If you have
set the display to show the address directory (following page) when the IMAGE SEND key is pressed, touch the
CONDITION SETTINGS key in the address directory to display the condition setting screen.
The key operator program can be used to set the display to show either the condition setting screen (shown below) or
the address directory screen (following page) when the IMAGE SEND key is pressed (refer to page 8-3).
■ Condition setting screen
The display is initially set (factory setting) to show the following condition setting screen as the initial screen.
Message display
Messages appear here to indicate the current status
of the machine. When the machine is ready to send,
an icon
Memory and reception mode display
This shows the amount of fax memory that is free
and the currently selected reception mode.
SPEAKER key (page 1-11)
This key is used for dialing with the speaker. During
dialing it changes into the PAUSE key, and after
pressing the SUB ADDRESS key it changes into
the SPACE key.
REDIAL key (page 1-11)
Touch this key to redial the most recently dialed
number. After dialing, this key changes into the NEXT
ADDRESS key.
ADDRESS DIRECTORY key (page 2-5)
This displays the Address Directory screen (next
page). Touch this key when you want to use an autodial number (one-touch dialing or group dialing).
SUB ADDRESS key (page 4-3)
Touch this key to enter a sub-address or passcode.
ADDRESS REVIEW key
When performing a broadcast transmission, touch
this key to check your selected destinations. Your
selected destinations will appear as a list, and the
list can be edited.
1-4
appears to the left.
SPECIAL MODES
SPECIAL MODES key
Touch this key to select one of the following special
functions:
• Timer transmission (page 3-4) • Polling (page 3-6)
• Dual page scan (page 3-10) • Program (page 3-11)
• Memory box (page 3-7)
Two-sided scanning icon display (pages 2-5)
Icons appear here when you touch the ORIGINAL
key and select two-sided scanning. The icons can
be touched to open function selection screens.
ORIGINAL key (page 1-8)
Touch this key when you wish to manually set the
size of the original to be scanned or scan both sides
of the original.
RESOLUTION key (page 1-9)
Touch this key to change the resolution setting for
the original to be scanned. The selected resolution
setting will be highlighted above the key. The initial
factory setting is STANDARD.
EXPOSURE key (page 1-10)
Touch this key to change the exposure setting for
the original to be scanned. The selected exposure
setting will be highlighted above the key. The initial
factory setting is AUTO.
Special function icon display (page 1-15 of
"Operation manual (for printer operation and
general information)")
When a special function such as polling or dual page
scan is selected, a special function icon appears
here.
Page 11
FREQUENT USE ABCD EFGHI JKLMN OPQRST UVWXYZ
ABC GROUP
CONDITION
SETTINGS
READY TO SEND.
SUB ADDRESS
ADDRESS REVIEW
REDIALSPEAKER
A LOOK AT THE OPERATION PANEL
■ Address directory screen (alphabetically ordered)
If you have set the initial screen to the address directory screen using the ke y operator program, the initial screen
will appear as follows.
A B
C D
1
E F
G H
One-touch key display
This shows the one-touch keys that ha ve been stored
on the selected "index card". The ke y type is indicated
by the icon at the right. One-touch keys in which a fax
number is stored are indicated by a "
" icon. The
display is initially set to show 8 keys. This can be
changed to 6 or 12 using the key operator progr am.
(Refer to page 8-3.)
Display switching keys
In cases where the one-touch keys cannot all be
displayed on one screen, this shows how many
screens are left. Touch the "
" " " keys to mo ve
through the screens.
CONDITION SETTINGS key
This displays the condition setting screen (previous
page), which is used to set various conditions.
ABC GROUP key
Touch this key to switch between the alphabetical
index and the group inde x.
Index keys
One-touch key destinations are stored on each of
these index cards (alphabetical index or group
index). Touch an index k ey to display the card.
Group indexes make it possible to store one-touch
keys by group with an assigned name for easy
reference. This is done with the custom settings (refer
to pages 6-3 and 6-9). Frequently used one-touch
key destinations can be stored on the FREQUENT
USE card for conv enient access .
NOTES
• The screen showed above is the alphabetical address directory . If desired, the initial screen can be set to the group address
directory (refer to page 8-3).
• If the Network Scanner option has been installed, one-touch keys in which a destination other than a fax number is stored are
indicated by the following icons:
: Scan to E-mail destination
: Scan to FTP destination
: Scan to Desktop destination
1-5
Page 12
ORIGINALS
ORIGINALS THAT CAN BE FAXED
■ Original sizes
Minimum original size Maximum original size
Using the auto document feeder
Using the document glass
NOTE
Originals that are not a standard size (5-1/2"x8-1/2", 8-1/2"x11", 8-1/2"x11"R, 8-1/2"x14", 11"x17", A5, B5, B5R, A4, A4R, B4,
A3) can also be faxed.
8-1/2" (width)x5-1/2" (length)
(A5: 210mm (width)x148mm (length))
5-1/2" (width)x8-1/2" (length)
(A5R: 148mm (width)x210mm (length))
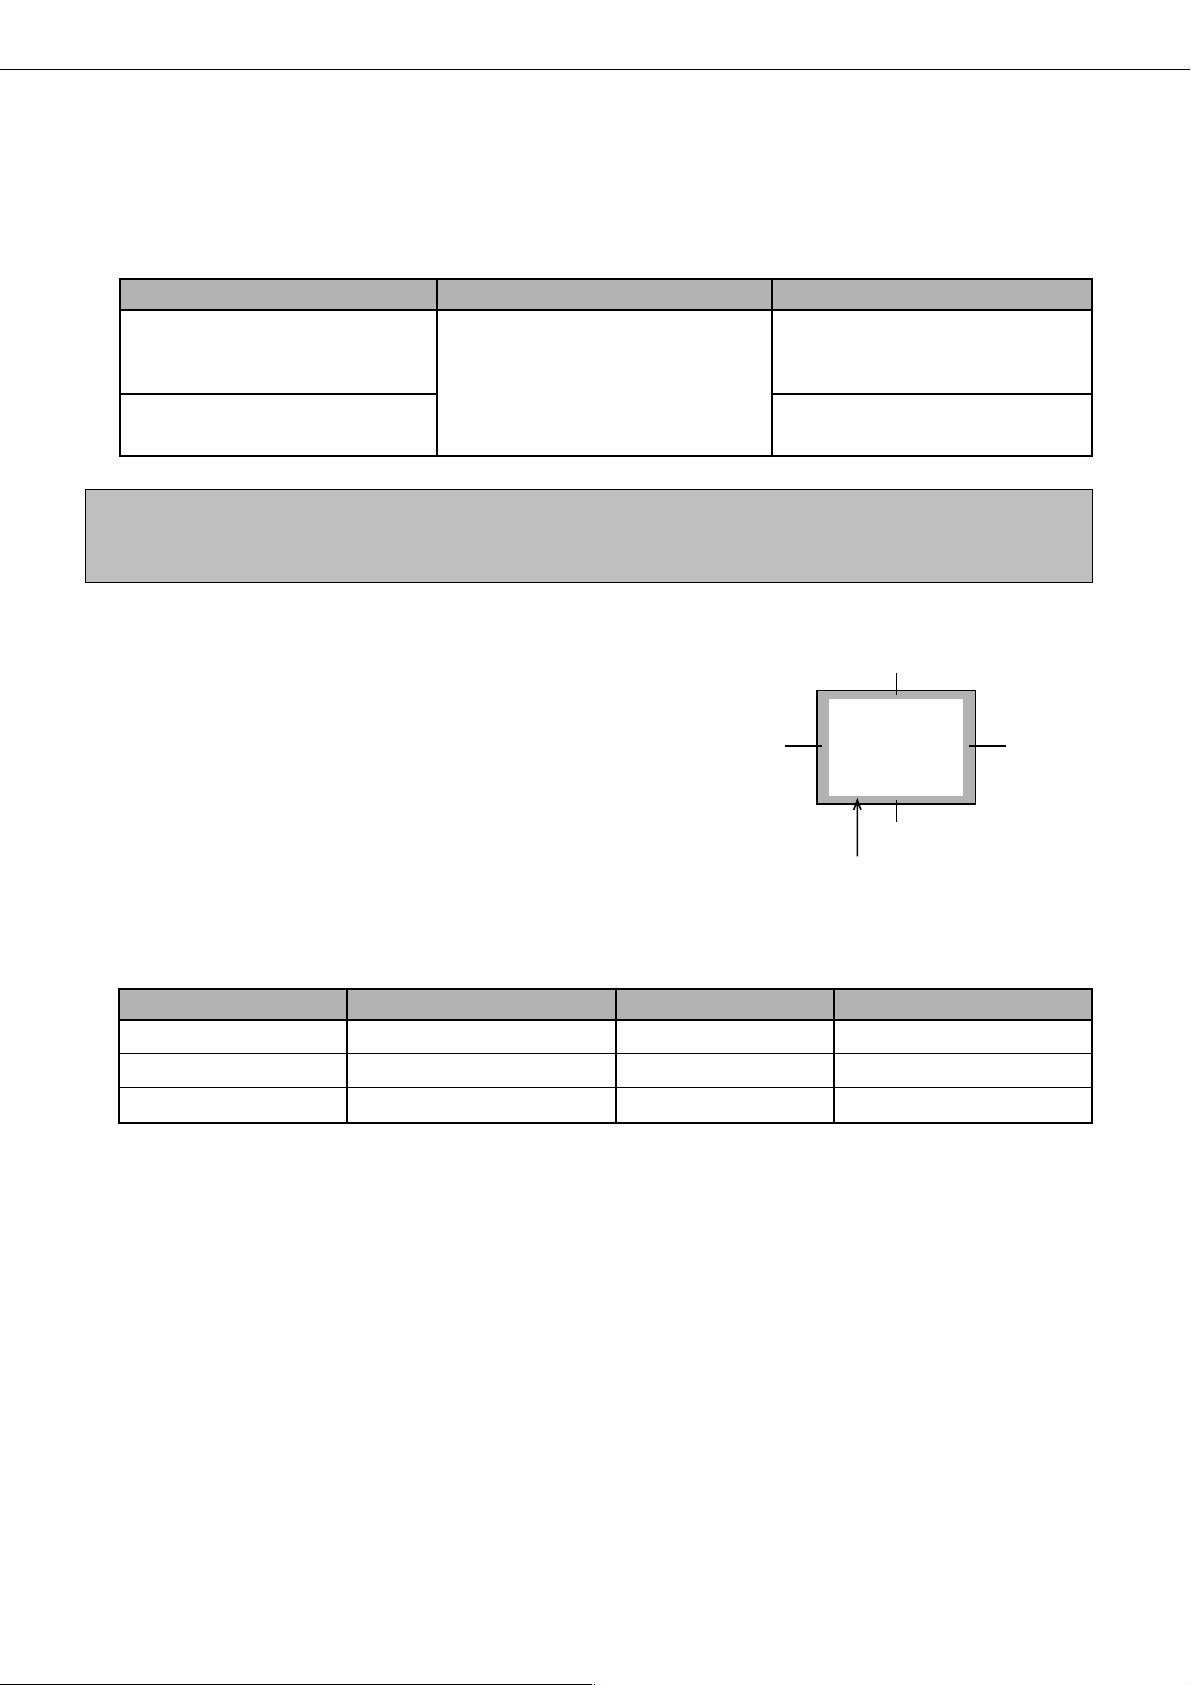
■ Scanning area of original
Note that the edges of an original cannot be scanned.
Area that cannot be scanned:0.2" (5mm) or less at top edge and
0.2" (5mm) or less at bottom edge
: Near edge + far edge = 0.2" (5mm)
or less
11" (width)x31-1/2"* (length)
(297mm (width)x800mm* (length))
*Long documents can be loaded
11" (width)x17" (length)
(297mm (width)x431.8mm (length))
Far edge
Bottom edgeTop edge
Near edge
Area that cannot be scanned
■ Automatic reduction of faxed document
If the size (width) of the faxed document is greater than the receiving machine's paper size, the size will be
automatically reduced.
Faxed document width
11"x17" (A3) 8-1/2"x14" (B4) 8-1/2"x14" (B4) 1 : 0.64 (1 : 0.78)
11"x17" (A3) 8-1/2"x11" (A4) 8-1/2"x11"R (A4R) 1 : 0.5 (1 : 0.5)
8-1/2"x14" (B4) 8-1/2"x11" (A4) 8-1/2"x11"R (A4R) 1 : 0.78 (1 : 0.64)
A document can also be faxed without reducing its siz e. In this case, the left and right edges will not be transmitted.
(Refer to page 8-6.)
Receiving machine's paper width
Reduced size Ratio (Area ratio)
1-6
Page 13
LOADING A DOCUMENT
A document can be loaded in the auto document feeder or on the document glass. Multiple-page documents and long
documents can be loaded in the auto document feeder . Single-sheet documents and bound documents that cannot
be loaded in the auto document feeder can be loaded on the document glass.
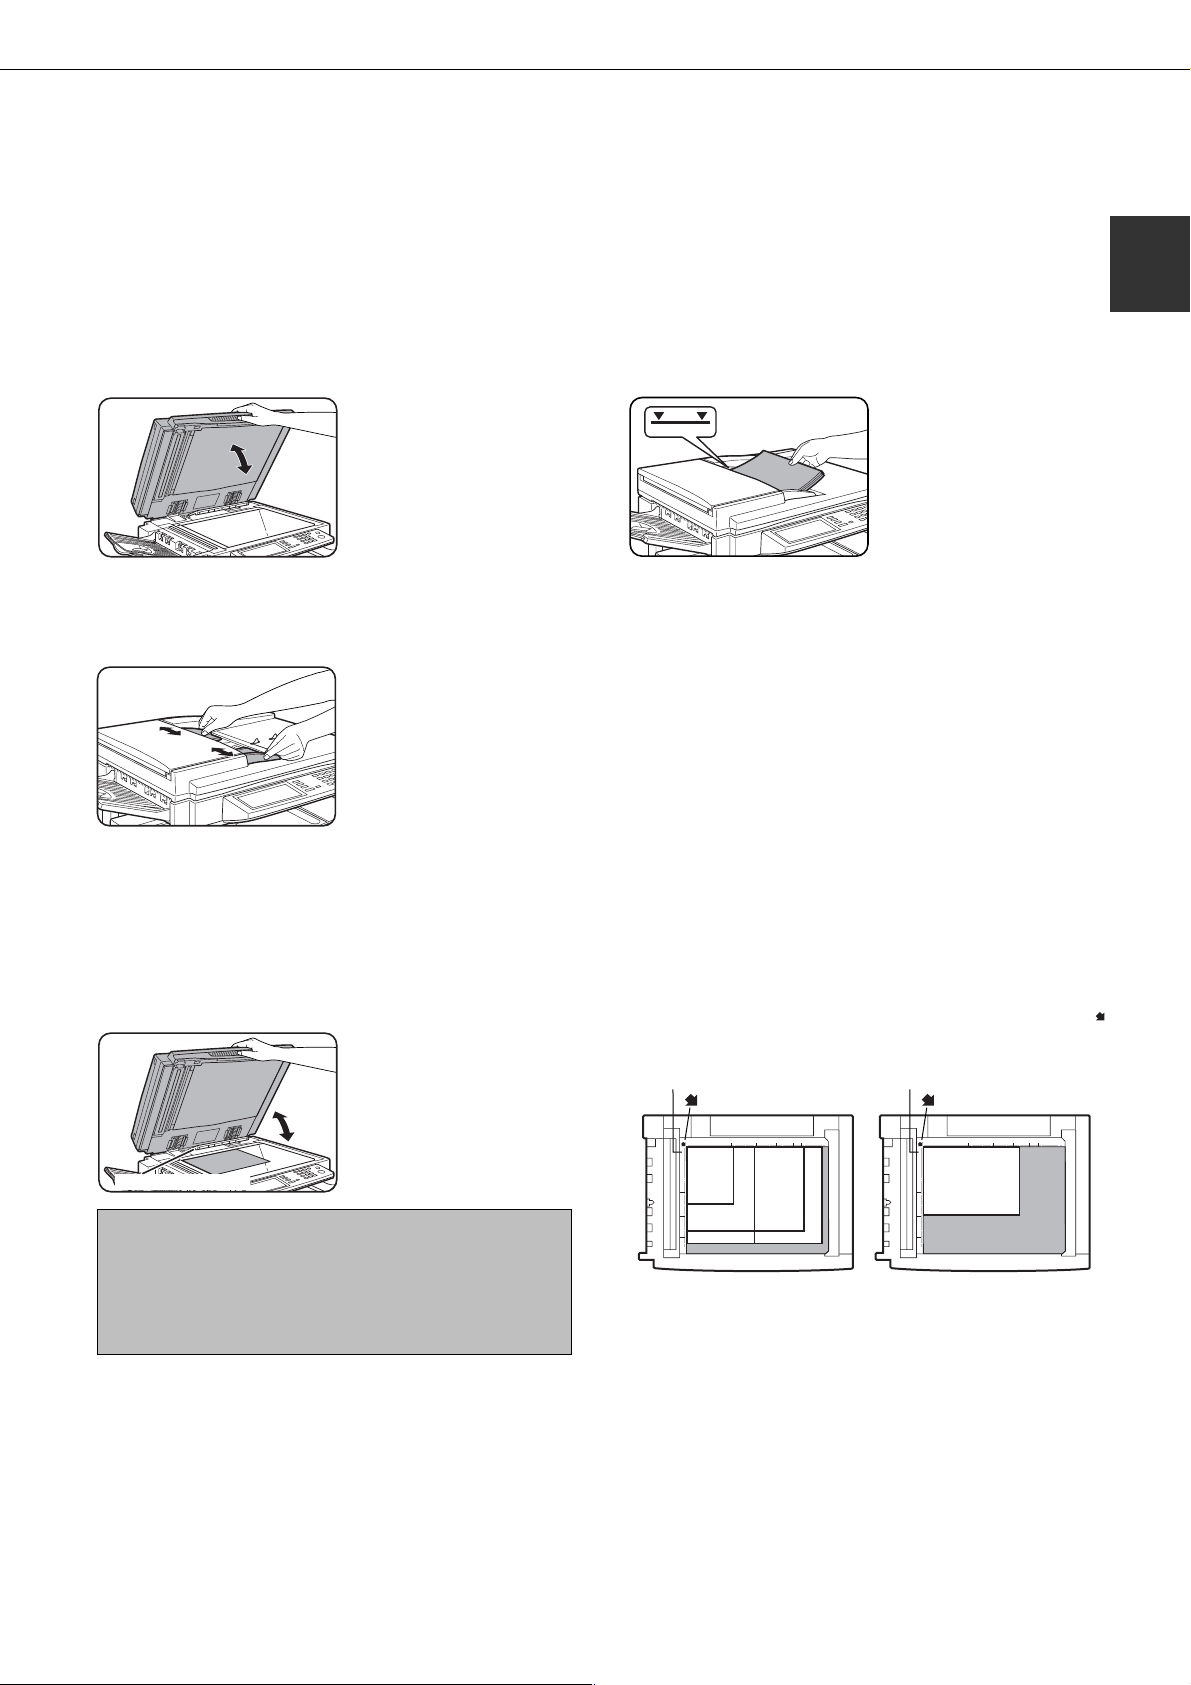
USING THE AUTO DOCUMENT FEEDER
Lift the document glass cover and make sure a
1
document is not placed on the document glass.
Gently close the cover.
Adjust the document guides on the auto document
2
feeder to the width of the document.
Align the edges of the document pages and then
3
insert the stack in the document feeder so that
the first page is face down.
1
Insert the stack into the auto
document feeder until it
stops. The stack should not
be higher than the indicator
line (maximum 50 pages, or
30 pages for 8-1/2"x14"
(B4) or larger documents).
USING THE DOCUMENT GLASS
Open the document glass cover , and place the
1
document face down on the document glass.
Gently close the cover.
Original size detector
NOTE
Do not place any objects under the original size detector
plate. Closing the document glass cover with an object
underneath may damage the original size detector plate
and prevent correct detection of the document size.
Regardless of the size of the original, place the original
in the far left corner of the document glass. (Align the
upper left-hand corner of the original with the tip of the
mark.)
Document glass scale
mark
1
1
x
/
/
5
8
2
2
8
or A5
1
x
/
2
11 or A4
1
/
8
2
or B4
11x17 or A3
x
14
Document glass scale
mark
1
x
/
8
2
11R or A4R
1-7
Page 14

MANUAL
ORIGINAL SIZE
O
2-SIDED
TABLET
REDIAL
OK
OK
B4
A3
B5R
A4
A5
A5R
INCH
AB
A4RB5
SPEAKER
ORIGINAL SIZE
MANUALAUTO
REDIAL
OK
OK
INCH
AB
SPEAKER
ORIGINAL SIZE
MANUALAUTO
5 X8
1
/
2
1
/
2
5 X8 R
1
/
2
1
/
2
8 X11
1
/
2
8 X11R
1
/
2
8 X14
1
/
2
11X17
REDIAL
OK
OK
KER
L
ORIGINAL
STANDARD
RESOLUTION
CHECKING THE SIZE OF A LO ADED ORIGINAL
AUTO A4
ORIGINAL
STANDARD
RESOLUTION
OK
B4
A3
INCH
AB
LONG SIZE
If the loaded original is a standard size*, the size will be detected (automatic original detection)
and displayed in the ORIGINAL k ey. Make sure that the size has been correctly detected. If
you have loaded a non-standard siz e original or wish to change the scanning size, y ou can
follow the steps below to man ually set the original scanning size.
NOTE
*Standard sizes that can be detected are as follows:
5-1/2"x8-1/2", 8-1/2"x11", 8-1/2"x11"R, 8-1/2"x14", 11"x17", A5, B5, B5R, A4, A4R, B4, A3. If a non-standard size original is
loaded (including special sizes), the closest standard size may be displayed, or the original size may not appear at all.
MANUALLY SETTING THE SCANNING SIZE
If you load an original that is not a standard size (such as an AB size), or if the size is not detected correctly, you must
touch the ORIGINAL key and set the original size manually. Perf orm the following steps after loading the document in
the automatic document feeder or on the document glass.
Touch the ORIGINAL key.
1
STANDARD
RESOLUTION
AUTO A4
ORIGINAL
If you wish to select an INCH size, touch the
AB
INCH key and then touch the desired
original size key .
INCH is highlighted and
INCH size keys are
displayed. To retur n to the
AB palette, touch the
INCH key once again.
AB
T ouch the MANUAL key.
2
The sizes that can be
T ouc h the outer OK key.
4
selected are displayed.
1
/
8 X11
2
T ouch the desired original size ke y.
3
AUTO is no longer
highlighted. MANUAL and
The selected size appears in the top half of the
5
ORIGINAL key .
the original size key you
touched are highlighted.
LONG SIZE
1
/
8 X11
2
NOTE
You can return to automatic detection by pressing the CA key.
■ If you loaded a long original
If you loaded a long (up to 31.5" (800mm)) original in the auto document feeder,
touch the LONG SIZE key in step 3 above.
You will return to the initial
screen. (Pressing the inner
OK key in the step above
returns you to step 2.)
NOTE
When a long original is loaded, you cannot use the automatic two-sided scanning function.
1-8
Page 15
SELECTING RESOLUTION AND EXPOSURE SETTINGS
AUTO A4
ORIGINAL
STANDARD
RESOLUTION
HALF TONE
OK
L/FTP
200
300
400
600
INTERNET
FAX
200 100
200 200
200 400
400 400
(dpi)
STANDARD
FINE
SUPER FINE
ULTRA FINE
200 200
300 300
400 400
600 600
200 100
200 200
200 400
400 400
(
HALF TONE
OK
INTERNET
FAX
200 100
200 200
200 400
400 400
(dpi)
OK
After loading an original, you can adjust the resolution and exposure settings to match the condition of the original-for
example, if it has small or f aint characters, or if it is a photo. After loading the original in f ax mode, adjust the settings
as explained below .
SELECTING THE RESOLUTION
The initial resolution setting is STANDARD. To change the setting, follow these steps:
■ Change the resolution.
T ouch the RESOLUTION ke y.
1
T ouch the desired resolution ke y.
2
The selected key is
highlighted. If you selected
FINE, SUPER FINE, or
ULTRA FINE, you can also
touch the HALF TONE key
to select halftone.
■ Resolution settings
Touch this key if your original consists of
Standard
Fine
Super fine
Ultra fine
normal-sized characters (like those in
this manual).
Touch this key if your original has small
characters or diagrams. The original will
be scanned at twice the resolution of the
Standard setting.
Touch this key if your original has intricate pictures or diagrams. A higher-quality image will be produced than with the
Fine setting.
Touch this key if your original has intricate pictures or diagrams. This setting
gives the best image quality. However,
transmission will take longer than with
the other settings.
1
T ouch the OK ke y.
3
You will return to the initial
screen.
NOTES
• The initial factory resolution setting is Standard. If desired,
you can change the initial setting to a different setting
using the key operator program. (Refer to page 8-3.)
• When using the automatic document feeder, the
resolution setting cannot be changed once scanning has
begun.
• Even if you send a document using Fine, Super fine, or
Ultra fine resolution, some receiving fax machines may
not be able to print the document at the same resolution.
Half tone
Touch this key if your original is a photograph or has gradations of color (such as
a color original). This setting will produce
a clearer image than Fine, Super fine, or
Ultra fine used alone. Half tone cannot be
selected if Standard has been selected.
1-9
Page 16
SELECTING RESOLUTION AND EXPOSURE SETTINGS
AUTO
ORIGINAL
AUTO
EXPOSURE
STANDARD
RESOLUTION
AUTO
DARK
LIGHT
ORIGINAL
OK
OK
LIGHT
SELECTING THE EXPOSURE
The initial exposure setting is A UT O. To change the setting, follow these steps:
■ Change the exposure.
T ouch the EXPOSURE key.
1
NOTE
When using the document glass to scan pages an original,
the exposure setting can be changed each time you change
pages. When using the automatic document feeder, the
exposure setting cannot be changed once scanning has
begun.
T ouch the desired e xposure key.
2
T ouc h the outer OK key.
3
The selected key is
highlighted.
You will return to the initial
screen.
■ Exposure settings
Dark Select this setting if your original consists
Original mostly of dark characters.
This setting automatically adjusts the ex-
Auto
Light Select this setting if your original consists
Original mostly of faint characters.
posure for light and dark parts of the original.
1-10
Page 17
CONVENIENT DIALING METHODS
FREQUENT USE ABCD EFGHI JKLMN OPQRS
CORPO.TPS
SHARP GROUP
SHARP CORPORATION
No.001:SHARP CORPORATION
0666211221
SHARP CORPORATION
CORPO.TPS
SHARP GROUP
No.005:SHARP GROUP
GROUP:025
ADDRESS
DIRECTORY
SUB ADDRESS
REDIALAKER
FAX MEMORY: 100%
AUTO RECEPTION
ADDR
DIRE
SUB
RESPEAKER
This product includes an auto-dialing feature to make dialing easier . By programming frequently dialed n umbers, you
can call and send documents to these locations by means of a simple dialing operation (refer to page 2-5). There are
two types of auto-dialing: one-touch dialing and g roup dialing. To program auto-dial numbers, refer to pages 6-3, 6-6.
● One-touch dialing
Simply press a one-touch key and then press the Start
key to dial the programmed location. A name of up to 36
characters can be programmed for the location (a maxim um
of 18 characters are displayed). When using F-code
transmission, a sub-address and passcode can also be
programmed (refer to page 4-2).
● Group dialing
Multiple one-touch dial locations can be programmed into
a single one-touch key. This is conv enient for successiv ely
sending a document to multiple locations.
• Full fax numbers entered with the numeric keys cannot
be stored in a group dial key. First program the number in
a one-touch key and then store it in a group dial k e y.
● Redialing
The machine keeps the last fax or voice number dialed
with the numeric keys in memory. You can redial the last
number dialed by simply pressing the REDIAL ke y.
• If numeric keys were pressed during a phone
conversation, the REDIAL key may not dial the correct
number.
1
T ouch the ADDRESS DIRECT ORY k ey in the initial
screen to display the above screen.
T ouch the ADDRESS DIRECT ORY k ey in the initial
screen to display the above screen.
● On-hook dialing
This feature allows you to dial without lifting an extension
phone connected to the machine. Press the SPEAKER
key, listen for the dial tone through the speaker, and then
dial.
• To speak with another person, you must lift the extension
phone connected to the machine when they answer.
• F axes must be sent manually when using on-hook dialing.
(Refer to page 5-2.)
• On-hook dialing is not possible using a one-touch key
that includes a sub-address and passcode, or a group
dial key.
NOTES
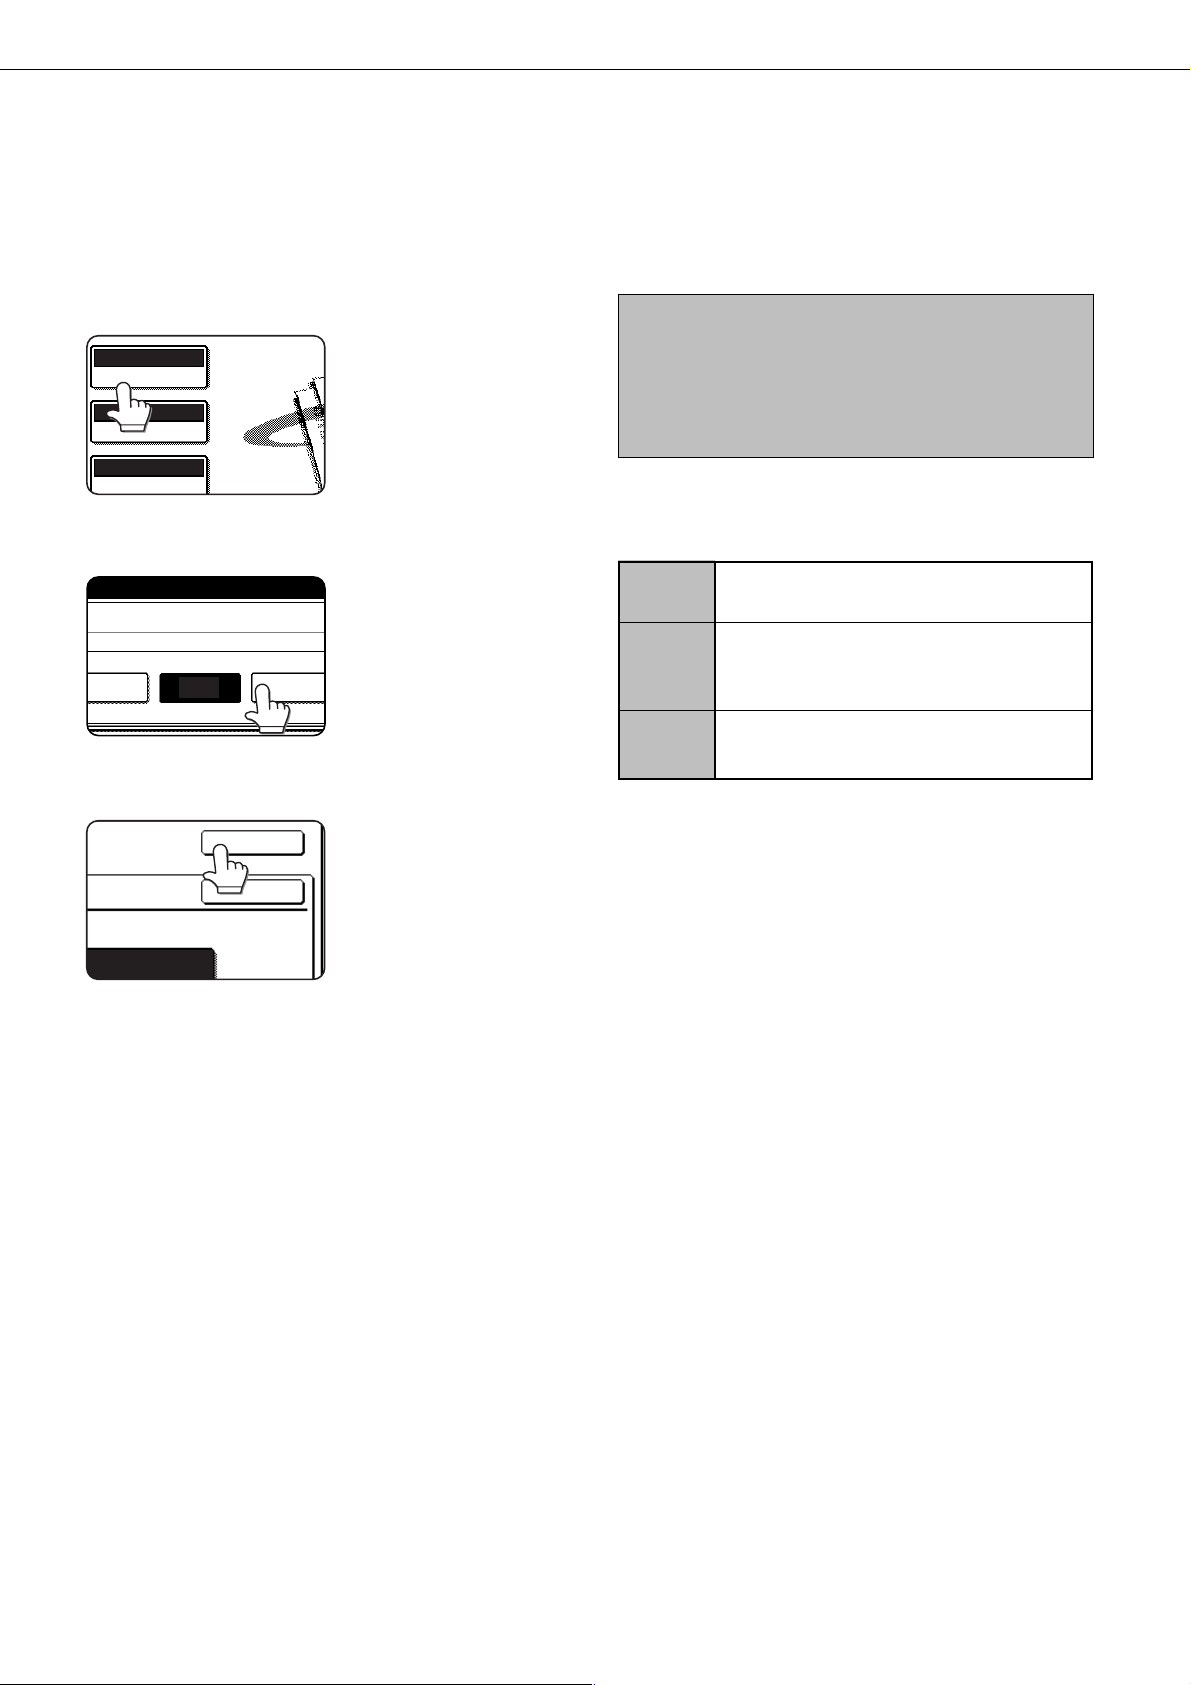
• A total of 500 one-touch dial and group dial keys can be programmed. (Refer to page 6-2.)
• Programmed one-touch keys and group dial keys are stored on "index cards". A key can be accessed by touching its card.
(Refer to page 1-5.)
• To prevent calling or sending a fax to a wrong number, look carefully at the touch panel and make sure you program the
correct number when programming an auto-dial number . You can also check programmed numbers by printing out an address
list or group list after programming (refer to page 6-14).
1-11
Page 18

Page 19

CHAPTER 2
BASIC OPERATIONS
This chapter explains basic operations such as sending faxes.
Page
SENDING A FAX ................................................................................... 2-2
●BASIC PROCEDURE FOR SENDING FAXES .............................. 2-2
●TRANSMISSION BY AUTO-DIALING ............................................ 2-5
●TRANSMITTING A TWO-SIDED DOCUMENT .............................. 2-5
PRIORITY TRANSMISSION OF A STORED JOB ................................ 2-6
CANCELING A FAX TRANSMISSION .................................................. 2-6
RECEIVING FAXES............................................................................... 2-7
●RECEIVING A FAX......................................................................... 2-7
2-1
Page 20
SENDING A FAX
AUTO A4
ORIGINAL
AUTO A4
ORIGINAL
STANDARD
RESOLUTION
AUTO
ORIGINAL
AUTO
EXPOSURE
STANDARD
RESOLUTION
ADDRES
DIRECTO
SUB ADD
NEXT ADDPAUSE
MEMORY:100%
BASIC PROCEDURE FOR SENDING FAXES
Make sure the machine is in fax mode.
1
When the IMAGE SEND
key light is on, the machine
is in fax mode. If the light is
not on, press the IMAGE
SEND key.
Load the original.
2
Refer to the following pages:
• Using the auto document feeder: Page 1-7
• Using the document glass: Page 1-7
If you are using the document glass to send multiple
pages, load the first page first.
NOTE
You cannot load documents in both the auto document
feeder and on the document glass and send them in a
single fax transmission. If documents are loaded in both
the auto document feeder and on the document glass, only
the document in the auto document feeder will be scanned
and transmitted.
Check the original size.
3
If you loaded a non-
STANDARD
RESOLUTION
standard size document or
the document size was not
correctly detected, touch
the ORIGINAL key and set
the document size. (Refer to
page 1-8.)
Dial the fax number.
6
The number that you
entered appears in the
message display. If it is not
correct, press the C key and
re-enter the number. You
can also use the REDIAL
key (page 1-11) or an autodial number (2-5).
Entering a pause.
If you need to insert a pause
between digits to access an
outside line or dial an
international number, touch
the P A USE k ey in the upper
right-hand corner of the
screen.
Each time you touch the PAUSE key, a hyphen ("-")
appears and a 2-second pause* is inserted.
After entering a number, you can also touch the PAUSE
key to enter a hyphen, and then enter another number
using the numeric keys or a one-touch ke y . This connects
the numbers together (Chain dialing).
* The duration of each pause can be changed with the
key operator program. (Refer to page 8-4.)
4
5
2-2
If needed, adjust the resolution setting.
(Refer to page 1-9.)
If needed, adjust the exposure setting.
(Refer to page 1-10.)
Page 21

SENDING A FAX
READ-END
Using the auto document feeder
Press the ST AR T key.
7
Scanning begins.
If a job is not in progress
and the telephone line is
not being used, the
destination is called after
the first page is scanned.
Transmission takes place
as the document pages
are being scanned.
(This is called "Quick on-line"-refer to the f ollo wing page.)
If there is a previously stored job or a job is in progress, or
if the line is being used, all pages of the document are
scanned into memory and stored as a transmission job.
(This is called memory transmission: the destination is
automatically called and the document transmitted after
previously stored jobs are completed.)
If scanning is completed normally, the machine makes a
beep sound to inform you that the transmission job is stored
and JOB STORED appears in the message displa y.
Using the document glass
Press the ST AR T key.
7
The original is scanned
and the READ-END key
appears.
If you have another page to scan, change pages
8
and then press the ST ART key.
Repeat this sequence until all pages have been scanned.
You can change the resolution and exposure settings
as needed for each page (refer to pages 1-9 and 1-10).
If no action is taken for one minute, scanning
automatically ends and the transmission job is stored.
After the final page is scanned, touch the READ-
9
END key .
The machine makes a beep
sound to inform you that the
transmission job is stored
and JOB STORED appears
in the message display.
(The destination is
automatically called and the
document transmitted after
previously stored jobs are
completed.)
Open the document glass cover and remove the
document.
2
NOTES
• Canceling transmission
T o cancel tr ansmission while SCANNING ORIGINAL... appears in the display or bef ore the READ-END ke y is pressed, press
the C key or the CA key. To cancel a transmission job that is already stored, press the JOB STATUS key and cancel the job
as explained on page 2-6.
• If the machine makes two beeps during or at the end of transmission and an error message appears in the message display ,
refer to page 7-3 to fix the problem.
• If the power is turned off or a power failure occurs while a document is being scanned in the auto document feeder, the
machine will stop and a document jam will occur. After power is restored, remove the document as explained on page 29 of
"Operation manual (for copier)".
2-3
Page 22

SENDING A FAX
■ Quick On-line
When you use the auto document feeder to send a multi-page document and there are no pre viously stored jobs
waiting or in progress (and the line is not being used), the machine dials the destination after the first page is
scanned and begins transmitting scanned pages while the remaining pages are being scanned. This transmission
method is called Quick On-line. The messages SCANNING ORIGINAL and SENDING both appear until scanning
of the final page is completed.
If the receiving party is busy , the transmission will switch to a memory transmission. (Refer to the f ollowing section,
"Storing transmission jobs (memory transmission)".)
NOTES
• The machine is initially set (factory setting) to perform Quick On-line transmission. If desired, you can turn off this function
with the key operator program (refer to page 8-7).
• When a document is transmitted using the following methods, the job will be stored in memory (Quick On-line transmission
will not be performed):
• Sending from the document glass • Broadcast transmission (page 3-2) • Timer transmission (page 3-4)
• F-code transmission (Chapter 4)
■ Storing transmission jobs (memory transmission)
When a document is sent from the document glass, or when the telephone line is in use, the document is scanned
into memory and then automatically transmitted after previously stored transmission jobs are completed. This
means that transmission jobs can be stored in memory by performing a transmission operation while the machine
is occupied with another transmission/reception operation. This is called memory transmission, and up to 50 jobs
can be stored in memory at once, including the job currently being executed. After transmission, the scanned
document data is cleared from memory .
NOTES
• You can check transmission jobs stored in memory in the job status screen. (Refer to page 1-14 of "Operation manual (for
printer operation and general information)".)
• If the memor y becomes full while a document is being scanned, a message will appear in the display. You can cancel the
transmission by touching the CANCEL key, or send only the pages already scanned by touching the SEND key. The page
that was being scanned when the memory became full will be cleared from memory. If the memory becomes full while
scanning the first page of a document, the transmission job is automatically canceled.
• The number of jobs that can be stored will depend on the number of pages in each job and the transmission conditions. The
number of storable jobs will increase if the optional expansion memory (8 MB) is installed.
■ If the receiving party is busy
If the receiving party is busy , the transmission is tempor arily canceled and then automatically re-attempted after
a brief interval (two attempts are made at an interval of 3 minutes*). If y ou do not want the machine to re-attempt
the transmission, cancel the job in the job status screen. (Ref er to page 2-6.)
*This setting can be changed with the key operator program (page 8-7).
■ If a transmission error occurs
The machine is initially set to not re-attempt transmission if transmission does not end normally due to a line error
or other reason, or if the other machine does not begin reception within 45 seconds after the connection is
established. If desired, you can use the key operator program to set the machine to automatically re-attempt
transmissions when a transmission error occurs (page 8-7). The machine also supports error correction mode
(ECM), and is initially set to automatically resend any parts of a document that were distorted due to noise on the
line or other reasons (page 8-5).
■ Image rotation
The machine is initially set to rotate a vertically-placed document 90° so that it is oriented horizontally before
transmission (8-1/2"x11" (A4) originals are rotated to 8-1/2"x11"R (A4R) and 5-1/2"x8-1/2"R (B5R or A5R) originals
are rotated to 5-1/2"x8-1/2" (B5 or A5)). 8-1/2"x11"R (A4R) originals and 5-1/2"x8-1/2" (B5) originals are not
rotated. If desired, y ou can turn this function off with the ke y operator prog ram as explained on page 8-6.
NOTE
When using the document glass, be sure to orient 5-1/2"x8-1/2" (A5) originals vertically. If oriented horizontally (5-1/2"x8-1/2"
(A5) orientation), the original size will be detected as 8-1/2"x11" (A4), and you will need to touch the ORIGINAL key and set
the original size to 5-1/2"x8-1/2"R or A5R (by touching the 5-1/2"x8-1/2"R (A5R) key). (Refer to page 1-8.)
2-4
Page 23
SENDING A FAX
AUTO A4
ORIGINAL
STANDARD
RESOLUTION
AUTO MANUAL
2-SIDED
BOOKLET
2-SIDED
TABLET
SPEAKER
ORIGINAL SIZE
REDIAL
OK
KER
AUTO A4
ORIGINAL
STANDARD
RESOLUTION
ADDRESS
DIRECTORY
SUB ADDRESS
REDIALAKER
FREQUENT USE ABCD EFGHI JKLMN OPQRS
T.P.S.
SHARP GROUP
S
SHARP CORPORATION
READY TO SEND.
Booklet Tablet
TRANSMISSION BY AUTO-DIALING
To send a document by auto-dialing (one-touch dialing or group dialing) instead of entering a full fax n umber with the
numeric keys, f ollo w the steps below. To use an auto-dial destination, you must first program the full f ax n umber and
name of the destination. Refer to page 1-11 for information on auto-dialing and pages 6-3, 6-6 for information on
programming auto-dial destinations.
Perform steps 1 thr ough 5 of "Basic Procedure
1
for Sending Faxes" (page 2-2).
T ouch the ADDRESS DIRECT ORY key .
2
The address directory
screen appears.
Touch the one-touch key for the desired
3
destination.
Refer to page 1-5 for
information on using the
address directory screen.
The key you touched is
highlighted. If y ou touch the
wrong key, touch the key
again to cancel the
selection. The key display
will return to normal.
Continue from step 7 of "Basic Procedure for
4
Sending Faxes" (page 2-3).
TRANSMITTING A TWO-SIDED DOCUMENT
A two-sided document can be automatically transmitted using the auto document feeder. Follow the steps below to
automatically send a two-sided document.
Make sure the machine is in fax mode and then
1
load the document in the auto document feeder
(page 1-7).
T ouc h the ORIGINAL key.
2
When you touch the
ORIGINAL key, check the
original size displayed in the
key .
T ouch the OK ke y.
4
You will return to the initial
screen.
A two-sided original icon appears next to the ORIGINAL key.
(Example: The icon that appears when the 2-SIDED
BOOKLET key is touched.)
2
Touch the 2-SIDED BOOKLET key or the 2-
3
SIDED TABLET key as appropriate for the
original you loaded.
NOTES
• Booklets and tablets
Two-sided originals that are bound at the side are booklets, and two-sided originals
that are bound at the top are tablets.
• Two-sided scanning turns off after the document is stored in memor y. Pressing the
CA key will also cancel two-sided scanning.
If necessary, touch the
MANUAL key and set the
original size. (Page 1-8)
Continue from step 4 of "Basic Procedure for
5
Sending Faxes" (pages 2-2 to 2-3)
2-5
Page 24
FAX JOB
DETAIL
PRIORITY
STOP/DELETE
WAITING
WAITING
WAITING
PRIORITY
STOP/DELETE
PRIORITY TRANSMISSION OF A STORED JOB
FAX JOB
DETAIL
PRIORITY
STOP/DELETE
WAITING
WAITING
WAITING
PRIORITY
STOP/DELETE
If you have an urgent transmission job and multiple transmission jobs have already been stored, you can give priority
to the urgent job so that it will be transmitted immediately after the job currently being executed. This is done from the
job status screen. For details on using the job status screen, refer to page 1-14 of "Operation manual (for printer
operation and general information)".
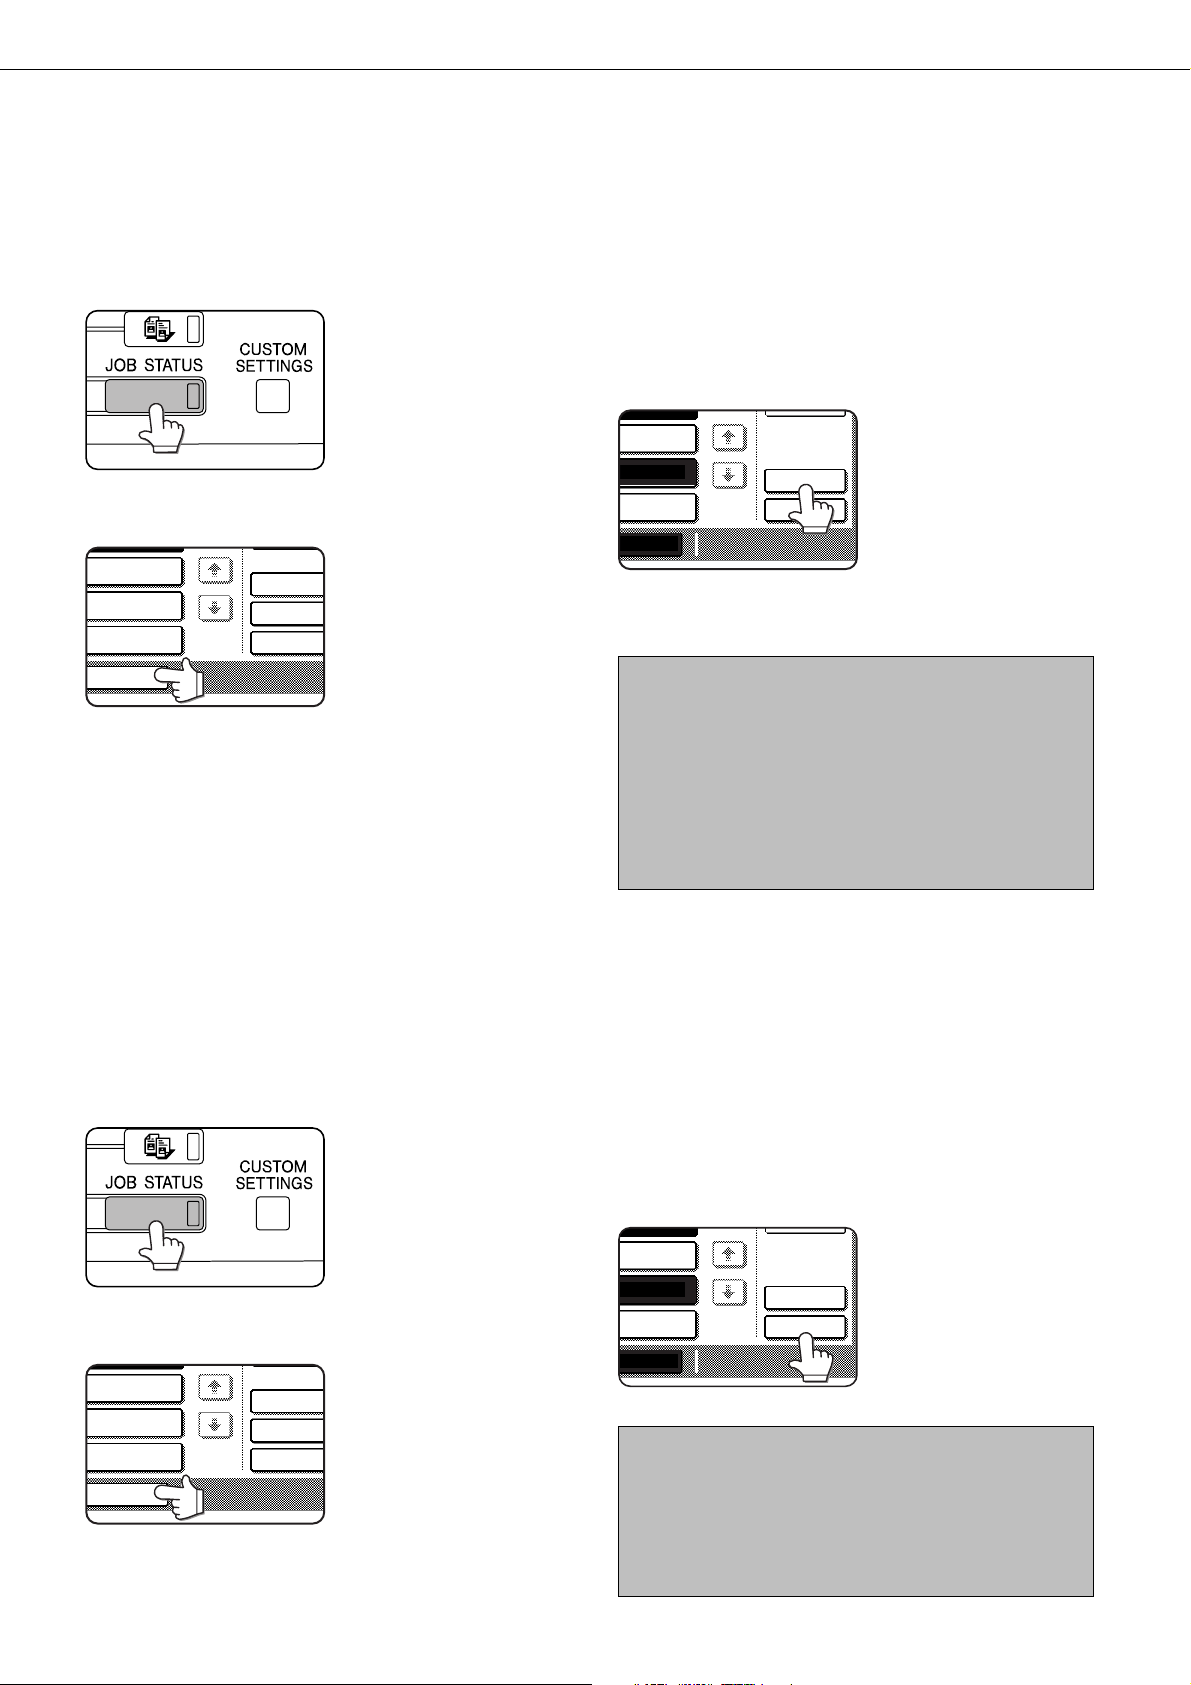
Press the JOB STATUS key.
1
Touch the FAX JOB key.
2
Touch the job key of the transmission job to
3
which you wish to give priority.
The touched key is highlighted.
Touch the PRIORITY key.
4
The selected job moves up
to the next position after the
job currently being
executed.
When the current job is completed, execution begins of
the job selected in step 3.
NOTE
If the job currently being executed is a broadcast
transmission (page 3-2) or a serial polling operation (3-5),
the priority job will be executed after the call to the current
destination is completed. When the priority job is
completed, the remaining broadcast or polling destinations
are called. However, if the priority job is also a broadcast
transmission or serial polling operation, the job is begun
after the current broadcast or serial polling job is completed.
CANCELING A FAX TRANSMISSION
You can cancel a transmission job that is in progress or has been stored. Cancellation is done from the fax job status
screen. (Printing of a received fax cannot be canceled.)
Press the JOB STATUS key.
1
Touch the FAX JOB key.
2
2-6
Touch the job key of the transmission job you
3
wish to cancel.
The touched key is highlighted.
Touch the STOP/DELETE key.
4
A message appears to
confirm the cancellation.
Touch the YES key to delete
the selected job key and
cancel the transmission.
NOTES
• If you do not wish to cancel the transmission, touch the
NO key.
• You can verify a canceled transmission job in the
transaction report. (Refer to page 7-2.)
"CANCEL" will appear in the Type/Note column.
Page 25
RECEIVING FAXES
When another fax machine sends a fax to your machine, your machine will ring*, automatically receive the fax, and
begin printing (automatic reception).
NOTES
• You can store a transmission job while fax reception is in progress (refer to page 2-4).
• If an extension phone is connected to the machine, you can answer using the e xtension phone and then begin f ax reception
(manual reception). This allows you to use the line for both voice calls and faxes. (Refer to page 5-4.)
• To receive faxes, sufficient paper must be loaded in the paper tray. Refer to pages 1-16 to 1-24 of "Operation manual (for
printer operation and general information)" to load appropriate paper. Incoming faxes will be automatically adjusted to the
orientation of the printing paper, so there is no need to load both horizontally and vertically oriented paper.
Howev er , if y ou receive a f ax that is smaller than 8-1/2"x11" (A4) siz e, the paper siz e used to print the fax will depend on how
the original was oriented (vertically or horizontally) in the sending fax machine.
RECEIVING A FAX
2
The machine will ring* and reception will
1
automatically begin.
NOTE
• If the fax is being sent manually and you have connected
an extension phone to the machine, you can lift the phone
before reception begins to talk with the other person.
Reception ends.
2
*Number of rings
The machine has been set to ring twice before beginning automatic reception. You can use the key operator program to change the number of rings to any
number from 0 to 15. (Refer to page 8-8.)
If the number of rings is set to 0, the machine will
receive faxes without ringing.
NOTES
• If the machine has multiple output trays, the key operator
program can be used to change the output tray for fax
reception (page 8-8).
• If desired, you can set the machine to output a blank
sheet of paper after printing the last page of each received
fax job. This will help you distinguish where one reception
ends and another begins.
■ If received data cannot be printed
If the machine runs out of paper or toner, or a paper jam occurs, print and copy jobs
that are in progress will be held in memory until printing becomes possible. The jobs
are automatically printed when printing capability is restored. When receiv ed data
is held in memory , the D ATA light next to the IMAGE SEND k e y b links.
Y ou can also use the tr ansfer function to hav e another fax machine print the received
data (refer to page 3-12).
When reception ends, the
machine makes a "beep"
sound.
The output tray for the
printed fax varies depending
on the output unit installed
on the machine.
NOTE
If the machine makes a double beep sound during reception or at the end of reception and an error message appears in the
display, clear the error as explained on page 7-3.
2-7
Page 26

Page 27

CHAPTER 3
USING CONVENIENT FUNCTIONS 1
ADVANCED TRANSMISSION METHODS
This chapter explains fax features for special situations and purposes.
Please read those sections that are of interest to you.
Page
SENDING THE SAME DOCUMENT
TO MULTIPLE DESTINATIONS IN A SINGLE OPERATION
(BROADCAST TRANSMISSION) .......................................................... 3-2
●USING BROADCAST TRANSMISSION......................................... 3-3
AUTOMATIC TRANSMISSION AT A SPECIFIED TIME
(TIMER TRANSMISSION) ..................................................................... 3-4
●SETTING UP A TIMER TRANSMISSION ...................................... 3-4
TRANSMISSION AND RECEPTION USING THE POLLING FUNCTION
●USING THE POLLING FUNCTION ................................................ 3-6
●USING POLLING MEMORY........................................................... 3-7
OWN NUMBER SENDING .................................................................... 3-9
FAXING A DIVIDED ORIGINAL (DUAL PAGE SCAN).......................... 3-10
PROGRAMMING FREQUENTLY USED OPERATIONS ...................... 3-11
●USING A PROGRAM ..................................................................... 3-11
TRANSFERRING RECEIVED FAXES
TO ANOTHER MACHINE WHEN PRINTING IS NOT POSSIBLE ........ 3-12
●USING THE TRANSFER FUNCTION ............................................ 3-12
... 3-5
3-1
Page 28

SENDING THE SAME DOCUMENT TO MULTIPLE
100%
ADDRESS
DIRECTRY
SUB ADDRESS
NEXT ADDRESSSE
DESTINATIONS IN A SINGLE OPERATION
(BROADCAST TRANSMISSION)
This feature is used to send a document to multiple destinations in a single operation. The document to be transmitted
is scanned into memory and then successively transmitted to the selected destinations. This feature is conv enient for
such purposes as distributing a report to company branches in different locations. Up to 300 destinations can be
selected. When transmission to all destinations has been completed, the document is automatically cleared from
memory.
NOTES
• If you frequently use broadcasting to send documents to the same group of destinations, it is convenient to program those
destinations into a group key. A group key is a one-touch k e y in which multiple destinations are prog r ammed. The procedure
for programming group keys is explained on page 6-6.
• When using a group key to send a fax, the destinations programmed in the group k ey are counted as broadcasting destinations.
For example, if five destinations are programmed in a group key and the key is touched for a broadcast transmission, the
broadcast transmission will have five destinations.
Beep
Sender
Successively enter
destination numbers
The document is scanned
into memory
Reception
Successive
transmission
Destination A
(recipient)
Beep
Destination B
(recipient)
Reception
Beep
Destination C
(recipient)
Reception
3-2
Page 29

SENDING THE SAME DOCUMENT TO MULTIPLE DESTINATIONS IN A SINGLE OPERATION (BROADCAST TRANSMISSION)
CORPO.TPS
SHARP GROUP
SPE
CONDITION
SETTINGS
SUB ADDRESS
NEXT ADDRESSSE
CONDITION
SETTINGS
SUB ADDRESS
ADDRESS REVIEW
0666211221
ADDRESS REVIEW
SELECT ADDRESS TO DELETE.
CORPO.TPS
SHARP GROUP
YES
0666211221
USING BROADCAST TRANSMISSION
Follow steps 1 through 5 in "Basic Procedure
1
for Sending Faxes". (Refer to page 2-2.)
Dial the fax number of the first destination or
2
touch an auto-dial key (one-touch key or gr oup
key). (Ref er to page 2-5.)
An auto-dial key is
highlighted when touched.
Touch the NEXT ADDRESS key and then dial
3
the fax number of the next destination or touch
an auto-dial key .
Repeat this step for each of
the remaining destinations.
NOTES
• If you enter an incorrect number
If you make a mistake while entering a number, press
the C key and then re-enter the correct digit(s).
If you have already completed entry of a fax n umber, y ou
can delete the number using steps 4 and 5.
• If you select an incorrect auto-dial key
Simply touch the incorrect key one more time to cancel
the selection.
• The NEXT ADDRESS key only needs to be pressed when
successively dialing fax numbers with the numeric k eys.
Example:
XXXX NEXT ADDRESS XXXX
Dial
Cannot be omitted.
Dial
T ouch the ADDRESS REVIEW key to display the
4
list of destinations.
When the ADDRESS
REVIEW key is pressed,
only the entered and
selected destinations are
displayed.
Check the destinations.
5
When you have finished
checking the destinations,
touch the OK key to return
to the screen of step 4.
If you wish to delete a
DELETE THE ADDRESS?
NO
Continue from step 7 of the basic procedure for
6
sending faxes (page 2-3).
NOTE
To cancel a broadcast transmission
To cancel a broadcast transmission when selecting
destinations, press the CA key.
destination, touch the
displayed one-touch key. A
message will appear to
confirm the deletion. Touch
YES and the destination will
be deleted from the
destination list. Touching NO
will close the message box.
3
XXXX NEXT ADDRESS One-touch NEXT ADDRESS One-touch
Dial
Can be omitted Can be omitted
If desired, you can use the key operator program to set
the machine so that the NEXT ADDRESS key must alw ays
be pressed (refer to page 8-3).
3-3
Page 30
AUTOMATIC TRANSMISSION AT A SPECIFIED TIME
SUB A
ADDRESSPECIAL MODES
SPECIAL MODES
TIMER
DAY OF THE WEEK
30
CANCEL
TIME
OK
mm.
30
OK
CANCEL
(TIMER TRANSMISSION)
This feature enables y ou to set up a transmission or polling operation to be performed automatically at a specified time
up to a week in advance. This allo ws you to take advantage of off-peak phone rates without having to be there when
the transmission is performed. A combined total of 50 timer transmission and memory transmission jobs can be stored.
NOTES
• After a timer transmission is performed, the information (image, destination, etc.) is automatically cleared from memory.
• To perform a timer transmission, the document must be scanned into memory. It is not possible to leave the document in the
auto document feeder or on the document glass and have it scanned at the specified time of transmission.
• To set the date and time in the machine , refer to page 3-6 of "Operation manual (f or printer operation and general information)".
• Only one polling timer operation can be set up at a time. If you wish to set up multiple timer polling operations, combine the
machines to be polled into a serial polling operation with a timer setting. (Refer to the next page.)
SETTING UP A TIMER TRANSMISSION
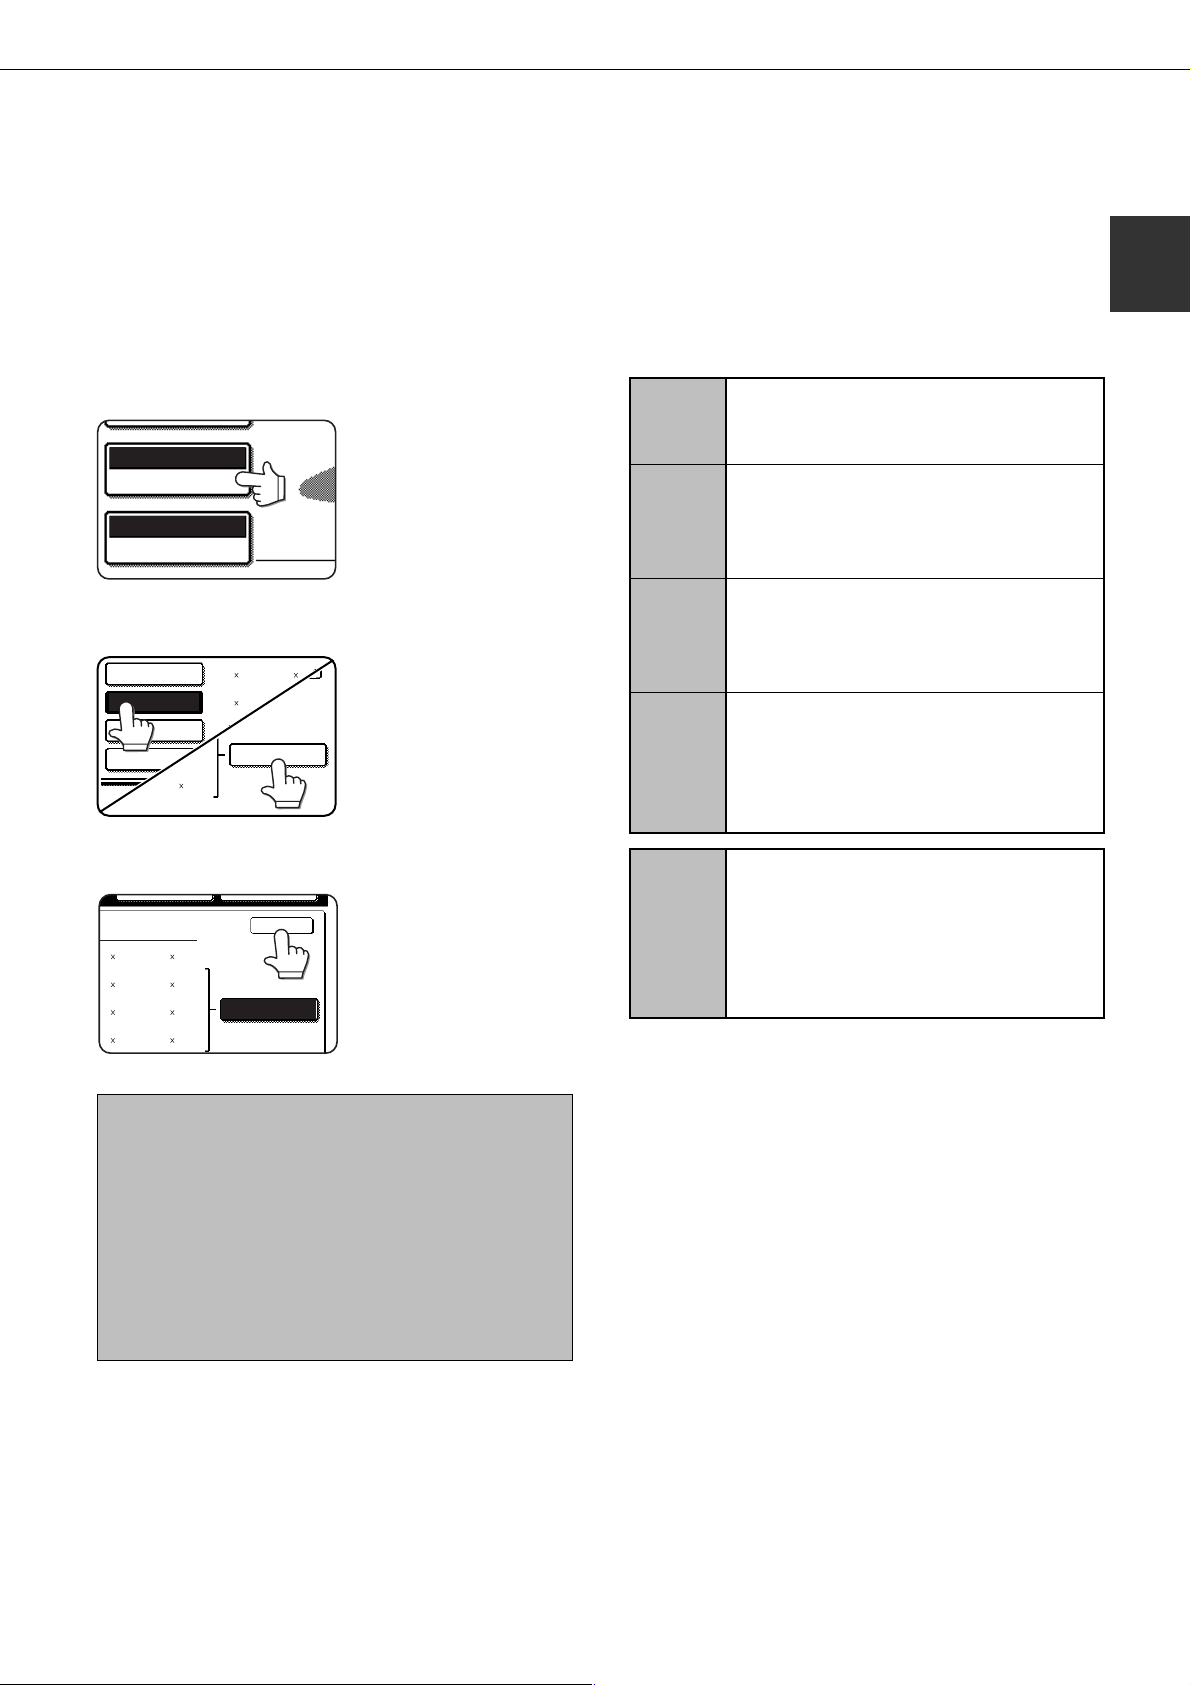
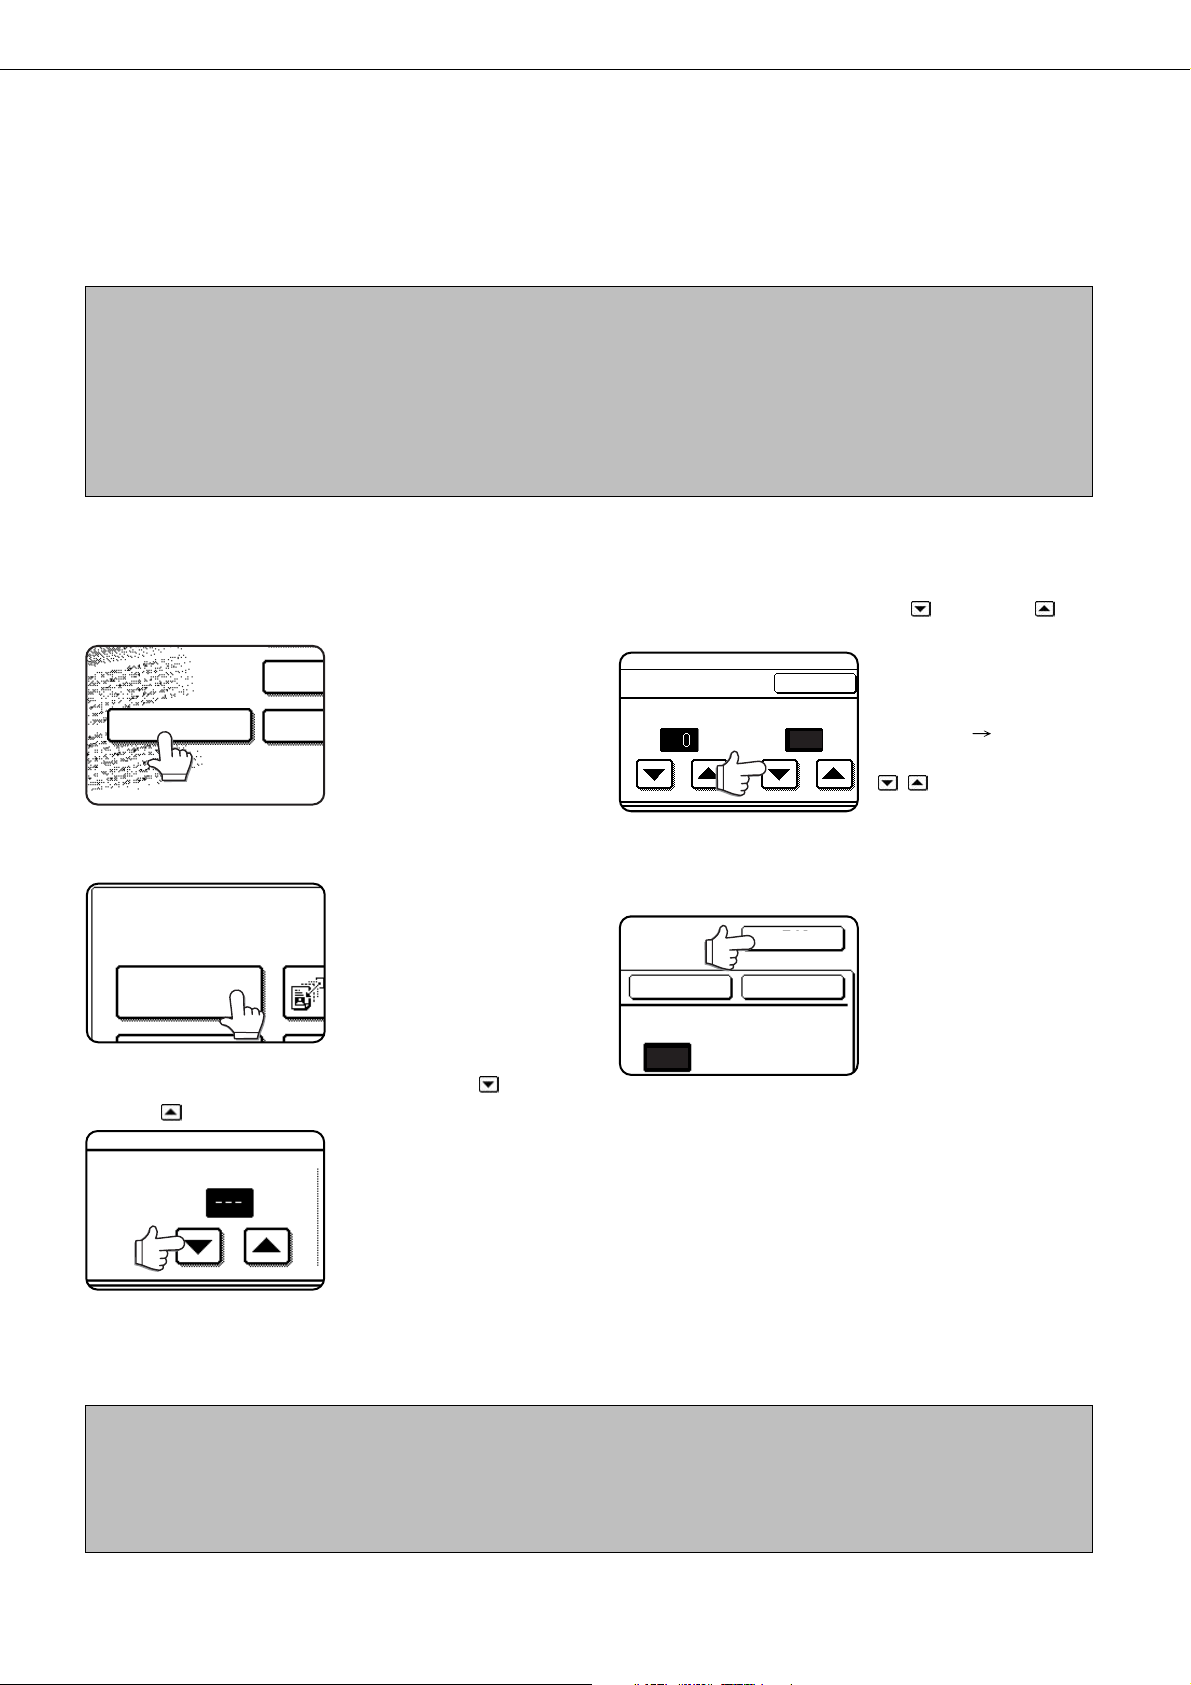
In fax mode, touch the SPECIAL MODES key.
1
T ouch the TIMER key.
2
The timer transmission
screen appears.
Select the day of the week. (Touch the key or
3
key until the desired day is selected.)
the
The initial setting is "---" (no
selection). If you select this
setting, the transmission will
be performed as soon as
the specified time arrives.
Select the time. (T ouc h the key or the key
4
until the desired time appears.)
Select the time in 24-hour
format.
Example:
HH.
T ouc h the outer OK key.
5
Perform the desired transmission operation.
6
The steps that follow will depend on the type of
transmission. The follo wing operations can be performed
in a timer transmission:
• Normal transmission (page 2-2)
• Broadcast transmission (page 3-2)
• Polling (ne xt page)
• Serial polling (next page)
• F-code polling (page 4-5)
• F-code confidential transmission (page 4-6)
• F-code relay request transmission (page 4-8)
11:00 P.M.
mm.
If you continue touching the
keys, the numbers
will change quickly.
You will return to the screen
in step 1. A timer icon will
appear to the right of the
SPECIAL MODES key.
To cancel the timer
transmission, touch the
CANCEL key.
23:00
NOTES
• Other operations can be performed after a timer transmission is set up. If another operation is in prog ress when the specified
time arrives, the timer transmission will begin when the job in progress is completed.
• If a timer transmission job is given priority in the fax job status screen (page 2-6), the time setting will be canceled and the job
performed as soon as the current job is completed.
3-4
Page 31
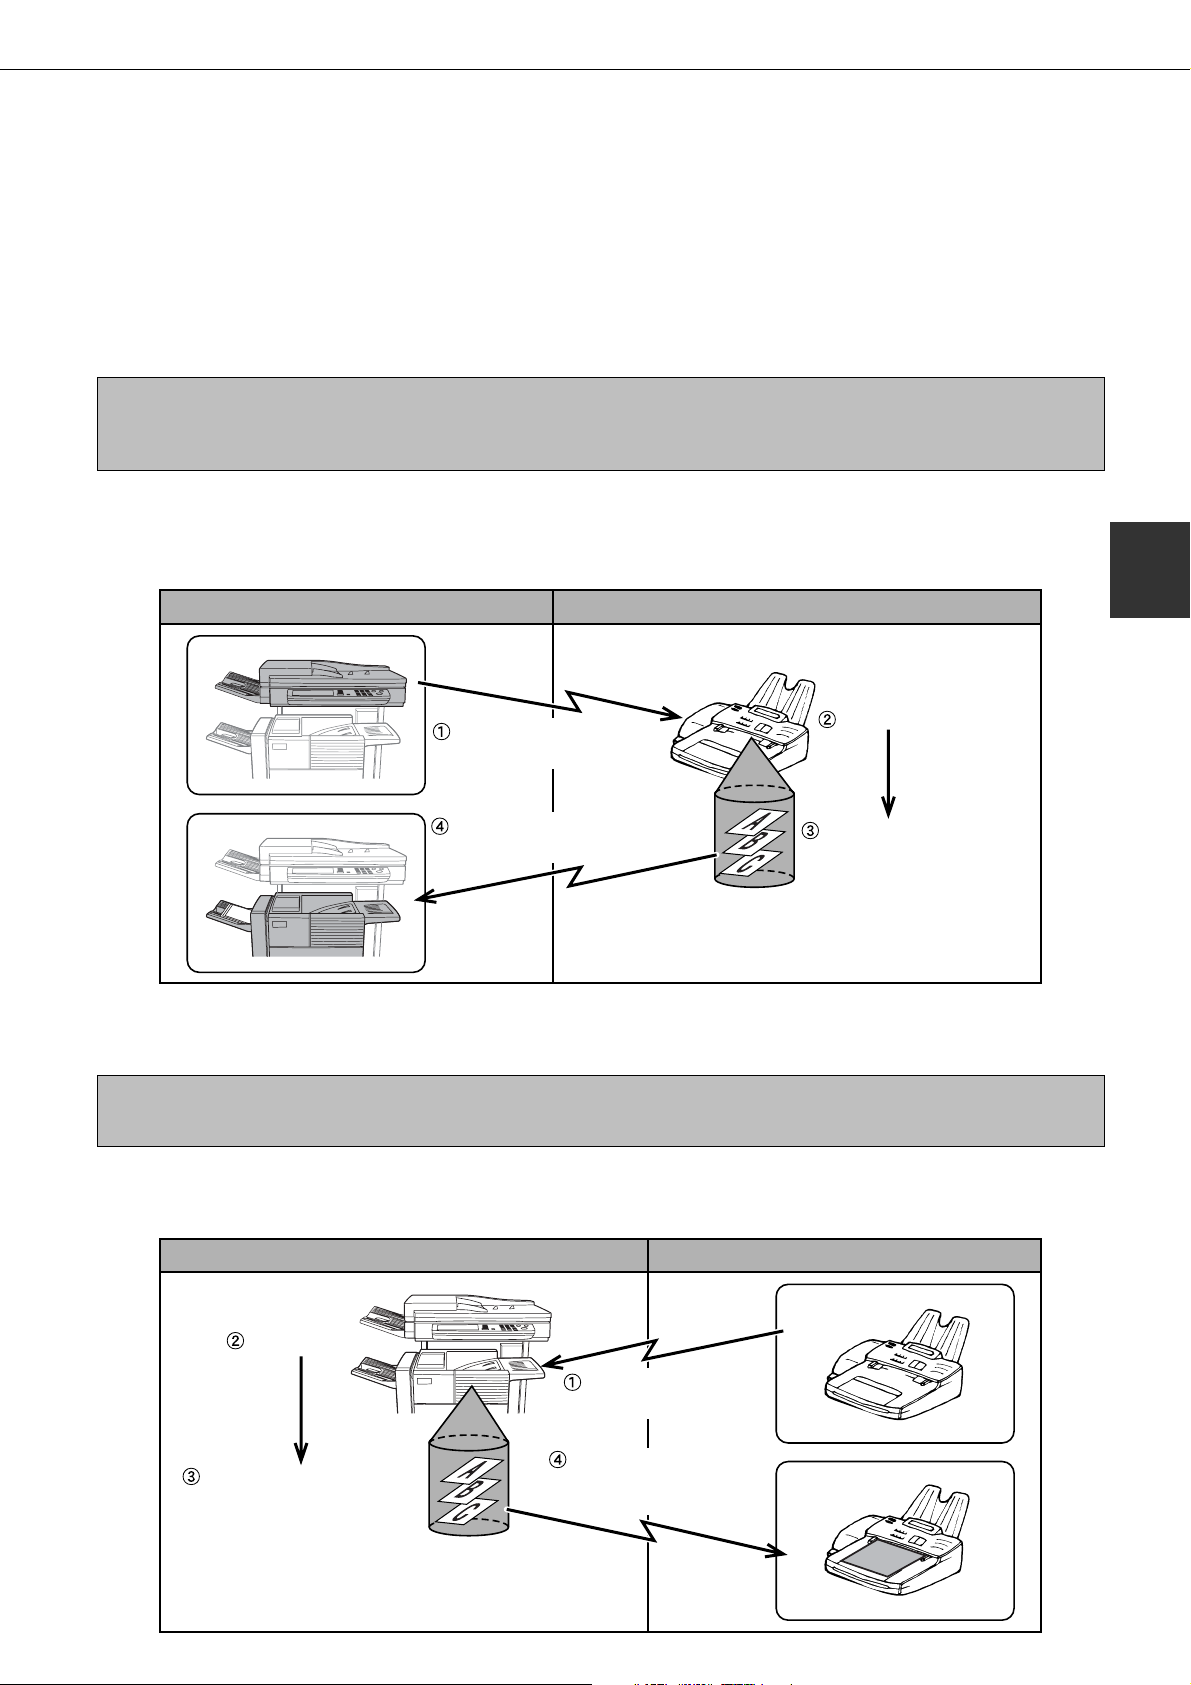
TRANSMISSION AND RECEPTION USING
THE POLLING FUNCTION
This function can only be used if the other machine is a Super G3 or G3 machine and supports the polling function.
The polling function allows your machine to call a fax machine that has document data set and initiate reception of the
document. You can also perform the reverse operation: scan a document into the memory of your machine so that
another machine can call your machine and initiate reception of the document.
This function whereby your machine calls the sending machine and asks the sending machine to begin transmission
of a loaded document is called the polling function. Scanning a document into memory and automatically sending it
when the receiving machine calls and "polls" your machine is called memory polling.
NOTE
For information on polling and polling memory using F-codes, refer to page 4-4. This section only explains normal polling and
normal polling memory.
■ Polling
This function allows your machine to call a sending machine and initiate reception of a document loaded in that
machine. A timer setting can also be established to have the operation take place at night or another specified
time (refer to the previous page).
Your machine
The other machine
3
Polling (ask other machine
to send document)
Document data is automatically
sent to your machine
Group keys and the broadcast transmission function (page 3-2) can be used to successively poll multiple fax
machines in a single operation (serial polling). Up to 300 machines can be polled. In this case, the sequence of
operations in the above diagr am is successively repeated for each sending machine selected.
NOTE
The receiving machine bears the expense (phone charges) of polling transmission.
Permits polling
Document data previously
scanned into memory
■ Polling memory
This feature allows your machine to automatically send a document pre viously scanned into memory when another
machine calls and polls your machine.
Your machine The other machine
Permits polling
Document data previously
scanned into memory
Polling
(request transmission)
Document data is
automatically sent to
other machine
3-5
Page 32

TRANSMISSION AND RECEPTION USING THE POLLING FUNCTION
POLLING
PROGRAM
DUAL PAGE
SCAN
SUB ADDRESS
ADDRESS REVISPECIAL MODES
OK
REDIALAKER
CORPO.TPS
SHARP GROUP
SPE
ADDR
DIRE
SUB
RESPEAKER
SUB A
ADDRESSPECIAL MODES
POLLINGER
PROGRAM
USING THE POLLING FUNCTION
A document should not be loaded in the machine when the following operation is perf ormed. When used in conjunction
with the timer transmission function, only one polling job can be stored.
NOTE
If the other machine has a polling security function (refer to page 3-8), use the key operator program to program your own fax n umber
(refer to page 8-4), and ask the operator of the other machine to appropriately program your fax number in that machine.
Touch the SPECIAL MODES key in fax mode,
1
and then touch the POLLING key.
The POLLING key is
highlighted and the polling
icon appears.
To cancel polling, touch the
POLLING key once again to
cancel the selection.
T ouch the OK ke y.
2
You will return to the initial
screen.
Dial the number of the other fax machine or
3
touch an auto-dial key (one-touch or group ke y)
(refer to page 2-5).
If you are performing serial
polling, touch the NEXT
ADDRESS key and repeat
this step. (Page 3-3)
NOTE
When performing serial polling, an auto-dial key that includes
a sub-address or passcode (page 4-2) cannot be selected.
When you have finished entering the
4
destination(s), press the START key.
JOB STORED appears in
the screen.
Your machine prints the
document after receiving it
from the sending machine.
NOTE
• To cancel the operation
Press the JOB STATUS key and then cancel the operation as explained on page 2-6.
■ Manual polling
A document should not be loaded in the machine when the following operation is performed. Manual polling is
begun on the signal of the other party.
1
2
3-6
Touch the SPEAKER key in fax mode, and dial
the number of the other machine.
A one-touch key or the
REDIAL key can also be
used.
If you have connected an
extension phone to the
machine, you can lift the
extension phone and then dial.
T ouch the SPECIAL MODES ke y.
When you hear the fax tone from the other
3
machine, press the POLLING key.
Polling reception begins.
4
If you lifted an extension phone to dial, replace the
extension phone. Your machine prints the document after
receiving it from the sending machine.
NOTE
Serial polling cannot be performed manually . When polling
reception ends, repeat steps 1 through 4.
POLLING appears in the
display.
Page 33

MEMORY BOX
OK
SUB ADDRESS
ADDRESS REVISPECIAL MODES
POLLIN
DATA STORE PRINT
PUBLIC BOX
TRANSMISSION AND RECEPTION USING THE POLLING FUNCTION
USING POLLING MEMORY
This function sends a document previously scanned into memory to a receiving machine when the receiving machine
calls and polls your machine. This machine has "memory boxes", which are memory used for such functions as the
normal polling memory function, F-code polling memory , F-code confidential transmission, and F-code relay transmission
(refer to page 4-2). The polling memory function explained here uses a memory box called the "PUBLIC BOX". (If
desired, you can restrict polling to fax machines whose f ax number you have programmed in your machine (refer to
page 8-9)).
NOTE
When using the polling memory function, do not set the reception mode to MANUAL. (Page 5-3)
■ Scanning a document into memory (Public Box) for polling memory
This procedure is for scanning a document into the Public Bo x. If other document data has already been stored in
the Public Box, the ne w document will be added after that data. If the previously stored data is no longer needed,
delete that data (refer to the follo wing page) bef ore scanning in ne w document data.
In fax mode, load the document in the auto
1
document feeder or on the document glass
(page 1-7).
Touch the SPECIAL MODES key and then the
2
MEMORY BO X key.
To cancel the operation,
touch the CA key.
Set the original size, resolution, exposure and
5
other scanning conditions as needed.
Press the ST AR T ke y.
6
The document is scanned.
If other document data has
previously been stored, the
new data will be added on
after the old data.
3
If you used the document glass and have another page
to scan, change the pages and then press the START
T ouch the D ATA ST ORE key.
3
T ouch the PUBLIC BOX key.
4
This specifies that the
document will be scanned into
the Public Box.
NOTE
The machine has been initially set to automatically clear document data from the Public Box after polling takes place and the
data is sent to the polling machine. You can use the key operator program to change this setting so that the data is not
automatically cleared and polling can take place repeatedly (refer to page 8-9).
key again. Repeat this procedure until all pages have
been scanned, and then press the READ-END key that
appears in the message screen. When the document
data has been stored in the Public Box, JOB ST ORED
appears on the screen, after which you will return to
the initial screen.
NOTE
To cancel scanning
To cancel scanning of a document while scanning is in
progress, press the C key.
3-7
Page 34

MEMORY BOX
OK
SUB ADDRESS
ADDRESS REVISPECIAL MODES
POLLING MEMORY
PUBLIC BOX
MEMORY BOX
OK
SUB ADDRESS
ADDRESS REVISPECIAL MODES
MEMORY
PUBLIC BOX
YES
PUBLIC BOX
DELETE THE DATA IN THE MEMORY BOX?
TRANSMISSION AND RECEPTION USING THE POLLING FUNCTION
■ Printing document data in the Public Box
When document data is stored in the Public Box, an icon will appear to the right of the PUBLIC BOX key. To
check the stored data, you can print it out.
Touch the SPECIAL MODES key in fax mode
1
and then touch the MEMORY BOX key.
T ouch the PRINT D ATA key.
2
T ouch the PUBLIC BOX key.
3
Press the ST AR T key.
4
Touching the CANCEL key
will return you to the screen
of step 2.
The message screen
appears and the Public Box
data is stored as a print job.
T o cancel printing, touch the
CANCEL key.
■ Deleting document data from the Public Bo x
This procedure is used to delete document data from the Public Box when it is no longer needed.
Touch the SPECIAL MODES key in fax mode
1
and then touch the MEMORY BOX key.
T ouch the PUBLIC BOX key.
3
The message screen
appears.
T ouch the DELETE D ATA key.
2
■ Restricting polling access (polling security)
If you wish to prev ent unauthorized fax machines from polling y our machine, turn on the polling security function.
When this function is turned on, polling permission will only be granted if the fax number of the polling machine (as
programmed in that machine) matches one of the fax numbers y ou have programmed in y our machine as passcode
numbers. Up to 10 fax numbers can be programmed as passcode numbers.
T o turn on the polling security function and program passcode numbers, use the k ey operator program as explained
on page 8-9.
NOTES
• If you do not use the polling security function, the document will be sent to any fax machine that polls you.
• When using the polling security function, even if you have programmed the f ax number of a another machine in your machine ,
polling will not be possible if the operator of the other machine has not programmed the same fax number in that machine.
3-8
T ouch the YES key.
4
All data in the Public Box is
deleted and you return to
the screen of step 2.
If you touch the NO key, you
NO
will return to the screen of
step 2 without deleting the
data.
Page 35

OWN NUMBER SENDING
This function prints the date, time, your programmed name, your programmed fax number, and the transmitted page
number at the top center of each page that you fax. All pages that you fax include this information. (Page 8-7)
Example of fax page printed out by the receiving machine
MAY-11-2001-FRI 03:00 PM SHARP PLANNING DIV. FAX No. 0666211221 P. 001/001
(1) (2) (3) (4)
(1) Date and time: programmed in the custom settings (page 3-6 of "Operation manual (for printer operation and
general information)").
(2) Own name: programmed with the key operator program (page 8-4).
(3) Own fax number: programmed with the key operator program (page 8-4).
(4) Transmitted page number: 3-digit number appearing in the format, "page number/total pages" (only the page
number appears if you use manual transmission or Quick On-Line transmission). If desired, you can use the
key operator program to omit the page number (refer to page 8-6).
■ Position of sender's information
The key operator program can be used to select whether the sender's information is added outside the original
data or inside the data (page 8-7). The initial factory setting is outside the data.
3
Direction of transmission
None of the transmitted image
is cut off; however, the
transmitted data is longer than
the scanned data, and thus
Length of
scanned data
Outside scanned data Inside scanned data
when both the sender and the
Length of
receiver use the same size of
transmitted data
paper, the printed fax may
either be reduced or split up
and printed on two pages.
Direction of transmission
Length of
scanned data
The top edge of the scanned
data will be cut off by the
sender's information; however,
when both the sender and the
receiver use the same size of
Length of
paper, the printed fax will
transmitted data
neither be reduced nor split
up and printed on two pages.
3-9
Page 36

F AXING A DIVIDED ORIGINAL (DUAL P AGE SCAN)
POLLING
PROGRAM
DUAL PAGE
SCAN
SUB ADDRESS
ADDRESS REVISPECIAL MODES
OK
REDIALAKER
When an open book is scanned and faxed, y ou can use this function to divide the two open pages of the book into two
separate fax pages.
This function can only be used when the original is scanned using the document glass.
Your machine The other machine
Book or sheet original
Printed out as
two separate pages
Transmission to
When page division is set,
the original is divided
into two pages when
scanned into memory
other machine
[Example]
Scanned original size
11"x17" (A3)
Transmitted document
Two 81/2"x11" (A4) pages
■ Selecting Dual Page Scan
Follow the steps below and then send the fax.
Touch the SPECIAL MODES key in fax mode
1
and then touch DUAL PAGE SCAN.
T ouch the OK ke y.
2
You will return to the initial
screen.
Place the original on the document glass (page
3
1-7), and perform the transmission operation.
If you have more originals to scan after pressing the
Start key and scanning the first original, change originals
and repeat scanning until all originals have been
scanned. When finished, press the READ-END k e y that
appears in the message display. (Page 2-3)
NOTES
• When you set Dual Page Scan, the original size is fixed
at 11"x17" (A3). A utomatic original size detection will not
function.
When the original on the document glass is scanned, it
will be divided at the book mark on the document glass
scale, with one page on the left side of the book mark
and one page on the right side.
• To cancel Dual Page Scan...
Press the CA key.
3-10
Page 37

PROGRAMMING FREQUENTL Y USED OPERATIONS
POLLING
PROGRAM
DUAL PAGE
SCAN
SUB ADDRESS
ADDRESS REVISPECIAL MODES
OK
OK
REDIALAKER
This function allows you to store the steps of an operation, including the destination and scanning settings, into a
program. When you w ant to send a document to that destination, you can simply call up the program and the steps will
be performed automatically . This function is conv enient when you frequently send documents , such as a daily report,
to the same destination. Up to eight prog rams can be stored.
NOTES
• A program differs from a timer transmission (page 3-4) in that it is not cleared from memory after transmission takes place. A
program thus allows you to repeatedly perf orm the same type of transmission. Note, ho wev er , that programs do not allo w you
to establish a timer setting for transmission.
• With the exception of polling, reception operations cannot be stored in a program.
Programs can be stored using the custom settings, and a name up to 18 characters long can be assigned.
For information on storing, editing, and deleting programs, refer to page 6-8.
The following settings can be stored in a program:
• Destination fax number • Polling • Dual Page Scan • Resolution and exposure
Auto-dial keys (one-touch or group keys) are used to store the destination fax number. A full number cannot be
entered using the numeric keys. When storing a broadcast transmission or serial polling operation in a program, up to
300 destination fax numbers can be stored.
USING A PROGRAM
In fax mode, load the document (page 1-7).
1
Do not load a document if you are performing a polling
operation.
If you are going to use Dual Page Scan (pre vious page),
place the document on the document glass.
Touch the SPECIAL MODES key and then the
2
PROGRAM key .
The program selection
screen appears.
Touch the program key you wish to execute.
3
Make sure the key is highlighted and then touch
the OK key.
The program key you touched
is selected and you return to
the screen of step 2.
The PROGRAM key is
highlighted.
T ouch the OK ke y.
4
You will return to the initial
screen.
If needed, set the original size and other
5
settings, and then press the ST AR T key .
Transmission takes place according to the program.
NOTE
Select settings that cannot be stored in a program in step
5. These include original size, two-sided scanning, and a
timer setting.
3
3-11
Page 38

TRANSFERRING RECEIVED FAXES TO ANOTHER
CLOCK
FAX DATA
FORWARD
YES
MA CHINE WHEN PRINTING IS NOT POSSIBLE
When printing is not possible because of a paper, toner , or other prob lem, you can tr ansfer receiv ed fax es to another
fax machine if that machine has been appropriately programmed in your machine . This function can be conveniently
used in an office or other workplace where there is another fax machine connected to a different phone line . When a
fax has been received to memory, the DATA light to the right of the IMAGE SEND key b links.
Printing not possible because of
paper or toner problem
Fax transmission
Your machine
"Transfer" instruction
using custom settings
Automatic dialing and
transmission to programmed
transfer destination
Printing
to your machine
Other machine
Transfer destination
NOTES
• When the transfer instruction is issued, all data that has been received in memory to that point is transferred. The page that
was being printed when the problem occurred and all following pages will be transferred.
• Data cannot be selected for transfer. Data received to a confidential memory box (page 4-6) cannot be transferred.
• The result of transfer is indicated on an activity report (page 7-3).
USING THE TRANSFER FUNCTION
■ Program the fax number of the transfer destination
Use the key operator progr am to program the number of the transf er destination (page 8-8). Only one fax number
can be programmed. The transfer function cannot be used unless a number is programmed.
■ Transferring received data
Press the CUSTOM SETTINGS key.
1
T ouch the YES key.
3
TRANSFER THE RECEIVED DATA TO ANOTHER
DEVICE?
NO
The machine automatically
dials the transfer destination
programmed with the key
operator program and
begins transfer.
If you do not wish to transfer
the data, touch the NO key.
T ouch the FAX DATA FORWARD key.
2
If there is no data to transfer
or a transfer number has not
been programmed (page 8-8),
a message will appear and
transfer will not be possible .
3-12
NOTES
• To cancel transfer
Press the JOB ST ATUS key , and then cancel the tr ansfer
in the same way as a transmission (refer to page 2-6).
The data that was going to be transferred will return to
print standby status in your machine.
• If the transfer is not possible because the line is busy or
a transmission error occurs, the data returns to print
standby status in your machine.
Page 39

CHAPTER 4
USING CONVENIENT FUNCTIONS 2
TRANSMISSION USING F-CODES
This chapter explains F-code transmission, which gives you a convenient means of performing advanced operations such as rela y broadcast
transmission and confidential transmission. Normally these functions require that the other fax machine be a similar Sharp machine; how ever , Fcode transmission enables these functions to be performed with any other
machine that supports F-code transmission. Please read those sections
which are of interest to you.
Page
TRANSMISSION BETWEEN MACHINES SUPPORTING F-CODES ... 4-2
●MEMORY BOXES AND SUB-ADDRESSES/PASSCODES
REQUIRED FOR F-CODE TRANSMISSION ................................. 4-2
●ENTERING A SUB-ADDRESS AND PASSCODE
FOR A MEMORY BOX IN THE OTHER MACHINE ....................... 4-3
●CREATING A MEMORY BOX FOR F-CODE TRANSMISSION .... 4-3
F-CODE POLLING MEMORY................................................................ 4-4
●USING F-CODE POLLING MEMORY............................................ 4-4
●PROCEDURE FOR F-CODE POLLING......................................... 4-5
F-CODE CONFIDENTIAL TRANSMISSION.......................................... 4-6
●F-CODE CONFIDENTIAL TRANSMISSION .................................. 4-6
●PRINTING A DOCUMENT RECEIVED
TO AN F-CODE CONFIDENTIAL MEMORY BOX ......................... 4-7
F-CODE RELAY BROADCAST TRANSMISSION................................. 4-8
●USING THE F-CODE RELAY BROADCAST FUNCTION
(your machine is the relay machine) .............................................. 4-9
●USING THE F-CODE RELAY REQUEST FUNCTION
(your machine requests a relay broadcast) .................................... 4- 9
4-1
Page 40

TRANSMISSION BETWEEN MACHINES
SUPPORTING F-CODES
This machine supports the "F-code" standard as established by the ITU-T*.
The F-code standard makes it possible to perform special operations such as relay broadcast and confidential
transmission, which previously could only be perf ormed with another similar Sharp machine, with any other machine
that also supports F-codes.
Before using any of the functions e xplained in this chapter, v erify that the other fax machine supports F-codes and the
function that you wish to use (the other machine may use a diff erent name f or the function).
* The ITU-T is a United Nations organization that establishes communications standards. It is a department of the International
Telecommunication Union (ITU), which coordinates global telecommunications networks and services.
MEMORY BOXES AND SUB-ADDRESSES/PASSCODES
REQUIRED FOR F-CODE TRANSMISSION
Fax machines that support F-code transmission enable the creation of a "memory box" in the unit's memory. The
memory box is used to store documents received from another fax machine or documents to be sent when another
machine polls that machine. Up to 100 memory boxes can be created for a variety of purposes, and a name can be
assigned to each box. A "sub-address" that indicates the box's location in memory must be programmed, and if
desired, a passcode can also be programmed to control access to the box.
MEMORY
7732123
0001
SHARP
3321 1115
3333
Department
Manager
*The Public Box is used for normal ser ial polling (page 3-5).
When communication occurs involving a memory box, the communication will only tak e place if the sub-address and
passcode that the other machine sends match the sub-address and passcode programmed in your machine f or that
box. Therefore, to allow communication, you must inform the other party of the sub-address and passcode of the
memory box. Likewise, to send a document to a memory box in another machine or use polling to retrie ve a document
from that memory box, you must know the sub-address and passcode of that memory box.
Memory boxes are managed in this machine not only by sub-addresses and passcodes (which are n umber sequences), but
also by names. For example, for the memory box with the sub-address, "7732123", and the passcode, "1115", you could
assign the name "Product Planning". Assigning names mak es it easier to manage memory boxes . (Note that you do not need
to inform the other party of a memory box name; the other party only needs to know the sub-address and passcode.)
This machine uses the term "sub-address" for the location of the memory box and the term "passcode" for the
password that allows comm unication; howe ver, other fax machines of other manufacturers may use different terms.
When asking the other party for a sub-address and passcode, you may find it useful to refer to the 3-character
alphabetical terminology used by the ITU-T.
11245
Document
Group 1
4444
Reports
11111111
Public Box*
7732123
Product Planning
Dept.
010
Section
Manager
123456
7732123
Product Planning
Dept.
1115
Product
Planning
Dept.
Sub-address (location in memory)
Select any number up to 20 digits.
Box name (used to manage
boxes in your machine)
Select a name of up to 18
characters.
Passcode (key)
Select any number up to 20 digits.
(Not required)
1115
This machine ITU-T
F-code polling memory box F-code Confidential box
Sub-address SEP SUB SUB
Passcode PWD SID SID
F-code Relay Broadcast Function
4-2
Page 41
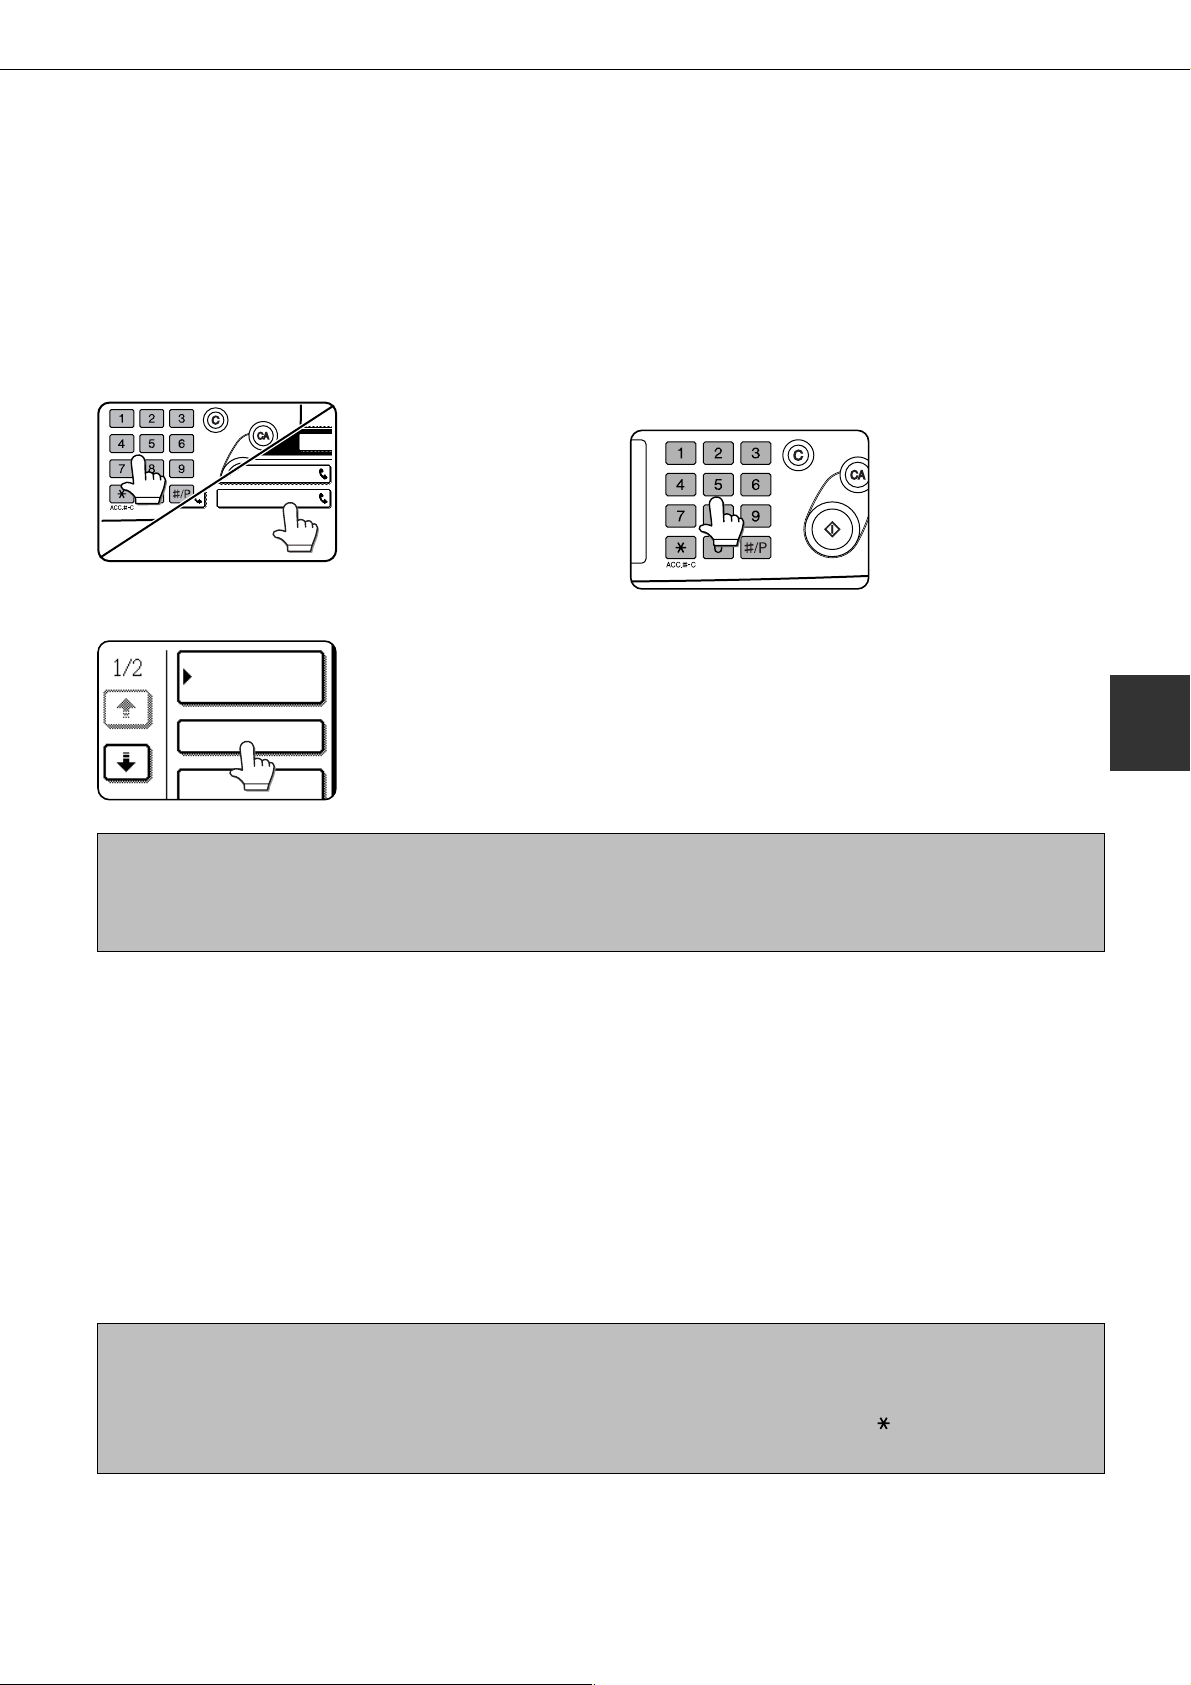
CORPO.TPS
SHARP CORPORATION
SPE
CONDITION
SETTINGS
SUB ADDRESS
ADDRESS REVIEW
TRANSMISSION BETWEEN MACHINES SUPPORTING F-CODES
ENTERING A SUB-ADDRESS AND P ASSCODE FOR A MEMORY
BO X IN THE OTHER MACHINE
When transmitting to a memory box in another fax machine, the sub-address and passcode must be entered after the
other machine's fax number . Enter the other machine's fax number as e xplained for a normal transmission (page 2-2)
or for a polling operation (page 3-6), and then enter the sub-address and passcode as f ollows:
Dial the fax number of the other machine, or
1
touch a one-touch key.
If the sub-address and
passcode have been
programmed into the onetouch key, the following
steps are not needed.
T ouch the SUB ADDRESS ke y.
2
A slash "/" appears at the
end of the fax number . If you
make a mistake, press the
C key to clear the mistake.
NOTES
• You can program a sub-address and passcode into a one-touch dial key along with the fax number (refer to page 6-3).
• Manual transmission (on-hook dialing or lifting an extension phone connected to the machine) using a sub-address and
passcode is not possible.
Use the numeric keys to enter the sub-address
3
of the other machine's memory box (max. 20
digits)
If you make a mistake,
press the C key and re-enter
the correct digit(s).
T ouch the SUB ADDRESS ke y once a gain.
4
A slash "/" appears at the end of the sub-address.
Use the numeric keys to enter the passcode of
5
the other machine's memory box (max. 20 digits)
If a passcode has not been established for the other
box, this step is not necessary.
4
CREATING A MEMORY BOX FOR F-CODE TRANSMISSION
F-code operations using memory boxes include F-code polling memory (following page), F-code confidential
transmission (page 4-6), and F-code relay broadcast (page 4-8). Memory boxes must be created to perform any of
these operations.
A memory box can be created using the custom settings. The method of setting up the box varies depending on the
operation. Up to 100 bo x es can be created. Note that two box es cannot use the same sub-address, and a passcode
can be omitted.
Refer to page 6-10 for the procedures f or creating, editing, and deleting memory boxes.
A maximum of 20 digits are permitted for sub-addresses and passcodes. Be sure to inform the other party of the subaddress and passcode.
NOTES
• If you attempt to create a box when 100 boxes hav e already been created, a message will appear and y ou will not be ab le to
create the box. First delete an unneeded box (page 6-13), and then create the new box.
• Spaces cannot be used when programming a sub-address or passcode. The characters "#" and "
address, but they can be used in a passcode.
" cannot be used in a sub-
4-3
Page 42

F-CODE POLLING MEMORY
SCAN TEAM MARKETING GROUP
SPEA
F-code polling memory allows one fax machine to call another fax machine and activ ate reception of a document that has
been scanned into the other machine's F-code polling memory box. Calling another machine and activ ating reception is
called F-code polling, and scanning a document into a memory box for another machine to retriev e by polling is called Fcode polling memory . This function is appro ximately the same as normal polling explained on page 3-5; how ev er , it uses
an F-code polling memory box and is always protected by means of the sub-address and passcode .
■■
■ How F-code polling memory works
■■
Your machine The other machine
1) F-code polling
2)
Check sub-address
and passcode
Match
Do not match
3) Polling memory
box opens
F-code polling is when your machine calls another machine and retrieves a document that w as scanned into the
polling memory box of that machine (the reverse of the abo v e diagram).
NOTES
• To perform polling or polling memor y without using an F-code, refer to page 3-5.
• To create an F-code memory box for polling memory, refer to page 6-10.
• Unlike normal polling, the other machine's fax number is not programmed as a passcode for F-code polling memory. The
sub-address and passcode of the polling memory box are always used for polling security.
• The receiving machine bears the expense (phone charges) of the transmission.
Product Planning
(transmission request)
Sub-address and passcode
are transmitted to your machine
4) Automatic transmission
of document data
to other machine
Subaddress
Passcode
USING F-CODE POLLING MEMORY
In order for another machine to retriev e a document from your machine, y ou must first scan the document into the Fcode polling memory box.
You can check scanned document data by printing it out (refer to the following page).
NOTE
When using F-code polling memory, do not set the reception mode to manual reception.
■■
■ Scanning a document into an F-code polling memory box
■■
The procedure for scanning a document into an F-code polling memory box created with the custom settings (page 6-10) is
almost the same as the procedure for scanning a document into the Public Box for normal polling memory. Instead of
touching the PUBLIC BOX key in Step 4 on page 3-7, touch the key of the memory box into which you wish to scan the
document. If document data has already been stored in that bo x, the new document data will be added on to the existing data.
If you no longer need the existing data, delete it as e xplained on the following page .
When you touch the memory box into which you wish to scan the document, the
key is highlighted and selected as the scanning destination.
NOTE
When creating the memory box, you can select whether to have the scanned document data automatically cleared after
polling, or left in the box to allow repeated polling.
4-4
Page 43
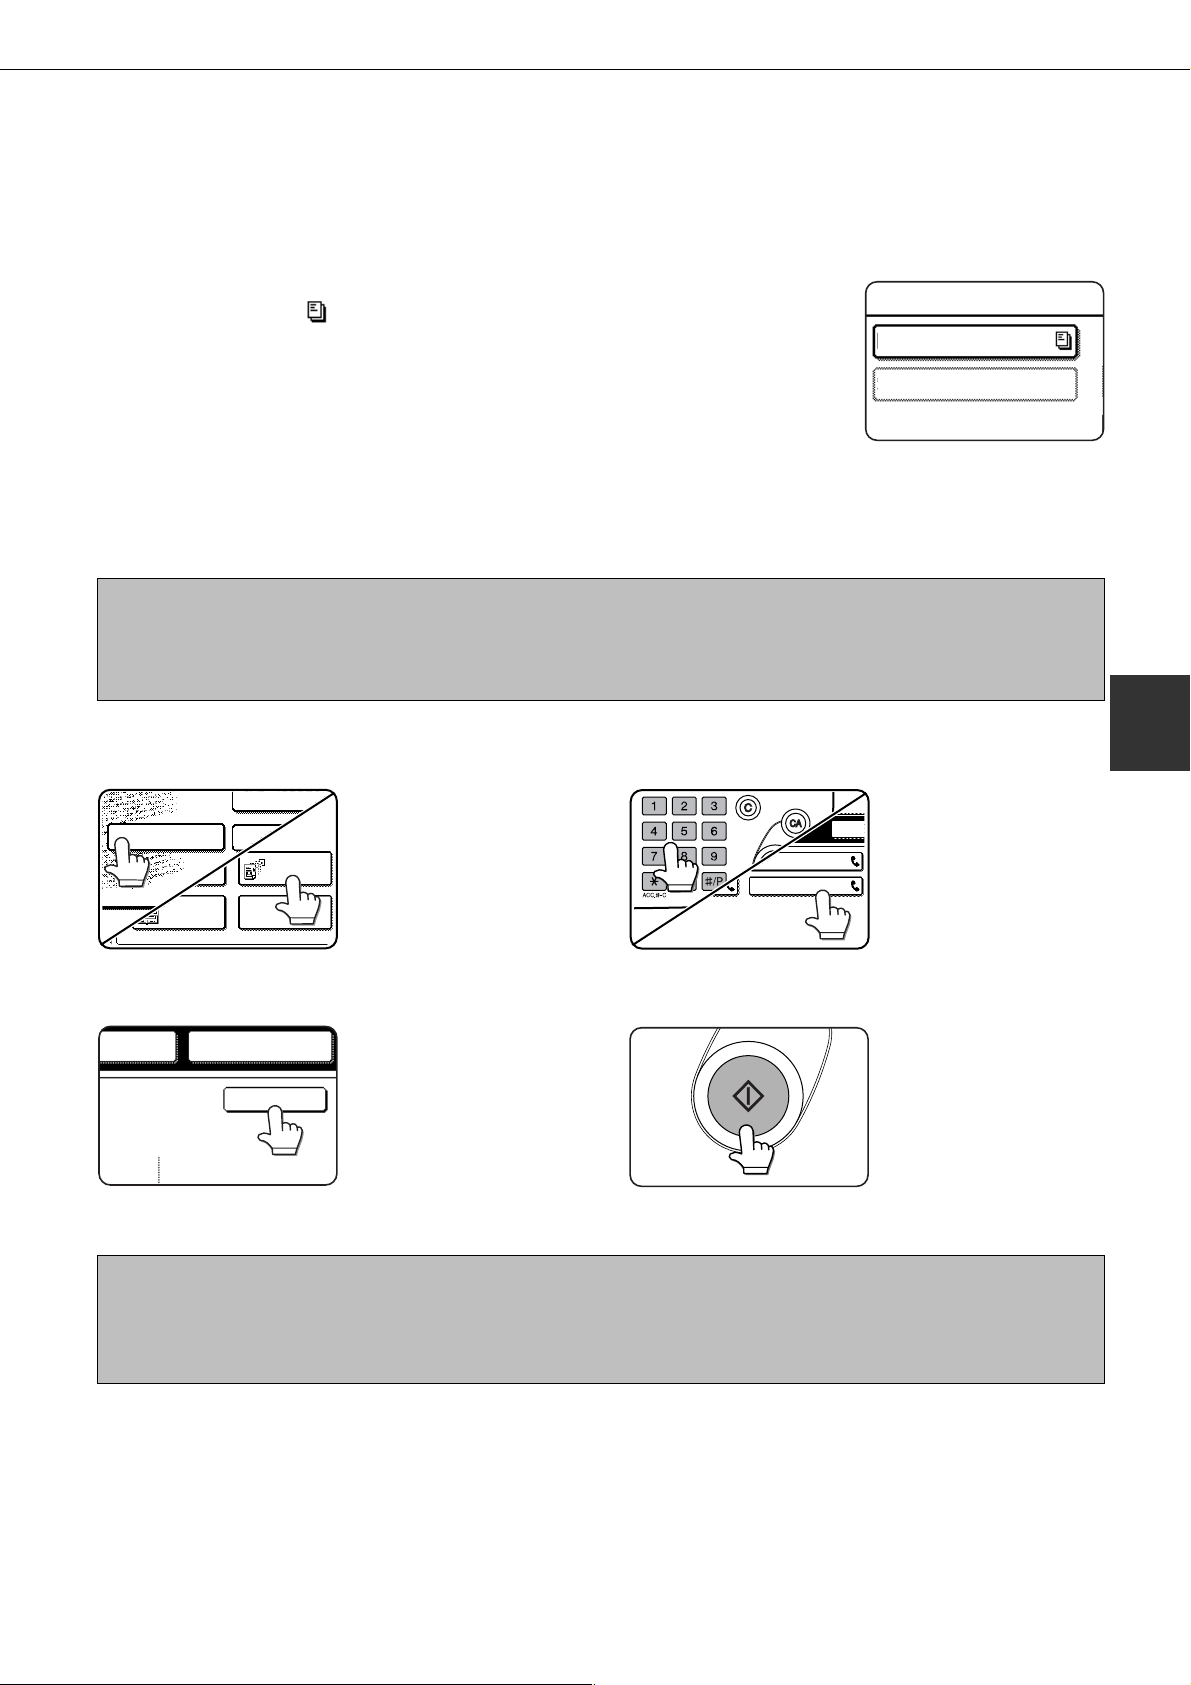
F-CODE POLLING MEMORY
MARKETING GROUP
SHARP BRANCH EX
POLLING
PROGRAM
DUAL PAGE
SCAN
SUB ADDRESS
ADDRESS REVISPECIAL MODES
OK
REDIALAKER
CORPO.TPS
SHARP CORPORATION
SPE
■■
■ Checking and clearing document data in a memory box
■■
The procedure for checking document data in an F-code polling memory box b y printing it and the procedure for
clearing data from a box are almost the same as the procedures for printing and clearing document data from the
Public Box. Instead of touching the PUBLIC BO X ke y in Step 3 on page 3-8, touch the memory box key of the data
you wish to print or clear.
If a document icon (
has been stored in that box and you can print it out.
Note that you cannot check or clear the contents of a memory box while it is being
used for transmission.
) appears to the right of a memory box key, document data
PROCEDURE FOR F-CODE POLLING
Make sure that a document has not been loaded in the auto document feeder or on the document glass, and then
follow the steps below.
NOTES
• You must know the sub-address (SEP) and passcode (PWD) of the other machine's F-code polling memory box.
• Serial polling (selecting multiple fax machines to be polled using a group key or by touching the NEXT ADDRESS ke y) is not
possible with F-code polling.
In fax mode, touch the SPECIAL MODES key
1
and then the POLLING key.
The POLLING key is
highlighted and the polling
icon is displayed.
T o cancel the polling selection,
press the POLLING key once
again so that it is no longer
highlighted.
Enter the fax number, sub-address, and
3
passcode of the other fax machine.
Refer to steps 2 through 5
on page 4-3 for the
procedure for entering subaddresses and passcodes.
4
T ouch the OK ke y.
2
NOTES
• To cancel the operation
Press the JOB STATUS key and then cancel the operation as explained on page 2-6.
• Only one polling operation with a timer setting (page 3-4) can be stored.
You will return to the initial
screen.
Press the ST AR T ke y.
4
JOB STORED appears on
the screen.
After communicating with
the other machine, your
machine prints the received
document data.
4-5
Page 44

F-CODE CONFIDENTIAL TRANSMISSION
This function is used to send confidential documents. The sub-address and passcode progr ammed for a memory box
restricts access to the box, and received data can only be printed by someone who knows the print PIN. (Personal
Identification Number).
This function is convenient when sending important documents that you only want a specific person to see, or when
multiple departments share a single fax machine.
The other machine
1) Document data, together
with a sub-address and passcode,
are sent to your machine.
Sub-address
Passcode
2)
Check sub-address
and passcode
Match
3) Data is read into the confidential
memory box (reception is permitted)
Do not match
Your machine
MARK
When data is printed
4-1)
Enter print PIN.
(4-digit number)
4-2)
Data is only
printed if correct
passcode is entered.
MARK
As the above diagram sho ws, receiving document data to the machine's F-code confidential memory box is called
F-code confidential reception, and sending document data to another machine's F-code confidential memory box
is called F-code confidential transmission.
NOTES
• This machine does not suppor t Shar p's previous confidential transmission function, which uses the programmed sender's
fax number and ID code.
• Refer to pages 6-10 through 6-13 for the procedures for creating, editing, and deleting F-code confidential memory boxes.
• Tak e care not to f orget the print PIN. prog rammed in the F-code confidential memory box. If you forget the passcode, consult
your dealer.
F-CODE CONFIDENTIAL TRANSMISSION
F-code confidential transmission is performed in the same way as a normal transmission (ref er to chapter 2); ho wev er,
you must enter the sub-address (SUB) and passcode (SID) after the fax number of the other machine. (Omit the
passcode if the other machine does not use a passcode.)
For the procedure for entering sub-addresses and passcodes, refer to page 4-3.
F-code confidential reception is performed in the same way as normal reception (refer to chapter 2); however, you
must inform the other party of the sub-address (SUB) and passcode (SID) of your confidential memory box. (Omit the
passcode if a passcode is not programmed in the box.)
NOTE
An F-code confidential transmission can be used in combination with the broadcast transmission function (page 3-2) or timer
transmission function (page 3-4), and can be stored in a program (page 6-8).
4-6
Page 45

F-CODE CONFIDENTIAL TRANSMISSION
MEMORY BOX
OK
SUB ADDRESS
ADDRESS REVISPECIAL MODES
CONFIDENTIAL
RECEPTION
DATA PRINT DATA
MEMORY BOX - CONFIDENTIAL RECEPTION
SLA SCANNER TEAM
MARKETING GROUP
SELECT MEMORY BOX.
PRINTING A DOCUMENT RECEIVED TO AN F-CODE
CONFIDENTIAL MEMORY BOX
When a document is received to an F-code confidential memory box, a T ransaction Report will print to inform you. The
document can be printed by entering the print PIN. (0000 to 9999) that was progr ammed when the memory box was
created. Printing of the confidential document will take priority ov er any other jobs w aiting to be printed.
NOTES
• Y ou can use the key operator prog ram to disable printing of the Transaction Report that is printed after a confidential document
is received (page 8-5).
• Document data received to an F-code confidential memory box is automatically cleared after printing.
• Multiple faxes can be received to an F-code confidential memory box.
In fax mode, touch the SPECIAL MODES key
1
and then touch the MEMORY BOX key.
The memory box menu
appears.
To cancel the operation,
press the CANCEL key.
T ouch the PRINT D ATA key.
2
Touch the memory box key that has the
3
document data you wish to print.
A mark appears to the
right of memory boxes that
have received document
data.
A memory box cannot be
selected while it is being
used for transmission.
Press the numeric keys to enter the 4-digit print
4
PIN..
As each digit is entered, "-"
changes to "
ENTER PIN VIA THE 10-KEY.
CANCEL
If the passcode is not correct, the message PIN IS NOT
VERIFIED appears and you return to the entry screen.
To return to the screen of step 3, touch the CANCEL
key .
Press the ST AR T ke y.
5
If the print PIN. you entered
is correct, the message
PRESS [ST AR T] T O PRINT
DATA appears .
Printing begins. If another
print job is already is
progress, the confidential
data is printed after that job
is completed.
".
4
NOTE
If received data remains in an F-code confidential memory box, the memory box cannot be deleted.
4-7
Page 46

F-CODE RELAY BRO ADCAST TRANSMISSION
The F-code relay broadcast transmission function makes it possib le to program the fax numbers of end receiving machines
in an F-code relay memory box. Y our machine thereby becomes a rela y machine. When your machine receiv es a document
from another F-code machine, your machine rela ys (transmits) that document to each of the end receiving machines.
The relay machine and the originating machine that requests the relay transmission must both support F-codes; howev er,
the end receiving machines programmed in the F-code relay broadcast memory box do not need to support F-codes.
Relay machine (your machine)Relay request machine (sends document)
1) Document is sent from
machine requesting
relay transmission
Sub-address
Passcode
2) Check sub-address
and passcode
Match
Does not match
3) Document data is
S.F.
4)
Document is successively transmitted
to end receiving machines programmed
in the relay broadcast memory box.
If the Network Scanner Expansion
Kit (AR-NS2) installed and your
machine acts as a relay machine,
you can also store E-mail and
Internet-Fax destinations in the relay
broadcast memory box for relay
transmission to E-mail and Internet-
Receiving machine CReceiving machine BReceiving machine A
Fax recipients.
read into relay broadcast
memory box
(reception is permitted).
The machine that originally sends the document is called the relay request machine, and the machine that has a
memory box containing the end receiving machines and which relays the received document to those machines
is called the relay machine.
The relay machine also prints the document sent by the relay request machine .
For example , corporate headquarters in Seattle wants to send the same document to branch offices in San Francisco ,
Oakland, Berkeley , and San Jose . If the San F rancisco office creates a relay broadcast memory box and prog rams the
Oakland, Berkeley, and San Jose offices as end receiving destinations, the ov erall phone charges will be low er than
if the Seattle office uses the normal broadcast transmission function (page 3-2). This function can also be combined
with a timer setting (page 3-4) to take advantage of off-peak rates , allowing a further reduction in phone charges.
Transmission by the rela y machine is called "F-code relay broadcast transmission", and transmission from the relay
request machine to the relay machine is called "relay request tr ansmission".
NOTES
• This machine does not suppor t Sharp's previous relay broadcast function, which uses the programmed sender's number
and relay ID code.
• To create an F-code rela y broadcast memory box and prog ram, edit, and delete end receiving machines, ref er to pages 6-10
to 6-13. When creating a box, a passcode (SID) can be omitted.
• The relay request machine only bears the expense of sending the document to the relay machine. The relay machine bears
the expense of sending the document to each of the end receiving machines.
4-8
Page 47

F-CODE RELAY BROADCAST TRANSMISSION
USING THE F-CODE RELAY BROADCAST FUNCTION
(your machine is the relay mac hine)
When a document is received from a relay request machine , the F-code relay broadcast function transmits the document
to the end receiving machines using a memory box only if the sub-address and passcode sent by the relay request
machine are correct.
Refer to pages 6-10 through 6-13 for the pr ocedures f or creating, editing, and deleting memory boxes.
Up to 30 end receiving machines (30 one-touch keys or group k eys) can be programmed in the F-code rela y broadcast
memory box.
A document received from a relay request machine is initially stored in the memory box of your machine . Y our machine
(the relay machine) also prints the document, thus the document is first stored as a print job and then as transmission
jobs to each of the programmed end receiving machines. The document data is automatically cleared after tr ansmission
to all end receiving machines is completed.
NOTE
End receiving machines are programmed using auto-dial keys (one-touch k eys or group keys). If you need to program an end
receiving machine that has not been programmed in a one-touch key, program the number in a one-touch key first and then
create the memory box.
USING THE F-CODE RELAY REQUEST FUNCTION
(your machine requests a relay broadcast)
First ask the operator of the other F-code machine to create an F-code relay broadcast memory box and program the
end receiving machines in that box. Ask the oper ator of the other machine f or the sub-address (SUB) and passcode
(SID) of the memory box.
When you send the document to the relay machine, enter the sub-address and passcode after the fax number. The
document will be stored in the memory box of the relay machine, and then transmitted from the rela y machine to each
of the programmed end receiving machines. A passcode (SID) need not be entered when dialing if a passcode was
not programmed for the memory box.
Aside from the method of dialing the relay machine, the transmission procedure is the same as f or a normal
transmission (refer to chapter 2).
Refer to page 4-3 for the procedure f or entering a sub-address and passcode after the fax number of the other
machine.
4
4-9
Page 48

Page 49

CHAPTER 5
USING CONVENIENT FUNCTIONS 3
CONVENIENT METHODS OF USE
This chapter explains conv enient f eatures that can be used when sending a document, as well as features that e xpand the range of use of the
fax machine such as connecting an extension phone .
Page
CONNECTING AN EXTENSION PHONE ............................................. 5-2
●CONNECTING AN EXTENSION PHONE ...................................... 5-2
●SENDING A FAX AFTER TALKING ON THE PHONE
(MANUAL TRANSMISSION) .......................................................... 5-2
●USING AN EXTENSION PHONE TO RECEIVE A FAX................. 5-3
●RECEIVING A FAX AFTER TALKING (MANUAL RECEPTION) ... 5-4
5-1
Page 50

CONNECTING AN EXTENSION PHONE
Extension
phone jack
CORPO.TPS
SHARP CORPORATION
You can connect a telephone to the machine and use it as an extension phone to place and receive calls like any
normal phone. Y ou can also activ ate f ax reception from the phone (remote operation).
NOTES
• If you connect a combination telephone/answering machine to the machine, you will not be able to use the answering
machine function.
• You can place calls from the phone even during a power failure.
CONNECTING AN EXTENSION PHONE
Insert the end of the extension phone cord into
1
the extension phone jack on the rear of the
machine.
Make sure you hear a "click"
sound indicating that the
cord is securely connected.
NOTE
In New Zealand,
machines will respond to incoming ringing when connected
to the extension socket of the equipment.
not all standard telephones and answering
SENDING A FAX AFTER TALKING ON THE PHONE
(MANUAL TRANSMISSION)
If the other fax machine is set to manual reception, you can talk to the other party and then send a fax without breaking
the connection. This procedure is called manual transmission.
NOTE
Automatic redialing (page 2-4) will not take place if the line is busy.
In fax mode, load the document and set any
1
needed scanning conditions such as the
original size, resolution, and e xposure.
NOTE
If you have loaded the original on the document glass,
you can only send one page by manual transmission.
Lift the extension phone.
2
Or, you can press the SPEAKER key (page 1-11).
Dial the number of the other party or touch a
3
one-touch key .
You can also dial using the
keypad on the extension
phone.
You cannot use a group ke y
or a one-touch key that
includes a sub-address and
passcode.
5-2
Speak to the other party when they answer .
4
If you used the SPEAKER key to dial, lift the extension
phone to talk.
After the other party switches to fax reception,
5
press your START key.
Transmission begins.
Replace the extension phone.
6
Page 51

AUTO RECEPTION
MANUAL RECEPTION
ECRPTION
OK
CONNECTING AN EXTENSION PHONE
USING AN EXTENSION PHONE TO RECEIVE A FAX
The machine normally receives faxes automatically after ringing (page 2-7); however, when an extension phone is
connected, you can set the reception mode to MANUAL. This will allow you to talk to the other party first and then
receive a fax.
This is convenient when you only ha v e one telephone line and receiv e more voice calls than f a xe s. You must answer
all calls on the extension phone, and activ ate f ax reception after y ou v erify that a call is a f ax transmission.
NOTES
• The reception mode is initially set to AUTO. If you have not connected an extension phone, keep the reception mode set to
AUTO.
If you hear beeps during reception or at the end of reception and an error message appears in the display, refer to page 7-3.
•
■■
■ Changing the reception mode to MANUAL.
■■
Press the CUSTOM SETTINGS key.
1
T ouch the RECEIVE MODE ke y.
2
LIST PRINT
RECEIVE MODE
NOTE
To return the reception mode to AUTO, touch the AUTO RECEPTION key in step 3 above.
T ouch the MANUAL RECEPTION key .
3
T ouch the OK ke y.
4
The MANUAL RECEPTION
key is highlighted.
The reception mode is set
to MANUAL.
5
5-3
Page 52

FAX RECEIVE
ADDRESS
DIRECTORY
CONNECTING AN EXTENSION PHONE
RECEIVING A FAX AFTER TALKING (MANUAL RECEPTION)
When an extension phone is connected to the machine and you have set the reception mode to MANUAL, you can
talk to a person sending a fax manually and then begin f ax reception without breaking the connection.
■■
■ Activating fax reception from an extension phone (remote reception)
■■
After speaking on the extension phone, you can activate fax reception from the extension phone. This is called
"remote reception". After speaking, or when y ou hear a fax tone through the e xtension phone, perform the following
procedure with the extension phone still lifted.
NOTE
The following procedure is not possible if you are on a pulse dial line and your extension phone cannot produce tone signals.
To find out whether your extension phone can produce tone signals, refer to the manual for your extension phone.
If you are on a pulse dial line, set y our phone to
1
issue tone signals.
Refer to your phone's manual to set the phone to issue
tone signals.
If your phone is already set to issue tone signals, proceed
to the next step.
NOTE
The one-digit number that is used to activate fax reception from an extension phone (initially set to "5") is called the "remote
reception number". Y ou can change this number to an y number from 0 to 9 with the k e y operator progr am. (Refer to page 8-5.)
■■
■ When the machine is in Fax mode
■■
A fax can be received manually even when transmission is in progress.
NOTE
If you are using a line divider to connect an extension phone to the machine, the following method cannot be used for fax
reception. In this case, use remote reception (see above) to receive faxes.
When the machine rings, lift the extension
1
phone and speak.
If you hear a fax tone through the extension phone, do
not speak and proceed to the next step.
Press the "5" key on the extension phone's
2
keypad, and then press the "
Fax reception is activated.
Replace the extension phone.
3
Replace the extension phone.
3
The received fax will be printed after previously stored
jobs have been printed. When printing is completed, yo u
will hear a "beep" sound.
" key twice.
With the extension phone still lifted, touch the
2
F AX RECEIVE key.
FAX MEMORY:100%
Reception begins when
the other party begins
transmission.
5-4
NOTE
You can also talk on the extension phone and manually
receive a fax while the machine is copying.
If the machine rings during copying, lift the extension phone
and speak. To receive a fax, press the IMAGE SEND key
with the extension phone still lifted. When you hear a fax
tone through the extension phone, touch the FAX RECEIVE
key .
Page 53

CHAPTER 6
PROGRAMMING
This chapter explains the procedures for programming and the
information programmed in auto dial keys (one-touch and group keys),
programs, user indexes, and memory boxes.
Page
PROGRAMMING ................................................................................... 6-2
STORING, EDITING, AND DELETING AUTO DIAL KEYS AND PROGRAMS
●STORING ONE-TOUCH DIAL KEYS ............................................. 6-3
●EDITING AND DELETING ONE-TOUCH KEYS ............................ 6-5
●PROGRAMMING A GROUP KEY .................................................. 6-6
●EDITING AND DELETING GROUP KEYS..................................... 6-7
●STORING A PROGRAM ................................................................ 6-8
●EDITING AND DELETING PROGRAMS........................................ 6-8
STORING A GROUP INDEX ................................................................. 6-9
PROGRAMMING, EDITING, AND DELETING F-CODE MEMORY BOXES
●PROGRAMMING AN F-CODE MEMORY BOX ............................. 6-10
●SETTING FOR F-CODE POLLING MEMORY BOXES
(NUMBER OF TRANSMISSIONS) ................................................. 6-11
●SETTING FOR F-CODE CONFIDENTIAL
TRANSMISSION MEMORY BOXES (PRINT PIN.)........................ 6-12
●SETTING FOR F-CODE RELAY BROADCAST
MEMORY BOXES (END RECEIVING MACHINES) ...................... 6-13
●EDITING AND DELETING A MEMORY BOX ................................ 6-13
PRINTING PROGRAMMED INFORMATION ........................................ 6-14
ENTERING CHARACTERS................................................................... 6-15
....... 6-2
..... 6-10
6-1
Page 54

KEY OPERATOR PRO
ADDRESS
CONTROL
REC
DIRECT ADDRESS / PROGRAM
CUSTOM INDEX
PROGRAMMING
There are two methods for storing and editing auto dial numbers (one-touch ke ys and group ke ys), user index es, and
memory boxes: using the touch panel of the machine, and using a W eb browser (Netscape Navigator , Internet Explorer,
etc.) on your computer to access the W eb page in the machine. This chapter only explains the procedures f or storing,
editing, and clearing using the touch panel of the machine. F or the procedure f or accessing the W eb page and items
that can be stored, edited and cleared in the Web page, refer to pages 2-6 through 2-8 of "Operation manual (for
printer operation and general information)".
STORING, EDITING, AND DELETING AUTO
DIAL KEYS AND PROGRAMS
This section explains the procedures for storing, editing, and deleting auto-dial ke ys (one-touch keys and g roup keys)
and programs, which simplify the transmission procedure. (The procedure f or using one-touch keys and group k eys is
explained on page 2-5 and the procedure for using prog rams is e xplained on page 3-11.)
A combined total of 500 one-touch keys and group keys can be stored, and eight programs can be stored. If you
attempt to store more than this, a warning message will appear. In this case, delete any auto-dial keys or programs
that are no longer needed (refer to pages 6-5, 6-7 and 6-8), and then store the new auto-dial k e y or program.
NOTE
T o cancel a storing, editing, or deleting operation, press the CA ke y . Pressing the CA key tak es you out of CUSTOM SETTINGS mod e.
T o store , edit, or delete an auto-dial key (one-touch k ey or group k ey) or program, first f ollow steps 1 through 4 belo w .
Press the CUSTOM SETTINGS key.
1
T ouch the ADDRESS CONTR OL ke y.
2
T ouch the DIRECT ADDRESS / PR OGRAM key.
3
The DIRECT ADDRESS /
PROGRAM menu appears.
Touch the desired key and perform the
4
programming operation.
Refer to the pages indicated below for the
operation you wish to perform.
CUSTOM SETTINGS
DIRECT ADDRESS / PROGRAM
STORE
INDIVIDUAL
INDIVIDUAL key
Store a one-touch
dial key (following
page)
GROUP key
Store a group key
(page 6-6)
GROUP
PROGRAM key
Store a program
key (page 6-8)
PROGRAM
AMEND/DELETE
AMEND/DELETE key
• One-touch key
(page 6-5)
• Group key (page 6-7)
• Program (page 6-8)
OK
6-2
Page 55
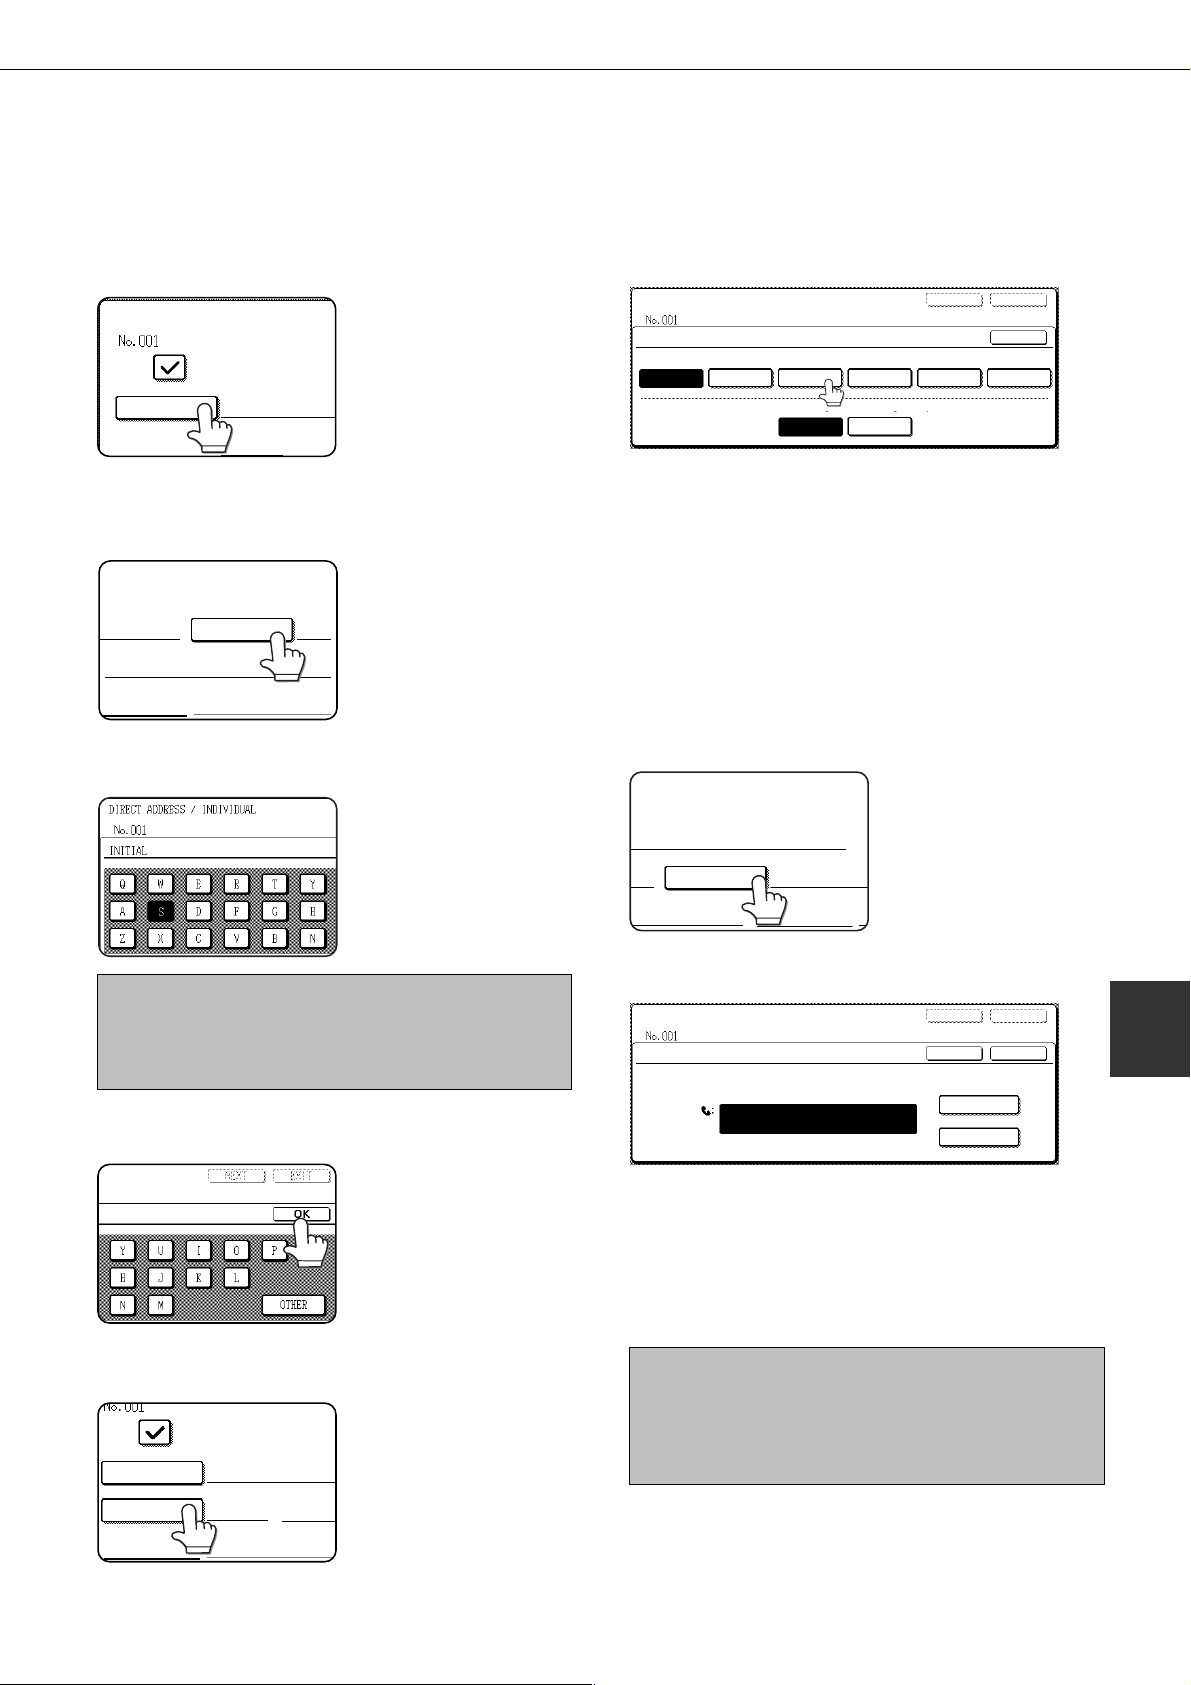
DIRECT ADDRESS / INDIVIDUAL
FAX
NAME
INDEX FAX
INITIAL
MODE
NAME SHARP CORPORATION
INDEX FAX N
KEY NAME
FAX No.
MODE
STORING, EDITING, AND DELETING AUTO DIAL KEYS AND PROGRAMS
STORING ONE-TOUCH DIAL KEYS
Follow the steps below to store a one-touch k e y after y ou ha v e completed steps 1 through 4 on page 6-2.
Make sure the FAX key is checked and then
1
touch the NAME key.
The "No." that automatically
appears is the lowest number
from 001 to 500 that has not
yet been programmed. When
NAME is touched, the letterentry screen appears. Enter up
to 36 characters for the name.
Refer to page 6-15 for the procedure f or entering letters.
T ouch the INITIAL ke y.
2
T ouch a letter ke y.
3
The first letter (initial) of the
name entered in step 1 is
initially selected and is
highlighted. If you wish to
change the letter, touch a
different letter key.
T ouch an inde x key.
6
DIRECT ADDRESS / INDIVIDUAL
INDEX
SELECT THE CUSTOM INDEX WHERE YOU REGISTER THIS ADDRESS.
USER 1 USER 2
DO YOU REGISTER THIS ADDRESS AT THE [FREQUENT USE], TOO?
Select one of the upper row of keys (USER 1 through
USER 6) to determine the location of the one-touch key
when the GROUP index is displa yed instead of the ABC
index (refer to page 1-5). The lower k eys are for selecting
whether to include the one-touch key in the FREQUENT
USE index.
If you touch the wrong key, simply touch the correct key .
T ouch the OK ke y.
7
T ouch the FAX No. key .
8
USER 3 USER 4 USER 5 USER 6
YES NO
NEXT EXIT
OK
The fax number entry
screen appears.
NOTE
The initial you enter here determines the position of the
one-touch key in the ABC index. For information on the
ABC index, refer to page 1-5.
T ouch the OK ke y.
4
T ouch the INDEX ke y.
5
FAX
Use the numeric keys to enter the fax number.
9
DIRECT ADDRESS / INDIVIDUAL
FAX No.
ENTER THE FAX No. VIA THE 10-KEY PAD, THEN PRESS [OK].
0666211221
To insert a pause between digits of the number, touch
the P A USE key . The pause appears as a hyphen "-". Refer
to page 8-4 to set the duration of the pause.
If you make a mistake , press the C ke y to clear one digit
at a time, and then enter the correct digit(s).
If you are not going to enter a sub-address and password
after the fax number, proceed to step 12.
NOTE
A maximum of 64 digits can be entered, including the fax
number, sub-address, passcode, any pauses (hyphens),
and slashes "/" (to separate the sub-address and
passcode).
NEXT EXIT
OKCANCEL
PAUSE
SUB ADDRESS
6
6-3
Page 56

STORING, EDITING, AND DELETING AUTO DIAL KEYS AND PROGRAMS
OKCANCEL
PAUSE
SUB ADDRESS
0666211221/3456/
NAME SHARP CORPORATION
FAX
REGISTRATION IS COMPLETED.
INDEX USER 3 FAX No
KEY NAME SHARP CORPORATION
SINITIAL
0666211221/3456/987654AX No.
33.6 kbps / NONEMODE
SINITIAL
NEXT EXIT
0666211221/3456/987654.
If you need to enter a sub-address, touch the
10
SUB ADDRESS key and then enter the subaddress with the numeric keys.
When you touch the SUB
ADDRESS key, a slash is
entered after the fax
number. Continue by
entering the sub-address
(max. 20 digits).
If you do not wish to enter a
passcode, proceed to step 12.
If you wish to enter a passcode, touch the SUB
11
ADDRESS key once again and enter the passcode
with the numeric keys.
When you touch the SUB
ADDRESS key, a slash is
entered after the subaddress. Continue by
entering the passcode
(max. 20 digits).
T ouch the OK ke y.
12
Y ou will return to the one-touch ke y programming screen.
REGISTRATION IS COMPLETED will appear
highlighted to the right of "No.".
Check the transmission settings
14
The initial transmission settings are "TRANSMISSION
SPEED: 33.6 kbps" and "INTERNATIONAL
CORRESPONDENCE MODE: NONE". T o change either
of the settings, touch the MODE key.
If you do not wish to change
the settings, this step is not
necessary.
After touching the MODE
key, you can change either
of the two settings. When
finished, touch the OK key.
T ransmission speed
Speed selections are 33.6 kbps, 14.4 kbps, 9.6 kbps, and
4.8 kbps. The higher the number , the faster the tr ansmission
speed.
NOTE
Set the transmission speed only when you know what
speed is most suitable, such as when you are sending
a fax to a foreign country and telephone line conditions
are bad. If y ou do not know the line condition, do not
change this setting.
International correspondence mode
Selections are NONE, MODE 1, MODE 2, and MODE 3.
NOTE
The "F AX No." line only shows 32 digits , regardless of how
many digits actually programmed.
Check the key name.
13
The characters appearing next to the NAME key will be
displayed in the key. Only the first 18 characters of the
name entered in step 1 will be displayed.
If you need to change the name that will be displayed in
the key, touch the KEY NAME key.
If you do not wish to change
the name, this step is not
necessary.
Refer to page 6-15 for the
procedure for entering
characters.
NOTES
• When sending a fax to a foreign country, telephone
line conditions can sometimes distort the fax or
interrupt the transmission. Selecting the right
international correspondence mode can help
alleviate these problems.
• If errors frequently occur when sending a fax to a
foreign country , try each of modes 1 to 3 and select
the mode that enables the best transmission.
When you have finished programming the one-
15
touch key, touch the EXIT key
If you wish to program another one-touch ke y,
touch the NEXT key.
Pressing the EXIT key
returns you to the screen of
step 4 on page 6-2.
6-4
Page 57

STORING, EDITING, AND DELETING AUTO DIAL KEYS AND PROGRAMS
AMEND/DELETE
SINITIAL
DELETE EXIT
SINITIAL
DELETE EXIT
DELETE THE ADDRESS?
SHARP CORPORATION
NO YES
EDITING AND DELETING ONE-TOUCH KEYS
If you wish to delete a one-touch key or change the fax number, name, or other information programmed in a onetouch key, follow steps 1 through 3 on page 6-2 and then perform the following procedure.
T ouch the AMEND/DELETE ke y.
1
Touch the one-touch key you wish to edit or
2
delete.
DIRECT ADDRESS / AMEND/DELETE
SELECT ADDRESS TO AMEND/DELETE.
SHARP CORPORATION
SHARP GROUP
SLA SCANNER TEAM CLIFF QUIROGA
DANIEL ERNY
FREQUENT USE
CORPO.TPS
SHARP DIGITAL DOCU
CHARLER WATTS
ABCD EFGHI JKLMN OPQRST UVWXYZ
EXIT
PROGRAM
ABC GROUP
● To edit a one-touch key, follow steps 3 and 4.
T o delete a one-touch key , follow steps 5 and 6.
●
● When you have finished editing or deleting,
touch the EXIT key.
T ouch the key corresponding to the information
3
you wish to change (change the information in
the same way as you stored the information on
page 6-3).
DIRECT ADDRESS / AMEND/DELETE
FAX
NAME SHARP CORPORATION
INDEX USER 3 0666211221/3456/987654FAX No.
KEY NAME SHARP CORPORATION 33.6 kbps/NONEMODE
Make sure that your changes are correct, and
4
then touch the EXIT key.
T ouch the DELETE ke y.
5
DELETE EXIT
SINITIAL
If you wish to change
another one-touch key,
repeat steps 2 through 4.
NOTE
If you cannot edit or delete a one-touch key
If you attempt to edit or delete a one-touch key in the following situations, a warning message will appear and editing/deletion
will not be possible.
●The one-touch key you wish to edit or delete is currently being used for transmission or is used in a currently stored
transmission job (including a timer transmission).
●The one-touch key is included in a group key.
●The one-touch key is included in a group of end receiving machines for an F-code relay broadcast operation.
●The one-touch key is included in a program.
If the key is being used for a current transmission or currently stored transmission, cancel the transmission or wait until it is
completed and then change or delete the key. If the key is included in one of the above groups, delete the key from the group
and then change or delete the key.
6
T ouch the YES key.
6
If you wish to delete another
one-touch key, repeat steps
2, 5, and 6.
6-5
Page 58
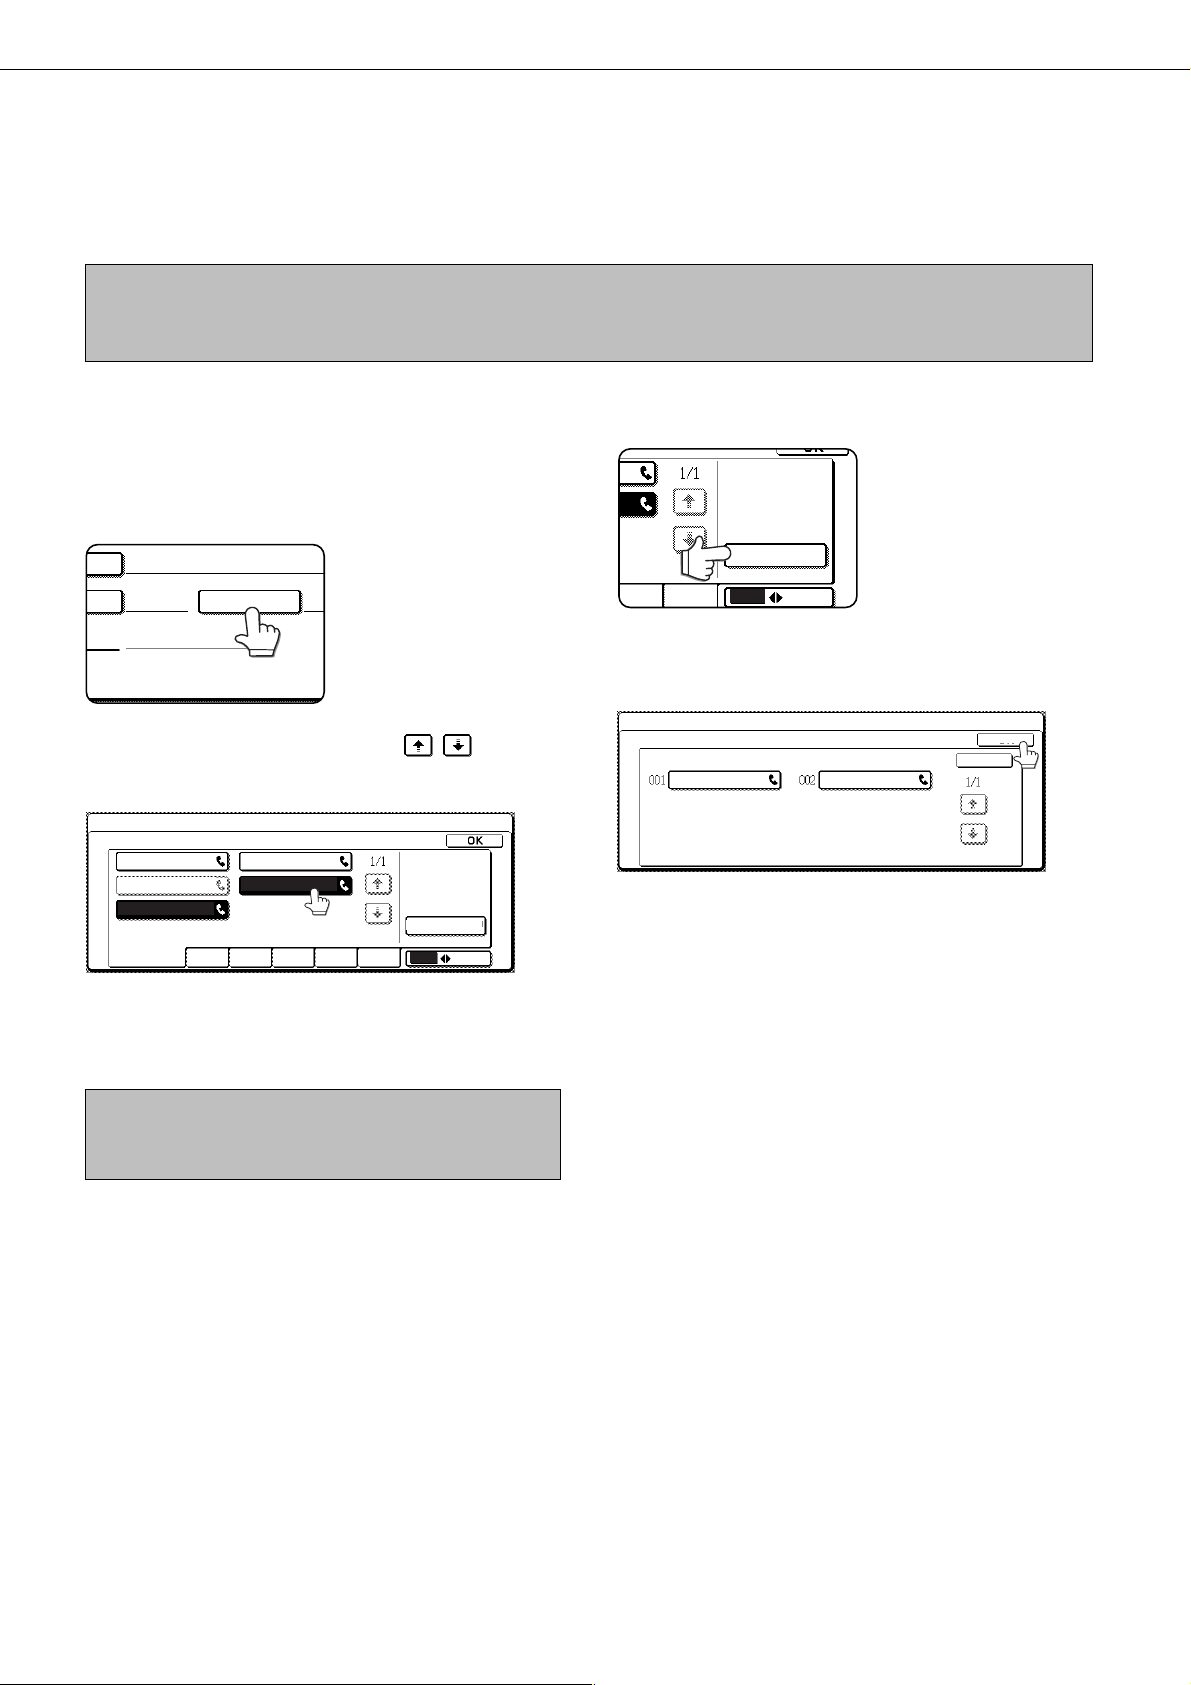
GROUP-SHARP DIGITAL DOCUMENT
STORING, EDITING, AND DELETING AUTO DIAL KEYS AND PROGRAMS
ABC GROUP
ADDRESS REVIEW
PROGRAMMING A GROUP KEY
Up to 300 destinations can be stored in a group key. To program a group key , f ollow steps 1 through 4 on page 6-2 and
then perform the following procedure .
NOTE
Only one-touch key destinations can be stored in a group key. If you wish to store a destination that is not programmed in a
one-touch key, first program the destination in a one-touch key and then store it in the group key.
Follow steps 1 through 7 of "Storing one-touch
1
dial keys" (page 6-3) to enter a GROUP NAME,
INITIAL, and INDEX.
T ouch the ADDRESS ke y.
2
Touch index keys and the keys as
3
needed, and then touch one-touch keys of the
destinations that you wish to store in the group.
DIRECT ADDRESS / GROUP
SELECT ADDRESS.
PRODUCTS PLANNING
MARKETING GROUP SHARP CORPORATION
CORPO.TPS
FREQUENT USE ABCD EFGHI JKLMN OPQRST UVWXYZ
One-touch keys that hav e been touched are highlighted.
If you touch the wrong key, simply touch it again to cancel
the highlighting and remove the destination from the
group.
NOTE
One group key cannot be stored in another group key.
Group keys appear grayed out and cannot be touched.
SHANE COFFEY
ADDRESS REVIEW
ABC GROUP
T o check the destinations that y ou have stored
4
in the group, touc h the ADDRESS REVIEW key .
A list of your selected
destinations is displayed.
You can delete a displayed
destination by touching it.
When a message appears
asking if you want to delete
the destination, touch the
YES key.
T ouc h the outer OK key.
5
DIRECT ADDRESS / GROUP
SELECT ADDRESS TO DELETE.
GROUP NAME : GROUP-SHARP DIGITAL DOCUMENT SYSTEMS
SHARP CORPORATION CORPO.TPS
The number of destinations in the group appears to the
right of the ADDRESS key.
Check the name of the key (refer to step 13 on
6
page 6-4).
The characters appearing next to the KEY NAME key
will be displayed in the group key. To change these
characters, touch the KEY NAME key. This step is not
necessary if you do not wish to change the characters.
The procedure for entering characters is explained on
page 6-15.
Touch the EXIT key when you have finished
7
programming the group key.
OK
OK
If you wish to program another gr oup key , touch
the NEXT key .
When you touch the EXIT key, you will return to the
screen of step 4 on page 6-2.
6-6
Page 59
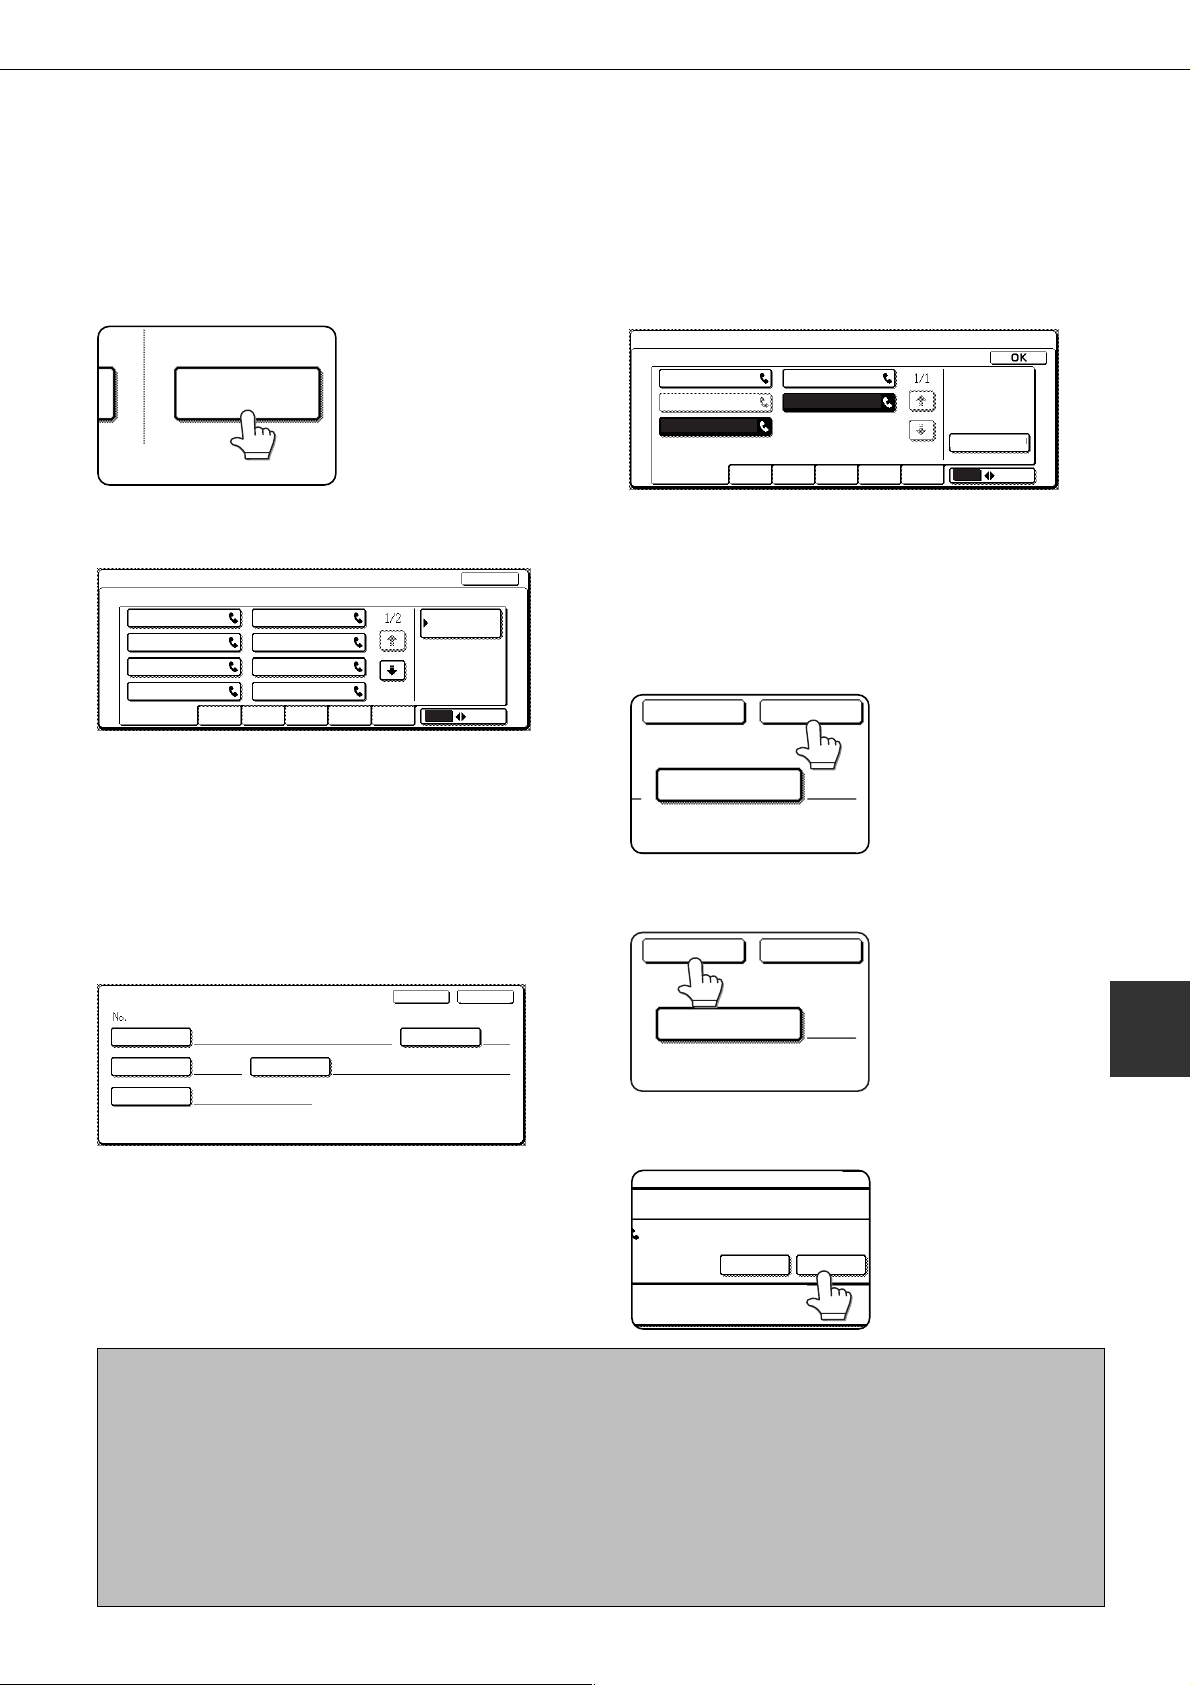
STORING, EDITING, AND DELETING AUTO DIAL KEYS AND PROGRAMS
AMEND/DELETE
INITIAL
DELETE EXIT
SINITIAL
DELETE EXIT
DELETE THE ADDRESS?
SHARP GROUP
NO YES
EDITING AND DELETING GROUP KEYS
If you need to delete a group ke y or change its name or a one of its stored destinations in a group key, first follow steps
1 through 3 on page 6-2, and then perform the following procedure.
T ouch the AMEND/DELETE ke y.
1
T ouch the group ke y you wish to edit or delete.
2
DIRECT ADDRESS / AMEND/DELETE
SELECT ADDRESS TO AMEND/DELETE.
SHARP CORPORATION
SHARP GROUP
SLA SCANNER TEAM CLIFF QUIROGA
DANIEL ERNY
FREQUENT USE
CORPO.TPS
SHARP DIGITAL DOCU
CHARLER WATTS
ABCD EFGHI JKLMN OPQRST UVWXYZ
EXIT
PROGRAM
ABC GROUP
● To edit a group ke y, f ollo w steps 3 and 4.
● To delete a group key, follow steps 5 and 6.
● When you have finished editing or deleting,
touch the EXIT key.
Touch the key of the item you wish to change
3
(to edit the item, follow the same steps as for
one-touch keys on page 6-3).
DIRECT ADDRESS / AMEND/DELETE
002
GROUP NAME SHARP GROUP
INDEX USER 2 2 ADDRESSESADDRESS
KEY NAME SHARP GROUP
NEXT EXIT
SINITIAL
To edit a destination stored in a group key, touch the
ADDRESS key. The following screen appears.
DIRECT ADDRESS / AMEND/DELETE
SELECT ADDRESS.
PRODUCTS PLANNING
MARKETING GROUP SHARP CORPORATION
CORPO.TPS
FREQUENT USE
SHANE COFFEY
ABCD EFGHI JKLMN OPQRST UVWXYZ
ADDRESS REVIEW
ABC GROUP
The one-touch keys stored in the group are highlighted.
To add another one-touch key to the group, touch the
key to highlight it.
To delete a one-touch key from the group , touch the k ey
so that it is no longer highlighted.
Make sure the edited information is correct, and
4
then touch the EXIT key.
If you wish to change
another group key, repeat
steps 2 through 4.
S
T ouch the DELETE ke y.
5
6
NOTE
If you cannot edit or delete a group key
If you attempt to edit or delete a group key in the f ollowing situations, a w arning message will appear and editing/deletion will not be possible.
●The one-touch key you wish to change or delete is currently being used for transmission or is used in a currently stored
●The group key is included in the end receiving machines for an F-code relay broadcast operation.
●The group key is included in a program.
If the key is being used for a current transmission or currently stored transmission, cancel the transmission or wait until it is
completed and then edit or delete the key. If the key is included in a program or in the end receiving machines for an F-code
relay broadcast operation, delete the key from the program or operation and then edit or delete the key.
transmission job (including a timer transmission).
T ouch the YES key.
6
If you wish to delete another
group key, repeat steps 2,
5, and 6.
6-7
Page 60

STORING, EDITING, AND DELETING AUTO DIAL KEYS AND PROGRAMS
PROGRAM
PROGRAM NAME
SETTINGS
ADDRESS
RESOLUTION
SPECIAL
No.1
PROGRAM NAME
SETTINGS
ADDRESS
PROGRAM FOR SHARP
RESOLUTION
SPECIAL
MODES
No.1
EXIT
PROGRAM
STORING A PROGRAM
You can store a destination fax number, polling or dual page scan selections, and resolution and e xposure settings in
a program. This enables y ou to call up the program and perf orm the transmission by means of a simplified operation.
To store a program, first follo w steps 1 through 4 on page 6-2 and then perf orm the fo llowing oper ation.
NOTE
A timer setting (page 3-4) cannot be included in a program.
T ouch the PR OGRAM NAME ke y.
1
The "No." that automatically
appears is the lowest number
from 1 to 8 that has not yet
been programmed. When the
PROGRAM NAME key is
touched, the letter-entry
screen appears. Enter up to
18 characters for the name.
Refer to page 6-15 for the procedure f or entering letters.
T ouch the SETTINGS ke y.
2
For the detailed procedures for each of the settings , refer to
the explanations of those features on the f ollo wing pages.
Special mode:
• Polling (page 3-6)
• Dual page scanning (page 3-10) • Exposure (page 1-10)
Resolution (page 1-9) Address Directory (page 3-3)
NOTE
You can store up to 300 destinations in a program; howe ver ,
you cannot directly enter fax numbers with the n umeric keys.
A destination must be programmed in an auto dial ke y (onetouch key or group k ey) before it can be stored in a prog ram.
T ouch the OK ke y.
4
Y our settings are displayed. Make sure they are
5
correct.
T ouch the keys for the settings you wish to store.
3
ENTER PROGRAM YOU REQUIRE.
AUTO
EXPOSURE
STANDARD
RESOLUTION
CANCEL OK
SPECIAL MODES
ADDRESS
DIRECTORY
ADDRESS REVIEW
PROGRAM
REGISTRATION IS COMPLETED.
No.1
PROGRAM NAME
SETTINGS
When you are finished, touc h the EXIT key.
6
If you wish to store another program, touch the
PROGRAM FOR SHARP
ADDRESS 2 ADDRESSES
RESOLUTION EXPOSURE
SPECIAL
MODES
HALF TONE
SUPER FINE
DUAL PAGE
SCAN
NEXT key .
Touching the EXIT key returns you to the screen of step
NEXT EXIT
DARK
ORIGINAL
4 on page 6-2.
EDITING AND DELETING PROGRAMS
If you need to edit or delete a previously stored program, perform steps 1 through 4 on page 6-2, touch the AMEND/
DELETE key, and then perform the following steps:
T ouch the PR OGRAM key.
1
T ouc h the pr ogram y ou wish to edit or delete.
2
ADDRESS
DIRECTORY
EXIT
DIRECT ADDRESS / AMEND/DELETE
SELECT PROGRAM TO AMEND/DELETE.
PROGRAM
PROGRAM FOR SHARP
ABYS FAX FORMAT A
EMAIL NEWS GROUP
6-8
When you touch the program name, the edit/delete
screen for the selected program appears.
Touching the ADDRESS DIRECTORY key returns you
to the screen of step 1.
T o edit the program, follow the same procedure
3
as for storing the program.
To delete the program, touch the DELETE key
and then touch the YES key in the confirmation
screen that appears.
Page 61

STORING A GROUP INDEX
DIRECT ADDRESS / PROGRAM
CUSTOM INDEX
Auto dial keys (one-touch keys and group keys) are normally stored in the ABC index. To make auto dial keys more
convenient to use, y ou can store a group of auto dial keys in a group inde x and assign a name to that index. When you
switch to the group index es , USER 1, USER 2, USER 3, USER 4, USER 5, and USER 6 appear . You can assign any
name up to 6 characters long to each of the USER index es .
The procedure for storing auto dial numbers in a group index is e xplained on page 6-3, and the procedure for s witching
between the ABC index and the group inde x es is e xplained on page 1-5.
Press the CUSTOM SETTINGS key, and then
1
touch the ADDRESS CONTROL key (refer to
steps 1 and 2 on page 6-2).
T ouch the CUSTOM INDEX key .
2
T ouc h an inde x key (USER 1 to USER 6).
3
You can enter a name for the selected index.
CUSTOM SETTINGS
CUSTOM INDEX
SELECT THE KEY TO BE CUSTOM NAMED.
USER 1 USER 2 USER 3 USER 4 USER 5 USER 6
When touched, the letter entry screen appears.
OK
Enter a maximum of 6 characters f or the inde x
4
name.
Use the key to clear the displayed name and then
enter the desired name. Refer to page 6-15 for the
procedure for entering characters.
When finished, touch the OK key. The ne w name appears
in the screen of step 3.
If you wish to program another index name,
5
repeat steps 3 and 4.
When finished, touch the OK key.
To change a user index name, re-enter the name as
explained in step 4.
6
6-9
Page 62
F-CODE MEMORY BOX
F-CODE MEMORY BOX / POLLING MEMORY
No.001
SUB ADDRESS
BOX NAME
POLLING TIMES
F-CODE MEMORY BOX / POLLING MEMORY
No.001
SUB ADDRESS
BOX NAME FAX INFORMATION
POLLING TIMES
OKCANCEL
PASS CODE
PROGRAMMING, EDITING, AND DELETING FCODE MEMORY BOXES
The procedure for programming a memory box f or F-code transmission is explained here . There are three types of Fcode memory boxes: F-code polling memory (page 4-4), F-code confidential transmission (page 4-6), and F-code
relay broadcast (page 4-8). Memory box es are prog rammed, edited, and deleted as f ollo ws.
PROGRAMMING AN F-CODE MEMORY BOX
A box name, sub-address/passcode, and function m ust be progr ammed in a memory box.
NOTES
• When programming a new memory box, a sub-address that is being used for another box cannot be used. The passcode,
however, can be the same as a passcode used in another box.
• A passcode can be omitted.
• Up to 100 F-code memor y boxes can be programmed. If 100 F-code memory boxes have already been programmed, a
warning message will appear and you will not be able to program a new box. First delete an unneeded F-code memory box
(page 6-13) and then program the new box.
Press the CUSTOM SETTINGS key and then
1
touch the ADDRESS CONTROL key (refer to
steps 1 and 2 on page 6-2).
T ouch the F-CODE MEMORY BOX ke y.
2
Touch one of the memory box keys (POLLING
3
MEMORY, CONFIDENTIAL, or RELAY
BRO ADCAST) on the top line (STORE).
CUSTOM SETTINGS
F-CODE MEMORY BOX
STORE
AMEND/DELETE
(POLLING MEMORY is touched in the example here.)
The F-code memory box programming screen appears.
T ouch the BOX NAME key.
4
Refer to page 6-15 for the procedure f or entering letters.
POLLING MEMORY
POLLING MEMORY CONFIDENTIAL
CONFIDENTIAL
The "No." that automatically
appears is the lowest number
from 001 to 100 that has not
yet been programmed. When
the BOX NAME key is
touched, the letter-entry
screen appears. Enter up to
18 characters for the name.
RELAY
BROADCAST
RELAY
BROADCAST
T ouch the SUB ADDRESS ke y.
5
The sub-address/passcode
entry screen appears.
Use the numeric keys (0 through 9) to enter a
6
sub-address (max. 20 digits).
F-CODE MEMORY BOX / POLLING MEMORY
No.001
SUB ADDRESS / PASS CODE
ENTER THE SUB ADDRESS / PASS CODE VIA THE 10-KEY PAD, THEN PARESS [OK].
214341434
OK
The characters " " and "#" cannot be used in a subaddress.
If you enter an incorrect digit, press the C key and reenter the correct digit.
If you do not wish to enter a passcode, proceed to step 9.
T o set a passcode, touch the PASS CODE key.
7
A slash (/) appears after the
sub-address.
If you make a mistake,
press the C key to clear the
mistake.
EXITNEXT
OKCANCEL
PASS CODE
6-10
Page 63
PROGRAMMING, EDITING, AND DELETING F-CODE MEMORY BOXES
OKCANCEL
PASS CODE
SUB ADDRESS
BOX NAME
FAX INFORMATION
ONCE
214341434/351212
POLLING TIMES
Use the numeric keys to enter a passcode (max.
8
20 digits).
F-CODE MEMORY BOX / POLLING MEMORY
No.001
SUB ADDRESS / PASS CODE
ENTER THE SUB ADDRESS / PASS CODE VIA THE 10-KEY PAD, THEN PRESS [OK].
214341434/351212
In addition to numbers, the characters " " and "#" can
be used in a passcode.
If you make a mistake, press the C key to clear the
mistake.
EXITNEXT
OKCANCEL
PASS CODE
T ouch the OK ke y.
9
You will return to the
memory box programming
screen. The entered subaddress and passcode are
displayed. REGISTRATION
IS COMPLETED appears to
the right of the box number.
Continue programming the settings that are
particular to each type of memory box. Refer to the
following pages:
● F-code polling memory (this page)
● F-code confidential transmission (next page)
● F-code relay broadcast transmission (page
6-13)
SETTING FOR F-CODE POLLING MEMORY BOXES (NUMBER
OF TRANSMISSIONS)
You can select whether to have document data that was scanned into an F-code polling memory box automatically
cleared after one transmission, or to leave the document data in the bo x and allow an unlimited number of transmissions
when polled. (The initial setting is "ONCE". Change the setting as needed.)
T ouch the POLLING TIMES key.
1
Touch the key for the desired number of
2
transmissions.
If you wish to leave the document data in the bo x, touch
the UNLIMITED key to highlight it.
F-CODE MEMORY BOX / POLLING MEMORY
No.001
POLLONG TIMES
ONCE
UNLIMITED
T ouch the OK ke y.
3
Y ou will return to the programming screen f or the F-code
polling memory box. The selected number of
transmissions appears.
NEXT
EXIT
OK
6
6-11
Page 64

PROGRAMMING, EDITING, AND DELETING F-CODE MEMORY BOXES
SUB ADDRESS
BOX NAME
FAX INFORMATION
55112233/481221
PRINT PIN
SETTING FOR F-CODE CONFIDENTIAL TRANSMISSION
MEMORY BOXES (PRINT PIN.)
Program the print PIN. (P ersonal Identification Number) that is used to print a document that has been receiv ed to an
F-code confidential memory box. F or information on using a print PIN., refer to page 4-7.
NOTES
• Program a 4-digit number for the print PIN.. The characters "
• The print PIN. can be omitted.
• Take care not to forget the print PIN. you have programmed. If you forget the passcode, consult your Sharp dealer.
" and "#" cannot be used.
T ouch the PRINT PIN ke y.
1
Use the numeric keys to enter a 4-digit number .
2
F-CODE MEMORY BOX / CONFIDENTIAL
No.003
PRINT PIN
ENTER THE PRINT PIN VIA THE 10-KEY PAD, THEN PRESS [OK].
If you make a mistake, press the C key. All digits will be
cleared, so you will need to re-enter the number from
the first digit.
To cancel entry of the print PIN., touch the CANCEL
key. You will return to the screen of step 1 without
programming a print PIN..
T ouch the OK ke y.
3
Y ou will return to the programming screen f or the F-code
confidential transmission memory box. The print PIN. you
entered is displayed.
NEXT
EXIT
OKCANCEL
6-12
Page 65

SUB ADDRESS
BOX NAME
FAX INFORMATION
123456/987654
RECIPIENT
ABC GROUP
ADDRESS REVIEW
OK
OK
PROGRAMMING, EDITING, AND DELETING F-CODE MEMORY BOXES
SETTING FOR F-CODE RELAY BROADCAST MEMORY
BOXES (END RECEIVING MACHINES)
Program the end receiving machines to which document data received in the F-code relay broadcast memory box will
be transmitted when your machine is a relay machine .
NOTES
• Up to 30 end receiving machines (30 one-touch keys or group keys) can be programmed. If you attempt to program more
than this number, a message will appear and programming will not be possible.
• Only destinations that have been programmed in auto dial keys (one-touch k e ys or g roup k eys) can be selected. If you need
to include a destination that has not been programmed in an auto dial key, first program it in a one-touch key (page 6-3) and
then program the destination as an end receiving machine.
T ouch the RECIPIENT key.
1
The address selection
screen appears.
Touch the one-touch keys you wish to include
2
as end receiving machines, touching indexes
and the keys as needed.
F-CODE MEMORY BOX / RELAY BROADCAST
SELECT ADDRESS.
PRODUCTS PLANNING
MARKETING GROUP CLIFF QUIROGA
DANIEL ERNY
FREQUENT USE ABCD EFGHI JKLMN OPQRST UVWXYZ
The selected one-touch keys are highlighted and
programmed as end receiving machines. If you touch
an incorrect key, touch the key again to remove the
highlighting and delete the destination.
SHANE COFFEY
ADDRESS REVIEW
ABC GROUP
To check the destinations that have been
3
selected as end receiving machines, touch the
ADDRESS REVIEW key .
T ouch the outer OK ke y.
4
EDITING AND DELETING A MEMORY BOX
The destinations selected
as end receiving machines
are displayed.
Y ou can delete a destination
by touching it. When the
confirmation message
appears, touch the YES ke y
to delete the destination.
You will return to the
programming screen for the
F-code relay broadcast
memory box. The number of
selected end receiving
machines appears.
6
Press the CUSTOM SETTINGS key and then
1
touch the ADDRESS CONTROL key (refer to
steps 1 and 2 on page 6-2).
T ouch the F-CODE MEMORY BOX ke y.
2
Touch a memory box key (POLLING MEMORY,
3
CONFIDENTIAL, or RELAY BROADCAST) on the
bottom line (AMEND/DELETE).
T ouch the memory box key that y ou wish to edit
4
or delete.
MEMORY BOX / AMEND/DELETE
SELECT MEMORY BOX TO AMEND/DELETE.
POLLING MEMORY
REPORT
The memory box edit/delete screen appears.
A "
" mark indicates that data has been stored.
A memory box cannot be edited or deleted when data is
stored in the box.
FAX INFORMATION
EXIT
Touch the keys as needed to edit or delete the
5
information.
F-CODE MEMORY BOX / POLLING MEMORY
No.005
BOX NAME
SUB ADDRESS
POLLING TIMES
REPORT
22233311/351212
UNLIMITED
EXITDELETE
● Edit a memor y box in the same way as you
programmed it.
● T o delete a memory box, touch the DELETE key
at the upper right of the screen (a message will
appear asking you to confirm the deletion).
● The print PIN. must be entered to edit or delete
a confidential memory box.
● A memory box cannot be edited or cleared while
it is being used for transmission.
6-13
Page 66

S
L
LIST PRINT
RECEIVE MODE
SENDING ADDRESS LIST
PRINTER TEST PAGE
ALL CUSTOM SETTING LIST
INDIVIDUAL
LIST
GROUP LIST PROGRAM LIST
MEMORY BOX
LIST
PRINTING PROGRAMMED INFORMATION
You can print out lists of the one-touch keys, group k e ys , programs , and memory box es that hav e been stored in the
machine.
Press the CUSTOM SETTINGS key.
1
T ouc h the LIST PRINT ke y.
2
NOTES
• The list is printed before other print jobs are pr inted.
• If you attempt to print a list when no data exists, a warning message will appear.
T ouch the SENDING ADDRESS LIST ke y.
3
T ouc h the ke y of the list you wish to print.
4
PROCESSING PRINT
DATA appears in the
message display and
printing begins.
T o cancel printing, touch the
CANCEL key.
6-14
Page 67

ENTERING CHARACTERS
Sharp
Sharp
Sharp ä
Sharp ä
Sharp äÄ
To enter or edit characters in setting screens such as auto dial key programming screens, follow the steps below.
Characters that can be entered are alphabetical characters, special characters, n umbers, and symbols .
■ Entering alphabetical characters
(Example: Sharp äÄ)
T ouch the S ke y.
1
Characters cannot be
entered beyond the " " mark.
T ouch the ÃÄÂ/ãäâ key.
5
To switch between upper case and lower case, touch
the ABC
case letters are entered.
T ouc h the ABC abc key.
2
S
T ouch the "h" key , "a" key , "r" key , and "p" ke y .
3
Shar
If you make a mistake , touch the key to mo ve the cursor
■
) back one space and then enter the correct character.
(
You can also press the AB/ab
to enter a number or symbol.
abc key. When ABC is highlighted, upper
12#$% key during entry
T ouch the "ä" key .
6
To switch between upper case and lower case, touch
the ÃÄÂ
letters are entered.
T ouc h the ÃÄÂ ãäâ key.
7
T ouch the "Ä" key .
8
ãäâ key . When ãäâ is highlighted, lower case
6
T ouch the SP ACE ke y .
4
Sharp
The cursor (■) moves f orw ard and a space is entered.
You can press the ABC/abc key during entry to return to
alphabetical character entry . You can also enter numbers
and symbols.
When finished, touch the OK key.
9
You will exit the character entry screen and return to the
programming screen. If you touch the CANCEL k ey, you
will return to the programming screen without storing
the entered characters.
6-15
Page 68

ENTERING CHARACTERS
■ Entering numbers and symbols
T ouc h the AB/ab 12#$% key.
1
When the characters "12#$%" are highlighted, number/
symbol entry mode is selected.
Enter the desired number or symbol.
2
Numbers and symbols that can be entered are as follows:
Screen 1/2
Screen 2/2
* Change screens by touching the key or key
displayed in the screen. If you make a mistake , touch
key to move the cursor (■) back one space
the
and then enter the correct character.
You can continue touching keys to enter characters.
You can also touch another character type selection
ÃÄÂ/ãäâ key or AB/ab 12#$% key) to enter
key (
characters other than numbers and symbols.
When you have finished entering characters,
3
touch the OK key.
1&1
You will exit the character entry screen and return to the
programming screen. If you touch the CANCEL k ey, you
will return to the programming screen without storing
the entered characters.
NOTE
If you are going to use the Web page to edit or delete the
stored name at a later time, do not use the characters ", <,
or >. These characters cannot be displa yed in the Web page.
6-16
Page 69

CHAPTER 7
TROUBLESHOOTING
This chapter contains information to help you make efficient use of the
fax features of the machine, including solutions to common problems.
Page
WHEN A TRANSACTION REPORT IS PRINTED................................. 7-2
VIEWING THE COMMUNICATION ACTIVITY REPORT ...................... 7-3
WHEN AN ALARM SOUNDS AND A WARNING MESSAGE IS
DISPLAYED ........................................................................................... 7-3
PROBLEMS AND SOLUTIONS............................................................. 7-4
7-1
Page 70

WHEN A TRANSA CTION REPORT IS PRINTED
The machine has been set to automatically print a Transaction Report when a transmission is not successful or when
the Broadcast transmission function is used. The Transaction Report informs you of the result of the operation. When
the machine prints a Transaction Report, be sure to check the contents.
The initial settings (factory settings) for printing Transaction Reports are indicated by shading
use the key operator progr am to change the settings (page 8-5).
• Single sending: Print out all report / Print out error report only / No printed report
• Receiving: Print out all report / Print out error report only / No printed report
• Broadcasting: Print out all report / Print out error report only / No printed report
• Confidential reception: Print out notice page / Not print out notice page
The Transaction Report shows the date of transmission, the time transmission began, the other party's name, the
duration of the operation, the number of pages, and the result.
NOTES
• The list count appears in the "#" column of the Transaction Report and a serial number appears in the FILE column. (These
numbers are not related to the transaction.)
• When a transmission error occurs, a portion of the or iginal document is pr inted along with the Transaction Report. You can
set the machine to not print the original using the key operator program (page 8-5).
■ Information appearing in the TYPE/NOTE column
Information such as the type of transmission and type of error appears in the TYPE/NO TE column of the T ransaction
Report. The f ollo wing notes may appear.
Note Explanation
OK The transaction was completed normally.
G3 Communication took place in G3 mode.
ECM Communication took place in G3 ECM mode.
SG3 Communication took place in Super G3 mode.
FW. The received data was forwarded.
NO RESPONSE No response from the receiving party.
BUSY Transmission was not possible because the other party was already using the line.
CANCEL A transmission was canceled while in progress , or a stored transmission job was canceled.
P. FAIL A power failure occurred during the transaction.
MEMORY OVER The memor y became full dur ing quick on-line transmission.
MEM. FULL The memory became full during reception.
LENGTH OVER The transmitted document was over 59" long and therefore could not be received.
ORIGINAL ERROR Manual transmission was not successful because a jam occurred.
PASS# NG The connection was broken because the polling passcode was not correct.
NO RX POLL The machine that was polled does not have a polling function.
RX POLL FAIL The other machine refused the polling operation, or your machine broke the connection
when polled because no data was in memory.
NO F-CODE POLL The other machine refused an F-code polling operation, or your machine broke the connection
when polled because no data was in its F-code memory polling box.
RX POLL# NG Your machine broke the connection because the other machine specified an F-code polling
sub-address that does not exist in your machine.
F PASS# NG
BOX NO. NG
F POLL PASS# NG
RX NO F-CODE POLL
NO F FUNC
NO F-CODE
M. BO X: [xxxxxx] Data was receiv ed to a confidential or rela y broadcast memory box, or data was sent from a
•••••• memory polling box.
F AIL xx(xxxx) The communication handshake signals or image signals were distorted due to line conditions
Y our machine broke the connection because an incorrect passcode w as sent for an F-code transmission.
Your machine broke the connection because the specified sub-address f or an F-code memory box does not e xist.
Y our machine broke the connection because the other machine sent an incorrect passcode f or F-code polling.
F-code polling was attempted, howe ver, the other machine did not ha ve an F-code polling memory box.
F-code transmission was attempted, howe ver, the other machine does not support F-code communication.
An F-code transmission was refused by the other machine because of an incorrect sub-address or other reason.
The name of the memory box appears in [xxxxxx], and the type of F-code operation (relay
request reception, polling memory transmission, or confidential reception) appears in ••••••.
or other reasons, and communication was not successful.
First two digits of communication error number: Error code from 00 to 31 appears.
Last four digits of communication error number: Codes for use by service technicians.
below. You can
7-2
Page 71

VIEWING THE COMMUNICATION ACTIVITY REPORT
Your machine keeps a record of the most recent 50 transactions (both transmissions and receptions) that were
performed. The record includes the date of the transaction, the other party's name, the duration, and result. You can
have the report automatically printed when the number of transactions exceeds 50, or at a specified time. This allows
you to check the machine's activity at regular intervals.
The machine is initially set (factory setting) to not print the report. To have the report printed, change the setting with
the key operator progr am (page 8-5).
NOTES
• After printing, the data is cleared from memory, so the repor t cannot be pr inted a second time.
Refer to the table in "When a Transaction Report is printed" on the previous page for the notes that appear in the TYPE/NOTE column.
•
WHEN AN ALARM SOUNDS AND A WARNING MESSAGE IS DISPLA YED
Alarms and display messages alert you to the condition of the machine during operation. If one of the following
messages appears, respond as indicated in the table.
Message screen (Alarm)
OPEN TRAY x AND ADD xxxxxxxx
PAPER.
CHANGE THE TONER CARTRIDGE.
PLEASE RETURN xx ORIGINALS TO THE
DOCUMENT FEEDER, THEN PRESS [START].
THE MEMORY BECOMES FULL.
SEND SCANNED DATA? OR CANCEL THE JOB?
THE LINE WAS BUSY. FAX TRANSMISSION
WAS SUSPENDED.
POLLING IS NOT POSSIBLE WITH
THE AVAILABLE MEMORY.
POLLING IS AVAILABLE ONLY FOR FAX.
THE FOLLOW DATA COULD NO T BE SENT.
PLEASE GIVE THIS TRANSACTION REPORT TO SENDER.
Meaning of message
Printing cannot take place because the
machine is out of suitable paper.
The machine is out of toner and the
received document cannot be printed.
The original jammed in the scanner unit
while being scanned.
The memory became full while the
original was being scanned.
The other party's line is busy.
Polling is not possible because there is
not enough space in memory.
The party you attempted to poll was not
a fax machine.
The transmission did not end normally
due to a communication error and a
Transaction Report was printed.
Action
Add the indicated paper.
Replace the toner cartridge.
Reload the indicated
original.
Send only the pages that were
already scanned, or cancel the
entire transmission.
T ry the transmission again.
Try polling again after
currently stored jobs are
completed.
Check to make sure the
number you are dialing is
a fax number.
Check the contents of the
T ransaction Report and then
try the transmission again.
Page
Printer
manual, 1-16
Printer
manual, 1-25
1-7
2-4
2-4
-
1-5
7-2
TRANSMISSION ERROR OCCURRED AT SOME RECEIVERS.
PLEASE GIVE THIS TRANSACTION REPORT TO SENDER.
MANUAL RECEIVE IS DISABLED
DUE TO OUT OF MEMORY.
CLOSE THE xxxx COVER.
CLOSE THE DOCUMENT FEEDER.
CLOSE THE LOWER LEFT SIDE COVER.
CALL FOR SERVICE. CODE:xx-xx
FAX FUNCTION TROUBLE.
* Printer manual : "Operation manual (for printer operation and general information)"
The transmission did not end normally
due to a communication error and a
Transaction Report was printed.
Manual reception was not possible
because there was not enough free
space in memory.
The indicated cover is open.
The self-diagnosis function has activated
and automatically stopped operation. An
error code appears in xx-xx.
Check the contents of the
T ransaction Report and then
try the transmission again.
T ry manual reception again
after currently stored jobs
have been completed.
Close the indicated cover.
Turn off the power and then
turn it back on. If the same
message still appears,
contact your dealer.
7-2
-
-
7-3 and 7-4
7-3
7
Page 72

PROBLEMS AND SOLUTIONS
If the fax features do not operate normally, please check the following.
Problem
The machine does not operate.
Dialing is not possible.
Transmission is not
possible.
The transmitted image
prints out blank at the
receiving side.
The transmitted image is
distorted.
T r ansmission does not take
place at the specified time.
Printing does not take place
after reception.
A received image prints out
blank.
The received image is faint.
The received image is
distorted.
White or black lines appear
in the transmitted image.
A dial tone is not heard
through the speaker.
A ringing sound is not
Telephone
made.
Check
Is the fax power switch turned on?
Is the correct dial mode set for your
line?
Is the telephone line properly connected?
Is the main switch turned on?
Is the machine in fax mode?
Does the receiving fax machine hav e
paper?
Does the receiving machine support
G3 transmission?
Are the sub-address and passcode correct?
Is the receiving machine ready to receive?
Is the original within the range of
transmittable documents?
Was the original placed so that the
correct side is scanned?
If the receiving machine is using
thermal paper, was the thermal paper
loaded with the wrong side out?
Were line conditions poor due to
thunder or another reason?
Were the resolution and exposure
settings suitable?
Is the machine's clock set to the
correct time?
Does a message appear in the display
instructing you to add toner or paper?
(Printing is not possible.)
Was the wrong side of the original
scanned in the transmitting machine?
Is the original faint?
Were line conditions poor due to
thunder or another reason?
Is the document glass or the scanner
in the scanning unit dirty?
Is the volume set to "low"?
Has the ringer volume been turned
off?
Turn on the fax power s witch.
Check your line and set the
correct dial mode.
Check the connections.
Turn the main switch on.
Press the IMAGE SEND ke y to
set the machine to fax mode.
Check with the operator of the
receiving machine.
Check the transmittable sizes .
Make sure the original is
placed so that the correct side
is scanned.
Check with the operator of the
other machine.
Try the transmission again.
Check the resolution and
exposure settings.
Set the clock to the correct
time.
Restore printing capability as
instructed by the display
message. Printing will begin.
Check with the operator of the
transmitting machine.
Ask the other party to re-send
the document using a suitable
exposure setting.
Ask the other party to send the
document again.
Clean the document glass or the
scanner in the scanning unit.
Set the speaker volume to
"medium" or "high".
Set the ringer volume to "low",
"medium", or "high".
Solution
Page
0-1
8-4
Printer manual,0-7
Printer manual,1-4
1-3, 2-2
-
1-8
1-7
-
-
1-9 and 1-10
Printer
manual, 3-6
7-3
-
-
-
Printer
manual, 4-12
8-5
8-5
* Printer manual : "Operation manual (for printer operation and general information)"
7-4
Page 73

CHAPTER 8
KEY OPERATOR
PROGRAMS
This chapter explains the key operator programs used by key operators.
Key operators should read this chapter well to ensure correct use of the
programs.
Page
KEY OPERATOR PROGRAMS............................................................. 8-2
●KEY OPERATOR PROGRAM LIST ............................................... 8-2
●USING THE KEY OPERATOR PROGRAMS................................. 8-2
●SETTING PROGRAMS .................................................................. 8-3
●PRINTING OUT SETTINGS ........................................................... 8-10
8-1
Page 74

KEY OPERATOR PR OGRAMS
This section explains the ke y oper ator progr ams for the fax features of the machine. For ke y oper ator prog rams that
are related to the printer and copy functions of the machine, refer to the KEY OPERATOR'S GUIDE and "Operation
manual (for copier)".
NOTES
• You may not be able to use all of the programs in the key operator program list. Programs that you can use will depend on
what peripheral devices are installed on the machine.
• Settings established with the key operator programs can be verified by printing them out (page 8-10).
KEY OPERATOR PROGRAM LIST
Program name Page
Image send settings
Operation settings
Default display setting 8-3
The number of direct address keys displayed setting
Must input next address ke y at broadcast setting
Initial resolution setting 8-3
Scan complete sound setting 8-3
Fax default settings
Own number and name set 8-4
Auto wak e up print 8-4
Pause time setting 8-4
V olume adjustment 8-4
Original print on send error report 8-5
Remote reception number setting 8-5
Transaction report print select setting 8-5
Activity report print select setting 8-5
ECM 8-5
Distinctive ring detection 8-6
8-3
8-3
Fax send settings
Auto reduction sending setting 8-6
Rotation sending setting 8-6
Printing page number at receiver 8-6
Call timer at memory sending 8-7
Date/own number print position setting 8-7
Recall in case of line busy 8-7
Recall in case of communication error 8-7
Times of recall setting in case of line busy
Interval of recall setting 8-7
Quick on line sending 8-7
Fax receive settings
Auto receive reduce setting 8-8
Number of calls in auto reception 8-8
Duplex reception setting 8-8
Print style setting 8-8
Set the telephone number for data f orwarding
Fax separator page 8-8
Output tray setting 8-8
Fax polling security
Polling security setting 8-9
Passcode number setting 8-9
Set number of times public box may be polled
8-7
8-8
8-9
USING THE KEY OPERATOR PROGRAMS
To use a key operator program, follow the procedure on page 6-6 of "Operation manual (for printer operation and
general information)". (Please carefully read "Supplementary explanation of key oper ation for ke y operator programs
(when using the operation panel with touch panel)" on the same page.) For e xplanations of each setting, ref er to the
following pages.
8-2
Page 75

KEY OPERATOR PROGRAMS
SETTING PROGRAMS
The setting programs for the f ax feature of the machine
are explained here. Explanations of the setting programs
used for the copy f eature, setting programs used f or the
network scanner feature, and setting programs that are
related to the printer feature can be found in the copy,
network scanner, and printer manuals.
Operation settings
The following operation settings are a vailab le:
●Default display setting
●The number of direct address keys displa yed setting
●Must input next address ke y at broadcast setting
●Initial resolution setting
●Scan complete sound setting
Default display setting
You can select the initial display that appears when
you press the IMAGE SEND key to change to fax
mode or when you press the CA key in fax mode.
Normally the initial display is set to the condition setting
screen (page 1-4).
The following three selections are av ailable:
• Condition setting screen
• Address directory (ABC)
• Address directory (Group)
When an address directory (ABC or Group) is
selected, the selected index of that address directory
(page 1-5) is set as the initial screen.
The number of direct address keys
displayed setting
The number of one-touch keys displayed in each
address directory screen can be changed from 8
(the normal setting) to 6 or 12.
Touch 6, 8, or 12 to select the desired number .
NOTE
For the key name that appears in each one-touch key, a
maximum of 18 characters can appear when the number
of one-touch keys display ed is set to 6 or 8. A maxim um of
10 characters can appear when the number of one-touch
keys displayed is set to 12.
Must input next address key at
broadcast setting
Y ou can select whether the NEXT ADDRESS ke y must
be pressed before entering the next destination when
performing a broadcast transmission (page 3-2).
Normally the machine is set so that touching the NEXT
ADDRESS key can be omitted except when the
numeric keys are used to enter one full fax number
after another full fax number .
Example: Normal setting (factory setting)
XXXX NEXT ADDRESS One-touch NEXT ADDRESS One-touch
Dial
Can be omitted Can be omitted
XXXX NEXT ADDRESS XXXX
Dial
Cannot be omitted.
If the box is check ed, it will no longer be possible to
omit the NEXT ADDRESS key as shown in the
above example. Even if the next destination to be
entered is a one-touch key, the NEXT ADDRESS
key must be touched bef ore the one-touch k e y can
be entered.
If you attempt to enter a subsequent destination
without touching the NEXT ADDRESS key, the
destination will not be entered.
Dial
Initial resolution setting
This setting is used to change the default resolution
setting for fax mode from STANDARD to FINE,
SUPER FINE, or ULTRA FINE. HALF TONE can
also be selected for the latter three resolution
settings. STANDARD is normally selected for the
initial resolution setting. If you wish to select HALF
TONE f or the selected resolution setting, touch the
HALF T ONE k e y to highlight it.
NOTES
• HALF TONE cannot be selected for STANDARD
resolution.
• For more information on each of the resolution settings,
refer to page 1-9.
8
Scan complete sound setting
You can select whether or not a beep sound is made
after an original is scanned on the scanner unit.
Normally a beep sound is made.
You can select "High" or "Low" for the volume of the
beep.
8-3
Page 76

KEY OPERATOR PROGRAMS
Fax default settings
The default fax settings can be changed as necessary
to meet your faxing needs.
The default fax settings are as f o llows:
●Own number and name set
●Auto wak e up print
●Pause time setting
●Speaker volume setting
●Original print on send error report
●Remote reception number setting
(only when extension phone is connected)
●Transaction report print select setting
●Activity report print select setting
●ECM (This setting is only effective if the other
machine is a G3 machine that supports ECM)
●Distinctive ring detection
Own number and name set
Use this setting to enter the fax number of the
machine and the name of the user. The entered
name and number are printed at the top of each fax
page you send. The number is also used as a
passcode when performing polling reception (page
3-5).
Y ou can chec k your entries by printing out the Sender
List. Ref er to page 8-10.
Auto wake up print
Use this setting to select how the machine responds
if a fax is received when the main switch is turned
off (the fax switch is turned on).
Auto wake up print is nor mally turned on, which
means that the machine automatically activates and
prints the received fax. If you turn off this setting,
received fax es will not be printed until the main switch
is turned on.
Pause time setting
This setting is used to select the duration of pauses
that are inserted in destination fax numbers.
Normally the setting is 2 seconds, which means that
each time the PAUSE key is touched when dialing
or storing a fax number, a pause of 2 seconds is
inserted. You can select any number of seconds from
1 to 15.
T ouc h the NAME ke y and enter the name.
1
The name entry screen appears.
Up to 20 characters can be entered for the name. Refer
to page 6-15 for the procedure for entering characters.
T ouch the F AX No. key and enter the fax n umber.
2
Enter up to 20 digits for the number using the numeric
keys.
To enter a "+", press the " " key.
To enter a space, press the SPACE key.
If you make a mistake , press the C k e y and re-enter the
correct digit.
T ouch the OK ke y.
3
Y ou will return to the OWN NUMBER AND NAME SET screen.
The number you entered appears. Make sure it is correct.
8-4
Page 77
KEY OPERATOR PROGRAMS
Volume adjustment
This setting lets you adjust the volume of the dial tone
heard through the speaker , the ringer, the line monitor,
the fax receive signal, and the f ax communication error
signal. These are normally set to medium.
KEY OPERATOR PROGRAMS
VOLUME ADJUSTMENT
SPEAKER
RINGER VOLUME
LINE MONITOR
Volume: Volume: Volume:
Low Medium High
OK
Off
T o change the v olume, touch the desired volume ke y .
Original print on send error report
This setting is used to select whether a portion of the
first page of the original is included on the T r ansaction
Report that is printed after a memor y transmission
error occurs. The machine is normally set to include a
portion of the original.
Remote reception number setting
(only when extension phone is connected)
Fax reception can be activated from an extension
phone connected to the machine by entering a 1-digit
number and pressing "
" twice on the phone's keypad.
This number is called the remote reception number,
and you can set it to any number from "0" to "9". The
number is normally set to "5".
Transaction report print select setting
This setting is used to select the conditions for printing
out Transaction Reports. Conditions can be selected
for normal transmissions, broadcast transmissions,
receptions, and confidential receptions.
SINGLE SENDING BR OADCASTING
PRINT OUT ALL REPORT PRINT OUT ALL REPORT
PRINT OUT ERROR REPORT ONLY PRINT OUT ERROR REPORT ONLY
NO PRINTED REPORT NO PRINTED REPORT
Touch the key to display the next two settings.
Select the print conditions for receptions and
confidential receptions
RECEIVING
CONFIDENTIAL RECEPTION
Activity report print select setting
You can select whether to have the activity report
automatically printed out after 50 transactions (both
transmissions and receptions) have been recorded,
or specify a time that the report is to be automatically
printed out (once a day only). Both settings can be
selected if desired.
The machine is initially set to not print the report. To
have the report automatically printed every 50
transactions, check the AUTO PRINT AT MEMORY
FULL box. To have the report automatically printed at
a specified time, check the PRINT DAILY AT
DESIGNA TED TIME box and then select the time with
the HOUR and MINUTE keys that appear .
KEY OPERATOR PROGRAMS
ACTIVITY REPORT PRINT SELECT SETTING
AUTO PRINT AT MEMORY FULL
PRINT DAILY AT DESIGNATED TIME
HOUR MINUTE
13 01
OK
Touch the HOUR key and then set the hour by
touching the and keys. Set the minute in the
same way. When finished, touch the OK ke y.
NOTES
• If you only select the PRINT DAILY AT DESIGNATED
TIME setting and the number of recorded transactions
exceeds 50 before the specified time, each new
transaction will delete the oldest transaction (the oldest
transaction will not be printed).
• The activity repor t can also be printed out on demand
(page 8-10).
ECM
(This setting is only effective if the other machine is
a G3 machine that supports ECM)
Line conditions can sometimes distort a transmitted
fax image. When ECM (Error Correction Mode) is
turned on, pages that are distorted are automatically
re-transmitted. This setting is initially turned on. If
turned off, distorted images will be transmitted
without being corrected.
NOTE
If the other machine supports Super G3, ECM will function
regardless of the setting.
8
PRINT OUT ALL REPORT PRINT OUT NO TICE P A GE
PRINT OUT ERROR REPORT ONLY
NOT PRINT OUT NOTICE PAGE
NO PRINTED REPORT
The normal settings are indicated by shading
above.
8-5
Page 78
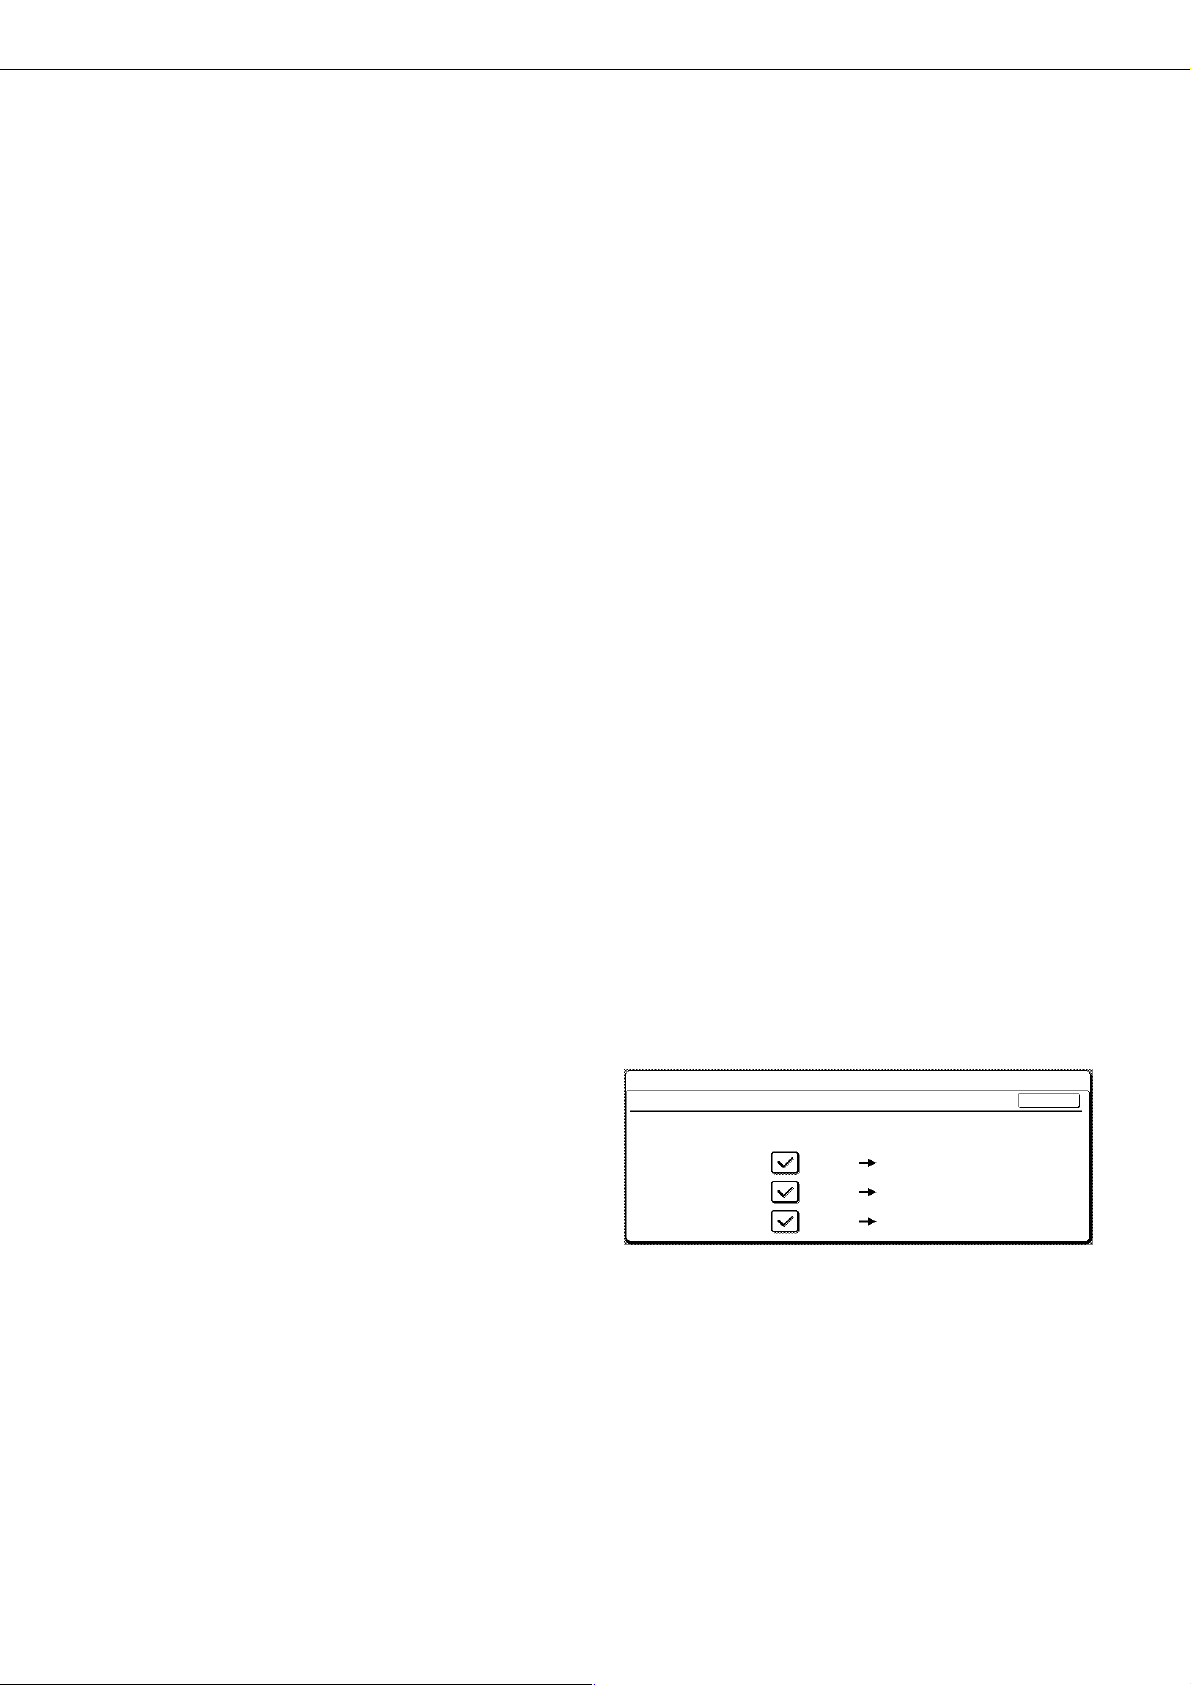
KEY OPERATOR PROGRAMS
Distinctive ring detection
This program can only be activated in Canada,
Australia, and New Zealand.
If multiple telephone numbers hav e been assigned to
your telephone line, the number called can be identified
by its ringing pattern. By using one number f or v oice
calls and another number for f axes, you can tell which
type of call you are receiving by the ringing pattern.
You can set your machine to automatically receive
faxes when your fax number is called by setting the
pattern that corresponds to your fax number. (Note
that in Canada, six selections are available .) Normally
OFF is selected.
Fax send settings
The fax transmission settings allow y ou to adjust certain
parameters for sending f axes to better suit y our needs.
The fax send settings are as follo ws:
●Auto reduction sending setting
●Rotation sending setting
●Printing page number at receiver
●Call timer at memory sending
●Date/own number print position setting
●Recall in case of line busy
●Recall in case of communication error
●Times of recall setting or times of recall setting in
case of line busy
●Interval of recall setting
●Quick on line sending
Auto reduction sending setting
This setting lets you select whether to have a tr ansmitted
document reduced to match the size of the other
machine's printing paper. Auto reduction is normally
turned on. If the setting is turned off, documents are
sent in their original size. Because the size is not
adjusted to match the size of the printing paper, part of
the received document may be cut off .
Rotation sending setting
When transmitting a document, this setting allows
you to rotate a vertically oriented 8-1/2"x11" (A4)
document to a horizontal orientation (8-1/2"x11"R
(A4R)), or rotate a 5-1/2"x8-1/2"R (B5R or A5R)
document to 5-1/2"x8-1/2" (B5 or A5). The setting is
normally turned on, and documents are rotated
counterclockwise. (8-1/2"x11"R (A4R) documents
are not rotated.)
KEY OPERATOR PROGRAMS
ROTATION SENDING SETTING
ORIGINAL
SET
SENDING
DIRECTION
A4RA4
B5RB5
A5RA5
Rotation settings can be separately established for
different document sizes. T o turn off a rotation setting,
touch the checkbox of the appropriate setting to
remove the checkmark.
Printing page number at receiver
This setting lets you select whether page numbers
are printed at the top of fax pages by the receiving
machine. The normal setting is to have page
numbers printed.
OK
8-6
Page 79

KEY OPERATOR PROGRAMS
Call timer at memory sending
When sending a fax by automatic transmission, this
setting lets you select the amount of time that the
machine waits before breaking the connection when
the other machine does not respond to your
machine's calling tone. If the other machine does
not respond within this set time, your machine will
automatically break the connection. Time selections
are 30 seconds, 45 seconds, and 60 seconds. This
setting is normally set to 45 seconds.
Date/own number print position setting
This setting lets you select the position (inside or
outside the original image) of the sender's name
and number that are printed at the top of each fax
page you send. Normally OUTSIDE THE ORIGINAL
IMAGE is selected. T o ha ve your name and number
printed inside the original image, select INSIDE THE
ORIGINAL IMAGE. For more detailed information
on the position of each setting, refer to page 3-9.
Recall in case of line busy
When sending a document, this setting is used to
select whether your machine will automatically reattempt the call when the other machine fails to
answer or the line is busy. Normally your machine is
set to re-attempt the call, and you can set the number
of attempts and the interval between attempts with
the "times of recall setting or times of recall setting
in case of line busy" and "interval of recall setting"
below .
NOTE
Even if this setting is turned on, your machine will not reattempt the call when a document is sent by manual
transmission.
Recall in case of communication error
When sending a document, this setting is used to
select whether your machine will re-attempt the call if
the transmission fails due to a line error . Normally your
machine is set to not automatically re-attempt the call.
To set the machine to automatically re-attempt the
call, touch the box so a checkmark appears, and then
adjust the "times of recall setting" and the "interval of
recall setting" below. Note that in Canada, Australia
and New Zealand, only one re-attempt is made (the
number of re-attempts cannot be selected).
Times of recall setting or Times of recall
setting in case of line busy
If you hav e set the machine to re-attempt a call when
a fax transmission is not successful due to the line
being busy, this setting lets you select the number
of times the machine re-attempts the call.
The number of recall times that can be set in each
country are shown in the following table.
Country Differentiation Table
United Kingdom
In case of line busy
In case of
communication error
Normally , the number marked by the asterisk (*) is set.
1 to 10 (*2) 1 to 9 (*2)
1 to 5 (*1) 1 only
Canada,
Australia and
New Zealand
Interval of recall setting
If you hav e set the machine to re-attempt a call when
a fax transmission is not successful due to the line
being busy or a communication error, this setting
lets you select the interval at which the machine reattempts the call (the attempt is stored as a
transmission job). You can select any number of
minutes from 1 to 15. Normally, "3" is set for line
busy and "1" is set for communication error.
Quick on line sending
When this setting is turned on, the machine will call
the other machine and start transmitting the
document as soon as the first page is scanned.
T ransmission theref ore takes place at the same time
as any further pages are being scanned. Normally
this setting is turned on.
If you turn the setting off, transmission will not begin
until all pages of the document have been scanned.
Note that this setting does not apply to manual
transmission.
8
NOTE
Even if this setting is turned on, your machine will not reattempt the call when a document is sent by manual
transmission.
8-7
Page 80

KEY OPERATOR PROGRAMS
FAX SEPARATOR PAGE
DISABLE FAX SEPARATOR PAGE
PLAIN PLAIN
TRANSPARENCY PLAIN
COLOR
BYPASS
OK
B5
B4
A4
A4
KEY OPERATOR PROGRAMS
Fax receive settings
The fax reception settings allow you to adjust certain
parameters for receiving f axes to better suit your needs .
Settings that can be adjusted depend on the peripheral
devices installed.
The fax receive settings are as f ollo ws:
●Auto receive reduce setting
●Number of calls in auto reception
●Duplex reception setting
(only when the duplex module is installed)
●Print style setting
●Set the telephone number for data f orwarding
●Fax separator page
●Output tray setting
Auto receive reduce setting
When you receive a fax that includes the sender's
name and number, the receiv ed image is slightly larger
than the standard size. This setting lets you select
whether to have the received image automatically
reduced before printing to fit the standard size.
Normally automatic reduction is turned on.
NOTE
If you turn automatic reduction off, the overall printed image
may be larger than the original and in some cases must
be split onto two pages. How ev er , the printed image of the
original itself will be the same size as the original, and
thus clearer.
Number of calls in auto reception
This setting is used to select the number of rings on
which the machine automatically receives a call and
begins fax reception when the reception mode is set
to auto. You can select a number of rings from 0 to 9.*
Normally "2" is selected.
*Note that in Australia and Ne w Zealand, the number
of rings can be selected from 2 to 4.
NOTE
If you select "0" for the number of rings, the machine will
immediately answer and begin fax reception without ringing
in auto reception mode.
However, do not select "0" when an extension phone is
connected to the machine.
Print style setting
This setting determines the selection condition for
paper when printing received documents. Select one
of the three conditions below . A UTO SIZE SELECT
is normally selected.
• PRINT ACTU AL SIZE CUT OFF DISABLED
Each received image is printed at actual size
without splitting the image onto multiple sheets of
paper. If there is no paper av ailable that is the same
size as the image or greater , the entire document
is temporarily stored in memory.
• PRINT ACTU AL SIZE CUT OFF ENABLED
Each received image is printed at actual size. If
necessary , the image is split onto multiple sheets
of paper.
• AUTO SIZE SELECT
Each received image is printed at actual size when
possible. When not possible, the image is
automatically reduced before printing.
Set the telephone number for data forwarding
When a problem prev ents the machine from printing
a received fax, the transf er function (page 3-12) can
be used to forward the received fax to another fax
machine. Use this setting to program the fax number
of the destination fax machine. Only one fax number
can be programmed (maximum of 64 digits).
If you wish to specify an F-code confidential memory
box in the destination machine, touch the SUB
ADDRESS key after entering the fax n umber to enter
a slash "/", and then enter the sub-address. Enter a
passcode as well if needed.
Fax separator page
This setting is used to have the machine output a
blank sheet of paper after printing each received
fax. The blank sheet acts as a separator between
received fax es, making it easy to distinguish where
one fax ends and another begins. This setting is
normally turned off.
If you wish to have the machine insert separator
sheets between fax es, touch the bo x to remov e the
checkmark.
Duplex reception setting
(only when the duplex module is installed)
When the duplex module is installed, you can use this
setting to select whether received documents are
printed on both sides of the paper. Normally this setting
is turned off. If turned on, received documents will be
printed on both sides of the paper whenever the
received document consists of two or more pages of
the same paper size.
8-8
When the setting is turned on, the tray keys can be
touched. Select the tray from which you would like
the separator paper to be drawn.
Output tray setting
This setting is used to select the output tray for
received faxes. The trays that can be selected will
vary depending on what peripheral devices have
been installed.
Page 81

KEY OPERATOR PROGRAMS
Fax polling security
These settings are for using the Public Box for polling
memory. Note that they do not apply to F-code polling
memory.
The fax polling security are as follows:
●Polling security setting
●Passcode number setting
●Set number of times public box ma y be polled
Polling security setting
When performing polling memory , this setting is used
to select whether any machine will be allowed to
poll your machine, or only machines that hav e been
programmed in your machine. Polling security is
normally turned on (a checkmark appears in the box).
To allow any machine to poll your machine, touch
the box to remov e the checkmark.
Passcode number setting
When the polling security setting is turned on, use
this setting to program (or delete) the fax numbers of
the machines that are allowed to poll your machine.
Programmed fax numbers are called passcodes . Up
to 10 fax numbers can be programmed.
Deleting a passcode
T ouch the DELETE ke y.
1
The passcode delete screen appears.
T ouch the key of the number you wish to delete.
2
T ouch the YES ke y in the message that appears to delete the
number. If you touch the NO ke y, y ou will return to the passcode
delete screen without deleting the number.
Set number of times public box may be polled
This setting is used to select whether the document
stored in the Public Box is automatically cleared after
one polling transmission (polling memory), or
whether the document is left in the Public Box to
allow polling an unlimited number of times.
Normally the machine is set to automatically clear
the document after transmission (the ONCE key is
highlighted), so that polling can only take place once.
If you wish to leav e the document in the Public Bo x
to allow polling an unlimited number of times, select
the UNLIMITED key.
Programming passcode numbers
T ouch the ENTER ke y.
1
The passcode entry screen appears.
Touch a blank key (a key in which no number
2
appears).
KEY OPERATOR PROGRAMS
PASSCODE NUMBER SETTING
ENTER
0743535521
0666211221
Keys with numbers cannot be touched.
If numbers have been stored in all of the ke ys, a message will
appear and no further numbers can be stored. First delete a
number that is no longer needed and then store the new
number.
Press the numeric keys to store the fax number .
3
Up to 20 digits can be entered.
To enter a space, touch the SPACE key. To enter a "+",
press the " " key.
If you make a mistake, press the C key.
OKCANCEL
8
T ouch the OK ke y.
4
You will return to the screen of step 2 and the stored fax
number will appear. To store another number, repeat steps 2
through 4.
8-9
Page 82

KEY OPERATOR PROGRAMS
DISPLAY
CONTRAST
RECEIVE MO
LIST PRIN
KEY OPERATOR PROGRAMS
ADDRESS
CONTROL
ON
DEVICE CONTROL
LIST PRINT
IMAGE SENDING ACTIVITY REPORT
SENDER LIST
ALL KEY OPERATOR PROGRAMS LIST
PRINTING OUT SETTINGS
Settings established with the key oper ator programs can be v erified by printing them out.
Press the CUSTOM SETTINGS key.
1
T ouch the KEY OPERATOR PROGRAMS key.
2
NOTES
• The list is printed before other jobs waiting to be printed.
• In the screen of Step 4, you can touch the SENDER LIST key to print the Sender List. This allows you to check the name and
fax number you programmed in "Own number and name set" on page 8-4.
• In the screen of Step 4, you can touch the IMAGE SENDING ACTIVITY REPORT ke y to print an activity report (transmissions
and receptions). Print this list when you wish to check the activity record.
T ouch the LIST PRINT ke y.
3
Touch the ALL KEY OPERATOR PROGRAMS
4
LIST key .
PROCESSING PRINT DAT A
appears in the message
screen and printing begins.
T o cancel printing, touch the
CANCEL key.
8-10
Page 83

CHAPTER 9
APPENDIX
This chapter contains reference information regarding the fax features of
the machine.
Page
SPECIFICATIONS ................................................................................. 9-2
9-1
Page 84

SPECIFICATIONS
For inf ormation on power requirements, power consumption, dimensions, w eight, and other specifications that are common to all
features of the machine, ref er to page 6-2 of "Operation manual (for printer operation and gener al information)".
For the specifications of the scanner unit, refer to "Oper ation manual (for copier)".
Applicable telephone line Public switched telephone network
Compression method MH, MR, MMR, JBIG
Transmission modes Super G3, G3 (the machine can only send faxes to and receiv e fax es from machines
that support G3 or Super G3)
Scanning method CCD flatbed scanning
Scanning resolution 200 x 100 dpi (Standard)
(Supports ITU-T standards) 200 x 200 dpi (Fine, Fine-Halftone)
300 x 300 dpi (Super Fine, Super Fine - Halftone)
400 x 400 dpi (Ultra Fine, Ultra Fine - Halftone)
Printing method Electrophotographic system (laser)
T r ansmission speed 33.6 kbps
T ransmission time*
Paper sizes 11"x17" to 5-1/2"x8-1/2", A3, B4, A4, B5, A5
Effective print width 11" max. (11"x17" printing) or 293mm max. (A3 printing)
Input document size 11"x17" to 5-1/2"x8-1/2" or A3 to A5 (5-1/2"x8-1/2" or A5: V ertically-oriented feeding);
Effective scanning width 11.7" (297mm) maximum
Halftone transmission Yes (256 levels)
Contrast adjustment Automatic (dark and light by manual adjustment)
Extension telephone connection
Auto dialing Combined total of 500 one-touch and group keys, redialing (automatic)
Timer transmission Yes
Program function Yes (8 programs)
F-code support Yes (can transmit and receive SUB/SEP (sub-address) and SID/PWD (passcode)
Automatic document feeding Yes (50 pages; 8-1/2"x14" (B4) or larger sizes: 30 pages)
Image memory 2 MB*
Error Correction Mode (ECM) Yes
1
2 seconds (Super G3 mode / 33.6 kbps, JBIG), 6 seconds (G3 ECM mode / 14.4
kbps, MMR)
Maximum length: 31-1/2" or 800mm (using DSPF)
*Refer to pages 2 - 4 for tr ansmission of 5-1/2"x8-1/2" (A5) siz e documents.
Possib le (1 telephone)
signals)
2
2.4 kbps Automatic fallbac k
*1Transmission speed is for an 8-1/2"x11" (A4) document with appro ximately 700 characters at standard resolution
(8x3.85 lines/mm) sent in high speed mode (33.6 kbps (JBIG) or 14.4 kbps (MMR)). This is only the time required
to transmit the image information; the time required to send protocol signals is not included. Actual transmission
times will vary depending on the contents of the document, the receiving machine type, and telephone line conditions.
*2Image memory can be expanded by installing the optional fax expansion memory (8 MB).
Some discrepancies may exist in the illustrations and content due to impro vements to the machine.
9-2
Page 85

NOTE
9-3
9
Page 86

NOTE
9-4
Page 87

Page 88

 Loading...