

Page 1

AR-150
SERIES
FA CSIMILE OPERATION
MANU AL
c
INSTALLATION
c
INITIAL SETTINGS
c
CHOOSING SUITABLE MEDIA
c
HOW TO USE THE FAX FUNCTION
c
TROUBLESHOOTING
c
SPECIFICATIONS
c
GLOSSARY
c
QUICK REFERENCE
c
INDEX
Cover page(SUK).p65 21/09/99, 16:161
Page 2

This product contains a lithium-ion battery , and must be disposed of properly .
Contact your local environmental officials f or disposal instructions.
Important safety information
• If any of your telephone equipment is not operating properly, you should
immediately remove it from your telephone line , as it may cause harm to the
telephone network.
• The AC power outlet shall be installed near the equipment and shall be easily
accessible.
• Never install telephone wiring during a lightning storm.
• Never install telephone jacks in wet locations unless the jack is specifically
designed for wet locations.
• Never touch uninsulated telephone wires or terminals unless the telephone
line has been disconnected at the network interface.
• Use caution when installing or modifying telephone lines.
• Avoid using a telephone (other than a cordless type) dur ing an electrical
storm. There may be a remote risk of electric shock from lightning.
• Do not use a telephone to report a gas leak in the vicinity of the leak.
• Do not install or use the machine near water, or when y ou are wet. Take care
not to spill any liquids on the machine.
DECLARA TION
The equipment has been approved in accordance with Council Decision 98/482/
EC for pan-European single terminal connection to the public switched telephone
network (PSTN). However, due to differences between the individual PSTNs
provided in different countries, the approv al does not, of itself, give an unconditional
assurance of successful operation on ev ery PSTN network termination point.
This equipment may hav e interworking problems with Spanish pub lic network.
In the event of prob lems , y ou should contact your equipment supplier in the first
instance.
00 1 WANGa(SUK) A5.p65 11/10/99, 15:021
Page 3

TABLE OF CONTENTS
1. INSTALLATION
Introduction ........................................................................................................ 1-1
Choosing a Location .......................................................................................... 1-1
Parts Identification ............................................................................................. 1-2
Connections....................................................................................................... 1-3
Connecting theTelephone Line Cord ................................................................. 1-3
Final Preparations .............................................................................................. 1-4
Connecting Other Devices................................................................................. 1-4
2. INITIAL SETTINGS
A Look at the Operation Panel........................................................................... 2-1
About the Liquid Crystal Display........................................................................ 2-2
Using the Arrow Keys ........................................................................................ 2-2
Adjusting the Beep Volume................................................................................ 2-2
Adjusting the Ringing Volume ............................................................................ 2-3
Setting he Length of Alarm Beeps ..................................................................... 2-3
Turning Key beeps Off ....................................................................................... 2 -4
Setting the Language......................................................................................... 2-4
Fax Setup........................................................................................................... 2-5
How to Enter Characters .................................................................................... 2-5
Entering your Name and Fax Number ............................................................... 2-6
Setting the Date and Time ................................................................................. 2-7
Auto Summer Time Setting ................................................................................ 2-8
Selecting the Reception Mode........................................................................... 2-9
Setting the Number of Rings for Auto Reception............................................. 2-10
Setting the Number of Rings for Manual Reception ........................................ 2-10
Selecting the Reception Paper Size ................................................................ 2-11
Setting the Tray Paper Size.............................................................................. 2-12
Setting the Number of Recall Times ................................................................ 2-13
Setting the Recall Interval................................................................................ 2-14
Setting the Index Function ............................................................................... 2-15
Setting Fine Resolution Priority ....................................................................... 2-16
Setting Up the Unit for Use with a PC Modem................................................. 2-16
Using the Remote Reception Function............................................................ 2-17
PBX Setting...................................................................................................... 2-18
Storing Numbers for Automatic Dialing ............................................................ 2-19
Chain Dialing for Long Numbers ...................................................................... 2-21
Storing Numbers Under Group Keys ............................................................... 2-22
Using the Unit with an Answering Machine ..................................................... 2-24
Quiet Detect Time ............................................................................................ 2-24
Answering Machine Backup ............................................................................ 2-25
3. CHOOSING SUITABLE MEDIA
Originals Suitable for Faxing .............................................................................. 3-1
Size and Weight ................................................................................................. 3-1
Unsuitable Originals ........................................................................................... 3-2
00 2 TABLE a(SUK) A5.p65 11/10/99, 15:071
i
Page 4

Table of contents
4. HOW TO USE THE FAX FUNCTION
Sending Documents ...................................................................................... 4-1
Setting the Document.................................................................................... 4-1
Optional Transmission Settings ..................................................................... 4-3
Resolution ..................................................................................................... 4-3
Contrast......................................................................................................... 4-3
Cover Sheet ................................................................................................... 4-4
Auto Cover Sheet .......................................................................................... 4-5
Dialing and Transmitting ................................................................................ 4-6
Direct Keypad Dialing.................................................................................... 4-6
Rapid Key Dialing.......................................................................................... 4-7
Speed Dialing ................................................................................................ 4-7
Chain Dialing ................................................................................................. 4-8
Using the SEARCH Key ................................................................................ 4-9
Redialing ....................................................................................................... 4-9
Receiving Faxes .......................................................................................... 4-10
Using AUTO Mode....................................................................................... 4-10
Using MANUAL Mode ................................................................................. 4-10
Using A.M Mode.......................................................................................... 4-10
Optional Reception Settings........................................................................ 4-11
Receive Reduce .......................................................................................... 4-11
Footer Printing............................................................................................. 4-12
When using manual sending and receiving ................................................ 4-12
Special Functions........................................................................................ 4-13
Memory ....................................................................................................... 4-13
Memory Backup .......................................................................................... 4-13
Subsitute Reception into Memory ............................................................... 4-13
Data Transfer ............................................................................................... 4-14
Transmission Reservation ........................................................................... 4-15
Broadcasting ............................................................................................... 4-17
Polling .......................................................................................................... 4-19
Setting the Polling Key ................................................................................ 4-19
Polling Others.............................................................................................. 4-19
Being Polled (Memory Polling).................................................................... 4-20
Timer Operations......................................................................................... 4-22
Anti Junk Fax ............................................................................................... 4-24
Printing Out Reports.................................................................................... 4-26
Activity Report Auto Listing ......................................................................... 4-28
Printing Transaction Reports ....................................................................... 4-28
5. TROUBLESHOOTING
Troubleshooting ............................................................................................. 5-1
Messages and Signals .................................................................................. 5-2
Display Messages ......................................................................................... 5-2
Audible Signals .............................................................................................. 5-3
6. SPECIFICATIONS
Specifications ................................................................................................ 6-1
GLOSSARY
QUICK REFERENCE
INDEX
ii
00 2 TABLE a(SUK) A5.p65 11/10/99, 15:072
Page 5

1. INSTALLATION
Introduction
This manual describes how to use the fax function of the AR-150 series.
Part names and functions shared with the copy function (for example, the misfeed
indicator and add paper indicator), are described in the copier operation manual.
For more information, please read the copier operation manual.
Choosing a Location
All electrical equipment is potentially dangerous if not installed and operated correctly .
Make sure that you meet the following requirements when you set up or move the
unit.
• The unit must be installed on a level surface.
• Use only the rated voltage
from a properly grounded wall
socket.
• Keep the unit away from
areas that are:
- Dusty or smoky
- Damp or humid
- Poorly ventilated
- In view of windows or
extremely bright light
- In direct sunlight
- Subject to other extreme
conditions
• Provide ample room for easy
access to the front, back, and
sides of the unit.
• Leave enough space around
the ventilation outlets for heat
from the fan to dissipate
properly. Blocking these outlets
could cause the unit to
overheat, which can cause
serious damage to the internal
parts.
• Use of extension cords is not
recommended.
01 INSTALLATIONb(SUK)A5.P65 11/10/99, 15:251
INSTALLATION
Fan
1-1
Page 6
Parts Identification
Fax control panel
1-2
01 INSTALLATIONb(SUK)A5.P65 11/10/99, 15:252
INSTALLATION
Page 7

Connections
Connecting the Telephone Line Cord
Plug one end of the telephone line cord into the jack on the unit marked “TEL LINE.”
Plug the other side into the wall jack (using the provided adaptator, if necessary).
For Germany , please connect the cable from the f ax unit with the wired plug connector
code (F) with the wire down into the wall socket (TAE 6) code (F).
The fax unit can be used as single device and in combination (in serial connection)
with approved terminal equipment(s).
To connect an extension telephone or an answering machine, plug the extension
line cord in the provided wall jak adaptator.(See “Connecting Other Devices” in this
chapter for details.)
Note: If your area experiences a high incidence of lightning or power surges, we
recommend that you install surge protectors for the power and telephone
lines. Surge protectors can be purchased from your dealer or at most telephone
specialty stores.
01 INSTALLATIONb(SUK)A5.P65 11/10/99, 15:253
INSTALLATION
TEL
LINE
1-3
Page 8

Final Preparations
Connecting Other Devices
If desired, an answering machine or external telephone can be connected to the unit
by plugging the external line cord in the external jack of the wall jack (wall socket
code “N” for Germany) or in the provided adaptator.
• Connecting an answering machine to the unit allows you to receive both voice and
fax messages when you are out. To use this feature, first change the outgoing
message of your answering machine, and then set the reception mode of the unit to
“A.M.” (Answering Machine mode) when you go out.
The outgoing message of your answering machine should be changed to inform
callers who want to send a fax to press their FAX START key.
Comments:
1. It is advisable to keep the length of the message under 10 seconds. If it is too long,
you may have difficulty receiving faxes sent by automatic dialing.
2. Your callers can even leave a voice message and send a fax message on the
same call. Modify your outgoing message to explain that this can be done by
pressing their FAX START key after leaving their voice message.
• You can connect an extension phone to the unit to make and receive calls like any
other extension phone on your line. Even if you pick up the extension phone and
hear a fax tone, the unit will automatically cut in and take over the line.
Note: The Remote Recepion function is initially set to “ON”.
1-4
01 INSTALLATION(SUK)A5.P65 07/10/99, 10:294
INSTALLATION
Page 9
2. INITIAL SETTINGS
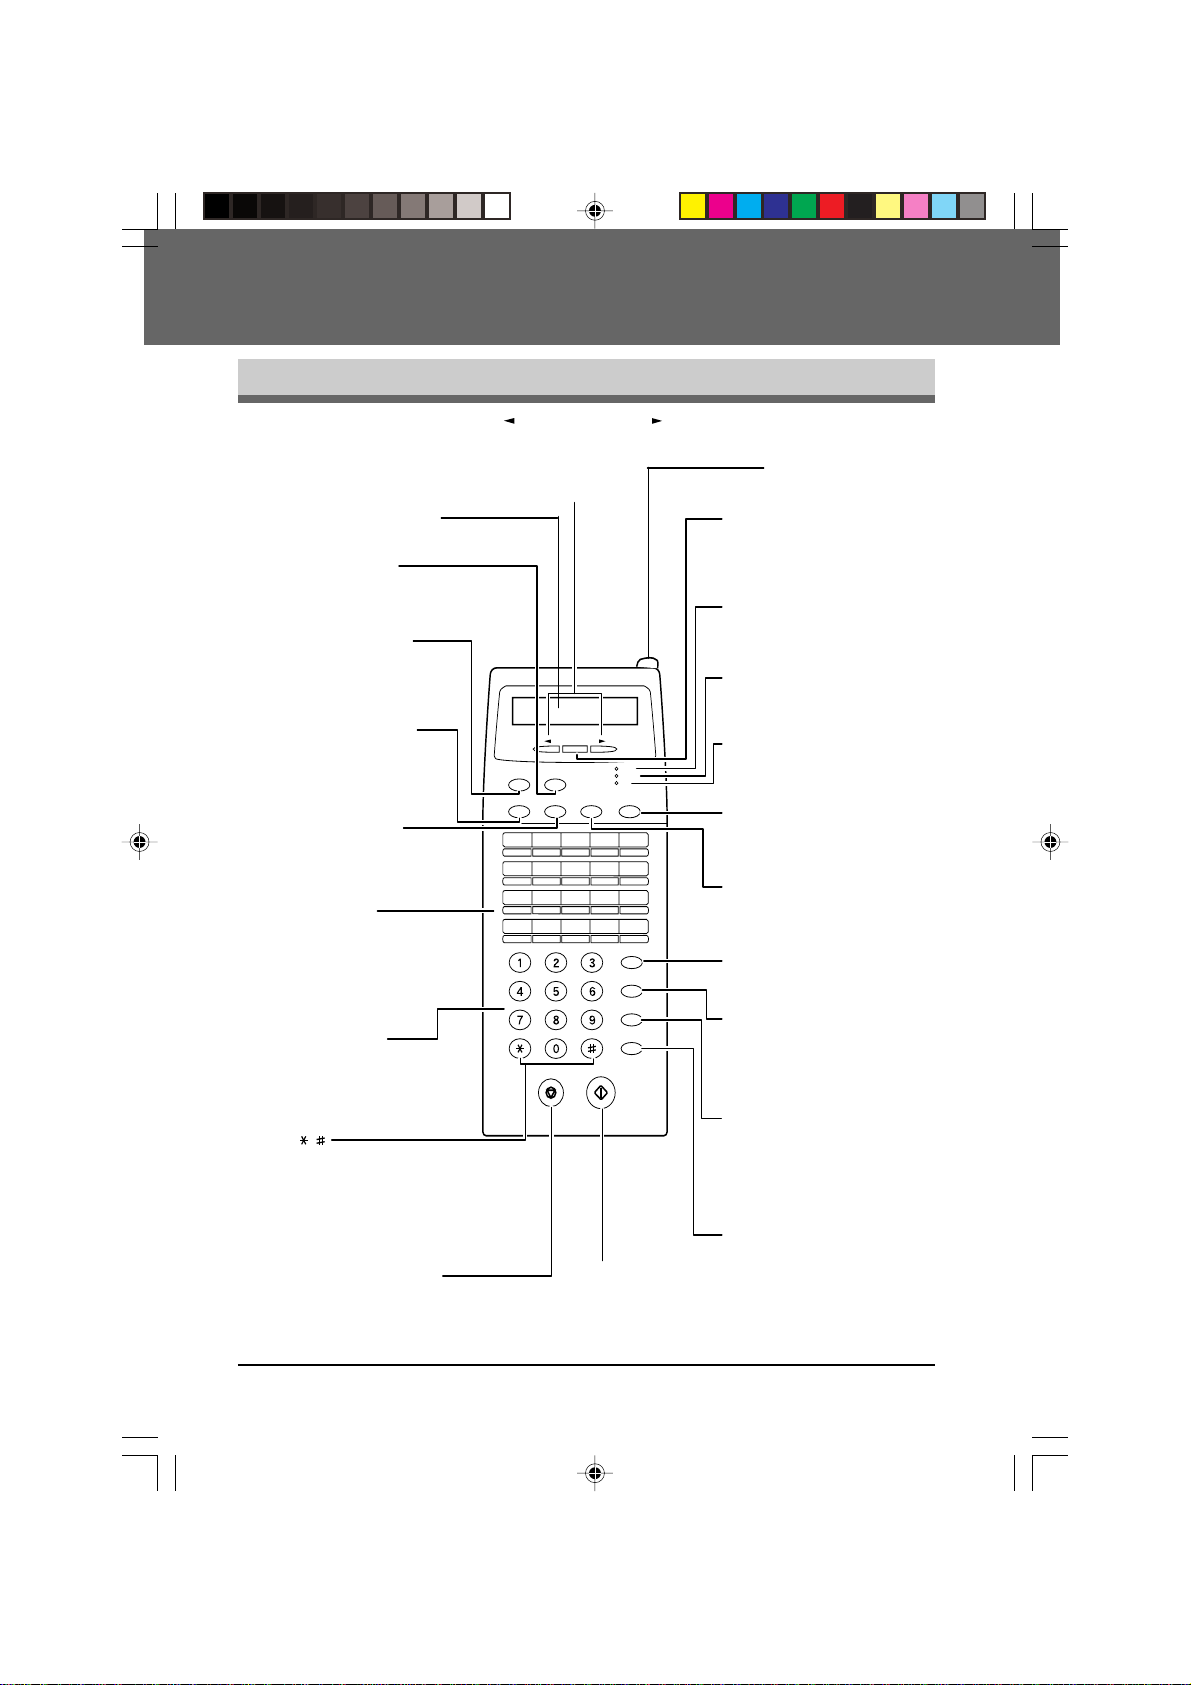
A Look at the Operation Panel
Left arrow key ( ) and right arrow key ( )
Press these keys to scroll through a menu. During
input mode, these keys are also sometimes used
to move the cursor.
LIQUID CRYSTAL DISPLAY
This display shows the various message
during fax operation and programming.
FUNCTION key
Press this key to
enter function
mode.
BOOK SEND key
Press this key to fax a
document from the
original table.
RESOLUTION key
Press this key to
adjust the resolution
before sending faxes.
CONTRAST key
Press this key to adjust
the contrast before
sending faxes.
Rapid keys
Press one of these keys
to dial a fax or telephone
number automatically.
Press Rapid key 20 to
start polling. (Note that
you must attach the
Rapid key labels.)
Number keys
Press these keys to dial
numbers, and enter
numbers and letters
during number/name
storing procedures.
/
Press these keys to enter
symbols during the name
storing procedure.
Pres these keys to scroll
thoruh a menu. During
input mode, these keys are
also sometimes used
move the cursor
to
STOP key
Press this key to stop an operation
before it is completed, or to delete
the number that was last input.
This key is also used to close the
line when manually dialing.
BOOK SEND
RESOLUTION CONTRAST BROADCAST
01 02 03 04 05
06 07 08 09 10
11 12 13 14 15
16 17 18 19 20/POLL
PQRS
ENTER
FUNCTION
ABC
DEF
MNO
JKL
GHI
WXYZ
TUV
FAX STARTSTOP
FAX START key
Press this key to begin
sending a fax or manually
receiving a fax.
AUTO
MANUAL
A.M.
RECEPTION
MODE
DOCUMENT
SPEED/
SEARCH
REDIAL/
PAUSE
SPEAKER
LCD contrasts dial
Turn this dial to adjust
the contrast level of
the LCD.
ENTER key
Press this key to decide an
item in a menu, or to enter
numbers and letters you
have typed in.
AUTO light
This light indicates that the
machine will answer
automatically.
machine
MANUAL light
This light indicates that
machine
must be answered
manually.
A.M. light
This light indicates the
answering machine will answer
the line if properly connected.
RECEPTION MODE key
Press this key to select
the mode of reception.
BROADCAST key
Press this key to send
documents to a group of
receiving fax machines.
DOCUMENT key
Press this key to perform a
direct send fax transmission.
SPEED/SEARCH key
Press this key to dial a two digit
Speed Dial number. During
character inputting, use this
key to delete an incorrect entry.
Press this key twice to search for
an automatic dialing number.
REDIAL/PAUSE key
Press this key to
automatically redial the last
number you dialed. Also,
press this key to insert a
pause when entering
numbers.
SPEAKER key
Press this key to begin
manual dialing. (To close the
line, press the SPEAKER
key again.)
the
the
02 INITAL. b(SUK) A5.p65 11/10/99, 13:401
INITIAL SETTINGS
2-1
Page 10

About the Liquid Crystal Display
The unit is equipped with a two-line liquid crystal display (LCD) on the operation
panel for displaying var ious messages and settings during operation. This LCD can
display up to 20 characters on each line. When the unit is idle, the LCD shows the
date, time, and the stand-by memory available.
Example:
Located to the upper right of the operation panel, the LCD contrast dial controls the
contrast of the display.Turning the dial to the right dar kens the LCD. Turning the dial
to the left lightens the LCD.
Using the Arrow Keys
The left and right arrow ( ) keys on the operation panel of the unit are ver y
useful for scrolling through the various function lists and settings. Once you have
pressed the FUNCTION key, you can scroll through the eight functions as desired.
(See the Function Table at the end of the Quick Reference Guide for an at-a-glance
view of all the unit’s functions and settings.) Pressing the ENTER key chooses the
displayed function. For many of the function lists, you can then use the arrow keys
again to scroll through the settings.
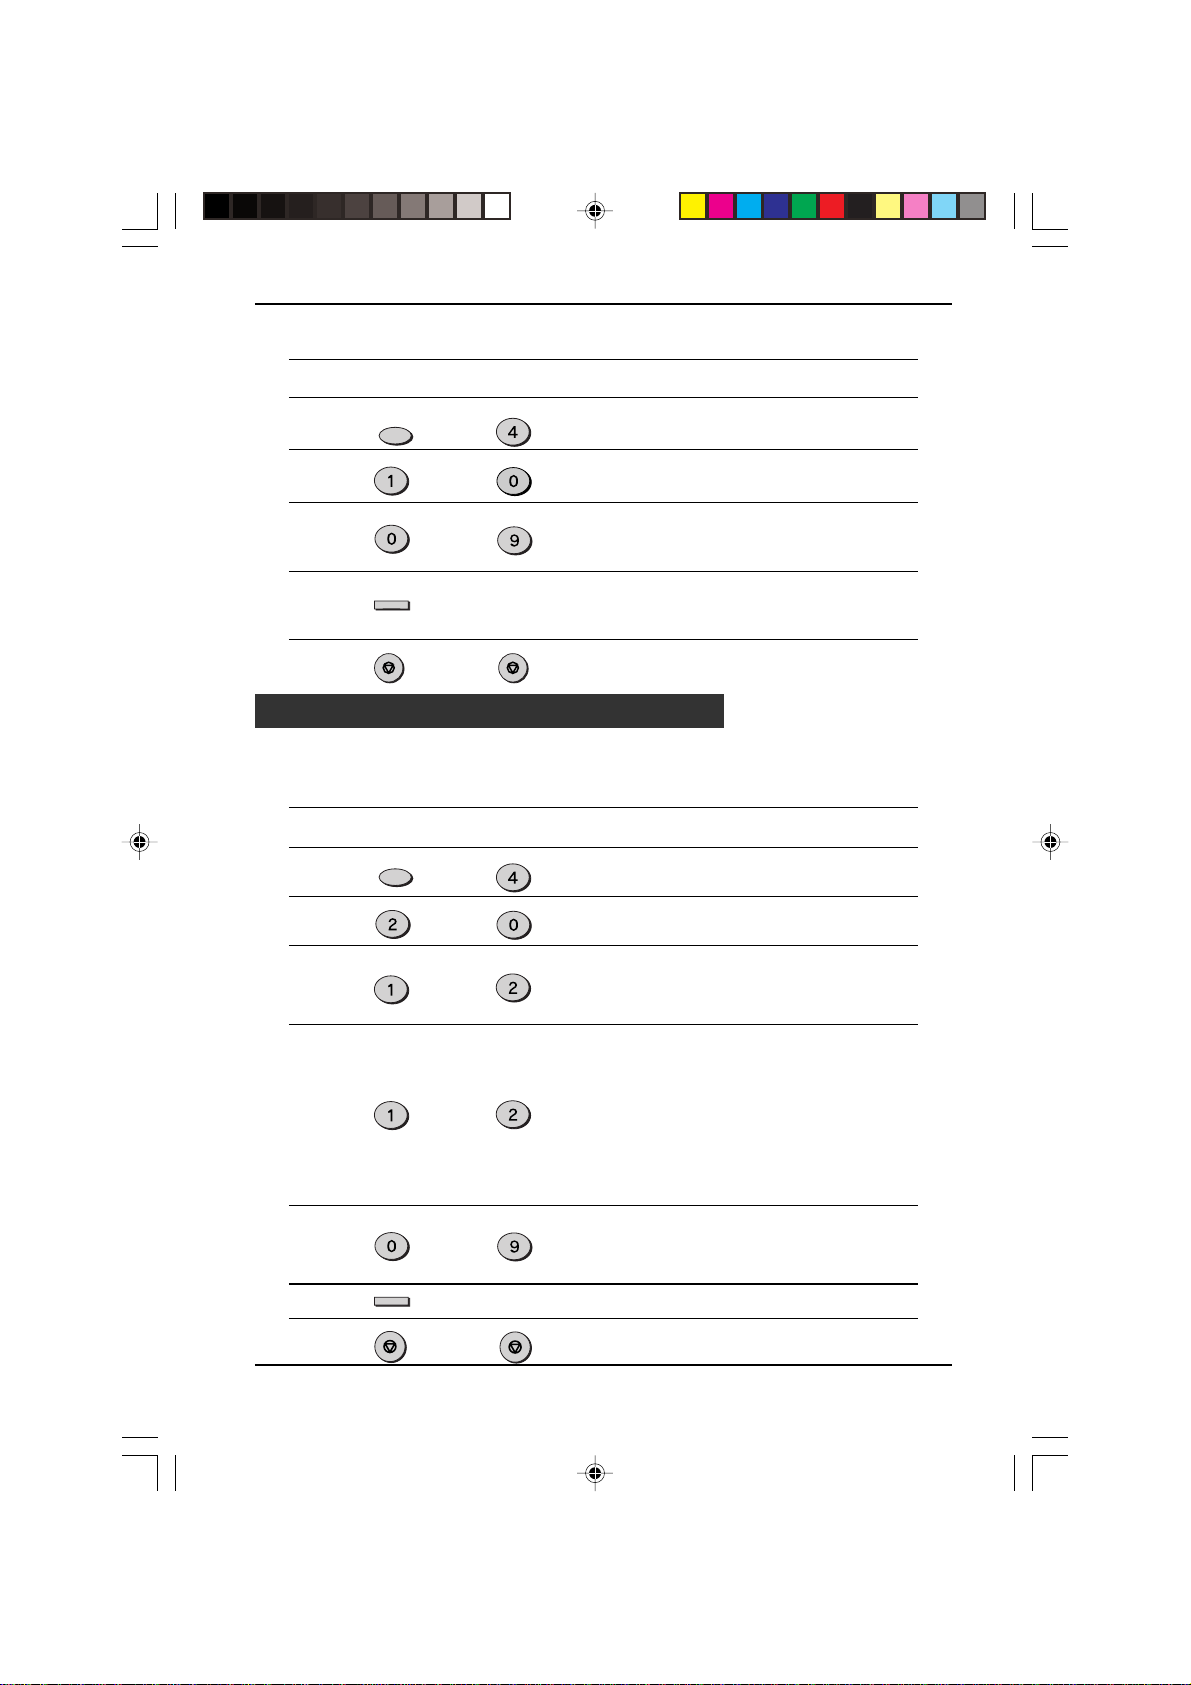
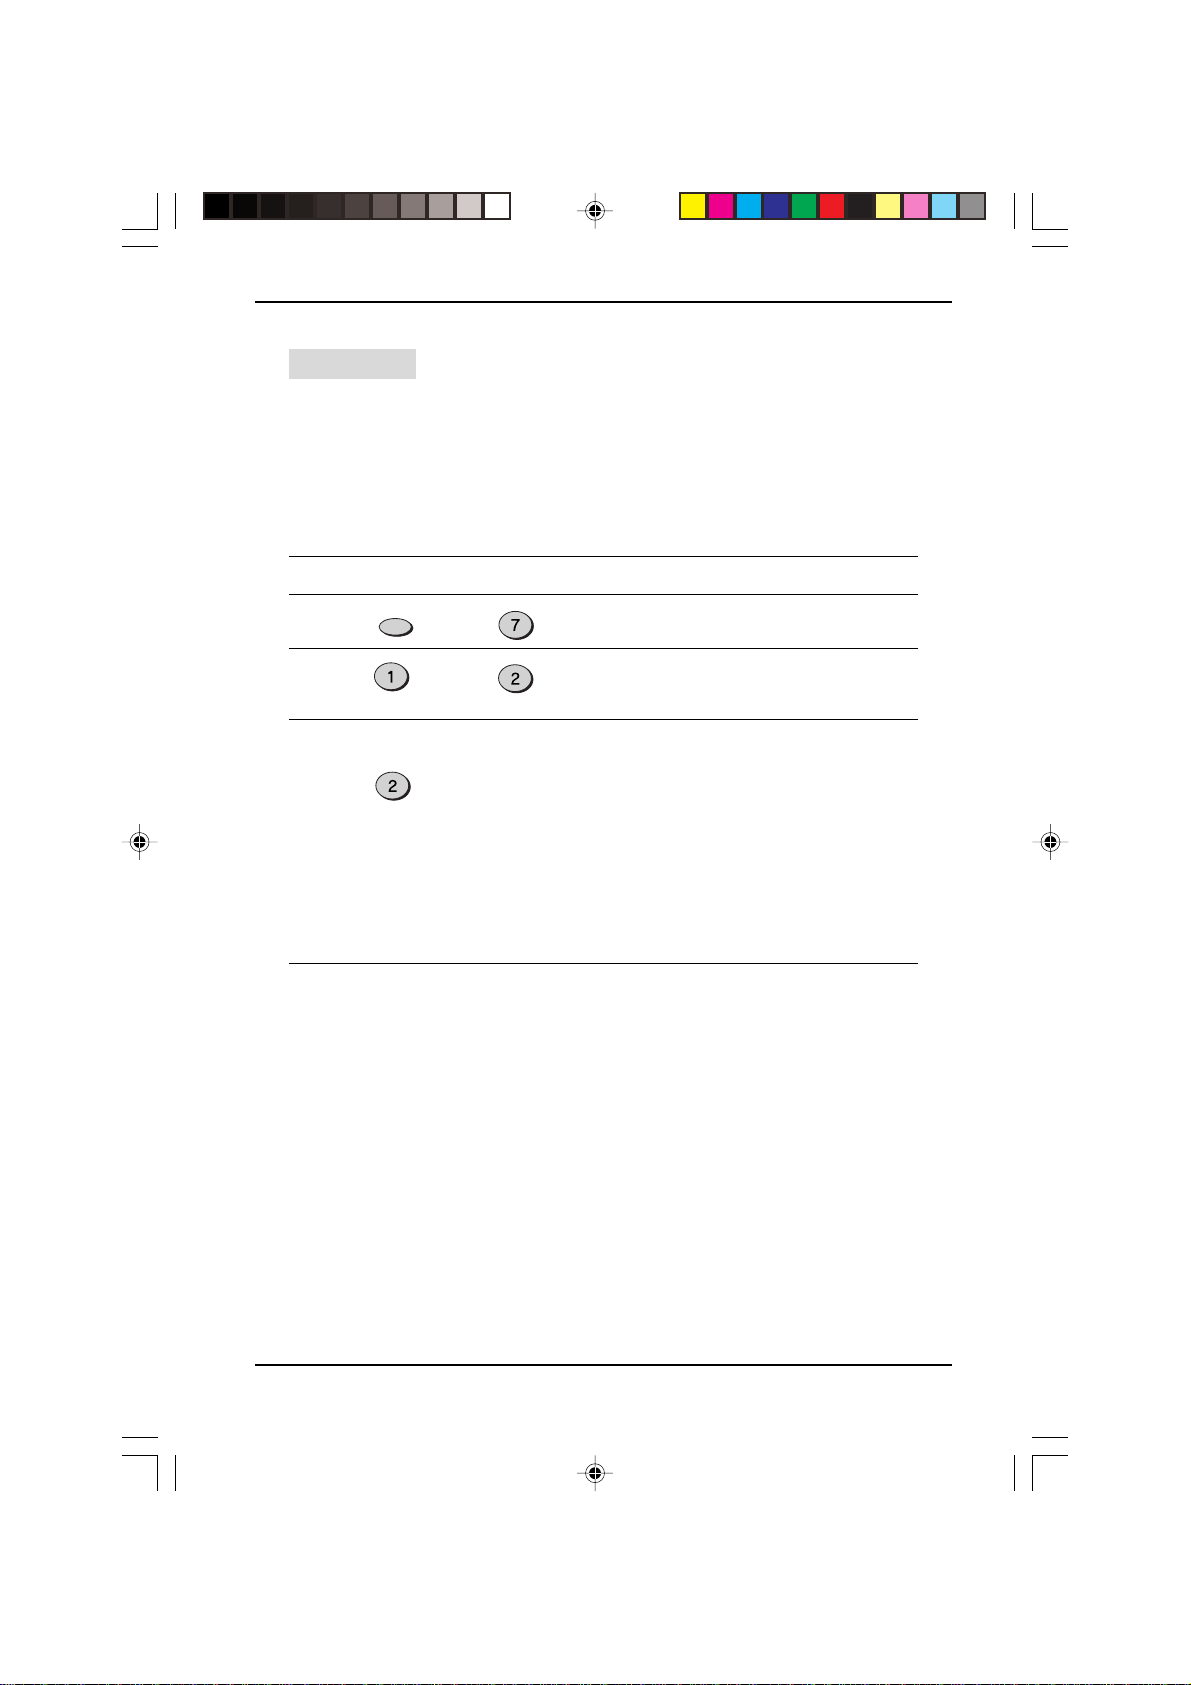
Adjusting the Beep Volume
Adjust the volume of both key beeps and alarm beeps (emitted at the end of transmission
and reception) using the procedure below.
Factory setting: 3 (MEDIUM)
Step Press these keys Comments
1 “OPTION SETTING” will appear
FUNCTION
2 “BEEP VOLUME” will appear in
3 Press the or key to lower
or
4 “STORED” will appear in the
5 Press the STOP key twice to
2-2
02 INITAL. b(SUK) A5.p65 11/10/99, 13:402
ENTER
STOP
GHI
in the display.
MNO
the display.
or raise the volume to the
desired level.
display.
STOP
exit.
INITIAL SETTINGS
Page 11

Adjusting the Ringing Volume
Adjust the ringing volume of the unit using the procedure below.
Factory setting: 3 (MEDIUM)
Step Press these keys Comments
1 “OPTION SETTING” will appear
FUNCTION
2 “RINGING VOLUME” will
GHI
in the display.
TUV
appear in the display.
3 Press the or key to lower
or
4 “STORED” will appear in the
5 Press the STOP key twice to
ENTER
STOP
STOP
or raise the volume to the
desired level.
display.
exit.
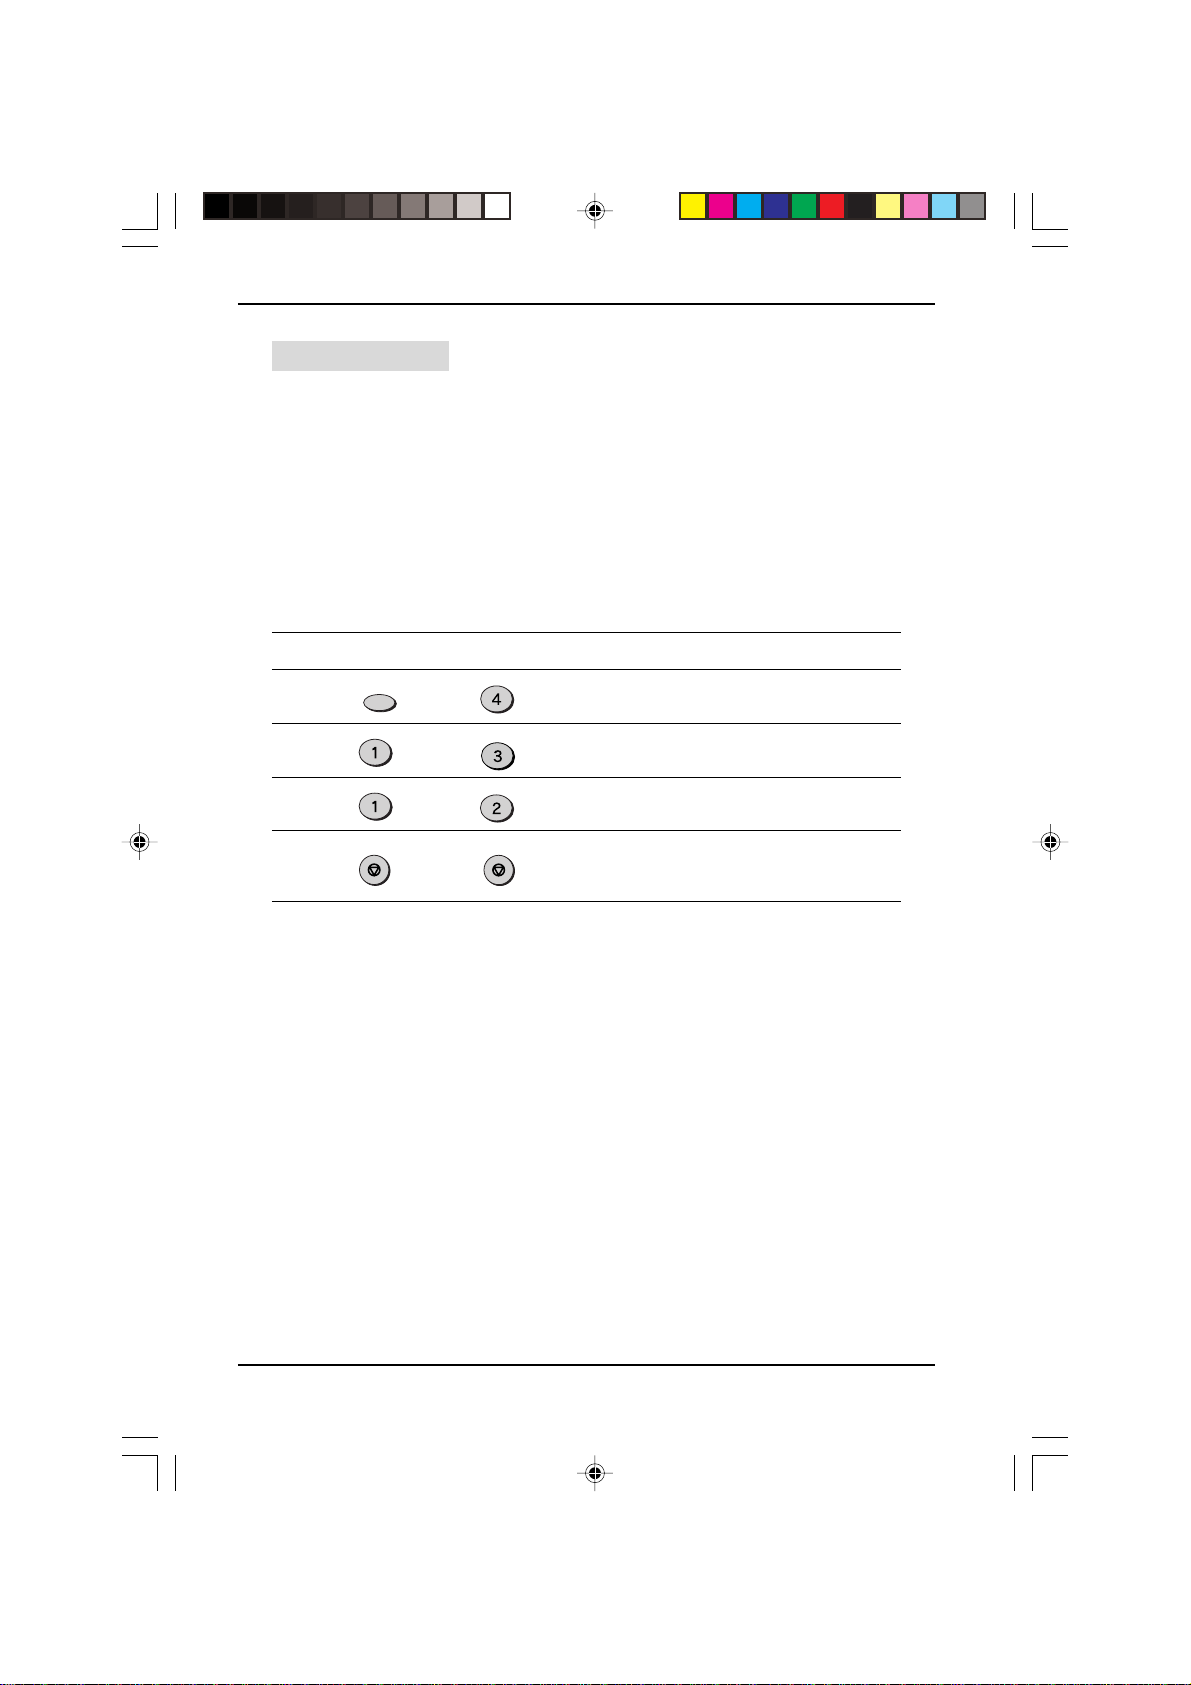
Setting the Length of Alarm Beeps
You can select the length in seconds of the alarm beeps following the procedure below .
Factory setting: 1 (3SEC)
Step Press these keys Comments
1 “OPTION SETTING” will appear
FUNCTION
2 “BEEP LENGTH” will appear in
3 Press the or key to set the
or
GHI
in the display.
JKL
the display.
alarm beeps to the desired
length or to turn them off.
4 “STORED” will appear in the
5 Press the STOP key twice to
02 INITAL. b(SUK) A5.p65 11/10/99, 13:413
ENTER
STOP STOP
display.
exit.
INITIAL SETTINGS
2-3
Page 12
Turning Key Beeps Off
If you prefer, you can choose to turn the key beeps off. To do this, follow the procedure below:
Factory setting: 1 (ON)
Step Press these keys Comments
1 “OPTION SETTING” will appear in
FUNCTION
2 “KEY BEEPS” will appear in the
3 Press 1 to turn the key beeps on,
4 Press the STOP key twice to exit.
STOP STOP
or
GHI
the display.
PQRS
display.
ABC
or 2 to turn them off.
Setting the language
You can select language of display and reports. To do this, follow the procedure below:
Step Press these keys Comments
1 “OPTION SETTING” will appear in
2 “LANGUAGE” will appear in the
3 Press the or keys to scroll the
4 Press ENTER to select language.
5 Press the STOP key twice to exit.
FUNCTION
ABC
or
ENTER
STOP
2-4
02 INITAL. b(SUK) A5.p65 11/10/99, 13:424
GHI
the display.
display.
languages.
STOP
INITIAL SETTINGS
Page 13
Fax Setup
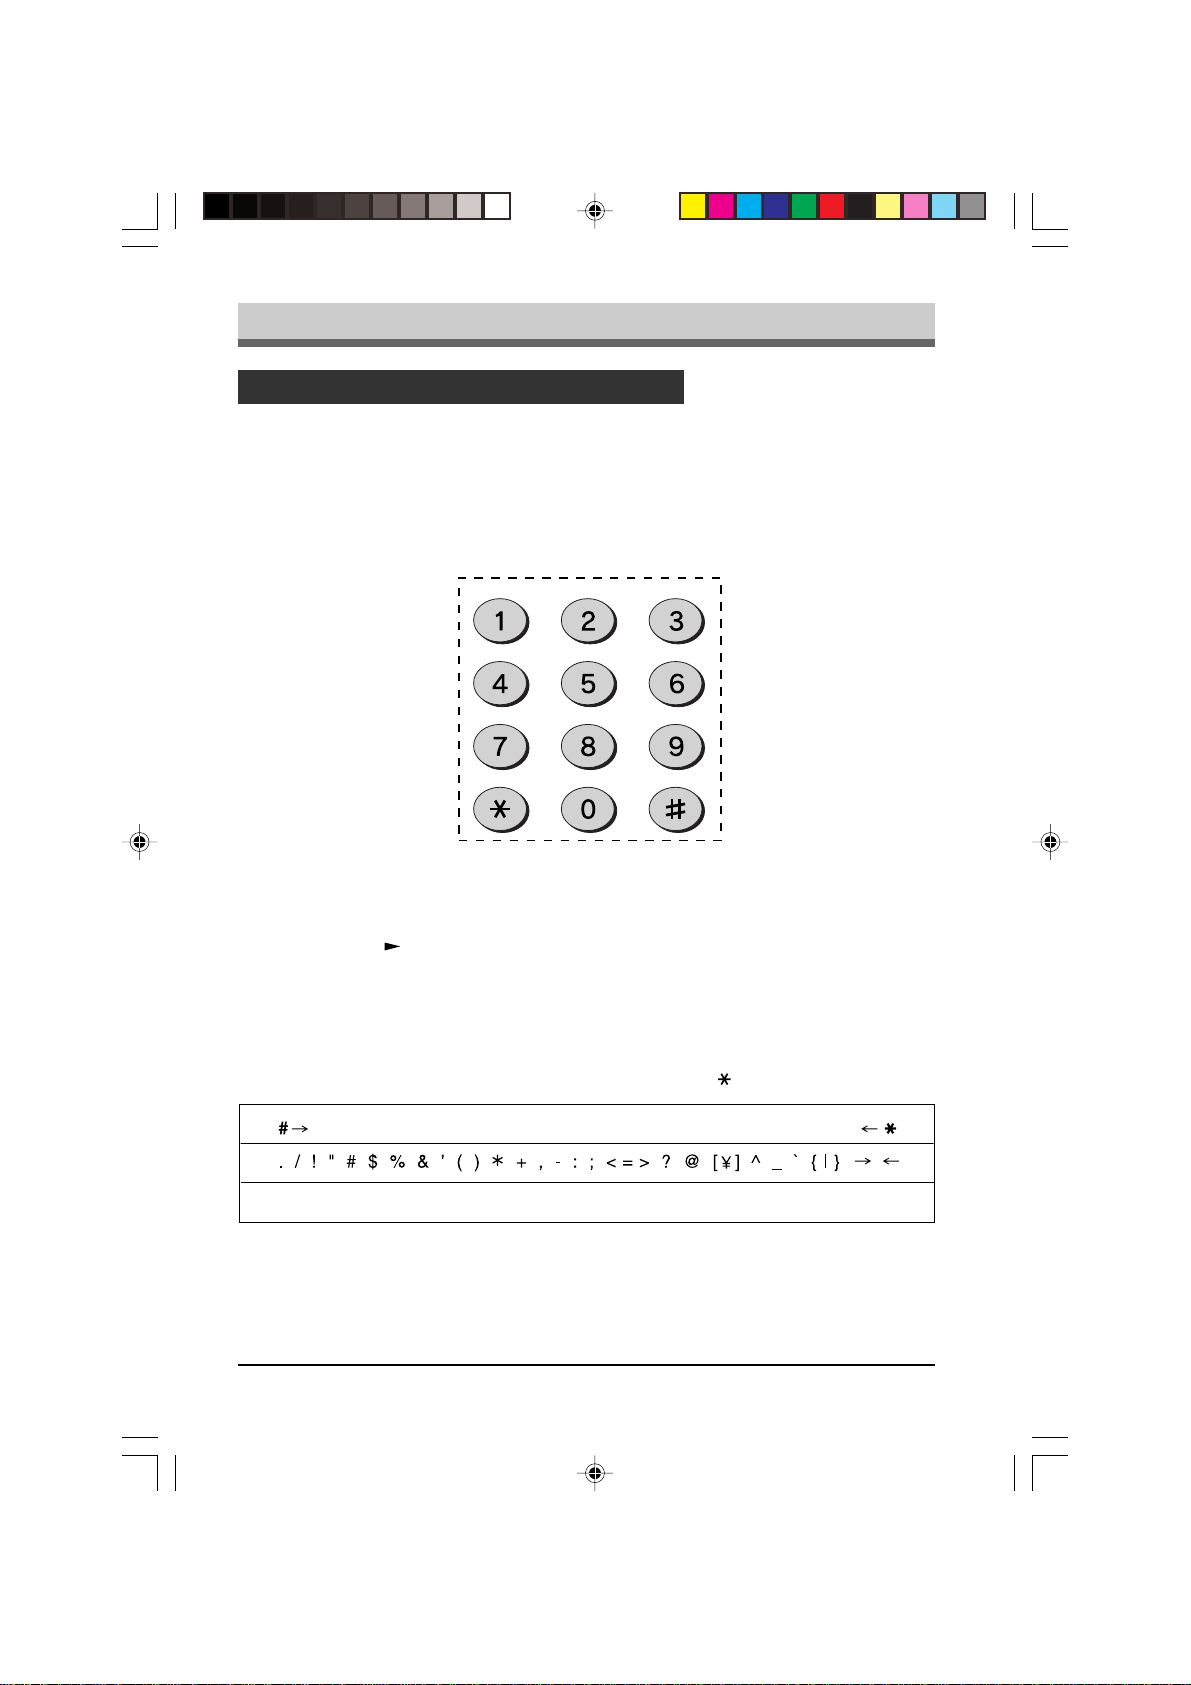
How to Enter Characters
You can enter letters with the number keys. Letters are marked above each of the
number keys “2” through “9”. To enter a letter, press the appropriate key repeatedly
until the desired letter appears (the number of the key appears first, followed by
letters in the order marked above the ke y). The keys used f or entering characters are
shown below.
GHI
PQRS
ABC
JKL
TUV
DEF
MNO
WXYZ
• To enter two characters in succession which require using the same key, press the
right arrow (
) key once after entering the first character , and then enter the second
character.
• To change one individual character to another, move the cursor to the character
you want to change and enter the new one. The new character will replace the old
one.
• Symbols can also be entered by pressing the “#” and “
” keys:
ЕДЖШЦ
• Pressing the “1” key on the 10-keypad enters space.
02 INITAL. b(SUK) A5.p65 11/10/99, 13:425
INITIAL SETTINGS
2-5
Page 14

Fax Setup
Entering Your Name and Fax Number
Note: You can view all of the items in the menu display b y pressing the FUNCTION
key, then using the left and right arrow (
) keys to scroll through the
function list. Pressing the ENTER key chooses the displayed function.
Procedures for inputting various items (name, telephone number, date, etc.)
are given as follows.
To have your name and fax number pr inted at the top of every page you transmit,
program them by pressing the operation panel keys as shown below.
• If you enter an incorrect character, press the SPEED SEARCH key to move the
cursor back to the mistake, then enter the correct character. To move the cursor
forward, press the right arrow ( ) key.
Use the following procedure to enter your name and fax number:
Step Press these keys Comments
1 “ENTRY MODE” will appear in
2 “ENTER Y OUR FAX #” will
3 Enter your own fax number
4 “ENTER Y OUR NAME” will
5 Enter your name by pressing
FUNCTION
DEF
TUV
GHI
PQRS
ENTER
PQRS PQRS PQRS
GHI GHI
GHI
PQRS PQRS PQRS
PQRS PQRS
DEF
ABC
DEF
ABC
PQRS PQRS
(example: 18002374277)
PQRS PQRS
PQRS
(example: SHARP)
the display.
appear in the display.
(maximum 20 digits) by pressing
the number keys. To insert a
space between digits, press the
” key. To insert a “+”, press
“
the “#” key.
appear in the display.
the appropriate number keys as
shown on the left. Press each
key repeatedly until the desired
letter appears in the display
(maximum of 24 characters). To
enter a space, press the 1 key
twice. To switch between lower
case and capital letters, press
the REDIAL PAUSE key once.
6 “STORED” will appear in the
7 Press the STOP key twice to
ENTER
STOP
2-6
02 INITAL. b(SUK) A5.p65 11/10/99, 13:446
display.
STOP
exit.
INITIAL SETTINGS
Page 15

Fax Setup
Setting the Date and Time
The date and time that appear in the display are printed at the top of each page you
transmit. Set the date and time b y pressing the ke ys on the operation panel as sho wn
below. To correct a mistake, press the STOP key to move the cursor back to the
mistake, and then enter the correct number.
Note: The unit supports millennial dates (those from the year 2000 on). To program
such a date, enter the last two digits; for example, the y ear 2000 is programmed
by entering “00”.
Use the following procedure to set the date and time:
Step Press these keys Comments
1 “ENTRY MODE” will appear in
2 “ENTER YEAR” will appear in
FUNCTION
ABC
DEF
the display.
the display.
3 Enter the last two digits of the
WXYZ
WXYZ
year. “ENTER MONTH” will
appear in the display.
(example: 1999)
4 Enter the month (2 digits: “01”
PQRS
(example: July)
5 Enter the day of the month (“01”
6 “ENTER TIME” will appear in
ENTER
7 Enter the hour (2 digits: “00” to
8 Enter the minute (2 digits: “00”
9 The clock starts when you
10 Press the STOP key twice to
ABC
ENTER
STOP
JKL
(example: the fifth)
DEF
STOP
for January, “02 for February,
“12” for December, etc.).
“ENTER DATE” will appear in
the display.
to “31”). “PRESS ENTER KEY”
will appear in the display.
the display.
“23”).
to “59”).
press this button. “STORED”
will appear in the display.
exit.
02 INITAL. b(SUK) A5.p65 11/10/99, 13:447
INITIAL SETTINGS
2-7
Page 16

Auto Summer Time Setting
The unit can be set to adjust to time changes during the year, so that its internal clock
and all subsequent notations of time (fax headers, programmed times, etc.) are
automatically adjusted. When the Auto Summer Time Setting is on, the adjustments
take place as shown below:
On the last Sunday of every March: 01:00 02:00
On the last Sunday of every October: 01:00
Use the procedure below to program the Auto Summer Time Setting:
Step Press these keys Comments
1 “ENTRY MODE” will appear in
2 “AUT O SUMMER TIME” will
FUNCTION
JKL
DEF
00:00
the display.
appear in the display.
3 Press 1 to turn the Auto
or
4 Press the STOP key twice to
STOP STOP
ABC
Summer Time Setting on, or 2
to turn it off.
exit.
2-8
02 INITAL. b(SUK) A5.p65 11/10/99, 13:458
INITIAL SETTINGS
Page 17

Fax Setup
Selecting the Reception Mode
Your unit has three modes for receiving incoming calls and faxes:
• AUT O mode:
Select this mode when you only want to receive faxes on your telephone line. The
unit will automatically answer all calls and receive incoming faxes.
• MANUAL mode:
This is the most convenient mode for receiving phone calls if you have an extension
phone. To have true manual mode, the unit must be set to not answer while in MANU AL
mode (see “Setting the Number of Rings for Man ual Reception” on the next page). You
can also receive faxes; however, all calls must first be answered by picking up the
receiver on the extension phone or telephone connected to the same line.
• A.M. mode:
Select this mode when an answering machine is connected to the unit and you
want the answering machine to answer all calls. This allows you to receive both
voice messages and faxes while you are out.
To set the reception mode, press the RECEPTION MODE key until the light next to
the desired mode comes on.
ENTER
For more information on reception modes, refer to Chapter 4.
02 INITAL. b(SUK) A5.p65 11/10/99, 13:459
BOOK SEND
FUNCTION
RESOLUTION CONTRAST BROADCAST
AUTO
MANUAL
A.M.
RECEPTION
INITIAL SETTINGS
MODE
2-9
Page 18

Fax Setup
Setting the Number of Rings for Auto Reception
You can set the number of rings before the unit answers in AUTO mode using the
procedure below.
Factory setting: 2
Step Press these keys Comments
1 “OPTION SETTING” will appear
FUNCTION
2 “# OF RINGS(AUTO)” will
3 Select the number of rings you
to
GHI
in the display.
GHI
appear in the display.
WXYZ
would like to use (0 to 9).
4 “STORED” will appear in the
5 Press the STOP key twice to
ENTER
STOP
display.
STOP
exit.
Note: If the external telephone is connected, the external telephone rings once
regardless the number of rings is set to 0.
Setting the Number of Rings for Manual Reception
The number of rings before the unit answers in MANU AL mode can also be set. If y ou
do not want the unit to answer at all in MANUAL Mode, select “0” in Step 3 below.
Factory setting: 0 (OFF)
Step Press these keys Comments
1 “OPTION SETTING” will appear
FUNCTION
2 “# OF RINGS(MAN.)” will
3 Select the number of rings you
4 “STORED” will appear in the
ENTER
to
GHI
in the display.
JKL
appear in the display.
WXYZ
would like to use (0 to 9).
display.
5 Press the STOP key twice to
STOP STOP
2-10
02 INITAL. b(SUK) A5.p65 11/10/99, 13:4510
exit.
INITIAL SETTINGS
Page 19
Fax Setup
Selecting the Reception Paper Size
On the control panel, you can select the paper size that you want received faxes to
be printed on (AUTO, A4, Letter, Legal). If you select the AUTO setting the unit
automatically prints the fax out on the most appropriate size paper.
Follow the procedure below:
Factory setting: 4 (AUTO)
Step Press these keys Comments
1 “OPTION SETTING” will appear
FUNCTION
GHI
in the display.
2 “PRINT PAPER SIZE ” will
appear in the display.
3 Press 1 for letter, 2 for legal, 3
4 Press the STOP key twice to
Note: If the size setting on the control panel differs from the size actually in the
paper trays, the error message “PAPER OUT (XX)” appears on the display
(for example, if you have set A4 on the control panel and the paper trays
contains letter-size and legal-size paper). When this happens, the received
fax is saved in memory and printed when you do either of the following.
•
Correct the setting on the control panel
•
Put paper of the selected size in the paper tray and set the siz e with function
(See the section “Setting the Paper Size”)
STOP
or
ABC
or
DEF
STOP
or
GHI
for A4, or 4 for AUTO.
“STORED” will appear in the
display.
exit.
02 INITAL. b(SUK) A5.p65 11/10/99, 13:4611
INITIAL SETTINGS
2-11
Page 20

Fax Setup
Setting the Tray Paper Size
You must program the size of paper you have loaded in the unit so that Receive
Reduce functions can properly adjust the size of documents printed out. Follow the
steps below.
Note: If you are using A4 size paper , y ou do not need to mak e any changes , as this
is the factory setting.
Factory setting: 3 (A4)
Step Press these keys Comments
1 “OPTION SETTING” will appear
FUNCTION
2 “PAPER SIZE MAIN
GHI
in the display.
ABC
CASSETTE”
will appear in the display.
3 Press 1 for letter, 2 for legal, 3
for A4-size paper or 4 for other
ABC
or
4 Press 1 for letter, 2 for legal, 3
ABC
or
DEF
or
DEF
or
5 Press the STOP key twice to
GHI
or
GHI
or
STOPSTOP
Notes: (If the option of the 2nd cassette has been installed)
When the unit runs out of paper while receiving a fax:
•
If paper of the same size is available in another paper tray, the unit automatically
switches to the other tray and prints the fax.
•
If the same size paper is loaded in both main cassette and the second cassette, select
“4: OTHER” for the tray that y ou do not want to use.
•
If same size paper is not available in the other tray, the error message “PAPER
SIZE” appears on the display. The received fax is saved in memory and printed
when you add paper of the proper size.
sizes. “STORED” and then
“SECOND CASSETTE“ (If the
option of the 2
been installed) will appear in
the display.
for A4-size paper or 4 for other
sizes. “STORED” will appear in
the display.
exit.
nd
cassette has
2-12
02 INITAL. b(SUK) A5.p65 11/10/99, 13:4612
INITIAL SETTINGS
Page 21
Fax Setup
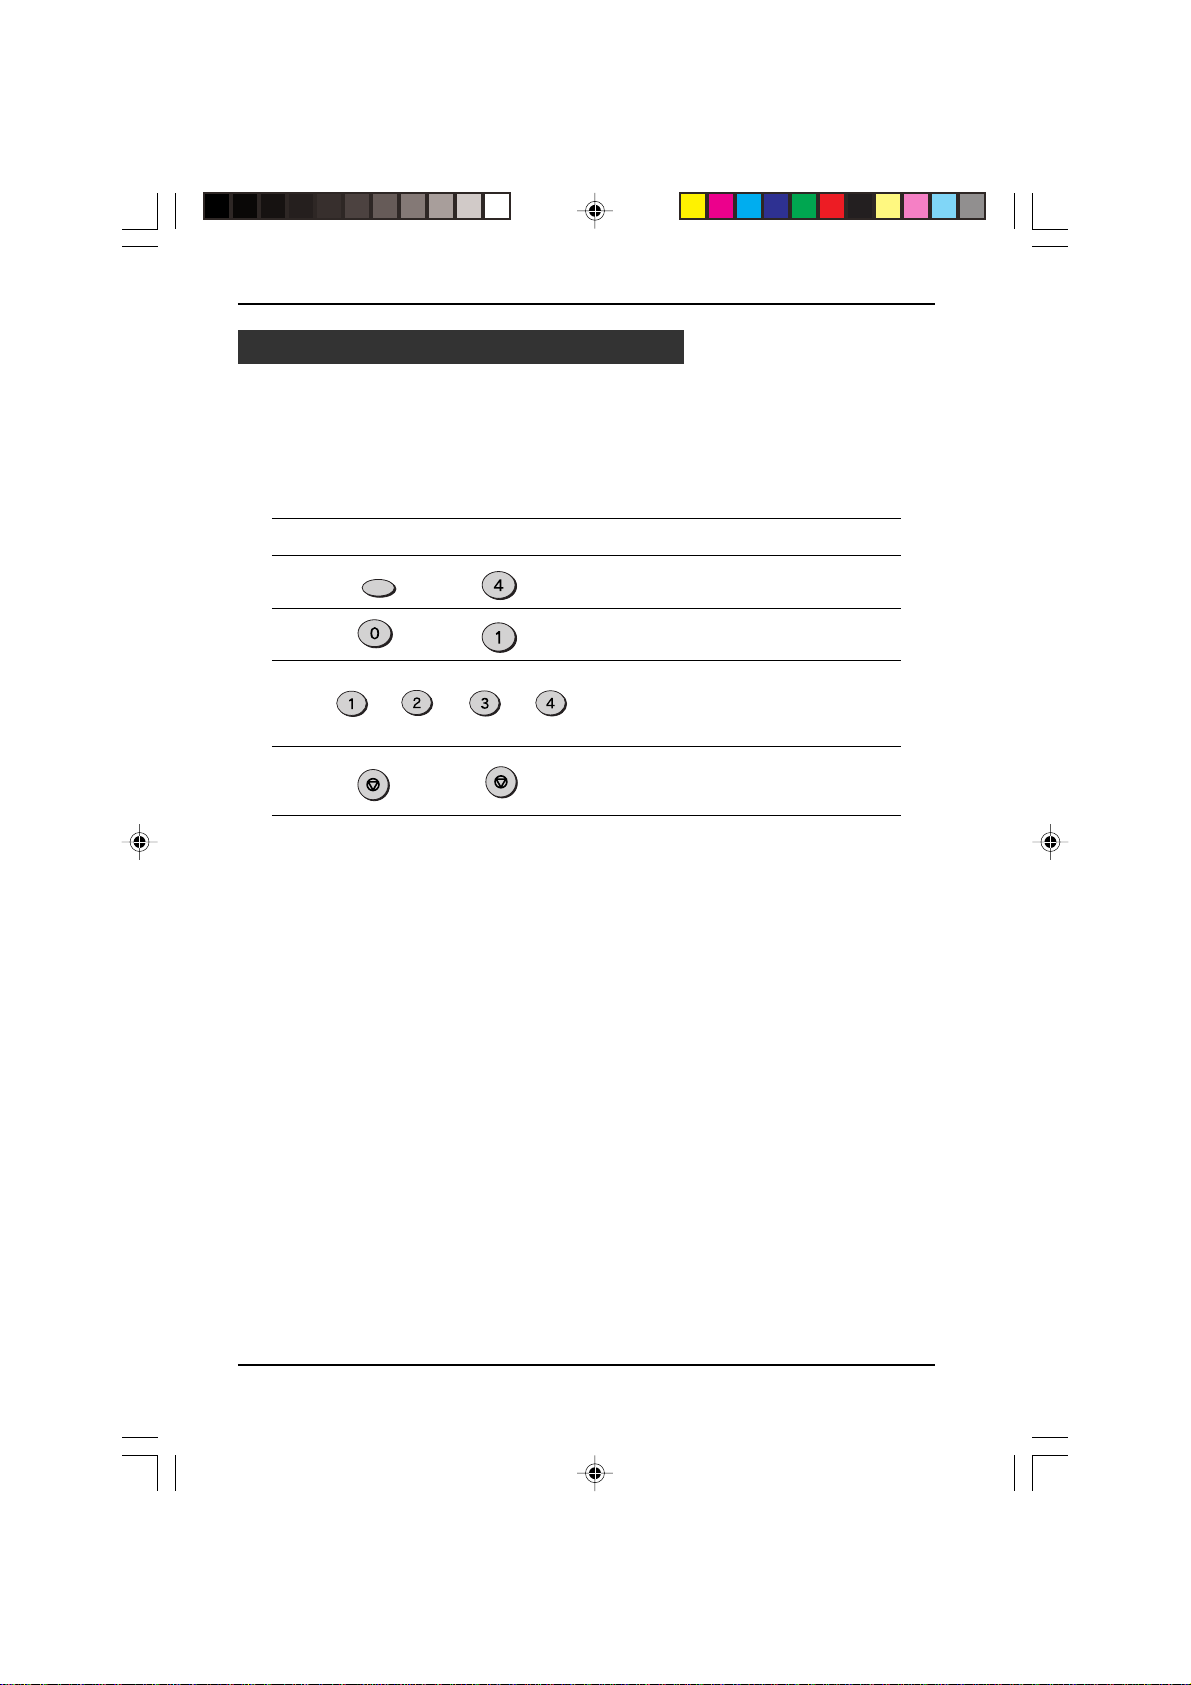
Setting the Number of Recall Times
You can select the number of times the unit will try to recall a busy number. If you
enter 00, the unit will not try to recall. Follow this procedure:
Factory setting: 02
Step Press these keys Comments
1 “OPTION SETTING” will appear
FUNCTION
2 “RECALL TIMES” will appear in
GHI
in the display.
TUV
the display.
3 Enter the number of recall times
(“00” to “14”).
to
4 “STORED” will appear in the
5 Press the STOP key twice to
ENTER
STOP STOP
GHI
display.
exit.
02 INITAL. b(SUK) A5.p65 11/10/99, 13:4713
INITIAL SETTINGS
2-13
Page 22

Fax Setup
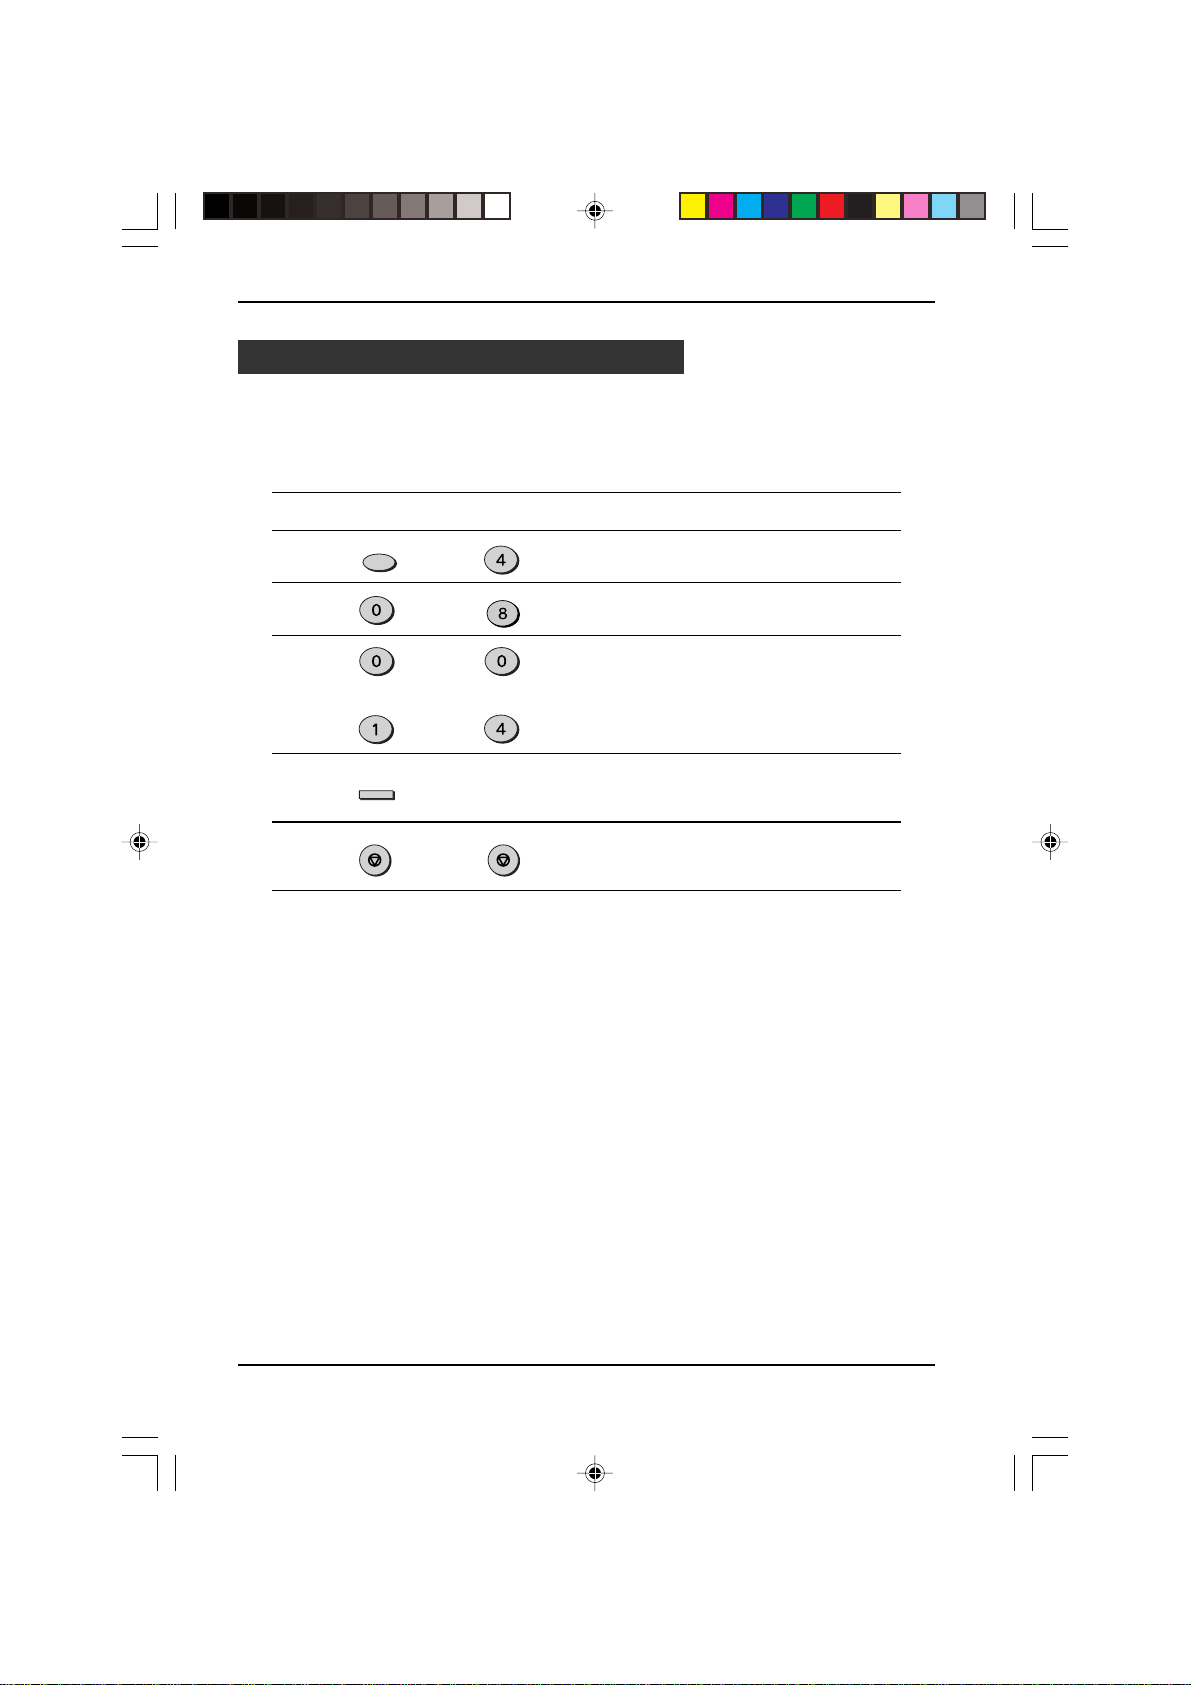
Setting the Recall Interval
The recall interval, the time the unit waits in between attempts to re-send a fax to
a busy number, can be set from 1 to 15 minutes. Follow this procedure:
Factory setting: 05 (5 minutes)
Step Press these keys Comments
1 “OPTION SETTING” will appear
FUNCTION
2 “RECALL INTERVAL” will
GHI
in the display.
WXYZ
appear in the display.
3 Enter the recall interval (“01” to
“15”).
to
JKL
4 “STORED” will appear in the
5 Press the STOP key twice to
ENTER
STOP
display.
STOP
exit.
2-14
02 INITAL. b(SUK) A5.p65 11/10/99, 13:4714
INITIAL SETTINGS
Page 23
Fax Setup
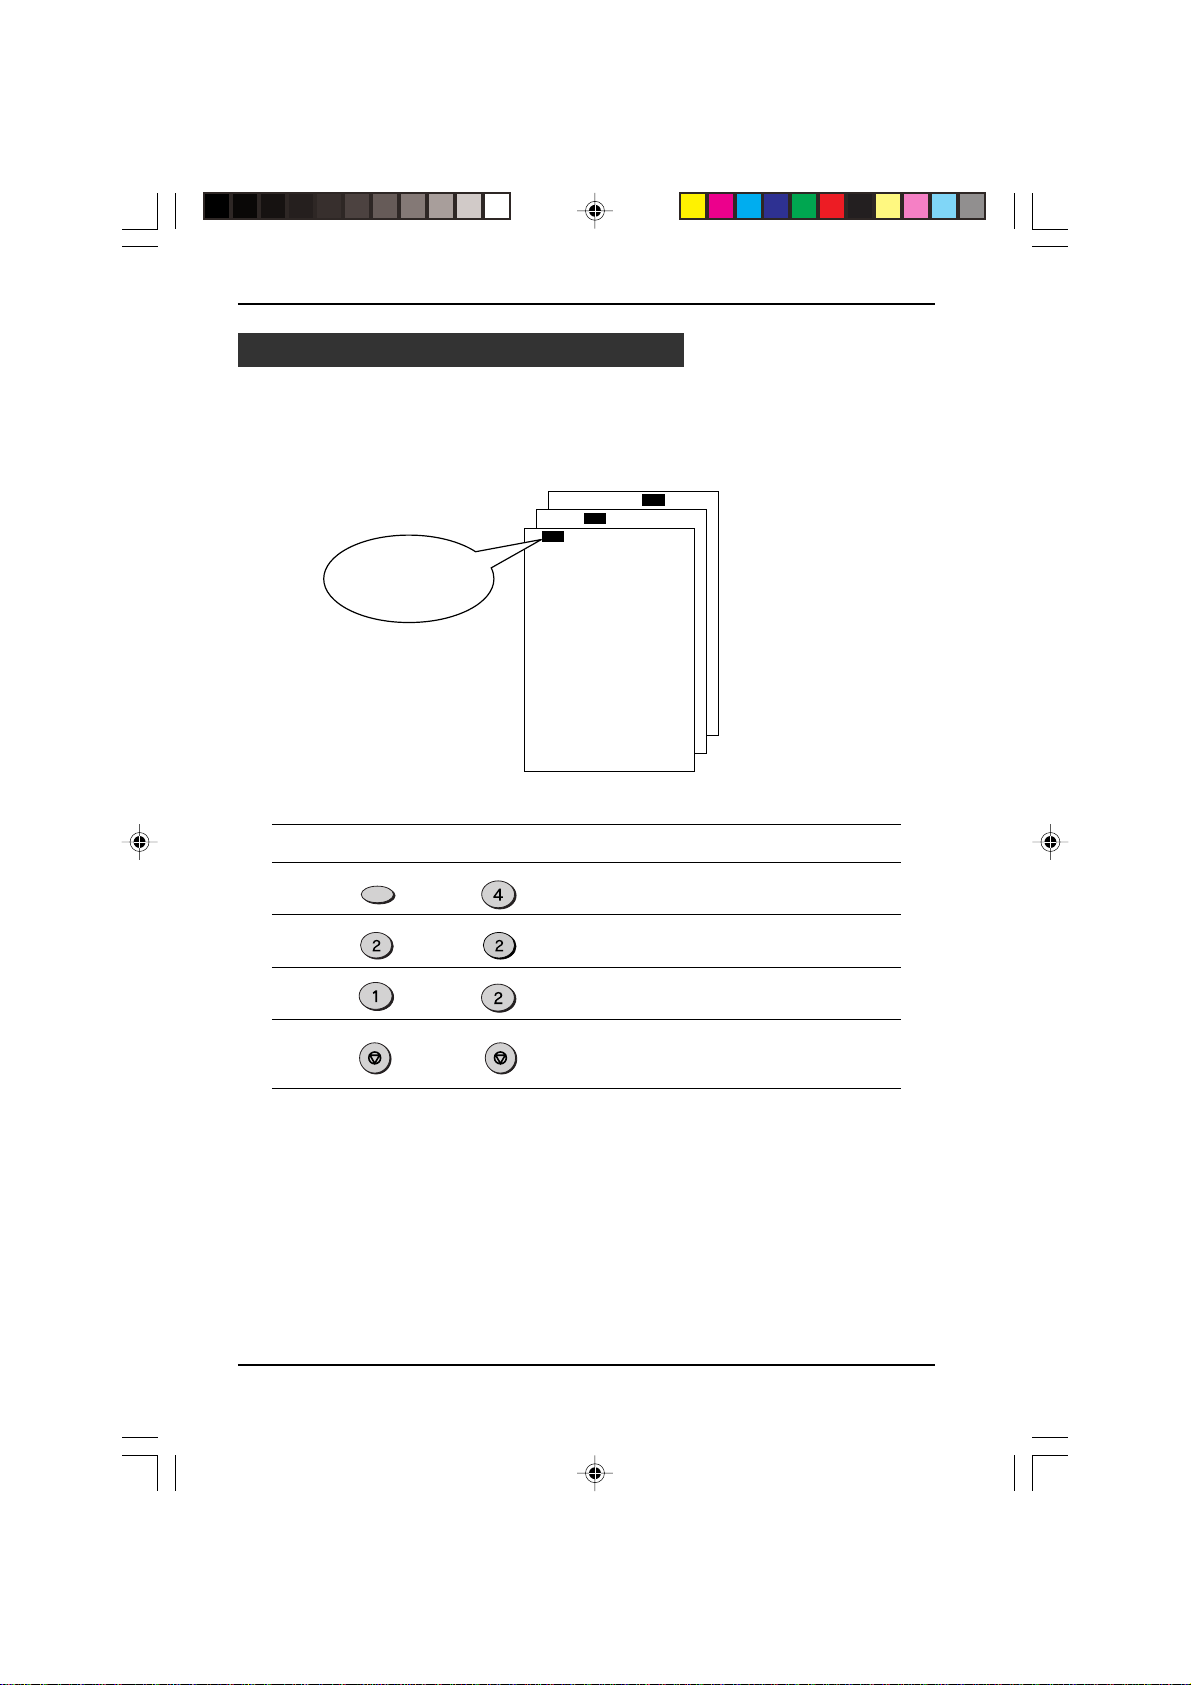
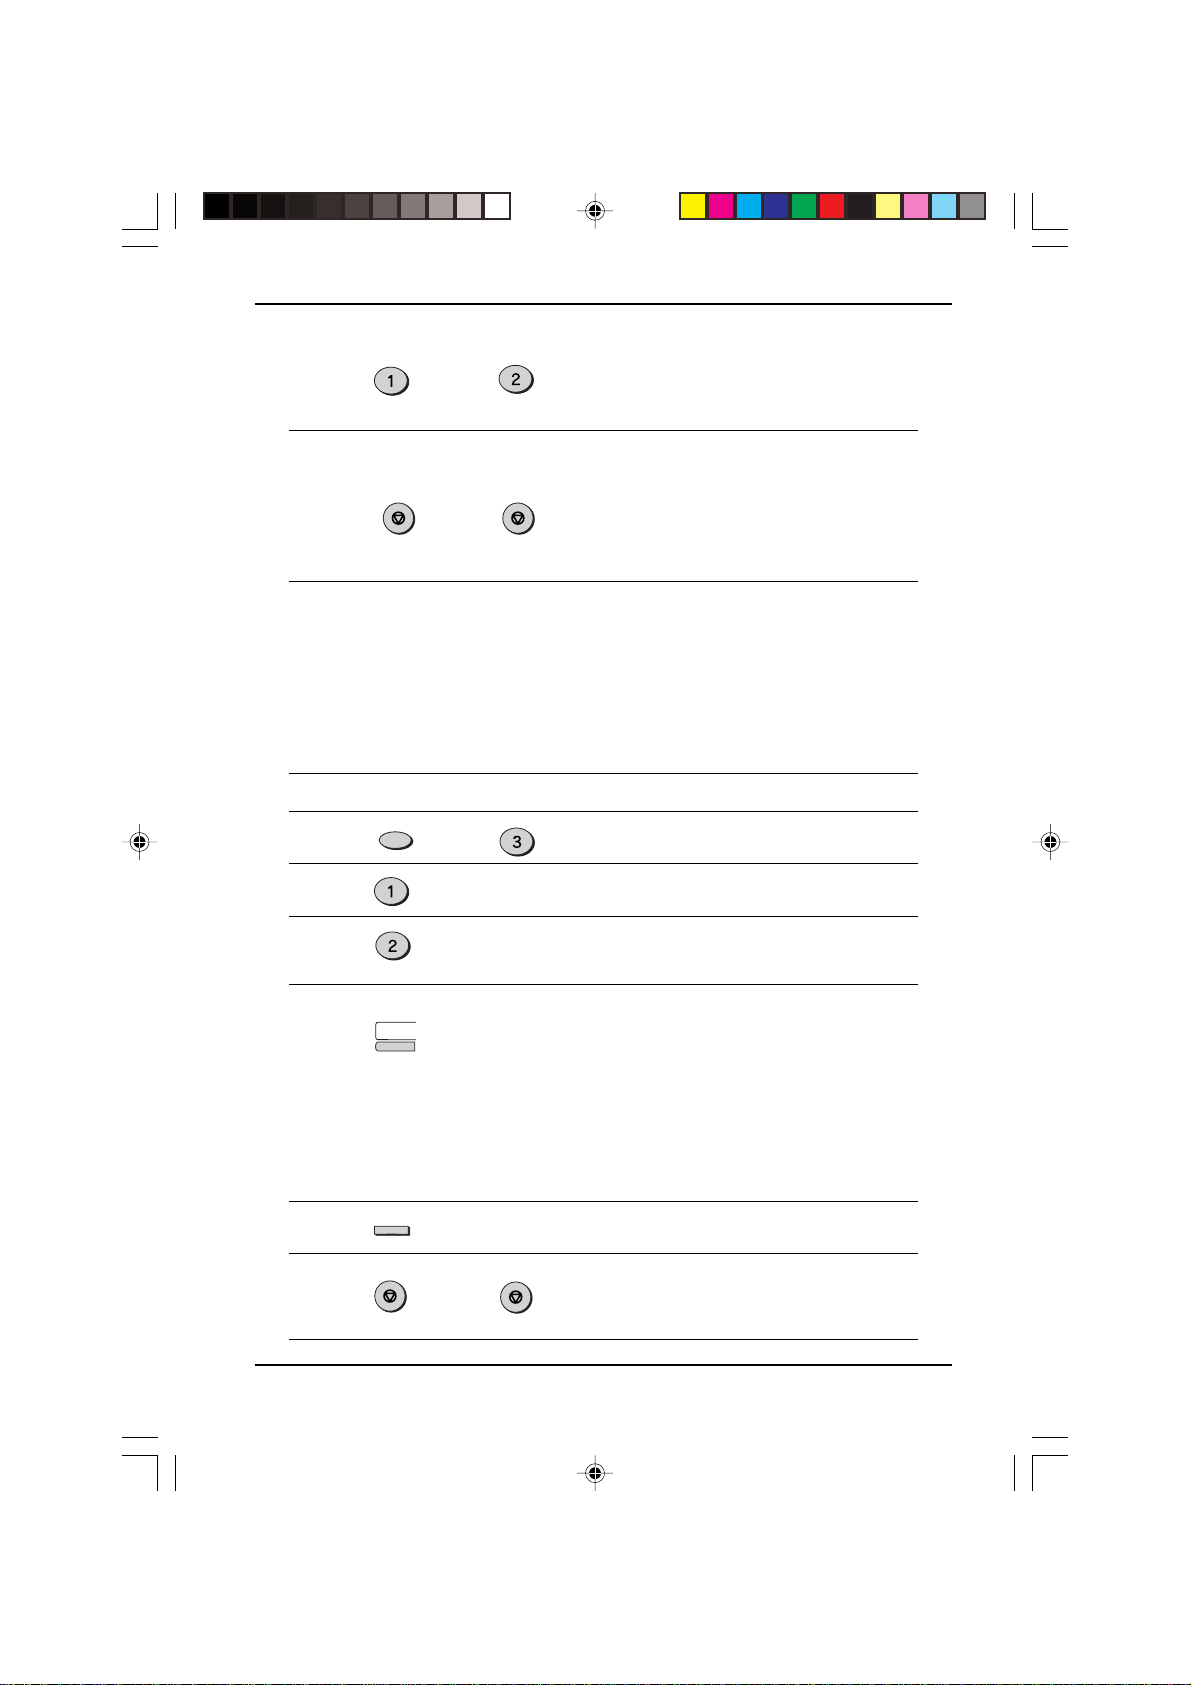
Setting the Index Function
You can print an index mark along the edge of the pages in each job. This makes it
easy to separate different jobs on the output tray.
Use the following procedure to set the index function.
Separate faxes
with index marks
Factory setting: 1 (ON)
Step Press these keys Comments
1 “OPTION SETTING” will appear
2 “BATCH INDEXING” will appear
3 Press 1 to turn on the index
4 Press the STOP key twice to
FUNCTION
ABC
or
STOP STOP
GHI
in the display.
ABC
in the display.
ABC
function, or 2 to turn it off.
exit.
02 INITAL. b(SUK) A5.p65 11/10/99, 13:4815
INITIAL SETTINGS
2-15
Page 24
Fax Setup
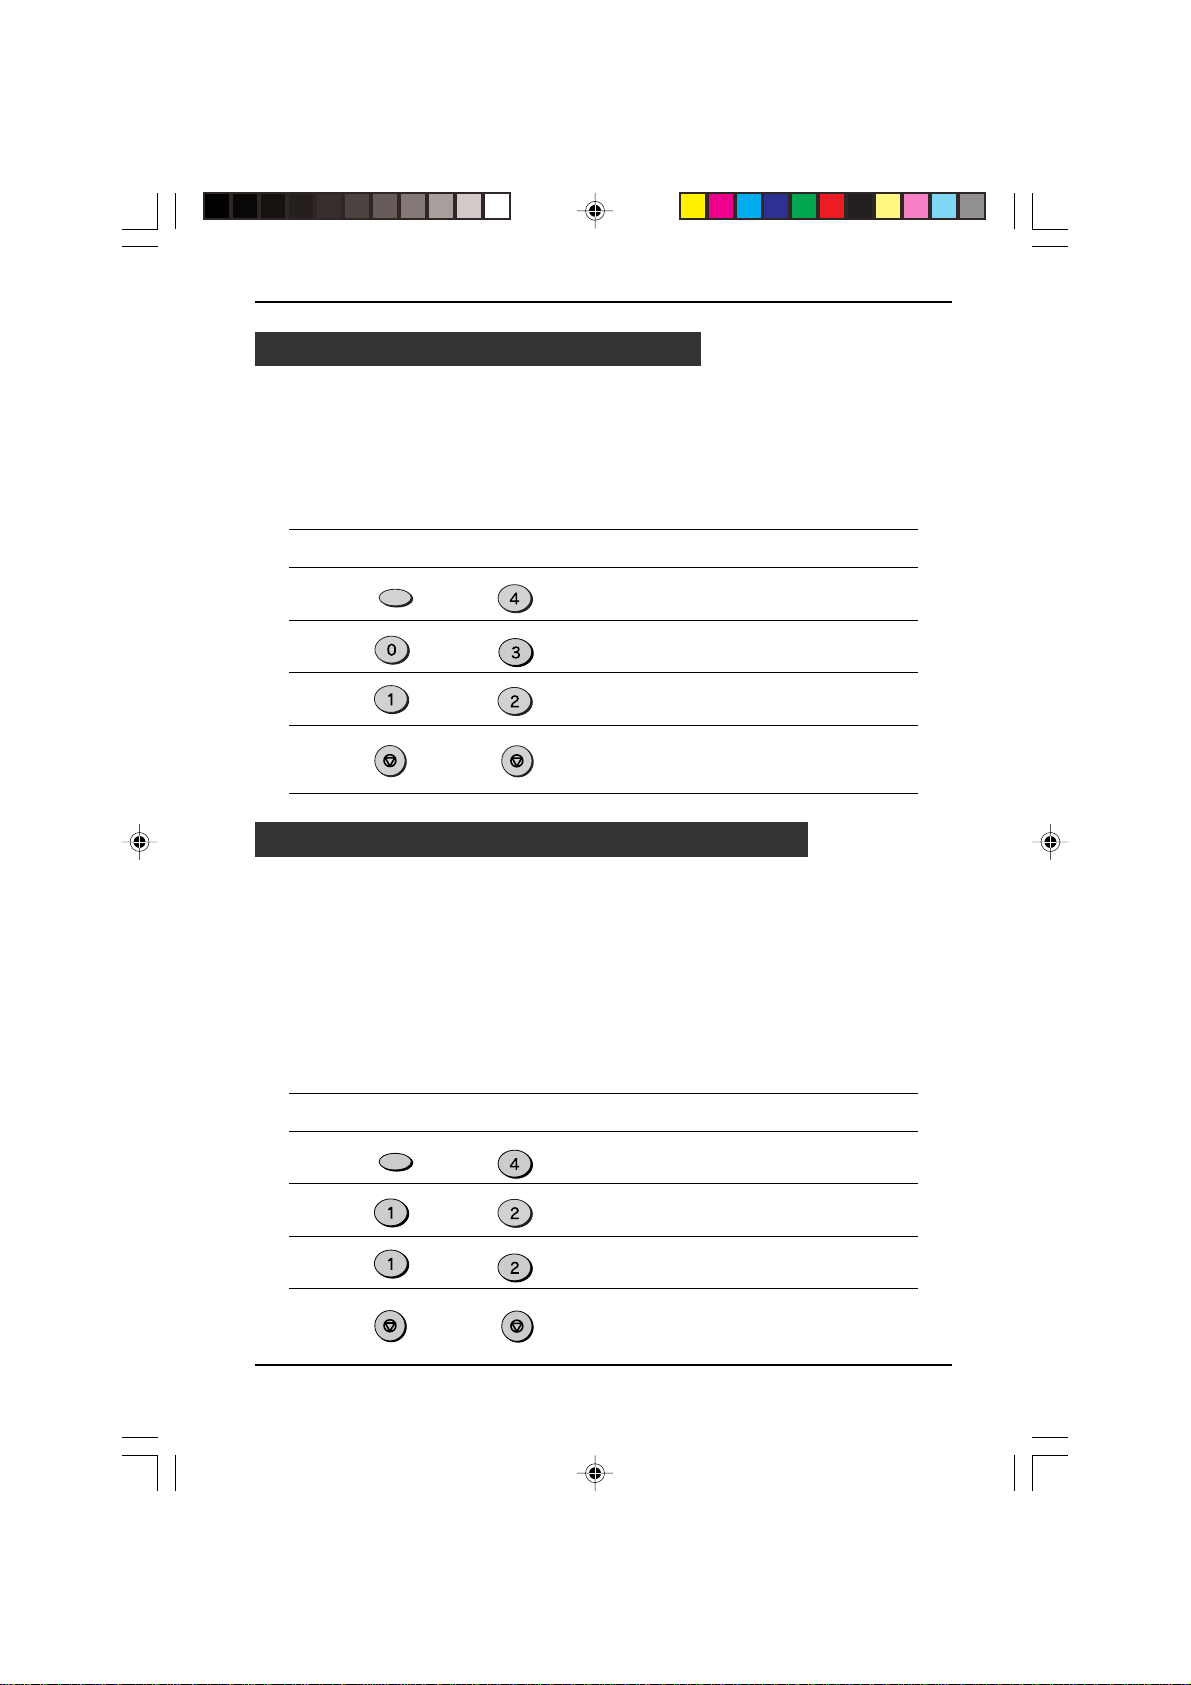
Setting Fine Resolution Priority
For most faxing jobs, you will most likely want to specify the resolution. However,
you can also set a default resolution when no setting is made using the RESOLU-
TION key. When Fine Resolution Prior ity is tur ned on, all faxes will be sent in Fine
Mode unless otherwise specified. To tur n on this function, follow the procedure
below:
Factory setting: 2 (OFF)
Step Press these keys Comments
1 “OPTION SETTING” will appear
FUNCTION
2 “FINE PRIORITY” will appear in
3 Press 1 to turn Fine Resolution
4 Press the STOP key twice to
STOP
or
GHI
in the display.
DEF
the display.
ABC
Priority on, or 2 to turn it off.
STOP
exit.
Setting Up the Unit for Use with a PC Modem
The unit is set to automatically begin reception if you pick up from an extension
telephone and the unit detects a fax tone. However , if y ou are using a modem on the
same line, you must deactivate this function : otherwise the unit will mistakenly attempt
to receive the transmission from your computer. To tur n of the Fax Signal Receive
function, follow the procedure below.
Note: If you turn off the Fax Signal Receive function, be sure to activ ate the Remote
Reception function. See “Using the Remote Reception Function” on the next
page for details on how to do this.
Factory setting: 1 (ON)
Step Press these keys Comments
1 “OPTION SETTING” will appear
FUNCTION
2 “FAX SIGNAL RECEIVE” will
3 Press 1 to turn Fax Signal
4 Press the STOP key twice to
2-16
STOP
or
GHI
in the display.
ABC
appear in the display.
ABC
Receive on, or 2 to turn it off.
STOP
exit.
INITIAL SETTINGS
02 INITAL. b(SUK) A5.p65 11/10/99, 13:4816
Page 25

Fax Setup
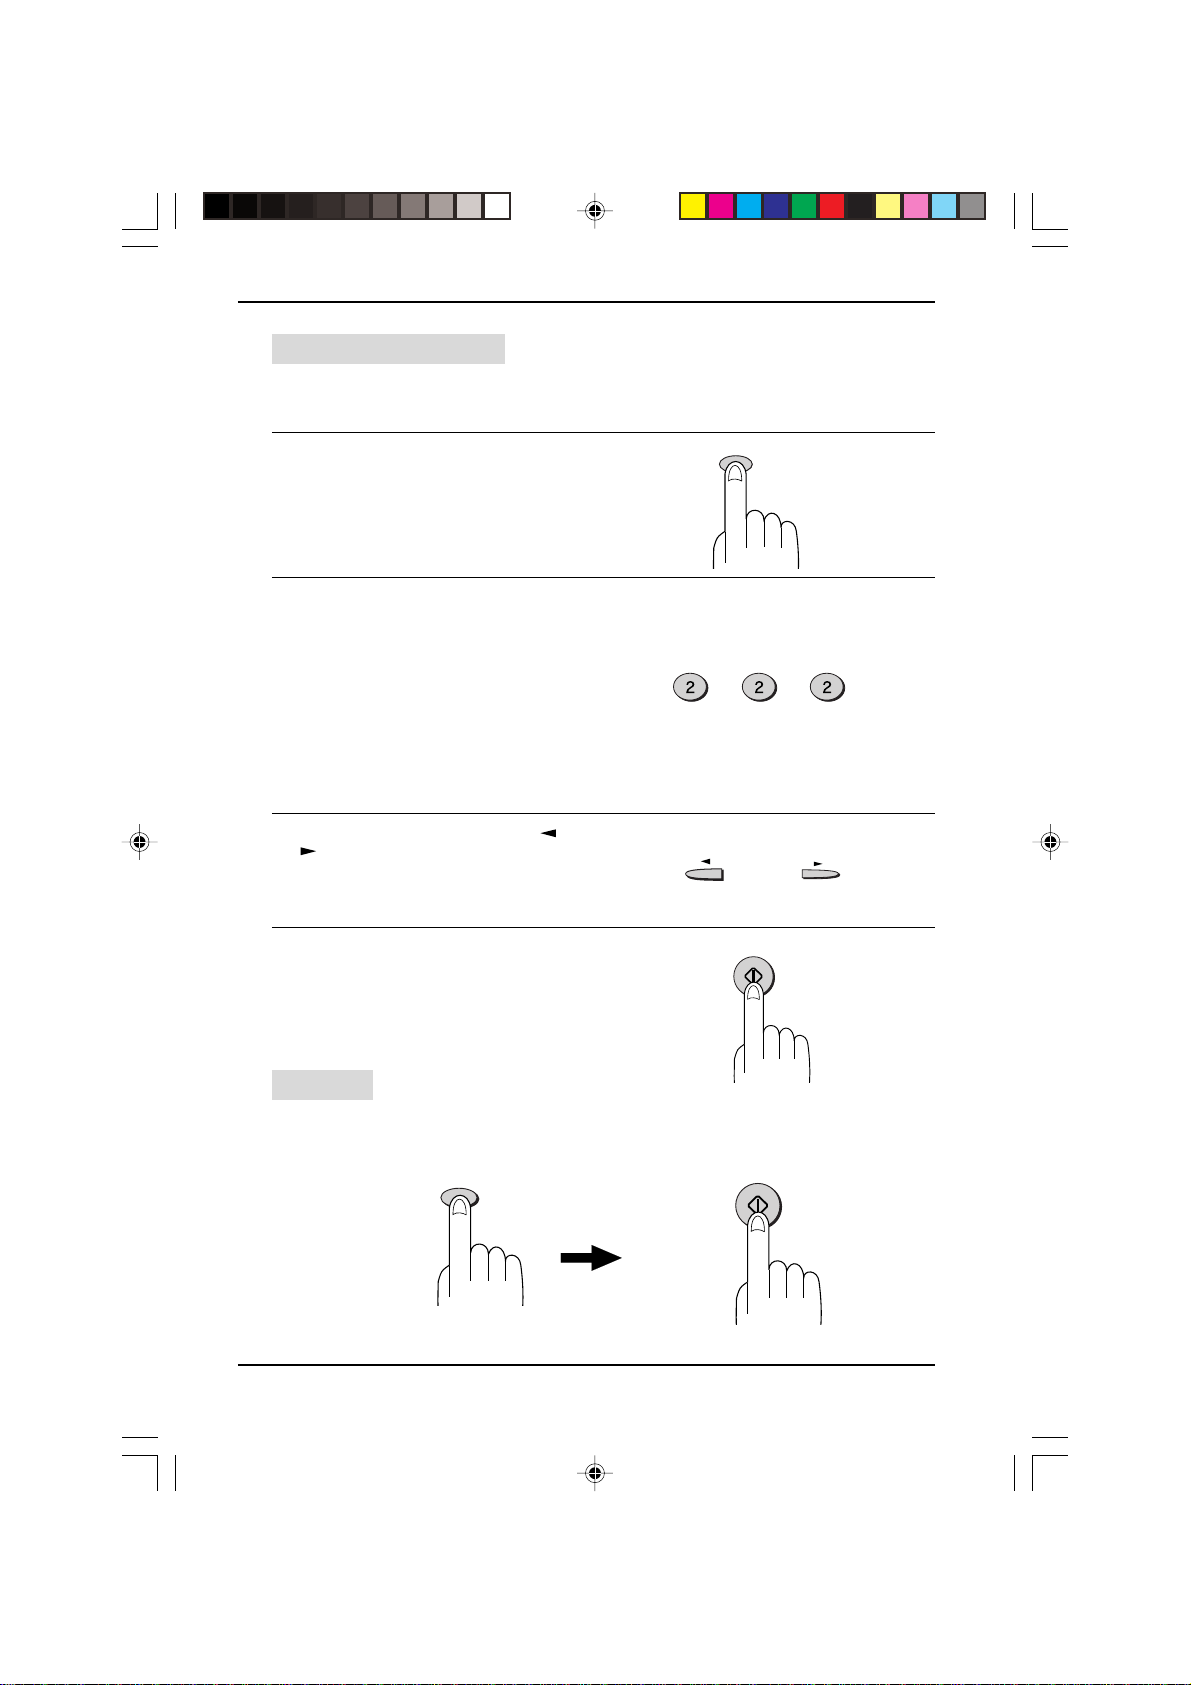
Using the Remote Reception Function
The unit’s Remote Reception f eature is designed to allow you to activate f ax reception
from an extension telephone. The Remote Reception function operates even when
the FAX Signal Receive function is turned off. When you hear the fax tone, simply
press the one-digit Fax Remote Number (F actory setting: 5) and
. Follow the two
procedures below to use this feature.
Notes:
•
If documents are set in the SPF, the unit does not respond to pressing Fax Remote
Number and
. However, if the originals are set in the SPF as a part of a copy job
in progress, the unit answers when you press the Fax Remote Number and
•
If you want to receive a f ax while you are on an e xtension telephone, when y ou hear
a fax tone, press the one-digit Fax Remote Number and
. To ensure proper fax
reception, hang up the extension phone only after you have confir med that fax
reception has begun. Confirm that the fax reception has begun by having the
extension telephone connected directly to the fax. Furthermore, there is no sound
when fax reception begins.
Turning on Remote Reception:
Factory setting: 1 (ON)
Step Press these keys Comments
1 “OPTION SETTING” will appear
FUNCTION
GHI
in the display.
2 “REMOTE RECEPTION” will
appear in the display.
3 Press 1 to turn Remote
4 Press the STOP key twice to
STOP
or
ABC
Reception on, or 2 to turn it off.
STOP
exit.
.
02 INITAL. b(SUK) A5.p65 11/10/99, 13:4917
INITIAL SETTINGS
2-17
Page 26
Fax Setup
Setting a Fax Remote Number:
Factory setting: 5
Step Press these keys Comments
1 “OPTION SETTING” will appear
FUNCTION
GHI
in the display.
2 “FAX REMOTE NUMBER” will
appear in the display.
3 Enter the number you would
4 “STORED” will appear in the
5 Press the STOP key twice to
ENTER
STOP STOP
to
PBX setting
The unit is connected to a PBX, you can program unit to access automatically public
line outside PBX.
Factory setting: 2 (OFF)
Step Press these keys Comments
1 “OPTION SETTING” will appear
2 “PBX SETTING” will appear in
FUNCTION
ABC
3 Press 1 (YES) if the unit is
or
4 “PBX SELECT” will appear in
or
WXYZ
GHI
ABC
ABC
like to use as the Fax Remote
Number.
display.
exit.
in the display.
the display.
connected to a PBX.
Press 2 (NO) if the unit is
connected to a public line.
the display.
This parameter permits to define
how connection of a call from a
PBX to an external line is made.
For more details about this
mode, see operation manual of
your PBX or contact support
department of PBX dealer.
Press 1 for “FLASH” mode.
Press 2 for “ID PBX” mode.
5 “PBX ID CODE” will appear in
6 Press ENTER key to continue.
7 Press the STOP key twice to
2-18
02 INITAL. b(SUK) A5.p65 11/10/99, 13:4918
ENTER
STOP
WXYZ
STOP
INITIAL SETTINGS
the display.
Enter identification number of
your PBX (max. 3 digits)
exit.
Page 27

Fax Setup
Storing Numbers for Automatic Dialing
Automatic Dialing is a quick and convenient way to dial by using only a Rapid key (Rapid
Key Dialing), or pressing the SPEED/SEARCH ke y and select the SPEED and entering a
two digit number (Speed Dialing).
T o use A utomatic Dialing, you must first store the full number . The w ay you store it depends
on whether you want to use it for Rapid Key Dialing or Speed Dialing:
Note:
If the unit is connected to a PBX, the numbers dialed in automatic dialing are automatically
transferred to the public line (y ou should not enter access code etc.) in order to obtain the
external line in case of registred numbers. In case of an internal number of the PBX, push
the SPEAKER key in order to insert the R character at the beginning of the number (when
you are in step 6, as shown below) ; this will cancel the automatic dialing of the access
code.
Storing numbers
Use the following procedure to store numbers for Rapid Key Dialing or Speed Dialing:
Step Press these keys Comments
FUNCTION
1 “ENTRY MODE” will appear in
DEF
the display.
2 “FAX NUMBER MODE” will
3 “FAX NUMBER SET” will
4 To store a Rapid key number,
01
(example)
ABC
TUV
ENTER
WXYZ
ABC
JKL
ABC
5 “ENTER FAX NUMBER” will
6 Enter the fax number
(example: 2015298200)
7 “ENTER NAME” will appear in
ENTER
8 Enter the name of the location
JKL
ABC
9 “CHAIN DIAL” will appear in
ENTER
GHI
. . .
(example)
appear in the display.
appear in the display.
press a Rapid key. To store a
Speed Dial number, press two
number keys (“00” to “99”).
“PRESS ENTER KEY” will
appear in the display.
appear in the display.
(maximum of 20 digits
including pauses) using the
number keys.
the display.
or party (maximum of 20 digits
including pauses) by pressing
number keys as described in
“How to Enter Characters ” in
this chapter. If you do not want
to enter a name, skip this step.
the display.
02 INITAL. b(SUK) A5.p65 11/10/99, 13:5019
INITIAL SETTINGS
2-19
Page 28
Fax Setup
10 Press “1” if you w ant to specify
ABC
or
the number as a Chain Dialing
number (see “Chain Dialing f or
Long Numbers” in this section).
Otherwise, press “2”.
11 Return to Step 4 to store
another number, or press the
STOP
STOP
Step 4 or
Note: You may need to add a pause between certain digits in the number to allow
time for connection. For example, if you are on a PBX telephone system that
STOP key a number of times
until you exit. If the number is a
Rapid key number, you can
write the name on the label
above the appropriate Rapid
key.
. . .
requires an access number, such as “9”, to be dialed to access an outside
line, you will need to enter a pause between the access number and the fax
number of the other party . P auses are entered by pressing the REDIAL P A USE
key (2 seconds per pause). If necessary, several pauses can be entered in a
row.
Use the following procedure to clear numbers:
Step Press these keys Comments
1 “ENTRY MODE” will appear in
FUNCTION
DEF
the display.
2 “FAX NUMBER MODE” will
appear in the display.
3 Select CLEAR. “FAX NUMBER
ABC
CLEAR” will appear in the
display.
4 To clear a Rapid key number,
01
5 “CLEARED” will appear in the
6 Return to Step 4 to clear
Step 4 or
2-20
02 INITAL. b(SUK) A5.p65 11/10/99, 13:5120
ENTER
STOP
(example)
. . .
STOP
INITIAL SETTINGS
press the appropriate Rapid
key. To clear a Speed Dial
number, enter the 2-digit
number with the number keys.
“PRESS ENTER KEY” will
appear in the display. If there is
no number stored under that
Rapid key or Speed Dial
number, “NO NUMBER
STORED” will appear in the
display.
display.
another number, or press the
STOP key a number of times
until you exit.
Page 29

Fax Setup
Chain Dialing for Long Numbers
The maximum number of digits which may be entered when storing a fax number is
20. If you need to store a number which is longer than 20 digits, use Chain Dialing.
Chain Dialing allows you to combine two or more A utomatic Dialing numbers , or use
an Automatic Dialing number followed by additional digits entered manually with the
number keys, to dial a single n umber. In addition to being conv enient f or storing long
numbers, it allows you to store an area code or access code as an A utomatic Dialing
number.
For example, to store a 36 digit number for Automatic Dialing, you must break it into
two parts:
1. Store the first 20 digits into one Speed Dial number (“01”, for example) using the
storing procedure described in the preceding section, and press “1” in Step 10 of
that procedure to specify it as a Chain Dialing number (this tells the machine to
wait for the remainder of the telephone number when dialing).
2. Store the remaining 16 digits into a separate Speed Dial number (“02”, for e xample),
and this time press “2” in Step 10 of the storing procedure to specify that it is not a
Chain Dial number (this tells the machine that the final part of the number has been
dialed).
In this way, you specify all parts of the number except the last as a Chain Dial number .
Note: The maximum number of digits that can be dialed at one time by Chain Dialing
is 50.
02 INITAL. b(SUK) A5.p65 11/10/99, 13:5121
INITIAL SETTINGS
2-21
Page 30

Fax Setup
Storing Numbers Under Group Keys
Group keys allow y ou to dial a group of fax numbers by simply pressing the appropriate
Group key once. They are con v enient f or the Broadcasting function, which is used to
transmit a document to a group of fax machines.
All Rapid keys can be programmed as Group keys. To program or clear a group key,
follow the steps below . Note that one key cannot be programmed as both a Rapid k ey
and a Group key at the same time.
• Up to 50 fax numbers can be stored in one Group key.
• Only Rapid keys and Speed Dial numbers can be stored in a Group key. No full
numbers can be stored.
Use the following procedure to store numbers under Group keys:
Step Press these keys Comments
1 “GROUP ENTRY MODE” will
2 Press “1” (SET) to program a
FUNCTION
or
JKL
appear in the display.
ABC
Group key, or “2” (CLEAR) to
clear a Group key.
3 Setting:
01
(example)
4 Enter fax numbers using one or
5 “ENTER GROUP NAME” will
02
ABC
ENTER
2-22
. . .
. . .
09
ABC
ABC
(example)
INITIAL SETTINGS
Press the Rapid key you wish to
use as a Group key . “GROUP
#=XX” will appear in the display,
followed by “DIAL #=”
Clearing:
Press the Group key you wish
to clear, and then go to Step 7.
both of the following methods:
• Press one or more Rapid
keys.
• Enter one or more Speed
Dial numbers with the
number keys.
appear in the display.
02 INITAL. b(SUK) A5.p65 11/10/99, 13:5122
Page 31

Fax Setup
6 Enter the name of the group
(maximum of 20 digits including
pauses) by pressing number
keys as described in “How to
Enter Characters” in this
chapter. If you do not want to
(example)
enter a name, skip this step.
7 Setting:
ENTER
8 Return to Step 3 to program/
Step 3 or
STOP
STOP
. . .
“GROUP SET” will appear in
the display.
Clearing:
“GROUP #=XX CLEARED” will
appear in the display.
clear another Group key, or
press the STOP key a number of
times until you exit.
02 INITAL. b(SUK) A5.p65 11/10/99, 13:5223
INITIAL SETTINGS
2-23
Page 32

Using the Unit with an Answering Machine
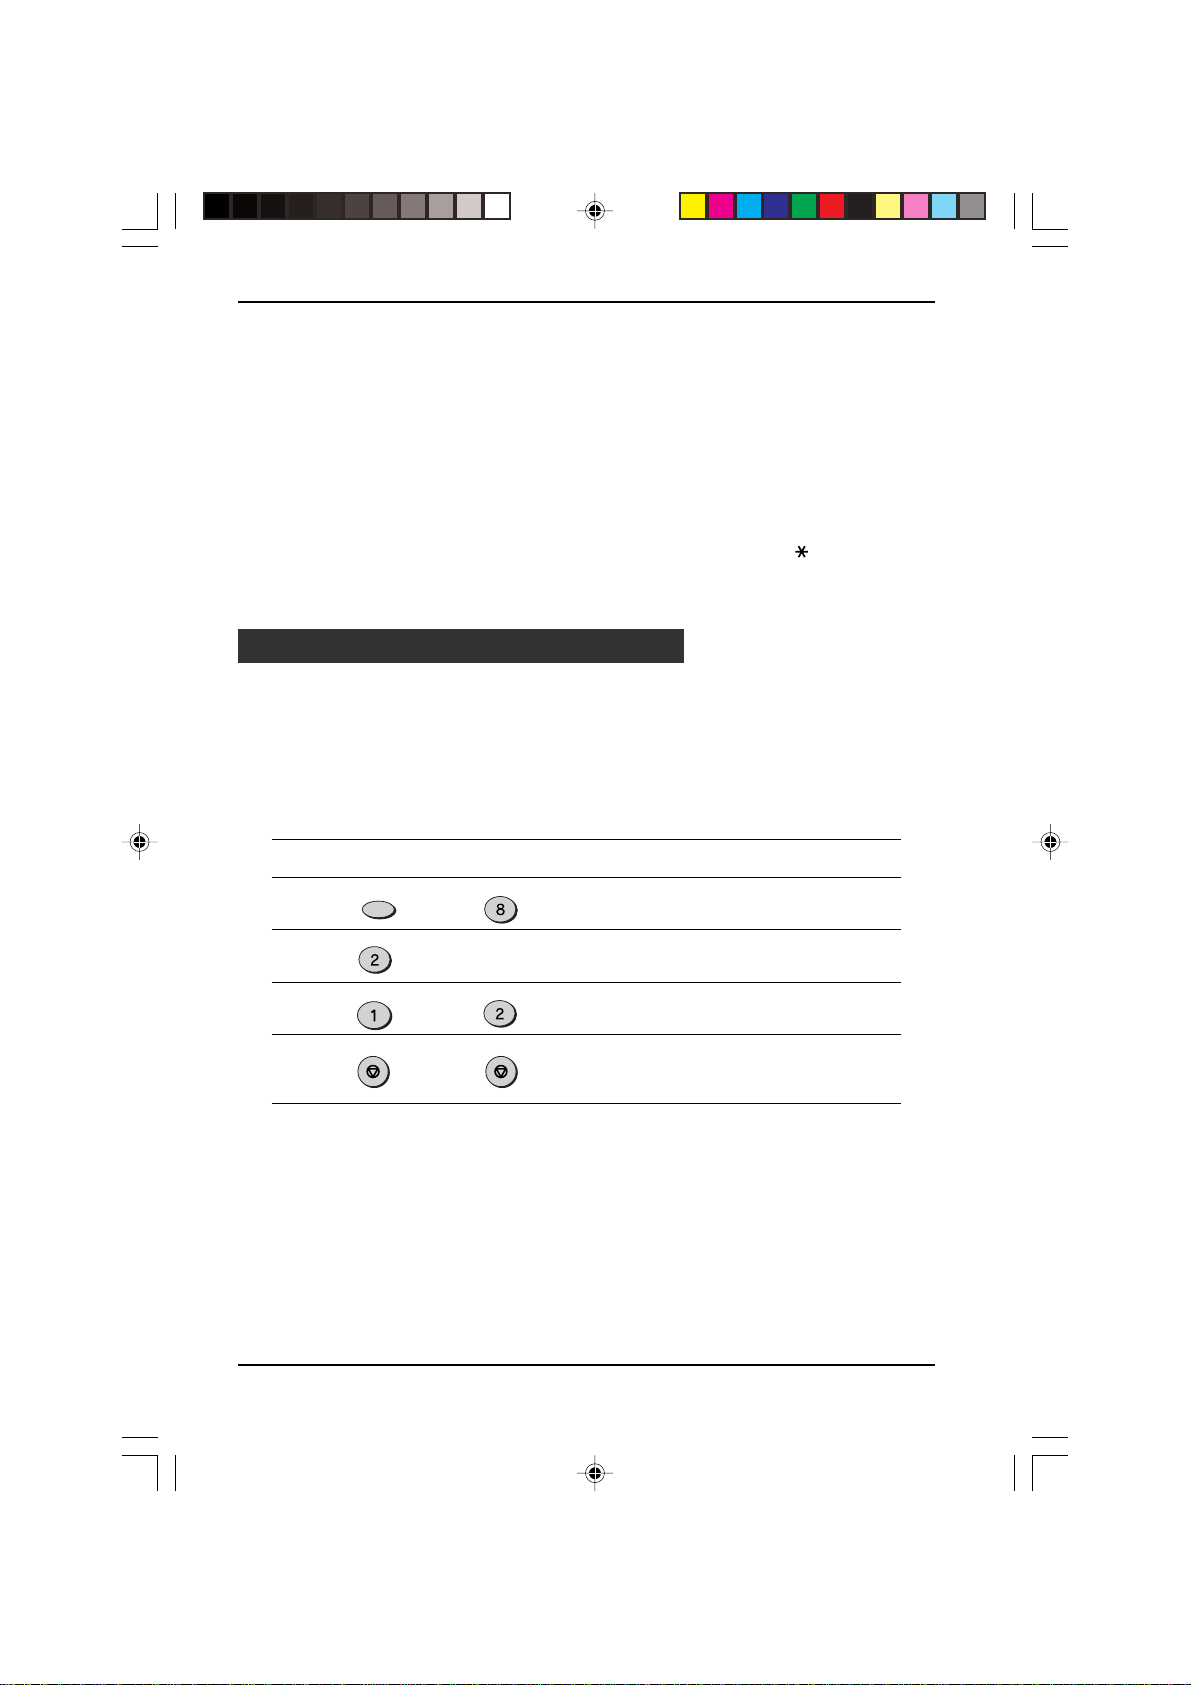
Quiet Detect Time
Quiet Detect Time is the function that enables the unit to be used along with an
answering machine for both phone messages and faxes. After the answer ing
machine has answered, any duration of silence longer than a certain threshold
time will prompt the unit to take over the line and prepare to receive a fax. The
Quiet Detect Time can be set from 00 to 10 seconds, following the procedure
below.
Factory setting: 05
Step Press these keys Comments
1 “A.M. MODE” will appear in the
FUNCTION
TUV
display.
2 “QUIET DETECT TIME” will
appear in the display.
3 Enter the Quiet Detect Time in
seconds, from 00 to 10.
to
4 “STORED” will appear in the
5 Press the STOP key twice to
Notes:
•
The unit has been set at the factory for a Quiet Detect Time of 5 seconds, which
gives the best performance for most answering machines. However, you may ha ve
to adjust the Quiet Detect Time depending on y our answering machine’ s disconnect
time, the time before the machine disconnects the line after a period of silence. If
your machine has a short disconnect time, you may have to shor ten the Quiet
Detect Time. However, if the unit is interrupting callers in the middle of messages,
you should set a longer Quiet Detect Time.
•
If there is a pause at the end of your answering machine message, make sure that
the Quiet Detect Time is longer than this pause.
•
Setting Quiet Detect Time to 00 turns the function off. However, the unit will not be
able to receive faxes sent using manual dialing (picking up the receiver, dialing the
number, and pressing the FAX START key when the fax tone is heard), unless the
sender follows the procedure described below.
ENTER
STOP
STOP
(Setting “00” turns off Quiet
Detect Time)
display.
exit.
2-24
02 INITAL. b(SUK) A5.p65 11/10/99, 13:5224
INITIAL SETTINGS
Page 33
Using the Unit with an Answering Machine
If Quiet Detect Time is not working properly...
With some answering machines, there is simply no Quiet Detect Time that will
allow both reception of faxes and uninterr upted voice messages. Even in this
case, however, you can set up the unit to receive both phone and fax messages
from callers on touch-tone lines. Follow this procedure:
1. Set the Quiet Detect Time to 00.
2. Alter your phone message to tell callers that they can send a fax by pressing the
Remote Reception Number (factory set to 5), followed by the “ ” key twice, and
then the FAX START key of their fax machine.
Answering Machine Backup
There may be times when the tape on your answering machine becomes full, or
when the answering machine itself malfunctions. It is still possible to receive faxes
even under these conditions, however, by turning on the Auto Receive function. The
unit will automatically answer all calls after five rings. To use this function, follow the
procedure below.
Factory setting: 2 (OFF)
Step Press these keys Comments
1 “A.M. MODE” will appear in the
2 “SELECT AUT O RECEIVE” will
3 Press 1 to turn Auto Receive
4 Press the STOP key twice to
FUNCTION
ABC
or
STOP STOP
TUV
display.
appear in the display.
ABC
on, or 2 to turn it off.
exit.
Note: If you are using Auto Receiv e, mak e sure that your answering machine is set
to answer on four rings or less. Otherwise, the unit will take over all calls,
preventing callers from leaving voice messages.
02 INITAL. b(SUK) A5.p65 11/10/99, 13:5225
INITIAL SETTINGS
2-25
Page 34

Notes
2-26
02 INITAL. b(SUK) A5.p65 11/10/99, 13:5226
INITIAL SETTINGS
Page 35

3. CHOOSING SUITABLE MEDIA
Originals Suitable for Faxing
Make sure that the documents you want to fax meet specifications and guidelines
listed in this section.
Size and W eight
The size and weight of documents that you can load in the SPF (Single Pass
Feeder) depend on whether you load one sheet at a time or several sheets at
once.
When using the SPF
One sheet at a time:
52 g/m
(14 lbs.)
2
85 g/m
(23 lbs.)
2
140 mm
(5.5")
216 mm
(8.5")
257 mm
(10.1")
500 mm
(19.7")
Several sheets at once:
14 lbs.
(52 /m
2
)
23 lbs.
(85 /m2)
5.5"
(140 mm)
8.5"
(216 mm)
10.1"
(257 mm)
14.3"
(364 mm)
Note: When feeding in a long document, grasp the document at the edges to guide
it into the unit.
When using the original table
Maximum
10.1"
(257 mm)
14.3"
(364 mm)
Note: Whether you are using the faxing functions of the unit, your documents
(originals) are, in effect, being scanned through the unit. The area of a
document that is scanned by the unit while faxing is slightly smaller than the
actual document (original) size. Any text or graphics outside this area will not
be scanned.
Scanning length: The length of the sheet minus 4mm from both the
03_CHOOSING(SUK) A5.p65 21/09/99, 09:501
top and bottom edges.
CHOOSING SUIT ABLE MEDIA
3-1
Page 36

Originals Suitable for F axing
Unsuitable Originals
General guidelines:
• All clips, staples, and pins should be removed from originals before they are used.
If these are not removed, they may damage the unit.
• Ink, glue, and correction fluid on originals must be completely dry before using the
documents with the unit.
• Originals that are in some way dangerous to the internal mechanisms of the unit
should not be used.
• When faxing, any writing on the originals that is yellow, yellowish-green, or light
blue cannot be transmitted.
The following kinds of originals should not be used:
• Originals with a glossy coating
• Originals with static electricity
• Originals with tears, folds, or curls
• Originals that have become stuck together and cannot be easily separated
• Originals with holes, windows, or perforations
• Transparency films, tracing paper, or other transparencies
• Originals with plastic or metallic coatings
Notes:
• Sharp does not accept any responsibility for the loss or damage of originals.
• It is a good idea to copy valuable originals on a flat-bed copier before using them
with the unit.
3-2
03_CHOOSING(SUK) A5.p65 21/09/99, 09:502
CHOOSING SUIT ABLE MEDIA
Page 37

4. HOW TO USE THE FAX FUNCTION
The standalone fax component of your unit offers a range of sophisticated features
that allow you to control image quality, reception mode, broadcasting, polling, and
transmission priorities. Functions such as sending documents from memory and
substituting reception into memory are greatly enhanced by the large memory capacity .
Sending Documents
Setting the Document
This section describes setting documents in the SPF (Single Pass Feeder) or on the
original table.
When Using the SPF:
Confirm that there are no
1
documents on the original table,
and that copying is not in
progress, then gently c lose the
original cover .
Adjust the document guides to
2
the width of your document.
Place the document face up and
3
push it gently into the document
tray. The top edge of the
document should enter the fax
first.
There are two ways to send the
4
fax:
• To scan the document into
memory, then dial and transmit,
continue with the “Dialing and
Transmitting” section.
• To dial and transmit the document
directly without first scanning it into
memory, press the DOCUMENT
key. “DIRECT SEND” will appear
in the display. Continue with the
“Dialing and Transmitting” section.
HOW TO USE THE FAX FUNCTION
04 USING FAX b(SUK) A5.p65 11/10/99, 17:281
Original face up
4-1
Page 38
Sending Documents
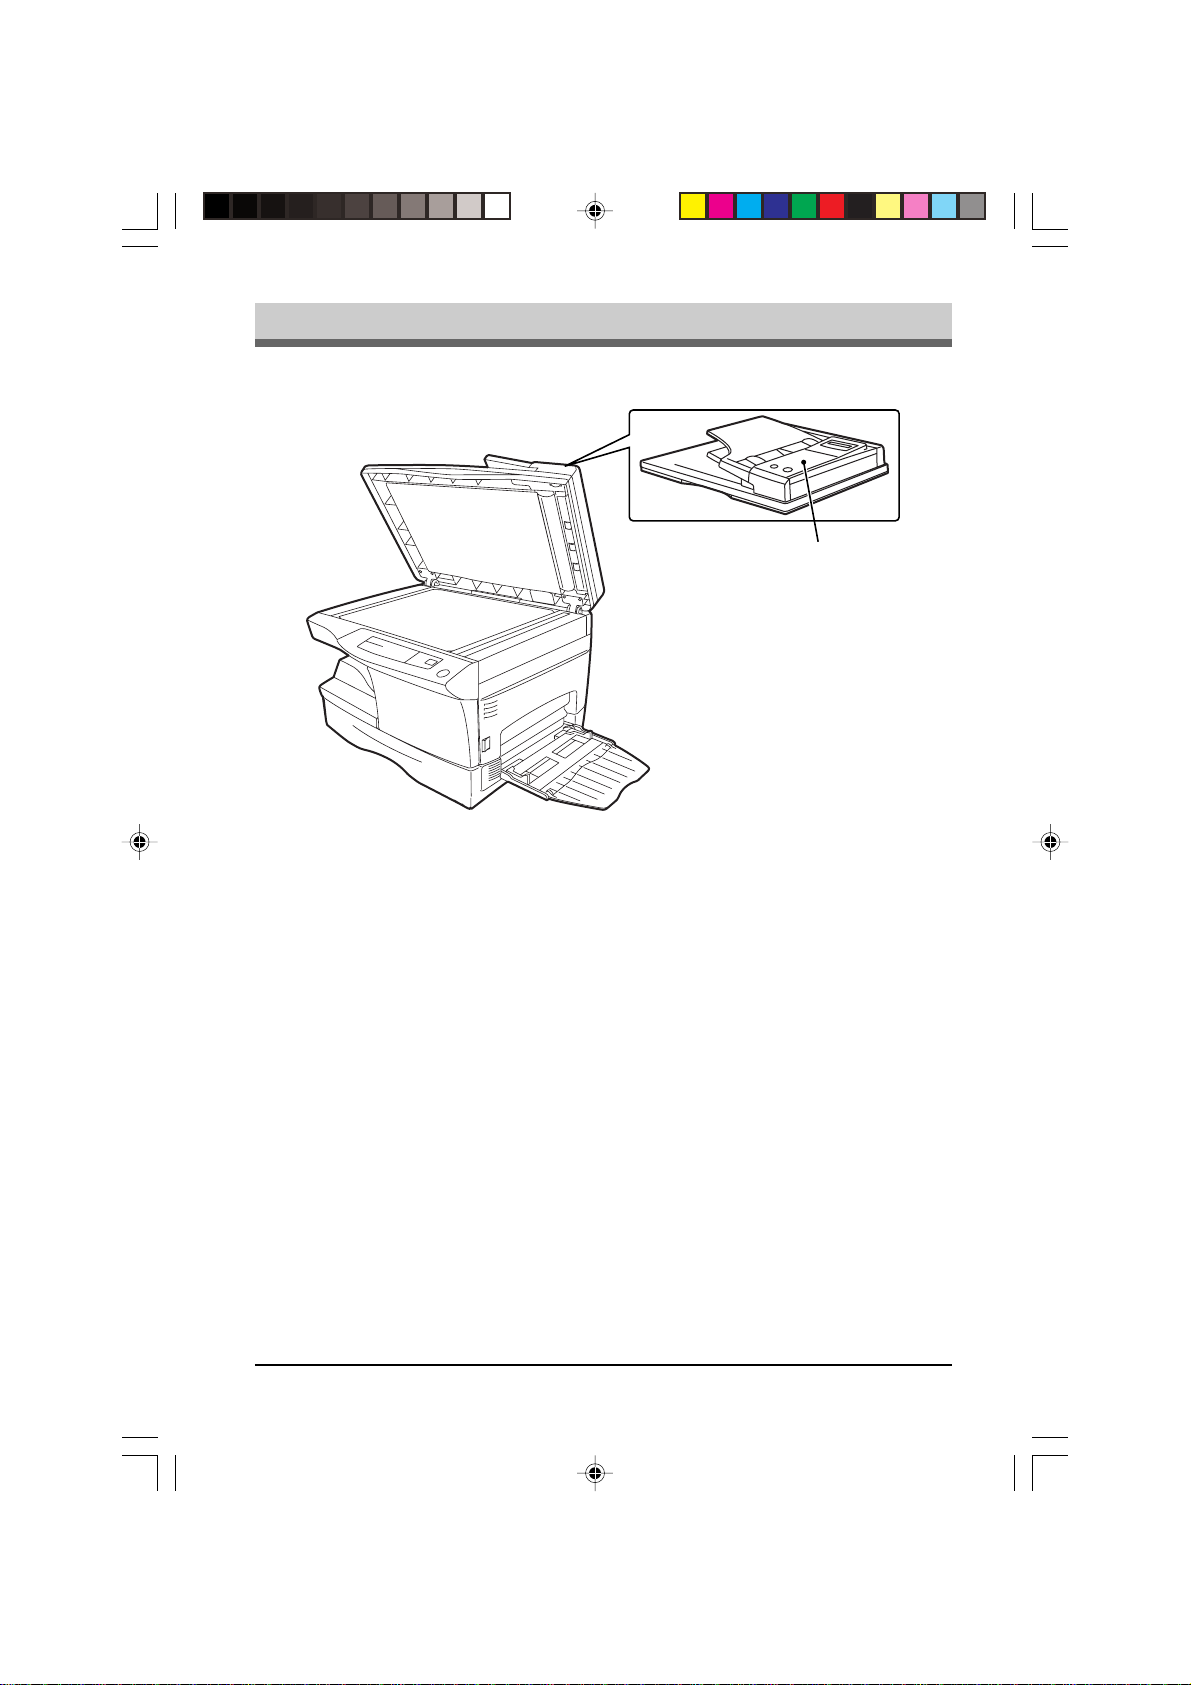
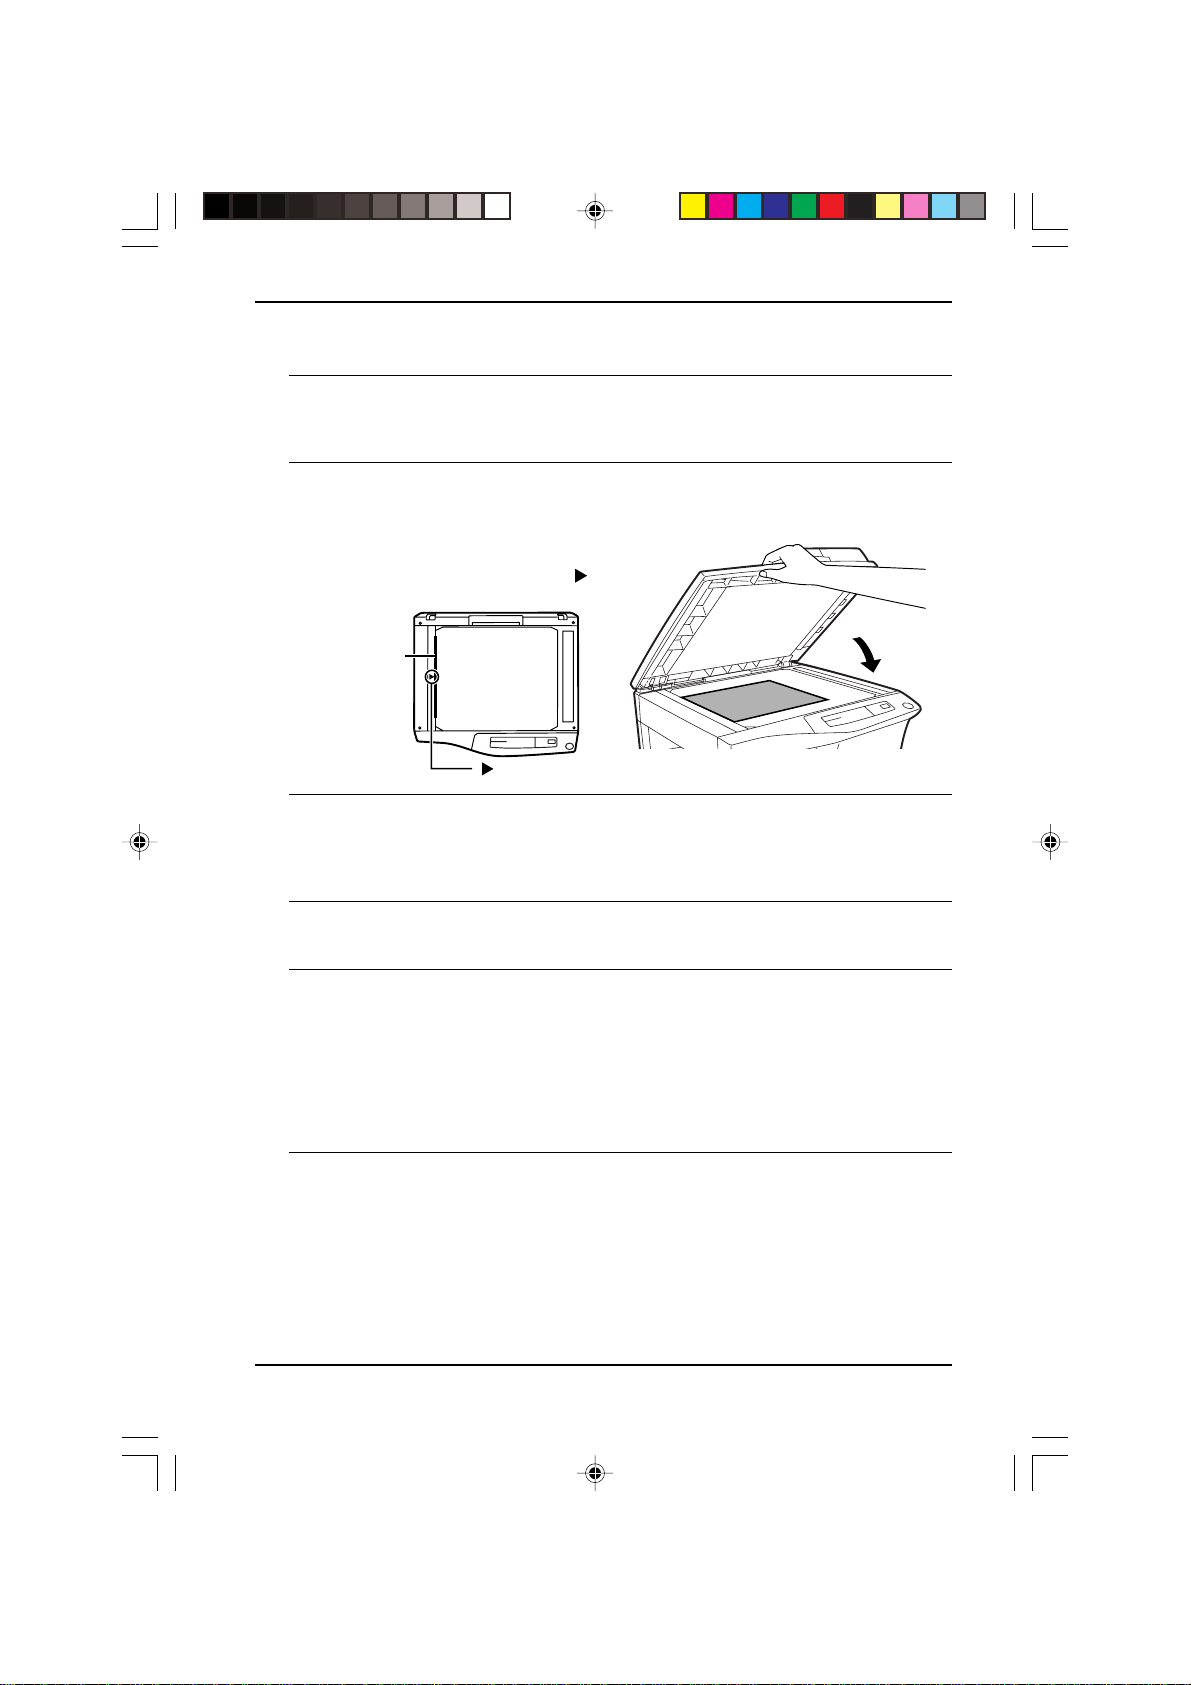
When placing the Original on the Table:
Confirm that there are no
1
documents in the SPF, and open
the original cover .
Place the document face down on
2
the original table. Align the
document according to the
original scale in the illustration
below. (Line up the center of the
edge of the document with the (
mark.)
Original scale
mark
Gently close the original cover.
3
Note: When using the original table, do not set documents in the SPF.
)
Press the BOOK SEND key to
4
scan the page into memory.
Select the document size from
5
those displayed.
You can now make resolution or
contrast settings as described in
the next section and dial and
transmit the fax. (See “Dialing and
Transmitting” in this chapter)
Press the BOOK SEND key. If you
6
have more than one document to
read into memory, place the next
page, and press the BOOK SEND
key to read each page.
4-2
04 USING FAX b(SUK) A5.p65 11/10/99, 17:282
HOW TO USE THE FAX FUNCTION
Page 39

Sending Documents
Optional T ransmission Settings
There are several transmission settings that you can make before dialing and
transmitting a document.
Resolution
Your fax has four resolution settings:
• HALF TONE
Use HALF TONE for photographs and illustrations. The original will be reproduced
in 256 shades of gray.
• STANDARD
Use STANDARD for ordinary documents. This setting gives you the fastest
transmission.
• FINE
Use FINE for improved reproduction, especially with documents containing small
letters or fine drawings.
• S. FINE
Use SUPER FINE when you need the highest quality of reproduction.
If you do not change the setting, the document will automatically be sent in
STANDARD mode.
BOOK SEND
RESOLUTION CONTRAST BROADCAST
FUNCTION
ENTER
AUTO
MANUAL
A.M.
RECEPTION
MODE
Note: If the document is B4 size, you cannot use the HALF TONE setting in the
following situations :
• With the Memory function
• For a Broadcast operation
• For a Timer operation
• For sending from the original table
• With the Memory Polling function
Contrast
The fax automatically controls the contrast, but you can also control it manually. To
do this, press the CONTRAST key one or more times until the desired contr ast settings
appear in the display. The three contrast levels are light, medium, and dark.
HOW TO USE THE FAX FUNCTION
04 USING FAX b(SUK) A5.p65 11/10/99, 17:283
ENTER
BOOK SEND
FUNCTION
RESOLUTION CONTRAST BROADCAST
AUTO
MANUAL
A.M.
RECEPTION
MODE
4-3
Page 40
Sending Documents
Cover Sheet
You can have your fax generate a cover sheet and send it as the last page of the
transmission. The cover sheet includes the date and time, the sender’s name and
number, and the receiv er’ s name and number if an automatic dialing number is used.
The total number of pages sent is indicated on the bottom.
To include a cover sheet with a transmission, follow these steps:
Factory setting: 2 (OFF)
Step Press these keys Comments
or
PQRS
appear in the display.
ABC
sheet function on, or “2” to
turn it off.
1 “COVER SHEET MODE” will
FUNCTION
2 Press “1” to turn the cover
3 If you pressed “1” in the
ABC
(example: URGENT)
Note: The receiver's name must be programmed in either the Rapid Key or Speed
Dial function for it to appear on the Cover Sheet.
previous step, select a
message by entering a
number from 2 to 6 as shown
below, or enter 1 if you do not
want to include a message.
1: NO MESSAGE
2: URGENT
3: IMPORTANT
4: CONFIDENTIAL
5: PLS. DISTRIBUTE
6: PLS. CALL BACK
4-4
04 USING FAX b(SUK) A5.p65 11/10/99, 17:284
HOW TO USE THE FAX FUNCTION
Page 41
Sending Documents
Auto Cover Sheet
If you want to send a cover sheet with your fax transmissions regularly, this function
is very useful. This function differs from the Cover Sheet function in two ways. First,
the Cover Sheet function must be programmed before every fax you want to use it
with; the A uto Cover Sheet function will send a cov er sheet with every fax transmission
unless you turn it off. No message is included on the cover sheets generated by the
Auto Cover Sheet function. Please note that the Co ver Sheet function is the dominant
of the two, so an ideal way to use the two together is to always leave Auto Cover
Sheet on, then use the Cover Sheet function to attach messages or not attach a
cover sheet to certain transmissions.
Use the procedure below to turn the Auto Cover Sheet function on or off:
Factory setting: 2 (OFF)
Step Press these keys Comments
1 “OPTION SETTING” will
FUNCTION
2 “AUTO COVER SHEET” will
3 Press 1 to turn the function
or
GHI
appear in the display.
DEF
appear in the display.
ABC
on, or 2 to turn it off.
4 Press the STOP key twice to
STOP
STOP
exit.
Note: The receiver's name must be programmed in either the Rapid Key or Speed
Dial function for it to appear on the Auto Cover Sheet.
HOW TO USE THE FAX FUNCTION
4-5
04 USING FAX b(SUK) A5.p65 11/10/99, 17:285
Page 42

FAX START
Sending Documents
Dialing and Transmitting
Once you have set the document (either in the automatic document feeder or on the
original table), and have selected the desired transmission settings, you are ready to
dial the number of the receiving fax machine and transmit the document. You can choose
from one of the several ways of dialing that best suit your needs.
Direct Keypad Dialing
If the number of the fax you want to reach is not a Rapid key or Speed Dial number,
use Direct Keypad Dialing to manually enter it using the following procedure:
Confirm that you have correctly
1
set the document in the automatic
document feeder or on the
original table. (See “Setting the
Document” in this chapter)
Enter the number of the fax
2
machine you want to send to by
pressing the number keys.
GHI
ABC
JKL
DEF
MNO
Check the display. If the number
3
of the receiving machine is shown
correctly, press the FAX START
key.
• If it is not correct, press the STOP
key to backspace and clear one
digit at a time, and then enter the
correct number.
4-6
HOW TO USE THE FAX FUNCTION
PQRS
TUV
WXYZ
04 USING FAX b(SUK) A5.p65 11/10/99, 17:286
Page 43

Sending Documents
Rapid Key Dialing
If the number you want to dial has been stored as a Rapid key number (see “Storing
Numbers for Automatic Dialing” in Chapter 2), you can dial it by pressing the
appropriate Rapid key as shown:
01 02 03 04 05
06 07 08 09 10
11 12 13 14 15
16 17 18 19 20/POLL
Speed Dialing
If the number you want to dial has been stored as a Speed Dial number, you can dial
it using the following procedure:
Press the SPEED/SEARCH key
1
and then enter the 2-digit number
by pressing the number keys (see
“Storing Numbers for Automatic
Dialing” in Chapter 2).
SPEED/
SEARCH
GHI
PQRS
ABC
DEF
JKL
MNO
TUV
WXYZ
Check the display. If the name or
2
number shown is correct, press
the FAX START key. (If it is not
correct, press the STOP key and
then repeat Step 1.)
HOW TO USE THE FAX FUNCTION
04 USING FAX b(SUK) A5.p65 11/10/99, 17:297
FAX START
4-7
Page 44

Sending Documents
Chain Dialing
The Chain Dialing function allows you to combine an Automatic Dialing number set
for Chain Dialing (see “Storing Numbers for Automatic Dialing” in Chapter 2) with
another Automatic Dialing number or digits entered manually with the number keys
to dial one phone number up to 50 digits long. The following are some examples of
how this can be done:
• Enter Speed Dial numbers that you have programmed f or Chain Dialing. F or example,
if you have stored the first part of a fax number in Speed Dial number 22 and the
second half in Speed Dial number 27, press the SPEED/SEARCH key and “22”,
then the SPEED/SEARCH key and “27”. Then press the FAX START key to begin
transmission.
• Press a Rapid key that is set for Chain Dialing and then manually enter a number b y
pressing the appropriate number keys. Press the FAX START key after the final
number key to begin transmission. (You can use this method, for example, when
you have stored a long distance access code into a Rapid k e y, and want to dial this
in combination with a number that is not stored as an automatic dialing number.)
4-8
04 USING FAX b(SUK) A5.p65 11/10/99, 17:298
HOW TO USE THE FAX FUNCTION
Page 45
Sending Documents
Using the SEARCH Key
If you do not remember the Rapid key or Speed Dial number in which you have
stored a particular fax number, y ou can search for the number by following the steps
below:
Press the SPEED/SEARCH key
1
twice.
Enter the first letter of the stored
2
name by pressing the appropriate
number key (the key below the
marked letter) until the letter
appears in the display. If the name
begins with a special character or
number, press “1”.
• If you do not remember the first
letter, go to Step 3 and scroll
through the list from the
beginning.
Press the left and right arrow (
3
) keys to scroll through the
names (numbers if you pressed
“0”). Stop when the desired name
appears in the display.
SPEED/
SEARCH
ABC ABC ABC
(example: “B”)
or
Press the F AX START key. The
4
document will be automatically
transmitted once the connection is
made.
Redialing
You can send a fax to the number you last dialed by pressing the REDIAL/PAUSE
key, followed by the FAX START key or Rapid key 20/POLL.
REDIAL/
PAUSE
HOW TO USE THE FAX FUNCTION
04 USING FAX b(SUK) A5.p65 11/10/99, 17:299
FAX START
FAX START
4-9
Page 46

Receiving Faxes
You can set the unit to one of three modes of reception, AUTO, MANUAL, or A.M.
(Answering Machine). To select the reception mode, press the RECEPTION MODE
key until the light next to the desired mode comes on.
ENTER
BOOK SEND
RESOLUTION CONTRAST BROADCAST
FUNCTION
AUTO
MANUAL
A.M.
RECEPTION
MODE
Using AUTO Mode
Select AUTO mode when you only want to receive faxes on y our telephone line . The
unit will automatically answer all calls and receive incoming faxes.
Using MANUAL Mode
MANUAL is the most convenient mode for receiving phone calls if you have an
extension phone. To have true manual mode, the unit must be set to not answer while
in MANUAL mode (see “Setting the Number of Rings f or Manual Reception” in Chapter
2). You can also receive fax es; ho we ver, all calls must first be answered by picking up
the receiver on the extension phone or telephone connected to the same line.
Using A.M. Mode
Select this mode when an answering machine is connected to the unit and you want
the answering machine to answer all calls. This allows you to receive both voice
messages and faxes when you are out.
4-10
04 USING FAX b(SUK) A5.p65 11/10/99, 17:2910
HOW TO USE THE FAX FUNCTION
Page 47

Optional Reception Settings
The unit has various optional settings for the reception of f ax es .
Receive Reduce
You may on occasion receive faxes that are larger than the paper loaded in the unit.
To ensure that you do not lose any part of the original, you should use the Receive
Reduce function, which scales the fax to the printing paper size. To use this feature,
follow this procedure:
Factory setting: 1 (auto reduction)
Step Press these keys Comments
1 “OPTION SETTING” will
FUNCTION
2 “RECEIVE REDUCE” will
GHI
appear in the display.
GHI
appear in the display.
3 Select one of the reduction
settings listed below by
pushing the corresponding
number key:
ABC
or
4 Press the STOP key twice to
STOP
STOP
1 (AUT O REDUCTION):
Automatic reduction
depending on size of original
and printing paper.
2 (NO REDUCTION):
No reduction
“STORED” will appear in the
display.
exit.
HOW TO USE THE FAX FUNCTION
04 USING FAX b(SUK) A5.p65 11/10/99, 17:2911
4-11
Page 48

Optional Reception Settings
Footer Printing
You can choose whether or not to have a footer with the sending machine’s ID
information (name, number, etc.) pr inted out.
Factory setting: 2 (OFF)
Step Press these keys Comments
1 “OPTION SETTING” will
FUNCTION
2 “FOOTER PRINT” will appear
3 Press 1 to print footers, or 2 to
4 Press the STOP key twice to
STOP
or
GHI
appear in the display.
WXYZ
in the display.
ABC
not print them.
STOP
exit.
When using manual sending and receiving
You need to use the SPEAKER key or an extension telephone to perform manual
sending and receiving. For information about connecting and extension telephone
see “Connecting Other Devices” in Chapter 1 for details.
When the extension telephone
1
rings, pick up the handset and
converse.
. If the SPEAKER key is used to
answer a call you cannot converse.
Note: You cannot use the SPEAKER key for fax transmission/reception while
copying is in progress.
When the hanset is off hook or
2
the SPEAKER key is used, press
the F AX START key.
. When there are originals in the
SPF, the machine senses the
presence of the originals and
displays the message.
Press “1” to send. Press “2” to
receive.
4-12
04 USING FAX b(SUK) A5.p65 11/10/99, 17:3012
HOW TO USE THE FAX FUNCTION
Page 49

Special Functions
Memory
Your unit has a memory area that can be used to store both incoming and outgoing
documents.
• Approximately 120 pages of average content can be held in memory for transmission.
Less can be held if any of the pages were scanned using fine or superfine resolution.
Memory Backup
• The unit uses a lithium-ion battery to keep automatic dialing numbers and other
programmed data in memory when the power is turned off (when the unit is
unplugged). Battery power is consumed primarily when the power is urned off.
With the power kept continuously off, the life of the battery is about 5 years. If
the battery dies, have your dealer or retailer replace it. Do not try to replace it
yourself.
• When documents are stored in memory, do not turn the power off. If power to
the unit is cut off due to power shortage or other causes, the fax memory data
will be kept approximately one hour. However, if power to the unit is cut off
within 10 minutes of it being turned on, fax memory data may not be saved.
Substitute Reception into Memory
This is a back-up function that is automatically activated if your f ax runs out of paper,
the imaging cartridge needs replacement, or the paper jams.
The message “FAX RX IN MEMORY” will only appear in the display at the time the
document is initially received into memory. After reception is complete, one of the
following messages, “REPLA CE TONER, ” or “PAPER JAM” will appear in the display.
When you add paper (and set the paper size), replace the imaging cartridge, or clear
the jam, the stored documents will automatically be printed out.
• If you received documents in memory because the fax ran out of paper, be sure to
add paper which is the same size as the paper previously used. If not, the document
print-out size may not match the size of the printing paper.
Caution!
If documents received in memory are lost due to a power failure or other
•
interruption in the power supply, a POWER FAIL REPORT will be printed out
when the power is restored. This gives available information about the faxes
lost, including the fax numbers of the transmitting machines.
HOW TO USE THE FAX FUNCTION
04 USING FAX b(SUK) A5.p65 11/10/99, 17:3013
4-13
Page 50

Special Functions
Data T ransfer
If there is a problem with the unit, you can use the Data Transfer function to have
received fax es read into memory and then sent to a different fax machine f or printing.
This function is used when you cannot print received faxes, for example when the
unit runs out of toner, a misfeed occurs.
Factory setting: 2
Step Press these keys Comments
1 “RX DATA TRANSFER” will
2 “F AX NUMBER” will appear in
FUNCTION
ABC
appear in the display.
the display.
3 Enter the transferring fax
TUV
ABC
PQRS
DEF
number (maximum 20 digits)
ABC
GHI
PQRS
TUV
by pressing the number keys.
(example : 18002374278)
4 “RX DATA TRANSFER” will
ENTER
appear in the display.
5 “TRANSFER ?” will appear in
the display.
6 Press 1 to turn Data Transfer
or
ABC
STOP
on, or 2 and the STOP key to
turn it off.
4-14
04 USING FAX b(SUK) A5.p65 11/10/99, 17:3114
HOW TO USE THE FAX FUNCTION
Page 51

Special Functions
Transmission Reservation
When your fax is busy receiving a document or tr ansmitting a document from memory ,
you can “reserve” a transmission by setting the document on the original table, reading
it into memory, and entering the f ax number . Once the current oper ation is completed,
your fax will automatically dial the number and transmit the document saving you
from having to wait.
When using the SPF :
Confirm that there are no
1
documents on the original table
and that copying is not in progres,
then gently close the original
cover.
Adjust the document guides to the
2
width of your document.
Place the document face up and
3
push it gently into the SPF. The
top edge of the document shoudl
enter the fax first.
• Adjust the resolution and/or
contrast settings if desired. Note
however that you cannot use the
HALF TONE resolution setting
with B4 size documents.
Original face up
Enter the number of the receiving
4
machine using one of the
following methods:
• Press a Rapid key.
• Press the SPEED/SEARCH key
and enter a Speed Dial number.
• Enter a full number with the
number keys.
Press the FAX START key if y ou
5
entered a Speed Dial number or a
full number.
• The number will be dialed once the
current operation is completed, and
transmission will begin once the
connection is made.
HOW TO USE THE FAX FUNCTION
04 USING FAX b(SUK) A5.p65 11/10/99, 17:3115
SPEED/
SEARCH
(example)
4-15
Page 52
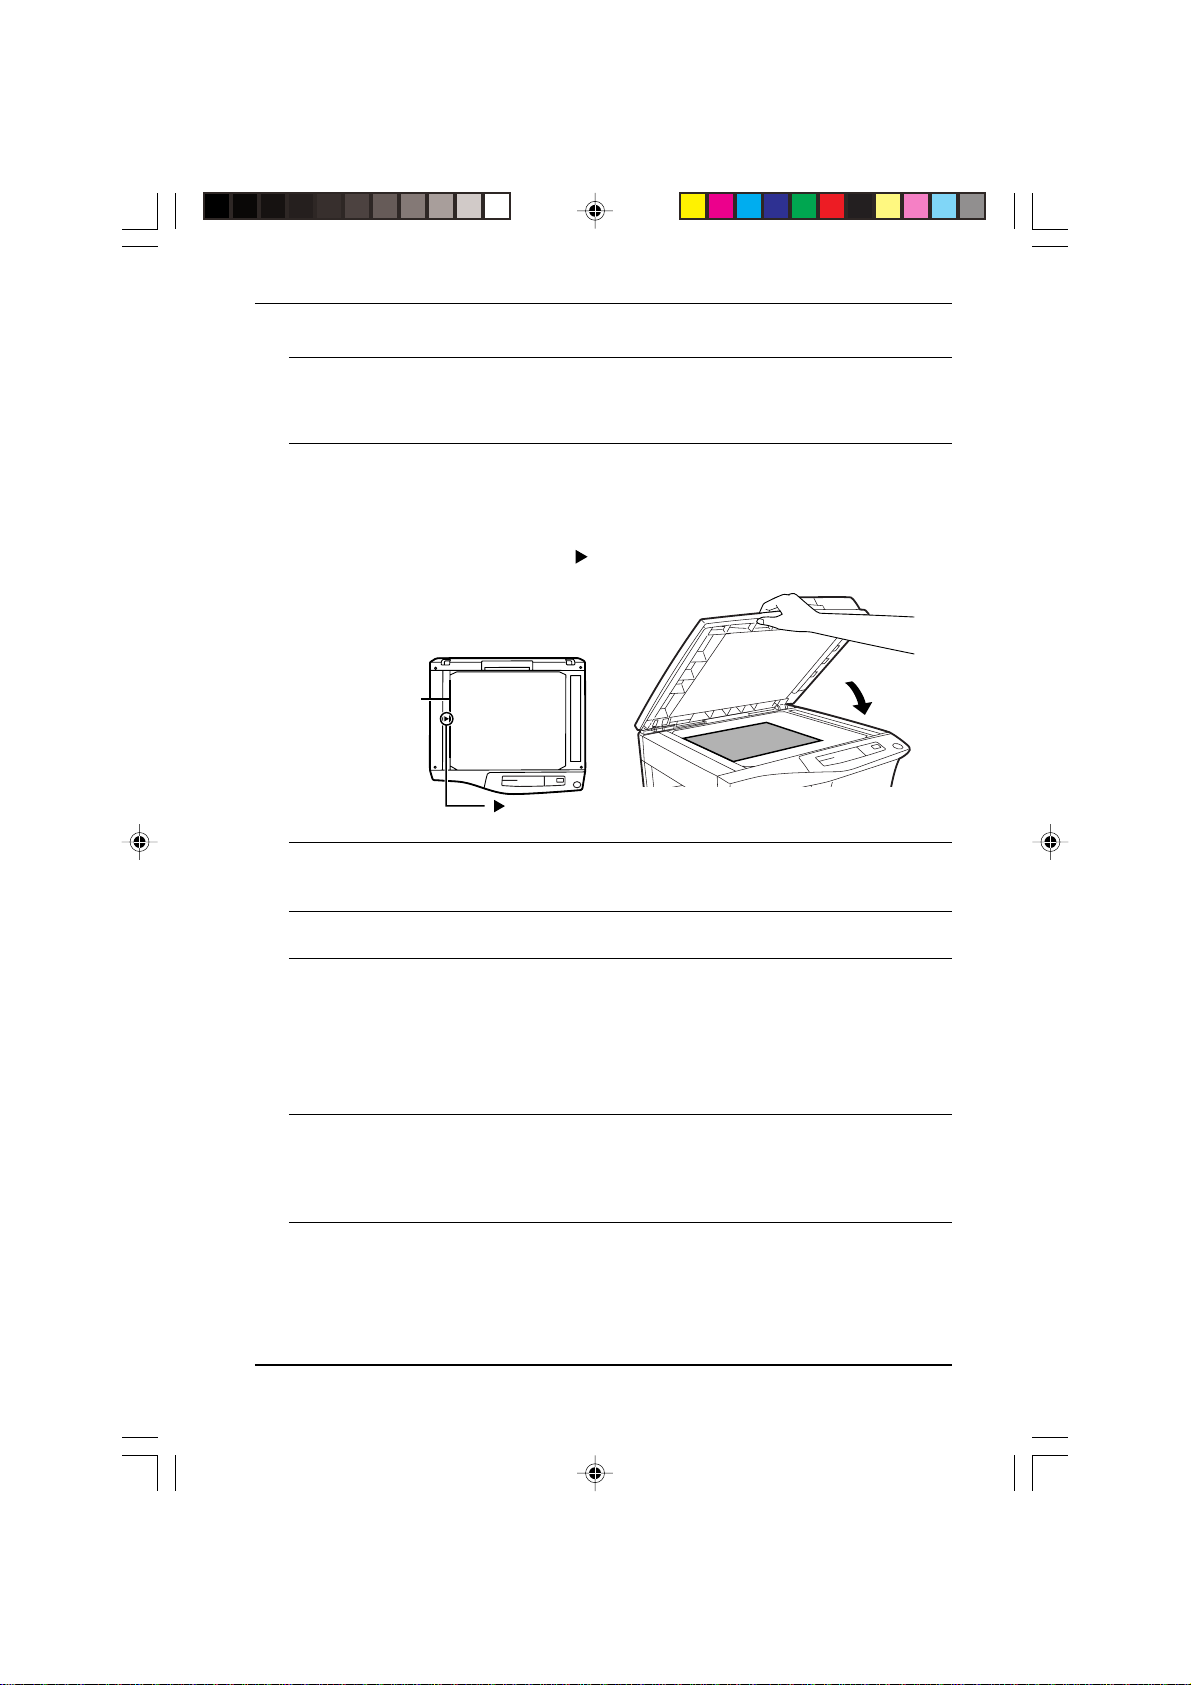
Special functions
When using the original table :
Confirm that there are no
1
documents in the SPF and that
copying is not in progres, then
gently close the original cover.
Place the document face down on
2
the original table. Align the
document according to the
original scale in the illustration
below. (Line up the center of the
edge of the document with the (
mark.
• Adjust the resolution and/or
contrast settings if desired.
Original scale
mark
Gently close the original cover.
3
Note : When using the original table, do not set documents in the SPF.
Press the BOOK SEND key to
4
scan the page into memory.
Select the document size from
5
those displayed.
• Adjust the resolution and/or
contrast settings if desired.Note
however that you cannot use the
HALF TONE resolution setting
with B4 size documents.
Press the BOOK SEND key. If you
6
have more than one sheet to read
into mmory, place the next page,
and press the BOOK SEND key to
read each page.
)
Continue with steps 4 ad 5 in the
7
previous section, “Using the
SPF”.
Note : If the document is remov ed from te document tr a y after a transmission
reservation is set, the reservation will be canceled.
4-16
04 USING FAX b(SUK) A5.p65 11/10/99, 17:3116
HOW TO USE THE FAX FUNCTION
Page 53

Special Functions
Broadcasting
This function allows you to send the same document to as many as 50 different
locations with just one operation. Once the document is loaded, it is scanned and
stored in memory. The fax numbers you have entered are then automatically dialed
in succession, and the document is transmitted to each location.
• To enter the fax numbers of the receiving machines, you must use Rapid keys,
Speed Dial numbers, or Group keys; no fax numbers can be entered manually.
Place the document face up and
1
push it gently into the document
tray.
• Adjust the resolution and/or
contrast settings if desired.
Original face up
Press the BROADCAST ke y.
2
Dial the numbers of the receiving
3
units using one or more of the
following methods:
• Press one or more Rapid keys.
• Enter Speed Dial numbers with
the number keys, for example
Speed Dial numbers 01, 02,
through to 09.
• Press one or more Group keys.
HOW TO USE THE FAX FUNCTION
BROADCAST
01
02 09
. . .
(example)
4-17
04 USING FAX b(SUK) A5.p65 11/10/99, 17:3117
Page 54

Special Functions
Press the F AX START key.
4
T ransmission will begin.
FAX START
Broadcasting using a Group key
If the fax machines to which you want to broadcast have all been programmed into
one Group key, you can perform the broadcasting operation using the following
simplified procedure. Refer to “Storing Numbers Under Group Keys” in Chapter 2.
Place the document face up and
1
push it gently into the document
tray.
• Adjust the resolution and/or
contrast settings if desired.
Original face up
Press the appropriate Group key.
2
T ransmission will begin.
If the memory becomes full while the
document is being scanned,
“MEMORY FULL” will appear in the
display.
• Press the FAX START key to
transmit the pages that have been
stored up to that point in memory.
• Press the STOP key to cancel the
entire transmission.
4-18
04 USING FAX b(SUK) A5.p65 11/10/99, 17:3118
HOW TO USE THE FAX FUNCTION
19
(example)
Page 55

Special Functions
Polling
Polling allows you to request another fax machine to send a document to your fax
machine. In other words, the receiving f ax machine, not the tr ansmitting fax machine ,
activates the transmission. You can use your fax to both poll and be polled by others.
Setting the Polling Ke y
To use the polling function, you must first set Rapid key 20/POLL f or use as a polling
key. This is done by following the procedure shown below.
• The polling key cannot be used for both Rapid Key Dialing and Polling. If it has
already been programmed for Rapid K ey Dialing, y ou must clear it first as described
in “Storing Numbers for Automatic Dialing” in Chapter 2.
Step Press these keys Comments
1 “ENTRY MODE” will appear in
2 “POLLING FUNCTION” will
3 Press “1” to turn the polling
4 Press the STOP key twice to
FUNCTION
GHI
or
STOP
DEF
the display.
appear in the display.
ABC
function on, or “2” to turn it off.
STOP
exit.
Polling Others
Dial the number of the fax
1
machine you want to poll using
one of the following methods:
• Press the SPEAKER key and dial
the full number. Wait for the fax
answer-back tone.
• Press the SPEED/SEARCH key
and enter a 2-digit Speed Dial
number.
• Enter the full number using the
number keys.
Press Rapid key 20/POLL.
2
HOW TO USE THE FAX FUNCTION
04 USING FAX b(SUK) A5.p65 11/10/99, 17:3119
SPEED/
SEARCH
(example)
20/POLL
4-19
Page 56

Special Functions
Being Polled (Memory P olling)
To allow multiple fax machines to poll your fax, or in cases where you want to free up the
Document Tray for other operations, use Memory Polling instead of Polling Standby.
Programming a Memory Polling Operation
You can choose whether to allow polling only once, or an unlimited number of times.
In the later case, your fax can be used as an electronic “bulletin board”.
• Only one document can be stored at a time for memory polling, however, you can
store multiple page documents.
• If you allow polling only once, the document will be automatically cleared from
memory after polling. If you allo w polling an unlimited number of times, the document
will remain in memory until you clear it using the procedure described in “Clearing
Documents” which follows.
• If you have a document stored in memory for polling, and you want to add to it,
following the procedure described in “Adding to Documents”.
To program a Memory Polling operation, either load the document in the automatic
document feeder or use the original table as described below . Then, set the reception
mode to AUTO (Press the RECEPTION MODE key until the AUTO light comes on).
Step Press these keys Comments
1 “MEMORY POLL MODE” will
FUNCTION
WXYZ
appear in the display. “1: TIME
2: REPEAT” will appear at the
bottom of the display.
2 “SET RESOLUTION &
CONTRAST THEN ENTER”
will appear in the display.
RESOLUTION
3 Adjust the resolution and/or
4 When using the automatic
5 Press the STOP key twice to
ENTER
STOP
CONTRAST
contrast settings if desired.
document feeder, press
ENTER key. When using the
original table, follow steps 1-6
in the section “Setting the
Document” in this chapter .
“STAND-BY” will appear in the
display, and the document will
be scanned into the unit’s
memory.
STOP
exit.
4-20
04 USING FAX b(SUK) A5.p65 11/10/99, 17:3220
HOW TO USE THE FAX FUNCTION
Page 57

Special Functions
Adding to Documents
If you have a document stored in memory for polling, and you want to add pages to
it, use the following procedure.
If you allow polling only once, the document will be automatically cleared from
memory after polling. If you allow polling an unlimited number of times, the
document will remain in memory until you clear it using the procedure below:
Step Press these keys Comments
1 “MEMORY POLL MODE” will
FUNCTION
2 Continue with step 2 in the
WXYZ
ENTER
appear in the display. “1: ADD
2: CLEAR” will appear at the
bottom of the display.
“Programming a Memory
Polling Operation” section.
Clearing Documents
Step Press these keys Comments
1 “MEMORY POLL MODE” will
2 The date and time will return
FUNCTION
ABC
WXYZ
ENTER
appear in the display. “1: ADD
2: CLEAR” will appear at the
bottom of the display.
to the display.
HOW TO USE THE FAX FUNCTION
04 USING FAX b(SUK) A5.p65 11/10/99, 17:3221
4-21
Page 58

Special Functions
Timer Operations
The timer function allows you to set a transmission or polling operation to be perf ormed
automatically at a time you specify. Up to three transmission operations or polling
operations can be set at any one time, and the times they will be performed can be
specified up to a week in advance.
Y ou can use this function, f or example, to tak e advantage of lower nighttime telephone
rates without having to be there when the operation is performed.
• For a timer transmission, scan the document into memory when you set the
transmission. Scanning the document into memory is convenient because you do
not have to worry about document mix-ups or forgetting to load the document.
• If the memory becomes full while the document is being scanned, “MEMORY FULL”
will appear in the display.
• Press the FAX START key to transmit the pages that have been stored up to
that point in memory.
• Press the STOP key to cancel the entire transmission.
• Code numbers are used to specify each day of the week. Refer to the table below
when making time settings which include a specified day.
Day
Code
4-22
Sunday0Monday1Tuesday
2
HOW TO USE THE FAX FUNCTION
Wednesday
3
Thursday4Friday5Saturday
6
04 USING FAX b(SUK) A5.p65 11/10/99, 17:3222
Page 59

Special Functions
To set a timer operation:
Step Press these keys Comments
1 “TIMER MODE” will appear in
FUNCTION
the display.
2 Select SET. “TIMER COMM.
#=1”, “TIMER COMM. #=2” or
“TIMER COMM. #=3” will
appear in the display.
3 Select “SEND MODE” or
4 Enter the time of the operation
5 Enter the code for the day of
or
DEF
ABC
or
6 “ENTER NUMBER” will appear
ENTER
ABC
ENTER
ENTER
(example)
(example)
“POLLING MODE”.
(2 digits for the hour and 2
digits for the minute).
the operation. If the operation
will be performed within 24
hours, just press the ENTER
key .
in the display.
7 Enter the fax number of the
JKL
(example)
8 “SET RESOLUTION &
ENTER
other machine using one of the
following methods:
• Press a Rapid key.
• Enter a Speed Dial number
with the number keys.
For a polling operation, go to
Step 11.
CONTRAST THEN ENTER”
will appear in the display.
9 If this is a transmission
RESOLUTION
10 “LOAD DOCUMENT(S)” will
ENTER
STOP
11 Press the STOP key a number
HOW TO USE THE FAX FUNCTION
04 USING FAX b(SUK) A5.p65 11/10/99, 17:3323
CONTRAST
STOP
(optional)
. . .
operation, adjust the
resolution and/or contrast if
desired. (Otherwise, skip this
step.)
appear in the display. If the
document is already loaded,
no message will appear in the
display.
of times until you exit.
4-23
Page 60

Special Functions
To cancel a timer operation:
If you need to cancel a timer operation after it has been set, follow the steps below:
If the timer operation is a transmission operation, you will need to know the number
assigned to it. If y ou do not remember the number (it appears in the display when y ou
set the operation), print out the Timer List. See “Printing Out Reports” in this chapter
for details on how to print out the Timer List.
Step Press these keys Comments
1 “TIMER MODE” will
FUNCTION
appear in the display.
2 Select “CLEAR”. “ENTER
ABC
# (1-3)” will appear in the
display.
3 Enter the 1-digit number
assigned to the operation.
4 “CLEARED” will appear in
5 Press the STOP key twice
Anti Junk Fax
You can avoid wasting fax paper by using the Anti Junk Fax function. This function
prevents the reception of faxes from up to ten specified par ties.
Factory setting : 2 (OFF)
To turn the Anti Junk Fax feature on and off, use the following procedure:
Step Press these keys Comments
1 “ANTI JUNK FAX” will
2 “ANTI JUNK SELECT” will
3 Turn Anti Junk Fax on or
ENTER
STOP STOP
FUNCTION
MNO
ENTER
ABC
or
(example)
the display.
to exit.
appear in the display.
appear in the display.
off.
4 Press the STOP key twice
4-24
04 USING FAX b(SUK) A5.p65 11/10/99, 17:3424
STOP
HOW TO USE THE FAX FUNCTION
STOP
to exit.
Page 61

To store junk fax numbers, use the f ollowing procedure:
Step Press these keys Comments
1 “ANTI JUNK FAX” will
FUNCTION
MNO
appear in the display.
Special Functions
2 “JUNK FAX # MODE” will
ABC
appear in the display.
3 “ENTER JUNK FAX #” will
ENTER
appear in the display.
JKL JKL JKL
ABC
ABC
MNO
4 Enter the fax number
(example)
5 “STORED” will appear in
6 Return to Step 3 to enter
Step 3 or
To clear junk fax numbers, use the f ollowing procedure:
ENTER
STOP
STOP
. . .
. . .
Step Press these keys Comments
1 “ANTI JUNK FAX” will
FUNCTION
ABC
MNO
(maximum of 20 digits).
the display.
another number, or press
the STOP ke y a n umber of
times until you exit.
appear in the display.
2 “JUNK FAX # MODE” will
appear in the display.
ABC
3 “JUNK FAX # CLEAR” will
appear in the display.
4 Enter the number of the fax
5 Return to Step 4 to clear
Step 4 or
04 USING FAX b(SUK) A5.p65 11/10/99, 17:3525
STOP
HOW TO USE THE FAX FUNCTION
STOP
ENTER
(example)
. . .
number to clear.
“CLEARED” will appear in
the display.
another number, or press
the STOP ke y a n umber of
times until you exit.
4-25
Page 62

Printing Out Reports
TIMER LIST
SEP-21-1999-TUE 9:39
1 12:02 MON
SEND
STANDARD 1 ABC
2
3
TIMER OPERATION
# RESERVED TIME
TYPE
RESOLUTION RECEIVER PAGES
P. 01
The unit is capable of printing a range of reports on faxing activities as well as various
settings you have made. The reports are described below.
1. TRANSMISSIONS ACTIVITY REPOR T:
Faxes sent from the unit.
ACTIVITY REPORT (SENDING)
#
START TX TIME NOTEPAGES
DATE
01 SEP-21
02
03
08:31
08:32
08:33
RECEIVER
2
0-0389741410
0-0389741410
TOTAL : 22"
2. RECEPTIONS ACTIVITY REPOR T :
Faxes received by the unit.
ACTIVITY REPORT (RECEIVING)
#
DATE
01 SEP-21 4509 1 OK09:35 PM 42"
START
SENDER
TOTAL :
3. TIMER LIST:
ID numbers for timer operations.
00"
00"
22"
RX TIME NOTEPAGES
42"
1
0
0
1
TYPE
SEND
SEND
SEND
TYPE
RECEIVER
P. 01
SEP-21-1999-TUE 9:36
CANCEL
DOCUMENT JAM
OK
P. 01
SEP-21-1999-TUE 9:36
4. F AX NUMBER LIST :
Fax numbers stored in the unit as either Rapid key or Speed Dial numbers.
4-26
04 USING FAX b(SUK) A5.p65 11/10/99, 17:3526
HOW TO USE THE FAX FUNCTION
RAPID/
SPEED #
R01
R06
FAX NUMBER LIST
NAME
ABC
DEF
FAX NUMBER
0123456789
GROUP STORED
P. 01
SEP-21-1999-TUE 9:36
CHAIN DIAL
Page 63

5. OPTIONAL SETTING LIST:
Currently activated optional settings.
Printing Out Reports
OPTIONAL SETTING LIST
SW #
1
2
3
4
5
6
7
8
9
10
11
12
13
14
15
16
17
18
19
20
21
22
SUMMER TIME SETTING
NAME
NUMBER
ITEM SETTING
PRINT PAPER SIZE
PAPER SIZE (MAIN CASSETTE)
FINE PRIORITY
# OF RINGS AUTO RX
# OF RINGS MANUAL RX
AUTO LISTING
PRINT SELECTION
RECALL TIMES
RECALL INTERVAL
FAX REMOTE NUMBER
REMOTE RECEPTION
FAX SIGNAL RECEIVE
AUTO COVER SHEET
RECEIVE REDUCE
BEEP LENGTH
BEEP VOLUME
KEY BEEPS
INCOMING RING VOLUME
FOOTER PRINT
PBX SETTING
LANGUAGE
BATCH INDEXING
6. GROUP LIST :
Fax numbers stored under Group keys.
GROUP LIST
#
G06
NAME
DEF
REMOTE STATION ID #
R01
7. ANTI JUNK FAX NUMBER LIST:
Fax numbers designated as Anti Junk Fax numbers.
ANTI JUNK FAX NUMBER LIST
#
01
ANTI JUNK FAX NUMBER
0123456789
SEP-21-1999-TUE 9:37
AUTO
A4
OFF
2 RINGS
OFF
OFF
ERROR/TIMER
2 TIMES
5 MINUTES
5
ON
ON
OFF
AUTO
3 SECONDS
MEDIUM
ON
MEDIUM
ON
OFF
ENGLISH
ON
ON
SEP-21-1999-TUE 9:40
SEP-21-1999-TUE 9:40
P. 01
P. 01
Use the following procedure to print out reports:
Step Press these keys Comments
1 “LISTING MODE” will appear in
FUNCTION
2 The unit will then automatically
to
HOW TO USE THE FAX FUNCTION
04 USING FAX b(SUK) A5.p65 11/10/99, 17:3527
ABC
the display.
PQRS
print out the selected report.
4-27
Page 64

Printing Out Reports
Activity Report Auto Listing
It is also possible to have the unit automatically print out Transmission and
Reception Activity Reports at designated times (for example, daily, every two days,
weekly, etc.) and every 50 operations.
Factory setting : 5 (NO)
Step Press these keys Comments
1 “OPTION SETTING” will
FUNCTION
2 “AUTO LISTING” will appear in
GHI
appear in the display.
MNO
the display.
3 Press 1 for /DAY, 2 for /2 DAY,
4 Press the STOP key twice to
STOP
to
JKL
3 for /4DAY, 4 for /WEEK, or 5
for OFF.
STOP
exit.
Printing T ransaction Reports
You can choose to have various Transaction Reports printed out after certain activities
on the unit: transmission, reception, or error. To use this feature, follow this procedure:
Factory setting: 2 (ERR OR/TIMER)
Step Press these keys Comments
1 “OPTION SETTING” will
FUNCTION
2 “TRANSACTION LIST” will
GHI
appear in the display.
PQRS
appear in the display.
3 Select the report setting:
1 (ALWAYS PRINT):
After each transmission,
reception, or error.
2 (ERROR/TIMER):
JKL
to
4 Press the STOP key twice to
STOP
STOP
After an error or timer
operation only.
3 (SEND ONLY):
After a transmission only.
4 (NEVER PRINT):
Never prints.
5 (ERROR ONLY):
After an error only.
“STORED” will appear in the
display.
exit.
4-28
04 USING FAX b(SUK) A5.p65 11/10/99, 17:3528
HOW TO USE THE FAX FUNCTION
Page 65

5. TR OUBLESHOO TING
T r oubleshooting
Problem Check and Remedy
Dialing cannot be done. Ma k e sure that the telephone line is
No transmission takes place. Make sure that the receiving machine has
Nothing is printed at the receiving end. Make sure that the document you are
A distorted image is received at the other end. Noise on the telephone line may cause
The received document is faint. Ask the other party to send higher contrast
Received images are distorted. Noise on the telephone line may cause
properly connected to both the unit and
the wall jack.
not run out of printing paper.
Make sure that the receiving machine is
G3 compatible. (This information should
be included in the machine’s
documentation.)
Check the display for possible error
messages.
sending is fed into the unit in the correct way.
Make sure that the receiving machine is
in working order.
distortion. Try sending the document again.
Make a copy of the document on the unit.
If the copy is also distorted, the unit may
have a problem.
documents. If the contrast is still too low,
make a copy with the unit to check it.
distortion. Have the sending party send
the document again.
The drum cartridge may need
replacement.
COPY SERVICE ERROR The copier will not function. T u rn the power
switch off, remove the power cord from
the outlet, and contact your Sharp dealer.
FAX SERVICE ERROR (X) The fax will not function.Contact your
Sharp dealer.
Note: If your problem cannot be solved b y carrying out the instructions in the Check
and Remedy column above, please contact your Sharp dealer.
TROUBLESHOOTING
05 TROUBLE a(SUK) A5.P65 11/10/99, 14:231
5-1
Page 66

Messages and Signals
Display Messages
Message Meaning
DOCUMENT JAM The original document is jammed.
FAX RX IN MEMORY A fax has been received in memory
LINE ERROR Fax transmission or reception was not
MEMORY FULL The memory is full. See “Memory” under
PAPER JAM The printing paper is jammed.
PAPER SIZE ERROR The setting for the printing paper size is
SET XXX SIZE PAPER incorrect. Set it correctly. In the area
CAN NOT PRINT Imaging cartridge empty.
CHECK COPIER COVER Front/side cover open.
PAPER OUT (XXX) The paper has run out and the data is read
because the imaging cartridge needs
replacement, the fax machine has run out
of printing paper, or the paper is jammed.
The fax will be printed out automatically
once the problem is fixed.
successful. Press the STOP key to clear
the message, and then try again.
“Special Functions” in Chapter 4.
labeled “XXX”, “LTR”, “LGL” or “A4” will
appear.
Imaging cartridge not inserted.
Imaging cartridge or drum cartridge life
expired.
into memory. Set it correctly. In the area
labeled “XXX”, “LTR”, “LGL” or “A4” will
appear.
LOAD DOCUMENT(S) Set the document(s) in the unit.
NO RESPONSE Line error.
RETURN ORG. Paper jam in the SPF.
XX SHEET (S) When memory is full and there is a line
5-2
05 TROUBLE a(SUK) A5.P65 11/10/99, 14:232
TROUBLESHOOTING
No answer from the receiver.
error, the display alternates between the
RETURN ORG. and MEMORY FULL
messages.
Page 67

Audible Signals
Messages and Signals
Sound Type Duration
Continuous tone
Continuous tone
3 seconds
1 second
Meaning
Indicates the end of
transmission,
reception, or line error.
Warning tone
05 TROUBLE a(SUK) A5.P65 11/10/99, 14:233
TROUBLESHOOTING
5-3
Page 68

Notes
5-4
05 TROUBLE a(SUK) A5.P65 11/10/99, 14:234
TROUBLESHOOTING
Page 69

6. SPECIFICATIONS
SPECIFICATIONS
Compatibility: ITU-T G3
Telephone line: PSTN
Dial mode: Pulse (10 pps), tone
Modem rate: 14,400 bps with automatic fallback to 12,000,
Compression method: MH, MR, MMR
Transmission time: Approximately 6 seconds
Memory: 2 megabytes of RAM
Sending document size: Maximum B4, minimum A5
Recording paper size: A4, Letter, or Legal
Automatic Document Feeding 30 sheets
(ADF):
Resolution in Text mode: Standard: 200 x 100 dpi
Resolution in Half tone mode: 200 x 200 dpi
Grayscale method in Error diffusion
Half tone mode:
Grayscale level in 256 levels
Half tone mode:
Contrast: Light, Medium, Dark
Quick scan: 14 pages per minute maximum
9,600, 7,200, 4,800, or 2,400 bps
(using SHARP standard document)
The time should be slightly different when
the line is busy.
(120 pages, when using SHARP document
with a standard resolution)
(When using the SPF:
One sheet at a time: Max.257mm x 500mm,
min. 216mm x 140mm
Several sheets at once: Max. 257mm x
364mm,
min. 216mm x 140mm
When using the original table: Max.257mm x
364mm, min. 216mm x 140mm)
Fine: 200 x 200 dpi
Super Fine: 200 x 400 dpi
(Using SHARP standard size document)
06 SPECIFICATIONS (SUK) A5.P65 22/09/99, 08:471
SPECIFICATIONS
6-1
Page 70

Specifications
Broadcasting: Destination: maximum of 50 different
Polling: Modes: Polling Others, Polling from memor y
Delayed faxing: 3 types selectable: Standard, Memory
Anti Junk Fax: Up to 10 numbers
Auto Cover Sheet: 6 message types selectable: “Urgent,”
Report: T ransaction, po wer f ail, activity (send/receive)
Printable setting lists: Anti Junk Fax numbers, timer, group, phone
As a part of our policy of continuous improvement, SHARP reserves the right to
make design and specification changes for product improv ement without prior notice.
The performance specification figures indicated are nominal values of production
units. There may be some deviations from these values in individual units.
locations
Destinations: Selected from Rapid key,
Speed Dial numbers, or
Group keys
Transmission, or Polling Others
“Important,” “Confidential,” “Pls. Distribute,”
“Pls. Call Back,” and no message
number, optional setting
6-2
06 SPECIFICATIONS (SUK) A5.P65 22/09/99, 08:472
SPECIFICATIONS
Page 71

GLOSSARY
A.M. mode:
When set to A.M. (Ans wering Machine) mode, the unit directs all incoming calls to an
answering machine connected to the same line.
Anti Junk Fax:
A faxing feature that enables the user to program up to ten fax numbers from which
he/she does not want to receive faxes.
Automatic Dialing:
A faxing feature b y which the unit will automatically dial a user-prog rammed number
with the press of one or more keys. See Rapid Key Dialing and Speed Dialing.
AUTO mode:
When set to AUTO mode, the unit receives faxes automatically.
Broadcasting:
A form of transmitting that allows a fax to be sent to multiple fax machine locations.
Chain Dialing:
A form of dialing that allows the user to dial a long number (up to 50 digits in length)
with a combination of Rapid keys, Speed Dial numbers, or Rapid keys and manually
entered numbers.
Contrast:
The degree of difference between dark and light areas of a printed, faxed, or scanned
document.
dpi (dots per inch):
A standardized unit of measurement used for the resolution of a scanned or printed
image.
Group Keys:
The term for multiple Rapid keys that have been programmed as a group of fax
numbers.
MANUAL mode:
When the unit is set to MANUAL mode, all calls must be answered manually by
pressing the SPEAKER key, or by lifting the handset of an external phone on the
same telephone line.
Polling:
A faxing function that allows the user to request a transmission from another fax
machine. In eff ect, the receiving f ax machine, dials the tr ansmitting f ax machine, and
activates the transmission.
A_Glossary(SUK)A5.p65 21/09/99, 10:071
GLOSSARY-i
Page 72

Glossary
Rapid Key Dialing:
A form of Automatic Dialing by which only a single fax number programmed key (a
Rapid key) has to be pressed in order to dial a number.
Receive Reduce:
A faxing function that automatically scales received faxes to the size of the paper
loaded in the unit.
Reception mode:
The setting that controls how the unit responds to incoming calls. See A.M. mode,
AUTO mode, and MANUAL mode.
Remote Reception:
A faxing function by which fax reception can be activ ated from an extension telephone
by entering a one-digit Fax Remote Number followed by .
Resolution:
The amount of space between lines of a printed, faxed, or scanned document.
Generally, the higher the resolution, the higher the quality of the document or image.
Speed Dialing:
A form of Automatic Dialing done by pressing the SPEED/SEARCH key, and then
entering a programmed Speed Dial number.
T ransmission Reservation:
A faxing function that enables the user to load a fax and enter the receiving fax
number while the unit is in use. The fax is sent as soon as the unit has finished the
previous job.
GLOSSARY-ii
A_Glossary(SUK)A5.p65 21/09/99, 10:072
Page 73

QUICK REFERENCE
This page summarizes the operations you can perform with this unit. For detailed
information about each operation, refer to the appropriate section of this manual.
FAX
Load the document
then following operation
BROADCASTING
TRANSMITTING DOCUMENTS
Set RESOLUTION CONTRAST MEMORY
Direct Keypad Dialing
Dial (press NUM keys)
FAX START
Rapid Key Dialing
Press Rapid key
Speed Dialing
SPEED/SEARCH
Enter Speed Dial number
FAX START
Normal Dialing
SPEAKER Dial
(Press NUM keys)
Wait for reception tone
FAX START
Redialing
REDIAL
FAX START
Set RESOLUTION/CONTRAST
Normal Broadcasting
BROADCAST
Enter Speed Dial number/Press
Rapid keys
FAX START
Using Group Key
Press GROUP key
POLLING OTHERS
Set Rapid 20 key as polling key
(FUNCTION key
3
4
1 STOP
STOP)
And set RESOLUTION/CONTRAST
Direct Keypad Dialing
Dial (press NUM keys)
POLLING (Rapid 20)
Speed Dialing
SPEED
Enter Speed Dial number
POLLING (Rapid 20)
Normal Dialing
SPEAKER
Dial (Press NUM keys)
Wait for reception tone
POLLING (Rapid 20)
B QUICK REFERENCE a(SUK) A5.P65 11/10/99, 14:421
QUICK REFERENCE-i
Page 74

Quick reference
FUNCTION MODE
STEP 1 Press FUNCTION key
STEP 2 Press the menu number from the list below STEP 3 Press the option number from the list below
1. TIMER MODE 1. OPERATION SET 2. OPERATION CLEAR
2. LISTING MODE 1. TRANSMISSION ACTIVITY 2. RECEPTIONS A CTIVITY
3. ENTRY MODE 1. FAX NUMBER MODE 2. DATE & TIME SET
4. OPTION SETTING 01.PRINT PAPER SIZE 02. PAPER SIZE SETTING
5. GROUP ENTRY MODE 1. GROUP SET MODE 2. GROUP CLEAR MODE
6. ANTI JUNK FAX MODE 1. ANTI JUNK SELECT (ON/OFF) 2. JUNK F AX NUMBER MODE
(SEND/POLLING)
REPORT REPORT
3. TIMER LIST 4. FAX NUMBER LIST
5. OPTION SETTING LIST 6. GROUP LIST
7. ANTI JUNK FAX NUMBER LIST
(SET/CLEAR)
3. O WN NUMBER SET 4. POLLING FUNCTION
(MAIN CASSETTE)
03. FINE RESOLUTION 04. NUMBER OF RINGS
PRIORITY AUTO RECEPTION
05. NUMBER OF RINGS 06. AUTO LISTING
MANUAL RECEPTION
07. TRANSA CTION REPORT 08. RECALL TIMES
PRINT SELECTION
09. RECALL INTER VAL 10. FAX REMOTE NUMBER
11. REMO TE RECEPTION 12. FAX SIGNAL RECEIVE
13. AUT O COVER SHEET 14. RECEIVE REDUCE
15. BEEP LENGTH 16. BEEP VOLUME
17. KEY BEEPS 18. INCOMING RING
V OLUME
19. FOOTER PRINT 20. PBX SETTING
21. LANGUAGE SETTING 22. BATCH INDEXING
(SET/CLEAR)
7. CO VER SHEET MODE 1. CO VER SHEET ON 2. COVER SHEET OFF
8. ANSWERING MACHINE 1. QUIET DETECT TIME 2. SELECT AUTO RECEIVE
MODE (ON/OFF)
9. MEMORY POLL SET 1. 1 TIME 2. REPEAT
0. RX DATA TRANSFER 1. DATA TRANSFER 2. FAX NUMBER
QUICK REFERENCE-ii
B QUICK REFERENCE a(SUK) A5.P65 11/10/99, 14:422
Page 75

INDEX
A
A.M. Mode..........................................4-10
Activity Report Auto Listing................4-28
Alarm Beep Length..............................2-3
Answering Machine Backup...............2-25
Anti Junk Fax.....................................4-24
Arrow Keys...........................................2-2
Audible Signals....................................5-3
Auto Cover Sheet.................................4-5
AUTO Mode.......................................4-10
Automatic Dialing...............................2-19
Auto Summer Time Setting..................2-8
B
Beep Volume........................................2-2
Broadcasting......................................4-17
C
Chain Dialing..............................2-21, 4-8
Connection...........................................1-3
Contrast for Faxing...............................4-3
Cover Sheet.........................................4-4
D
Data transfer......................................4-14
Dialing and Transmitting.......................4-6
Direct Keypad Dialing..........................4-6
Display Messages................................5-2
G
Group Keys.........................................2-22
Group List...........................................4-27
I
Index Function....................................2-15
L
Liquid Crystal Display............................2-2
M
MANUAL Mode...................................4-10
Manual sending and receiving............4-12
N
Number of Rings.................................2-10
O
Operation Panel.....................................2-1
Optional Setting List............................4-27
Originals.................................................3-1
P
Paper Size...........................................2-11
Parts Identification.................................1-2
PBX Setting.........................................2-18
Polling.................................................4-19
E
Entering Characters.............................2-5
Entering Your Name and Fax
Number................................................2-6
F
Fax Setup.............................................2-5
Fax Transmission Settings...................4-3
Fine Resolution Priority.....................2-16
Footer Printing..................................4-12
C Index a(SUK) A5.p65 11/10/99, 14:431
Q
Quiet Detect Time...............................2-24
R
Rapid Key Dialing..................................4-7
Recall Interval.....................................2-14
Recall Times.......................................2-13
Receive Reduce..................................4-11
Receiving Faxes..................................4-10
INDEX-i
Page 76

Index
Reception into Memory ...................... 4-13
Reception Mode................................... 2-9
Redialing .............................................. 4-9
Remote Reception ............................. 2-17
Resolution ............................................ 4-3
Ringing Volume .................................... 2-3
S
SEARCH Key....................................... 4-9
Sending Documents ............................ 4-1
Setting Date & Time............................. 2-7
Setting the Language........................... 2-4
Specifications....................................... 6-1
Speed Dialing ...................................... 4-7
T
Telephone Line Cord............................ 1-3
Timer List ........................................... 4-26
Timer Operations ............................... 4-22
Transaction Reports ........................... 4-28
Transmission Reservation.................. 4-15
Transmissions Activity Report ............ 4-26
Troubleshooting.................................... 5-1
Turning Key Beeps Off ......................... 2-4
U
Unsuitable Originals ............................. 3-2
Use with Answering Machine
Backup ............................................... 2-24
Use with a PC Modem ....................... 2-16
INDEX-ii
C Index a(SUK) A5.p65 11/10/99, 14:432
Page 77

License Agreements
SHARP
Data lssued: September .19,1997
MSDS No.P-00081
MATERIAL SAFETY DATA SHEET
Section 1. Product Identification
Product: FO- 36DC (Black Toner)
Section 2. Supplier’s Name and Address
Sharp Corporation
22-22 Nagaike-cho, Abeno-ku, Osaka, Japan
Local suppliers are listed below. Please contact the nearest supplier for additional
information.
Section 3. Ingredients
Carbon black 1333-86-4 4.0% 3.5mg/m
Silica 68909-20-6 1.0%80.0mg/m
Iron oxide 1317-61-9 1.0% 5.0mg/m
Styrene-Acrylate 25767-47-9 90.5% Not listed Not listed None
copolymer
Organic pigment 1333-86-4 0.5% Not listed Not listed None
mixture
Polypropylene 25085-53-4 1.5% Not listed Not listed None
Polyethylene 9002-88-4 1.5% Not listed Not listed None
(Country)
U.S.A
Sharp Electronics Corporation
(Name and Telephone Number)
Telephone number for information : 1-800-237-4277
Emergency telephone number : 1-800-255-3924
Canada
Sharp Electronics of Canada Ltd.
Telephone number for information : 905-890-2100
Emergency telephone number : 1-800-255-3924
United
Kingdom
Ingredients CAS No. Proportion OSHA PEL ACGIH TLV Other Limits
109125-51-1 (total for the pigment mixture)
109125-50-0
84179-66-8
Sharp Electronics (U.K.) Ltd.
Telephone number for information : 01923-474013
3
3
3
3.5mg/m
6.0mg/m
10.0mg/m
3
None
3
None
3
None
Section 4. Hazardous Identification (Emergency Overview)
Toner is a fine, black powder possessing no immediate hazard. There are no
anticipated carcinogenic effects from exposure based on animal tests perfor med using
toner. When used as intended according to instructions, studies do not indicate any
symptoms of fibrosis will occur.
License 0(SUK) A5.P65 22/09/99, 16:451
Page 78

License Agreements
Section 5. Health Hazard Data
Route(s) of Entry : Inhalation? Skin? Ingestion?
Yes No Possible but very unusual.
Health Hazards : Acute oral toxicity—LD50 of this toner is over 2,000mg/kg.
Mutagenicity—The result of Ames test is negative.
Carcinogenicity : In 1996 the IARC reevaluated carbon blac k as a Group 2B carcinogen
Chronic Effect : In a study in rats of chronic inhalation exposure to a typical toner,
(possible human carcinogen). This classification is given to chemicals
for which there is inadequate human evidence, b ut sufficient animal
evidence on which to base an opinion of carcinogenicity. The
classification is based upon the development of lung tumors in rats
receiving chronic inhalation exposures to free carbon blac k at lev els
that induce particle overload of the lung. Studies perf ormed in animal
models other than rats did not show any association between carbon
black and lung tumors. Moreover, a tw o-y ear cancer bioassay using
a typical toner preparation containing carbon black demonstrated
no association between toner exposure and tumor development in
rats.
a mild to moderate degree of lung fibrosis was observed in 92% of
the rats in the high concentration (16mg/m
a minimal to mild degree of fibrosis was noted in 22% of the animals
in the middle (4mg/m
was reported in the lowest (1mg/m3) exposure group, the most
relevant level to potential human exposures.
3
) exposure group, b ut no pulmonary change
3
) exposure group, and
Signs and Symptoms of Exposure : Minimal irritation to respiratory tract may
occur as with exposure to any non-to xic
dust.
Medical Conditions Generally Aggravated b y Exposure : None
Emergency and First Aid Procedures :
Inhalation ; Remove to fresh air . If effects occur , consult medical personnel.
Eye ; In case of contact, immediately flush eyes with water f or 15 minutes.
Section 6. Physical Chemical Characteristics
Boiling/Melting Point : Not applicable Specific Gravity : 1.1
Vapor Pressure : Not applicable Solubility in W ater : Negligible
Vapor Density : Not applicable PH : Not applicable
Evaporation Rate : Not applicable Viscosity : Not applicable
Appearance : Fine powder Color : Black
Odor : Odorless
License 0(SUK) A5.P65 22/09/99, 16:452
Page 79

License Agreements
Section 7. Fire and Explosion Data
Flash Point (Method Used) : Not applicable
Ignition Temperature : No data available
Flammable Limits : (LEL); Not applicable
(UEL); Not applicab le
Extinguishing Media : CO2, dry chemical, foam or water
Special Fire Fighting Procedure : None
Unusual Fire and Explosion Hazard :
Sensitivity to Mechanical Impact : None
Sensitivity to Static Charge : None
Section 8. Reactivity Data
Stability : Stable
Incompatibility (Material to Avoid) : None
Hazardous Decomposition : CO and NOx
Hazardous Polymerization : Will not occur.
Section 9. Precautions for Safe Handling and Use
Personal Protection Information (Respiratory, Eye Protection and Protective Glove):
Use of a dust mask is recommended when handling a large quantity of
toner or during long term exposure, as with any non-toxic dust.
Engineering Control/Ventilation : Not required.
Work/Hygienic Practice : Inhalation should be minimized as
Steps to be taken in case of Spill or Leak : Sweep up or clean up with vacuum
Waste Disposal Method : Waste material may be disposed
This material has no unusual fire or
explosion hazards.
with any non-toxic dust.
cleaner.
under conditions which meet all
federal, state and local environmental
regulations.
Section 10. Regulatory Information
NFPA Rating (U.S.A) : Health = 1 Flammability = 1
WHMIS Legislation (Canada) : This product is not a controlled product.
Transpor t Information : This product is not a hazardous material.
UN No. : None allocated.
Reactivity = 0
Section 11. Other Information
References : IARC (1996) IARC Monographs on the Evaluation of the
Carcinogenic Risk of Chemicals to Humans, Vol. 65, Printing Process and Printing
inks, Carbon Black and Some Nitro Compounds, Lyon, pp-149-261 H. Muhle, B.
Bellmann, O. Creutzenberg, C. Dasenbrock, H. Ernst, R. Kilpper, J. C. Mackenzie, P.
Morrow, U. Mohr, S. Takenaka, and R. Mermelstein (1991) Pulmonary Response to
T oner upon Chronic Inhalation Exposure in Rats. Fundamental and Applied Toxicology
17, pp. 280-299
License 0(SUK) A5.P65 22/09/99, 16:453
Page 80

PUMA_1530_Front1.p65 08/04/99, 14:4720
Page 81

PUMA_1530_Front1.p65 08/04/99, 14:4720
Page 82

PUMA_1530_Front1.p65 08/04/99, 14:4720
Page 83

License Agreements
This equipment complies with the requirements of Directives 98/13/EC, 89/336/EEC and 73/23/
EEC as amended by 93/68/EEC.
Dieses Gerät entspricht den Anforderungen der EG-Richtlinien 98/13/EWG, 89/336/EWG und
73/23/EWG mit Änderung 93/68/EWG.
Ce matériel répond aux exigences contenues dans les directives 98/13/CEE, 89/336/CEE et 73/
23/CEE modifiées par la directive 93/68/CEE.
Dit apparaat voldoet aan de eisen van de richtlijnen 98/13/EEG, 89/336/EEG en 73/23/EEG,
gewijzigd door 93/68/EEG.
Quest’ apparecchio è conf orme ai requisiti delle direttive 98/13/EEC , 89/336/EEC e 73/23/EEC ,
come emendata dalla direttiva 93/68/EEC.
Este equipamento obedece às exigências das directivas 98/13/CEE, 89/336/CEE e 73/23/CEE,
na sua versão corrigida pela directiva 93/68/CEE.
Este aparato satisface las exigencias de las Directivas 98/13/CEE, 89/336/CEE y 73/23/CEE,
modificadas por medio de la 93/68/CEE.
Dette udstyr overholder krav ene i Direktiverne 98/13/EØF, 89/336/EØF og 73/23/EØF med senere
ændringer 93/68/EØF.
Tämä laite noudattaa direktiiveissä 98/13/EEC, 89/336/EEC ja 73/23/EEC säädettyjä vaatim uksia
ja niihin direktiivissä 93/68/EEC tehtyjä tarkistuksia.
Dette utstyret tilfredsstiller kravene i direktivene 98/13/ECC, 89/336/EEC og 73/23/EEC med
endringer i 93/68/EEC.
Denna utrustning uppfyller kraven enligt direktiv 98/13/EEC, 89/336/EEC och 73/23/EEC enligt
tillägget 93/68/EEC.
Required in Appendix ZB of BS 7002 (En 60 950) — United Kingdom
The mains lead of this equipment is already fitted with a mains plug which is either a nonrewireable (moulded) or a rewireable type. Should the fuse need to be replaced, a BSI or ASTA
approved fuse to BS1362 marked or and of the same rating as the one removed from the
plug must be used.
Always refit the fuse cover after replacing the fuse on the moulded plug. Never use the plug
without the fuse cover fitted.
In the unlikely event of the socket outlet in your home not being compatible with the plug
supplied either cut-off the moulded plug (if this type is fitted) or remove by undoing the screws if
a rewireable plug is fitted and fit an appropriate type observing the wiring code below.
DANGER: The fuse should be removed from the cut-off plug and the plug destroyed
immediately and disposed of in a safe manner.
Under no circumstances should the cut-off plug be inserted elaswhere into a 13A socket outlet
as a serious electric shock may occur.
To fit an appropriate plug to the mains lead, follow the instructions below:
IMPORTANT: The wires in this mains lead are coloured in accordance with the following code:
As the colours of the wires in this mains lead may not correspond with coloured markings
identifying the terminals in your plug, proceed as follows:
The wire which is coloured GREEN-AND YELLOW must be connected to the terminal in the
plug which is marked with the letter E, or by the safety earth symbol , or coloured green or
green-and-yellow.
The wire which is coloured BLUE must be connected to the terminal which is marked with the
letter N or coloured black.
The wire which is coloured BROWN must be connected to the terminal which is marked with
the letter L or coloured red.
If you have any doubt, consult a qualified electrician.
WARNING: THIS APPARATUS MUST BE EARTHED.
MAINS PLUG WIRING INSTRUCTIONS
.
ASA
GREEN-AND-YELLOW: Earth
BLUE: Neutral
BROWN: Live
This equipment is not designed for making emergency telephony calls when the power
fails. Alternative arrangements should be made for access to emergency services.
License 1EMC SUK.P65 04/11/99, 17:011
Page 84

Cover page(SUK).p65 20/09/99, 13:352
THE IDEAS COMPANY
Printed in France
TINSE0266TSZZ
 Loading...