

Page 1
A
s an ENERGY STAR
E
NERGY STAR
®
trademark.
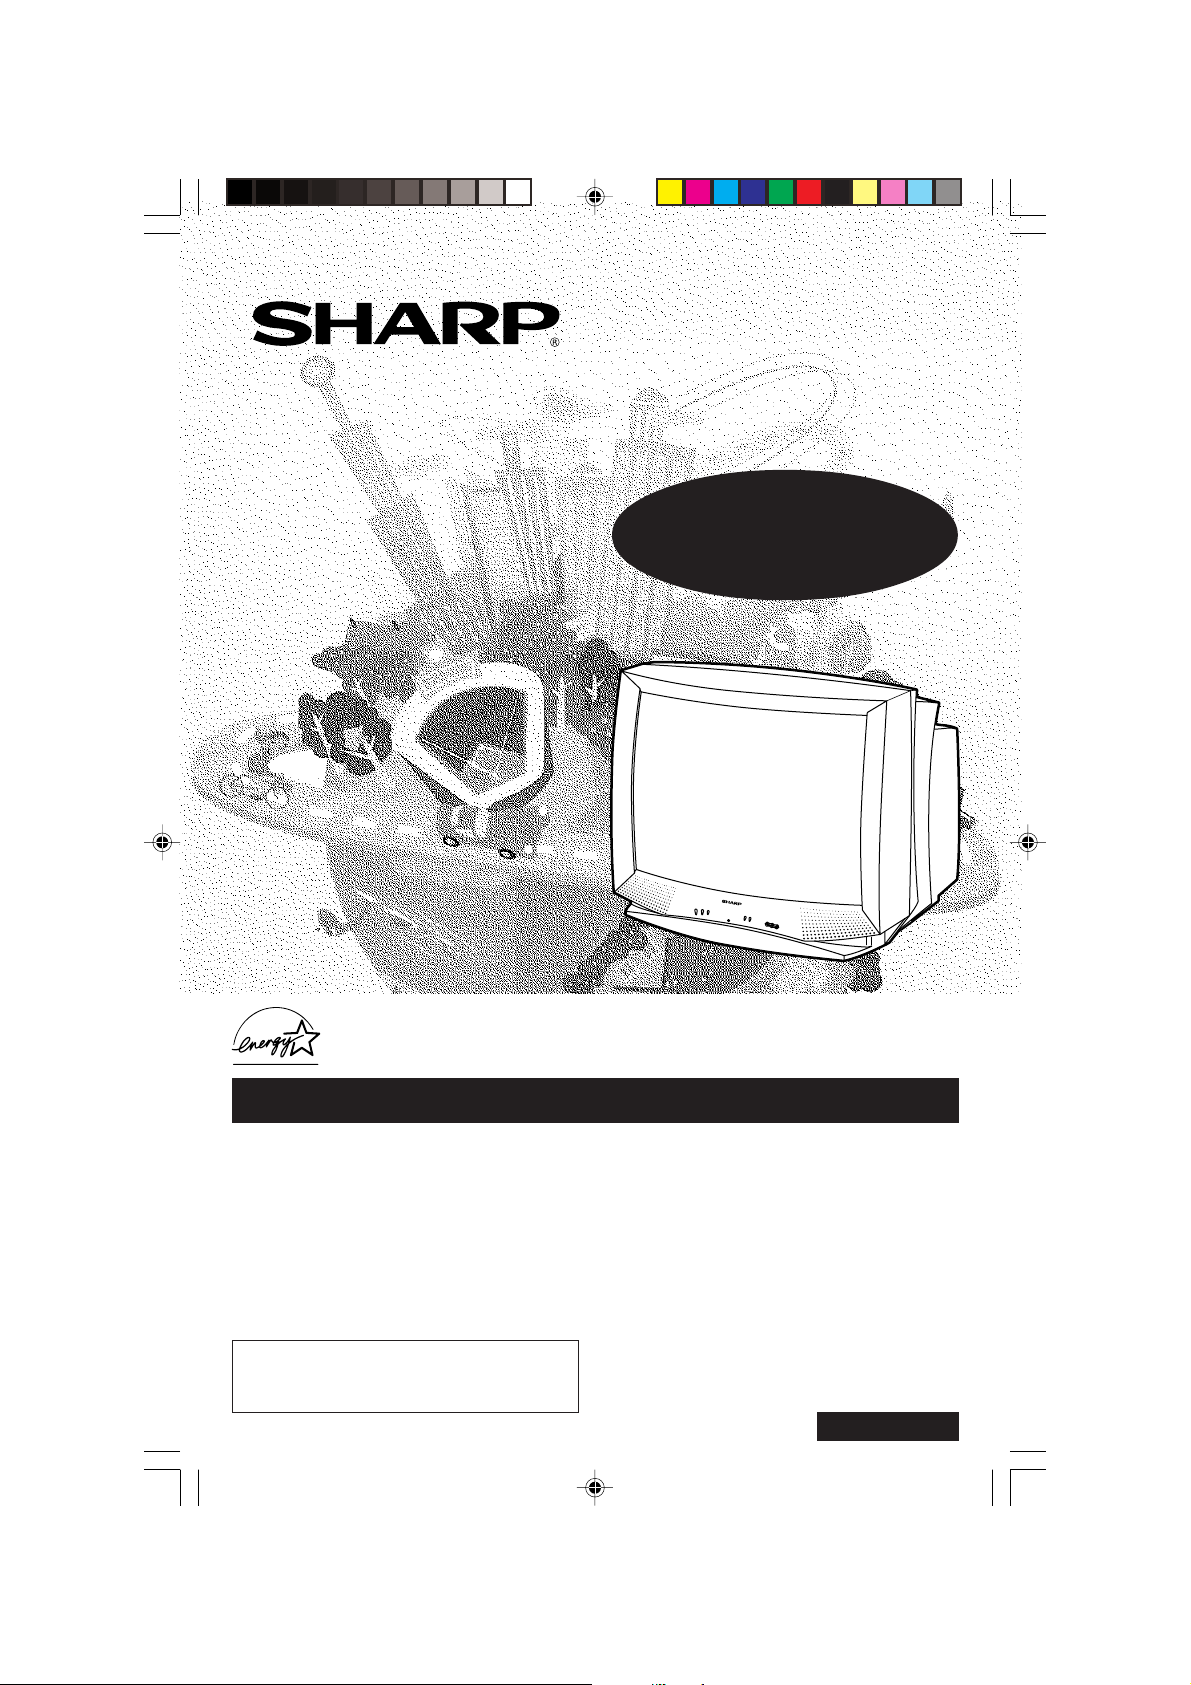
COLOR TELEVISION
MODEL
32R-S50
36R-S50
L OPERATION MANUAL L
P
I
P
/
M
T
S
S
T
E
R
E
O
®
P
artner, SHARP has determined that this product meets the
guidelines for energy efficiency. ENERGY STAR
®
is a
U.S.
registered
CONTENTS
• Important Information ......................................... 2 ~ 3
• Important Safeguards .........................................3 ~ 4
• Supplied Accessories ............................................... 5
• Before Operating Your Television ............................. 5
• Antenna Connections .........................................5 ~ 6
• Quick Reference Control Operation .................. 7 ~ 9
• EZ SETUP during First Power On ..........................10
• Demo Mode ............................................................ 11
• Accessing the MAIN MENU screen without
Remote Control ...................................................... 11
• Language ............................................................... 12
• Sleep Timer ............................................................ 12
This operating manual includes basic operating
instructions in Spanish and French.
SPANISH is on page 8, 34.
FRENCH is on page 9.
01 32/36R-S50.p65e 19/1/01, 5:14 PM1
PAGE
• Video Adjust ........................................................... 13
• Audio Select ........................................................... 14
MTS (Multichannel TV Sound) ............................14
• Closed Caption .......................................................15
• Parent Control ................................................ 16 ~ 26
V-CHIP ....................................................... 16 ~ 23
VIEW TIMER .............................................. 24 ~ 26
• Energy Save ........................................................... 27
• Set Up ............................................................ 28 ~ 31
EZ Setup .............................................................28
Channel Setting .......................................... 29 ~ 31
Blue Screen ........................................................ 31
• Using the Video and Audio Input Jacks .................. 32
• Before Calling for Service ............................... 33 ~ 34
• Calling for Service .................................................. 33
• Specifications ......................................................... 35
• Limited Warranty .................................................... 36
PAGE
7362 GJ
1
Page 2
Welcome to the SHARP Family. We are pleased that you are now the owner of a SHARP Color Television
– built for outstanding quality, reliability and performance.
Every SHARP Color Television set is tuned and adjusted for proper color and sound, and has passed
through the most stringent quality control tests at the factory. We have prepared this OPERATION MANUAL
so that you may adjust the picture and color to your personal viewing preference.
We sincerely hope that you receive the greatest satisfaction and enjoyment from your new SHARP Color
Television set for years to come.
Please read these instructions carefully, and keep them handy for your future reference.
IMPORTANT
To aid reporting in case of loss or theft, please record the TV’s
model and serial numbers in the space provided. The numbers
are located at the rear of the TV.
Model No.:
Serial No.:
Important Information
There are two important reasons for prompt warranty registration of your new SHARP television set,
using the REGISTRATION CARD packed in with the set.
FIRST – WARRANTY
This is to assure that you will immediately receive the full consumer benefit of the parts, service and labor
warranty applicable to your purchase.
SECOND – CONSUMER PRODUCT SAFETY ACT
To assure that you will promptly receive any safety notification on inspection, modification or recall that
SHARP may be required to give under the 1972 Consumer Product Safety Act. PLEASE READ
CAREFULLY THE IMPORTANT “LIMITED WARRANTY” CLAUSE ON THE LAST PAGE.
WHAT IS ENERGY STAR
TVs and VCRs use energy both when they are on and when they are off. Americans spend more than $1
billion a year on energy consumed by TVs and VCRs when they are not in use. The new ENERGY
STAR® models will reduce that energy “leakage” by up to 75 percent. Ultimately, this will mean more than
$500 million a year in energy savings for consumers.
The energy savings will help reduce the burning of fossil fuels and the related carbon dioxide pollution
that contributes to global warming. If every American family replaced their TVs and VCRs with ENERGY
STAR® models, it would reduce carbon dioxide emissions by five million tons every year — equivalent to
eliminating the pollution from more than one million cars.
By using ENERGY STAR® products, you will save money on your electric bills and use less energy. That
makes good economic sense and it’s good for our environment.
®
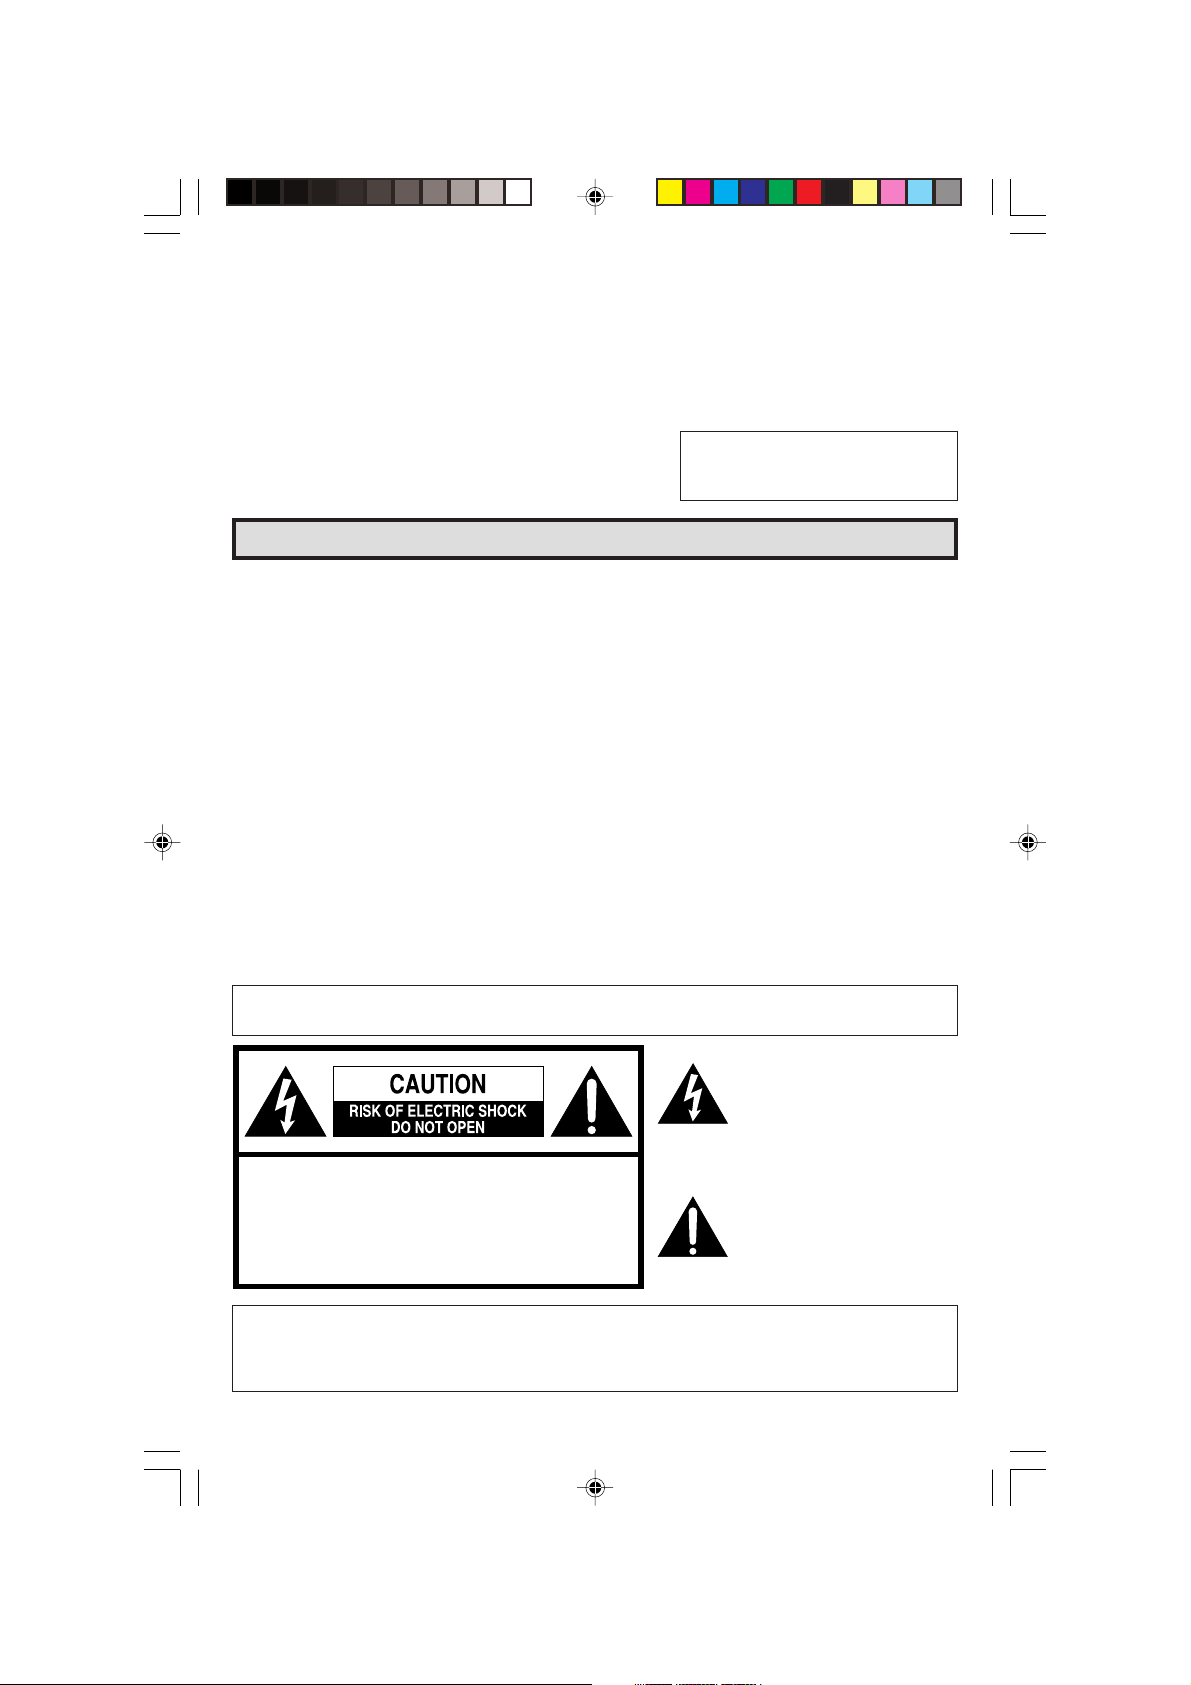
WARNING:
CAUTION: TO REDUCE THE RISK OF
DO NOT REMOVE COVER (OR BACK).
NO USER-SERVICEABLE PARTS INSIDE.
REFER SERVICING TO QUALIFIED SERVICE
“Note to CATV system installer: This reminder is provided to call the CATV system installer’s attention
to Article 820-40 of the National Electrical Code that provides guidelines for proper grounding and, in
particular, specifies that the cable ground shall be connected to the grounding system of the building,
as close to the point of cable entry as practical.”
TO REDUCE THE RISK OF FIRE OR ELECTRIC SHOCK, DO NOT
EXPOSE THIS APPLIANCE TO WET LOCATIONS.
The lightning flash with
arrowhead within a triangle is
intended to tell the user that
parts inside the product are a
risk of electric shock to
persons.
The exclamation point within a
ELECTRIC SHOCK,
PERSONNEL.
triangle is intended to tell the
user that important operating
and servicing instructions are
in the papers with the
appliance.
2
02-04 32/36R-S50.p65e 19/1/01, 5:14 PM2
Page 3
Important Information (Continued)
WARNING – FCC Regulations state that any unauthorized changes or modifications to this equipment not
PRODUCT DISPOSAL
expressly approved by the manufacturer could void the user’s authority to operate this
equipment.
This product utilizes a Cathode Ray Tube (CRT) containing lead and tin lead solder.
Disposal of these materials may be regulated due to environment considerations. For disposal or
recycling information, please contact your local authorities or the Electronics Industries
Alliance:www.eiae.org
Important Safeguards
CAUTION: Please read all of these instructions before you operate your television and save these
instructions for later use.
Electrical energy can perform many useful functions. This unit has been engineered and manufactured to assure
your personal safety. BUT IMPROPER USE CAN RESULT IN POTENTIAL ELECTRICAL SHOCK OR FIRE
HAZARDS. In order not to defeat the safeguards incorporated in this equipment, observe the following basic
rules for its installation, use and servicing.
1. Unplug this television equipment from the wall outlet before cleaning.
2. Do not use liquid cleaners or aerosol cleaners. Use a damp cloth for cleaning.
3. Do not use attachments not recommended by the television equipment manufacturer as they may cause
hazards.
4. Do not use this television equipment near water — for example, near a bathtub, washbowl, kitchen sink or
laundry tub, in a wet basement, or near a swimming pool, etc.
5. Do not place this equipment on an unstable cart, stand, or table. The television equipment may fall, causing
serious injury to a child or an adult, and serious damage to the equipment. Use only with a cart or stand
recommended by the manufacturer or sold with the television equipment.
6. Television equipment and cart combination should be moved with care. Quick stops,
excessive force, and uneven surfaces may cause the equipment and cart combination to
overturn.
7. Wall or shelf mounting should follow the manufacturer’s instructions, and should use a
mounting kit approved by the manufacturer.
8. Slots and openings in the cabinet and the back or bottom are provided for ventilation. To insure reliable
operation of the television equipment and to protect it from overheating, these openings must not be blocked
or covered. This television equipment should not be placed in a built-in insulation such as a bookcase
unless proper ventilation is provided.
9. The openings should never be covered with a cloth or other material, and the bottom openings should not
be blocked by placing the television equipment on a bed, sofa, rug, or other similar surface. This television
equipment should never be placed near or over a radiator or heat register.
10. This television equipment should be operated only from the type of power source indicated on the marking
label. If you are not sure of the type of power supplied to your home, consult your television dealer or local
power company.
For television equipment designed to operate from battery power, refer to the operating instructions.
11. As a safety feature, television equipment is equipped with a 2-wire polarized plug (one plug blade bigger
than the other). The 2-wire polarized plug will fit only one way into the power outlet.
If the plug does not fit, ask your electrician to replace your obsolete outlet. Do not modify the plug and
defeat this safety feature.
12. Do not allow anything to rest on the power cord. Do not locate this television equipment where the cord will
be abused by persons walking on it.
13. Follow all warnings and instructions marked on the television equipment.
02-04 32/36R-S50.p65e 19/1/01, 5:14 PM3
3
Page 4
Important Safeguards (Continued)
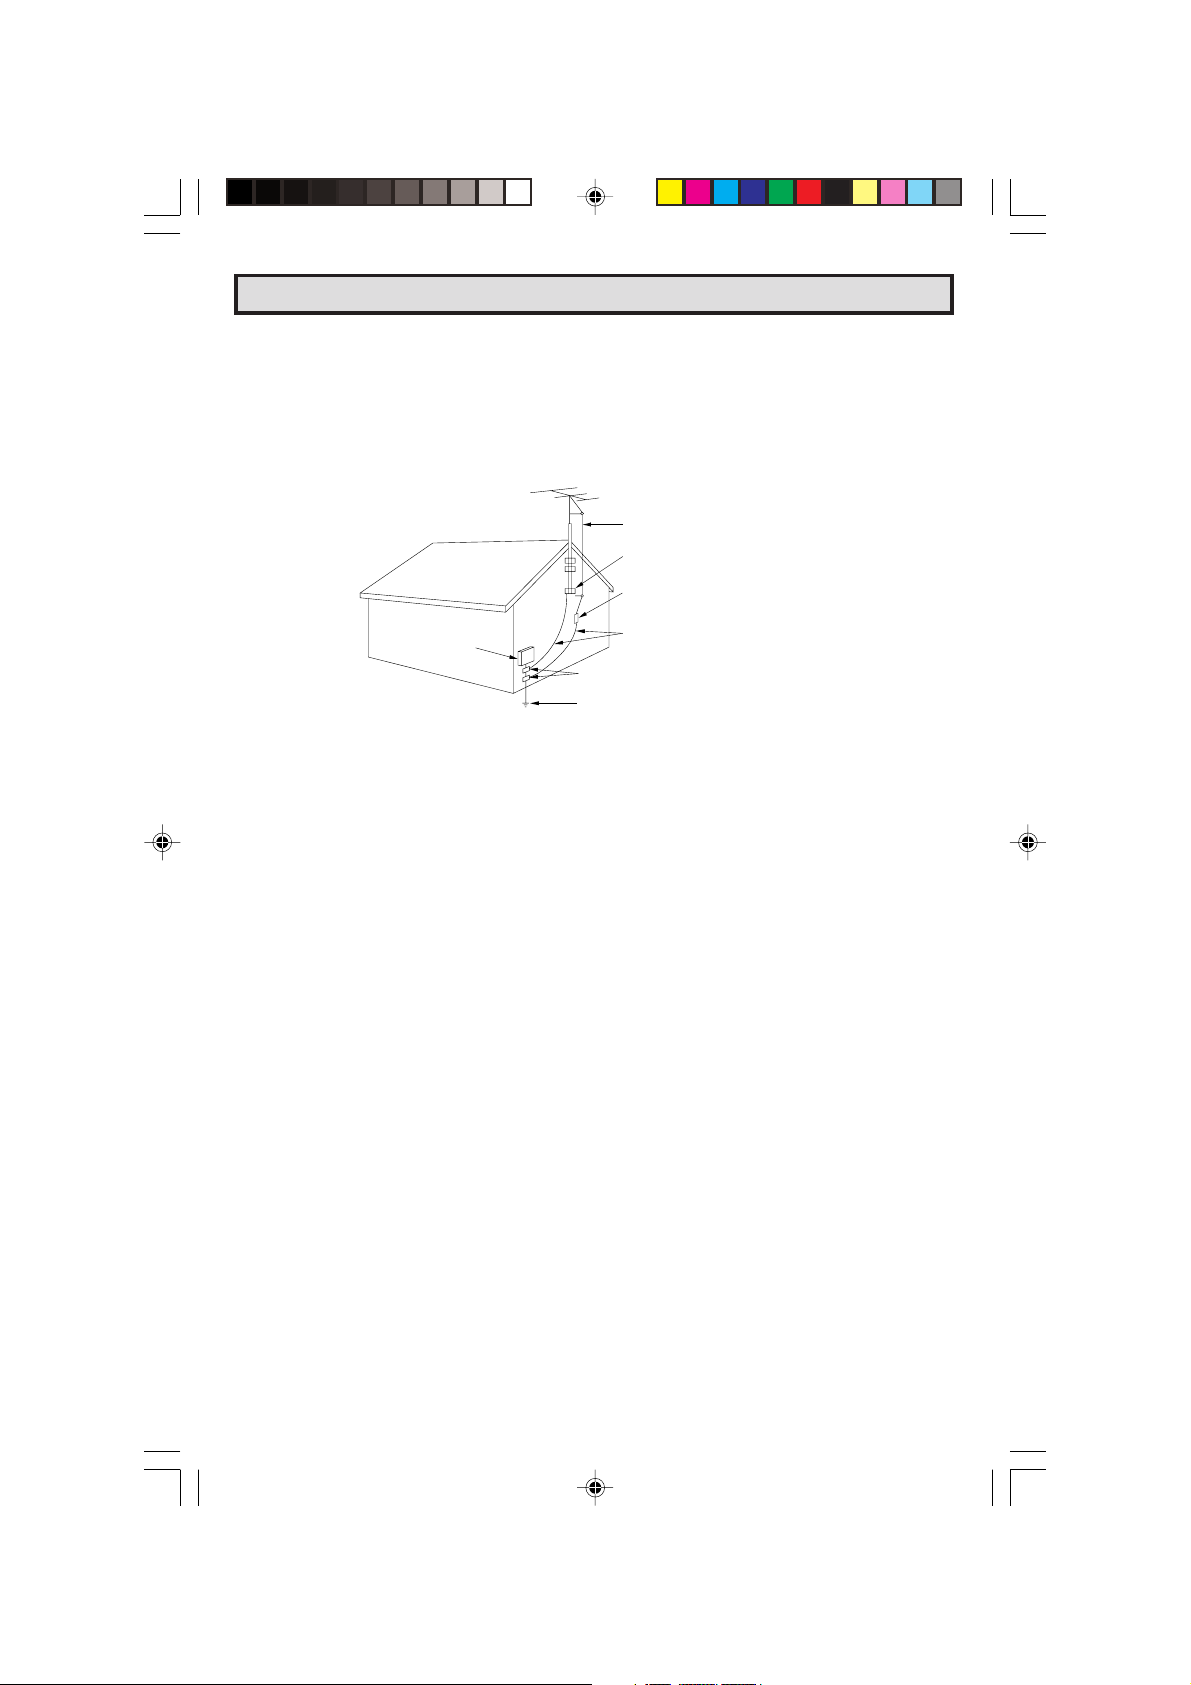
14. If an outside antenna is connected to the television equipment, be sure the antenna system is grounded
so as to provide some protection against voltage surges and built-up static charges. Section 810 of
the National Electrical Code provides information with respect to proper grounding of the mast and
supporting structure, grounding of the lead-in wire to an antenna discharge unit, size of grounding
conductors, location of antenna-discharge unit, connection to grounding electrodes, and requirements
for the grounding electrode.
EXAMPLE OF ANTENNA GROUNDING
ACCORDING TO NATIONAL ELECTRICAL CODE.
ANTENNA LEAD-IN WIRE
GROUND CLAMP
ANTENNA DISCHARGE UNIT
ELECTRIC
SERVICE
EQUIPMENT
NEC - NATIONAL ELECTRICAL CODE
15. For added protection for this television equipment during a lightning storm, or when it is left unattended
and unused for long periods of time, unplug it from the wall outlet and disconnect the antenna. This
will prevent damage to the equipment due to lightning and power-line surges.
16. An outside antenna system should not be located in the vicinity of overhead power lines or other electric
light or power circuits, or where it can fall into such power lines or circuits. When installing an outside
antenna system, extreme care should be taken to keep from touching such power lines or circuits as
contact with them might be fatal.
17. Do not overload wall outlets and extension cords as this can result in fire or electric shock.
18. Never push objects of any kind into this television equipment through cabinet slots as they may touch
dangerous voltage points or short out parts that could result in a fire or electric shock. Never spill liquid
of any kind on the television equipment.
19. Do not attempt to service this television equipment yourself as opening or removing covers may
expose you to dangerous voltage or other hazards. Refer all servicing to qualified service personnel.
20. Unplug this television equipment from the wall outlet and refer servicing to qualified service personnel
under the following conditions:
A. When the power cord or plug is damaged or frayed.
B. If liquid has been spilled into the television equipment.
C. If the television equipment has been exposed to rain or water.
D. If the television equipment does not operate normally by following the operating instructions. Adjust
only those controls that are covered by the operating instructions as improper adjustment of other
controls may result in damage and will often require extensive work by a qualified technician to
restore the television equipment to normal operation.
E. If the television equipment has been dropped or the cabinet has been damaged.
F. When the television equipment exhibits a distinct change in performance — this indicates a need
for service.
21. Upon completion of any service or repairs to this television equipment, ask the service technician to
perform routine safety checks to determine that the television is in safe operating condition.
22. When replacement parts are required, be sure the service technician has used replacement parts
specified by the manufacturer that have the same characteristics as the original part. Unauthorized
substitutions may result in fire, electric shock, or other hazards.
(NEC SECTION 810-20)
GROUNDING CONDUCTORS
(NEC SECTION 810-21)
GROUND CLAMPS
POWER SERVICE GROUNDING ELECTRODE SYSTEM
(NEC PART 250, PART H)
4
02-04 32/36R-S50.p65e 19/1/01, 5:14 PM4
Page 5
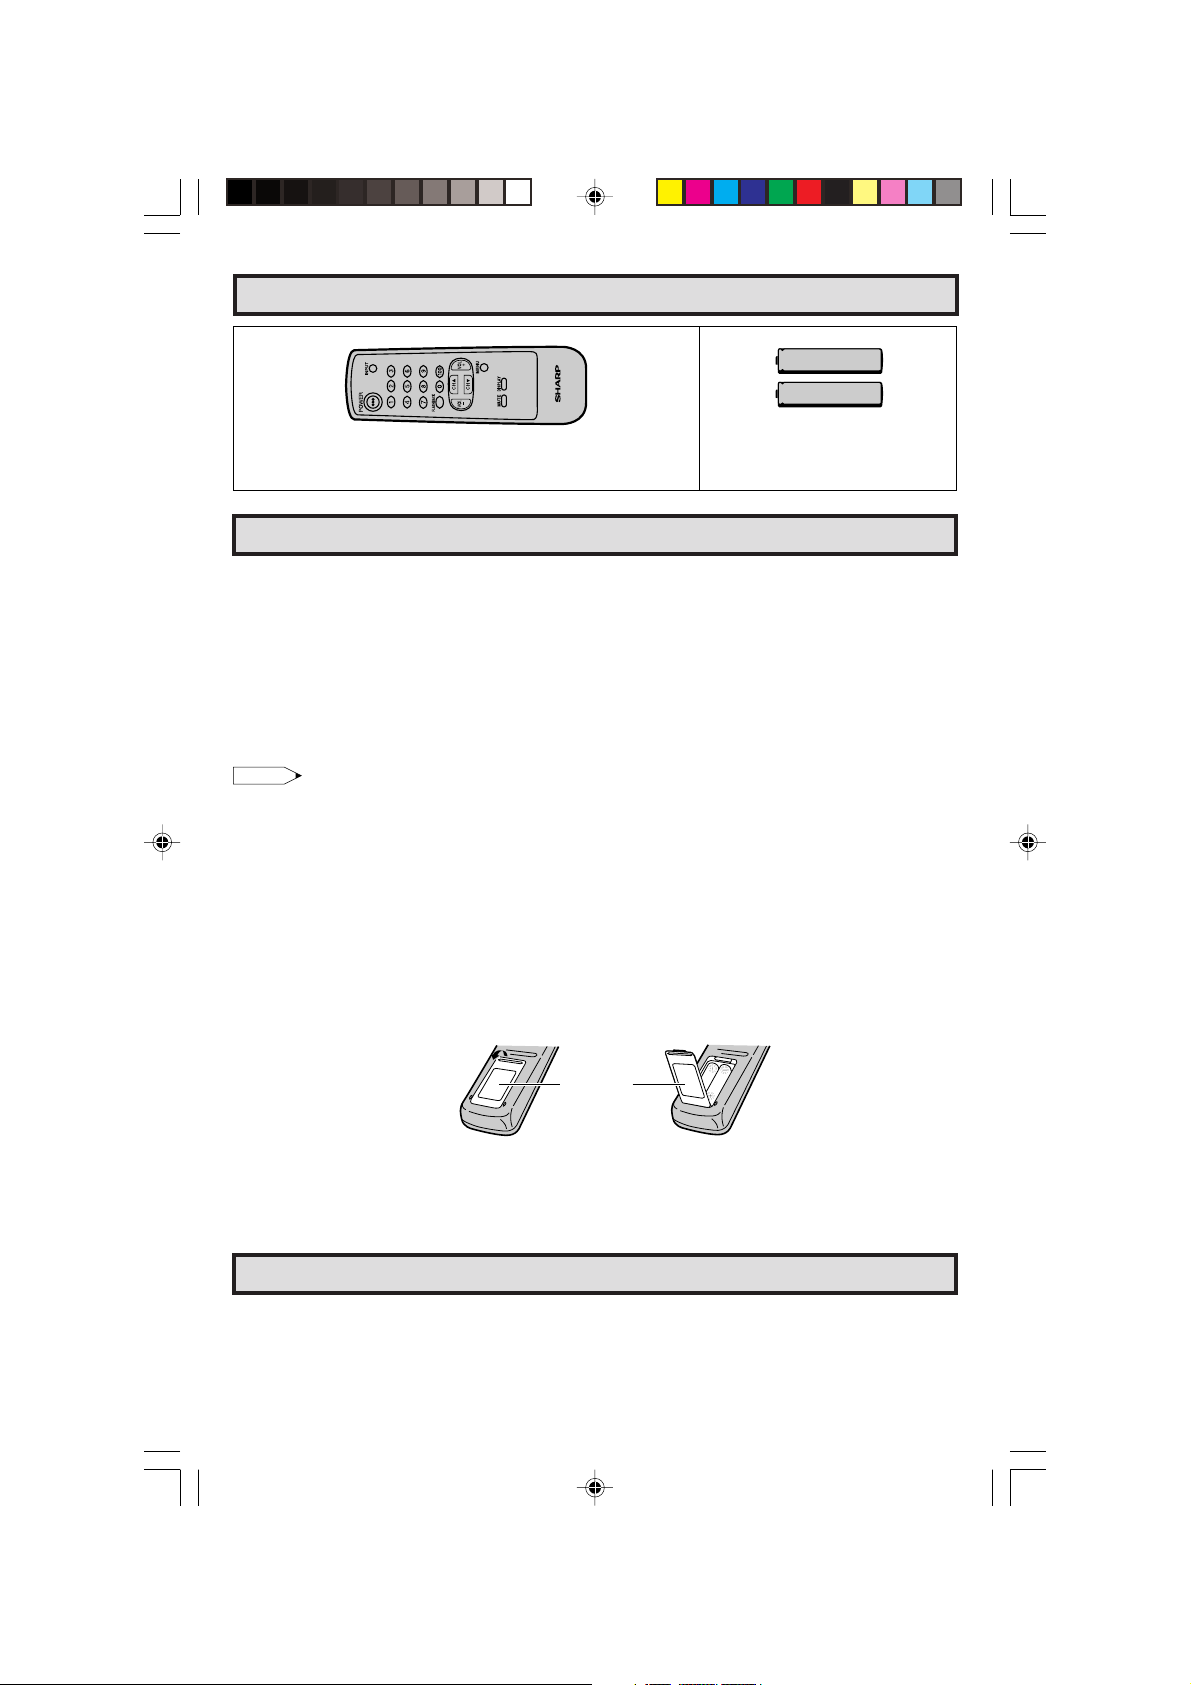
Supplied Accessories
TV
Infrared Remote Control/Part Number
RRMCG1324CESA
Size AA
Dry Batteries
Before Operating Your Television
Location
• For normal operation, your TV should be located in an area of the room where cool adequate ventilation
is provided. Do not place the back of the television set in a place where free airflow will be restricted.
• Any magnetic force may disturb the color picture. Make sure that magnets, electric clocks, toys using
magnets or any other magnetic substance, such as iron are kept well away from this TV set.
Power
Your TV operates on 120 Volts, 60 Hertz (normal household current) and has a polarized plug. If you
are unable to insert the plug fully into the outlet, try reversing the plug. Should it fail to fit, contact an
electrician. Do not defeat the safety feature of the polarized plug.
Note:
• If the set will not be used for a long period, such as during a vacation, unplug the set from the wall
outlet to economize power. (If the TV set is plugged in, a slight current still flows, even with the
POWER BUTTON in the OFF position.)
• Lines and other noise may appear in TV broadcast images when an FM tuner or radio is located near
the TV and both radio and TV broadcasts are being received. Should such noise appear, turn off
either the TV or the radio.
• If you are listening to an AM broadcast, turn the TV off. AM broadcast signals may not be received
due to the interference of the TV.
L Before using the television, prepare the Remote Control
To use the remote control, insert batteries first.
Insert the batteries
Pull up
Battery
Cover
• With your thumbnail, pull up the slit as indicated by the arrow to remove the back cover. Insert two
batteries (size “AA”). Be sure to match the battery e/d terminals with the e/d marks inside the
compartment.
Antenna Connections
Antennas
• The antenna requirements for good color television reception are more important than those for
black & white television reception. For this reason, a good quality outdoor antenna is strongly
recommended.
The following is a brief explanation of the type of connections that are provided with the various
antenna systems:
05-06 32/36R-S50.p65e 19/1/01, 5:14 PM5
5
Page 6
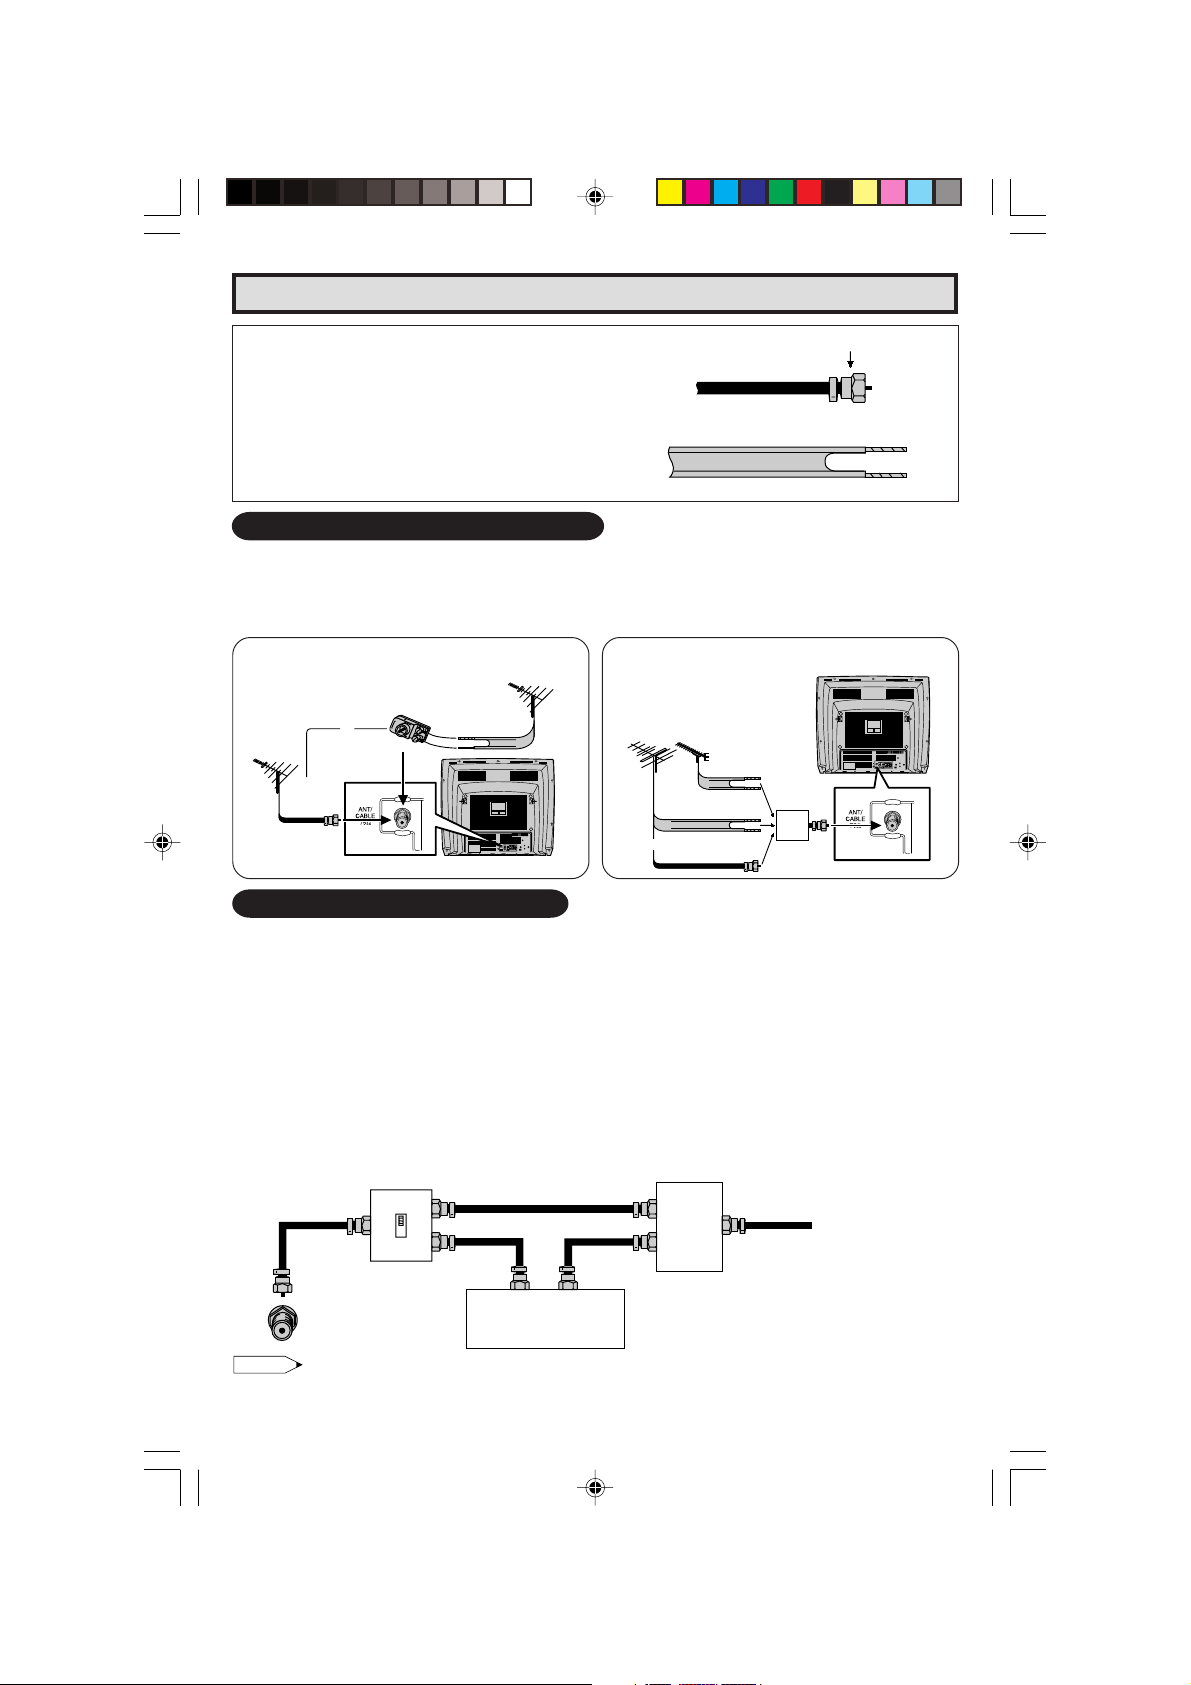
Antenna Connections (Continued)
1. A 75 ohm system is generally a round cable
F-type connector
with F-type connector that can easily be
attached to a terminal without tools (not
supplied).
2. A 300 ohm system is a flat “twin-lead” cable
75-ohm coaxial cable (round)
that can be attached to a 75 ohm terminal
through a 300-75 ohm ADAPTOR (not
supplied).
300-ohm twin-lead cable (flat)
OUTDOOR ANTENNA CONNECTION
• Use one of the following two diagrams if you connect an outdoor antenna.
A: Using a VHF/UHF combination outdoor antenna.
B: Using separate VHF and/or UHF outdoor antenna.
• Connect an outdoor antenna cable lead-in to the COAXIAL CABLE CONNECTOR on the rear of the
TV set.
A. Combination VHF/UHF Antennas
300/75-ohm
ADAPTOR
(not supplied)
75-ohm
coaxial
cable
or
VHF/UHF
ANTENNA
VHF/UHF ANTENNA
300-ohm
twin-lead
REAR OF TV
B. Separate VHF/UHF Antenna
VHF
UHF
ANTENNA
ANTENNA
300-ohm
twin-lead
COMBINER
300-ohm
(not supplied)
twin-lead
or
75-ohm coaxial
IN OUT
cable
REAR OF TV
CABLE TV (CATV) CONNECTION
• A 75 ohm coaxial cable connector is built into the set for easy hookup. When connecting the 75 ohm
coaxial cable to the set, screw the 75 ohm cable to the COAXIAL CABLE CONNECTOR.
• Some cable TV companies offer “premium pay channels”. Since the signals of these premium pay
channels are scrambled, a cable TV converter/descrambler is generally provided to the subscriber
by the cable TV company. This converter/descrambler is necessary for normal viewing of the scrambled
channels. (Set your TV on channel 3 or 4. Typically one of these channels is used. If this is unknown,
consult your cable TV company.) For more specific instructions on installing cable TV, consult your
cable TV company. One possible method of utilizing the converter/descrambler provided by your
cable TV company is explained below.
Please note: RF switch equipped with position A/B (not provided) is required.
“A” position on the RF switch (not supplied) : You can view all unscrambled channels using the TV’s
channel keys.
“B” position on the RF switch (not supplied) : You can view the scrambled channels via the converter/
RF switch (not supplied)
descrambler using the converter’s channel keys.
Two-set
OUTAIN
B
OUT
IN
signal
splitter
(not
supplied)
Cable TV Line
Cable TV converter/
descrambler
(not supplied)
Note:
• Consult your SHARP Dealer or Service Center for the type of splitter, RF switch or combiner that
might be required.
6
05-06 32/36R-S50.p65e 19/1/01, 5:14 PM6
Page 7
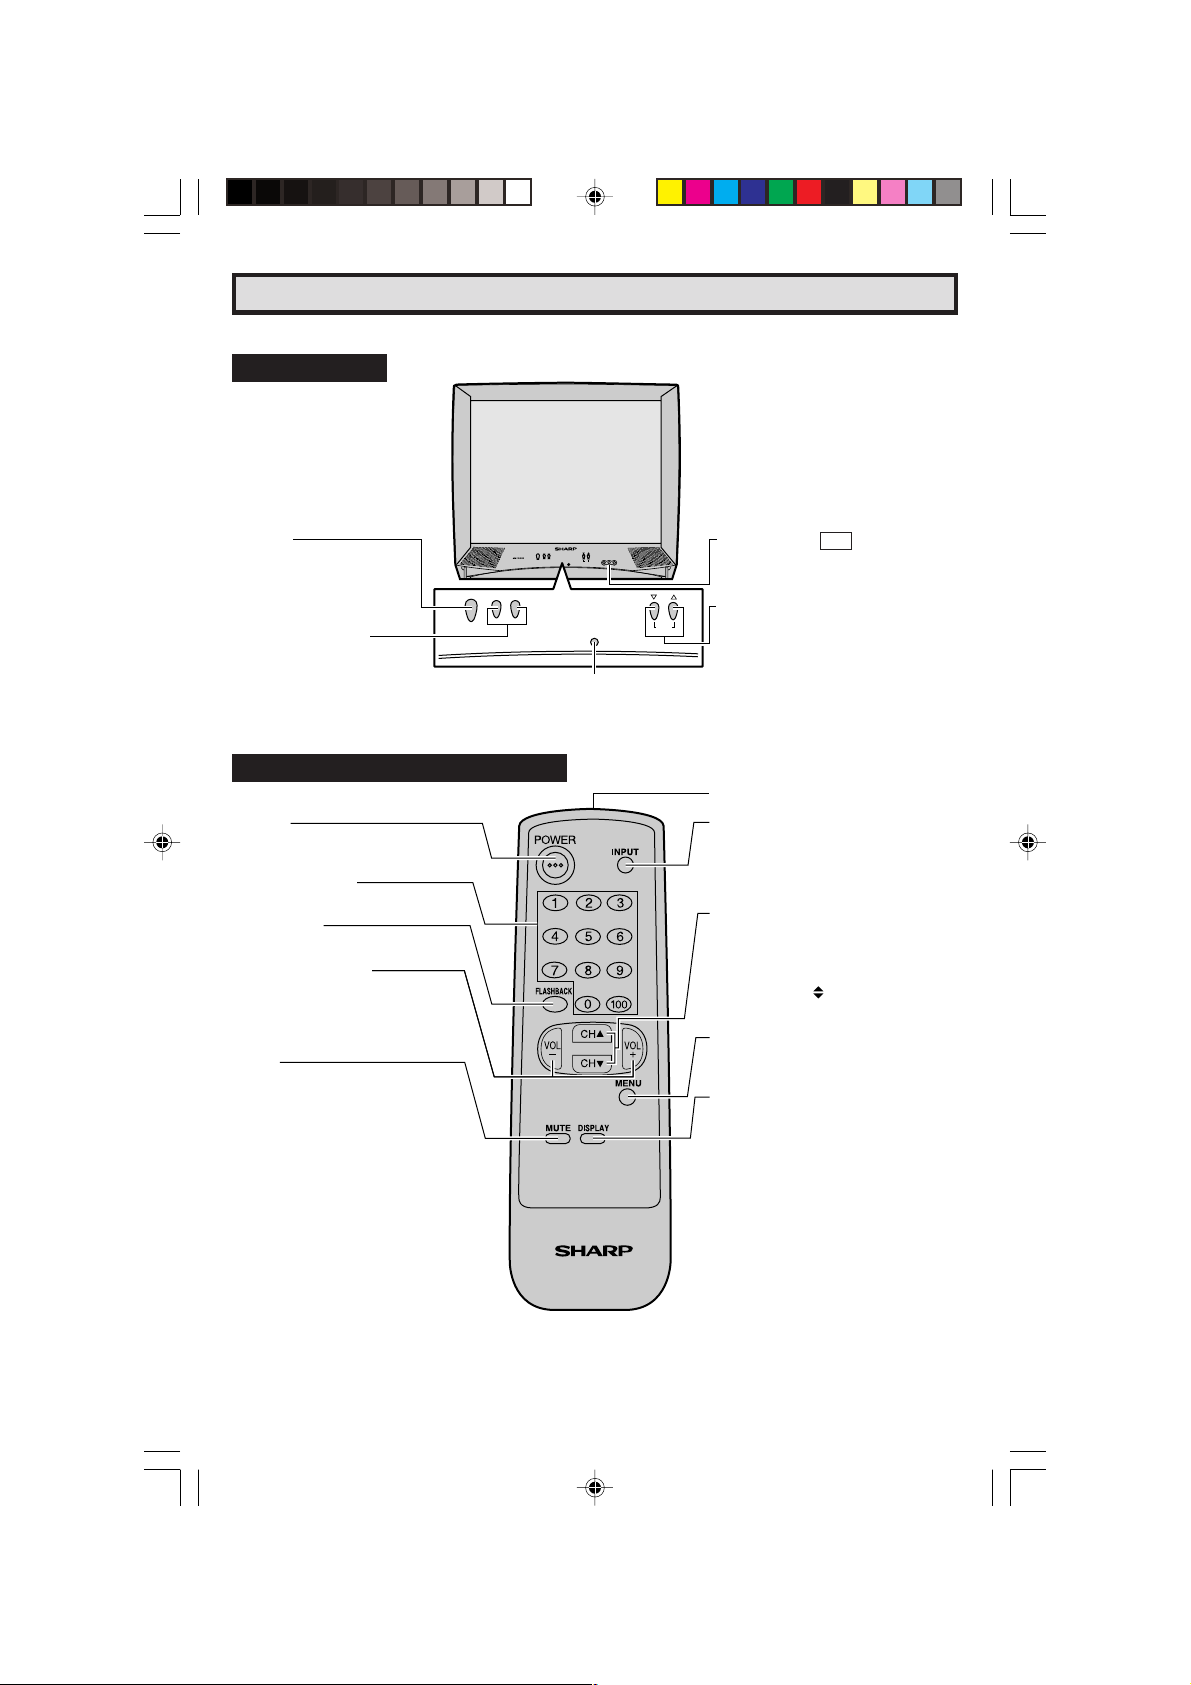
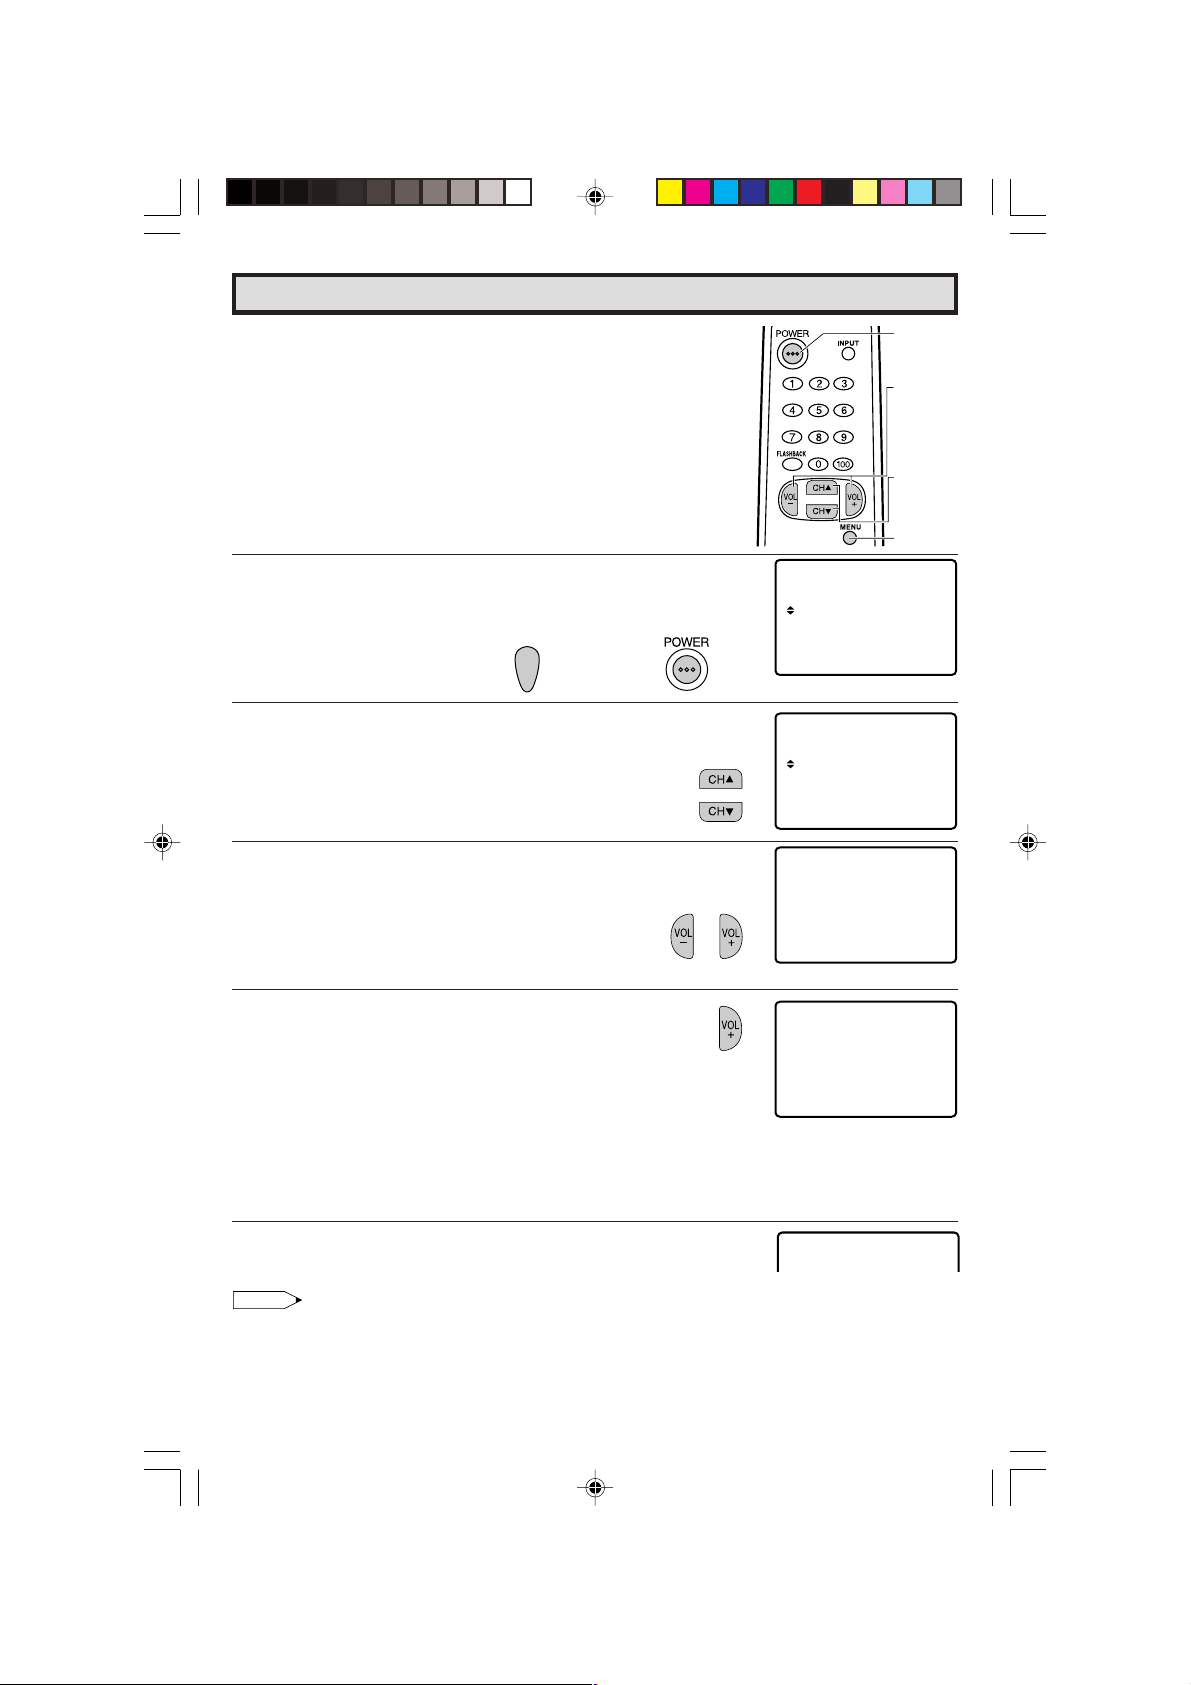
Quick Reference Control Operation
Quick Reference Control Operation
L Location of Controls (ENGLISH)
Front Panel
POWER
Press → On.
Press again → Off.
VOLUME UP/DOWN
(+) Increases sound.
(–) Decreases sound.
POWERCH– VOL +
Basic Remote Control Functions
POWER
Press → On.
Press again → Off.
REMOTE KEYPAD
Accesses any channel from keypad.
FLASHBACK
Returns to previous channel.
VOLUME UP/DOWN
(+) Increases sound.
(–) Decreases sound.
• In menu mode, changes or selects
the TV adjustments.
MUTE
Press → Mutes sound.
Press again → Restores sound.
• CLOSED CAPTION appears when
sound is muted.
POWERCH– VOL +
MENU
SENSOR AREA FOR
REMOTE CONTROL
MENU
VIDEO/AUDIO TERMINALS
(VIDEO/AUDIO terminals are also
provided on the rear.)
CHANNEL UP/DOWN – MENU
(8) Selects next higher channel.
(9) Selects next lower channel.
• Press both at the same time to
access the MAIN MENU screen.
Infrared Transmitter Window
INPUT
Press → Switch to external video input
mode.
Press again → Switch to TV mode.
See page 32.
CHANNEL UP/DOWN
(8) Selects next higher channel.
(9) Selects next lower channel.
• See pages 29 ~ 31 for channel
presetting.
• Moves the “
screen.
MENU
Press → Accesses MAIN MENU.
Press again → Exits MAIN MENU.
DISPLAY
Press → Displays receiving channel for
four seconds.
Press again → Removes display.
• Temporarily displays receiving
channel when in Closed Caption
mode.
IN 2
” mark of the MENU
07-09 32/36R-S50.p65e 19/1/01, 5:14 PM7
TV
7
Page 8
Referencia rápida de los controles de operación
L Ubicación de los controles (ESPAÑOL)
Panel Delantero
ALIMENTACION
(POWER)
Pulsando → Enciende (On).
Pulsando nuevamente
→ Apaga (Off).
AUMENTO/DISMINUCION
DEL VOLUMEN (VOL)
(+) Aumenta el sonido.
(–) Disminuye el sonido.
POWERCH– VOL +
ZONA DEL SENSOR DEL
MANDO A DISTANCIA
Funciones Basicas Del Control Remoto
ALIMENTACION (POWER)
Pulsando → Enciende (On).
Pulsando nuevamente → Apaga
(Off).
TECLADO A DISTANCIA
Para tener acceso a cualquier canal
empleando las teclas.
RETORNO AL CANAL
ANTERIOR (FLASHBACK)
Para volver al canal anterior.
AUMENTO/DISMINUCION
DEL VOLUMEN
(VOLUME UP/DOWN)
(+) Aumenta el sonido.
(–) Disminuye el sonido.
• En modo de MENU cambia o
selecciona el ajuste del televisor.
SILENCIAMIENTO (MUTE)
Pulsando → Silencia el sonido.
Pulsando nuevamente → Restaura el
sonido.
• CLOSED CAPTION aparece
automáticamente cuando el sonido
es silenciado. Siempre y cuando la
transmisión tenga esta señal.
POWERCH– VOL +
TERMINALES DE ENTRADA
MENU
MENU
VIDEO/AUDIO
(Los terminales VIDEO/AUDIO también
se encuentran en la parte posterior)
CANAL SUPERIOR/INFERIOR (CH) – MENU
(8) Selecciona el siguiente canal superior.
(9) Selecciona el siguiente canal inferior.
Pulse ambos al mismo tiempo para acceder
•
a la pantalla de MENU PRINCIPAL.
IN 2
Ventanilla del transmisor de infrarrojos
ENTRADA (INPUT)
Pulsando → Cambìa al modo de
entrada de video externo.
Pulsando nuevamente → Cambìa al
modo de TV.
CANAL SUPERIOR/INFERIOR
(CHANNEL UP/DOWN)
(8) Selecciona el siguiente canal
superior.
(9) Selecciona el siguiente canal
inferior.
• En el modo de MENU, mueve la
marca “
MENU (MENU)
Pulsando → Accede al MENU PRINCIPAL.
Pulsando nuevamente → Sale del
MENU PRINCIPAL.
VISUALIZACION (DISPLAY)
Pulsando → Aparece el canal de recepción por cuatro segundos.
Pulsando nuevamente → Elimina la
visualización.
• En el modo de “Closed Caption” se
muestra el canal de recepción por
TV
un corto tiempo.
”.
8
07-09 32/36R-S50.p65e 19/1/01, 5:14 PM8
Page 9

Référence rapide sur les commandes
L Emplacement des touches (FRANÇAIS)
Panneau Avant
ALIMENTATION (POWER)
Appuyer pour mettre sous
tension.
Appuyer de nouveau pour
mettre hors tension.
AUGMENTATION/
RÉDUCTION DU VOLUME
SONORE (VOL)
(+) Pour augmenter le volume du son.
(–) Pour diminuer le volume du son.
POWERCH– VOL +
Fonctions de base de la télécommande
ALIMENTATION (POWER)
Appuyer pour mettre sous tension.
Appuyer de nouveau pour mettre hors
tension.
PAVE NUMERIQUE DE
COMMANDE A DISTANCE
Sélectionne directement le canal
voulu sur le pavé numérique.
RETOUR (FLASHBACK)
Rappelle le canal regardé précédent.
AUGMENTATION/RÉDUCTION DU
VOLUME SONORE
(VOLUME UP/DOWN)
(+) Pour augmenter le volume du son.
(–) Pour diminuer le volume du son.
• Pour changer ou sélectionner les
réglages du téléviseur en mode
menu.
SOURDINE (MUTE)
Appuyer → Mise en sourdine du son.
Appuyer de nouveau → Rétablisse-
ment du son.
• CLOSED CAPTION apparaît lorsque
le son est mis en sourdine.
POWERCH– VOL +
MENU
ZONE DE DETECTION
DU CAPTEUR
TV
MENU
PRISES D’ENTRÉE VIDÉO/AUDIO
(Les prises VIDÉO/AUDIO sont
également reprises à l’arrière.)
TOUCHES DES CANAUX CROISSANT/
DECROISSANT (CH) – MENU
(8)
Sélectionne le canal supérieur suivant.
(9)
Sélectionne le canal inférieur précédent.
• Appuyez simultanément sur ces deux
touches pour accéder à l’écran MENU
PRINCIPAL.
IN 2
Fenêtre d’émission du signal infrarouge
ENTRÉE (INPUT)
Appuyer pour sélectionner le mode
vidèo externe.
Appuyer de nouveau pour sélectionner
la télévision.
TOUCHES DES CANAUX CROISSANT/DÉCROISSANT
(CHANNEL UP/DOWN)
(8)Sélectionne le canal supérieur
suivant.
(9)Sélectionne le canal inférieur
précédent.
• Déplace le curseur “
du MENU.
RÉGLAGE (MENU)
Appuyer → Accè s au MENU
PRINCIPAL.
Appuyer de nouveau → Sortie du
MENU PRINCIPAL.
” sur l’écran
AFFICHAGE (DISPLAY)
Appuyer pour afficher le canal reçu
pendant quatre secondes.
Appuyer de nouveau pour faire
disparaître le canal.
• Pour afficher temporairement le
canal reçu en le mode Sous-titres.
07-09 32/36R-S50.p65e 19/1/01, 5:14 PM9
9
Page 10
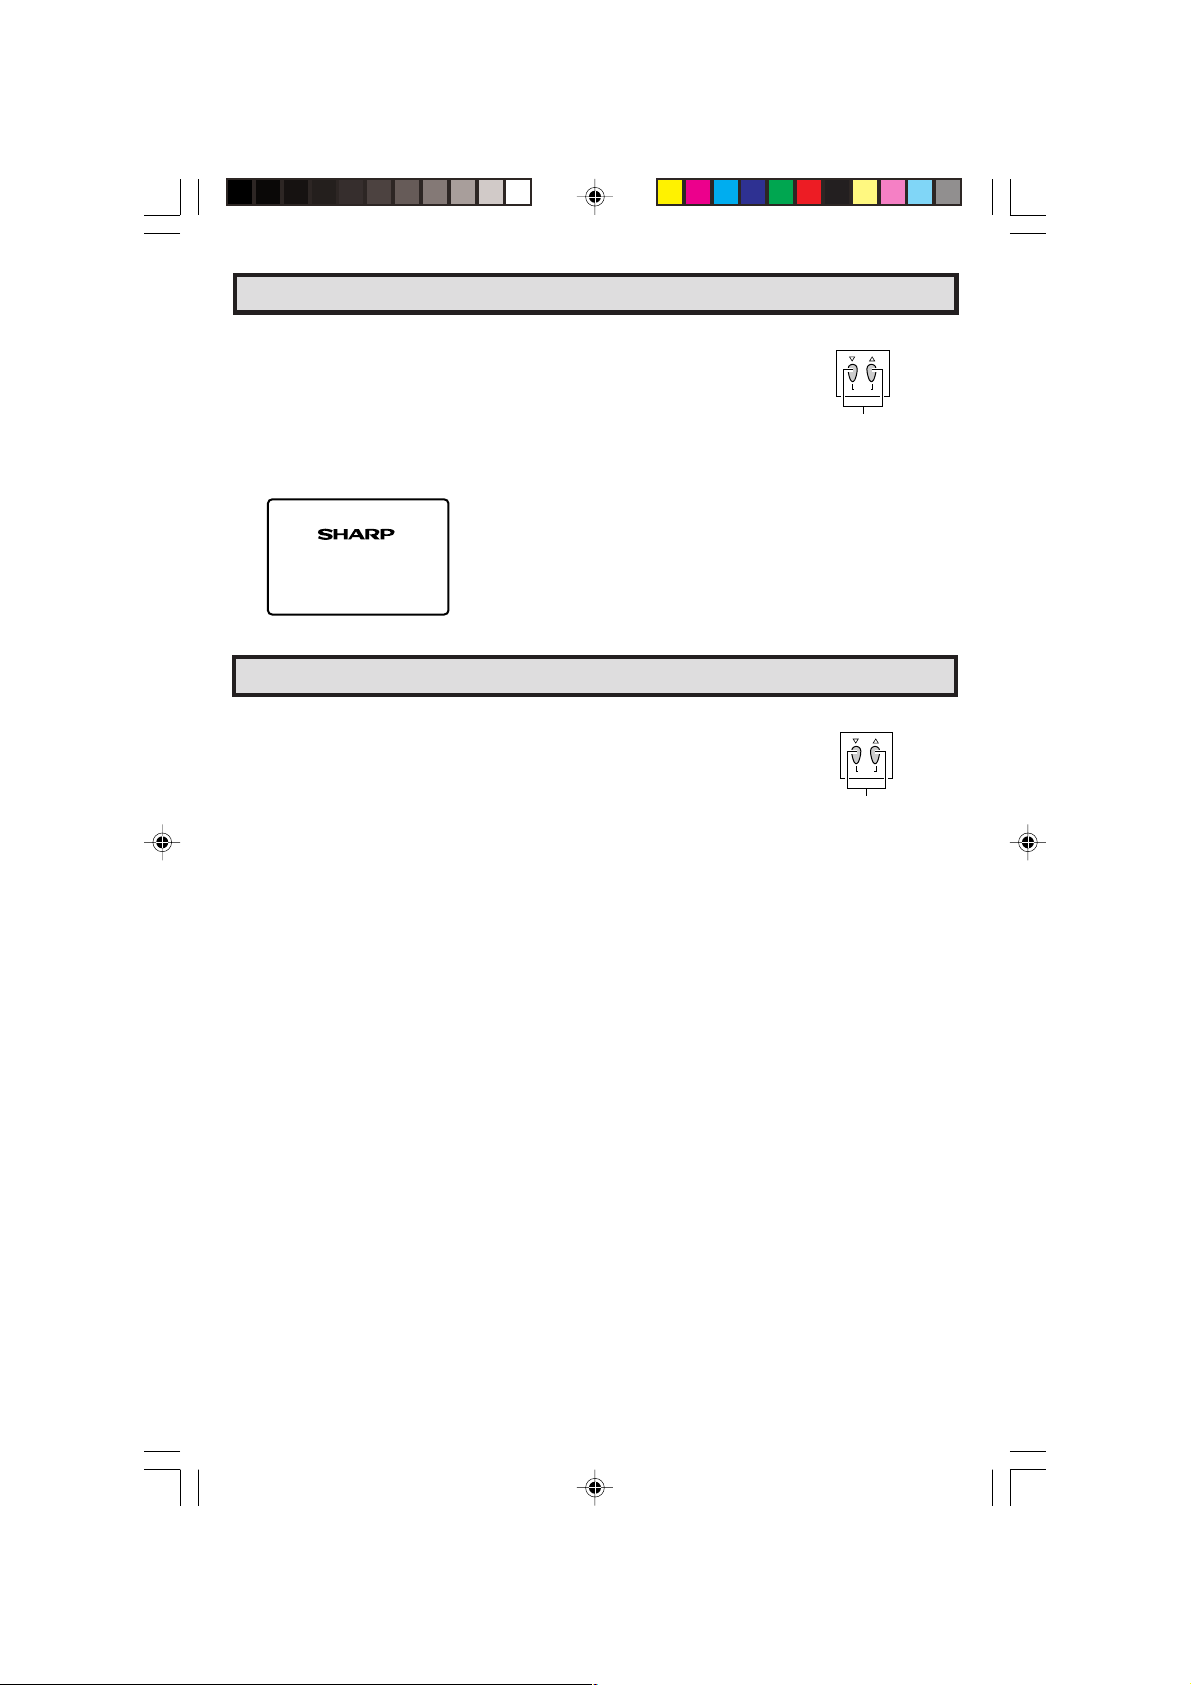
EZ SETUP during First Power On
L When you turn on the TV for the first time, it will automatically
memorize the broadcasting channels.
Please perform the following instructions before you press the
power button.
(1) Insert the batteries into the remote control. (See page 5)
(2) Connect the antenna cable to the TV set. (See page 5 ~ 6)
(3) Plug in the AC POWER cord to the wall outlet.
POWER
VOLUME
(+)/(–)
CHANNEL
UP (8)/
DOWN (9)
MENU
1 Press the
POWER
button on the TV set or on the Remote Control
to turn on the TV. The SELECT LANGUAGE mode will be displayed.
(Remote Control)
2 Press
CH UP
(8) or
(On the Set)
POWER
DOWN
(9) to select “ENGLISH”, “SPANISH
(ESPAÑOL)” or “FRENCH (FRANÇAIS)”.
3 Press
4 Press
VOL (+)
VOL (+)
or
(–)
to access EZ SETUP mode.
.
The tuner will automatically search for the
broadcasting and cable TV channels. (The CH No.
will automatically increase when it appears.)
If you want to stop the EZ SETUP process once it
has started, press
VOL (–)
and it will be canceled.
If you want to SETUP again, please refer to page
28 on SETUP.
To cancel EZ SETUP
Press
VOL (–)
.
LANGUAGSELECT E
ENGL I SH
ESPAÑOL
FR NCA I S
A
SE ECT :CH8 / 9
L
SE :TL+–/
VO
(SELECT LANGUAGE mode)
LANGUAGSELECT E
ENGL I SH
ESPAÑOL
FR NCA I S
A
SE ECT :CH8 / 9
L
SE :TL+–/
OR CA BL E .
TSART SETUP?ZE
VO
ANTENNCONNECT A
YE : VOL+
S
NO :
VOL –
(EZ SETUP mode)
WA I TPLE EAS
AU18TO RGGAMMI NORP
TSOP:
VOL –
5 Once EZ SETUP is completed, the lowest channel number
memorized will be displayed.
Note:
• If EZ SETUP does not memorize all the channels in your region, please refer to page 29 for more
information on manually memorizing the channels using CHANNEL SETTING.
• It may be difficult to PRESET when the broadcasting signals are weak, the channel cycle frequency
is incorrect or the frequency jamming is occuring around the area. Please refer to pages 29 ~ 31 for
more information on manually memorizing the channels using CHANNEL SETTING.
10
10-11 32/36R-S50.p65e 19/1/01, 5:14 PM10
Page 11
Demo Mode
• To quickly learn more about the TV set, press and hold for more than
three seconds both
CH UP (
88
8
)
and
88
DOWN (
99
9
)
on the TV set. The TV
99
set will go into DEMO mode and briefly explain the various features.
• To cancel DEMO mode, again press both
CH UP (
88
8
)
and
88
DOWN (
99
9
99
on the TV set.
Example:
)
(On the Set)
CHANNEL
88
UP (
8
)/DOWN (
88
buttons
CH
MENU
DEMO mode display
oem
ndd
s
SHARP
uc
PMrio
t
CForm
SHARP
s
Accessing the MAIN MENU screen without Remote Control
• If you misplaced your Remote Control you can still access most settings
via the MAIN MENU screen when you press both
DOWN (
99
9
)
on the TV set.
99
CH UP (
88
8
)
and
88
• Some features of your TV set will not be accessible without the Remote
Control. If you lost your Remote Control, contact a Sharp Service
Center for a replacement.
(On the Set)
CHANNEL
88
UP (
8
)/DOWN (
88
buttons
CH
MENU
99
9
)
99
99
9
)
99
10-11 32/36R-S50.p65e 19/1/01, 5:14 PM11
11
Page 12

Language
TI ER
SET UP
M
VI DEO ADJUST
CAPT IONCLOSED
CONT ROLPARENT
ENERGY SAV E
AUD IO SELECT
TI ER
SET UP
M
VI DEO ADJUST
CAPT IONCLOSED
CONT ROLPARENT
ENERGY SAV E
AUD IO SELECT
FR NCA IS
ENGL I SH
ESPAÑOL
LANGUAGE
A
SL EP TIMERE
120 RE A IMN
BL E SCREENU
LANGUAGE
INGCH SETT
L The language for the ON SCREEN DISPLAY can be set to ENGLISH, SPANISH or FRENCH.
L Setting the ON SCREEN DISPLAY Language.
TI ER
1 Press
MENU
to access MAIN MENU screen.
M
VI DEO ADJUST
AUD IO SELECT
CAPT IONCLOSED
CONT ROLPARENT
ENERGY SAV E
SET UP
(MAIN MENU screen)
2 Press
3 Press
DOWN
or
CH UP
(8) or
DOWN
(9) to move the “ ” mark to “SET UP”.
VOL (+)
or
(–)
to access SET UP mode, then press
(9) to move the “ ” mark to “LANGUAGE”.
CH UP
(8)
→
4 Press
5 Press
6 Press
VOL (+)
CH UP
or
(–)
to access LANGUAGE change mode.
(8) or
DOWN
(9) to select “ENGLISH”, “SPANISH
(ESPAÑOL)” or “FRENCH (FRANÇAIS)”.
MENU
to exit.
Sleep Timer
L You can set the number of minutes for your TV to automatically turn off.
(SET UP mode)
(LANGUAGE change mode)
IDIOMA
ENGL I SH
ESPAÑOL
FR NCA IS
A
1 Press MENU to access MAIN MENU screen.
2 Press VOL (+) or (–) to access TIMER SET mode.
→
(MAIN MENU screen)
3 Press VOL (+) or (–) to set a sleep time of 30, 60, 90 or 120 minutes.
4 Press MENU to exit.
→
Note:
• To turn off the Sleep Timer, repeat the above SLEEP TIMER steps and select “– – – REMAIN” during
step 3.
• While SLEEP TIMER is active, the time remaining will be briefly displayed on-screen at regular intervals
or when the remote’s Display key is pressed.
12
12-14 32/36R-S50.p65e 19/1/01, 5:14 PM12
(TIMER SET mode)
Page 13

Video Adjust
ICTUR
E
– +
P50ICTUR
E
– +
P
50
TI ER
SET UP
M
VIDEO ADJUST
CAPT IONCLOSED
CONT ROLPARENT
ENERGY SAVE
AUD IO SELECT
Description of Adjustment Items
Selected VOL UP (+) button VOL DOWN (–) button
item
PICTURE To increase contrast To decrease contrast
TINT To make skin tones greenish To make skin tones purplish
COLOR To increase color intensity To decrease color intensity
BRIGHT To increase brightness To decrease brightness
SHARP To increase sharpness To decrease sharpness
COLOR To choose a LOW, ML, MH or HIGH COLOR TONE.
TEMP.
RESET To return all adjustments to factory preset levels.
1 Press
2 Press
MENU
to access MAIN MENU screen.
CH UP
(8) or
DOWN
(9) to move the “ ” mark to “VIDEO
ADJUST”.
→
3 Press
VOL (+)
or
(–)
to access PICTURE adjust mode.
VOLUME
(+)/(–)
CHANNEL
UP (8)/
DOWN (9)
MENU
(MAIN MENU screen)
(PICTURE adjust mode)
4 Press
CH UP
(8) or
DOWN
(9) to select the desired mode.
(Refer to the diagram below.)
PICTURE
RESET
: CH UP (8)
5 Press
VOL (+)
TINT
COLOR TEMP.
or
(–)
to adjust the setting.
COLOR
: CH DOWN (9)
6 Repeat steps 4 to 5 to adjust other settings.
7 Press
12-14 32/36R-S50.p65e 19/1/01, 5:14 PM13
MENU
to exit.
BRIGHT
SHARP
VOL UP (+)
increase contrast
VOL DOWN (–)
decrease contrast
13
Page 14

Audio Select
TI ER
SET UP
M
VIDEO ADJUST
SELECT
CAPT IONCLOSED
AUD IO
PARENT CONTROL
ENERGY SAVE
SELECT
:SAPMTS
AUD IO
L MTS (MULTI CHANNEL TV SOUND)
This circuit allows reception of stereo or bilingual TV sound.
1 Press
2 Press
MENU
to access MAIN MENU screen.
CH UP
(8) or
DOWN
(9) to move the “ ” mark to “AUDIO
SELECT”.
→
(MAIN MENU screen)
3 Press
4 Press
5 Press
L You can enjoy Hi-Fi stereo sound or SAP broadcasts where available.
• Stereo broadcasts
• SAP broadcasts
L If stereo sound is difficult to hear.
• You can obtain clearer sound by manually switching to fixed monaural
Note:
• Once MONO mode is selected, the TV sound remains monaural even if the TV set receives a stereo broadcast.
• Selecting MTS while in the INPUT mode does not change the type of sound; in this case, sound is determined
VOL (+) or (–)
to access AUDIO SELECT mode.
(AUDIO SELECT mode)
VOL (+) or (–)
STEREO SAP MONO
to select “STEREO”, “SAP” or “MONO”.
AUD IO
SELECT
:STEREOMTS
(AUDIO SELECT mode)
MENU
to exit.
Ex: Actual screen indicating ON AIR when receiving STEREO broadcasts.
Actual channel number
12
“← ON AIR” will appear next to STEREO or
SAP when receiving STEREO or SAP
broadcasts.
REO
T IRON A
SSAE
P
MO O
N
ON A
IR
(Channel call on screen)
Live television transmission of sports, shows, concerts, etc. can be received in dynamic stereo sound.
Television broadcast can be received with either MAIN or SAP sound.
MAIN sound: The normal program soundtrack. (Monaural or stereo where available.)
SAP sound: Second language, supplementary commentaries, etc. (SAP sound is monaural.)
mode.
You must switch the mode back to STEREO if you want to hear stereo sound again.
by the video source.
14
12-14 32/36R-S50.p65e 19/1/01, 5:14 PM14
Page 15

CAPT IONCLOSED
MOD E : CA P
DATA : CH 1
TION
CAPT IONCLOSED
MOD E : CA P
DATA : CH 1
TION
TI ER
SET UP
M
VIDEO ADJUST
CAPT IONCLOSED
CONT ROLPARENT
ENERGY SAVE
AUD IO SELECT
Closed Caption
L HOW TO SET CLOSED CAPTION
• Your TV is equipped with an internal Closed Caption decoder. “Closed
Caption” is a system which allows you to view conversations, narration,
and sound effects in TV programs and home videos as subscript on
your TV screen as shown on the right.
• Not all the programs and videos will offer closed caption. Please look
for the “ ” symbol to ensure that captions will be shown.
• Closed Caption broadcast can be viewed in two modes: CAPTION
and TEXT. For each mode, two channels are available, CH1 and CH2:
The [CAPTION] mode subscripts dialogues and commentaries of TV
dramas and news programs while allowing clear view of the picture.
The [TEXT] mode displays over the picture other various information
(such as TV program schedule, weather forecast, etc.) that is
independent of the TV programs.
1 Press MENU to access MAIN MENU screen.
2 Press
CH UP
CAPTION”.
(8) or
DOWN
(9) to move the “ ” mark to “CLOSED
→
VOLUME
(+)/(–)
CHANNEL
UP (8)/
DOWN (9)
MENU
(MAIN MENU screen)
3 Press
VOL (+)
or
(–)
to access CLOSED CAPTION setting mode.
CAPT IONCLOSED
MOD E : CA P
DATA : CH 1
TION
(CLOSED CAPTION setting mode)
4 Press
CH UP
(8) or
DOWN
(9) to move the “ ” mark to either
“MODE” or “DATA”.
5 Press
6 Press
MODE :
VOL (+)
CAPTION
MENU
or
(–)
to change the CLOSED CAPTION setting.
DATA :
TEXT
OFF
CH 1
CH 2
to exit.
Note:
• If a broadcast has CLOSED CAPTION and the MUTE button is pressed, the set enters [CAPTION]
mode automatically. Pressing MUTE again will return the set to its previous condition.
• Closed Caption may malfunction (white blocks, strange characters, etc.) if signal conditions are poor
or if there are problems at the broadcast source. This does not necessarily indicate a problem with
your set.
• If any button is pressed to call up the ON SCREEN DISPLAY while viewing a CLOSED CAPTION
broadcast, the closed captions will disappear momentarily.
• When viewing in TEXT mode, if no TEXT broadcast is being received, for some programs the screen
may become dark and blank. Should this occur, set the Closed Caption mode to “OFF”.
15
15-19 32/36R-S50.p65e 19/1/01, 5:15 PM15
Page 16

Parent Control (V-CHIP Operation)
L V-CHIP
• This function allows you to restrict TV programs and also allows you to control TV usage based on
FCC data. This function is to prevent your children from watching violence or sexual scenes that may
be harmful.
• Restriction of TV programs includes two characters that contain information about the program’s MPAA
rating and the TV Parental Guidelines. MPAA is restricted by age. TV Parental Guidelines are restricted
by age and contents.
• Since a TV program may use either the MPAA rating or the TV Guidelines you should adjust both for
complete control.
[1] MPAA RATING
RATING
G GENERAL AUDIENCES. All ages admitted.
PG PARENTAL GUIDANCE SUGGESTED. Some material may not be suitable for
age
PG-13 PARENTAL STRONGLY CAUTIONED. Some material may be inappropriate
base
R RESTRICTED. Under 17 requires accompanying parent or adult guardian.
NC-17 NO ONE 17 AND UNDER ADMITTED.
X X Rating is an older rating that is unified with NC-17 but may be encoded on
• MPAA RATING (Example)
Example 1.
“PG-13” in the age based RATING is blocked,
this will automatically block the high ratings “R”,
“NC-17”, “X” also.
1. User setting 2. Block table
G
– – – – –
PG
– – – – –
BLOCK
PG-13
BLOCK
R
BLOCK
NC-17
BLOCK
X
Note:
• MPAA RATING is only age based ratings.
[2] TV PARENTAL GUIDELINES
TV-Y (All children)
TV-Y7 (Direct to Older Children)
E
TV-G (General Audience)
age
TV-PG (Parental Guidance
base
Suggested)
TV-14 (Parents Strongly
D
Cautioned)
TV-MA (Mature Audience Only)
V : Content Rating can be set.
–
: Content Rating can not be set (not normally broadcast by TV station).
16
children.
for children under 13.
older movie’s data.Note:
not to
G
block
not to
PG
block
Select
PG-13
age
base
R
NC-17
X
block
auto-
block
auto-
block
auto-
block
RATING
Example 2.
“R” in the age based RATING is blocked, this will
automatically block the high rating “NC-17”, “X” also.
1. User setting 2. Block table
G
– – – – –
PG
– – – – –
PG-13
R
NC-17
X
– – – – –
BLOCK
BLOCK
BLOCK
y
age
base
content base
G
PG
PG-13
R
NC-17
X
not to
block
not to
block
not to
block
Select
block
autoblock
autoblock
x
AGE D L S V FV
(Sexually (Adult (Sexual (Violence) (Fantasy
Suggestive Language) Situation) Violence)
Dialog)
V –––––
V ––––V
V –––––
VV V V V –
VV V V V –
V – VVV –
15-19 32/36R-S50.p65e 19/1/01, 5:15 PM16
Page 17

Parent Control (V-CHIP Operation Continued)
• TV-PARENTAL GUIDELINES (Example)
Example 1.1 : Age Based setting
Go through all select ratings and select unblocked for “AGE”.
This will automatically unblock everything.
Example 1.2 : Age Based setting
For “TV-G” select “BLOCK” for “AGE”. This will automatically block the
higher age ratings “TV-PG”, “TV-14” and “TV-MA” as well as “TV-G”.
Furthermore, the content ratings “D”, “L”, “S”, “V”, “FV” are automatically
blocked as well for “TV-PG”, “TV-14” and “TV-MA” as well as “TV-G”.
Example 2.1 : Content Based setting
For “TV-PG”, “TV-14” and “TV-MA” select unblocked for each content
ratings (“D”, “L”, “S”, “V”, “FV”) by leaving “AGE” unblocked for “TV-
PG”, “TV-14” and “TV-MA”. If you choose to unblock for each one in
content base.
Example 2.2 : Content Based setting
Then for “TV-PG” and select “BLOCK” for only “V” (Violence). This will
automatically block the higher ratings “TV-14-V” and “TV-MA-V” (“TV-
14” and “TV-MA” for Violence content only).
Please note that with these settings blocking does NOT occur. If a
program is rated only “TV-MA”; it must be rated “TV-MA-V” to be blocked.
TV–Y
TV–Y7
TV–G
TV–PG
TV– 14
TV–MA
TV–Y
TV–Y7
TV–G
TV–PG
TV– 14
TV–MA
TV–Y
TV–Y7
TV–G
TV–PG
TV– 14
TV–MA
TV–Y
TV–Y7
TV–G
TV–PG
TV– 14
TV–MA
L
G
AE
D
–
–
–
–
–
–
–
MENU : R ETU RN
G
AE
D
L
–
–
–
–
–
–
V
V
–
MENU : R ETU RN
L
G
AE
D
–
–
–
–
–
–
–
MENU : R ETU RN
G
AE
D
L
–
–
–
–
–
–
–
MENU : R ETU RN
V
S
FV
–
–V::
–
VIE
W
–
–
BLOCK
–
–
–
–
–
–
S
V
FV
:
VIE
–
–
–
S
–
–
–
S
–
–
–
W
–
–
:
BLOCK
–
V
–
–
–
VVVV
–
VVVV
–
VVVVV
V
FV
–
–V::
VIE
W
–
BLOCK
–
–
–
–
–
FV
V
VIE
W
–
–V::
BLOCK
–
–
–
–
V
–
V
–
V
Example 3 : Reset an Age Based setting
For “TV-14” and select again “BLOCK” for “AGE”.
This will again automatically block the content ratings “D”, “L”, “S”, “V”,
“FV” for “TV-MA” as well as “TV-14”.
Please note that the lower age rating “TV-PG” did not change from its
previous settings.
TV–Y
TV–Y7
TV–G
TV–PG
TV– 14
TV–MA
L
G
AE
D
–
–
–
–
–
–
–
V
MENU : R ETU RN
V
S
FV
–
–V::
–
VIE
–
–
BLOCK
–
–
–
–
–
VVVVVVVV
–
Note:
• Content ratings can be modified but only in the combinations indicated by an V in the table on page
16.
• Changing a lower age rating’s content setting to “BLOCK” automatically changes the same higher age
rating’s content setting to “BLOCK” regardless of their previous settings.
• Changing a lower rating’s “AGE” setting to “BLOCK” automatically changes all higher ratings to “BLOCK”
regardless of their previous settings.
• Any rating’s “AGE” set to unblocked must have its content settings individually set.
[3] ADDITIONAL MODE
Besides the above “MPAA RATINGS” and “TV PARENTAL GUIDELINES” new ratings system’s data
can be downloaded when they become available. (See page 20.)
15-19 32/36R-S50.p65e 19/1/01, 5:15 PM17
W
17
Page 18

TI ER
SET UP
M
VIDEO ADJUST
CAPT IONCLOSED
CONT ROLPARENT
ENERGY SAVE
AUD IO SELECT
IP BLOCK
V –C
H
TIMER
VIE
W
PARENT CONTROL
Parent Control (V-CHIP Operation Continued)
L HOW TO SET V-CHIP
[1] MPAA RATING
1 Press
2 Press
MENU
to access MAIN MENU screen.
CH UP (8)
or
DOWN (9)
to move the “ ” mark to “PARENT
CONTROL”.
3 Press
VOL (+)
or
(–)
to access PARENT CONTROL mode, then
“PARENT CONTROL V-CHIP BLOCK” is displayed.
REMOTE
KEYPAD
VOLUME
(+)/(–)
CHANNEL
UP (8)/
DOWN (9)
MENU
(MAIN MENU screen)
TI ER
M
VIDEO ADJUST
AUD IO SELECT
ENERGY SAVE
SET UP
CAPT IONCLOSED
CONT ROLPARENT
(PARENT CONTROL mode)
4 Press
VOL (+)
VOL (+)
or
(–)
to access V-CHIP select mode, then press
or
(–)
to select “MPAA RATING”.
→
MP AA
TV GUIDELINES
STATUS :OFF
(V-CHIP select mode)
5 Press
CH UP (8)
then press
or
VOL (+)
DOWN (9)
or
(–)
to move the “ ” mark to "PG",
to select BLOCK. If you set “PG” to
BLOCK, “PG-13”, “R”, “NC-17” and “X” are automatically blocked.
G
PG
PG– 13
R
NC– 17
X
→
6 Repeat pressing
Note:
Ex.
• If you set “G” to BLOCK , all RATING are automatically blocked.
• If you set “X” to BLOCK, “G”, “PG”, “PG-13”, “R” and “NC-17” are not blocked.
18
15-19 32/36R-S50.p65e 19/1/01, 5:15 PM18
MENU
to return V-CHIP select mode exit.
W
NLO
MENU : R ETU RN
AD :OFFDO
–: ––––
B:LOCK
B:LOCK
B:LOCK
B:LOCK
B:LOCK
Page 19

Parent Control (V-CHIP Operation Continued)
[2] TV GUIDELINES
1 Repeat steps 1 to 3 of [1] MPAA RATING.
2 Press
3 Press
4 To change CONTENT SETTING, press
5 Press
6 Press
CH UP (8)
or
DOWN (9)
to move the “ ” mark to “TV
GUIDELINES”.
VOL (+)
or
(–)
to access TV GUIDELINES mode.
CH UP (8)
to move the “ ” to the desired rating and then press
to select.
CH UP (8)
content and then press
or
DOWN (9)
VOL (+)
to move the “ ” to the desired
or
(–)
to select either “BLOCK” or
unblock (“– – – –”).
MENU
to return to TV GUIDELINES mode.
or
DOWN (9)
VOL (+)
→
→
or
MP AA
TV GUIDELINES
W
NLO
STATUS :OFF
D
G
AE
–
TV–Y
–
TV–Y7
VV
–
TV–G
V
TV–PG
V
TV– 14
V
–
TV–MA
MENU : R ETU RN
(TV GUIDELINES mode)
(–)
TV–Y7
BLOCK
A
:
GE
:
D
–––––
L
:
–––––
S
:
–––––
V
:
–––––
:
BLOCK
F
V
MENU : R ETU RN
(CONTENT RATING mode)
D
G
AE
–
TV–Y
–
TV–Y7
–
TV–G
V
TV–PG
V
TV– 14
V
TV–MA
MENU : R ETU RN
AD :OFFDO
V
S
L
FV
–
–
:
–
–
–
–
L
–
–
–
VIE
W
–
V
:
–
BLOCK
–
–
–
–
VVVV
–
VVV
–
VVVVV
V
S
FV
:
–
–
–
VIE
W
:
–
V
–
BLOCK
–
–
–
–
VVVV
–
VVV
––
VVVVV
7 Repeat steps 4 to 5 until all ratings and their contents are set.
8 When done, press
15-19 32/36R-S50.p65e 19/1/01, 5:15 PM19
MENU
to exit.
19
Page 20

Parent Control (V-CHIP Operation Continued)Parent Control (V-CHIP Operation Continued)
[3] ADDITIONAL MODE (DOWNLOAD)
There will be an additional new rating system. In that case, please set up as follows.
Subsequently the new rating system will set up automatically.
1 Repeat steps 1 to 3 of [1] MPAA RATING.
2 Press
3 Press
4 Repeat pressing
DOWNLOAD V-CHIP DATA
•
CH UP (8)
“DOWNLOAD”.
VOL (+)
or
DOWN (9)
or
(–)
to “DOWNLOAD : ON”.
MENU
to return exit.
to move the “ ” mark to
MP AA
TV GUIDELINES
W
NLO
W
NLO
AD :OFF
OFF
AD :ON
OFF
REMOTE
KEYPAD
VOLUME
(+)/(–)
CHANNEL
UP (8)/
DOWN (9)
MENU
DO
STATUS :
MP AA
TV GUIDELINES
DO
STATUS :
1 If you watch the program with “New Rating System Data”,
DOWNLOAD screen will be displayed.
NOWDOLADINGNWO
V –CH TAADPI
WA I TPLE EAS
(DOWNLOAD screen)
2 DOWNLOAD screen will disappear, if DOWNLOAD is finished.
Note:
• DOWNLOAD would not be started, if you don’t watch the program with “New Rating System
Data”.
20
20-23 32/36R-S50.p65e 19/1/01, 5:15 PM20
Page 21

Parent Control (V-CHIP Operation Continued)
ADDITIONAL MODE (Example)
•
1 Repeat steps 1 to 2 of [3] ADDITIONAL MODE.
2 Press
CH UP (8)
or
DOWN (9)
English Ratings”, then press
to move the “ ” mark to “Cdn.
VOL (+)
or
(–)
.
→
MPAA
TV GUI
Cdn .
Cdn .
W
DO
STATU
NL
EDLINES
nEglis Rhatinsg
rFenchRatinsg
OAD : ON
S:ON
(After download the
rating data)
3 You can select “BLOCK” or “– – – – –” (unblock) from each RATING
mode by pressing
CH UP (8)
or
DOWN (9)
and
VOL (+)
→
or
(–)
C
–: ––––
B:LOCK
C8+
.
G
–: ––––
PG
B:LOCK
14+
–: ––––
B:LOCK
18+
IDUAL BL
INDIV
OCK
MENU : R ETU RN
(ENGLISH INDIVIDUAL
BLOCK MODE)
4 You can select “BLOCK” or “– – – – –” (unblock) from each RATING
mode by pressing
CH UP (8)
you select “Cdn. French Ratings” in step 2.
or
DOWN (9)
and
VOL (+)
→
or
(–)
if
G
8+
13+
16+
18+
INDIV
–: ––––
B:LOCK
–: ––––
B:LOCK
–: ––––
IDUAL BL
MENU : R ETU RN
OCK
(FRENCH INDIVIDUAL
BLOCK mode)
Note:
• In additional mode
Including two types (English mode, French mode), altogether you are able to download 4 kinds
of mode.
20-23 32/36R-S50.p65e 19/1/01, 5:15 PM21
21
Page 22

Parent Control (V-CHIP Operation Continued)
L ACTIVATE ON TO TURN ON V-CHIP BLOCK
1 Repeat steps 1 to 3 of [1] MPAA RATING.
2 Press
CH UP (8)
“STATUS”, then press
or
DOWN (9)
VOL (+)
to move the “ ” mark to
or
(–)
to activate ON the V-CHIP
BLOCK. (If STATUS is OFF, V-CHIP BLOCK will not be operated.)
→
MP AA
TV GUIDELINES
AD :OFFDO
W
NLO
STATUS :ON
3 Press
4 Enter the 4-digit SECRET No. using the
5 Press
MENU
, then “INPUT SECRET No.” will be displayed.
REMOTE KEYPAD
MENU
and SECRET No. is registered.
NIPUT SECRET No.
–
– – –
.
NIPUT SECRET No.
1
2 3 4
L To cancel the V-CHIP BLOCK screen while V-CHIP BLOCK has been activated.
1 “V-CHIP HAS BEEN ACTIVATED” will be displayed if you watch
the program with Program Rating data as same as you configured.
Note:
•“V-CHIP HAS BEEN ACTIVATED” will not be displayed if STATUS is not configured to “ON”.
2 Press
MENU
, then “INPUT SECRET No.” will be displayed.
V –CH HIP AS BEEN
AC I VATEDT
TV– Y7
FV
NIPUT SECRET No.
–
– – –
23
3 Enter the 4-digit SECRET No. using the
V-CHIP BLOCK temporarily will be canceled. If the wrong SECRET
No. is chosen, “SECRET No. IS INCORRECT” will be displayed.
Input the SECRET No. again in this case.
REMOTE KEYPAD
, then
NIPUT SECRET No.
∗
∗ ∗ ∗
Note:
• If you change Power from OFF to ON, then V-CHIP BLOCK will be activated ON again.
22
20-23 32/36R-S50.p65e 19/1/01, 5:15 PM22
Page 23

Parent Control (V-CHIP Operation Continued)
L To change the V-CHIP BLOCK setting. (Secret No. is registered.)
1 Repeat steps 1 to 3 of [1] MPAA RATING, then “INPUT SECRET
No.” will be displayed.
NIPUT SECRET No.
–
– – –
2 Enter the 4-digit SECRET No. using the
REMOTE KEYPAD
and the V-CHIP select mode will be displayed. Repeat
configuration of the V-CHIP BLOCK.
NIPUT SECRET No.
∗
∗ ∗ ∗
L If you intend to change or forget your Secret No., clear the original Secret No. and set
up a new one.
1 Repeat steps 1 to 3 of [1] MPAA RATING, or 1 to 2 of [L To
cancel the V-CHIP BLOCK screen while V-CHIP BLOCK has
been activated], then “INPUT SECRET No.” will be displayed.
2 Press and hold both
simultaneously until the message “INPUT SECRET No.”
disappears.
3 Press
MENU
VOL (+)
and
two times to exit.
CH DOWN (9)
on the TV set
(On the Set)
VOL +
VOL (+)/CHANNEL
DOWN (
CH
MENU
99
9
) buttons
99
20-23 32/36R-S50.p65e 19/1/01, 5:15 PM23
23
Page 24

Parent Control (VIEW TIMER)
L VIEW TIMER
This function allows you to restrict TV viewing time and also allows you to control TV usage.
This function is to prevent your children from watching too much TV.
VIEWING TIME (an accumulative timer: counts only the time
duration acquired while the TV is on.)
• VIEWING TIME can be set from 30M (30 minutes) to 10H00M (10
hours) in 30 minutes intervals.
OFF TIME (Restricts TV watching after the VIEWING TIME reaches
zero.)
• OFF TIME can be set from 30M (30 minutes) to 10H00M (10 hours)
in 30 minutes intervals.
STATUS (ON/OFF setting of VIEW TIMER)
L How to set VIEW TIMER.
1 Press
2 Press
MENU
to access MAIN MENU screen.
CH UP
(8) or
DOWN
(9) to move the “ ” mark to “PARENT
CONTROL”.
→
VEWT
IIMER
VEWINGITIME
––H
––M
TIME
OFF
––H ––M
STATU
S:OFF
TI ERM
V I DEO ADJUST
ENERGY SAVE
SET UP
ELECTAUD IO S
CAPT IONCLOSED
CONTROLPARENT
(MAIN MENU screen)
3 Press
4 Press
VOL (+) or (–)
CH UP
(8) or
to access PARENT CONTROL mode.
DOWN
(9) to move the “ ” mark to “VIEW
TIMER”.
5 Press
6 Press
VOL (+) or (–)
CH UP
(8) or
to access “VIEW TIMER”.
DOWN
(9) to select “VIEWING TIME” and
“OFF TIME”. For each selection, press the
the time duration.
7 Press
CH UP
VOL (+) or (–)
(8) or
DOWN
(9) to select “STATUS”. Press the
to turn ON the “VIEWING TIMER”. (If STATUS is
OFF, VIEW TIMER is not operated)
8 Press
MENU
. “INPUT SECRET No.” will be displayed.
→
VOL (+) or (–)
→
→
to set
PARENT CONTROL
V –C
H
IP
CK
W
BLO
TIMER
VIE
(PARENT CONTROL mode)
VIWTIMER
E
W
ITIME
EGN
VI
OFF T IME
ST TAUS
VEWT
IIMER
VEWINGITIME
OFF
STATU
VEWT
IIMER
VEWINGITIME
OFF
STATU
NI PUT SECRET No .
––––H
––––H
:OFF
2H
00M
TIME
––H ––M
S:OFF
2H
00M
TIME
5H 00M
S:ON
–
– – –
M
M
24
24-26 32/36R-S50.p65e 19/1/01, 5:15 PM24
Page 25

Parent Control (VIEW TIMER Continued)
9 Enter the 4-digit SECRET No. using the
10
Press
MENU
, and SECRET No. is registered.
REMOTE KEYPAD
1 2 3
4 5 6
7 8 9
ENTER
0
100
.
→
Example
• To restrict anybody from watching the TV for 5 hours, after watching the
TV for 2 hours, your settings would look like this:
• They can choose to watch the 2 hours of TV however they wish. For
example, they could watch 1 hour of TV, turn TV off for 30 minutes, then
turn TV on and watch the remaining 1 hour on the VIEWING TIMER.
L To change the VIEW TIMER settings. (SECRET No. is registered)
1 Repeat “How to set VIEW TIMER” steps and select
“PARENT CONTROL VIEW TIMER” during step 3.
VOL (+) or (–)
Press
be displayed.
2 Enter the 4-digit SECRET No. using the
KEYPAD
be displayed. Repeat step 5 ~ 6.
Note:
• When you choose the correct SECRET No., the VIEW TIMER access
screen is displayed. If the wrong SECRET No. is chosen, “SECRET No.
IS INCORRECT” is displayed. Input the SECRET No. again in this case.
, and the VIEW TIMER access screen will
, and “INPUT SECRET No.” will
REMOTE
1 2 3
4 5 6
7 8 9
0
ENTER
100
NI PUT SECRET No .
1
2 3 4
VEWT
IIMER
VEWINGITIME
2H
00M
TIME
OFF
5H 0 0M
STATU
S:ON
NI PUT SECRET No .
–
– – –
I PUT ESN CRET No .
****
S ECRET N o . I S
INC
O
RRECT
L To cancel the VIEW TIMER (While the TV set is OFF but the VIEW
TIMER is set)
1 Turn on TV; a blue screen message “TIME OVER” will appear. If you
do nothing, the TV will turn off in approximately 30 seconds.
2 Enter the 4-digit SECRET No. using the
KEYPAD
the VIEW TIMER is canceled. If the wrong SECRET
No. is chosen, “SECRET No. IS INCORRECT” is
. When you choose the correct SECRET No.,
REMOTE
1 2 3
4 5 6
7 8 9
0
displayed. Input the SECRET No. again in this case.
L To cancel the VIEW TIMER setting or change the SECRET No. (When
you forget the SECRET No.)
1 Repeat “How to set VIEW TIMER” steps and select
“PARENT CONTROL VIEW TIMER” during step 3.
VOL (+) or (–)
Press
be displayed.
24-26 32/36R-S50.p65e 19/1/01, 5:15 PM25
, and “INPUT SECRET No.” will
ENTER
100
TMEO
I VER
I PUT ESN CRET
–––
–
TMEOI VER
I PUT ESN CRET
****
NI PUT SECRET No .
–
– – –
No .
No .
25
Page 26

Parent Control (VIEW TIMER Continued)
2 Press and hold both
VOL (+
) and
CH DOWN
(9) on the TV set
simultaneously until the VIEW TIMER access screen is displayed.
Now you can cancel the VIEW TIMER settings or can change the
SECRET No. while “INPUT SECRET No.” is displayed.
L Notice of Remaining VIEWING TIME
•
For every 30 minute interval, the “remaining time” will be displayed for
4 seconds. For the last 5 minutes, the “remaining time” will be displayed
every minute.
•“0 REMAIN” will be displayed for 10 seconds just before the VIEWING
TIME is completed.
(On the Set)
VOL +
CH
MENU
VOL (+)/CHANNEL
DOWN (
VIEWING TIME
99
9
99
VIEWING TIME
0H
VIEWING TIME
0H
05M
0
REMAIN
) buttons
30M
REMAIN
REMAIN
26
24-26 32/36R-S50.p65e 19/1/01, 5:15 PM26
Page 27

Energy Save
TI ER
SET UP
M
VIDEO ADJUST
CAPT IONCLOSED
CONT ROLPARENT
ENERGY SAVE
AUD IO SELECT
:OFF
EN REGYSAVE
:ON
EN REGYSAVE
L This feature lets you lower the power consumption of your TV
set which in turn saves you money and minimizes the impact on
the environment. When this feature is turned on, it reduces the
brightness of the TV to a level that consumes approximately 20
percent less energy than when the feature is turned off.
The reduction in brightness will be less noticeable under low
room lighting conditions.
1 Press MENU to access MAIN MENU screen.
2 Press
3 Press
4 Press
SAVE”.
CH UP
VOL (+)
VOL (+)
(8) or
DOWN
(9) to move the “ ” mark to “ENERGY
or
(–)
to access ENERGY SAVE select mode.
or
(–)
to select “ON”.
→
VOLUME
(+)/(–)
CHANNEL
UP (8)/
DOWN (9)
MENU
(MAIN MENU screen)
(ENERGY SAVE select mode)
5 Press
27-29 32/36R-S50.p65e 19/1/01, 5:15 PM27
MENU
to exit.
27
Page 28

Set Up
TI ER
SET UP
M
VIDEO ADJUST
CAPT IONCLOSED
CONT ROLPARENT
ENERGY SAVE
AUD IO SELECT
L EZ SETUP
By operating the channel presetting functions, you can preset
your TV to the desired channels for viewing.
REMOTE
KEYPAD
VOLUME
(+)/(–)
CHANNEL
UP (8)/
DOWN (9)
MENU
1 Press
2 Press
MENU
to access MAIN MENU screen.
CH UP
(8) or
DOWN
(9) to move the “ ” mark to “SET
UP”.
3 Press
4 Press
5 Press
6 Press
(8) or
VOL (+)
DOWN
VOL (+)
VOL (+)
VOL (+)
or
(–)
to access SET UP mode, then press
(9) to move the “ ” mark to “CH SETTING”.
or
(–)
to access CH SETTING mode.
or
(–)
to access EZ SETUP mode.
.
The tuner will automatically search for the
broadcasting and cable TV channels. (The CH No.
will automatically increase when it appears.)
If you want to stop the EZ SETUP process once it
has started, press
VOL (–)
. Search will be
canceled.
To cancel EZ SETUP
Press
VOL (–)
.
→
→
CH UP
(MAIN MENU screen)
BL E SCREENU
LANGUAGE
INGCH SE TT
(SET UP mode)
EZ
SETUP
AI /CABLER
CH SEARCH
CH MEMORY
(CH SETTING mode)
OR CA BL E .
TSART SETUP?ZE
ANTENNCONNECT A
YE : VOL+
S
NO :
VOL –
(EZ SETUP mode)
WA I TPLE EAS
AU18TO RGGAMMI NORP
TSOP:
VOL –
7 Once EZ SETUP is completed, the lowest channel number
memorized will be displayed.
28
27-29 32/36R-S50.p65e 19/1/01, 5:15 PM28
Page 29

Set Up (Continued)
L CHANNEL SETTING
If EZ SETUP does not memorize all the channels in your region, follow the instructions below
to manually memorize the channel.
1 Press
2 Press
UP”.
MENU
to access MAIN MENU screen.
CH UP
(8) or
DOWN
(9) to move the “ ” mark to “SET
→
TI ER
M
VIDEO ADJUST
AUD IO SELECT
ENERGY SAVE
SET UP
CAPT IONCLOSED
CONT ROLPARENT
(MAIN MENU screen)
3 Press
4 Press
VOL (+)
CH UP
SETTING”.
5 Press
6 Press
VOL (+)
CH UP
CABLE”, then press
7 Press
CH UP
desired mode.
CABLE STD
AIR
or
(–)
to access SET UP mode.
(8) or
DOWN
(9) to move the “ ” mark to “CH
or
(–)
to access CH SETTING mode.
(8) or
DOWN
VOL (+)
(8) or
(9) to move the “ ” mark to “AIR/
or
(–)
to access AIR/CABLE mode.
DOWN
(9) to move the “ ” mark to the
CABLE HRC CABLE IRC
→
→
BL E SCREENU
LANGUAGE
INGCH SE TT
(SET UP mode)
EZ
SETUP
AI /CABLER
CH SEARCH
CH MEMORY
(CH SETTING mode)
EZ SETUP
AI /CABLER
H SEARCH
C
HMEMORYC
AI /CABLER
AI
R
ABLE STD
C
ABLE HRCC
ABLE I RCC
8 Press
Note:
MENU
to exit.
• Receivable channels of your TV set are:
AIR channels: CABLE channels:
VHF: 2 through 13. 1 (HRC and IRC mode only)
UHF: 14 through 69. 2 through 125 (STD, HRC and IRC)
27-29 32/36R-S50.p65e 19/1/01, 5:15 PM29
(AIR/CABLE mode)
29
Page 30

Set Up (Continued)
L Saving broadcast TV channels into memory.
1.1 Press
1.2 Press
1.3 Press
1.4 Press
MENU
screen, then press
to access MAIN MENU
CH UP
(8) or
DOWN
(9) to move the “ ” mark to “SET UP”.
VOL (+)
mode, then press
or
(–)
to access SET UP
CH UP
(8) or
DOWN
(9) to move the “ ” mark to “CH
SETTING”.
VOL (+)
or
(–)
to access CH
SETTING screen.
CH UP
(8) or
DOWN
” mark to “CH SEARCH”, then press
the “
VOL (+)
or
(–)
to access CH SEARCH
(9) to move
screen.
→
→
→
EZ
SETUP
AI /CABLER
CH SEARCH
CH
MENU
CH MEMORY
(CH SETTING mode)
START
2.1 Press
VOL (+)
. The tuner will search
through all available channels in your area
and add them into the TV’s memory.
STOP
2.2 Press
VOL (–)
. CH SEARCH will stop at
the current channel and will not add any
(STOP)
(START)
CH SEARCH
AIR
(CH SEARCH mode)
2
1
AR +T:
ST
TO –P:
S
higher channels.
2.3 Press
Note:
• If you press
program will start again, and the previously memorized channels will
be lost.
L Adding weak or additional channels or erasing unwanted channels from TV memory.
1.1 Press
1.2 Press
1.3 Press
MENU
to exit.
VOL (+)
again while in the CH SEARCH mode, auto-
MENU
screen, then press
to access MAIN MENU
CH UP
(8) or
DOWN
(9) to move the “ ” mark to “SET UP”.
VOL (+)
mode, then press
or
(–)
to access SET UP
CH UP
(8) or
DOWN
(9) to move the “ ” mark to “CH
SETTING”.
VOL (+)
SETTING mode, then press
DOWN
(9) to move the “ ” mark to “CH
or
(–)
to access CH
CH UP
(8) or
→
→
→
EZ
SETUP
AI /CABLER
CH SEARCH
CH MEMORY
(CH SETTING mode)
MEMORY”.
2.1 Press
VOL (+)
or
(–)
to access CH
MEMORY.
2.2 Use
CH UP
KEYPAD
(8) or
DOWN
(9) or
to select each desired channel
to add or erase.
2.3 Press
VOL (+)
to add a channel to the TV’s
memory or press
VOL (–)
channel from the TV’s memory.
30
30-32 32/36R-S50.p65e 19/1/01, 5:15 PM30
REMOTE
or
to erase a
Page 31

Set Up (Continued)
:OFF
BL EUSCREEN
:ON
BL EUSCREEN
TI ER
SET UP
M
VIDEO ADJUST
CAPT IONCLOSED
CONT ROLPARENT
ENERGY SAVE
AUD IO SELECT
2.4 Press
MENU
to exit.
VOL (+)
HMEMORY
C
AIR
2
1
D+:
ADTO
(CH MEMORY
unmemorized channel)
To add channel 12 to
the TV memory
VOL (–)
To erase channel 12 from
the TV memory
CH MEMORY
21
AIR
ESTO AR
(CH MEMORY
memorized channel)
L BLUE SCREEN
Automatically turns the screen blue if a broadcast signal is not
received.
1 Press
2 Press
MENU
to access MAIN MENU screen.
CH UP
(8) or
DOWN
(9) to move the “ ” mark to “SET
UP”.
→
3 Press
VOL (+)
or
(–)
to access SET UP mode.
VOLUME
(+)/(–)
CHANNEL
UP (8)/
DOWN (9)
MENU
E –:
(MAIN MENU screen)
BL E NSCREEU
LANG GEUA
CH SE TT I NG
(SET UP mode)
4 Press
VOL (+)
or
(–)
to access BLUE SCREEN select mode.
(BLUE SCREEN select mode)
5 Press
6 Press
VOL (+)
MENU
or
(–)
to exit.
to select “ON”.
Note:
• Poor reception due to weak signals, or too much noise might activate the BLUE SCREEN function
despite the presence of a broadcast signal. To continue watching TV under these conditions, switch
the BLUE SCREEN “OFF”.
• While VCR input mode is selected, the BLUE SCREEN will not be shown on your TV even if the
BLUE SCREEN is turned on.
30-32 32/36R-S50.p65e 19/1/01, 5:15 PM31
31
Page 32

Using the Video and Audio Input Jacks
L Connecting video equipment for playback of video material.
• When the television is connected to video equipment as shown below, the material being played
back on the video equipment can be seen on the television screen.
Connecting video device equipped with video output terminal.
CONNECTIONS
VIDEO EQUIPMENT
To VIDEO
OUTPUT
CAMCORDER
TV GAME
VCR
FWDREV
DVD
L To watch video material playback.
• Press the Remote’s
INPUT
to select VIDEO INPUT mode to which the video equipment you want to
playback is connected.
• The external VIDEO INPUT mode will change as follows each time the
AIR
or
CABLE
INPUT 1
(IN-1)
Rear
INPUT 2
(IN-2)
Front
To AUDIO OUTPUT (L)
To AUDIO OUTPUT (R)
To VIDEO
OUTPUT
To AUDIO OUTPUT (R)
To AUDIO OUTPUT (L)
(Front connection
terminals of TV)
VIDEO IN 2 L-AUDIO-R
(Rear connection
terminals of TV)
INPUT
is pressed.
• INPUT mode can be selected by pressing either the
TV is set to the highest channel stored in memory, or by pressing the
CH UP
(8) on the TV remote control when the
CH DOWN
(9) when it is set to
the lowest channel.
Note:
• When connecting video or audio equipment to the television, be sure that the power is turned off in
order to prevent damage to either the television or the equipment being connected.
• It is the intent of SHARP that this product be used in full compliance with the copyright law of the
United States and that prior permission be obtained from copyright owners whenever necessary.
• For detailed information on the connection and use of auxiliary equipment, refer to the instruction
manuals of the equipment being used.
• The connection cords can be obtained from your local video store.
32
30-32 32/36R-S50.p65e 19/1/01, 5:15 PM32
Page 33

Before Calling for Service
Check these items and see if you can correct trouble with a slight adjustment of the controls.
’t Work
QUICK SERVICE
CHECK LIST
PROBLEM
No Playback of VCR and Disk
Player
No Picture or Sound from
External Video/Audio Products
Remote Control Doesn
Bars on Screen
Picture Distorted
Picture Rolls Vertically
No Color
Poor Reception on Some
Channels
Weak Picture
Lines or Streaks in Picture
Ghosts in Picture
Picture Blurred
Sound OK, Picture Poor
Picture OK, Sound Poor
POSSIBLE REMEDY
Try a new channel, if OK, then
possible station trouble.
Is TV plugged in? Power at outlet?
Is TV’s POWER button on?
Is antenna connected to terminal on
the back of the set?
If outside antenna is being used,
check for broken wire.
Check for local interference or
external electrical noise.
Turn off with POWER button and
then turn it on after about a minute.
Adjust COLOR control.
Adjust PICTURE control.
Check external Video/Audio
products: look for loose/broken
connection leads. (Refer to page
32)
Check batteries of Remote Control.
Change Closed Caption mode to
“OFF” / Energy Save mode to
“OFF”.
Unplug the TV and plug it in again
after two minutes or longer.
XXXXXXX X X XX XX XX XX
X XXXXXX X XXXXXXX XX
X X XX X X X X X XX XX XX XX
XXXXXXXXXX X X X X X XX
XXXXXXX X XXXXXX X XX
XXXX X X X X X XX X XXXX X
X X XX X X X X X XX XX XX XX
XXXXXXX X X XX XX XX X X
X X XXXXX X X XX XX XX X X
XXXX X X X X X XX XXXXXX
XXX X X X X X X XXXXXX X X
X X XX X X X X X XX XX XX X X
XXX XXXX X XXX XXXXX X X
No Picture or Sound
’s Operation
Dark and Blank Picture
External Electrical Noise
Interfering with TV
Color on Part of the Screen
Appears Distored
Note:
• When viewing in TEXT mode, if no TEXT broadcast is being received,
the screen may become dark and blank. Should this occur, set the
Closed Caption mode to “OFF”.
(Dark and Blank Picture)
Calling for Service
For location of the nearest Sharp Authorized Service, or to obtain product literature accessories, supplies,
or customer assistance, please call 1-800-BE-SHARP.
33-34 32/36R-S50.p65e 19/1/01, 5:15 PM33
33
Page 34

Antes de llamar al servicio de reparaciones
Verifique estos items para ver si usted mismo puede solucionar el problema.
LISTA DE
COMPROBACIONES
DE SERVICIO
RAPIDO
PROBLEMA
éctrico externo con el
POSIBLE SOLUCIÓN
Pruebe con otro canal y si todo está
bien, el problema puede ser de la
emisora.
Está conectado el televisor?
Llega electricidad al tomacorrientes?
Está conectado el interruptor del
televisor?
Está conectado la antena al terminal
del panel posterior del televisor?
Si utiliza una antena exterior,
cerciórese de que el cable no esté
dañado.
Compruebe si hay interferencia local.
Desconecte el interruptor POWER y
vuelva a conectarlo después de
transcurrir un minuto.
Ajuste el control de COLOR.
Ajuste el control de MATIZ.
Verifique los productos externos de
Video/Audio, revise si hay fugas de
conexiones sueltas o rotas.
Compruebe el estado de las pilas del
mando a distancia.
Desactive (OFF) el modo CLOSED
CAPTION / Desactive (OFF) el modo
Ahorro de Energía (Energy Save).
Desenchufe el televisor y vuelva a
enchufarlo despúes de dos minutos
o más.
El vídeo o el reproductor de discos de video no
reproducen imágenes
El equipo de video/audio externo no produce
imágenes ni sonido
El mando a distancia no funciona
Barras en la pantalla
Imagen distorsionada
La imagen se desplaza verticalmente
No hay color
Mala recepción de algunos canales
Imagen débil
Franjas en la imagen
Imagen fantasma
Imagen borrosa
Sonido adecuado, imagen mala
Imagen adecuada, sonido malo
No hay imagen ni sonido
Imagen oscura y en blanco
Interferencia de ruido el
funcionamento del televisor
El color se ve distorsionado en parte de la
XXXXXXXXXXXXXXXXX
X XXX X XXXXXX XX X X XX
X X XXXXXXXXXXXXX XX
XXXXXXXXXX X X X X X XX
XXXXX XX XX X X XX X X XX
XXXX X X X X X XXX XXXX X
X X XXXXXXXXXXXXX XX
XXXXXXX XX X X XX X XX X
X X XXXXXXX XXXX XXX X
XXXXXXXXXXXXXXXXX
XXX X X XX XX X X XXX XX X
X X XXXXXXXXXXXXXX X
XXX XXXX XXXXXXXXX X X
pantalla
Nota:
• Cuando se ve en modo TEXTO sin recibir emisiones de TEXTO, la
pantalla puede ponerse en blanco y negro. Si ocurriera ésto, ponga
el modo CLOSED CAPTION en OFF.
34
33-34 32/36R-S50.p65e 19/1/01, 5:15 PM34
(Imagen oscura y en blanco)
Page 35

Specifications
MODEL 32R-S50 36R-S50
Receiving System NTSC
Reception Channels
AIR VHF 2-13 ch
UHF 14-69 ch
CATV 1-125 ch
Channel Tuning 181-channel Reception PLL tuning system
Antenna Input Impedance VHF/UHF 75 ohm Unbalance
Screen Size 32˝ Diagonally Measured 36˝ Diagonally Measured
Terminals Audio/video input x 2 (front x 1, rear x 1)
Sound Output 3.0W (RMS) x 2
Power Source AC 120V, 60 Hz
Power Consumption 137 W 162 W
Dimensions 3021/64˝ x 267/8˝ x 2157/64˝ 3447/64˝ x 2955/64˝ x 2425/32˝
[(w) x (H) x (D)]mm [770.0 x 682.0 x 556.0] [882.0 x 758.0 x 629.0]
Weight (approx.) 114.6 lbs. (52.0 kg) 154.0 lbs. (70.0 kg)
• Design and specifications are subject to change without notice.
35-36[Bk] 32/36R-S50.p65e 19/1/01, 5:15 PM35
35
Page 36

Limited Warranty
CONSUMER LIMITED WARRANTY
SHARP ELECTRONICS CORPORATION warrants to the first consumer purchaser that this Sharp brand product
(the “Product”), when shipped in its original container, will be free from defective workmanship and materials, and
agrees that it will, at its option, either repair the defect or replace the defective Product or part thereof with a new or
remanufactured equivalent at no charge to the purchaser for parts or labor for the period(s) set forth below.
This warranty does not apply to any appearance items of the Product nor to the additional excluded item(s) set forth
below nor to any Product the exterior of which has been damaged or defaced, which has been subjected to improper
voltage or other misuse, abnormal service or handling, or which has been altered or modified in design or construction.
In order to enforce the rights under this limited warranty, the purchaser should follow the steps set forth below and
provide proof of purchase to the servicer.
The limited warranty described herein is in addition to whatever implied warranties may be granted to purchasers by
law. ALL IMPLIED WARRANTIES INCLUDING THE WARRANTIES OF MERCHANTABILITY AND FITNESS FOR
USE ARE LIMITED TO THE PERIOD(S) FROM THE DATE OF PURCHASE SET FORTH BELOW. Some states do
not allow limitations on how long an implied warranty lasts, so the above limitation may not apply to you.
Neither the sales personnel of the seller nor any other person is authorized to make any warranties other than those
described herein, or to extend the duration of any warranties beyond the time period described herein on behalf of
Sharp.
The warranties described herein shall be the sole and exclusive warranties granted by Sharp and shall be the sole
and exclusive remedy available to the purchaser. Correction of defects, in the manner and for the period of time
described herein, shall constitute complete fulfillment of all liabilities and responsibilities of Sharp to the purchaser
with respect to the Product, and shall constitute full satisfaction of all claims, whether based on contract, negligence,
strict liability or otherwise. In no event shall Sharp be liable or in any way responsible, for any damages or defects in
the Product which were caused by repairs or attempted repairs performed by anyone other than an authorized
servicer. Nor shall Sharp be liable or in any way responsible for any incidental or consequential economic or property
damage. Some states do not allow the exclusion of incidental or consequential damages, so that above exclusion
may not apply to you.
THIS WARRANTY GIVES YOU SPECIFIC LEGAL RIGHTS. YOU MAY ALSO HAVE OTHER RIGHTS WHICH
VARY FROM STATE TO STATE.
Model Specific Section
Your Product Model Number & Description: 32R-S50, 32 inch Color Television,36R-S50, 36 inch Color
Warranty Period for this Product: One (1) year parts and labor. The warranty period continues for
Additional Item(s) Excluded from Non-rechargeable batteries.
Warranty Coverage (if any):
Where to Obtain Service: From a Sharp Authorized Servicer located in the United States.
What to Do to Obtain Service: Contact your Sharp Authorized Servicer to obtain in-home
TO OBTAIN ACCESSORY OR PRODUCT INFORMATION, CALL 1-800-BE-SHARP OR VISIT www.sharp-usa.com
Television, (Be sure to have this information available when you
need service for your Product.)
an additional one (1) year, for a total of two (2) years, with respect
to the picture tube(s) in the Product for parts only. Labor and
service are not provided free of charge for this additional period.
To find the location of the nearest Sharp Authorized Servicer,
call Sharp toll free at 1-800-BE-SHARP.
service for this Product. The Servicer will come to your home
and if it is necessary to remove the Product, the Servicer will
reinstall it. Be sure to have Proof of Purchase available.
SHARP ELECTRONICS CORPORATION
Sharp Plaza, Mahwah, New Jersey 07430-2135
36
35-36[Bk] 32/36R-S50.p65e 2/3/01, 3:38 PM36
Printed in Mexico
TINS-7362GJZZ
1P03-MMP
 Loading...