

Page 1
WPM BRONZE SERIE
1
Manual
Page 2

WPM BRONZE SERIE
2
WPM BRONZE SERIE 2
Table of Contents
1. Features 3
2. Specifications 4
2.1 Overview 4
2.2 Temperature range and humidity 5
2.3 Mains voltage and protective functions 5
2.4 Safety standards 5
2.5 Warranty period 5
3. Parts and accessories 6
4. The modular system of the PSU 7
4.1 The terminals on the PSU 7
4.2 The modular cables 7
4.3 Cable lengths 8
5. Installation 9
5.1 Installing the PSU into a PC case 9
5.2 Connecting mainboard and graphics card(s) 9 -10
5.3 Connecting optical drives and other peripherals devices 11
5.4 Connecting the cables to the PSU 12
5.5 Checking all connections 12
6. Troubleshooting 12
Page 3

WPM BRONZE SERIE
3
Dear Customer,
Congratulations and thank you for your purchase of this high-quality Sharkoon product. To ensure a
long service life, and full functionality of the product, we recommend that you read this manual
thoroughly.
We hope you enjoy our product!
SHARKOON Technologies
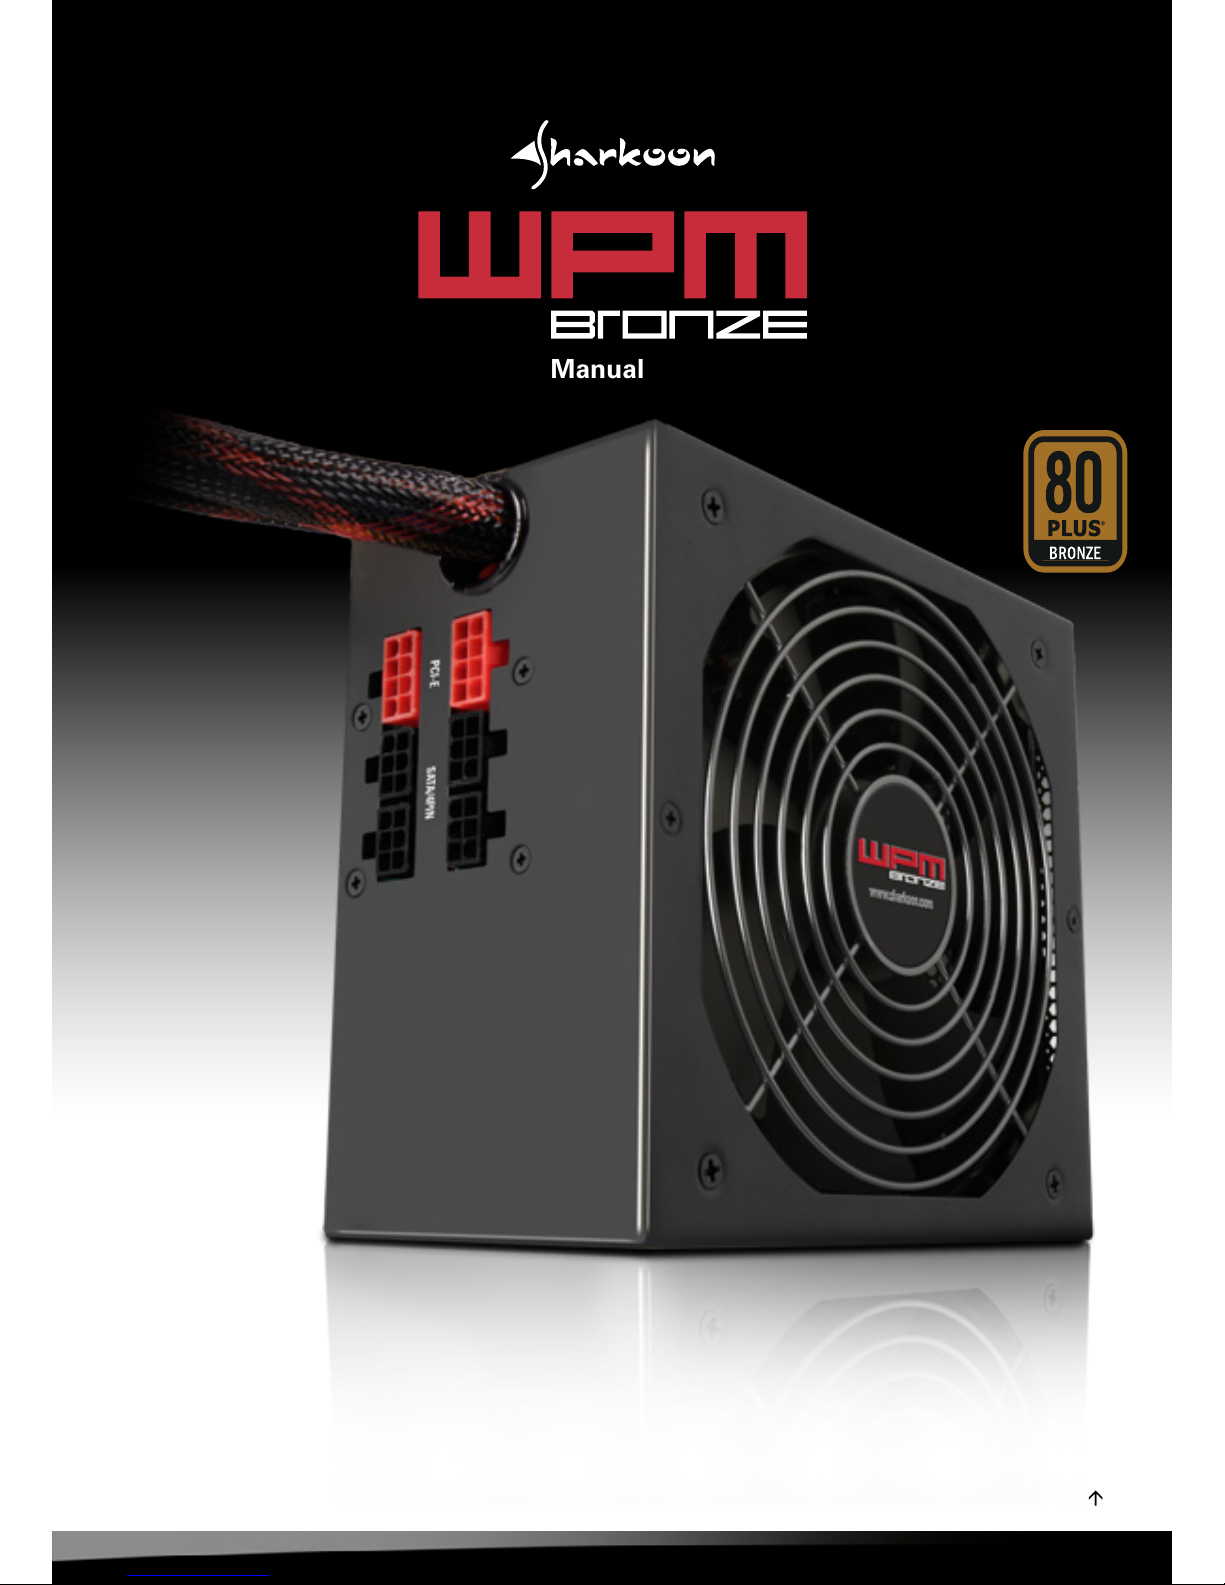
Higher efficiency:
This PSU complies with “80 PLUS Bronze” certification, providing an efficiency of 85% by 50% load
and 81% efficiency by 20% as well as 100% load.
Cable management:
This PSU provides a modular cable system, which only the required cables need tob e connected.
Active PFC function:
This PSU operates with active power factor correction (PFC).
140 mm fan:
The installed 140 mm fan provides considerably higher airflow with lower rpm, thus effectively
reducing operating noise.
PCIe connectors:
This power supply is equipped with two 6+2-pin PCIe connectors.
ErP ready:
Standby energy consumption, max. 0.3W
ATX 12V V2.3 with standard.
1. Specifications
Page 4

WPM BRONZE SERIE
4
To prevent the risk of electric shock, do not open the power supply case. No user-exchangeable
parts are inside. Refer service and maintenance to authorized Sharkoon personnel. Warranty is
void under unauthorized attempt to open the power supply housing
Suitable for indoor or office use only.
Keep the power supply away from humidity!
2. Specifications
2.1 Overview
Page 5

WPM BRONZE SERIE
5
2.2 Temperature range and humidity
Operation 0 to +40 °C 20 – 90% rel. humidity, non-condensing
Storage -20 to +70 °C 5 – 95% rel. humidity, non-condensing
2.3 Mains voltage and protective functions
This PSU works with 100 to 240 V (47/63 Hz) and is equipped with the following protective functions:
1. Surge protection:
The PSU has a large surge protector, which is active in the following voltages:
2. Short circuit protection:
The PSU is designed with a short circuit protection to prevent damage of the power supply
components. Main power will be shutdown when a short circuit occurs. The PSU will return to normal
after the short circuit has been removed and the main power switch has been turned off and back on
again, with a minimum cycle pause of 2 seconds.
3. Overload protection:
The PSU has an overload protection that shuts off the power supply at 110%-150% overload
2.4 Safety standards
Our power supply has been certified to comply with CE and CB regulations.
2.5 Warranty period
For this power supply unit we provide a 2 year warranty.
+5 V 7 V
+3,3 V 4,5 V
+3,3 V 15,6 V
Page 6

WPM BRONZE SERIE
6
3. Parts and accessories
(A) Power supply ”WPM400 Bronze”, ”WPM500 Bronze” , ”WPM600 Bronze” or
”WPM700 Bronze”
(B) Power cable
(C) Set of modular cables:
2x PCIe cables with 1x 6+2-pin connector each
2x SATA cables with 3x 15-pin connectors
1x cable with 3x 4-pin peripheral connectors
1x cable with 4-pin peripheral connectors and 1x Floppy connector
(D) Set of mounting screws (4 screws)
(E) Cable bag
(F) Data sheet
Note:
If you are missing any of the items listed above, please contact our customer service immediately:
support@sharkoon.com (Germany and Europe)
support@sharkoon.com.tw (international).
C B
A
E
D
F
Page 7

WPM BRONZE SERIE
7
4. The modular system of the PSU
A special feature for the connection of peripheral devices is the so-called cable management. Thanks
to this modular system only the really required cables need to be connected thus keeping the case tidy
and optimizing the airflow within.
4.1 The terminals on the PSU
(A) 2x 6+2-pin terminals for PCIe connectors (red)
(B) 4x 6-pin terminals for SATA and peripheral
device connectors (black)
4.2 The modular cables
Besides the 20+4-pin ATX connector cable, a 4+4-pin P8 connector cable and a 6+2-pin PCIe cable are
soldered to the PSU. The PSU is delivered with an extensive set of modular cables:
A
B
1x 20+4-pol.
mainboard connector
2x 6+2-pol.
PCIe connector
1x 4+4-pol.
power connector
6x SATA
power cable
5x 4-pol.
cable
1x Floppy-
power cable
Page 8

WPM BRONZE SERIE
8
4.3 Cable lengths
Page 9

WPM BRONZE SERIE
9
5. Installation
Remove the previously installed PSU from the case. Proceed as follows:
1. Switch off your PC. Disconnect the PSU’s power cord from the wall outlet and your
PSU. Unplug all cables connected to the PC case (e.g. keyboard, mouse, etc.)
2. Open the PC case (for additional information refer to the PC case’s manual)
3. Disconnect all cable connections between the PSU and other PC components
(e.g. mainboard, HDDs, drives, fans, etc.).
4. Remove the mounting screws connecting the PSU to the PC case and carefully
remove the PSU from the case.
5.1 Installing the PSU into the PC case
1. Insert the PSU into the PC case and place it against the PSU bracket on the
case’s back side
2. Screw the PSU to the case from the outside using the included screws. Be careful
not to cover the fan/air intake of the built-in PSU.
Note:
All connectors are designed fault-preventing to avoid misconnection. If you are unable to the male
connector-to-female connector of the drive or peripheral, please check if both connectors are attached
in the correct orientation.
Do not force to plug the connectors within the incorrect orientation, nor modify any of the
components, as this will damage the PSU and other hardware. SHARKOON warranty does not cover
damage cause by incorrect handling.
5.2 Connecting mainboard and graphics card(s)
1. Plug the ATX power connector (fig. 1) to the respective jack on the mainboard.
fig. 1
Page 10

WPM BRONZE SERIE
10
2. In case the mainboard also provides an additional 4-pin or 4+4-pin power connector (the so-called
P4, or rather, P8 connector), also plug the respective connector (fig. 2).
Note:
The power connection of the mainboard depends on the vendor and may vary. For detailed
information on how to establish the power connector refer to your mainboard’s manual.
3. In case your PCIe graphics card is equipped with an additional power connector, also plug the 6-pin
(fig. 3a) or (fig. 3b) PCIe power connector which will provide stable power support for your
graphics card.
fig. 3a fig. 3b
fig. 2
Page 11

WPM BRONZE SERIE
11
5.3 Connecting optical drives and other peripheral devices
1. Connect the 4-pin plug (fig. 4), the SATA plug (fig. 5) and the 4-pin floppy plug
(fig. 6) to the respective peripheral devices.
Note:
For additional information refer to the respective manuals of your drives and peripheral devices.
fig. 4 fig. 5 fig. 6
Page 12

WPM BRONZE SERIE
12
5.4 Connecting the cables to the PSU
Connect the modular cables to the PSU according to the connector coding (see above fig. 4).
5.5 Checking all connections
Make sure that all devices are connected properly then plug the PSU’s power cord to a wall outlet and
switch the power supply on. This ends the installation of the PSU.
6. Troubleshooting
If the PSU does not work properly, check the following:
1. Is the power cord correctly connected to a wall outlet and the PSU’s power connector?
2. Ensure that the on/off switch is in the “I” position.
3. Check if the main power connector is correctly plugged to the mainboard.
4. Check if the power connectors are properly connected to the peripheral devices in case the short
circuit protection function was activated when switching on the PSU.
5. Turn the power switch “off” and back “on” several times, with a minimum cycle pause of 5 seconds.
6. If the PSU still does not start, please contact support@sharkoon.com
On/Off switch of the power supply
Page 13

WPM BRONZE SERIE
13
Legal disclaimer
As part of SHARKOON continued policy of product improvement, product design and specifications are subject to change without notice.
The specifications may vary in different countries.
All rights reserved, especially (also partly) the translation, reprinting, reproduction by copying or similar methods. Offenders will be liable for damages.
All rights reserved, including the granting of patents or registration. Subject to availability and technical modifications.
Disposal of your old product:
Your product is designed and manufactured with high quality materials and components, which can be recycled and reused.
When this crossed-out wheeled bin symbol is attached to a product, it means the product is covered by the
European Directive 2002/96/EC.
Please be informed about the local separate collection system for electrical and electronic products.
Please act according to your local rules and do not dispose of your old products with your normal household
waste. The correct disposal of your old product will help prevent potential negative consequences to the environment and human health.
© SHARKOON Technologies 2014
www.sharkoon.com
 Loading...