

Page 1

MANUAL
Page 2

2
Table of Contents
1. Specifications . . . . . . . . . . . . . . . . . . . . . . . . . . . . . . . . . 3
1.1 General . . . . . . . . . . . . . . . . . . . . . . . . . . . . . . . . . 3
1.2 Key Properties . . . . . . . . . . . . . . . . . . . . . . . . . . . . . . . 3
1.3 Cable and Connectors . . . . . . . . . . . . . . . . . . . . . . . . . . . . 4
1.4 Software Properties . . . . . . . . . . . . . . . . . . . . . . . . . . . . . 4
1.5 Package Contents. . . . . . . . . . . . . . . . . . . . . . . . . . . . . . 4
2. Installation . . . . . . . . . . . . . . . . . . . . . . . . . . . . . . . . . . 5
3. Overview. . . . . . . . . . . . . . . . . . . . . . . . . . . . . . . . . . . 5
3.1 Profile Keys . . . . . . . . . . . . . . . . . . . . . . . . . . . . . . . . 6
3.2 Illumination Keys . . . . . . . . . . . . . . . . . . . . . . . . . . . . . . 7
3.3 Reset . . . . . . . . . . . . . . . . . . . . . . . . . . . . . . . . . . 8
4. Software Installation . . . . . . . . . . . . . . . . . . . . . . . . . . . . . . 9
5. Software Overview . . . . . . . . . . . . . . . . . . . . . . . . . . . . . . . 10
6. Game Profiles . . . . . . . . . . . . . . . . . . . . . . . . . . . . . . . . 11, 12
7. Main Control . . . . . . . . . . . . . . . . . . . . . . . . . . . . . . . . . 13
7.1 Key Assignments . . . . . . . . . . . . . . . . . . . . . . . . . . . . . . 14
8. Macro Settings . . . . . . . . . . . . . . . . . . . . . . . . . . . . . .15, 16, 17
9. Light Settings . . . . . . . . . . . . . . . . . . . . . . . . . . . . . . . . 18, 19
10. Adanced Settings. . . . . . . . . . . . . . . . . . . . . . . . . . . . . . . . 20
11. Reset . . . . . . . . . . . . . . . . . . . . . . . . . . . . . . . . . . . . 21
Page 3
3
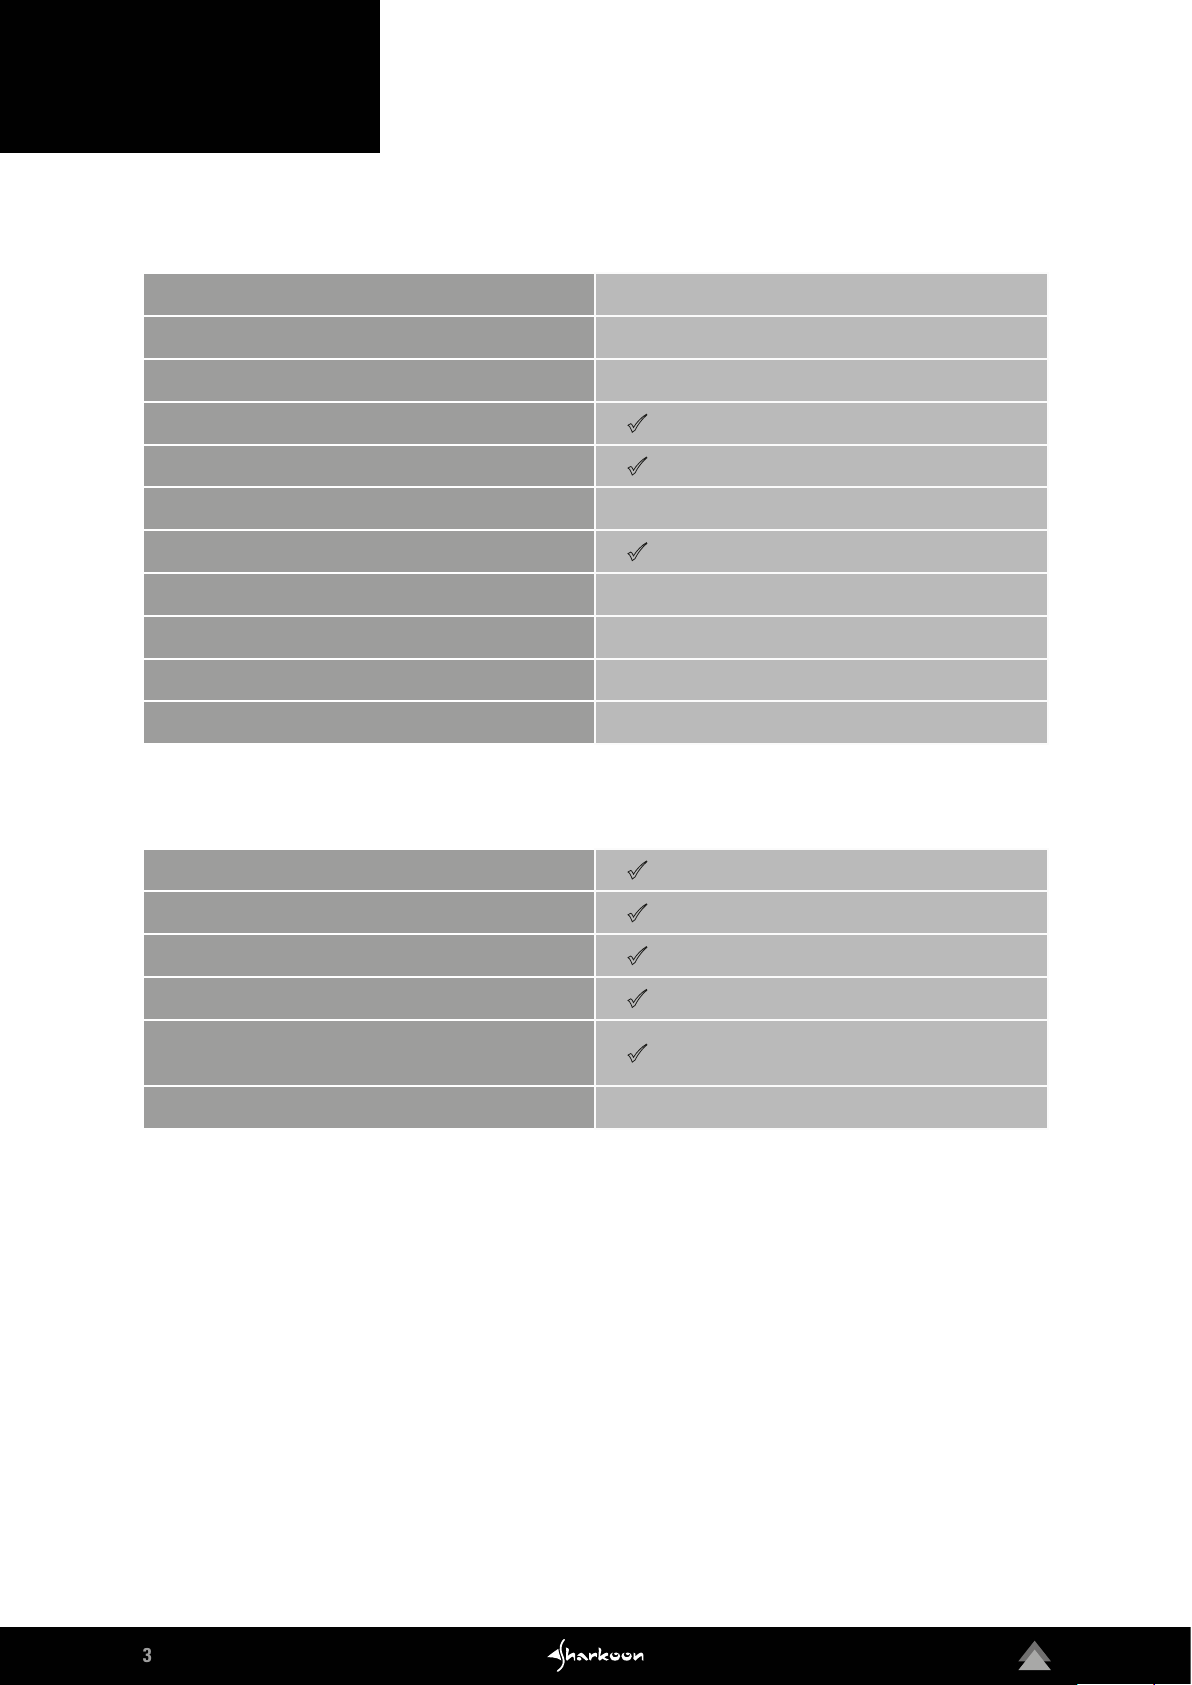
1. Specifications
1.1 General
Type
Switch Technology
Illumination
Adjustable Illumination
Lighting Effect
Max. Polling Rate
Gaming Mode
Block
Weight incl. Cable
Dimensions (L x W x H)
Supported Operating Systems
1.2 Key Properties
Profile Keys
Gaming Keyboard
Rubber Dome
RGB, 6 Zones
ü
ü
1,000 Hz
ü
3-Block Layout
955 g
472 x 212 x 43 mm
Windows 7/8/10
ü
Function Keys with Preset Multimedia Actions
Anti-Ghosting Keys
N-Key Rollover Support
Arrow Keys Functions are Interchangeable with
the WASD Section
Operating Life Cycles of Keys
ü
ü
ü
ü
Min. 10 Million Keystrokes
Page 4
4
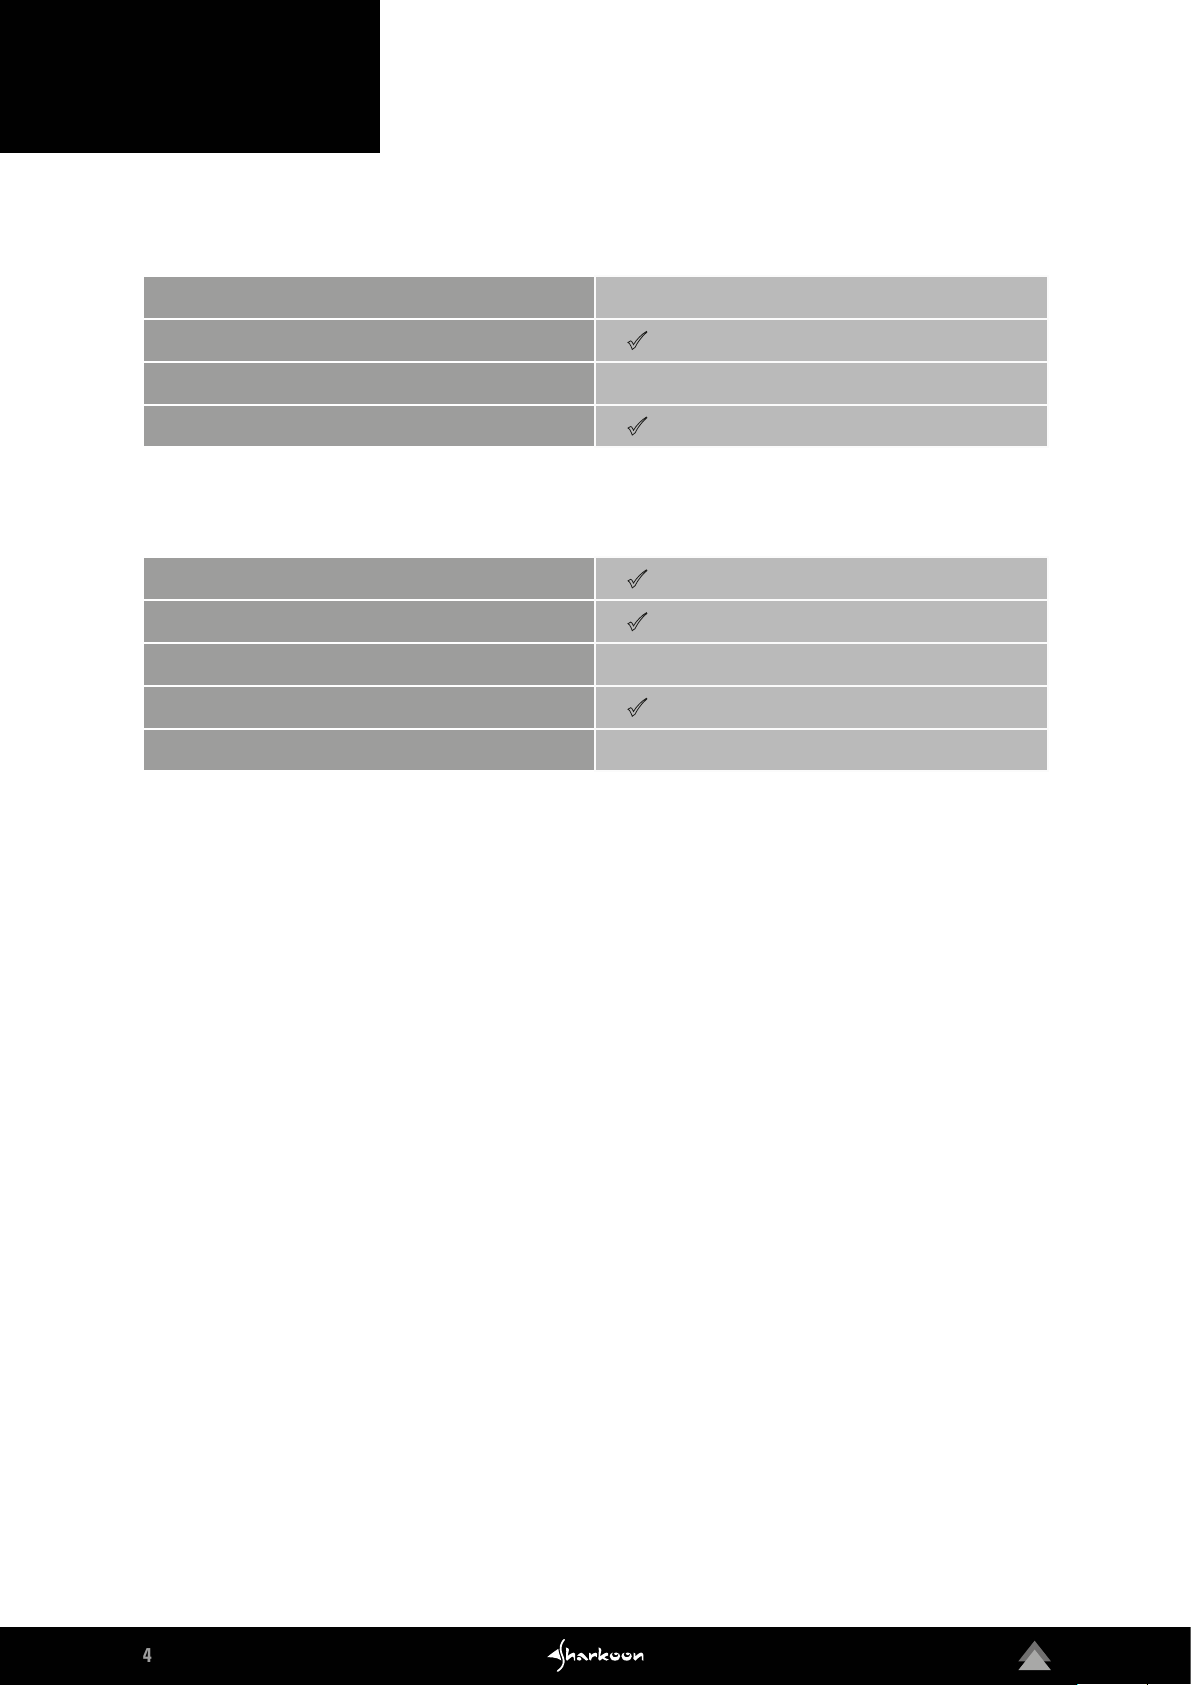
1. Specifications
1.3 Cable and Connectors
Connector
Textile Braided Cable
Cable Length
Gold-Plated USB Plug
1.4 Software Properties
Gaming Sof tware
Individually Configurable Key Functions
Number of Profiles
Onboard Memory for Game Profiles
Capacity of Onboard Memory
1.5 Package Contents
USB
ü
180 cm
ü
ü
ü
4
ü
256 kb
SKILLER SGK4
Manual
Page 5
5
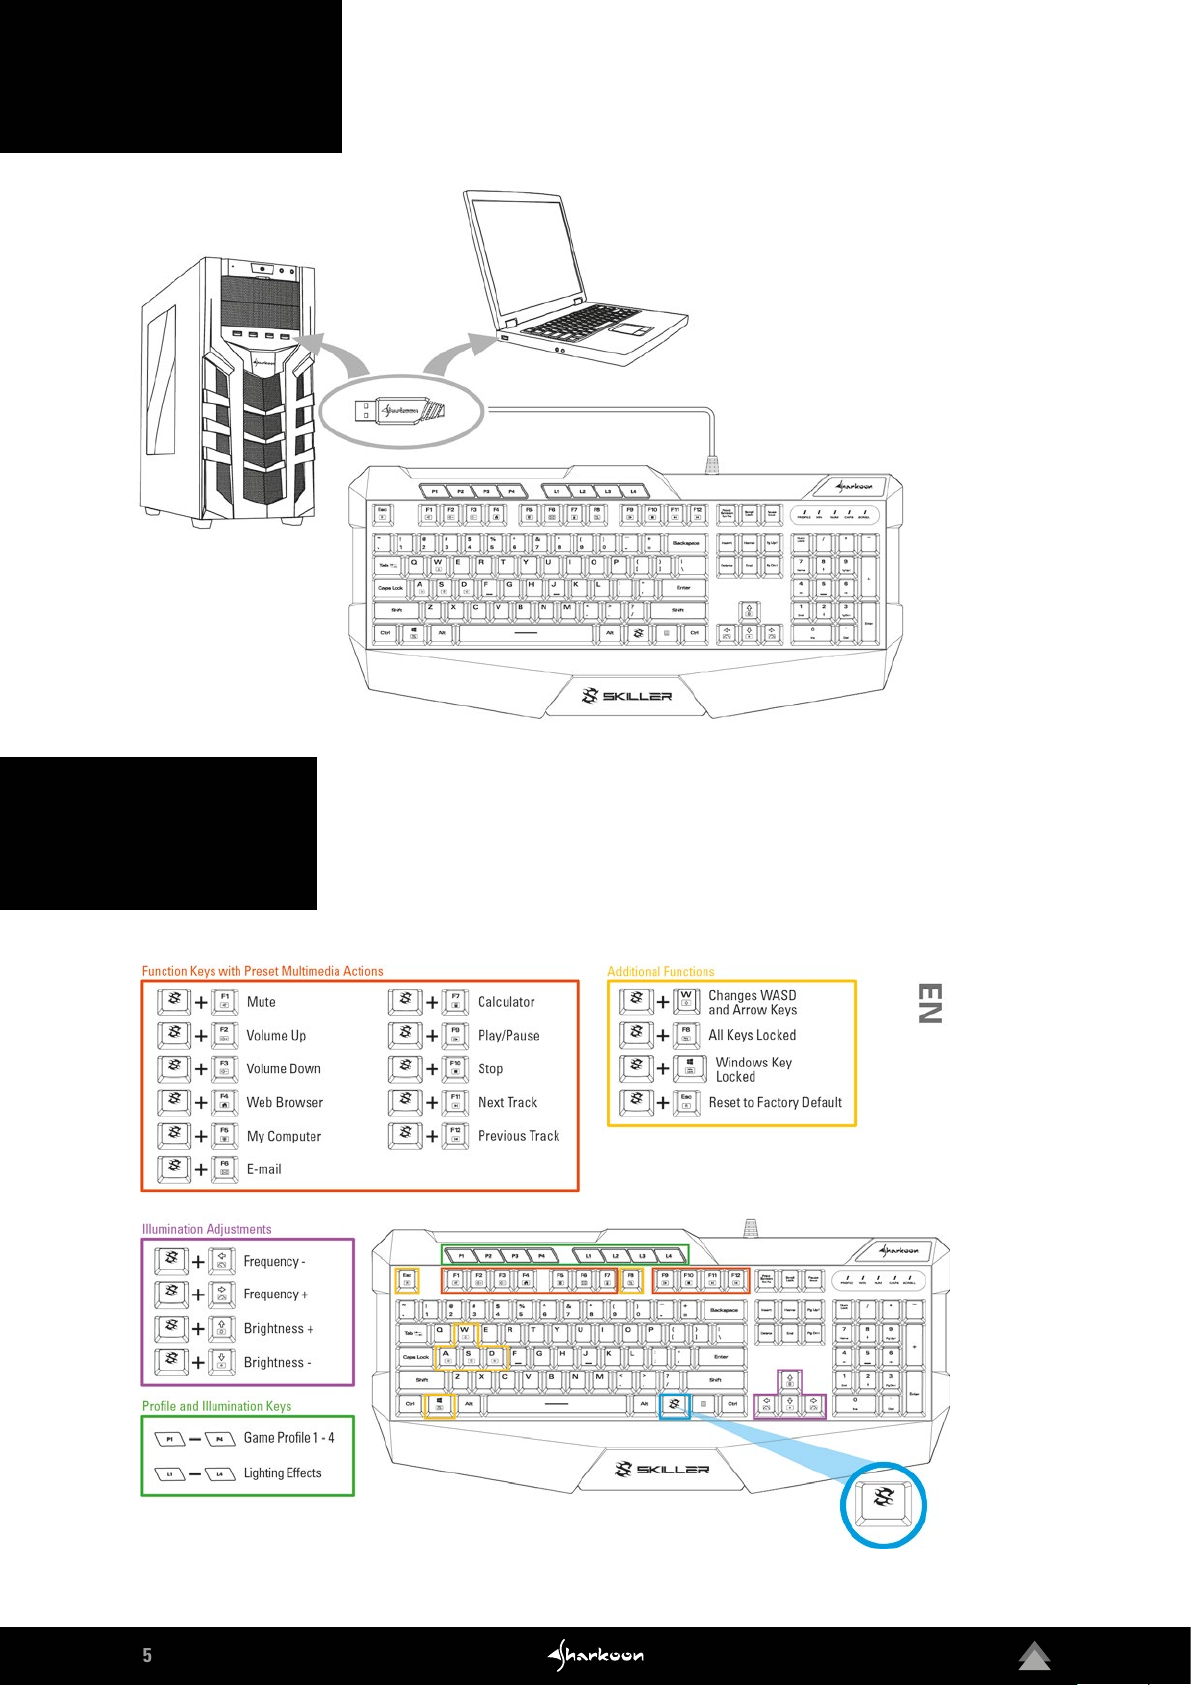
2. Installation
3. Overview
Page 6
6
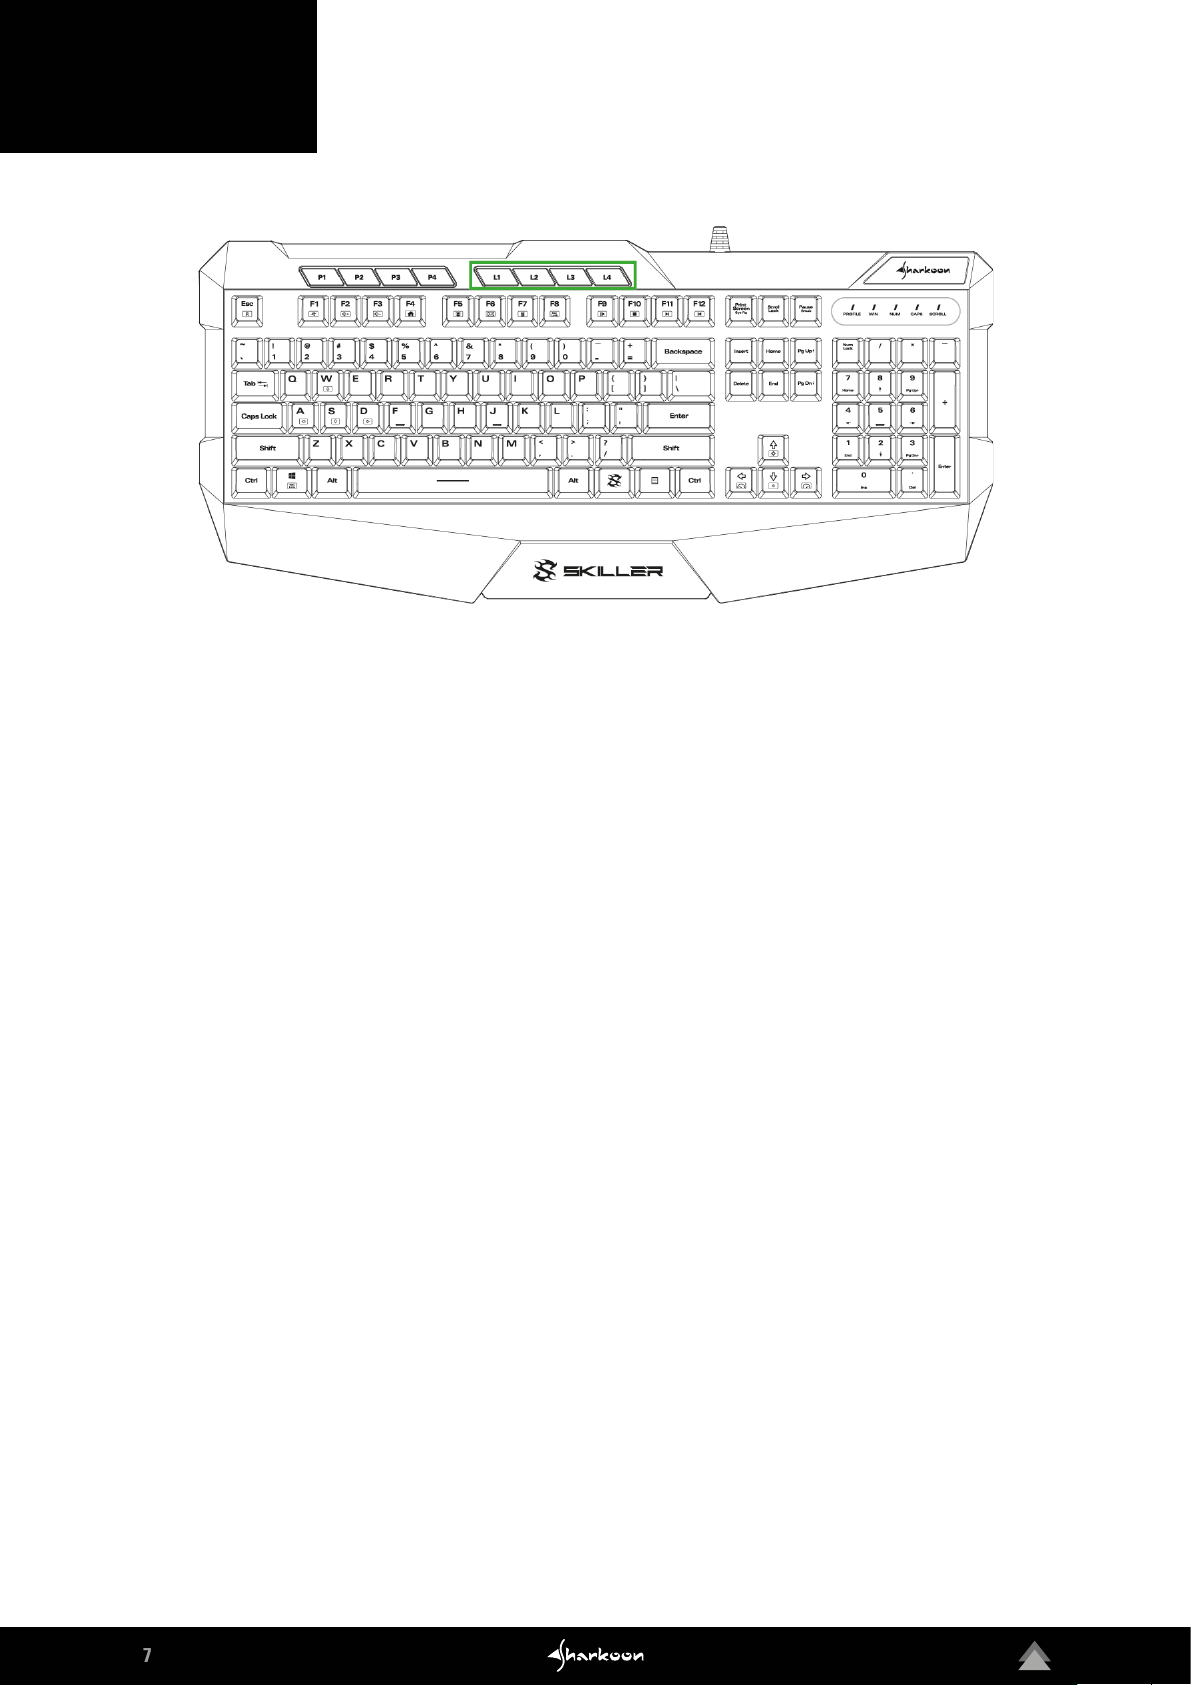
3. Overview
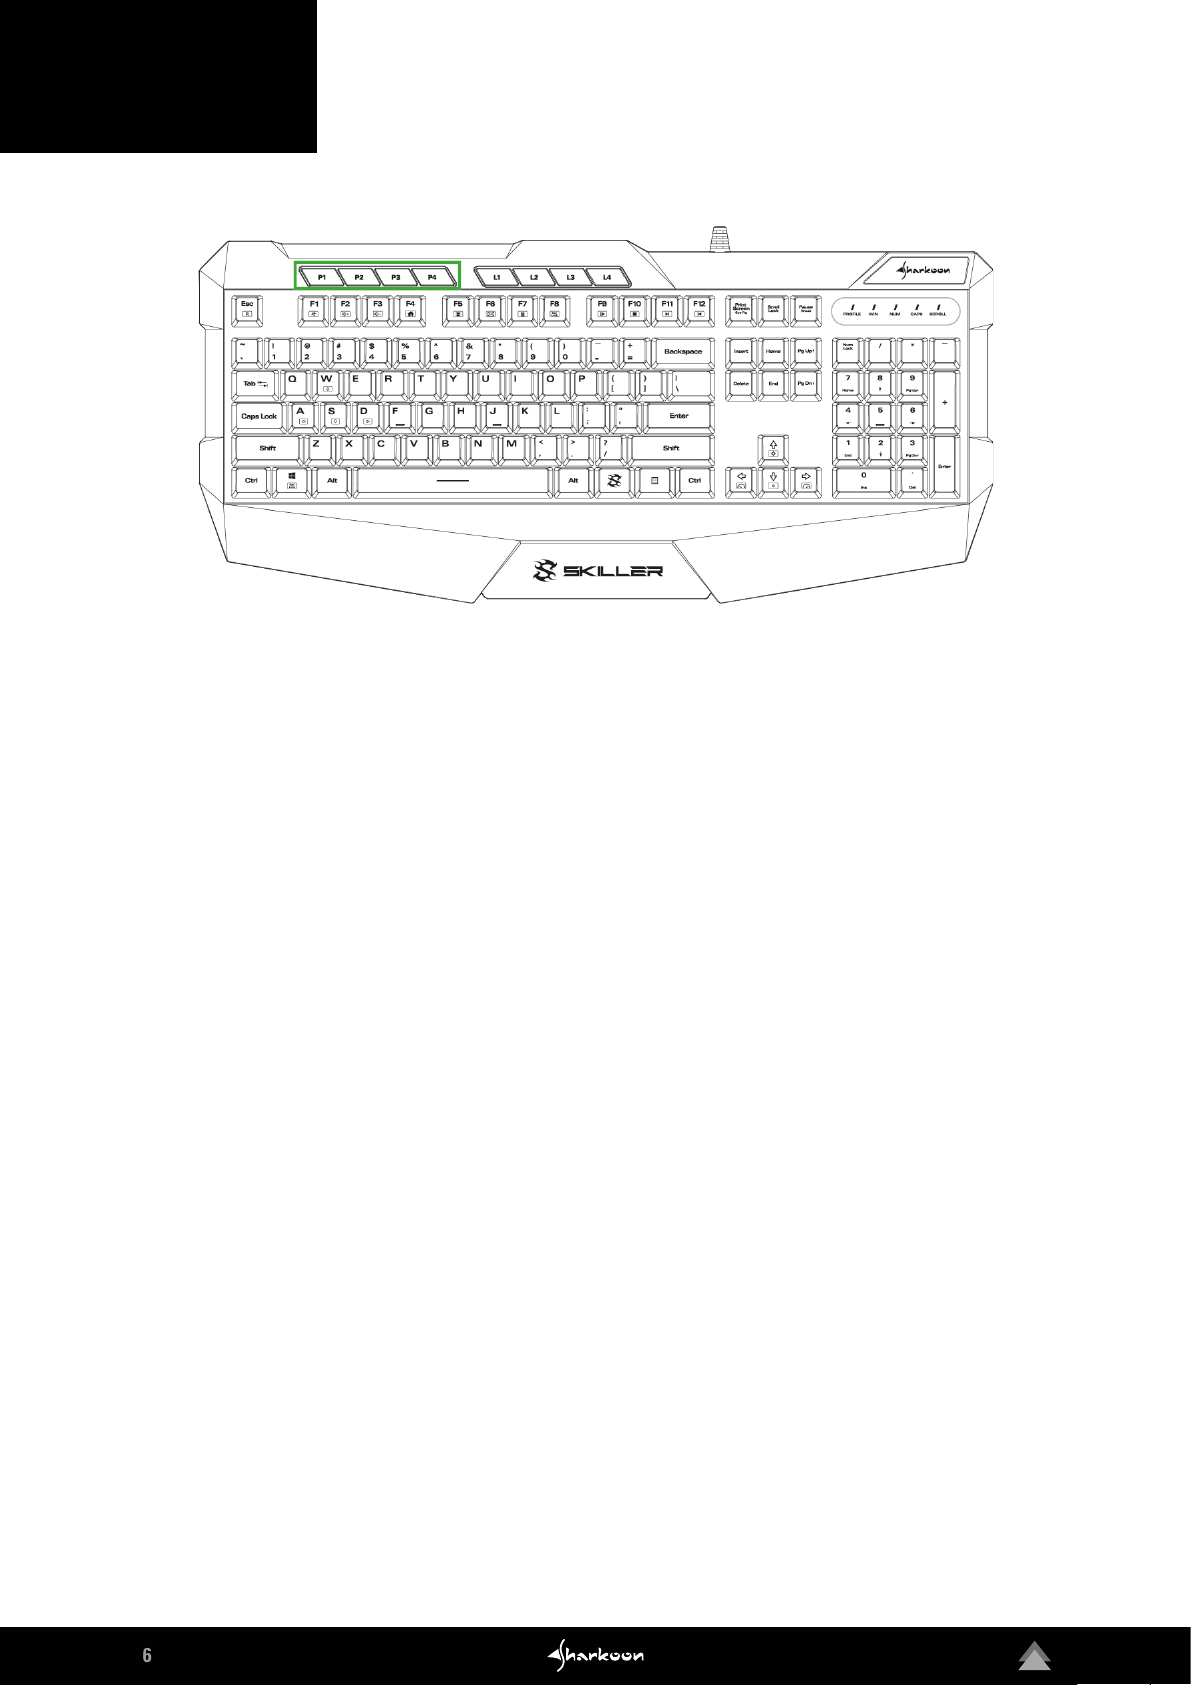
3.1 Profile Keys
Game profiles can be activated with the keys P1 to P4. Game profiles contain all the settings of the gaming
software. These include reassignments of keys, illumination settings, the chosen behavior of the windows key
as well as the preferred polling rate and the key response time. Macros are created independently of the game
profiles, but each macro can be used for any of these profiles.
The profile LED above the number block indicates which game profile is active. When profile P1 is active, the
profile LED is lit in white. P2 is blue. P3 is green. P4 is red. After the gaming software has been installed, the game
profile which has been activated will be briefly indicated in the bot tom right corner of the screen when switching
profiles via the profile keys.
Initially, all the game profiles have the same default keyboard settings. The profiles can then be customized as
desired using the gaming software. For more information about setting and managing the profiles see the section
“Game Profiles”.
Page 7
7
3. Overview
3.2 Illumination Keys
The preset lighting effects of the keyboard can be activated with keys L1 to L4.
Press L1 once to start the “wave“ lighting effect. Press L1 again to start the “color marquee“ effect. Another
press of the key returns back to the “wave“ effect.
L2 starts the “color change“ effect.
Pressing L3 starts the “permanent“ lighting effect. Each additional keystroke changes the color of this lighting
effect. The first color is red, followed by green, blue, yellow, pink, turquois, white and then returning to red.
The colors can also be changed using the gaming software.
Press L4 to start the “pulsating RGB cycle“ effect.
Page 8

8
3. Overview
3.3 Reset
To reset the keyboard to factory default settings, simultaneously press the SKILLER key and the Esc key for
several seconds.
After a successful reset, the profile LED above the number block will flash several times.
Page 9

9
4. Software Installation
Download the sof tware for the SKILLER SGK4 from the Sharkoon website at www.sharkoon.com. Unzip the ZIP
file in a folder of your choice and then double click the file “SKILLER SGK4 Setup.exe“ to launch the installation.
Follow the instructions of the setup wizard and then click on “Finish“ to complete the installation. The SGK4
symbol will then appear in the taskbar. The software has now been successfully installed.
To start the gaming soft ware, double click on the SGK4 symbol in the taskbar.
Please note:
The gaming software continuously runs in the background while the computer is on. Only this allows the full
range of functions of the SKILLER SGK4 to be used. The SGK4 symbol will be displayed in the Windows taskbar
while the gaming sof tware is running.
Page 10

10
5. Software Overview
B
C D
E
A
Game Profiles: In this menu - which is visible and available throughout the software - game profiles can be
A
F
created, saved and modified. Changes must be confirmed with a click on the “Apply“ but ton.
B
Main Control: The Main Control allows individual keys to be reassigned. It is also possible to assign keys
with macros or multi-media functions. Also here, changes must be confirmed by clicking the “Apply“ button.
C
Macro Settings: In this section of the software, macros can be created or deleted.
Light Settings: The illumination of the keyboard can be customized in the Light Set tings menu. Changes must
D
be confirmed by clicking “Apply“.
Advanced Settings: This menu has settings for the polling rate, the key response time and the status of the
E
windows key.
Reset: This resets the keyboard to the factory default settings. Macros, which have previously been created,
F
will not be affected by the reset.
Page 11

11
6. Game Profiles
The menu for selecting, creating, loading, saving and editing game profiles is visible and available throughout the
software. To select a game profile, click on one of the four game profiles within the “Game Profiles“ menu, and
confirm this selection by clicking on “Apply“. The four game profiles are also assigned to the four profile keys
P1 to P4 on the keyboard. In the gaming software, the profile which is active is highlighted in blue.
Page 12

12
6. Game Profiles
To create a game profile, click on “Create Profile“. You now have the possibility to give the profile a name and
to link the profile with a game or other application. The game profile will be automatically activated with all its
settings when the linked application is started.
Please note: If an application has been linked to more than one profile, then the profile with the lowest number
will be activated.
In addition to the four game profiles on the keyboard, any number of game profiles can be saved on the PC.
To save a game profile, first make sure that the desired game profile is active. Next, click on “Save Profile“ and
choose a name and a folder where the profile will be saved.
Please note: By default, the game profiles are saved in the subfolder “config“ in the installation folder of the
SKILLER SGK4.
Game profiles which have previously been saved on the PC can be loaded into the internal memory of the
keyboard via the “Load Profile“ but ton. Click this button and choose the desired game profile saved on the
PC. The keyboard‘s currently active game profile will be replaced by the game profile which is loaded from
the PC.
Under “Edit Profile“, the name of the game profile can be changed. The customized profile can also be linked to
a game or other application.
Page 13

13
7. Main Control
In the Main Control, the individual keys can be reassigned or allocated functions. The Esc key, P1 to P4, L1 to L4,
F1 to F12, the Windows key, the W key, the arrow keys and the SKILLER key cannot be reassigned.
To process a key, click this key on the illustrated keyboard of the gaming software. In the window which then
appears, the key can be assigned a new function via the dropdown menu. The menu offers a number of options
for the chosen key: to be reset to factory default, to be reassigned with another key, to be assigned a media
function, to be allocated for a macro you have created, to use for switching the game profiles, to use for
launching applications, to be assigned shortcuts, or to be completely deactivated.
Page 14

14
7. Main Control
7.1 Key Assignments
To reassign a key, click under “Keyboard Button“ on the red record but ton or in the adjacent field and type in the
desired character or command. The changed key is highlighted in red in the illustrated keyboard of the gaming
software.
For the reassignment of a key, up to four different keys can be combined. Keys such as Shift and Ctrl are counted.
This means, for example, the combination Shift + a + s + d will give ASD when the reassigned key is pressed.
Page 15

15
8. Macro Settings
To create macros, first click the “New“ button. A macro with a default name and consecutive numbering will be
initiated. Double click on the default name to change this, and enter a name of your choice.
Page 16

16
8. Macro Settings
Select the macro, and under “Options“ click on “Start Recording“ to record a sequence of up to 50 key
commands.
Please note: Make sure you release the Shif t, Ctrl, etc. key only after you have released the key to be modified.
This ensures that the Shift, Ctrl. etc. keys are correctly registered while recording macros.
If you wish to also record delays between key commands, click “Record delay between keystrokes“. The
sequence of the entered key commands is displayed in the field “Keystroke Sequence“. Click “Stop Recording“
to finish the recording of the macro. If you wish to replace the recorded sequence with a new one, click again on
“Start Recording“. To completely delete the macro, click “Delete“.
Page 17

17
8. Macro Settings
It is also possible to edit macros which have already been recorded. First, select the macro which is to be edited.
Then select and click the recorded key command or delay where you wish to edit. Now click with the right button
of the mouse in the field “Keystroke Sequence“. You now have various options: An additional recording can now
be inserted before or after the selected key command; a delay can be inser ted or edited; a mouse command can
be added; or the selected key command can be deleted.
A macro sequence can be repeated up to 255 times. Click the box “Numbers of Loops“ and, in the field directly
underneath, enter the desired number of repetitions.
For example:
If the macro has the keystroke sequence F6 F2 4 7 8 with three loops, the macro will be:
F6 F2 4 7 8 F6 F2 4 7 8 F6 F2 4 7 8.
Macros are independent of the game profiles. Before they can be used, they must be assigned to a key within
the “Main Control“ menu. Apart from the settings for the number of loops, the Main Control can set macros to be
continuously repeated while the assigned key is being pressed or, alternatively, to be continuously repeated until
any key on the keyboard is pressed. Under these options, any previous loop settings will be overridden. Finally,
click on “Apply“ to confirm the new key assignment for the selected game profile.
Page 18

18
9. Light Settings
To change the lighting effect of the keyboard for the chosen game profile, select the desired effect in the “Lighting
Effect“ dropdown menu. You have the choice of: Wave, Color Marquee, Color Change, Permanent, Pulsating RGB
Cycle or Pulsating Profiles.
The direction of the Wave and Color Marquee lighting effects can be adjusted. You can select whether the effect
begins from the lef t or the right of the keyboard. It is also possible to adjust the brightness and the frequency of all
the effects using the relevant slide bars.
Page 19

19
9. Light Settings
The “Permanent“ and “Pulsating Profiles“ lighting effects allow customized illumination along the keyboard‘s
lighting zones. A separate color can be adjusted for each zone af ter clicking on the colored box underneath each
zone number. With the “Permanent“ lighting effect, a single lighting profile can be used at any one time. With
the L3 key, you can switch through to any of the other 6 lighting profiles. With the “Pulsating Profiles“ lighting
effect, up to 7 lighting profiles will alternate in turn. To enable this, click two or more of the boxes under “Lighting
Profile” and then click “Apply” to confirm the lighting effect for the chosen game profile.
When not being used, the illumination of the keyboard can automatically switch itself off after a predetermined time. Select the desired time from the dropdown menu “Sleep Mode After:“ and confirm the setting by
clicking “Apply“.
Page 20

20
10. Adanced Settings
Under “Advanced Settings“ you can adjust the polling rate: the frequency at which the keyboard reports to the
PC. The higher the Hz value, the shorter the time between reports. 125 Hz corresponds to 8 ms, 250 Hz 4 ms,
500 Hz 2 ms and 1000 Hz 1 ms.
You can also determine the behaviour of the Windows key. Select “Deactivate“ if the function of the Windows
key has to be blocked for the chosen game profile.
The key response time refers to the debouncing time for single keystrokes. If a single keystroke is unintentionally producing outputs of several characters, an increase of the key response time can remedy this. Select the
desired reaction time from the dropdown menu. You have the option of 2 ms, 4 ms, 8 ms and 16 ms.
Page 21

21
11. Reset
The reset but ton is visible and available throughout the software. You can use this to reset the game profiles P1
to P4, which are saved in the internal memory of the keyboard, back to factory default. Game profiles which are
saved on the PC and created macros remain unaffected by this feature.
Page 22

22
Legal Disclaimer
For potential loss of data, especially due to inappropriate handling, SHARKOON assumes no liability.
All named products and descriptions are trademarks and/or registered trademarks of the respective manufacturers and are accepted as protected.
As a continuing policy of product improvement at SHARKOON, the design and specifications are subject to change without prior notice. National product specifications may vary.
The legal rights of the enclosed software belong to the respective owner. Please observe the license terms of
the manufacturer before using the software.
All rights reserved especially (also in extracts) for translation, reprinting, reproduction by copying or other
technical means. Infringements will lead to compensation. All rights reserved especially in case of assignation
of patent or utility patent. Means of delivery and technical modifications reserved.
Disposal of your old product
Your product is designed and manufactured with high quality materials and components, which can be recycled
and reused.
When this crossed-out wheeled bin symbol is attached to a product, it means the product is covered by
the European Directive 2012/19/EU.
Please be informed about the local separate collection system for electrical and electronic products.
Please act according to your local rules and do not dispose of your old products with your normal household
waste. The correct disposal of your old product will help prevent potential negative consequences to the environment and human health.
SHARKOON Technologies GmbH
Siemensstraße 38
D-35440 Linden
Germany
© SHARKOON Technologies 2018
info@sharkoon.com
www.sharkoon.com
 Loading...