

Page 1
Manual
Page 2

TABLE OF CONTENTS
1. Properties 3
2. Specific ations 3
2.1 General 3
2.2 Key Properties 4
2.3 Cable and Connectors 4
3. Package Contents 4
4. SKILLER MECH SGK1 Overview 5
4.1 SKILLER Function Key 5
4.2. Set Brightness 5
4.3. Select Lighting Effectt 6
4.4. Set Frequency 6
4.5. Lighting Profiles 6
4.6. Gaming Mode 7
4.7. Arrow Keys Functions Are Interchangeable with the WASD Section 7
4.8. Function Keys with Preset Multimedia Actions 7
4.9. Reset 7
5. Connecting to the PC 7
SKILLER MECH SGK1
Page 3
3
Dear Customer,
Thank you for the purchase of your new Sharkoon product. To ensure a long service life, and full functionality of
the product, we recommend that you read this manual thoroughly.
SHARKOON Technologies
www.sharkoon.com
1. Properties
• Mechanical gaming keyboard with white LED illumination
• Aluminium alloy reinforced top cover
• Six pre-programmed lighting effects
• Five individually programmable lighting profiles
• Six brightness levels
• Professional Kailh switches
• N-key rollover
• Anti-ghosting keys
• Gaming mode with disabled windows key
• Arrow keys functions are interchangeable with the WASD section
• Function keys with preset multimedia actions
• Integrated palm rest
• Gold-plated USB plug
2. Specifications
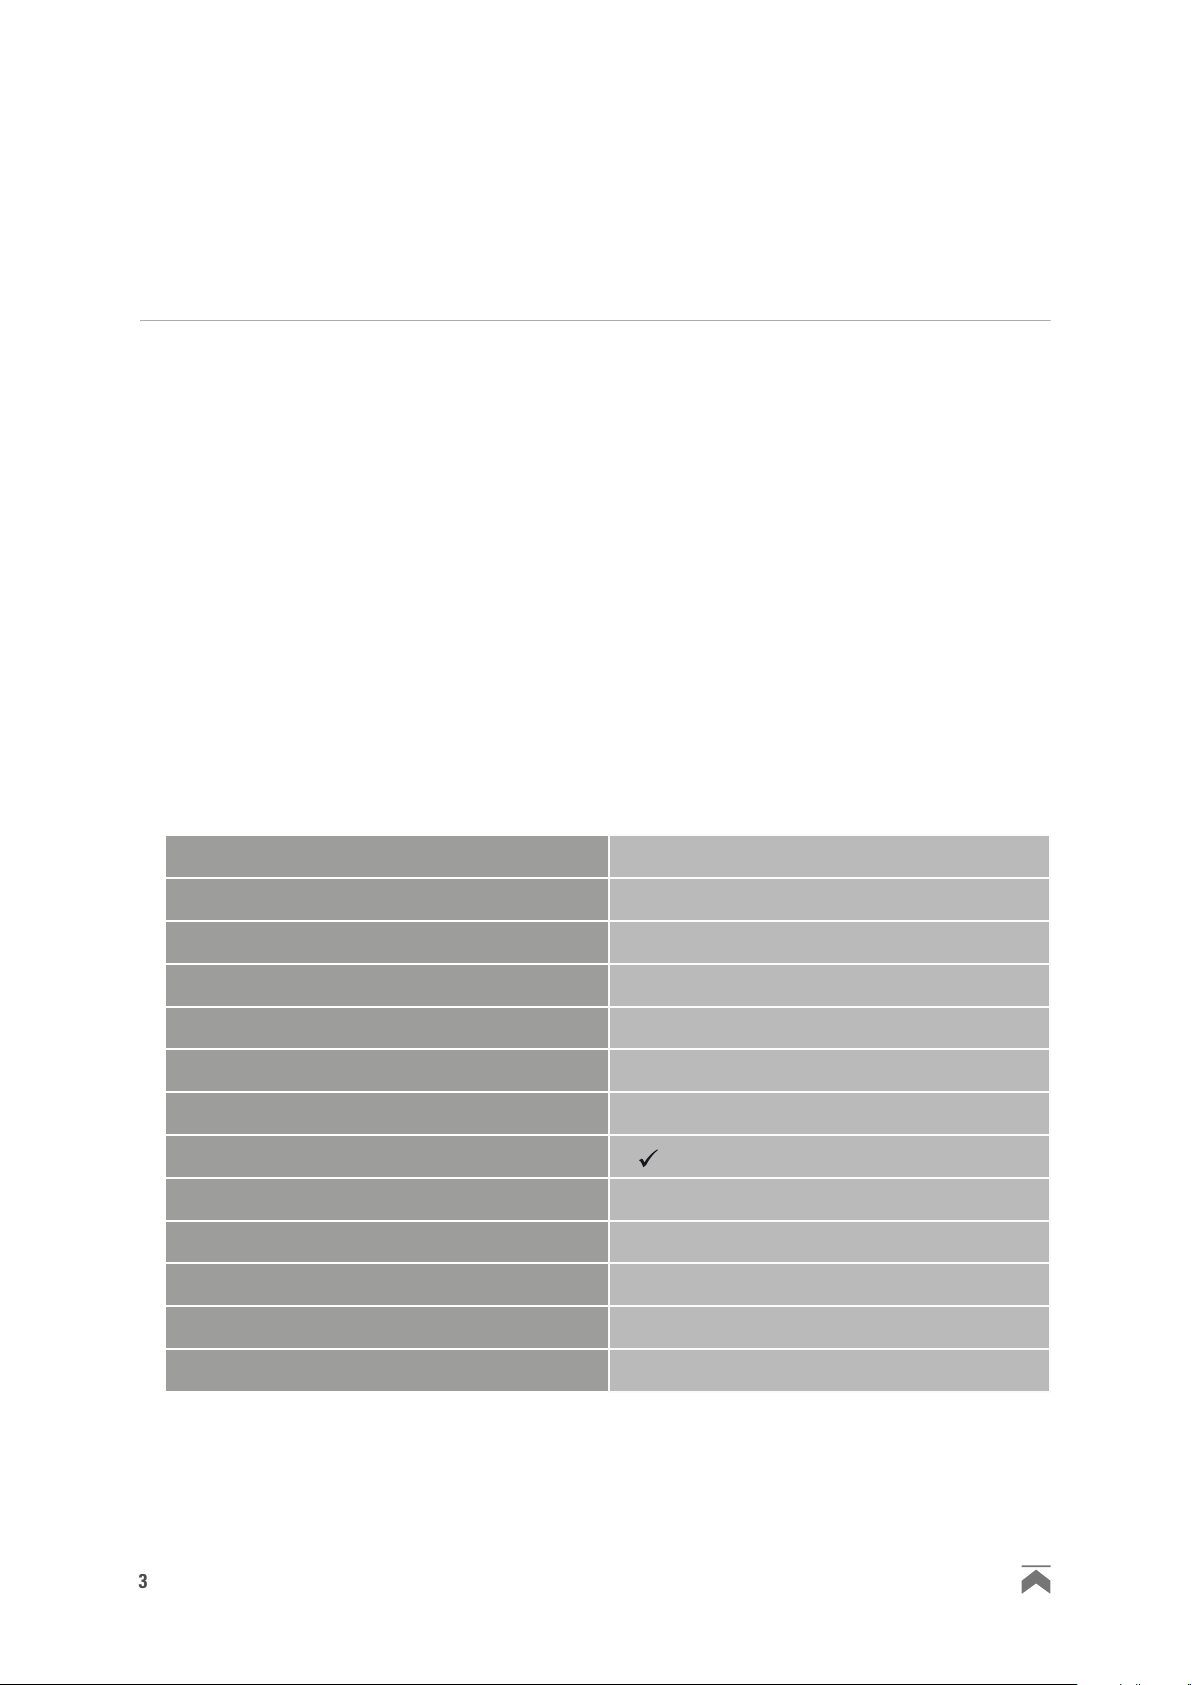
2.1 General
Type
Switch Technology
Illumination
Adjustable Illumination
Lighting Effect
Lighting Profiles
Max. Polling Rate
Gaming Mode
Block
Palm Rest
Weight incl. Cable
Dimensions (L x W x H)
Gaming Keyboard
Mechanical (Kailh)
White, LED
20 %, 40 %, 60 % , 80 %, 100 % , Off
6
5
1,000 Hz
3-Block Layout
Integrated
1.32 kg
458 x 220 x 44 mm
Supported Operating Systems
SKILLER MECH SGK1
Windows 7/8/10
Page 4

4
2.2 Key Properties
Function Keys with Preset Multimedia Actions
Anti-Ghosting Keys
N-Key Rollover Support
Red Brown Blue
Operating Force
Switch
Switching Point
Click Point
Distance to Actuation Point
Operating Life Cycle of Keys
2.3 Cable and Connectors
Connector
Textile Braided Cable
Cable Length
Gold-Plated USB Plug
3. Package Contents
• SKILLER MECH SGK1
• Manual
50 g 45 g 50 g
Linear Tac t ile Tac t ile
Undetectable Detectable Detectable
Undetectable Undetectable
2 mm 2 mm 1.9 mm
Min. 50 Million Keystrokes
USB
180 cm
Precisely
Detectable
Note:
Should any of the above items be missing, please contact our customer service immediately:
support@sharkoon.com (Germany and Europe)
support@sharkoon.com.tw (International)
SKILLER MECH SGK1
Page 5

5
4. SKILLER MECH SGK1 Overview
Lighting Profiles and Lighting Effects
Tide/Tide illuminated
Brightness +
Lighting
Profiles
Wave/Swirl
Function Keys with
Preset Multimedia Actions
Play/Pause
Stop
Previous Track
Next Track
Media Player
Mute
Volume Down
Volume Up
Key Lock Function
Windows Key Locked
Explosion
Spiral/Grid
Trigger
Pulsating/Permanent
Set Up Lighting Profiles
Arrow Keys Functions are
Interchangeable with the WASD Section
Brightness -
Frequency +
Frequency -
Changes WASD and Arrow Keys
4.1 SKILLER Function Key
Some keys on the SKILLER MECH SGK1 keyboard are preset with additional functions. To activate these functions press the SKILLER Function key.
4.2 Set Brightness
The SKILLER Function key + decreases the illumination brightness, while the SKILLER Function key + increases the brightness. This applies to all effects, as well. Brightness levels of 20 %, 40 %, 60 %, 80 %, 100 %,
plus turning the brightness of f, are all possible.
Once the lowest level is reached, the Scroll Lock LED will blink to indicate that a lower level is not possible.
The same will happen once the highest level is reached.
Note:
To turn off the illumination entirely, press the SKILLER Function key + repeatedly until the illumination goes off.
SKILLER MECH SGK1
Page 6

6
4.3 Select Lighting Effect
Switch between the six total lighting effects by pressing the SKILLER Function key + F6-F11. The F6, F7 and F9
keys offer two lighting variations. Press the respective key combination twice to cycle through the variations.
Example: To launch the “Wave” effect, press the SKILLER Function key + F6 once. To launch the “Swirl” variation, press the SKILLER Function key + F6 t wice.
FN + F6: Wave – The keys light in the form of a wave from left to right, or right to left. Use the SKILLER
Function key + sideways arrow keys to change the direction of the wave.
FN + F6 (twice): Swirl – The lighting rotates around the center of the keyboard. Use the SKILLER Function
key + sideways arrow keys to change the direction of the vortex.
FN + F7: Tide – Waves run over the keyboard.
FN + F7 (twice): Tide illuminated – The same effect as Tide, but with an activated background illumination.
FN + F8: Explosion – Starting from the pressed key, the lighting spreads out in a circular pattern
across the keyboard.
FN + F9: Spiral – Starting from top-right, the keys will light up and run clockwise from outside to inside.
FN + F9 (twice): Grid – Starting from top-right, the keys will light up and run from right to lef t, then on the
second row from left to right, and then on the third row from right to left, etc.
FN + F10: Trigger – Every pressed key illuminates and slowly fades.
FN + F11: Pulsating – All keys will slowly light and dim repeatedly.
FN + F11 (twice): Permanent – All keys continuously illuminate.
4.4 Set Frequency
All lighting effect speeds can be increased or decreased. Press the SKILLER Function key + Page Up to increase the ef fect speed or SKILLER Function key + Page Down to slow down the effect speed.
Note:
Once the lowest level is reached, the Scroll Lock LED will blink to indicate that a lower level is not possible.
The same will happen once the highest level is reached.
4.5 Lighting Profiles
Your SKILLER MECH SGK1 already includes five preset lighting profiles, which each can be individually customizable. Within each profile, every key can illuminate with exception to the SKILLER Function key. To customize a profile, proceed as follows:
• Press the SKILLER Function key + F12. The profile key will start to blink.
• Select the desired profile key (F1 - F5). The lighting will cease.
• Press all keys that should illuminate during this profile. The selected keys will stay illuminated.
• To save the profile, press the SKILLER Function key + F12 again.
The profile is now saved under the selected Function key. To launch the profile, press the SKILLER Function
key and the defined profile key (F1 – F5). To stop the profile, simply select another profile or lighting effect.
SKILLER MECH SGK1
Page 7

7
4.6 Gaming Mode
If you want to lock the Windows key, press the SKILLER Function key + Windows key. To unlock the Windows
key, press this combination again.
4.7 Arrow Keys Functions Are Interchangeable with the WASD Section
To swap the functions of the arrows and WASD keys, press the SKILLER Function key + the W-key. To undo
this functions swap, press this combination again.
4.8 Function Keys with Preset Multimedia Actions
The 1 – 8 keys are preset with multimedia actions and quick access to the media play.
Keys Function
+ 1 Play/Pause
+ 2 Stop
+ 3 Previous Track
+ 4 Nex t Track
4.9 Reset
To reset the keyboard, press and hold for three seconds the key combination SKILLER Function key + Pause.
Afterwards, the keyboard lighting is set to 100% brightness and Wave mode is enabled. The lighting profiles
also reset to factory settings.
Keys Function
+ 5 Media Player
+ 6 Mute
+ 7 Volume Down
+ 8 Volume Up
5. Connecting to the PC
Connect the USB plug on SKILLER MECH SGK1 to an available USB port on your PC. The operating system will
automatically recognize the SKILLER MECH SGK1.
Note:
If the SKILLER MECH SGK1 is not recognized, disconnect it and try a different USB port on your PC.
SKILLER MECH SGK1
Page 8

8
Legal Disclaimer:
For potential loss of data, especially due to inappropriate handling, SHARKOON assumes no liabilit y. All named products and descriptions are trademarks and/or registered trademarks of the respective manufacturers
and are accepted as protected. As a continuing policy of product improvement at SHARKOON, the design
and specifications are subject to change without prior notice. National product specifications may vary. The
legal rights of the enclosed software belong to the respective owner. Please observe the license terms of
the manufacturer before using the software. All rights reserved especially (also in extracts) for translation,
reprinting, reproduction by copying or other technical means. Infringements will lead to compensation. All
rights reserved especially in case of assignation of patent or utility patent. Means of delivery and technical
modifications reserved.
Disposal of Your Old Product:
Your product is designed and manufactured with high quality materials and components, which can be recycled and reused.
When this crossed-out wheeled bin symbol is at tached to a product, it means the product is covered
by the European Directive 2002/96 /EC. Please be informed about the local separate collection system
for electrical and electronic products. Please act according to your local rules and do not dispose of
your old products with your normal household waste. The correct disposal of your old product will
help prevent potential negative consequences to the environment and human health.
SHARKOON Technologies GmbH
Siemensstraße 38
35440 Linden
Germany
© SHARKOON Technologies 2016
info@sharkoon.com
www.sharkoon.com
SKILLER MECH SGK1
 Loading...