

Page 1
Commercially Rated Upright Vacuum
Aspiradora Vertical de Uso Comercial
Aspirateur Balais de Classification Commerciale
OWNER’S MANUAL
MANUAL DEL USARIO
MANUEL D’UTILISATION
Models/Modelos/Modèles:
UVC805-UVC805B-UVC805C
120V., 60Hz., 3.6 Amps
COPYRIGHT© EURO-PRO OPERATING LLC 2008
USA: EURO-PRO Operating LLC Canada: EURO-PRO Operating LLC
94 Main Mill Street, Door 16 4400 Bois Franc
Plattsburgh, NY 12901 St. Laurent, QC H4S 1A7
Tel: 1 (800) 798-7398
www.sharkvac.com
Page 2

IMPORTANT SAFETY INSTRUCTIONS
When using your Commercially Rated Upright Vacuum, basic safety precautions should always
be observed, including the following:
READ ALL INSTRUCTIONS BEFORE USING
YOUR VACUUM CLEANER
WARNING: To reduce the risk of fire, electrical
shock, or injury:
1. Do NOT leave vacuum cleaner unattended
when it is plugged in. Unplug from outlet when
not in use and before changing the HEPA bag.
2. To reduce the risk of electric shock – do NOT
use outdoors or on wet surfac es.
3. Do NOT allow children to use as a toy. Close
attention is necessary when used by or near
children.
4. Use only as described in this manual.
5. Do NOT use with damaged power cord or plug.
Do NOT use vacuum cleaner if it has been
dropped, damaged, left outdoors, or dropped
into water. Return appliance to EURO-PRO
Operating LLC for examination, repair or
adjustment.
6. Do NOT pull or carry by power cord. Do NOT
use power cord as a handle, close a door on
cord, or pull cord around sharp edges or
corners. Do NOT run appliance over power
cord. Keep power cord away fromheated
surfaces.
7. Do NOT unplug by pulling on the power cord.
To unplug, grasp the plug, not the cord.
8. Do NOT handle plug or vacuum cleaner with
wet hands.
9. Do NOT use the vacuum cleaner to pick up
large objects or objects that are likely to
damage the vacuum cleaner.
10. Keep hair, loose clothing, fingers, feet and all
parts of body away from the nozzle opening,
rotating agitator and all other moving parts.
Do NOT operate cleaner in bare feet or when
wearing open toe shoes.
11. Do NOT pick up hot coals, cigarette butts,
matches or any hot, smoking, or burning
objects.
12. Do NOT pick up hard or sharp objects such as
glass, nails, screws, coins, etc.
13. Do NOT use without HEPA vacuum bag in
place.Use ONLY the HEPA vacuum bags
and belts provided by EURO-PRO
Operating LLC. Failure to do so will void
the warranty.
14. Turn off all controls before plugging or
unplugging vacuum cleaner into electrical
outlet.
15. Use extra care when vacuuming on stairs.
16. Use caution when vacuuming over area
rug edges and fringe.
17. Do NOT pick up flammable or combustible
materials (lighter fluid, gasoline, kerosene,
etc.) or use in the presence of e xplosive
liquids or vapor.
18. Do NOT pick up toxic material (chlorine
bleach, ammonia, drain cleaner, etc.).
19. Do NOT use in an enclosed space filled
with vapors given off by oil based paints,
paint thinner, moth proofing substances,
flammable dust, or other explosive or toxic
vapors.
20. Use only on dry, indoor surfaces.
NOT use for any purpose other than
21. Do
described in this user’s guide.
22. Use only extension cords that are UL-rated,
or cUL-rated, at 15 amperes. Extension
rated for less amperage may overheat.
Care should be taken to arrange the cord
so that it cannot be tripped over or pulled
under the vacuum.
23. Do NOT put objects into nozzle opening.
Do NOT use with nozzle opening blocked.
Keep free of dust, lint, hair and anything
else that may reduce air flow.
24. Store your appliance indoors in a cool, dry
area.
25. Keep your work area well lit.
26. Do NOT immerse the vacuum into water or
other liquids.
27. To avoid damaging the carpet, keep the
vacuum cleaner head moving at all times.
28. Connect to a properly grounded outlet only.
Using improper voltage may result in
damage to the motor and/or injury to the
user. See grounding instructions.
SAVE THESE INSTRUCTIONS
For Household or Commercial Use Only
GROUNDING INSTRUCTIONS
This appliance must be grounded. If it should malfunction or breakdown, grounding provides a
path of least resistance for electric current to reduce the risk of electric shock. This appliance is
equipped with a cord having an equipment-grounding conductor and grounding plug. The plug
must be inserted into an appropriate outlet that is properly installed and grounded in accordance
with all local codes and ordinances.
WARNING: Improper connection of the equipment-grounding conductor can
result in a risk of electric shock. Check with a qualified electrician or service person
if you are in doubt as to whether the outlet is properly grounded. Do not modify the
plug provided with the appliance - if it will not fit the outlet, have a proper outlet
installed by a qualified electrician.
This appliance is for use on a nominal 120-volt circuit, and has a grounding
attachment plug that looks like the plug illustrated at right. Make sure that the
appliance is connected to an outlet having the same configuration as the
plug. No adaptor should be used with this appliance.
1 Rev. 03/08
Page 3
Modèles
UVC805
UVC805B
UVC805C
EURO-PRO Operating LLC garantit ce produit contre les défauts de pièces et main-d’œuvre pour une période
de deux (2) ans à compter de la date d'achat originale lorsqu'il est utilisé dans le cadre d’un usage normal
commercial ou domestique, conforme aux conditions, aux exclusions et aux exceptions suivantes.
Si votre appareil ne fonctionne pas correctement alors qu'il est utilisé dans des conditions nor males d’un usage
commercial ou domestique pendant la période de garantie, retournez l'appareil et les accessoires au complet,
port payé, à :
É-U : EURO-PRO Operating LLC, 94 Main Mill Street, Plattsburgh, N.Y., 12901
Canada: EURO-PRO Operating LLC, 4400 Bois Franc, St. Laurent, Québec, H4S 1A7
Si l’appareil est trouvédéfectueux de matériau ou de main-d’œuvre, EURO-PRO Operating LLC le réparera ou
le remplacera sans frais. Une preuve de la date d’achat ainsi qu’un montant de 14.95$ afin de couvrir les coûts
de transport et de manutention doivent être inclus. *
Les accessoires consommables incluant, sans limitation, les courroies, les brosses rotatives, les sacs à
poussière et les composantes électriques qui nécessitent un remplacement normal sont spécifiquement exclus
de la garantie.
La responsabilité de EURO-PRO Operating LLC se limite entièrement au coût de réparation ou de
remplacement de l’unité selon son choix. Cette garantie ne couvre pas l’usure normale des pièces et ne
s’applique pas aux appareils altérés. La garantie limitée ne couvre pas les dommages causés par un mauvais
usage, de l’abus, de la négligence lors de la manutention ou des dommages dus à un mauvais emballage ou à
une mauvaise manipulation lors du transport. Cette garantie ne couvre pas les dommages ou défauts causés ou
résultants de dommages dus au transport ou à la réparation, à l'entretien ou à toute altération de ce produit ou
de chacune de ses pièces, qui aurait été effectués par une personne non autorisée par EURO-PRO Operating
LLC.
Cette garantie est donnée seulement à l‘acheteur original de l’unité et exclut toute autre garantie légale et/ou
conventionnelle. La responsabilité de EURO-PRO Operating LLC s’il y en a une, se limite aux obligations
spécifiques exprimées sous cette garantie limitée. En aucun cas EURO-PRO Operating LLC ne peut être t enu
responsable pour des dommages indirects ou consécutifs de toute nature confondue. Certaines provinces
n’autorisent pas l’exclusion ou limitation de dommages circonstanciels ou conséquents, auquel cas cette
disposition ne s’applique rait pas.
Cette garantie vous donne des droits légaux spécifiques, et il se peut que vous ayez d’autres droits qui peuvent
varier d’un état à l’autre ou d’une province à l’autre.
*Important: Emballez soigneusement l’item afin de prévenir tout dommage lors de l’envoi. Assurez-vous
d’inclure une preuve de la date d’achat et d’attacher une étiquette à votre produit avant de l’emballer
avec votre nom, adresse complète et numéro de téléphone ainsi qu’une note donnant les informations
d’achat, le numéro de modèle ainsi qu'une brève description du problème. Nous vous recommandons
d’assurer votre envoi (puisque les dommages dus au transport ne sont pas couverts par la garantie).
Marquez à l'extérieur de votre paquet « À L’ATTENTION DU SERVICE À LA CLIENTÈLE ». Nous essayons
constamment d’améliorer nos produits, donc les clauses contenues dans ce document peuvent changer
sans préavis.
GARANTIE LIMITÉE DE DEUX (2) ANS
--------------------------------------------------------------------------------
CARTE D’ENREGISTREMENT DU PRODUIT
POUR LES CONSOMMATEURS CANADIENS SEULEMENT
PRECAUTIONARY MEASURES
Important: If the suction opening in the unit is blocked, switch off the vacuum
cleaner and remove the blockage before you start the unit again.
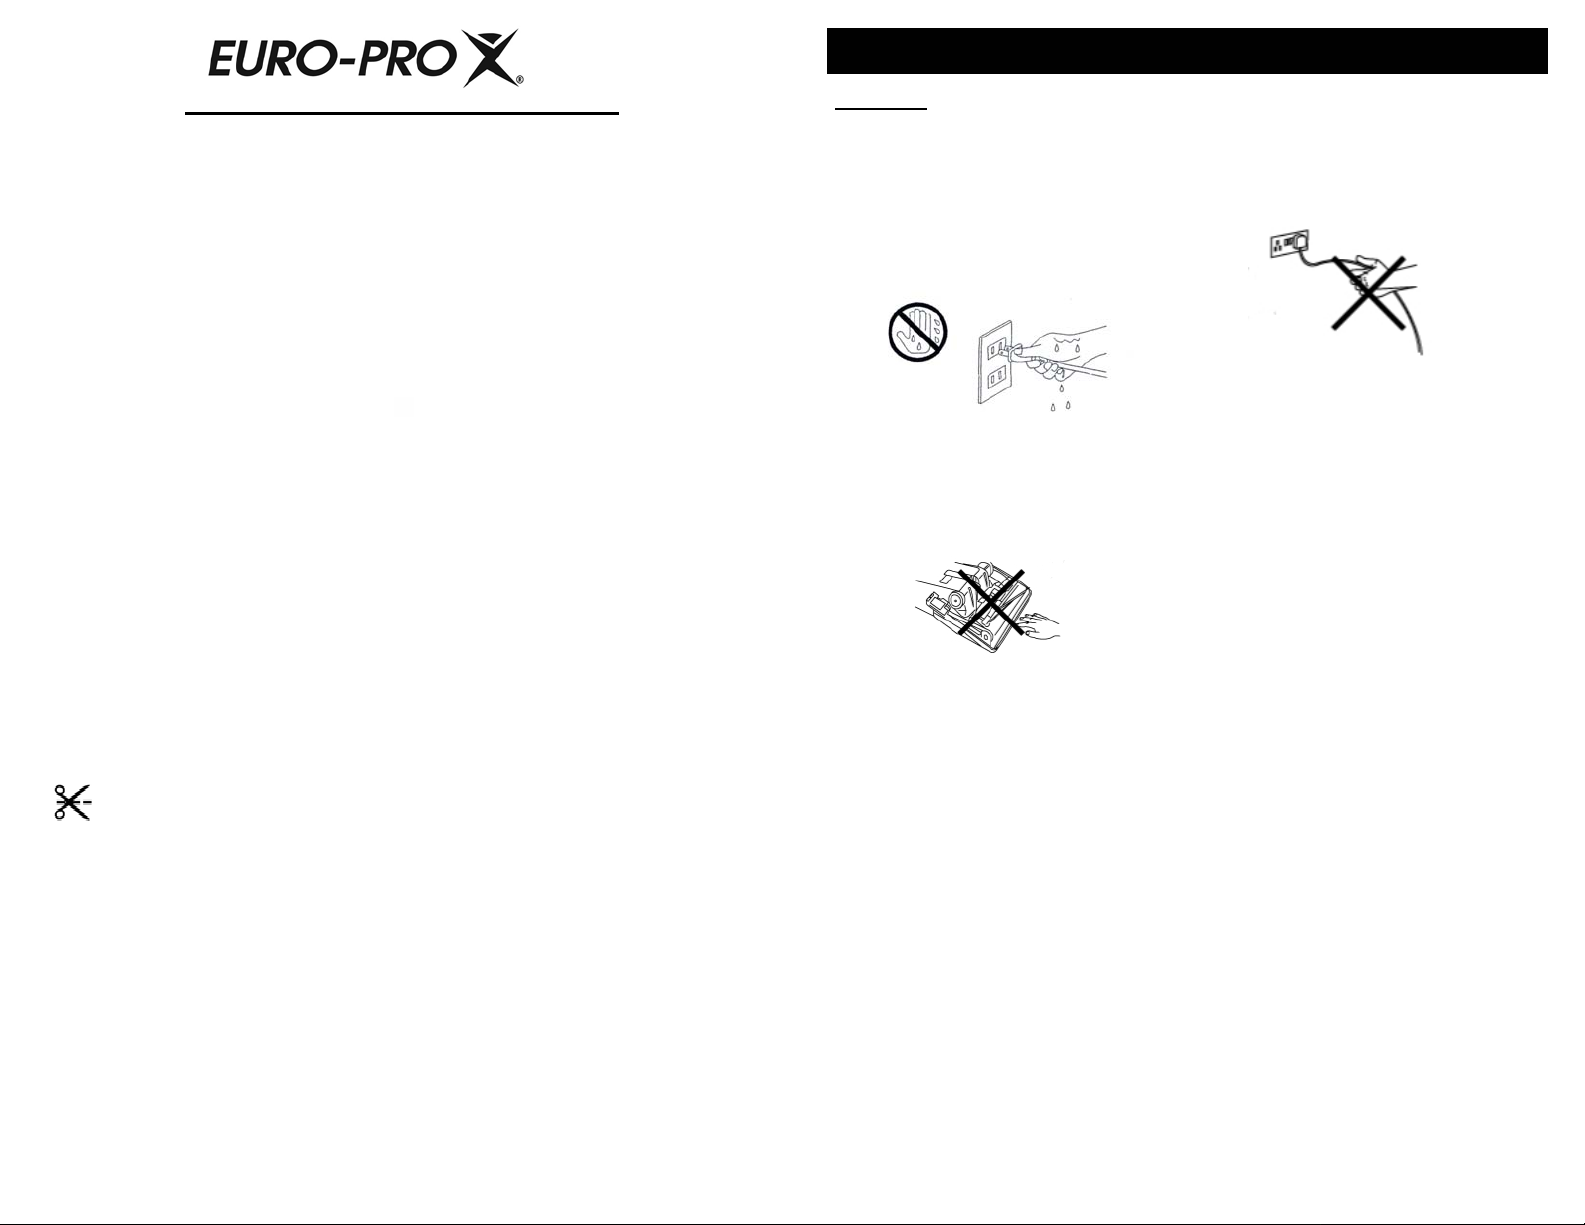
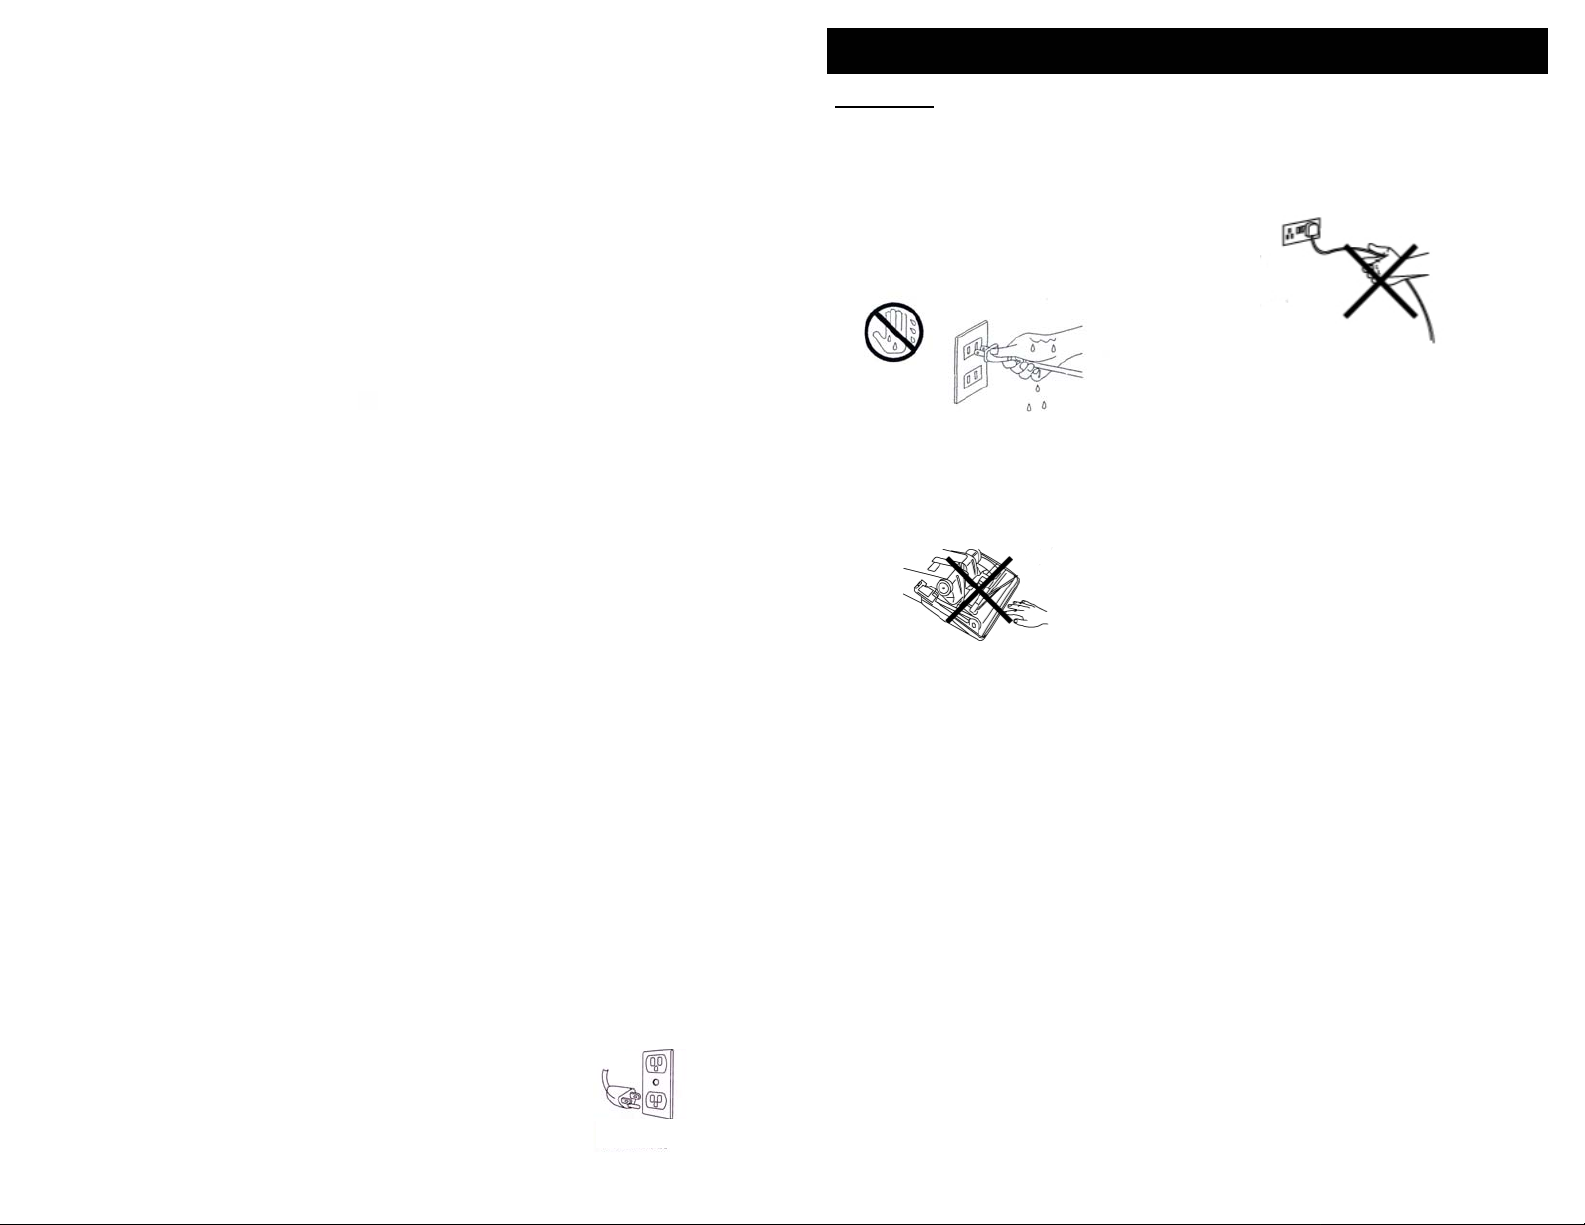
1. Do not operate the vacuum
cleaner too close to heaters,
or radiators.
2. Before inserting the power plug
into the wall outlet, make sure that
your hands are dry.
3. Do not vacuum any liquids.
4. Keep hair, loose clothing, fingers,
feet and all parts of body away from
openings, rotating agitator and other
moving parts.
5. When pulling out the power plug
from the wall outlet, pull the plug
not the power cord.
6. Do not pick up anything that is
burning or smoking such as
cigarettes, matches or hot ashes.
7. Do not run appliance over power
cord.
8. Do not use without outer bag
and HEPA dust bag in place.
9. Before you start vacuuming,
make sure to remove large or
sharp objects that might damage
the vacuum.
S’il vous plaît, veuillez remplir et poster la carte d’enregistrement du produit àl’intérieur des dix (10) jours suivant
l'achat. L’enregistrement nous permettra de vous contacter dans le cas fort improbable d’un rappel ou d’un avis
de sécurité. En retournant cette carte, vous reconnaissez avoir lu et compris les instructions pour l’usage ainsi
que les avertissements des instructions qui accompagnent le produit.
Canada: EURO-PRO Operating LLC, 4400 Bois Franc, St. Laurent, Québec H4S 1A7
Modèles UVC805-UVC805B-UVC805C
______________________________________________________________________________
Modèle de l’Appareil
______________________________________________________________________________
Date d’Achat Nom du magasin
______________________________________________________________________________
Nom du Propriétaire
______________________________________________________________________________
Adresse Ville Prov. Code Postal
Imprimé en Chine
37
2
Page 4

GETTING TO KNOW YOUR
COMMERCIALLY RATED UPRIGHT VACUUM
1. Soft Grip Handle
2. Off/On/Turbo Power Switch
3. Outer Bag
4. Bag Tension Bar
5. Power Nozzle
6. Xenon Headlight (not shown)
7. Furniture Guard
8. Agitator (Not shown)
9. Interconnecting Cord
10. Handle Release
11. Swivel Steering Lock
12. Interconnecting Cord Clamp
13. Lower Cord Holder
14. Lower Tube
15. Bag Inlet Collar
16. Carry Handle
17. Bag Inlet
18. Power Cord Quick
Release Holder
Aspirateur Balais de
Classification Commerciale
Pour Commander des Accessoires de Remplacement
pour les Modèles UVC805-UVC805B-UVC805C
PIÈCE #ITEM
XSB800Sacs, ensemble de 3
XSL800Courroies, ensemble de 2
124FMIAmpoules, ensemble de 2
Appelez au : 1 (866) 826-6941
Du lundi au vendredi de 8 h 30 – 17 h 00 heure de l’est
ou
visitez notre site Internet au : www.sharkvac.com
Technical Specifications
Voltage: 120V., 60Hz.
Power: 3.6 Amps
Note: Illustrations may differ from actual unit.
3
POUR OBTENIR UN SUPPORT TECHNIQUE
pour les modèles UVC805-UVC805B-UVC805C
Appelez au : 1 (866) 826-6941
Du lundi au vendredi de 8 h 30 à 17 h 00 heure de l’est.
Veuillez Noter :
Pour obtenir une performance optimale, remplacez le sac HEPA au moins
une fois par mois, ou lorsque la succion semble réduite. Un remplacement
du sac HEPA régulièrement peut être requis, dépendant de l’usage que
vous en faites.
36
Page 5

RÉSOLUTION DE PROBLÈMES
OPERATING INSTRUCTIONS
Cet appareil a été inspecté complètement et était en bonne condition de marche quand
il a été envoyé de l’usine. Si un problème mineur se produit, il peut habituellement être
réglé assez facilement quand la cause est connue. Donc, cette liste est fournie pour
votre convenance.
SOLUTION POSSIBLECAUSE POSSIBLEPROBLÈME
L’aspirateur ne
fonctionne pas
L’aspirateur
n’aspire pas
L’agitateur ne
tourne pas
De la poussière
s’échappe de
l’aspirateur
1. N’est pas bien branché
dans la prise électrique
2. La poignée est en position
verticale et verrouillée.
3. Pas d’électricité da ns la
prise.
4. L’interrupteur n’est pas en
position de marche.
5. Le thermostat du moteur est
déclenché.
6. Le disjoncteur est
déclenché.
1. Le sac HEPA est rempli ou
bouché.
2. L’agitateur, le tube ou la
sortie du sac est bloqué.
3. Courroie cassée.
4. La poignée n’est pas
assemblée correctement.
5. Les brosses de l’agitateur
sont usées.
6. Les capuchons de
l’agitateur ne sont pas
installés de manière égale
des deux côtés.
7. Buse bouchée.
8. Blocage dans la sortie du
sac ou dans la partie
inférieure de la poignée.
1. Courroie cassée.
2. Courroie installée
incorrectement.
1. Le sac à poussière est
plein.
2. Le sac à poussière n’est
pas installé correctement.
3. Il y a un trou ou un
déchirement dans le sac à
poussière.
1. Branchez adéquatement.
2. Appuyez sur le déclencheur
de la poignée.
3. Réinitialisez le disjoncteur ou
remplacez le fusible.
4. Mettez l’interrupteur en
position de marche.
5. Attendez que le moteur
refroidisse.
6. Appuyez sur le bouton de
réinitialisation.
1. Remplacez le sac à poussière
HEPA.
2. Enlevez l’obstruction.
3. Remplacez la courroie
4. Relisez les instructions
d’assemblage et
désassemblez et réassemblez
si nécessaire.
5. Remplacez l’agitateur.
6. Réinstallez l’agitateur.
7. Enlevez l’agitateur et vérifiez
s’il n’y a pas de blocage dans
la buse.
8. Enlevez le sac de poussière.
Ensuite, enlevez l’entrée du
sac sur le tuyau et vérifiez s’il
y a des blocages à l’intérieur
de l’entrée du sac et du tube
inférieur de la poignée.
1. Remplacez la courroie
2. Réinstallez la courroie.
1. Remplacez le sac à poussière.
2. Relisez les instructions
d’installation du sac de
poussière.
3. Replacez le sac à poussière.
Assembling Your Vacuum Cleaner
NOTE: Do not plug the power cord into
an electrical outlet until the vacuum is
fully assembled.
1. Carefully unpack all the
components and set aside the
packaging.
2. Place the power nozzle on a solid
flat surface and make sure the
lower tube is in the vertical and
locked position.
3. Slide the bag inlet onto the lower
tube. (Fig.1) Push the o-ring up until
it rests under the bag inlet, then
twist the bag inlet
collar counter clockwise
until tightened.
DO NOT over-tighten.
(Fig. 2 and 3)
Fig. 1
O-ring
Fig. 2
4. Attach the bag retention spring
to the outer bag’s tension bar.
(Fig. 4)
Bag
Retention
Spring
Fig. 4
Handle Assembly
1. Remove the handle screw and
then insert the handle into the
connector assembly. (Fig. 5)
Fig. 5
2. Take care to ensure that the
screw holes are aligned and then
insert the screw. Carefully
tighten the screw using a screw
driver. (Fig. 6)
CAUTION:
tightening could strip the screw holes.
Do not operate the vacuum without
the handle screw in place.
Do not over tighten. Over
Turn
counter
clockwise
Fig. 3
35
4
Fig. 6
Page 6
OPERATING INSTRUCTIONS
INSTRUCTIONS D’UTILISATION
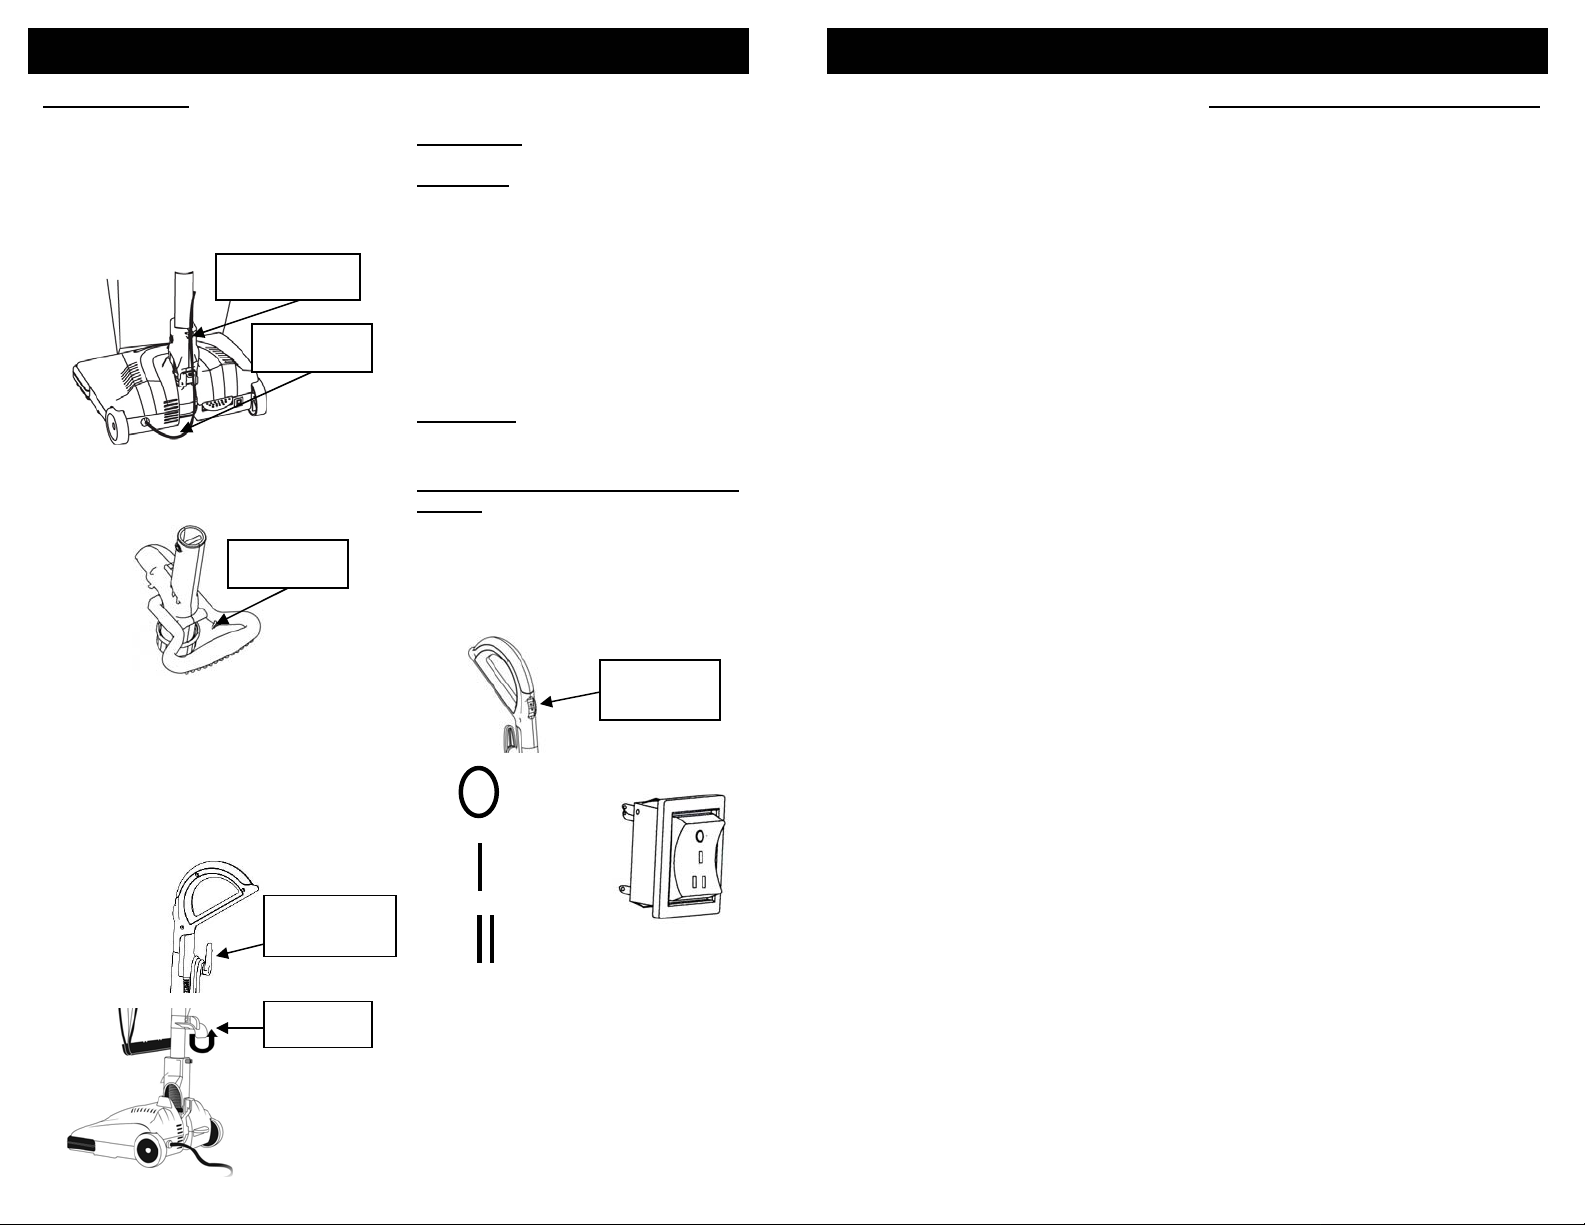
Cord Assembly
1. The interconnecting cord emerges
from the rear left side of the power
nozzle and connects to the handle
underneath the power cord quick
release holder. Press the
interconnecting cord into the cord
clamp above the steering lock.
(Fig. 7)
2. Press the interconnecting cord
into the cord clamp located on the
inside of the carrying handle.
(Fig. 8)
3. Make sure that the quick release
power cord holder is in the upright
position.
4. Remove the wire tie from the power
cord
5. Wrap the cord into place by winding it
around the power cord quick release
holder and the lower cord holder.
(Fig. 9 and 10)
Fig. 9
Interconnecting
Cord Clamp
Interconnecting
Cord
Fig. 7
Interconnecting
Cord Clamp
Fig. 8
Quick
Release Power
Cord Holder
Lower Cord
Holder
Fig. 10
6. To unwrap the cord, turn the quick
release cord holder to the left or right.
WARNING: Do not plug in if the power
switch is in the “I” or “II” position.
CAUTION: Make sure a disposable
HEPA dust bag is in place before
operating. DO NOT operate the vacuum
cleaner without a HEPA dust bag.
7. Plug the power cord into an electrical
outlet and press the On/Off/Turbo
power switch when ready to operate.
NOTE: Your vacuum will not turn on
when the handle is in the upright and
locked position. Press the handle release
and then turn on your vacuum using the
power switch.
WARNING: Avoid leaving the vacuum in
one place for an extended period of time,
particularly on thick carpet.
The Off/On/Turbo Fingertip Power
Switch
The fingertip power switch has two
speed settings. Position "I” should be
used on area rugs, bare floors and
carpets. Position “II” is a higher power
and is intended for deeper carpet
cleaning on full sized carpets.
Off/On/Turbo
Fingertip
Power Control
Fig. 11
= OFF
ON
= (Bare Floors,
Area Rugs,
Carpets)
Turbo
=
(Carpets)
1. Push the power switch down. The
power switch will click into the “I”
position. This turns the vacuum
on.
2. Push the power switch from
position “I” to position “II” for turbo
power.
3. Push the power switch up into the
“O” position to turn the vacuum off.
5
Fig. 12
7. Enlevez le bulbe de lumière en tirant
fermement mais délicatement sur la
douille.
8. Replacez le nouveau bulbe en le
poussant fermement à l’intérieur de
la douille.
9. Replacez le couvercle de plastique
sur la buse d’aspir ation et retournez
l’aspirateur sur le côté afin d’avoir
accès à la plaque inférieure.
10. Resserrez soigneusement les vis en
utilisant un tournevis. NE serrez
PAS trop.
Entreposer Votre Aspirateur Balais
1. Lorsque vous avez terminé de passer
l’aspirateur, mettez votre appareil en
position d’arrêt en déplaçant
l’interrupteur.
2. Appuyez sur la poignée de
l’aspirateur pour la remettre en
position verticale et verrouillée.
3. Enroulez le cordon d’alimentation
autour de supports de dégagement
rapide et de la poignée de transport.
4. Attachez la pince en « U » du cordon
d’alimentation sur le cordon enroulé.
34
Page 7

INSTRUCTIONS D’UTILISATION
OPERATING INSTRUCTIONS
Fonctionnement du Thermostat de
Protection
Votre aspirateur est équipé d'un thermostat
protégeant le moteur. Si votre aspirateur
venait qu’à surchauffer, à cause d’un sac
HEPA rempli, d’un blocage ou d’un blocage
d’agitateur, votre aspirateur se mettrait en
arrêt automatiquement. Si cela se
produisait:
1. Assurez-vous que votre aspirateur est
en position d’arrêt.
2. Débranchez le cordon d’alimentation
de la prise électrique.
3. Vérifiez le sac HEPA et assurez-vous
qu’il n’est pas rempli ou bouché. (Voir
“Remplacement du sac HEPA”).
Remplacez le sac si nécessaire.
4. Tournez l’aspirateur sur le côté afin de
pouvoir accéder à la section inférieure.
5. Enlevez la plaque inférieure. (Voir
“Changement de la Courroie de
l’Aspirateur” pour les instructions.)
6. Vérifiez les agitateurs pour enlever la
poussière, les débris ou les blocages.
7. Tournez les agitateurs avec vos mains
pour vous assurer qu’ils peuvent
tourner facilement.
8. Tournez la bague de l’entrée du sac
dans le sens contraire des aiguilles
d’une montre pour le dévisser.
9. Glissez l’entrée du sac à l’extérieur du
tube inférieur de la poignée.
10. Vérifiez le tube inférieur de la poignée
et l’entrée du sac pour voir s’il y a des
obstructions.
11. Pour réassembler la poignée, référezvous à la section « Assemblage de
votre Aspirateur ».
12. Attendez 45 minutes afin que le moteur
soit complètement refroidi avant de
remettre l’aspirateur en marche.
13. Une fois les 45 minutes écoulées,
branchez le cordon d’alimentation et
mettez l’aspirateur en marche de
nouveau.
REMARQUE: Si votre aspirateur
éprouvait des difficultés même après avoir
suivi les instructions ci-dessus, veuillez
contacter le Service à la Clientèle au
1 (866) 826-6941.
Changement de la Lumière
Avertissement: Pour réduire les
risques de décharge électrique, le
cordon d’alimentation doit être
débranché de la prise électrique avant
de tenter de changer le bulbe de
lumière ou de faire toute autre
maintenance ou vérification afin de
résoudre un problème.
1. Mettez l’aspirateur en arrêt.
Appuyez sur l’interrupteur afin de
le mettre en position d’arrêt.
2. Débranchez le cordon
d’alimentation de la prise électrique.
3. Mettez l’aspirateur sur le côté afin
de pouvoir accéder à la plaque
inférieure.
4. À l’aide d’un tournevis, enlevez les
trois vis. (Fig. 24)
Vis
Fig. 24
5. Retournez délicatement l’aspirateur
afin de le remettre sur ses roues.
6. Soulevez délicatement le couvercle
de plastique sur la buse
d’aspiration. (Fig. 25)
Fig. 25
The Swivel Steering Feature
Your vacuum’s unique swivel steering
allows you to glide effortlessly around
furniture to easily clean every corner of
the room.
Enabling the Swivel Steering
Feature
To disengage the swivel steering
feature:
1. Push the tab upward into the
locked position. (Fig. 13) This will
prevent the power nozzle from
swiveling to the right or left when
the unit is in use.
Fig. 14
Fig. 13
2. To unlock the swivel steering
feature, push the tab down (Fig. 14)
and the power nozzle will swivel
easily once again.
Using Your Commercially Rated
Upright Vacuum
NOTE: Your vacuum will not turn on
when the handle is in the upright and
locked position.
1. Turn the quick release cord holder
either right or left 180 degrees to
release the power cord.
2. Plug the power cord firmly into a
120V electrical outlet.
3. Place your foot on the handle release
pedal and pull the handle back gently.
4. Push the power switch to the desired
position, either the “I” or “II” position.
CAUTION: To avoid accidental carpet
damage, DO NOT leave your vacuum in
one stationary position when vacuuming.
Keep the vacuum moving while it is
operating.
The HEPA Dust Bag
Tips for optimal performance:
• The disposable HEPA dust bag
should be changed often.
• The use of powdered carpet
freshener can decrease the
efficiency of the HEPA dust bag by
clogging it and preventing the flow
of air.
• Hard objects, such as pins, broken
glass and paper clips, should be
picked up off the floor before
vacuuming.
• Use only genuine Shark HEPA dust
bags.
Changing the HEPA Dust Bag
1. Ensure that your vacuum is turned
off.
2. Place vacuum handle in the upright
position.
3. Unplug the power cord from the
electrical outlet.
4. Unzip the outer bag. (Fig. 15)
Bag
Zipper
Fig. 15
5. To release the HEPA dust bag,
press on the bag locking tab.
(Fig. 16) To remove the HEPA dust
bag, firmly grip the HEPA dust bag
collar and lift it off of the bag inlet.
Remove carefully in order to prevent
dust and dirt from escaping.
Bag
Locking
Tab
Dust
Bag
Collar
33
Fig. 16
6
Page 8

OPERATING INSTRUCTIONS
INSTRUCTIONS D’UTILISATION
6. Pull the cardboard tab on the HEPA
dust bag collar. (Fig. 17 and 18)
This will close the opening of the
HEPA dust bag, to help prevent
spillage.
Open Closed
Fig. 17 Fig. 18
7. Discard the HEPA dust bag.
NOTE: If the HEPA bag becomes full
or clogged with fine dust, air may not be
able to pass through the bag. This can
effect the performance of your vacuum.
We recommend that you change your
HEPA bag once a month, depending on
usage.
Installing a HEPA Dust Bag
1. Place the HEPA bag collar over the
bag inlet. Position the HEPA bag
collar into the tabs at the bottom of
the bag holder. Then rotate over the
bag inlet. (Fig. 19)
Locking
Tab
Bag
Tabs
Fig. 19
2. Press the top of the HEPA bag collar
onto the bag inlet. The collar will
‘snap’ into place as the bag locking
tab locks onto the HEPA dust bag
collar.
3. Ensure that the entire HEPA dust bag
is inside the outer bag before closing
the outer bag.
4. Ensure the outer bag’s zipper is
completely closed.
Inlet
Changing the Vacuum Belt
Occasionally, the power nozzle drive
belt will require changing. The
frequency with which you will need to
change the belt depends on the amount
of usage.
If the agitator does not engage when the
vacuum is turned on, perform the
following:
CAUTION: To reduce the risk of
electric shock, the power cord must be
disconnected from the electrical outlet
before you perform maintenance.
1. Unplug the vacuum and turn it over
exposing the bottom plate.
2. Press down on the three holding
tabs. This will release the bottom
plate. (Fig. 20 and 21)
Bottom
Plate
Fig. 20
Holding Tabs
Fig. 21
3. Carefully remove any debris from
the belt and agitator area. (Fig. 22)
Agitator
Belt
4. Agrippez l’agitateur avec votre
main et soulevez le côté gauche
afin de le sortir de la fente. Ensuite,
soulevez le côté droit. Si la
courroie n’est pas brisée, il y aura
une certaine tension sur les
agitateurs.
5. Enlevez la courroie usée ou brisée,
ainsi que tous les morceaux de la
courroie et les débris avant
d’installer la nouvelle courroie.
6. Positionnez la nouvelle courroie
par-dessus l’arbre de conduite du
moteur et ensuite par-dessus
l’agitateur. (Fig. 22)
7. Insérez le côté droit de l’agitateur
en glissant l’extrémité de l’agitateur
dans la fente. Ensuite, utilisez vos
deux mains pour appuyer
fermement sur le côté gauche de
l’agitateur afin qu’il pénètre dans la
fente.
8. Assurez-vous que la courroie est
bien centrée par-dessus la partie
surélevée de l’agitateur. Utilisez
votre main pour faire tourner
l’agitateur. Il devrait pouvoir
bouger facilement.
9. Replacez la plaque inférieure en
alignant les onglets de la plaque à
l’avant de la buse d’aspiration.
10. Appuyez sur la plaque inférieure
pour la remettre en place. Les
onglets de retenue de la plaque
inférieure se s’enclencheront
lorsque vous appuierez sur la
plaque. Assurez-vous que les trois
onglets sont en place.
11. Branchez le cordon d’alimentation
et appuyez sur l’interrupteur pour le
mettre en position de marche.
12. Si les agitateurs ne bougent pas ou
que l’aspirateur ne démarre pas,
veuillez appeler le Service à la
Clientèle au numéro sans frais
1 (866) 826-6941.
REMARQUE: Pour vous assurer
d’une capacité de nettoyage optimale,
la courroie de l’aspirateur devrait être
inspectée au moins une fois par année.
La courroie devrait être remplacée si
elle est étirée, craquée ou usée.
Le Bouton de Réinitialisation
Votre aspirateur est pourvu d’un
disjoncteur interne, qui vous protège ainsi
que votre aspirateur contre les
surtensions électriques. Si le disjoncteur
est déclenché, le bouton de
réinitialisation va se déplacer afin
d’indiquer que l’aspirateur doit être
réinitialisé.
Voici ce que vous devez faire:
1. Assurez-vous que votre aspirateur
est en position d’arrêt. Débranchez
cordon d’alimentation de la prise
électrique.
2. Mettez l’aspirateur sur le côté afin de
pouvoir accéder à la plaque
inférieure.
3. Enlevez la plaque inférieure. (Voir
“Changement de la Courroie de
L’Aspirateur”).
4. Vérifiez les agitateurs et enlevez tout
blocage ou débris qui pourraient
empêcher l’agitateur de fonctionner
correctement.
5. Inspectez la courroie pour tout signe
d’usure ou de dommage et
remplacez-la si nécessaire.
6. Tournez les agitateurs avec vos
mains pour vous assurer qu’ils
peuvent tourner facilement.
7. Replacez la plaque inférieure. (Voir
“Changement de la Courroie de
L’Aspirateur”.)
8. Appuyez sur le bouton de
réinitialisation situé à côté du
déclencheur de poignée. Ceci
réinitialisera le disjoncteur. (Fig. 23)
9. Branchez le cordon d’alimentation
dans la prise électrique.
10. Appuyez sur l’interrupteur afin de
mettre en marche l’aspirateur.
REMARQUE: Si votre aspirateur
éprouvait des difficultés même après
avoir suivi les instructions ci-dessus,
veuillez contacter le Service à la Clientèle
au 1 (866) 826-6941.
Touche de
réinitialisation
Motor Drive
Shaft
7
Fig. 22
32
Fig. 23
Page 9

INSTRUCTIONS D’UTILISATION
OPERATING INSTRUCTIONS
6. Tirez sur l’onglet de carton de la
bague du sac de poussière HEPA.
(Fig. 17 et 18) Ceci fermera
l’ouverture du sac de poussière
HEPA afin de prévenir les dégâts.
Ouvert Fermé
Fig. 17 Fig. 18
7. Jetez le sac de poussière HEPA.
REMARQUE: Si le sac HEPA est
plein ou bouché par de la fine
poussière, il se peut que l’air ne puisse
circuler à travers le sac. Ceci peut
affecter les performances de votre
aspirateur. Nous recommandons que
vous changiez votre sac HEPA une
fois par mois, tout dépendant de votre
usage.
Installer un Sac de Poussière HEPA
1. Placez la bague du sac HEPA pardessus l’entrée du sac. Positionnez la
bague du sac HEPA sur les onglets
au bas du support du sac. Ensuite
tournez vers l’entrée du sac. (Fig. 19)
Onglet
du sac
L’entrée
du sac
Fig. 19
2. Appuyez sur le dessus de bague du
sac HEPA pour l’introduire dans
l’entrée du sac. La bague
s’enclenchera en place lorsque les
onglets du sac se verrouilleront sur la
bague du sac de poussière HEPA.
3. Assurez-vous que le sac à poussière
HEPA est entièrement à l’intérieur du
sac externe avant de fermer le sac
externe.
4. Assurez-vous que la fermeture éclair
du sac externe est complètement
fermée.
Onglets
Changement de la Courroie de
l’Aspirateur
La courroie de la buse d’aspiration
nécessitera d’être changée
occasionnellement. La fréquence à
laquelle vous devez la changer dépendra
de l’usage.
Si l’agitateur ne s’engage pas lorsque
l’aspirateur est en marche, faites les
étapes suivantes:
AVERTISSEMENT: Pour réduire le
risque de décharge électrique, le cordon
d’alimentation doit être débranché avant
de faire de l’entretien.
1. Débranchez l’aspirateur et tournez-le
sur le côté afin d’avoir accès à la
plaque inférieure.
2. Appuyez sur les trois onglets de
maintenue. Ceci dégagera la plaque
inférieure. (Fig. 20 et 21)
Plaque
Inférieure
Fig. 20
Onglets de
Maintenue
Fig. 21
3. Enlevez délicatement tous débris
provenant de la courroie dans la
zone de l’agitateur. (Fig. 22)
Agitateur
Courroie
Fig. 22
31
Conduite de
moteur
4. Grip the agitator with your hand
and lift the left side out of its slot.
Then, lift the right side out. If the
belt is not broken, there will be
tension on the agitator.
5. Remove the worn or broken belt,
and any pieces of broken belt, or
debris, before installing the new
belt.
6. Carefully loop the new belt over the
motor drive shaft and then over the
agitator. (Fig. 22)
7. Insert the right side of the agitator
by sliding the agitator’s end cap
into its slot. Then, use both hands
to firmly press the left-side agitator
end cap into its slot.
8. Make sure the belt is centered over
the raised area on the agitator.
Use your hand to turn the agitator.
It should move easily.
9. Replace the bottom plate by
aligning the bottom plate’s tabs at
the front of the power nozzle.
10. Press the bottom plate into place.
The bottom plate’s holding tabs will
‘snap’ as you press down on the
plate. Check to make sure all three
tabs are locked into place.
11. Plug in the power cord an d press
the power switch to the on position.
12. If the agitator does not move or the
vacuum does not start, please call
Customer Service, toll free, at
1(800) 798-7398.
NOTE: To ensure maximum cleaning
efficiency, the vacuum belt should be
carefully inspected at least once a year.
If the belt is stretched, cracked, or worn
down, then it should be replaced.
The Reset Button
Your vacuum is equipped with a circuit
breaker, which protects both you and the
vacuum from electrical surges. If the
circuit breaker is tripped, the reset button
will flip to indicate that the vacuum must
be reset.
Here is what to do:
1. Ensure that your vacuum is turned
off. Unplug the power cord from the
electrical outlet.
2. Turn the vacuum over to expose the
bottom plate.
3. Remove the bottom plate. (See
“Changing the Vacuum Belt”.)
4. Inspect the agitator and remove any
blockage or debris that may be
preventing the agitator from
operating.
5. Inspect the belt for any signs of
wear or damage and replace if
necessary.
6. Turn the agitator with your hand in
order to make sure it can rotate
easily.
7. Replace the bottom plate. (See
“Changing the Vacuum Belt”.)
8. Press the reset button located next
to the handle release. This will
reset the circuit breaker. (Fig. 23)
9. Plug in the power cord to the
electrical outlet.
10. Press the power switch to start the
vacuum.
NOTE: If your vacuum fails to operate
after you have carefully followed the
instructions above, please call Customer
Service at 1(800) 798-7398.
Reset
Button
Fig. 23
8
Page 10

OPERATING INSTRUCTIONS
INSTRUCTIONS D’UTILISATION
Thermostat Protection Feature
Your vacuum is equipped with a motor
protective thermostat. If your vacuum
overheats, due to a full HEPA dust bag,
clog in the unit, or agitator blockage,
your vacuum will automatically shut off.
Should this occur:
1. Ensure that your vacuum is turned
off.
2. Unplug the power cord from the
electrical outlet.
3. Check the HEPA dust bag and
make sure it is not full or clogged.
(See “Replacing the HEPA Bag”.)
Replace the dust bag if necessary.
4. Turn the vacuum over in order to
expose the bottom plate.
5. Remove the bottom plate. (See
“Changing the Vacuum Belt” for
instructions.)
6. Check the agitator for dirt, debris,
or blockages.
7. Turn the agitator with your hand
and make sure it can rotate easily.
8. Turn the bag inlet collar in a
counter-clockwise direction until
completely unscrewed.
9. Slide the bag Inlet off of the lower
handle tube.
10. Check the lower handle tube and
bag inlet for blockages.
11. To re-assemble the handle, refer to
“Assembling Your Vacuum
Cleaner”.
12. Wait for 45 minutes for the motor
to cool before turning the vacuum
on again.
13. After 45 minutes, plug in the power
cord and turn on the vacuum
again.
NOTE: If your vacuum fails to operate
after you have carefully followed the
instructions above, please call
Customer Service at 1(800) 798-7398.
Changing the Headlight Bulb
Warning: To reduce the risk of
electric shock, the power cord must be
disconnected from the electrical outlet
before attempting to change the
headlight bulb or performing any other
maintenance/trouble shooting checks.
1. Turn off the vacuum. Press the
power switch into the off position.
2. Unplug the power cord from the
electrical outlet
3. Turn the vacuum over, exposing
the bottom plate.
4. With a screw driver, remove the
three screws. (Fig. 24)
Screws
Fig. 24
5. Carefully turn the vacuum over
onto it’s wheels.
6. Carefully lift off the hard plastic top
of the power nozzle. (Fig. 25)
Fig. 25
7. Remove the light bulb by firmly but
carefully pulling it out of the socket.
8. Replace the new bulb by firmly
pressing it into the socket.
9. Replace the plastic top of the power
nozzle and turn the vacuum over
again, exposing the bottom plate.
10. Replace the thr ee screws using a
screw driver. DO NOT over-tighten.
La Conduite Pivotante
La conduite pivotante de votre
aspirateur vous permet de glisser sans
effort autour des meubles afin de
nettoyer tous les coins de la pièce.
La Conduite Pivotante
Afin de désenclencher la conduite
pivotante:
1. Appuyez sur l’onglet vers le haut
en position verrouillée. (Fig. 13)
Ceci empêchera la buse
d’aspiration de tourner à gauche et
à droite lors de l’utilisation.
Fig. 13
Fig. 14
2. Pour enclencher la conduite
pivotante,appuyez sur l’onglet vers le
bas (Fig. 14) et la buse d’aspiration
pourra pivoter de nouveau.
Utilisation de Votre Aspirateur
Balais
REMARQUE: Votre aspirateur ne se
mettra pas en marche si la poignée est en
position verticale et verrouillée.
1. Tournez le support du cordon à
dégagement rapide de 180° d’un côté
ou de l’autre pour libérer le cordon.
2. Branchez le cordon d’aliment ation
dans une prise électrique de 120 volts.
3. Placez votre pied sur la pédale de
dégagement de la poignée et tirez sur
la poignée délicatement.
4. Poussez sur l’interrupteur vers
l’ajustement désirez, soit la position
«I» ou la position «II».
AVERTISSEMENT
endommagement du tapis, NE laissez
PAS votre aspirateur au même endroit
lorsque vous l’utilisez. Gardez l’aspirateur
en mouvement lorsqu’elle est en fonction.
: Pour éviter tout
Sac à Poussière HEPA
Trucs pour une performance optimale:
• Le sac jetable HEPA devrait être
changé régulièrement.
• L’usage de déodorant de tapis en
poudre peut diminuer l’efficacité du
sac HEPA en le bouchant et en
empêchant la circulation de l’air.
• Les objets durs, comme les épingles,
le verre cassé, les trombones à papier
devraient être ramassés avant de
passer l’aspirateur.
• Utilisez seulement les sacs HEPA de
Shark.
Changement du Sac à Poussière
HEPA
1. Assurez-vous que votre aspirateur
est en position d’arrêt.
2. Placez la poignée de l’aspirateur en
position verticale.
3. Débranchez le cordon d’alimentation
de la prise électrique.
4. Glissez la fermeture éclair du sac
extérieur. (Fig. 15)
Sac
Fermeture
éclair
Fig. 15
5. Appuyez su l’onglet du sac afin de
libérer le sac à poussière HEPA.
(Fig. 16) Pour enlever le sac à
poussière HEPA, tenez fermement
la bague du sac HEPA (Fig. 16) et
soulevez-le de l’entrée du sac.
Enlevez-le doucement afin de ne
pas échapper de poussière et de
saleté.
Onglet
du sac
Bague du
sac de
poussière
Fig. 16
9
30
Page 11

INSTRUCTIONS D’UTILISATION
OPERATING INSTRUCTIONS
Assemblage du Cordon
1. Le cordon de raccordement émerge du
côté gauche à l’arrière de la buse
d’aspiration et se raccorde à la poignée
sous le support de dégagement rapide
du cordon d’alime ntation. Appuyez sur
le cordon de raccordement à l’intérieur
de la pince du cordon située au-dessus
du verrou du pivot. (Fig. 7)
Pince du cordon
de raccordement
Cordon de
raccordement
Fig. 7
2. Insérez le cordon de
raccordement à
l’intérieur de la
pince situé à
l’intérieur de la
poignée de
transport. (Fig. 8)
3. Assurez-vous que
le support de
dégagement rapide du cordon
d’alimentation est aligné vers le haut.
4. Enlevez l’attache pour fil situé sur le
cordon d’alimentation.
5. Enroulez le cordon en le tortillant
autour du support de dégagement
rapide du cordon d’alimentation et le
crochet inférieur du cordon
d’alimentation. (Fig. 9 et 10)
Fig. 9
Pince du
cordon de
raccordement
Support de
dégagement
rapide du cordon
d’alimentation
Crochet inférieur
du cordon
d’alimentation
Fig. 10
Fig. 8
6. Pour dérouler le cordon d’alimentation,
tournez le crochet du cordon à
dégagement rapide vers la gauche ou
vers la droite.
AVERTISSEMENT: Ne branchez pas le
cordon d’alimentation si l’interrupteur est
en position «I» ou «II».
AVERTISSEMENT: Assurez-vous qu ’il
y a un sac HEPA en place avant d’utiliser
l’aspirateur. N’utilisez PAS l’aspirateur
sans un sac HEPA.
7. Branchez le cordon d’aliment ation
dans une prise électrique et appuyez
sur l’interrupteur Marche/Arrêt/Turbo
lorsque vous êtes prêt à l’utiliser.
REMARQUE: Votre aspirateur ne se
mettra pas en marche si la poignée est en
position verticale et verrouillée. Appuyez
sur le bouton de dégagement de la
poignée et mettez en marche votre
aspirateur en utilisant l’interrupteur.
AVERTISSEMENT: Éviter de laisser
l’aspirateur au même endroit pour une
longue période de temps, particulièrement
sur du tapis épais.
Interrupteur Arrêt/Marche/Turbo
L’interrupteur possède deux
ajustements de vitesse. La position «I»
devrait être utilisé sur les tapis, les
planchers sans tapis et les moquettes.
La position «II» possède plus de
puissance et est conçue pour les tapis
plus épais.
Interrupteur
Arrêt/Marche/Turbo
Fig. 11
= ARRÊT
Marche
= (Planchers sans
tapis, tapis et
moquettes)
= Turbo
(Tapis plus épais)
1. Poussez l’interrupteur vers le bas.
L’interrupteur sera en position «I».
Ceci mettra l’aspirateur en marche.
2. Poussez l’interrupteur de la position «I»
vers la position «II» pour la puissance
turbo.
3. Poussez l’aspirateur en position «O»
pour arrêter l’aspirateur.
29
Fig. 12
Storing Your Upright Vacuum
1. When you are finished vacuuming,
turn the unit “Off” by pushing the
power switch to the “Off” position.
2. Press the vacuum handle forward
into the upright and locked position.
3. Wrap the power cord around the
quick release holder and the
lower cord holder.
4. Attach the u-shaped power cable
clamp, located on the plug, to the
wrapped cord.
PROBLEM SOLVING
This appliance was inspected thoroughly and was in good operating cond ition when it
was shipped from the factory. If a minor problem occurs, it usually can be solved quite
easily when the cause is found. Therefore, this checklist is provided for your
convenience.
PROBLEM POSSIBLE CAUSE POSSIBLE SOLUTION
1. Plug in firmly.
2. Press on the handle release.
3. Reset household circuit breaker
or replace fuse.
4. Push power to on position.
5. Unplug the power cord and let
the motor cool down for about
45 minutes.
6. Press the reset button.
1. Change HEPA dust bag.
2. Remove obstruction.
3. Replace belt.
4. Review assembly instructions
and disassemble/reassemble as
necessary.
5. Replace agitator.
6. Re-install agitator.
7. Remove agitator and check
nozzle for blockages.
8. Remove the dust bag. Then
remove the bag inlet from the
hose tube and check for
blockages within the bag inlet
and lower handle tube.
1. Replace belt.
2. Re-install belt.
1. Replace dust bag.
2. Review dust bag installation
instructions.
3. Replace dust bag.
Cleaner Won’t
Run
Cleaner Won't
Pick Up
Agitator Does
Not Turn
Dust
Escaping
from Vacuum
1. Not properly plugged into
wall outlet.
2. The handle is in the upright
and locked position.
3. No electricity in wall outlet.
4. Power switch not turned to
on position.
5. Motor thermostat tripped.
6. Circuit breaker tripped.
1. Full or clogged HEPA dust
bag.
2. Clogged agitator, tube, or
bag inlet.
3. Broken belt.
4. Handle not assembled
properly.
5. Agitator bristles are worn
down.
6. Agitator caps are not
installed evenly on both
sides.
7. Clogged power nozzle.
8. Clog in the bag inlet or
lower handle.
1. Broken belt.
2. Belt installed incorrectly.
1. Dust bag is full.
2. Dust bag is not installed
correctly.
3. There is a hole or puncture
in the dust bag.
10
Page 12

INSTRUCTIONS D’UTILISATION
Commercially Rated
Upright Vacuum
TO ORDER REPLACEMENT ACCESSORIES
for Models UVC805C-UVC805-UVC805B
PART #ITEM
XSB800Dust Bag, 3-pack
XSL800Belts, 2-pack
124FMIBulbs, 2-pack
Call: 1 (800) 798-7398
Monday to Friday 8:30 A.M. - 5:00 P.M. Eastern Standard Time
or
visit our website: www.sharkvac.com
FOR TECHNICAL SUPPORT
for Models UVC805C-UVC805-UVC805B
Call: 1 (800) 798-7398
Monday to Friday 8:30 A.M. - 5:00 P.M. Eastern Standard Time
Please Note:
Assemblage de Votre Aspirateur
REMARQUE: Ne branchez pas le
cordon d’alimentation de l’aspirateur
dans une prise murale avant que
l’aspirateur soit entièrement assemblé.
1. Sortez soigneusement toutes les
composantes de l’emballage.
2. Placez la buse d’aspiration sur une
surface plane et assurez-vous que le
tube inférieur de la poignée est en
position verticale et verrouillée.
3. Glissez l’entrée du sac à l’intérieur
du tube inférieur de la poignée.
(Fig.1) Soulevez l’anneau jusqu’à ce
qu’il soit appuyé sous l’entrée du
sac, ensuite faites tourner
la bague de l’entrée du
sac dans le sens
contraire des aiguilles
d’une montre.
(Fig. 2 et 3)
NE serrez
PAS trop.
Fig. 1
Anneau
Fig. 2
4. Attachez le ressort de rétention à la
barre de tension du sac. (Fig. 4)
Ressort
de rétention
du sac
Fig. 4
Assemblage de la Poignée
1. Enlevez les vis de la poignée et
insérez la poignée à l’intérieur de
l’assemblage de raccordement.
(Fig. 5)
Fig. 5
2. Prenez le temps de vous assurer
que les trous des vis sont bien
alignés et insérez les vis. Resserrez
soigneusement les vis en utilisant un
tournevis. (Fig. 6)
AVERTISSEMENT: Ne serrez pas
trop. Trop serrer pourrait entraîner
l’arrachement des filets à l’intérieur des
trous. N’utilisez pas l’aspirateur sans
que les vis de
la poignée
soient en
place.
To ensure peak performance, replaced the HEPA dust bag at least once
each month, or when suction appears to be reduced. Replacing the HEPA
dust bag frequently may be required, depending on level of usage.
11
Tournez dans le sens
contraire des aiguilles
Fig. 3
d’une montre
Fig. 6
28
Page 13

APPRENEZ À CONNAÎTRE VOTRE
ASPIRATEUR BALAIS DE CLASSIFICATION COMMERCIALE
1. Poignée
2. Interrupteur Arrêt/Marche/Turbo
3. Sac extérieur
4. Barre de tension du sac
5. Buse d’aspiration
6. Lumière au xénon (non illustrée)
7. Protection des meubles
8. Agitateur (non illustré)
9. Cordon de raccordement
10. Déclencheur de poignée
11. Verrouillage de la conduite
pivotante
12. Raccordement de la tête
pivotante
13. Crochet inférieur du cordo n
d’alimentation
14. Tube inférieur de la poignée
15. Bague de la sortie du sac
16. Poignée de transport
17. Entrée du sac
18. Support de dégagement rapi de du
cordon d’alimentation
Models
UVC805
UVC805B
UVC805C
Two (2) YEAR LIMITED WARRANTY
EURO-PRO Operating LLC warrants this product to be free from defects in material and
workmanship for a period of two (2) year from the date of the original purchase when used for
normal commercial or household use, subject to the following conditions, exclusions and
exceptions.
Should your appliance fail to operate properly while in use under normal commercial or household
conditions within the warranty period, return the complete appliance and accessories, freight
prepaid to:
U.S.: EURO-PRO Operating LLC, 94 Main Mill Street, Plattsburgh, N.Y., 12901
Canada: EURO-PRO Operating LLC, 4400 Bois Franc, St. Laurent, Quebec, H4S 1A7
If the appliance is found to be defective in material or workmanship, EURO-PRO Operating LLC
will repair or replace it free of charge. Proof of purchase date and $14.95 to cover the cost of
return shipping and handling must be included. *
Non-durable parts including, without limitation, drive belts, rotating brushes, bulbs, dust bags and
electrical parts which normally require replacement are specifically excluded from warranty.
The liability of EURO-PRO Operating LLC is limited solely to the cost of the repair or replacement
of the unit at our option. This warranty does not cover normal wear of parts and does not apply to
any unit that has been tampered with. This limited warranty does not cover damage caused by
misuse, abuse, negligent handling or damage due to faulty packaging or mishandling in transit.
This warranty does not cover damage or defects caused by or resulting from damages from
shipping or repairs, service or alterations to the product or any of its parts, which have been
performed by a repair person not authorized by EURO-PRO Operating LLC.
This warranty is extended to the original purchaser of the unit and excludes all other legal and/or
conventional warranties. The responsibility of EURO-PRO Operating LLC if any, is limited to the
specific obligations expressly assumed by it under the terms of the limited warranty. In no event is
EURO-PRO Operating LLC liable for incidental or consequential damages of any nature
whatsoever. Some states do not permit the exclusion or limitation of incidental or consequential
damages, so the above may not apply to you.
This warranty gives you specific legal rights, and you may also have other rights which vary from
state to state or province to province.
*Important: Carefully pack item to avoid damage in shipping. Be sure to include proof of
purchase date and to attach tag to item before packing with your name, complete address
and phone number with a note giving purchase information, model number and a
description of the problem. We recommend you insure the package (as damage in shipping
is not covered by your warranty). Mark the outside of your package “ATTENTION
CUSTOMER SERVICE”. We are consta ntly striving to improve our products, therefore the
specifications contain ed herein are subject to change without notice.
------------------------------------------------------------------------------------- -------------
OWNERSHIP REGISTRATION CARD
FOR CANADIAN CONSUMERS ONLY
Please fill out and mail the product registration card within ten (10) days of purchase. The registration will enable
us to contact you in the unlikely event of a product safety notification. By returning this card you acknowledge to
have read and understood the instructions for use, and warnings set forth in the accompanying instructions
Canada: EURO-PRO Operating LLC, 4400 Bois Franc, St. Laurent, Québec H4S 1A7
.
Spécifications Techniques
Voltage: 120V. 60Hz.
Puissance : 3.6 Ampères
Remarque : Les illustrations peuvent être différentes de votre produit.
27
Models: UVC805-UVC805B-UVC805C
______________________________________________________________________
Appliance model
______________________________________________________________________
Date purchased Name of store
______________________________________________________________________
Owner' s name
______________________________________________________________________
Address City Prov. Postal Code
Printed in China
12
Page 14
INSTRUCCIONES IMPORTANTES DE SEGURIDAD
Al usar su Aspiradora Vertical de uso comercial, siempre debe seguir precauciones básicas de
seguridad, incluyendo las siguientes:
LEA TODAS LAS INSTRUCCIONES ANTES DE
UTILIZAR SU ASPIRADORA
ADVERTENCIA:
descarga eléctrica o daños personales:
1. No deje la aspiradora desatendida cuando esté
enchufada. Desenchúfela del tomacorriente cuando
no la utilice y antes de cambiar la bolsa HEPA.
2. Para reducir el riesgo de descargas eléctricas – NO
la utilice al exterior o sobre superficies mojadas.
3. No permita que los niños la utilicen como un juguete.
Debe tener mucho cuidado al ser utilizada por o
cerca de niños.
4. Utilícela solamente como se indica en este manual.
5. No la use si el cable o el enchufe están dañados. No
utilice la aspiradora si se ha caído, dañado, dejado
en el exterior o tirado al agua. Retórnela a EURO-
PRO Operating LLC para que sea examinada,
reparada o ajustada.
6. No la jale o transporte del cable. No utilice el cable
como manija, no lo apriete con una puerta, o tire del
cable a través de esquinas o bordes filosos. No
pase el artefacto por encima del cable de
alimentación. Mantenga el cable alejado de
superficies calientes.
7. No la desenchufe tirando del cable. Para
desenchufarla, tire del enchufe, no del cable.
8. No toque el enchufe o la aspiradora con las manos
húmedas.
9. No use la aspiradora para levantar objetos muy
grandes u objetos que podrían dañarla.
10. Mantenga el cabello, la ropa suelta, los dedos y toda
parte del cuerpo alejados de la punta del cabezal,
del cepillo giratorio y de las partes móviles. No use
la aspiradora cuando esté descalzo o con zapatos
abiertos.
11. No levante carbón caliente, colillas de cigarrillos,
fósforos ni ningún objeto caliente, echando humo o
quemándose.
12. No levante objetos duros o filosos como vidrios,
clavos, tornillos, monedas, etc.
13. No la utilice sin la bolsa HEPA instalada en su lugar.
Use únicamente bolsas HEPA y c orreas
suministradas por EURO-PRO Operating LLC. el
no hacerlo invalidará la garantía.
Para reducir el riesgo de incendio,
14. Apague todos los controles antes de enchufar
o desenchufar la aspiradora.
15. Tenga especial cuidado al aspirar escaleras.
16. Tenga cuidado al aspirar sobre los bordes de
tapetes y flecos.
17. No levante materiales inflamables o
combustibles (l íquido para encendedor,
gasolina, kerosén, etc.) o la utilice en
presencia de líquidos o vapores explosivos.
18. No levante materiales tóxicos (lavandina,
amoníaco, destapa cañerías, etc.).
19. No la utilice en ambientes cerrados llenos de
vapores emanados de pinturas al aceite,
diluyente de pintura, substancias a ntipolilla,
polvo inflamable u otros vapores explosivos o
tóxicos.
20. Úsela solamente en superficies secas, en
interiores.
21. No la utilice con ningún propósito que no esté
descrito en este manual del usuario.
22. Use únicamente cables de extensión
aprobados por UL o cUL para 15 amperes por
lo menos. Los cables de capacidad menor
pueden recalentarse. Tenga cuidado al
colocar el cable para que nadie lo tironee o se
tropiece con él o sea arrastrado por debajo de
la aspiradora.
23. No introduzca ningún objeto en la punta del
cabezal. No la use con la punta del cabezal
obstruida. Manténgala sin tierra, pelusa,
cabellos o cualquier otra cosa que pueda
reducir la circulación de aire.
24. Siempre guarde su artefacto en el interior en
un lugar frío y seco.
25. Mantenga el área de trabajo bien iluminada.
26. No sumerja la aspiradora en agua o ningún
otro líquido.
27. Para evitar daños a la alfombra, mantenga el
cabezal de la aspiradora en movimiento todo
el tiempo.
28. Conéctela únicamente a un tomacorriente con
conexión a tierra. El uso de un voltaje
incorrecto puede dañar el motor y/o lesionar
al usuario. Vea las instrucciones de conexión
a tierra.
MESURES DE PRÉCAUTION
Important: Si les conduits d’air dans l’unité bloquent, éteignez l’aspirateur et enlevez
la substance qui bloque avant de remettre en marche l’unité.
1. N’utilisez pas l’aspirateur trop
près des chaufferettes ou des
radiateurs.
2. Avant d’insérer la fiche à
l’intérieur de la prise électrique
murale, assurez-vous que vos
mains sont sèches.
3. N’aspirez aucun liquide.
4. Éloignez les cheveux, les
vêtements, les doigts, les pieds et
toute partie du corps des
ouvertures, de l’agitateur rotatif et
autres pièces amovibles.
5. Si vous désirez débrancher
l'appareil de la prise murale, tirez
sur la fiche et non sur le cordon.
6. Ne vous servez pas de l’appareil
pour ramasser quelque chose qui
brûle ou qui fume comme des
cigarettes, des allumettes ou de la
cendre encore chaude.
7. Ne passez pas l’aspirateur sur le
cordon d’alimentation.
8. N’utilisez pas l’aspirateur sans que
le sac externe et le sac HEPA
soient en place.
9. Avant de mettre en marche
l’aspirateur, assurez-vous
d’enlever tous les gros objets ou
les objets coupants qui peuvent
endommager votre aspirateur.
CONSERVE ESTAS INSTRUCCIONES
Para uso Doméstico o Comercial Únicamente
INSTRUCCIONES DE LA CONEXIÓN A TIERRA
Este artefacto debe ser conectado a tierra. Si deja de funcionar o se descompone, la conexión
a tierra proporciona un camino de menor resistencia para la corriente eléctrica reduciendo el
riesgo de descargas. Este artefacto viene con un cable de alimentación que tiene un conductor
y pata del enchufe de tierra. El enchufe debe conectarse a un tomacorriente apropiado que esté
instalado y conectado a tierra de acuerdo con las normas y reglamentaciones locales.
ADVERTENCIA: La conexión inadecuada del cable de tierra puede causar riesgo de descarga
eléctrica. Consulte con un electricista calificado o representante técnico si tiene
dudas acerca de la conexión a tierra del artefacto. No modifique el enchufe
suministrado con el artefacto – si no entra en el tomacorriente, haga que un
electricista calificado le instale el tomacorriente adecuado. Este artefacto
debe usarse en un circuito de 120 voltios nominales y tiene un enchufe con
conexión a tierra como el que se muestra en la figura de la derecha.
Asegúrese de conectar el artefacto a un tomacorriente con la misma
configuración que el enchufe. No debe usar ningún adaptador con este
artefacto.
13 Rev. 03/08
TOMACORRIENTE
CON CONEXIÓN A
TIERRA
LA PATA DE TIERRA ES LA
MÁS LARGA DE LAS TRES
PATAS
26
Page 15

INSTRUCTIONS DE SÉCURITÉ IMPORTANTES
Des précautions de sécurité de base doivent toujours être respectées lorsque vous utilisez votre
Aspirateur Balais de Classification Commerciale, dont les suivantes :
LISEZ ATTENTIVEMENT TOUTES LES
INSTRUCTIONS AVANT D’UTILISER VOTRE
ASPIRATEUR.
AVERTISSEMENT: Afin de réduire les risques
de feu, de décharges électriques ou de blessures:
1. Ne laissez pas l’aspirateur sans surveillance
lorsqu’il est branché. Débranchez-le de la prise s’il
n’est pas utilisé et avant de changer les filtres
HEPA.
2. Afin de réduire les risques de décharges électriques
– n’utilisez PAS l’appareil à l’extérieur ou sur des
surfaces humides.
3. Ne laissez PAS les enfants s’en servir comme un
jouet. Une attention particulière doit être portée
lorsque utilisé près ou par des en fants.
4. Utilisez-le seulement co mme il vous l'est expliqué à
l’intérieur de ce manuel.
5. N’utilisez PAS l'appareil si le cordon d’alimentation
ou la fiche est endommagé. N’utilisez PAS
l’aspirateur s’il a été échappé, endommagé, laissé à
l’extérieur ou échappé à l’eau. Retournez l’appareil
à EURO-PRO Operating LLC afin de le faire
examiner, réparer ou ajuster.
6. Ne le tirez PAS ou ne le transportez PAS par le
cordon d’alimentation. N’utilisez PAS le cordon
d’alimentation comme étant une poignée, ne fermez
pas de porte sur le cordon ou ne tirez pas sur le
cordon près d’objets aux extrémités pointues. Ne
passez PAS l’appareil sur le cordon d’alimentation.
Gardez le cordon d’alimentation loin des surfaces
chaudes.
7. Ne le débranchez PAS en tirant sur le cordon
d’alimentation. Pour débrancher, attrapez la fiche et
non le cordon.
8. Ne manipulez PAS la fiche ou l’aspirateur si vous
avez les mains humides.
9. N’utilisez PAS l’aspirateur pour ramasser de gros
objets ou des objets qui pourraient endommager
l’aspirateur.
10. Éloignez les cheveux, les vêtements, les doigts, les
pieds et toute partie du corps des ouvertures, de
l’agitateur rotatif et autres pièces amovibles.
N’opérez PAS l’aspirateur pieds nu ou en portant
des souliers ne recouvrant pas les orteils.
11. Ne ramassez PAS du charbon encore chaud, des
filtres de cigarette, des allumettes ou tout autre
objet encore chaud ou dégageant de la fumée.
12. Ne
ramassez pas d’objets durs ou acérés comme
le verre, les clous, les vis, la monnaie, etc.
13. Ne l’utilisez PAS si le sac HEPA de l’aspirateur
n’est pas en place. Utilisez SEULEMENT les sacs
HEPA et les courroies fournis par EURO-PRO
Operating LLC. Si ce n’est pas le cas, cela
pourrait annuler votre garantie.
14. Fermez toutes les commandes avant de brancher
ou débrancher l’aspirateur de la prise électrique.
15. Portez une attention particulière lorsque vous
passez l’aspirateur dans des marches.
16. Portez une attention particulière lorsque vous
passez l’aspirateur sur les bordures de tapis et les
franges.
17. N’aspirez PAS de matériaux combustibles ou
inflammables (liquide à briquet, essence,
kérosène, etc.) ou n’utilisez pas en présence de
liquide explosif ou de vapeur.
18. N’aspirez PAS de matériaux toxiques (javellisant,
ammoniaque, déboucheur de drain, etc.).
19. Ne l’utilisez PAS dans un endroit clos rempli de
vapeurs provenant de peinture à l’huile, de solvant
à peinture, de boules à mites, de poussières
inflammables, et de toutes autres vapeurs
explosives ou toxiques.
20. Utilisez seulement s ur des surfaces sèches à
l’intérieur.
21. N’utilisez PAS l’aspirateur pour toute autre fonction
que celles décrites à l'intérieur de ce guide de
l'utilisateur.
22. Utilisez seulement les cordons d’extension qui sont
classés UL, ou classés cUL, de 15 ampères. Les
cordons d’extension étant classés pour une
intensité plus faible risquent de surchauffer. Il faut
faire attention au cordon de manière à ce qu’il ne
puisse pas faire trébucher ou être tiré sous
l’aspirateur.
23. Ne placez AUCUN objet près de l’ouverture de la
buse. N’utilisez PAS si l’ouverture est bloquée.
Éliminez la poussière, les peluches et tout autre
objet qui pourraient réduire l’entrée d’air.
24. Garder votre aspirateur à l’intérieur dans un
endroit frais et sec.
25. Gardez votre endroit de travail bien éclairé.
26. N'immergez PAS l’aspirateur sous l’eau ou dans
tous autres liquides.
27. Pour éviter d’endommager le tapis, déplacez
toujours la tête de l’aspirateur en un mouvement
continu.
28. Branchez à une prise mise à la terre appropriée.
Utiliser une tension non conforme peut causer des
dommages au moteur et possiblement blesser
l’utilisateur. Consultez les directives de mi se à la
terre.
MEDIDAS DE PRECAUCIÓN
Importante: Si la abertura de succión de la unidad se tapa, apague la aspiradora y
destápela antes de encender nuevamente la unidad.
1. No use la aspiradora cerca de
calefactores o radiadores.
2. Antes de enchufar el cable en
un tomacorriente, asegúrese
de tener las manos secas.
3. No aspire ningún líquido.
4. Mantenga el cabello, la ropa
suelta, los dedos y toda parte del
cuerpo alejados de las aberturas
y de las partes móviles.
5. Al desenchufar el cable del
tomacorriente, tire del enchufe,
no del cable.
6. No recoja nada que se esté
quemando o echando humo,
como cigarrillos, fósforos, o
cenizas calientes.
7. No pase el artefacto por encima
del cable de alimentación.
8. No la utilice sin la bolsa exterior y
la bolsa HEPA colocadas en su
lugar.
9. Antes de empezar a usar la
aspiradora, asegúrese de quitar
los objetos grandes o filosos que
podrían dañar la aspiradora.
CONSERVEZ CES INSTRUCTIONS
Pour Usage Domestique ou Commercial
INSTRUCTIONS DE MISE À LA TERRE
Cet appareil doit être mis à la terre. En cas de mauvais fonctionnement ou de panne, la mise à la terre assure
un trajet de moindre résistance au courant électrique, ce qui réduit le risque d’électrocution. Cet appareil est
muni d'un cordon d'alimentation comportant un conducteur de mise à la terre de l'équipement et une fiche de
mise à la terre. La fiche de mise à la terre doit être branchée dans une prise de courant appropriée et mise à
la terre conformément à la réglementation locale.
AVERTISSEMENT:Un mauvais branchement du conducteur de mise àla terre de
l'équipement peut entraîner un risque d’électrocution. Si vous n'êtes pas certain qu'une
prise de courant est mise à la terre comme il se doit, demandez à un électricien qualifié
ou du personnel d’entretien de la véri fier. Ne modifiez pas la fiche de mise à la terre
fournie avec l’appareil. Si vous n'arrivez pas à l'insérer dans la prise de courant, faites
installer une prise de courant adéquate par un électricien qualifié. Cet appareil est
conçu pour être utilisé sur un circuit à intensité nominale de 120 volts, et il est doté d'une
fiche de branchement de mise à la terre ressemblant à celle illustrée à droite. Assurez-vous
que l’appareil est branché à une prise ayant la même configuration que la fiche. Aucun
adaptateur ne devrait êt re utilisé a vec cet appareil.
25 Rev. 03/08
BOÎTE DE SORTIE
MISE À LA TERRE
LA LAME DE MISE ÀLA
TERRE EST LA PLUS
LONGUE DES TROIS LAMES
14
Page 16

COMPONENTES DE SU ASPIRADORA VERTICAL
DE USO COMERCIAL
1. Mango blando
2. Llave de encendido/apagado/turbo
3. Bolsa exterior
4. Barra tensionadora de la bolsa
5. Cabezal eléctrico de la aspiradora
6. Lámpara de xenón (no se
muestra)
7. Banda protectora de muebles
8. Cepillo eléctrico (no se muestra)
9. Cable de interconexión
10. Botón de liberación del mango
11. Traba del control de movimien to
12. Gancho para el cable de
interconexión
13. Gancho inferior
14. Tubo del mango inferior
15. Borde de entrada de la bolsa
16. Mango de transporte
17. Entrada de la bolsa
18. Gancho rápido para el cable de
alimentación
Modelos
UVC805
UVC805B
UVC805C
GARANTÍA LIMITADA DE DOS (2) AÑOS
EURO-PRO Operating LLC garantiza este producto contra defectos de materiales y mano de obra por un
término de dos (2) años a partir de la fecha de compra original, siempre que sea utilizado para uso comercial o
doméstico normal, sujeto a las siguientes condiciones, exclusiones y excepciones.
Si su artefacto no funciona correctamente al utilizarlo bajo condiciones comerciales o domésticas normales
dentro del período de garantía, devuelva el artefacto completo y los accesorios, pagando el envío, a:
EE.UU.: EURO-PRO Operating LLC, 94 Main Mill Street, Plattsburgh, N.Y., 12901
Canadá: EURO-PRO Operating LLC, 4400 Bois Franc, St. Laurent, Quebec H4S 1A7
Si el artefacto presenta un defecto de materiales o mano de obra, EURO-PRO Operating LLC lo reparará o
remplazará sin cargo. El envío debe incluir un comprobante de la fecha de compra y $14,95 para cubrir los
gastos de envío. *
Los insumos tales como, sin limitación, correas, cepillos giratorios, lámparas, bolsas para la tierra y partes
eléctricas que normalmente necesitan ser reemplazados son explícitamente excluidos de la garantía.
La responsabilidad d e EURO-PRO Operating LLC se limita únicamente al costo de reparación o reemplazo de
la unidad, a nuestro criterio. Esta garantía no cubre el desgaste normal de las partes y no cubre ninguna unidad
que haya sido alterada. Esta garantía limitada no cubre daños ocasionados por uso inadecuado, abuso,
negligencia o daños causados por embalaje inapropiado o maltrato durante el transporte. Esta garantía no cubre
daños o defectos causados o resultantes durante el transporte para su reparación o alteraciones del producto o
cualquiera de sus partes, realizadas por una persona no autorizada por EURO-PRO Operating LLC.
Esta garantía es válida para el comprador original del producto y excluye cualquier otra garantía legal y/o
convencional. La responsabilidad de EURO-PRO Operating LLC, de existir, se limita a las obligaciones
específicas asumidas expresamente bajo los términos de esta garantía limitada. Bajo ninguna circunstancia
EURO-PRO Operating LLC será responsable por daños incidentales o indirectos de ninguna clase. Algunos
estados no permiten la exclusión o limitación de daños consiguientes o incidentales, por lo tanto lo anterior
puede no ser válido para usted.
Esta garantía le otorga derechos legales específicos, y usted puede también tener otros derechos los que varían
de estado a estado o de provincia a provincia.
*Importante: Embale el producto cuidadosamente para evitar daños durante el transporte. Asegúrese de
incluir un comprobante de la fecha de compra y de colocarle una etiqueta al producto con su nombre,
dirección completa y número de teléfono, una nota proporcionando información de la compra, número
de modelo y una descripción del problema. Le recomendamos asegurar el paquete (puesto que la
garantía no cubre daños de envío). Escriba en el exterior del paquete “ATTENTION CUSTOMER
SERVICE”. Nosotros nos esforzamos constantemente en mejorar nuestros productos, por lo tanto las
especificaciones aquí indicadas pueden cambiar sin previo aviso.
Especificaciones Técnicas
Voltaje: 120V., 60Hz.
Potencia: 3,6 Amperes
Nota: El dibujo puede no ser igual al producto real.
15
------------------------------------------------------------------------------------- -------------
TARJETA DE REGISTRO DEL CLIENTE
Complete y envíe la tarjeta de registro del producto dentro de los diez (10) días posteriores a la compra. El
registro nos permitirá contactarnos con usted en caso de existir alguna notificación de seguridad con respecto al
producto. Retornando esta tarjeta usted reconoce haber leído y entendido las instrucciones de uso y
advertencias incluidas en estas instrucciones.
Canadá: EURO-PRO Operating LLC, 4400 Bois Franc, St. Laurent, Québec H4S 1A7
Modelos: UVC805-UVC805B-UVC805C
______________________________________________________________________
Modelo del Artefacto
______________________________________________________________________
Fecha de Compra Nombre del Negocio
______________________________________________________________________
Nombre del Usuario
______________________________________________________________________
Dirección Ciudad Provincia Código Postal
Impreso en China
SÓLO PARA CONSUMIDORES CANADIENSES
24
Page 17

INSTRUCCIONES DE USO
Aspiradora Vertical
de uso Comercial
PARA ORDENAR ACCESORIOS de REEMPLAZO
para el modelos UVC805-UVC805B-UVC805C
PARTE #ARTICULO
XSB800Bolsas , con j unto de tres
XSL800Correas, conjunto de dos
124FMILámparas, conjunto de dos
Llame al: 1 (800) 798-7398
de Lunes a Viernes de 8:30 AM hasta 5:00 PM Eastern Standard Time
o
visite nuestro sitio Web: www.sharkvac.com
POR ASISTENCIA TÉCNICA
para el Modelos UVC805-UVC805B-UVC805C
Llame al: 1 (800) 798-7398
de Lunes a Viernes de 8:30 AM hasta 5:00 PM Eastern Standard Time
Observaciones:
Para asegurar el máximo rendimiento, reemplace la bolsa HEPA para la tierra una
vez por mes, o cuando disminuya el nivel de succión. Puede ser necesario
reemplazar la bolsa HEPA para la tierra más frecuentemente, dependiendo del
uso.
Armado de su Aspiradora
NOTA: No enchufe el cable en un
tomacorriente hasta que la aspiradora
esté completamente armada.
1. Desempaque cuidadosamente
todos los componentes y separe el
material de empaque.
2. Coloque el cabezal eléctrico sobre
una superficie sólida y plana, y
verifique que el tubo del mango
inferior esté trabado en posición
vertical.
3. Deslice la entrada de la bolsa sobre
el tubo del mango inferior. (Fig. 1)
Empuje el anillo de goma hacia
arriba hasta que quede
debajo del borde de la
entrada de la bolsa,
luego gire el borde de
la entrada de la bolsa en
bentido contra horario
hasta que quede
ajustado.
(Fig. 2 y Fig. 3)
No lo ajuste
de más.
Anillo
de
goma
Fig. 2
Gírelo en
sentido contra
horario
Fig. 3
4. Coloque el resorte de retensión
de la bolsa en el exterior de la
barra tensionadora de la bolsa.
(Fig. 4)
Armado del Mango
1. Quite el tornillo del mango e
inserte el mango dentro del
conector. (Fig. 5)
Fig. 1
Fig. 5
2. Tenga cuidado para que los
agujeros del tornillo queden
alineados y luego coloque el
tornillo. Ajuste cuidadosamente
el tornillo con un destornillador.
(Fig. 6)
CUIDADO: No lo ajuste de más.
Podría falsear los tornillos. NO use
la aspiradora sin el tornillo del
mango en su lugar.
Resorte de
Retensión
de la bolsa
Fig. 4
23
Fig. 6
16
Page 18
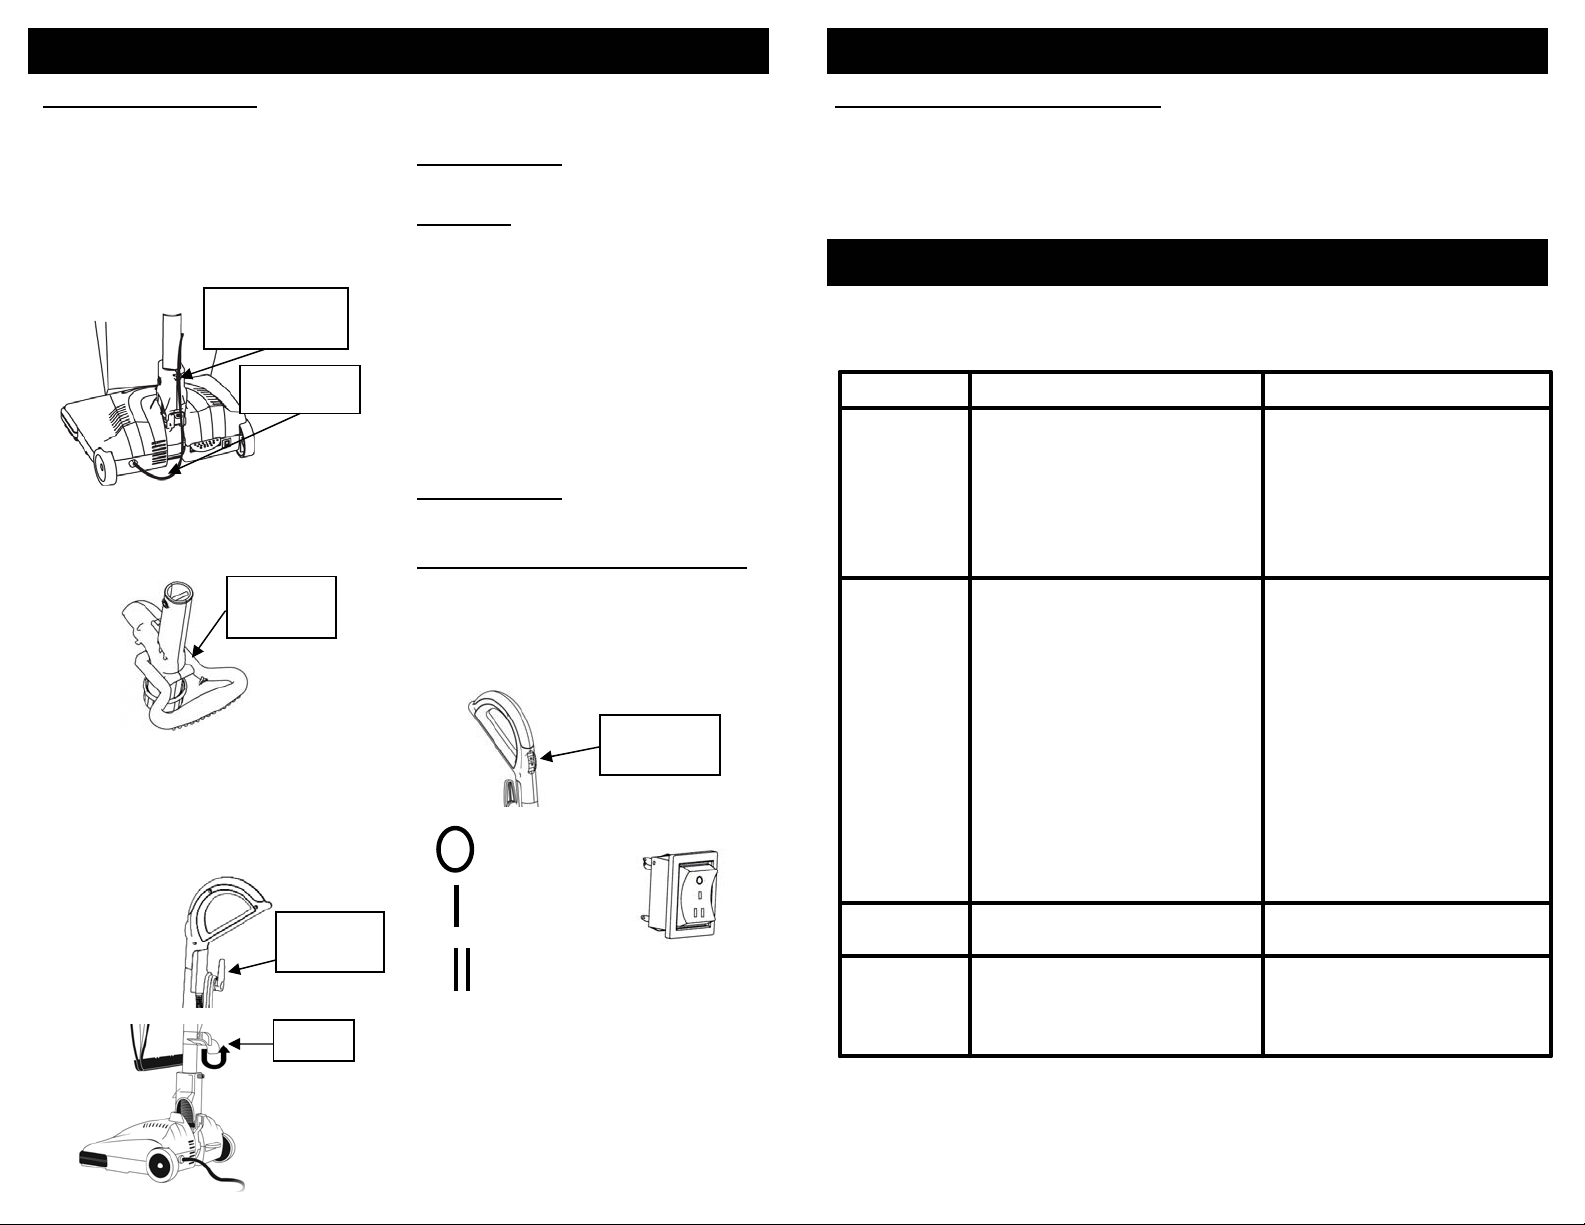
INSTRUCCIONES DE USO
INSTRUCCIONES DE USO
Cable de Alimentación
1. El cable de interconexión sale por
la parte posterior izquierda del
cabezal eléctrico y se conecta con
el mango por debajo del soporte de
liberación rápida del cable de
alimentación. Presione el cable de
interconexión dentro del gancho para
el cable de interconexión que está
arriba de la traba de dirección.
(Fig. 7)
2. Presione el cable de interconexión
dentro del gancho ubicado en la
parte interna del mango de
transporte. (Fig. 8)
3. Asegúrese de que el gancho del cable
de alimentación esté para arriba.
4. Quite el precinto que ata el cable de
alimentación.
5. Enrosque el cable en su lugar alrededor
del gancho de liberación rápida y el
gancho inferior. (Fig. 9 y Fig. 10)
Fig. 9
Gancho para el
cable de
interconexión
Cable de
interconexión
Fig. 7
Gancho para
el cable de
interconexión
Fig. 8
Gancho para
el Cable de
Alimentación
Gancho
Inferior
Fig. 10
6. Gire el gancho superior hacia la
derecha o la izquierda para
desenrollar el cable.
ADVERTENCIA: No la enchufe si la
llave de encendido está en la posición “I”
o “II”.
CUIDADO: Verifique que la bolsa
desechable HEPA para la tierra esté
colocada antes de usarla. No use la
aspiradora sin la bolsa HEPA para la
tierra.
7. Enchufe el cable de alimentación en
un tomacorriente y presione el botón
de encendido cuando esté listo para
usarla.
NOTA: Su aspiradora no se encenderá
cuando el mango esté trabado en
posición vertical. Presione el botón de
liberación del mango y luego encienda la
aspiradora con la llave de encendido.
ADVERTENCIA: Evite dejar la
aspiradora por mucho tiempo en el mismo
lugar, especialmente en alfombras altas.
Llave de encendido/apagado/turbo
La llave de encendido tiene dos ajustes
de velocidad. La posición “I” debe usarse
en tapetes, pisos lisos y alfombras. La
posición "II” tiene más potencia y es para
limpieza profunda de alfombras de pared
a pared.
Llave de
encendido/
apagado/turbo
Fig. 11
= APAGAD O
ENCENDIDO
= (Pisos lisos,
tapetes, alfombras)
= Turbo (Alfombras)
1. Presione la llave de encendido. La
llave de encendido se trabará en la
posición “I”. Esto enciende la
aspiradora.
2. Mueva la llave de encendido de la
posición “I”a la “II” para mayor
potencia.
3. Mueva la llave de encendido a la
posición “O” para apagar la aspiradora.
17
Fig. 12
Guardando Su Aspiradora Verti cal
1. Cuando termine de aspirar, apague
la unidad moviendo la llave de
encendido a la posición de apagado.
2. Presione el mango de la aspiradora
hacia delante para trabarlo en
3. Enrosque el cable de alimentación
alrededor del gancho de liberación
rápida y el mango de transporte.
4. Fije el gancho del cable en forma
de ‘U’, ubicado en el enchufe, al
cable enrollado.
posición vertical.
RESOLUCIÓN DE PROBLEMAS
Este artefacto fue inspeccionado detenidamente y funcionaba correctamente al salir
de la fábrica. Si se presenta algún problema menor, puede solucionarse fácilmente
encontrando su causa. Por lo tanto, le proporcionamos esta lista de control para su
conveniencia.
POSIBLE SOLUCIÓNPOSIBLE CAUSAPROBLEMA
1. Ench ú f ela firmemen t e.
2. Presione el botón para liberar el
mango.
3. Cierre la llave térmica o cambie
el fusible.
4. Mueva la llave a la posición de
encendido.
5. Espere que se enfríe el motor.
6. Presione el botón de reinicio.
1. Cambie la bolsa de la tierra
HEPA.
2. Quite la obstrucción.
3. Reemplace la correa.
4. Revise las instrucciones de
armado y corrija lo que sea
necesario.
5. Reemplace el cepillo giratorio.
6. Vu elva a coloc ar el cepillo.
7. Quite el cepillo y revise que no
haya ninguna obstrucción en el
cabezal.
8. Quite la bolsa de la tierra. Luego
quite la entrada de la bolsa del
tubo de la manguera y verifique
que no haya nada tapando la
entrada de la bolsa y el tubo del
mango inferior.
1. Reemplace la correa.
2. Vuelva a colocar la correa.
1. Reemplace la bolsa.
2. Revise las instrucciones de
instalación de la bolsa.
3. Reemplace la bolsa.
Aspiradora no
funciona
Aspiradora no
absorbe
El cepillo no
gira
Sale tierra de
la aspiradora
1. No está enchufada correctamente
en el tomacorriente.
2. El mango está trabado en
posición vertical.
3. El tomacorriente no funciona.
4. La llave de encendido no está en
la posición de encendido.
5. Termostato del motor activado.
6. Llav e t érmica abi ert a .
1. Bolsa de tierra HEPA llena o
tapada.
2. Cepillo giratorio, manguera o
entrada de la bolsa tapados.
3. Correa rota.
4. El mango no está armado
correctamente.
5. Las cerdas del cepillo están
gastadas.
6. Los extremos del cepillo no están
instalados correctamente en los
costados.
7. Cabezal eléctrico tapado.
8. Atascamiento en la entrada de la
bolsa o el mango inferior.
1. Correa rota.
2. Correa incorrectamente instalada.
1. La bolsa para la tierra está llena.
2. La bolsa de la tierra no está
instalada correctamente.
3. Hay un agujero o rotura en la
bolsa para la tierra.
22
Page 19

INSTRUCCIONES DE USO
INSTRUCCIONES DE USO
Función de Termostato de
Protección
Su aspiradora está equipada con un
termostato montado en el motor. Si su
aspiradora se sobrecalienta debido a que la
bolsa HEPA está llena, atascamiento en la
unidad o un bloqueo en el cepillo giratorio,
su aspiradora se apagará
automáticamente. Si pasa esto:
1. Verifique que la aspiradora esté
apagada.
2. Desenchufe el cable de alimentación.
3. Revise la bolsa HEPA y verifique que
no esté llena o tapada. (Vea
“Reemplazo de la bolsa HEPA”.)
Remplace la bolsa de la tierra si es
necesario.
4. Dé vuelta la aspiradora para exponer
la cubierta inferior.
5. Quite la cubierta inferior. (Vea
“Reemplazo de la correa” por
instrucciones.)
6. Revise que el cepillo giratorio no tenga
suciedad, residuos o atascamientos.
7. Mueva el cepillo con la mano y
verifique que pueda girar fácilmente.
8. Gire el borde de entrada de la bolsa en
sentido contra horario hasta
desatornillarlo por completo.
9. Deslice la entrada de la bolsa fuera del
tubo del mango inferior.
10. Revise que nada esté tapand o el tubo
del mango inferior ni la entrada de la
bolsa.
11. Para volver a armar el mango, siga las
instrucciones de “Armado de su
aspiradora".
12. Espere 45 minutos para que se enfríe
el motor antes de volver a encender la
aspiradora.
13. Luego de los 45 minutos, enchufe el
cable de alimentación y encienda
nuevamente la aspiradora.
NOTA: Si su aspiradora no funciona luego
de seguir cuidadosamente estas
instrucciones, llame al Servicio al Cliente al
1(800) 798-7398.
Reemplazo de la Luz Frontal
Advertencia: Para evitar el riesgo de
una descarga eléctrica, desenchufe la
unidad antes de reemplazar la luz
frontal o al efectuar mantenimiento o
localización de fallas.
1. Apague la aspiradora. Coloque la
llave de encendido en la posición
de apagado.
2. Desenchufe el cable de
alimentación.
3. Dé vuelta la aspiradora,
exponiendo la cubierta inferior.
4. Quite los tres tornillos con un
destornillador. (Fig. 24)
Tornillos
Fig. 24
5. Dé vuelta la aspiradora con
cuidado.
6. Levante con cuidado la cubierta
plástica del cabezal eléctrico.
(Fig. 25)
Fig. 25
7. Quite la lámpara sacándola del
soporte con firmeza y mucho
cuidado.
8. Coloque la lámpara nueva
presionándola firmemente dentro del
soporte.
9. Vuelva a colocar la cubierta plástica
del cabezal eléctrico y dé vuelta
nuevamente la aspiradora para
exponer la cubierta inferior.
10. Vuelva a colocar los tres torni llos con
un destornillador. No los ajuste de
más.
Función de Control de Movimiento
El sistema original de control de dirección
de su aspiradora le permite moverse sin
esfuerzo alrededor de los muebles para
limpiar fácilmente toda la superficie del
cuarto.
Habilitación de la Función de
Control de Movimiento
Para desenganchar la función de control
de movimiento:
1. Empuje la pestaña hacia arriba en la
posición de traba. (Fig. 13) Esto
evitará que el cabezal se mueva de
izquierda a derecha al usar la unidad.
Fig. 14
Fig. 13
2. Para destrabar la función de control
de movimiento, empuje la pestaña
hacia abajo (Fig. 14) y el cabezal se
moverá fácilmente otra vez.
Usando Su Aspiradora Vertical
NOTA: Su aspiradora no se encenderá
cuando el mango esté trabado en
posición vertical.
1. Gire el gancho superior del cable
180º para cualquier lado para
desenganchar el cable.
2. Enchufe el cable de alimentación en
un tomacorriente de 120V.
3. Coloque su pie en el pedal de
liberación del mango y jale
suavemente el mango hacia atrás.
4. Mueva la llave de alimentación a la
posición deseada, ya sea “I”o “II”.
CUIDADO: Para evitar daños
accidentales a la alfombra, NO deje su
aspiradora en el mismo lugar al aspirar.
Manténgala en movimiento al usarla.
Bolsa de Tierra HEPA
Consejos para un rendimiento óptimo:
• Debe cambiar la bolsa desechable
HEPA frecuentemente.
• El uso de desodorantes en polvo para
alfombras puede reducir la eficiencia
de la bolsa HEPA para la tierra al
taparla y evitar que circule el aire.
• Los objetos duros, como clavos,
vidrio roto y ganchos sujetapapeles
deben recogerse del suelo antes de
aspirar.
• Use únicamente bolsas HEPA para la
tierra legítimas de Shark.
Cambio de la Bolsa HEPA de la
Tierra
1. Verifique que la aspiradora esté
apagada.
2. Coloque el mango de la aspiradora
en posición vertical.
3. Desenchufe el cable de alime ntación.
4. Abra la bolsa exterior. (Fig. 15)
Bolsa
Cremallera
Fig. 15
5. Para liberar la bolsa HEPA de la
tierra, presione la pestaña de traba
de la bolsa. (Fig. 16) Para quitar la
bolsa HEPA de la tierra, sostenga
firmemente el borde de la bolsa
(Fig. 16) y levante la entrada de la
bolsa. Quítela con cuidado para
evitar que se salga el polvo y la
tierra.
Pestaña de
traba de
la bolsa
Borde de
la bolsa
Fig. 16
21
18
Page 20

INSTRUCCIONES DE USO
INSTRUCCIONES DE USO
6. Jale la pestaña de cartón del borde
de la bolsa HEPA. (Fig. 17 y Fig. 18)
Esto cerrará la abertura de la bolsa
HEPA, evitando que se desborde.
Abierto Cerrado
Fig. 17 Fig. 18
7. Deseche la bolsa HEPA de la tierra.
NOTA: Si la bolsa HEPA se llena o se
tapa con polvo muy fino, puede impedir la
circulación de aire por la misma. Esto
puede afectar el rendimiento de su
aspiradora. Le recomendamos que
cambie su bolsa HEPA para la tierra una
vez por mes, dependiendo del uso.
Instalación de la Bolsa HEPA para la
Tierra
1. Coloque el borde de la bolsa HEPA
sobre la entrada de la bolsa. Presione el
borde de la bolsa HEPA contra las
pestañas en el fondo del soporte de la
bolsa. Luego gírelo sobre la entrada de
la bolsa. (Fig. 19)
Pestaña de
traba de
la bolsa
Entrada de
la bolsa
2. Presione la parte superior del borde
de la bolsa HEPA dentro de la entrada
de la bolsa. El borde se encastrará
en su lugar cuando las pestañas de
traba se enganchen en el borde de la
bolsa HEPA.
3. Verifique que toda la bolsa HEPA
quede dentro de la bolsa exterior antes
de cerrar la bolsa exterior.
4. Verifique que el cierre de la bolsa
exterior esté completamente cerrado.
Pestañas
Fig. 19
Reemplazo de la Correa
Ocasionalmente, deberá reemplazar la
correa del cabezal eléctrico. La
frecuencia con la que deberá
reemplazarla depende del uso.
Si el cepillo no gira al encender la
aspiradora, haga lo siguiente:
CUIDADO: Para evitar el riesgo de
una descarga eléctrica, desenchufe la
unidad antes de efectuar el
mantenimiento.
1. Desenchufe la aspiradora y déla
vuelta, exponiendo la cubierta
inferior.
2. Presione hacia abajo las tres
pestañas de traba. Esto liberará la
cubierta inferior. (Fig. 20 y Fig. 21)
Cubierta
Inferior
Fig. 20
Pestañas
de traba
Fig. 21
3. Quite cuidadosamente todos los
residuos del área de la correa y del
cepillo. (Fig. 22)
Cepillo
Correa
Fig. 22
4. Tome el cepillo con la mano y
levante el extremo izquierdo fuera
de su ranura. Luego, levante y
quite el lado derecho. Si la correa
no está rota, el cepillo deberá estar
tensionado.
5. Quite la correa gastada o rota, y
cualquier resto de correa rota, o
desechos, antes de instalar una
correa.
6. Pase la correa impulsora con
cuidado alrededor del eje del motor
y luego sobre el cepillo. (Fig. 22)
7. Inserte el extremo derecho del
cepillo deslizándolo dentro de su
ranura. Luego, presione
firmemente con ambas manos el
extremo izquierdo del cepillo dentro
de su ranura.
8. Verifique que la correa quede
centrada sobre la zona elevada del
cepillo. Gire el cepillo con la mano.
Debe moverse fácilmente.
9. Vuelva a colocar la cubierta inferior
alineando las pestañas del frente
del cabezal.
10. Presione la cubierta inferior para
encastrarla en su lugar. Las
pestañas de la cubierta inferior se
trabarán al presionarla. Verifique
que las tres pestañas queden
trabadas en su lugar.
11. Enchufe el cable de alimentac ión y
encienda la aspiradora.
12. Si el cepillo no se mueve o la
aspiradora no se enciende, llame al
Servicio al Cliente al
1 (800) 798-7398.
NOTA: Para asegurar la mayor
eficiencia de limpieza, deberá
inspeccionar la correa de la aspiradora
por lo menos una vez al año. Si la
correa está estirada, rajada o gastada,
deberá reemplazarla.
Botón de Reinicio
Su aspiradora viene equipada con un
interruptor automático para proteger a
usted y a la aspiradora contra
sobrecargas eléctricas. Si se dispara el
interruptor automático, el botón de
reinicio se dará vuelta para indicar que la
unidad debe ser reiniciada.
Esto es lo que debe hacer:
1. Verifique que la aspiradora esté
apagada. Desenchufe el cable de
alimentación.
2. Dé vuelta la aspiradora, exponiendo
la cubierta inferior.
3. Quite la cubierta inferior. (Vea
“Reemplazo de la Correa”).
4. Revise el cepillo y quite todo lo que
podría evitar que funcione
normalmente.
5. Revise que la correa no esté
gastada o dañada y reemplácela si
es necesario.
6. Mueva el cepillo con la mano para
verificar que pueda girar fácilmente.
7. Vuelva a colocar la cubierta inferior.
(Vea “Reemplazo de la Correa”).
8. Presione el botón de reinicio ubicado
junto al botón de liberación del
mango. Esto reiniciará el interruptor
automático. (Fig. 23)
9. Enchufe el cable de alimentación en
el tomacorriente.
10. Encienda la aspiradora.
NOTA: Si su aspiradora no funciona
luego de seguir cuidadosamente estas
instrucciones, llame al Servicio al Cliente
al 1 (800) 798-7398.
Botón de
reinicio
Fig. 23
19
Eje del
motor
20
 Loading...