

Page 1
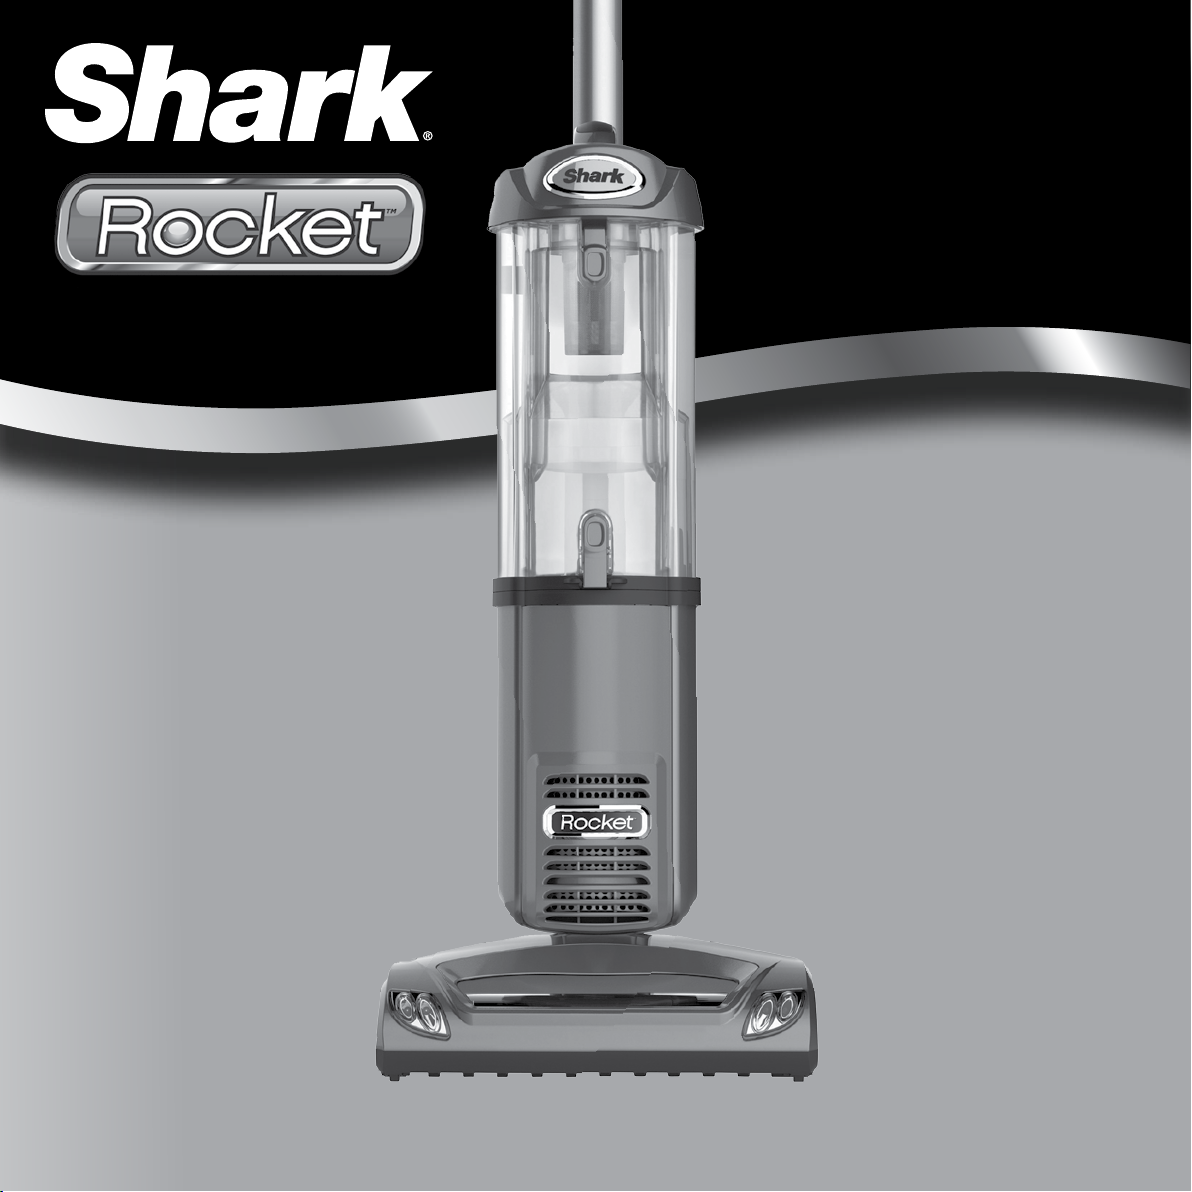
OWNER’S GUIDE
NV480UKP
Page 2
READ ALL INSTRUCTIONS BEFORE USE
THANK YOU!
Thank you for purchasing the Shark® Rocket Upright Vacuum
Cleaner.
This Owner’s Guide is designed to help you get a complete understanding of your new vacuum cleaner. Please read it carefully and
keep for future reference.
RECORD THIS INFORMATION:
Model Number: ���������������������������������������������
Date of Purchase (Keep receipt):
����������������������������������������������������������
TECHNICAL SPECIFICATIONS:
Voltage: 220-240 V, 50/60 Hz
Watts: 700W
Power nozzle 80W
This appliance complies with the WEEE-Directive 2012/19/EU on the disposal of electrical and electronic equipment (WEEE).
This marking indicates that this product should not be disposed with other household wastes throughout the EU. To prevent possible
harm to the environment or human health from uncontrolled waste disposal, recycle it responsibly to promote the sustainable reuse
of material sources. To return your used device, please use the return and collection systems or contact the retailer where this
product was purchased. They can take this product for environmental safe recycling.
This appliance complies with the European directives for electromagnetic compatibility (EMC) 2004/108/EC and its revisions, as well as Low
Voltage Directive (LVD) 2006/95/EC and its revisions.
For a list of what is included with this model, refer to inside flap
of box.
RECOMMENDED FILTER CLEANING SCHEDULE:
See the MAINTENANCE section for filter cleaning instructions
Foam filter: XFF450 Every month
Felt Filter: XFF450 Every month
HEPA Filter: XHF450 Every 12 months
IMPORTANT SAFEGUARDS
When using an electrical appliance, basic safety precautions should
always be observed, including the following:
WARNING
TO REDUCE THE RISK OF FIRE, ELECTRIC SHOCK OR INJURY:
1 DO NOT use outdoors or on wet surfaces.
2 Unplug from electrical outlet when not in use and before cleaning or
servicing.
3 DO NOT use vacuum cleaner with a damaged cord or plug or if the unit has
been dropped, damaged, left outdoors, or dropped into water. If the cord
is damaged, it must be replaced by the manufacturer, its service agent or
similarly qualified persons in order to avoid a hazard. To avoid the risk of
electric shock, do not disassemble or attempt to repair the appliance on your
own. Incorrect re-assembly or repair can cause a risk of electrical shock or
injury to persons when the appliance is used.
4 DO NOT pull or carry vacuum cleaner by the cord or use the cord as a handle.
5 DO NOT unplug by pulling on cord; to unplug, grasp the plug, not the cord.
6 DO NOT handle plug or vacuum cleaner with wet hands.
7 DO NOT run the vacuum cleaner over the power cord, close a door on the
cord or pull cord around sharp corners.
8 The use of an extension cord is not recommended.
9 DO NOT leave vacuum cleaner when plugged in.
10 Keep cord away from heated surfaces.
11 Turn off all controls before plugging or unplugging the vacuum cleaner.
12 Always turn off the vacuum cleaner before connecting or disconnecting
Power nozzle.
CAUTION: Power nozzle contains electrical connections
and the Power nozzle is not a serviceable part
13 Store your vacuum cleaner with the power cord secured around the two cord
holders - as shown in the storage instructions.
GENERAL USE
14 Use only as described in this manual.
15 DO NOT put any objects into openings. DO NOT use with any opening
blocked; keep free of dust, lint, hair, and anything that may reduce air flow.
16 Keep your work area well lit.
17 Keep the vacuum cleaner moving over the carpet surface at all times to
avoid damaging the carpet fibers.
18 DO NOT place vacuum cleaner on unstable surfaces such as chairs or tables.
19 DO NOT use without dust cup and/or filters in place.
20 This appliance is not intended for use by persons (including children) with
reduced physical, sensory or mental capabilities, or lack of experience and
knowledge.
21 Children should be supervised to ensure that they do not play with the
appliance.
HOSE ATTACHMENTS
22 DO NOT use if air flow is restricted; if the air paths, the hose, or the
accessories become blocked, turn the vacuum cleaner off. Remove all
obstructions before you turn on the unit again.
23 Keep the end of the hose and accessory openings away from face and body.
24 Keep cleaning tools and hose suction openings away from hair, face, fingers,
uncovered feet, or loose clothing.
25 Only use manufacturer’s recommended attachments.
DUST CUP/FILTERS/ACCESSORIES
Before turning on the vacuum:
26 Make sure that all filters are thoroughly dry after routine cleaning.
27 Make sure that dust cup and all filters are in place after routine
maintenance.
28 Make sure accessories are free of blockages.
29 Use only manufacturer’s recommended accessories and replacement parts.
GENERAL CLEANING
30 DO NOT pick up large-sized objects.
31 DO NOT pick up hard or sharp objects such as glass, nails, screws or coins
that could damage the vacuum cleaner.
32 DO NOT pick up smoking or burning objects such as hot coals, cigarette
butts, or matches.
33 DO NOT pick up flammable or combustible materials such as lighter fluid,
gasoline, or kerosene or use vacuum in areas where they may be present.
34 DO NOT pick up toxic solutions such as chlorine bleach, ammonia, or drain
cleaner.
35 DO NOT use in an enclosed space where vapors are present from paint,
paint thinner, moth-proofing substances, flammable dust or other explosive
or toxic materials.
36 DO NOT vacuum up any liquids.
37 DO NOT immerse vacuum cleaner in water or other liquids.
38 DO NOT use outdoors or on wet surfaces; use only on dry surfaces.
39 Use extra care when cleaning on stairs.
FOR HOUSEHOLD USE ONLY
SAVE THESE INSTRUCTIONS
32
Page 3
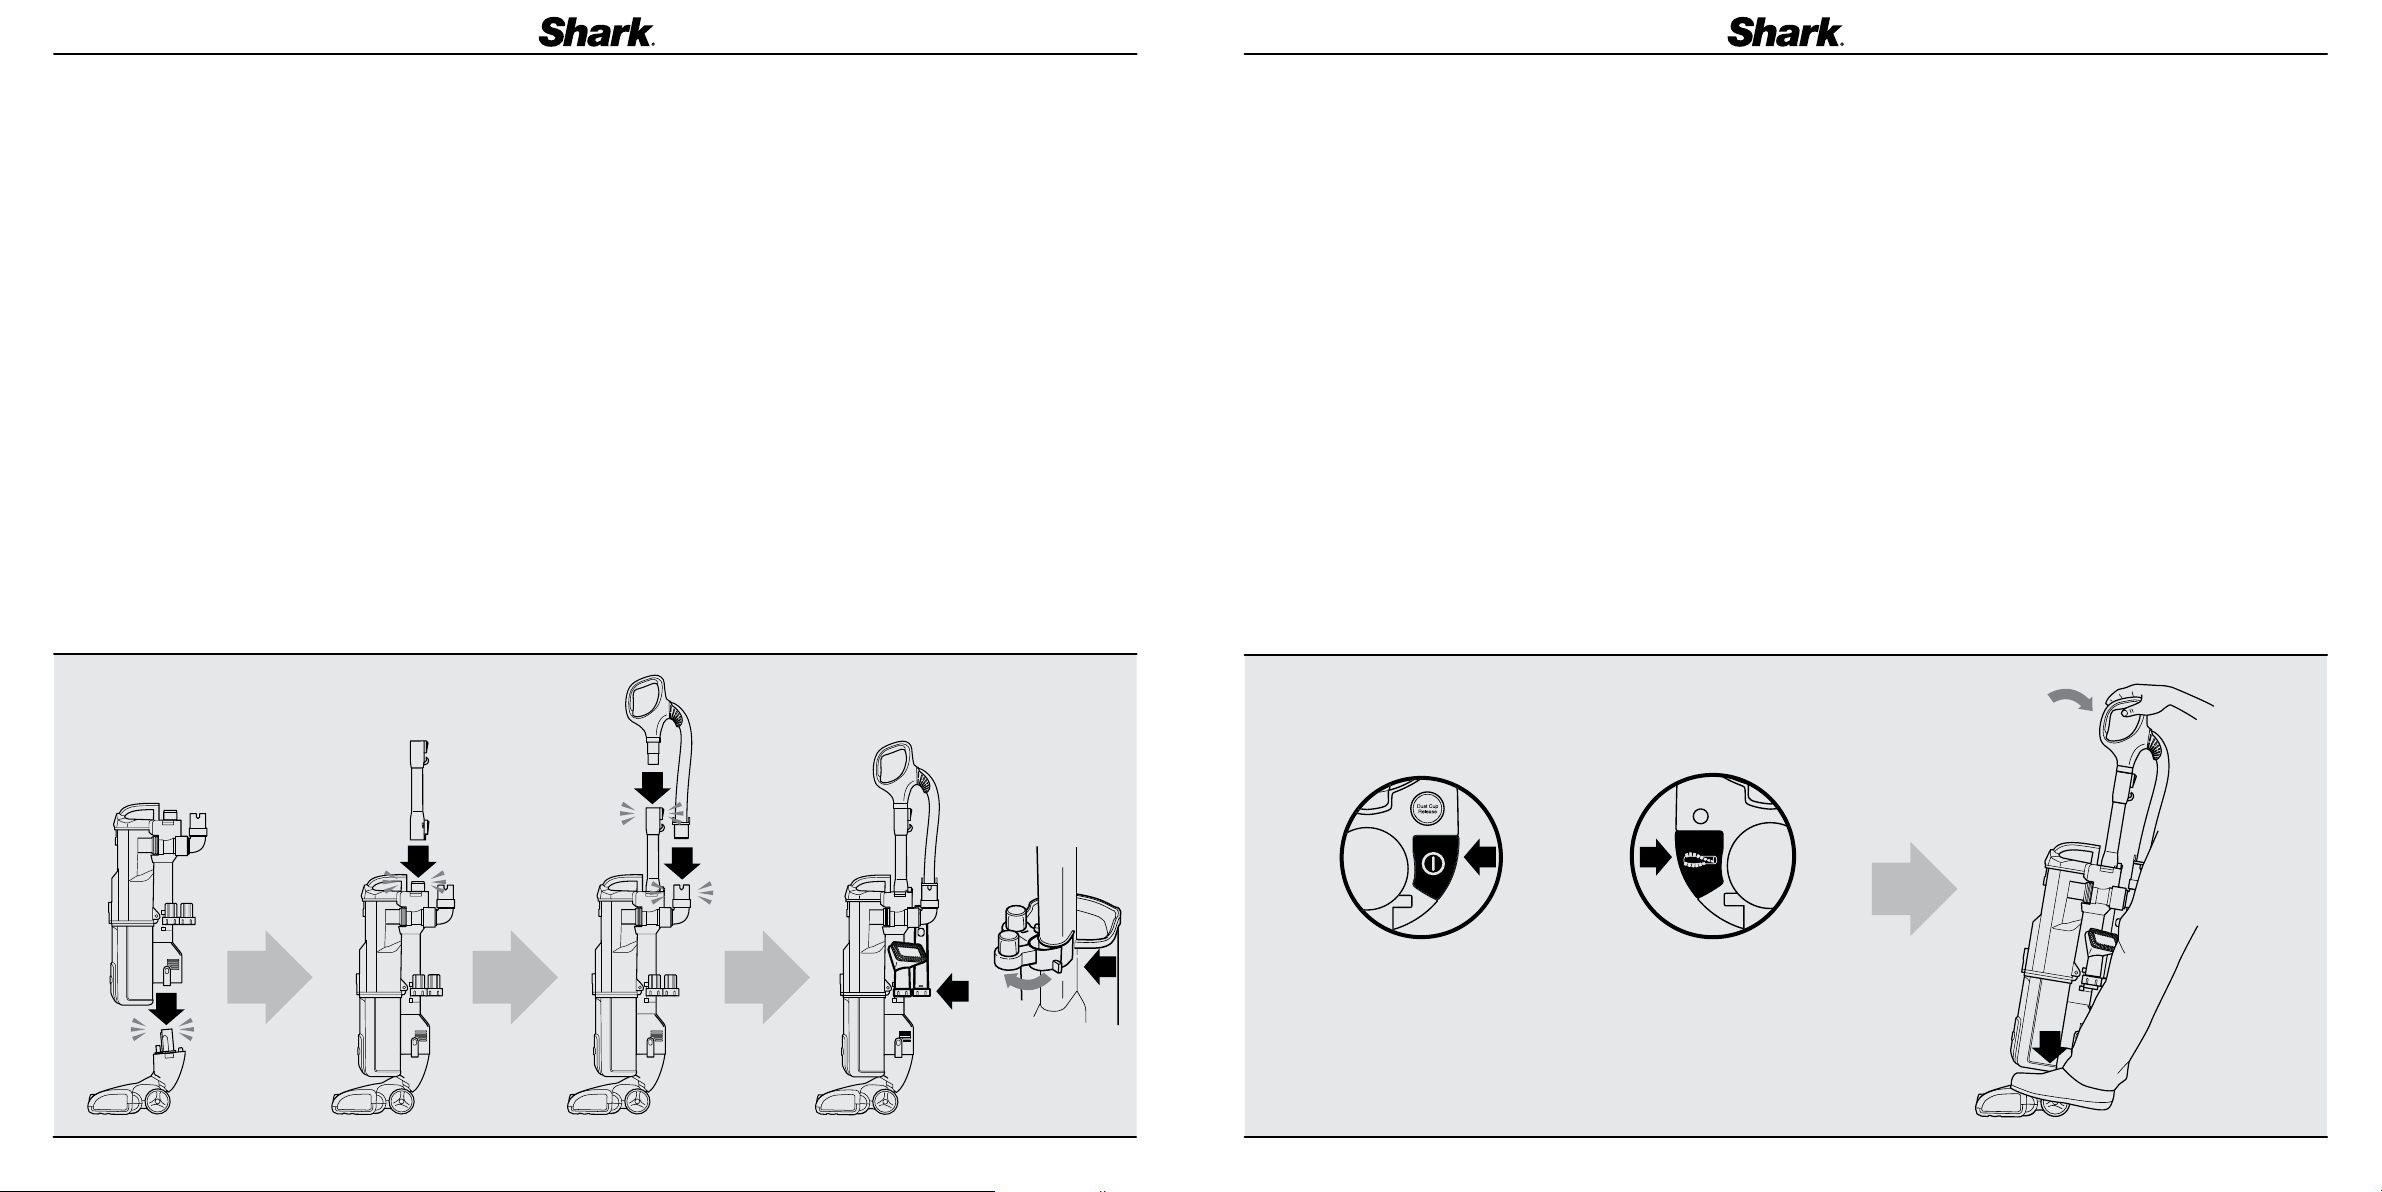
ASSEMBLY
1 Place the vacuum body onto Power nozzle.
2 Insert extension wand into top of the vacuum.
3 Insert handle into the top of the extension wand (if not already assembled).
4 Insert hose into hose connector.
5 Insert the crevice tool and dusting brush onto the accessory holder as shown.
6 The accessory holder is removable. To remove, first remove the dust cup (as explained on page 9), then hold and pull the tab to the left
and pull out. To replace, align the pins into the hinge on the vacuum and clip back into place.
FLOOR
CLEANING
1 Press POWER to clean bare floor surfaces, area rugs or areas above-floors. The brushroll will not spin in this mode.
2 Press POWER and BRUSHROLL to clean carpets. The brushroll indicator lights will illuminate GREEN. If there is a jam, the indicator light
on Power nozzle will illuminate RED. Refer to MAINTENANCE (P10) for instructions on removing blockages.
3 Place your foot gently on the Power nozzle and tilt the handle back to start cleaning.
Note: The brushroll will only spin once the vacuum is reclined back.
3
CLICK
OR
2
POWER + BRUSHROLL
Carpet cleaning
CLICK
2
4
CLICK
6
POWER
Bare floor or wand cleaning
1
5
CLICK
1
3
4 5
Page 4

ABOVE FLOOR
CLEANING
1
1 Depending on the amount of reach required, remove either the handle by pressing the handle release button or handle with
extension wand by pressing the Extension Wand button.
2 Attach desired cleaning accessory. Note, the handle will slide into the accessory and the extension wand will slide over the accessory.
3 You can also Lift-Away for portable cleaning on stairs. Simply remove the Power nozzle by pressing the Nozzle Release button and
attach accessories on to the handle or wand.
Re-assemble back on to the Power nozzle when finished.
NOTE: Select cleaning accessories are included with this model. Additional accessories are available for purchase.
For a list of what is included with this model, refer to inside flap of box.
1
HELPFUL TIPS
POWER BUTTONS
1 The POWER button turns on suction only. This is ideal for use on bare floors, delicate area rugs and for use with accessories.
2 The BRUSHROLL button spins the floor brush, ideal for use on carpeted surfaces. Note: The floor brush will only spin once the vacuum
is reclined back.
CORD HOOK
3 For quick cord access, rotate upper hook 180° and remove cord. Rotate it back to store.
HEADLIGHTS
4 Designed to illuminate debris in dark areas, the headlights illuminate any time the power is on. The headlights are long-lasting and
designed to last the life of the vacuum.
HEIGHT ADJUSTMENT
5 This Power nozzle has been optimised to work on all types of carpets as well as bare floors so there is never any need to adjust heights
for different floor surfaces.
FILTERS
6 Remember to clean your filters regularly under normal use. Also, for optimal performance, tap clean filters between washes as needed.
6
3
1
2
4
OR
2 2
3
6 7
Page 5

ACCESSORIES
NOTE: Select cleaning
accessories are included.
Others are available for
purchase .
For a list of what is
included with this model,
refer to inside flap of box.
33 cm Crevice Tools
3066FLI480
Extendable with
rubberised end flexes to
reach tight areas.
Power Brush
S - 224FFJ480
Designed for removal of
pet hair and ground in
dirt from carpeted stairs
and upholstery.
Dusting Brushes
134FLI480
Cleans hard surfaces and
upholstery.
MAINTENANCE
EMPTY THE DUST CUP
1 Press the dust cup release button and lift the dustcup off the vacuum.
2 Holding the dust cup over a refuse bag or bin, press the bottom empty release latch located near the bottom of the front of the dust cup.
3 Press the top dust cup release latch to access and clean dust screen as required.
CLEAN THE FILTERS
See cleaning schedule on page 2
4 With the dust cup removed, remove and rinse the foam and felt filters every month. Let air dry completely before replacing. Hand wash
only. Tap loose dirt off filters between washes as needed.
5 Remove and rinse the HEPA filter frame once every year. First, remove the Power nozzle by pressing the red nozzle release button on
the side of the vacuum. Turn the latch to the unlock symbol to release the filter frame. Rinse the HEPA filter and let air dry completely
before replacing back into the vacuum. Hand wash only.
Re-assemble back on to Power nozzle.
1
2
3
XFF450
Foam
Felt
4
XHF450
HEPA
5
8 9
Page 6

MAINTENANCE
CHECK FOR BLOCKAGES
REMOVE AND INSPECT:
1 HOSE AND TUBES
Remove Power nozzle and extension wand and shine a torch up from the bottom to check for possible blockage.
Remove dustcup and hose to check intake opening and hose elbow.
2 BOTTOM OF POWER NOZZLE
CAUTION: NOZZLE CONTAINS LIVE PARTS
a Squeeze tabs together and pull up to expose the airway.
b Remove any string, carpet fibers or hair that may be wrapped around the brushroll.
TROUBLESHOOTING
GUIDE
Vacuum is not picking up dirt.
No suction or light suction
• Check filters to see if they need cleaning. Follow instructions for rinsing and drying the filters before re-inserting back into the vacuum.
• Dust cup may be full; empty dust cup.
• Check hose, hose connections, nozzles and accessories for blockages; clear blockages if required.
• Close the suction release on the handle to increase suction power.
Vacuum lifts area rugs
• Turn off the unit to disengage the brushroll and restart with the POWER button for suction only cleaning.
Brush roll does not spin
• Pull the handle toward you and release the Power nozzle to engage the brushroll feature.
• With the power on, turn the brushroll on by pressing the BRUSHROLL button.
• Immediately turn off and unplug vacuum, disconnect the Power nozzle and remove blockage before reconnecting and turning vacuum
back on.
Vacuum turns off on its own
• This vacuum cleaner is equipped with a motor protective thermostat. If for some reason your vacuum overheats, the thermostat will
automatically turn the unit off. Should this occur, perform the following steps to restart the motor thermostat:
1. Turn the unit off.
2. Unplug the vacuum.
3. Empty the dust cup and clean filters.
4. Check for blockages in hose, accessories and inlet openings.
5. Allow the unit to cool for a minimum of 45 minutes.
6. Plug in the vacuum.
7. Restart the unit using the POWER button.
a
b
a
10 11
Page 7

NOTESNOTES
12 13
Page 8

WARRANTY TERMS AND CONDITIONS
These conditions set out the conditions and scope of our guarantee. They do not affect the agreement between you and your retailer, your statutory rights or any other obligations of your retailer.
IMPORTANT: Please keep your receipt at all times. It will be used for verification purposes if you need to use your extended guarantee, and your guarantee may be invalidated if you cannot produce
your receipt.
Term of the free Shark guarantee
We understand that your new Shark machine needs to operate properly for as long as possible. The following guarantees reflect our confidence in the quality of your product and its manufacturing:
• One year unconditional guarantee of all Shark machines against all defects of workmanship and materials
• An additional extended 4 years guarantee for all Shark Vacuum cleaners.
• A free parts and labour guarantee for every Shark machine. You can find online support at www.sharkclean.eu/uk, or you can contact our customer service helpline and speak to a Shark
representative directly. Our helpline is open Monday to Friday from 9.00am to 6.00pm and is free to call.
Both the one year and the extended 4 years guarantees cover your machine from the date of purchase as stated on your receipt or delivery note.
Shark understands that in some circumstances, you may want to repair your Shark machine after the relevant guarantee has elapsed. In such circumstances, please contact our free phone customer
service help line on 0800 862 0453 and enquire about our out-of-warranty program.
Scope of the free Shark guarantee
In addition to your legal rights as a consumer, the free Shark guarantee covers repair or replacement of your Shark machine (at Shark’s discretion), including all parts and labour.
The free Shark guarantee does not cover the following:
• Blockages – For details of how to unblock your vacuum cleaner, please refer to the Operating Manual.
• Normal wear and tear including to the brush bar, fuse, belt, batteries etc.
• Accidental damage, faults caused by negligent use or care, misuse, neglect, careless operation or any other handling of the vacuum cleaner which does not comply with the Shark Operating
Manual supplied with your machine.
• Use of the vacuum cleaner other than for normal domestic household purposes.
• Use of parts not assembled or installed in accordance with the operating instructions.
• Use of parts and accessories which are not Shark Genuine Components.
• Faulty installation (unless the installation was carried out by Shark).
• Repairs and alterations (unless carried out by Shark or its agents)
Extending your Shark guarantee
To benefit from the extended Shark guarantee, within 28 days of making your purchase you must register your guarantee online at www.sharkclean.eu/uk/register-guarantee. To register your
guarantee, you will need your serial number (which can be found on the machine rating label) and the date you purchase the machine (as stated on your receipt or delivery note). When you submit
your details online, we will confirm that we have received them instantly.
Once you have registered your guarantee, we may contact you using the details you have provided if needed. You can also opt to receive tips and advice on how to get the best out of your Shark
machine and updates about our new Shark products and technology.
Genuine Shark parts and accessories
The same engineers who developed your Shark machine have developed our range of Shark spares and accessories.
The guarantee is invalidated if you use spare parts that are not Euro-Pro spare parts or are not approved by Euro-Pro.
For all Shark machines our full range of Shark spares and replacement parts can be found at www.sharkclean.eu/uk/parts, and our full range of Shark accessories can be found at
www.sharkclean.eu/uk/accessories.
Euro-Pro, Shark, and Shark Rocket are trademarks of Euro-Pro
Operating LLC. All other brand names may be trademarks of their
respective owners.
14 15
Page 9

Euro-Pro Europe Limited
15 Mariner Court
Calder Park
Wakefield
WF4 3FL
Freephone 0800 862 0453
www.sharkclean.eu
NV480UKP�26�IB�150616�2
© 2014 Euro-Pr o Operating LLC
Printed in China
Illustr ations may differ from actual product.
 Loading...