

Page 1
Item # XSG709
for Model EP709
10 Paper Bags – 1 Pre-Motor Filter – 1 Post Motor Filter
Item # XSG709
for Model EP709
10 Paper Bags – 1 Pre-Motor Filter – 1 Post Motor Filter
Warning: To reduce the risk of electric shock, the power cord
must be disconnected before changing the bag or
performing maintenance/trouble shooting checks.
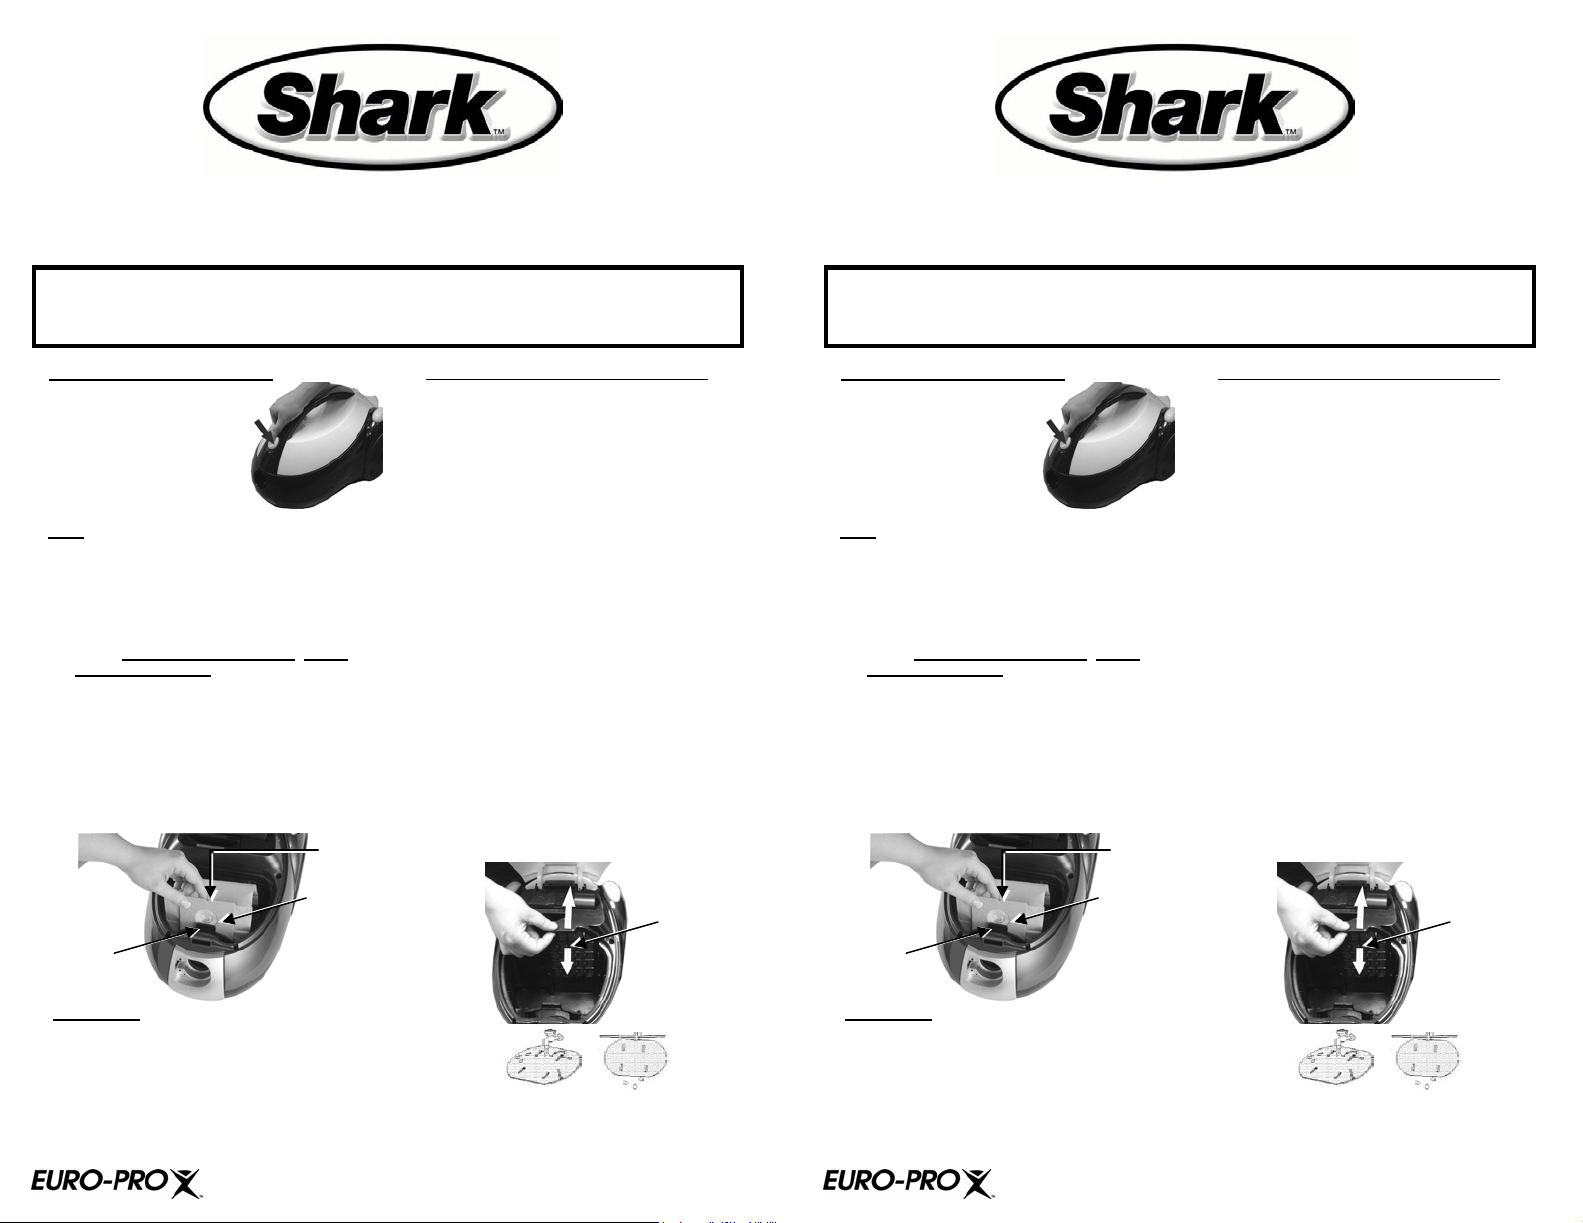
Replacing the Dust Bag
1. To open main unit,
press the storage
compartment release
button to unlock and lift
the cover. (Fig. 1)
Fig. 1
Note Vacuuming new carpet or carpet with
fine powders may clog the dust bag, so
check the bag more often. Never operate
without dust bag in place.
2. Remove the old dust bag by pushing the
paper bag holder towards the rear of the
unit and then pull up on the cardboard
collar. Dispose of paper bags
reuse Paper Bags.
3. To insert a new dust bag slide the
cardboard collar end with the slot into the
matching slot on the holder (a). Cardboard
should be behind the (2) two securing tabs
on holder. Press the paper bag holder (b)
toward the front of the unit and make sure
that the paper bag is locked in place.
(Fig. 2)
4. Close storage compartment cover.
. Never
a) Cardboard
insert
Changing the Pre-Motor Filter
The pre-motor filter is located inside the
storage compartment behind the dust bag.
(Fig. 3)
• The pre-motor filter should be cleaned at
least twice a year or when it becomes
visibly soiled.
• Always operate the cleaner with the filter
installed.
• Disconnect from electrical outlet before
cleaning the filter.
• Do not use a washing machine to rinse the
filter.
• Do not use a hair dryer to dry it.
• Always allow 24 hours to air dry.
1. Press the storage compartment release
button and open the cover.
2. Remove the paper bag from the unit.
3. Pull the pre-motor filter assembly out of
the unit.
4. Remove the pre-motor filter from the
filter grill.
5. Rinse the pre-motor filter in lukewarm
water and let the pre-motor filter air dry
for 24 hours until it is completely dry.
(Fig. 4)
6. Replace the pre-motor filter into the filter
grill and replace back into the unit.
7. Replace the dust bag and close the
storage compartment cover.
Warning: To reduce the risk of electric shock, the power cord
must be disconnected before changing the bag or
performing maintenance/trouble shooting checks.
Replacing the Dust Bag
1. To open main unit,
press the storage
compartment release
button to unlock and lift
the cover. (Fig. 1)
Fig. 1
Note Vacuuming new carpet or carpet with
fine powders may clog the dust bag, so
check the bag more often. Never operate
without dust bag in place.
2. Remove the old dust bag by pushing the
paper bag holder towards the rear of the
unit and then pull up on the cardboard
collar. Dispose of paper bags
reuse Paper Bags.
3. To insert a new dust bag slide the
cardboard collar end with the slot into the
matching slot on the holder (a). Cardboard
should be behind the (2) two securing tabs
on holder. Press the paper bag holder (b)
toward the front of the unit and make sure
that the paper bag is locked in place.
(Fig. 2)
4. Close storage compartment cover.
. Never
a) Cardboard
insert
Changing the Pre-Motor Filter
The pre-motor filter is located inside the
storage compartment behind the dust bag.
(Fig. 3)
• The pre-motor filter should be cleaned at
least twice a year or when it becomes
visibly soiled.
• Always operate the cleaner with the filter
installed.
• Disconnect from electrical outlet before
cleaning the filter.
• Do not use a washing machine to rinse the
filter.
• Do not use a hair dryer to dry it.
• Always allow 24 hours to air dry.
1. Press the storage compartment release
button and open the cover.
2. Remove the paper bag from the unit.
3. Pull the pre-motor filter assembly out of
the unit.
4. Remove the pre-motor filter from the
filter grill.
5. Rinse the pre-motor filter in lukewarm
water and let the pre-motor filter air dry
for 24 hours until it is completely dry.
(Fig. 4)
6. Replace the pre-motor filter into the filter
grill and replace back into the unit.
7. Replace the dust bag and close the
storage compartment cover.
Paper bag
holder
b) Push in
Fig. 2
Pre-motor
Fig. 3
Warning: Before closing main unit, make
certain that paper bag is well inside the
compartment and does not get caught between
the hinges when closing the cover.
USA: EURO-PRO Operating LLC Canada: EURO-PRO Operating LLC
94 Main Mill Street, Door 16 4400 Bois Franc
Plattsburgh, NY 12901 St. Laurent, QC H4S 1A7
Tel.: 1 (866) 98SHARK
www.sharkvac.com
Printed in China
filter
Fig. 4
Rev. 06/04
Page 2

Changing the Post Motor
Filter
• Filter should be cleaned at least twice
a year or when it becomes visibly soiled.
• Always operate the cleaner with the post
motor filter installed.
• Disconnect from electrical outlet before
cleaning the filter.
• Do not use a washing machine to rinse
the filter.
• Do not use a hair dryer to dry it.
• Always allow 24 hours to air dry.
1. Remove the post motor filter cover that is
located the rear of the unit. (Fig. 5)
2. Remove the post motor filter from the
filter grill. (Fig. 6)
3. Rinse the post motor filter in lukewarm
water and let the post motor filter air
dry for 24 hours until it is completely
dry. (Fig. 7)
4. Replace the post -motor filter into the
filter grill and replace back into the
unit.
Fig. 5
Fig. 6
Fig. 7
Fig. 6
Fig. 5
Fig. 7
 Loading...