

SGS SSB200 Owner's Manual
FOR YOUR SAFETY
PLEASE READ THESE INSTRUCTIONS CAREFULLY
AND RETAIN THEM FOR FUTURE USE.
OWNER’S MANUAL
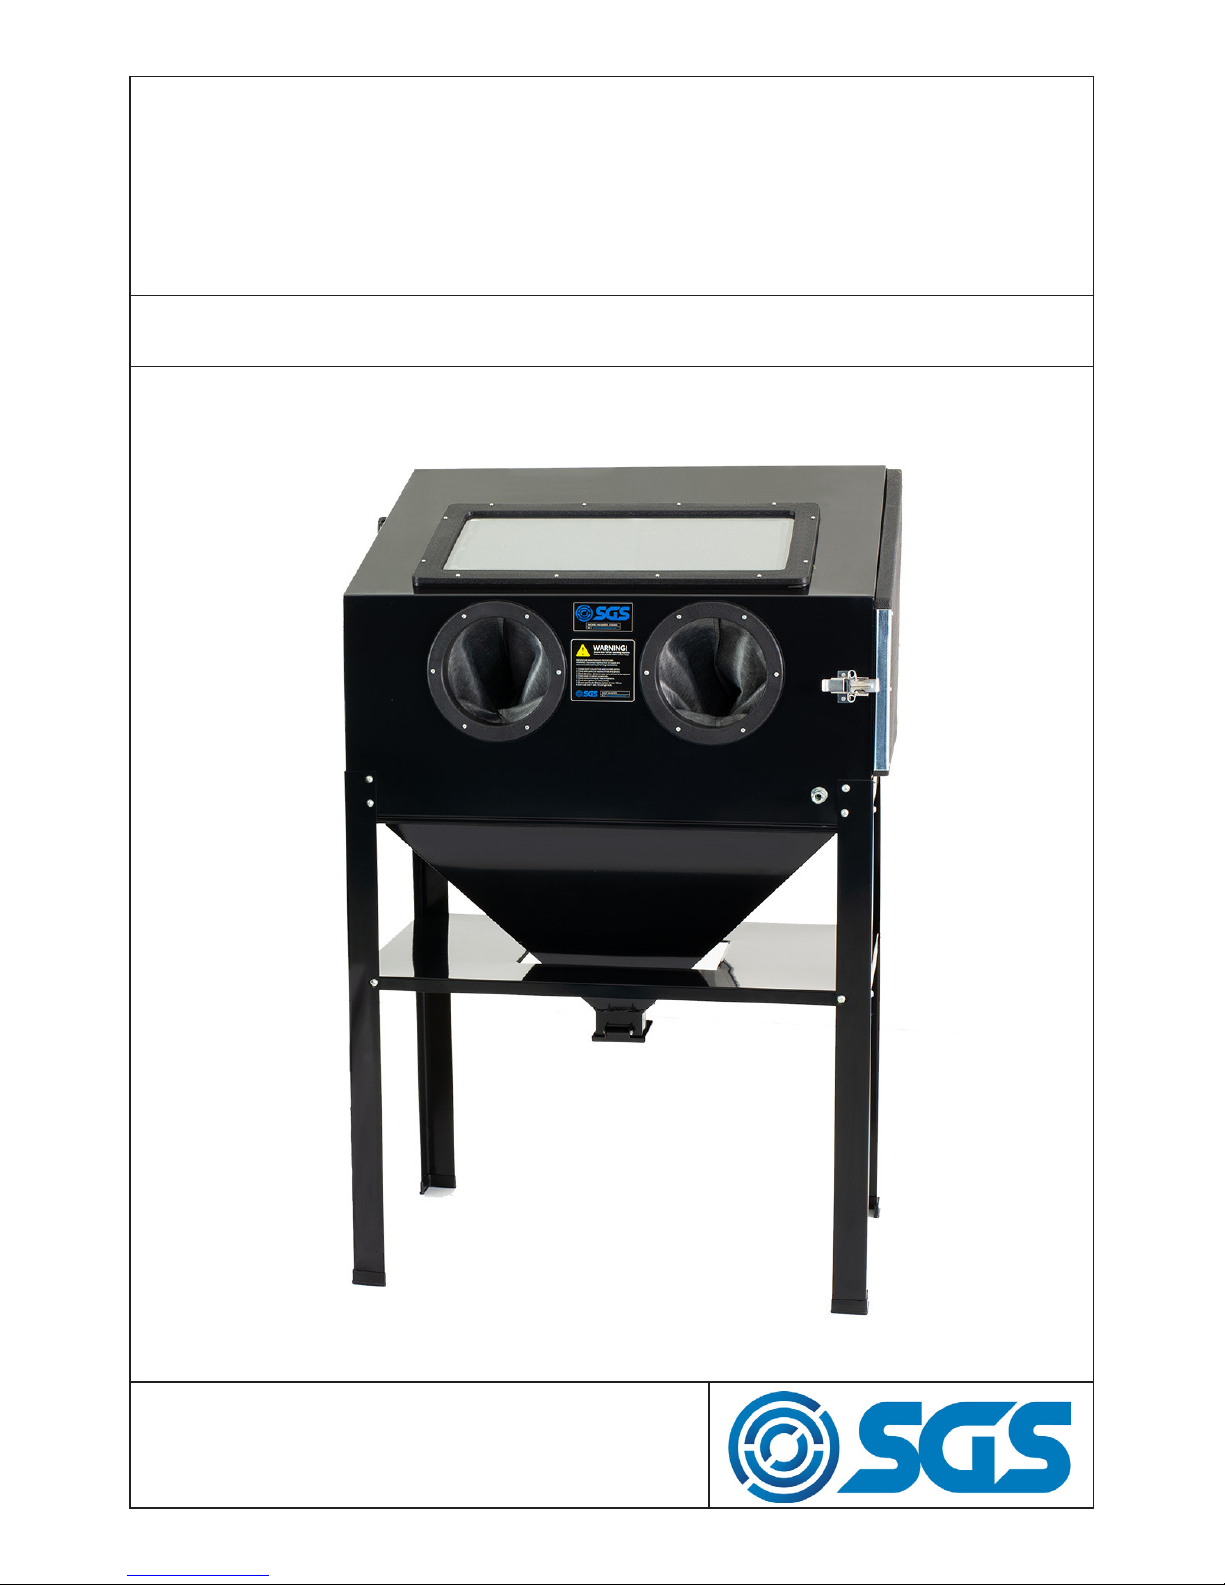
SSB200
SHOT BLAST CABINET
PAGE 3
PAGE 2
SPECIFICATION
WARNING
Read and understand instructions before use.
Always wear eye/face and hand protection.
Do not use any silica based abrasives with this cabinet.
Silica based abrasives have been linked to severe res-
piratory disease. Always use recommended abrasives.
Abrasives used in this unit may be covered by COSHH.
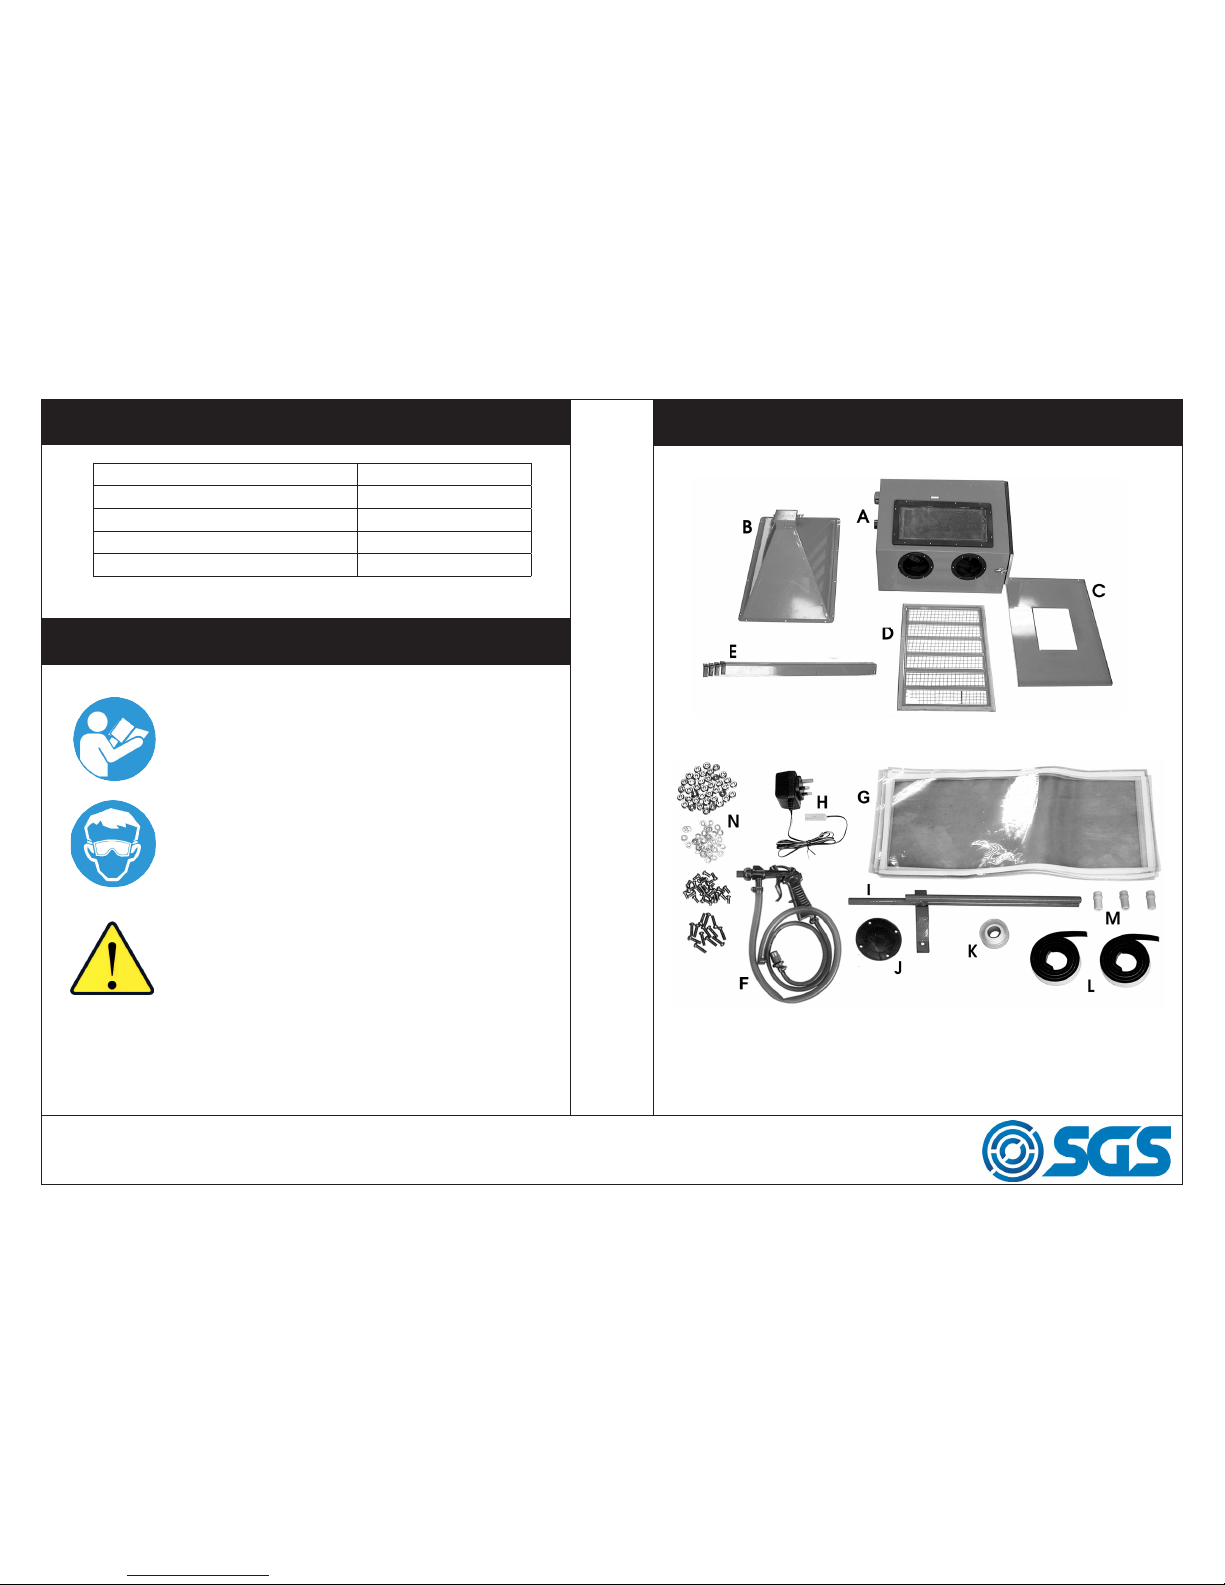
INVENTORY
A - Cabinet B - Funnel C - Shelf D - Grid Support E - Legs
F - Gun & Hose G - Protective Film H - Transformer I - Pick-up Tube
J - Intake Vent Cover K - PTFE Tape L - Foam Strip (may be fitted)
M - Ceramic Nozzles (one nozzle fitted) N - Nuts, screws & washers
TOOL MODEL SSB200
TYPE FLOOR STANDING
VOLTS 12V
MIN AIR REQUIREMENT 10 CFM
MIN AIR REQUIREMENT 80-100 PSI
WWW.SGS-ENGINEERING.COM
PAGE 5
PAGE 4
ASSEMBLY
1. Lay the cabinet on its back and attach the four legs using the M6
x12mm screws, flat washers and nuts, ensuring the flat washers are
against the screw heads.
2. Fit the intake vent cover to the cabinet.
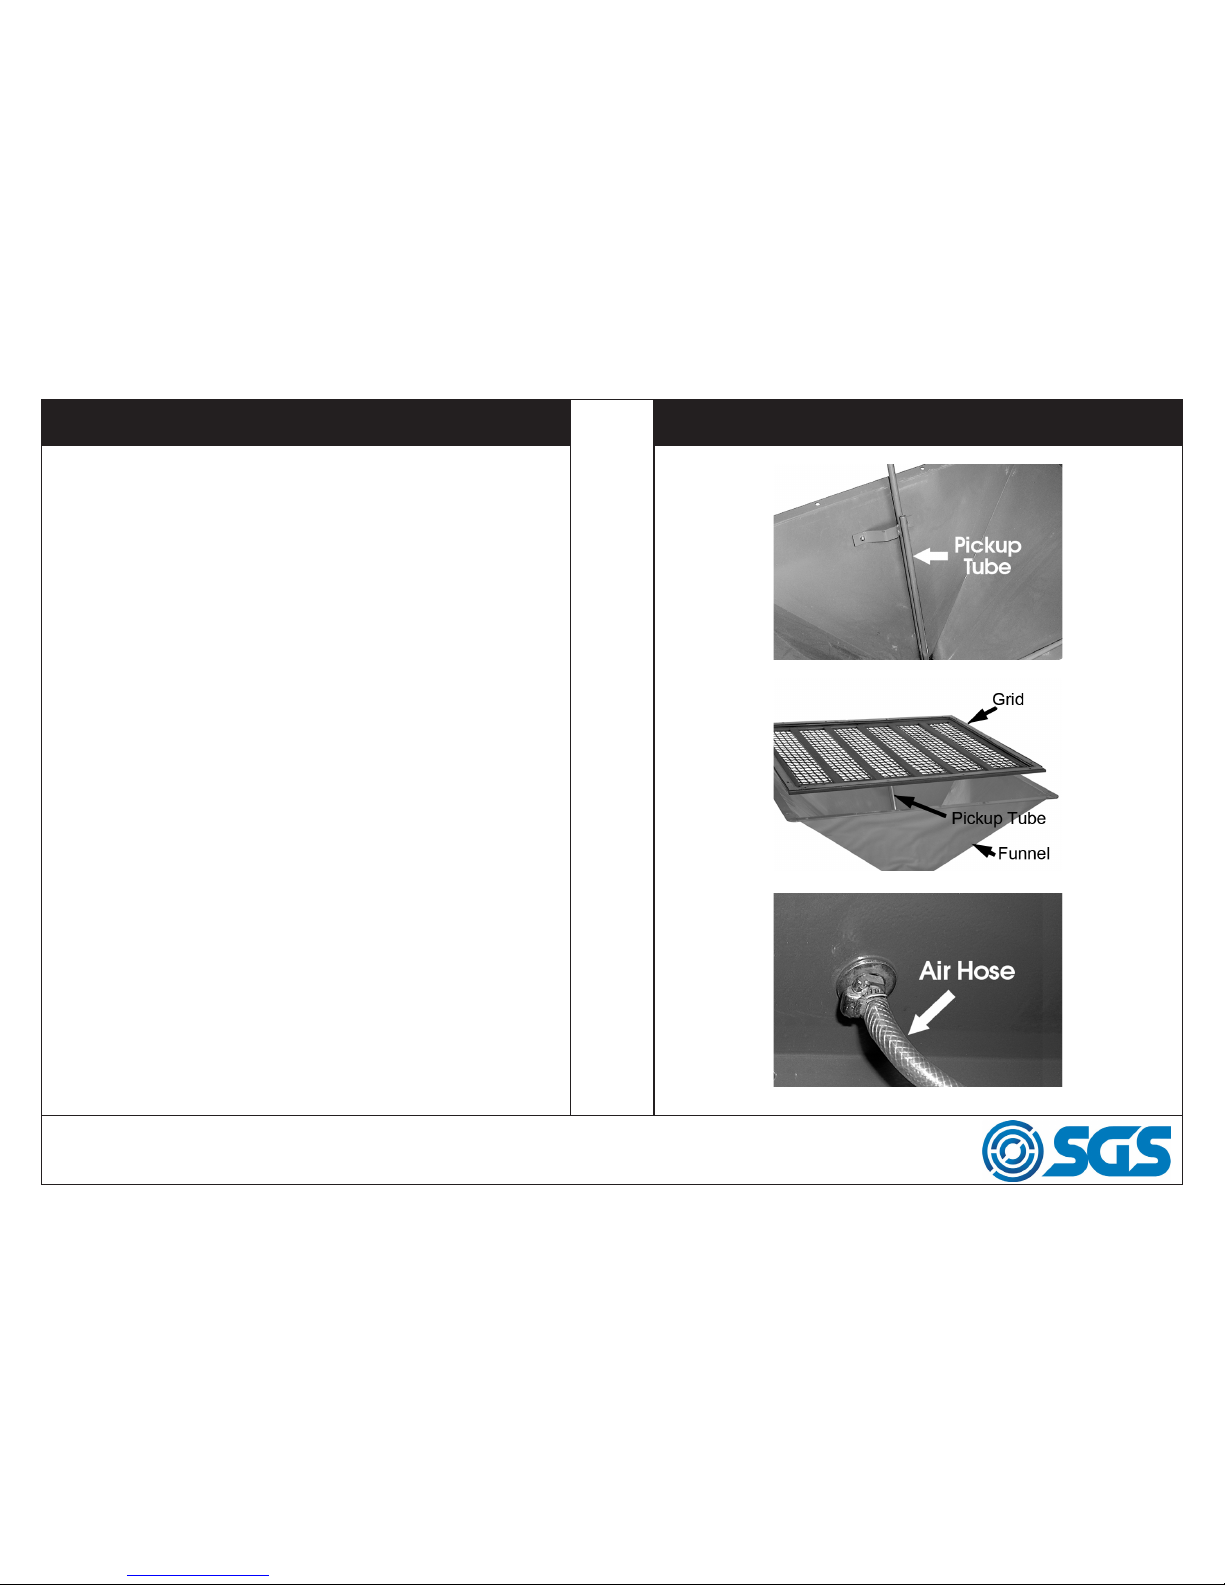
3. Attach the pick-up tube to the funnel as shown, using the M6 x 12mm
screws provided.
4. If not already fitted, peel the backing paper from the foam strip and
apply the strip to the edge of the grid support. Trim the strip accordingly.
5. Use a punch (or similar) to make holes in the foam strip, at the bolt
holes.
6. Place the grid support on the funnel flange and the grid into the
recess in the grid support, so that the pick-up tube protrudes through
the grid neatly. Do not use undue force.
7. Turn the cabinet on to its legs then and with assistance, raise the funnel to meet the underside of the cabinet, ensuring the pickup tube
is at the front of the cabinet. Bolt the funnel assembly to the cabinet
using the M6 x 20mm screws with the nuts and flat washers provided,
ensuring the flat washers are against the screw heads.
8. Open the cabinet door and attach the air hose from the gun to the
inlet port on the front of the cabinet, then connect the pick-up hose
from the gun to the pick-up tube attached to the funnel, securing with
the worm drive clip provided.
9. Attach the shelf to the legs using the screws and nuts provided.
ASSEMBLY
WWW.SGS-ENGINEERING.COM
 Loading...