

SFA SANITOP Installation And Care Instructions
INSTALLATION AND CARE INSTRUCTIONS
INSTALLATION AND CARE INSTRUCTIONS
THESE INSTRUCTIONS MUST BE READ BEFORE INSTALLATION IS ATTEMPTED. FAILURE TO DO SO MAY COMPROMISE WARRANTY. FOLLOWING
INSTALLATION PLEASE LEAVE ALL PAPERWORK WITH CLIENT AS IT CONTAINS IMPORTANT INFORMATION ON HOW TO UNDERTAKE ONGOING
CARE FOR YOUR SANITOP PUMP TOGETHER WITH WARRANTY PAPERS.
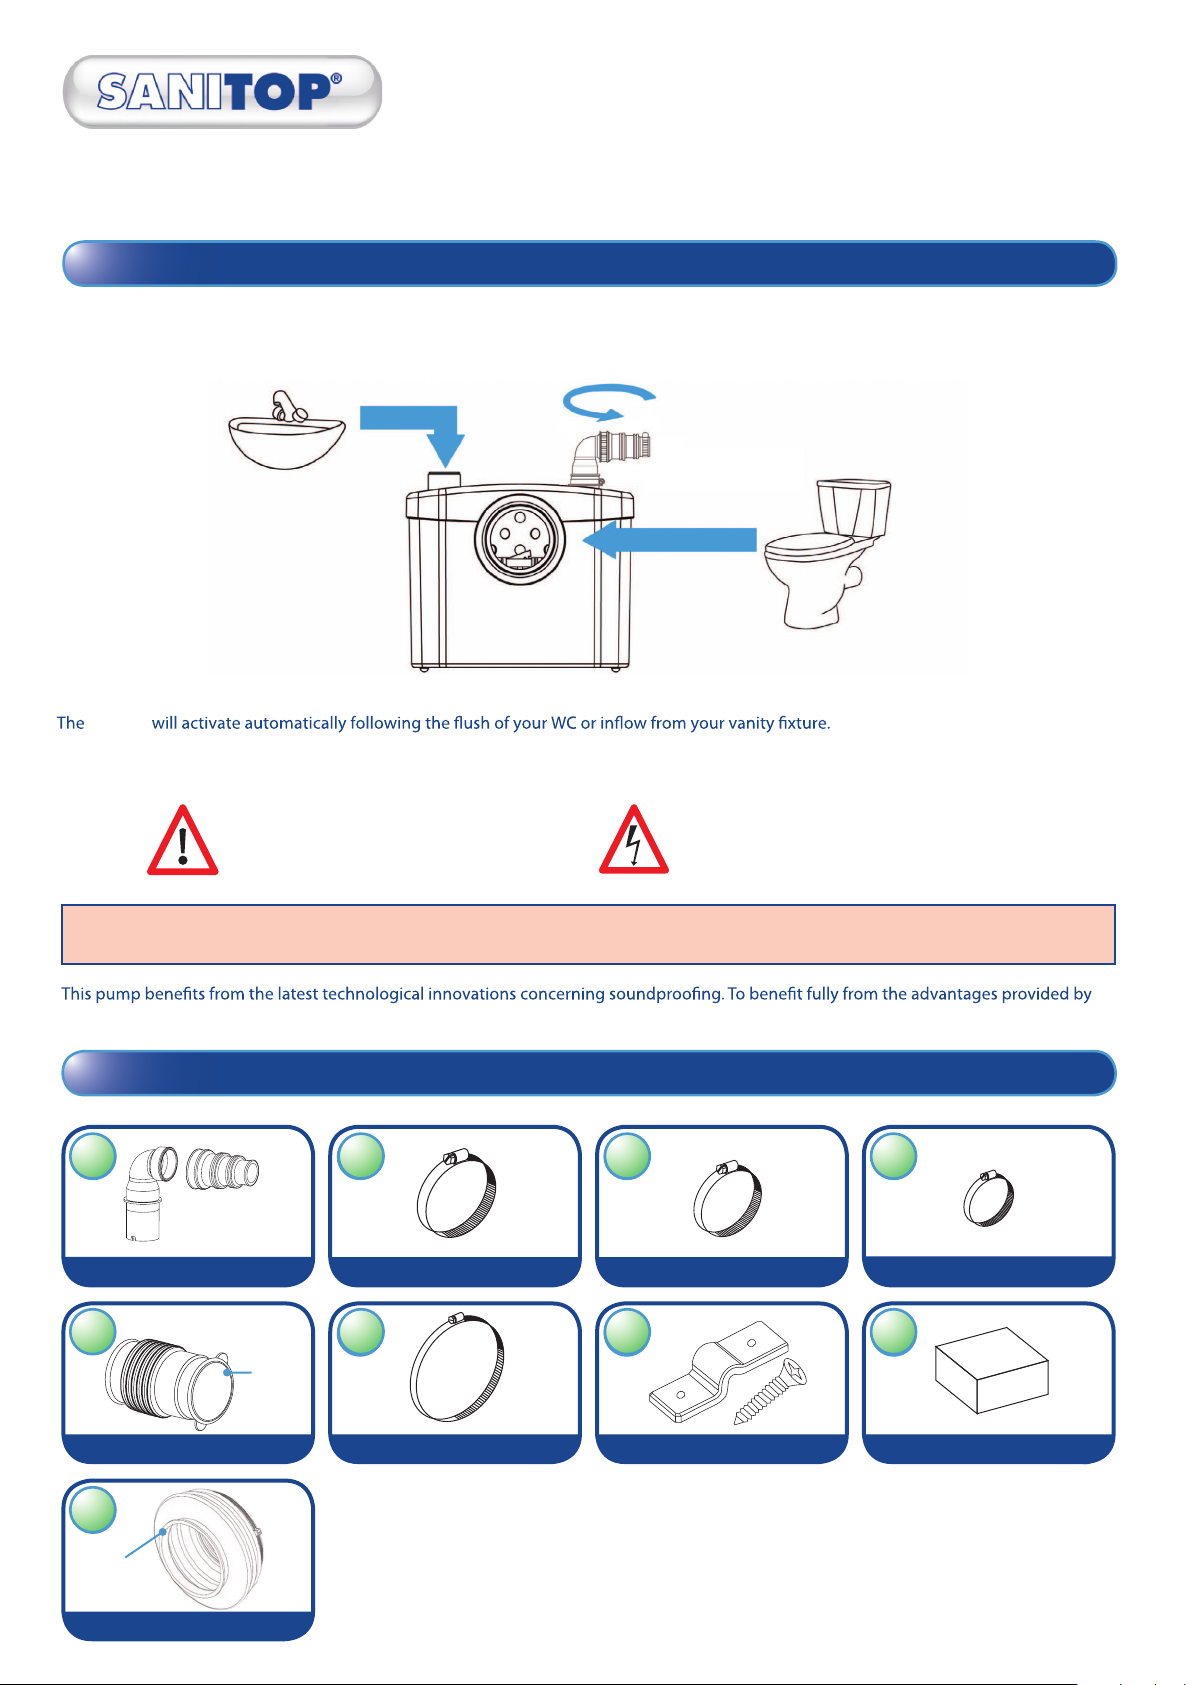
1. Description - THIS UNIT IS FOR DOMESTIC USE ONLY
1. Description - THIS UNIT IS FOR DOMESTIC USE ONLY
The Sanitop
alone or together with one vanity basin.
Sanitop
Please pay particular attention to the following:
is a compact macerator pump designed to receive and pump away sewage waste and water from one standard P-trap WC pan
Possible danger to personnel Warning of possible electrical hazard
“ATTENTION” This is a general warning that failure to follow instructions could result in poor functioning of the unit.
this new generation of appliances, it is important to comply with the installation instructions in section 5, 6 and 7.
2. List of Accessories included
A
A
E
Smaller
diameter
towards
pump casing
I
I
Discharge elbow
Inlet Connector
x1
x1
Smaller
diameter
towards
pump
casing
x1
B
B
F
F
100mm
Hose clip
Hose clip
x4
32 x 55
x1
90 x 110
C
C
Hose clip
G
G
Floor mounting bracket
x1
25 x 40
x2
D
D
HE
H
20 x 32
Hose clip
Foam feet
x1
x4
Smaller
diameter
towards
pump casing
Pan Collar and Cable Tie
SANITOP PAGE 1
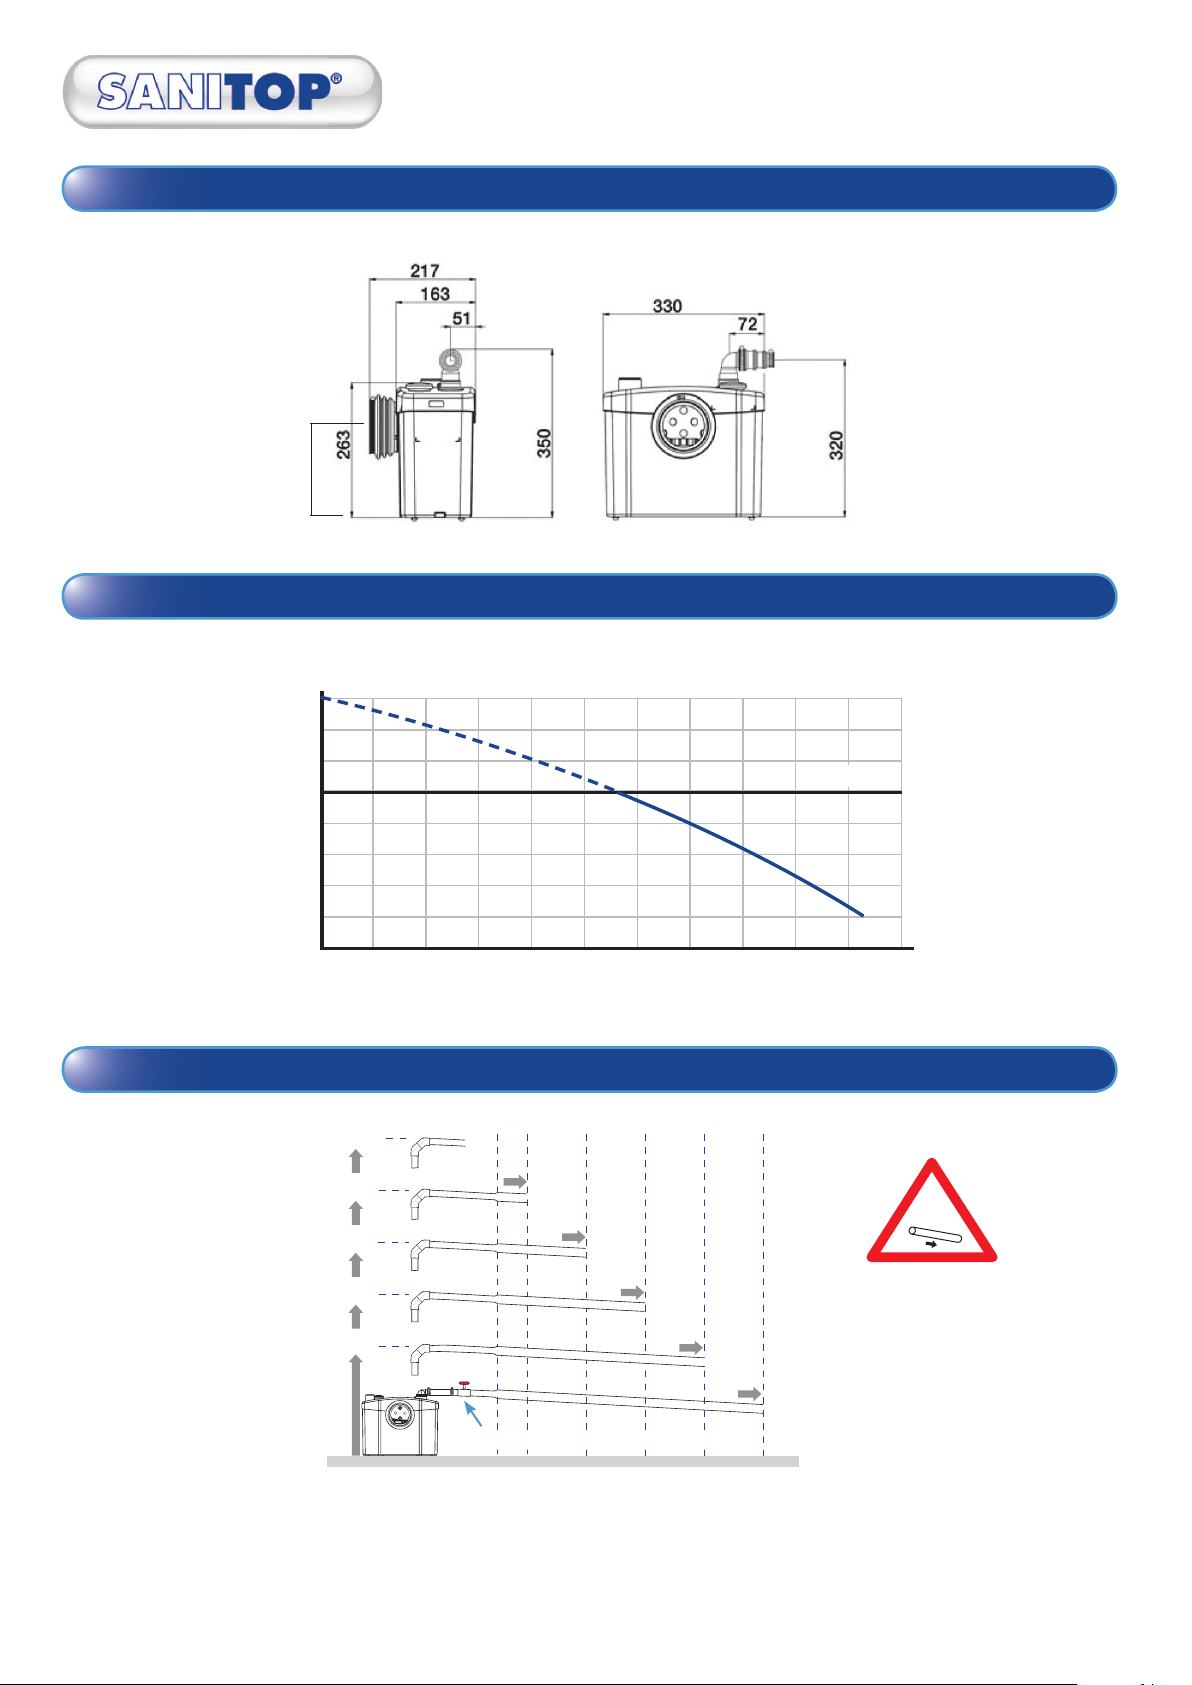
3. Dimensions and overall measurements
180
4. Performance curve
USE ONLY Ø 20MM PRESSURE PIPE FOR VERTICAL LIFT
8
7
6
5
4
HEIGHT (m)
3
2
1
0
0 20 40 60 80 100
EN12050-3
OUTPUT (litres/min)
5. Vertical and horizontal pumping parameters
All elbows must
be 2 x 45˚
Following vertical lift, increase discharge pipe diameter by one size on the Horizontal run to Sewer or vent connection.
N.B. VERTICAL LIFT MUST PRECEDE HORIZONTAL RUN
5m max
4m
3m
2m
1m
Install Isolation Valve at beginning of pipe run
20
10 metres
100806040
1:100
All horizontal
pipework requires a
minimum of 1:100 fall
SANITOP PAGE 2

6. Installation
20mm
TO BE UNDERTAKEN BY A REGISTERED PLUMBER IN CONJUNCTION WITH: AS3500 10:10
H
H
G
• The Sanitop should be installed to allow full access in the event that servicing and or removal is necessary.
Sanitop
movement during operation.
• The Sanitop must be coupled directly to the spigot (outlet) of the P-trap WC pan.
Sanitop
Connections - Incoming waste water
• The inlet port for a Vanity basin connection is located on top of the Sanitop lid.
• If using the lid port use a stanley blade or hack-saw to remove the very top of the port to allow connection.
• Use rubber connectors and pipe clips (supplied) to make secure connections. Ensure connectors are facing in the right direction before
securing. See diagram E on page 1.
1 2
G
• Position the pump so that it is not in contact with a partition or wall of the room ensuring that the foam feet are attached to the underside of
the pump.
• Place the WC pan on a level surface.
• Apply soapy water to the WC spigot and position the pan to the pump, ensuring that there is a 20mm gap between them. The reason for this is
two-fold 1. If in contact with the pump sound vibration occurs, and 2. the pump can be removed if service is needed.
• Locate pan collar onto front of the pump, ensuring small diameter opening is secured to the pump using plastic cable tie provided.
The other end of the pan collar has a larger opening to allow easier tting to WC pan outlet (spigot).
• Pull the pan collar over the pan spigot
• Position the metal hose clip (G) over the end of the pan collar (Spigot end) and tighten with a screwdriver. Affi x plastic cable tie to other end of
pan collar.
• Once the pump has been positioned, use 2 screws through the oor mounting brackets to x it to the oor. (optional)
SANITOP PAGE 3
 Loading...