

Page 1
Serif WebPlus 6
Companion
For Windows
Page 2

©1999 Serif, Inc. All rights reserved. No part of this publication may be reproduced in any form
without the express written permission of Serif, Inc.
All Serif product names are trademarks of Serif, Inc. Microsoft, Windows and the Windows logo are
registered trademarks of Microsoft Corporation. All other trademarks acknowledged.
Serif WebPlus 6.0 © 1999 Serif, Inc.
Companies and names used in samples are fictitious.
Clipart samples from Serif ArtPacks © Serif, Inc. & Paul Harris
Portions clipart and graphic content ©1999 Nova Development Corporation and its licensors. All
rights reserved.
TrueType font samples from Serif FontPacks © Serif, Inc.
Portions graphics import/export technology © AccuSoft Corp. & Eastman Kodak Company &
INSO Corporation & LEAD Technologies, Inc.
ImageStream® Graphics and Presentation Filters, Copyright © 1991-1999 INSO Corporation. All
Rights Reserved.
International ProofReader™ English text proofing system © 1994 by INSO Corporation. All rights
reserved. Reproduction or disassembly of embodied computer programs or algorithms prohibited.
Enhanced Roget’s US and UK Electronic Thesaurus © 1994 by INSO Corporation. Adapted from
the Oxford Thesaurus © 1991 by Oxford University Press and from Roget’s II: The New Thesaurus
© 1980 by Houghton Mifflin Company. All rights reserved. Reproduction or disassembly of
embodied computer programs or algorithms prohibited.
International Hyphenator © 1994 by INSO Corporation. All rights reserved. Reproduction or
disassembly of embodied computer programs or algorithms prohibited.
Page 3

Software License Agreement
This Software License Agreement (“License Agreement”) is a legal agreement between you (either
an individual or a single entity) and Serif, Inc. (“Serif”) for the accompanying software product,
which includes computer software and may include associated media, printed materials, and “online”
or electronic documentation (the “Software Product”). By installing, copying, or otherwise using the
Software Product, you agree to be bound by the terms of this License Agreement. If you do not agree
to the terms and conditions of this License Agreement, do not install or use the Software Product;
you may, however, return it to your place of purchase for a full refund.
THANK YOU FOR LICENSING THE USE OF THE SOFTWARE PRODUCT. IT IS
IMPORTANT THAT YOU (THE "LICENSEE") READ THIS NOTICE CAREFULLY. THESE
ARE THE ONLY TERMS AND CONDITIONS APPLICABLE TO YOUR RIGHTS WITH
RESPECT TO THE SOFTWARE PRODUCT. THE SOFTWARE PRODUCT IS PROTECTED BY
COPYRIGHT LAWS AND INTERNATIONAL COPYRIGHT TREATIES, AS WELL AS OTHER
INTELLECTUAL PROPERTY LAWS AND TREATIES. THE SOFTWARE PRODUCT IS
LICENSED, NOT SOLD.
1. GRANT OF LICENSE
Serif hereby grants to Licensee a personal, non-exclusive, nontransferable license (a "License") to use one (1) copy of the
Software Product, including any updates thereto, and
accompanying documentation, if any, provided by Serif,
according to the terms set forth below. If the Software Product
is being provided to Licensee as an update or upgrade to
software which Licensee has previously licensed (such software
referred to as the "Prior Softwar e"), then Licensee agrees to
destroy all copies of the Prior Software within thirty (30) days
after opening this package except for one backup copy of the
Prior Software.
2. SCOPE OF USE
You may install and use one copy of the Software Product, on a
single computer. The primary user of the computer on which the
Soft ware Pr odu ct is inst alled may make a sec ond cop y for his or
her exclusive use on a portable computer. Licensee may also
store or install a copy of the Software Product on a storage
device, such as a network server, used only to install or run the
Software Product o n other computers over an internal network;
however, you must acquire and dedicate a license for each
separate computer on which the Software Product is installed or
run from the storage device. A license for the Software Product
may not be shar ed or used co ncurrent ly on different co mputer s.
3. LICENSE PAK
If you have acquired this LICENSE AGREEMENT in a Serif
License Pak, you may make the number of additional copies of
the computer software portion of the Software Product as
authorized in the Serif License Pak, and you may use each copy
in the manner specified above. You are also entitled to make a
corresponding number of secondary copies for portable
computer use as specified above.
4. PROHIBITIONS
You may not: modify, prepare derivative works from, translate,
reve rse engineer, decompile , dis asse mble o r other wise deriv e
source code from the Software Pr oduct (except to the extent that
such acts are expressly permitted by applicable law
not with sta nding this limit ation); cop y the Soft ware Pr od uct
(except as provided above) or the accompanying
documentation; rent, transfer, disclose, make available or grant
any rights in the Software Product (including any
accompanying documentation) in any form to any person
without the prior written consent of Serif; remove any
proprietary notices, labels, or marks on the Software Product
(including any accompanying documentation); use the Software
Pro duc t in a ny manne r that in fringe s th e int ellect ual prop ert y or
other rights of another party; or use the Software Product to
provide on-line or other database services to any other person.
5. RETENTION OF RIGHTS; TERMINATION
This License Agreement does not constitute a sale. All title,
trade secrets, copyrights, patents and other intellectual rights to
the Software Product, its accompanying documentation and any
copy made by Licensee remain with Serif, and Licensee hereby
agrees to preserve and acknowledges the foregoing. Licensee
further agrees and acknowledges that the Software Product and
all copies thereof are Serif's exclusive property and constitute a
valuable trade secret of Serif. Licensee further agrees and
acknowledges that unauthorized copying of the Software
Product or the accompanying documentation, or failure to
comp ly with any o f the pro visio ns her eof (eac h, a "Terminable
Even t") , will r esu lt in a uto matic te rminat ion of th is Lice nse. In
the event of a violation of this License by Licensee, Serif
rese rve s and shall ha ve av ailable all legal reme dies .
6. TERM OF LICENSE FOR TRIAL VERSION
SOFTWARE
The License pertaining to a trial version of the Software Product
(a "Trial Version") shall expire in accordance with the terms as
set fort h in the inst allat ion proc ess fo r the Tr ial Ve rsio n alo ng
with the designated trial period as set forth in the trial program.
7. LIMITED WARRANTY AND DISCLAIMER
Serif warrants that, for a period of ninety (90) days after
delivery, the diskettes or CD-RO Ms on which the software
includ ed in t he Softw are Pro duc t is fu rnish ed will, und er no rmal
use, be free from defects that prevent Licensee from loading the
Soft ware Pr odu ct on a c ompu te r. S erif's ent ire lia bility an d
Licensee's exclu sive r emedy unde r this warra nty will be, a t
Serif's option, to (a) use reasonable commercial efforts to
attempt to correct or work around errors, or (b) to replace the
Software Product with functionally equivalent Software
Product, on diskettes or CD-ROM, as applicable or (c) return
the price paid for the Software Product, in each case upon return
of the Software Product to Serif together with a copy of your
receipt for the purchase thereof. This Limited Wa rr anty is void
if failure of the Software Product or hardware has resulted from
accident, abuse, or misapplication. Any replacement Software
Pro duc t will b e war ranted for t he remainde r o f the orig inal
warranty period or thirty (30) days, whichever is longer.
Outside the United States, neither these remedies nor any
product support services offered by Serif are available without
proof of purchase from an authorized non-U.S. source. The
Page 4

Software Pro duct is licensed to you on an "as is" basis without
any wa rra nty o f any natu re.
8. NO OTHER WARRANTIES
EXCEPT FOR THE ABOVE EXPRESS LIMITED
WARRANTIES, SERIF AND ITS SUPPLIERS MAKE AND
LICENSEE RECEIVE S NO WARRANTIES OR
CONDITIONS, OR TERMS, EXPRE SS, IMPLIED,
STATUTORY, OR IN ANY COMMUNICATION WITH
LICENSEE. TO THE MAXIMUM EXTENT PERMITTED
BY APPLICABLE LAW, SERIF AND ITS SUPPLIERS
DISCLAIM ALL OTHER WARRANTIES AND
CONDITIONS, EITHER EXP RESS OR IMPLIED,
INCLUDING, BUT NOT LIMITED TO, I MPLIED
WARRANTIES OF MERCHANTABILITY, FITNESS FOR A
PARTICULAR PURPOSE, TITLE AND NONINFRINGEMENT, WITH REGARD TO THE SOFTWARE
PRODUCT AND THE PROVISION OF OR FAILURE TO
PROVIDE SUPPORT SERVICES. LICENSEE SHALL BE
SOLELY RESPONS IBLE FOR THE SELE CTION, USE,
EFFICIENCY AND SUITABILITY OF THE SOFTWARE
PRODUCT AND SERIF SHALL HAVE NO LIABILITY
THEREFOR. SERIF SHALL HAVE NO LIABILITY FOR,
NOR OBLIGATION TO INDEMNIFY LICENSEE
REGARDING ACTIONS ALLEGING THE INFRINGEMENT
OF PROPRIETARY RIGHTS BY THE SOFTWARE
PRODUCT. SERIF DOES NOT WARRANT THAT THE
OPERATION OF THE SOFTWARE PRODUCT WILL BE
UNINTERRUPTED OR ERROR FREE OR THAT THE
SOFTWARE PRODUCT WILL MEET LICENSEE'S
SPE CIFIC RE QUIREM ENT S. T he Limited Warr anty gives
you specific legal rights. Yo u may have ot hers, w hich vary from
state/jurisdiction to state/jurisdiction.
9. LIMITATION OF LIABILITY
IN NO EVENT WILL SERIF OR ITS SUPPLIERS BE
LIABLE FOR LOSS OF DATA, CORRUPT ION, LOST
PROFITS, COST OF COVER, OR OTHER SP ECIAL,
INCIDENTAL, PUNITIVE, CONSE QUENTIAL, OR
INDIRECT DAMAGES ARISING FROM THE USE OF THE
SOFTWARE PRODUCT (INCLUDING ANY
ACCOMPANYING DOCUMENTATION), HOWEVER
CAUSED AND ON ANY THEORY OF LIABILITY. THIS
LIMITATION WILL APPLY EVEN IF SERIF OR AN
AUTHORIZED DISTRIBUTOR HAS BEEN ADVISED OF
THE POSSIBILITY OF SUCH DAMAGE. IN NO EVENT
WILL SERIF'S LIABILITY EXCEED THE AMOUNT PAID
FOR THE SOFTWARE PRODUCT. LICENSEE
ACKNOWLEDGES THAT THE AMOUNTS PAID BY
LICENSEE FOR THE SOFTWARE PRODUCT REFLECT
THIS ALLOCATION OF RISK. Some states or other
jurisdict ions do no t allow t he exclusio n or limitation of liab ility
for incidental or consequential damages, so the above
limitat ions and e xclus ions may not be applica ble in c ert ain
instances. None of the above affects the statutory rights of
licensees residing in the United Kingdom.
10. NOT FOR RESALE SOFTWARE
If th e So ftwa re P ro duct is labeled “N ot for R esale ” or “NFR ,”
then, notwithstanding section 1 of this License, your use of the
Soft ware Pr odu ct is limited to use for d emon str atio n, test , o r
evaluation purposes.
11. NO RENTAL; OTHER TRANSFERS
You may transfer this License to another computer or
works tatio n only on a per manent basis (t hat is, with no intent to
transfer again) provided the computer, workstation, or ot her
digital electronic device from which you have transferred this
License no longer accesses or otherwise utilizes t he So ftw are
Product, and the Software Pro duct is used in accordance with
the terms of this License Agreement.
12. TERMINATION
You may terminate this License Agreement at any time. Serif
may te rminat e this Lice nse A gre ement if you fail to comply
with the terms and conditions of this License Agreement. In
either event, you must destroy all copies of the Software
Product.
13. UPGRADE
If this License is an “Upgrade,” you must have a valid license
for the Prior Software for this License Agreement to be valid,
and this License Agreement must be used to replace such
license for the Prio r So ftware. The to tal nu mber of lice nse
“Upgrades” you may acquire may not exceed the total number
of computers, workstations, or o ther digital electronic devices
that were licensed to access or otherwise utilize the Software
Product at the time you upgraded the Software Product.
14. MISCELLANEOUS
This Agreement shall not be governed by the 1980 U. N.
Conventio n on Cont racts for the Interna tional Sale o f Goods;
rather, this Agreement shall be governed by the laws of the
State of New Jersey, of the United States of America, including
the U nifor m Co mmercia l Code o f the Sta te of Ne w Jer sey,
without reference to conflicts of law principles. This Agreement
is the entire Agreement between Serif and Licensee and
supersedes any other communications or advertising with
respect to the Software Product. If any provision of this
Agre ement is held invalid o r unenforcea ble, such pro visio n
shall be revised t o the e xtent ne cessary t o cure the invalidity or
non- enfo rce ability, and the rema inder of t his Agreeme nt s hall
cont inue in full for ce an d effec t. If th e So ftwa re P rod uct is
acquired by the United Stat es Gover nment or on its behalf, t he
Software is furnished with restricted rights. The use,
dup licat ion, or disclo sure by t he Unit ed Sta tes Governme nt a nd
par ties act ing o n its b ehalf is gove rne d by, a nd su bject to
restrictions as set forth in subdivision (c) (1) (ii) of the Rights in
Technical Data and Computer Software clause at DFARS
252.227-7013, the subparagraphs (c)(1) and (2) of the
Commercial Computer Software - Restricted Rights at 48 CFR
52.227-19, or other comparable regulations of other government
agencies, as applicable. Licensee agrees not to allow the
Software Product to be sent to or used in any other country
exce pt in comp liance with app licable Unit ed S tat es laws and
regulations. This Agreement shall constitute the entire
agreement between Serif and Licensee and supersedes all prior
agreements, understandings, communications, proposals or
representations, oral or written, by either party. This Agreement
shall be amended only by an executed writing by authorized
representatives of both parties.
.
Page 5

How to contact us
Our main office (USA, Canada):
Software Publishing Corporation
PO Box 803, Nashua NH 03061 USA
Main (603) 889-8650
Registration (800) 794-6876
Sales (800) 55-SERIF or 557-3743
Technical Support (603) 886-6642
E-mail support@serif.com
Customer Service (800) 489-6720
General Fax (603) 889-1127
European office (UK, Europe):
The Software Centre
PO Box 2000, Nottingham, NG11 7GW, UK
Main (0115) 914 2000
Registration (0800) 376 1989
Sales (0800) 376 7070
Technical Support (0115) 914 9090
E-mail support@serif.co.uk
Customer Service (0115) 914 9090
General Fax (0115) 914 2020
Online
Web site http://www.serif.com
International
Please contact your local distributor/dealer. For further details please
contact us at one of our phone numbers above.
Page 6

Contents
1 ♦♦♦♦ Welcome
About the Companion ............................................................................... 3
Linking to additional help .......................................................................... 3
What's new in Serif WebPlus 6.0.............................................................. 4
...and a legacy of powerful features:......................................................... 5
Registration and support........................................................................... 6
System requirements ................................................................................ 6
Installing WebPlus 6.0 .............................................................................. 6
2 ♦♦♦♦ Overview
What is a Web site? ................................................................................ 11
How does WebPlus work?...................................................................... 11
How do I publish my Web site? .............................................................. 12
How should I get started? ....................................................................... 12
3 ♦♦♦♦ Getting Started
WebPlus Startup Wizard......................................................................... 15
Using a Page Wizard… .......................................................................... 16
Take a look around ................................................................................. 18
Customizing Wizard elements ................................................................ 21
For more help on the basics... ................................................................ 23
4 ♦♦♦♦ Working with Text
Two kinds of text ..................................................................................... 27
Objects on the master page.................................................................... 28
Working with text objects ........................................................................ 29
Creating text objects ............................................................................... 29
Editing text .............................................................................................. 31
Changing the ‘Web colors’...................................................................... 32
Importing text .......................................................................................... 33
For more help on working with text......................................................... 34
Page 7

5 ♦♦♦♦ Working with Graphics and Animation
Graphics in WebPlus ...............................................................................39
Importing a picture or animation ..............................................................40
Drawing basic lines and shapes ..............................................................41
Other tools and techniques......................................................................42
Adding animations ...................................................................................43
For more help on working with graphics and animation... ......................44
6 ♦♦♦♦ Working with Hyperlinks and Interactivity
Hyperlinking text ......................................................................................49
Hyperlinking graphics ..............................................................................50
Using hotspots .........................................................................................50
About HTML and Java .............................................................................51
For more help on hyperlinks and interactivity..........................................52
7 ♦♦♦♦ Previewing and Publishing
Optimizing the publication .......................................................................55
Previewing the site...................................................................................55
Publishing to a local folder.......................................................................56
Publishing to the World Wide Web ..........................................................57
For more help on previewing and publishing...........................................59
8 ♦♦♦♦ Starting from Scratch
Step 1: Design .........................................................................................63
Step 2: Content........................................................................................65
Step 3: Finishing touches ........................................................................66
HTML 3.2 and 4.0 ....................................................................................66
Design tips and rules of thumb ................................................................67
Where should I go from here? .................................................................69
Page 8

Welcome
1
Page 9

About the Companion
The WebPlus 6.0 Companion provides everything you need to get up to
speed, from the basics to tips and tricks for advanced users. Here’s a
brief chapter summary:
1 Welcome. Reviews the program’s main features, requirements,
and installation sequence.
2 Overview. Offers a simple introduction to Web sites—and how
WebPlus helps you create and publish your own.
3 Getting Started. Introduces Page Wizards—our built-in design
assistants—and the WebPlus environment.
4 Working with Text. Describes how to edit the Page Wizard’s
placeholder text, customize the text layout, and import text.
5 Working with Graphics and Animation. Examines how to
insert or create your own pictures and animations.
6 Working with Hyperlinks and Interactivity. Shows you how
to link text or graphics to Web pages, e-mail, or files, and
enhance pages with Java or HTML effects.
7 Previewing and Publishing. Covers “finishing touches” and
the simple steps that will get your publication onto the Web.
8 Starting from Scratch. Provides detailed, step-by-step
suggestions on designing, adding content, and proofing—plus a
special section with proven tips to improve your site.
Welcome 3
Linking to additional help
Throughout the Companion, use these symbols as your key to further
information that’s available in WebPlus:
QT
?
QuickTours. Illustrated overviews of basic principles, tools, and
features. Choose View a QuickTour... from the Help menu.
Online Help. A complete Visual Reference to the WebPlus
interface, plus a comprehensive “How To” section covering goals
and procedures. Choose Contents or Index from the Help menu.
Page 10

4 Welcome
What's new in Serif WebPlus 6.0...
Welcome to Serif WebPlus 6.0—the easiest way ever to get your
business, organization, or household on the World Wide Web!
Among new WebPlus 6.0 features, you’ll find...
♦ Integrated Wizard Technology for “Smart Documents”
Easier, more powerful publication startup interface! Preview
multiple Page Wizard categories and document choices—revisit
your color scheme and text selections at any time as you continue
to work with a publication.
♦ Multiple Document Interface
You asked for it... Now you can open more than one publication at
a time—even tile your publications and drag-and-drop objects
between them.
♦ Improved HTML Support
WebPlus now supports HTML 4.0 for better WYSIWYG Web
page design. More efficient HTML output eliminates duplicated
graphics—and you can use WebPlus to add sound and video, as
well as Java and HTML code, to your Web pages. As a bonus, you
get hundreds of new GIF animations!
♦ Intelligent Color Schemes
Choose from dozens of preset color schemes to change the overall
appearance of your Page Wizard publications with a single click.
You can customize the scheme colors, create brand new schemes,
and apply any scheme to a “from-scratch” publication.
♦ Drag-and-Drop Gallery Objects
Now WebPlus comes with built-in logos, flashes, text effects, and
other page elements that you can simply drag onto your page, then
customize to suit your needs!
♦ On-screen Studio Combining Convenience with Functionality
The Studio’s panels provide rapid visual access to commonly used
controls such as fonts, line settings, and the color table...plus the
Portfolio, Color Schemes, and Gallery... all on one compact
toolbar.
♦ New Graphic Shapes
Break out of the boring box! We’ve added 27 new graphic shape
tools—including stars, triangles, arrows, polygons, and callouts—
to add new fun and meaning to your pages.
Page 11

♦ Table Editor and Calendar Wizard
Use TablePlus to create colorful, sophisticated cell-based
publication elements. Include formatted text and spreadsheet
formulas; vary color and table style with a few mouse clicks! To
create a calendar, choose from a wide variety of sizes and design
options, then just click and drag to fit your calendar to a column or
a whole page.
♦ 20,000 WebArt Collection
Browse a bonus assortment of Web-ready graphics, including
animations, pictures, and page elements!
...and a legacy of powerful features:
♦ Page Wizards for Instant Web Sites
Choose from professionally designed site schemes, provide some
basic information, then customize to suit your needs. The Layout
Checker helps you fine-tune your design for most efficient Web
use. Then preview your site in your own Web browser and publish
it to the Web.
♦ Easy Editing and Special Effects
With WebPlus 6.0, it’s a snap to import your own text and graphics
to replace the Wizard samples. You’ll find built-in modules like
WritePlus, for integrated word processing, plus tools for creating
text hyperlinks and hotspot graphics. Choose the color scheme that
looks best... The Snapping feature and Dot Grid help you achieve a
crisp layout. Everything’s wrapped into a friendly DTP
environment with onscreen tooltips, HintLine, and contextsensitive help!
♦ Amazing Logo/Graphic Module
Produce attention-grabbing headlines, unique text effects, and
powerful logos instantly using our exclusive LogoPlus creation
tool...
♦ Animated GIF Wizard and Animation Library
Add life to your Web pages! Choose from over 600 animated
Animals, Cartoons, Dingbats, Logos, Objects, and more...
♦ Animated Marquee Wizard
Custom-design your own varied and colorful multi-line text
messages that scroll across the screen...
Welcome 5
Page 12

6 Welcome
♦ Spell-Checking and Thesaurus
Enhance your proofreading potential and ensure your site’s
readability with these built-in support tools...
Registration and support
If you see the Registration Wizard when you launch WebPlus, please
take a moment to complete the registration process. Just call Serif tollfree and provide the installation number and code shown. We’ll give
you a personalized registration number in return. Remember, if you
need technical support please contact us. We aim to provide fast,
friendly service and knowledgeable help.
System requirements
To run WebPlus 6.0, you’ll need a system including:
♦ 486 IBM-compatible PC (Pentium recommended) with CD-ROM
drive and mouse (or other Microsoft-compatible pointing device)
♦ Microsoft Windows® 95, 98, 2000 or Windows NT® operating
system
♦ 16MB (Windows 95, 98) or 32MB (Windows NT) RAM
♦ 30MB (minimum install) free hard disk space
♦ SVGA (256-color display, 800x600 resolution) monitor; High
Color (16-bit) or True Color (24-bit) display recommended
♦ Internet account and connection required for use with Web
Publishing features and Online Resources
If you need help installing Windows or setting up your printer, refer to
Windows documentation and help.
Installing WebPlus 6.0
To install the program, simply insert the WebPlus 6.0 CD-ROM into
your CD-ROM drive. The AutoRun feature automatically starts the
Setup process. (If AutoRun does not start the install, use the Control
Panel method as described for reinstallation below.)
Answer the on-screen questions to install the program. You’ll have the
option of choosing a Recommended install (which optimizes
performance by loading speed-critical files to your hard drive for best
performance) or a Custom install (which lets you specify which
components to copy to your hard drive).
Page 13

Welcome 7
To reinstall the software or change the installation at a later date, select
Settings/Control Panel from the Windows Start menu and
then double-click the Add/Remove Programs icon.
♦ To install, make sure the WebPlus 6.0 CD-ROM is inserted into
your CD-ROM drive, then click the Install… button and follow
the on-screen instructions. To install just one component, choose
the Custom option and check only that component.
♦ To uninstall, select WebPlus 6.0 in the scrolling list, then click
the Add/Remove... button.
Page 14

Overview
2
Page 15

What is a Web site?
A Web site is a collection of files stored on a computer where users
with special programs called Web browsers can view the files as
pages. Browsers can read the common file format known as HTML
that describes how the various elements of text, pictures, hyperlinks,
and other elements are arranged on each Web page. Each Web site has
a single Home Page—the first page a visitor sees—usually containing
hyperlinks to other pages on the site, which in turn have links to others.
To the person using a browser to access the Web site, the content
appears seamlessly linked. You just click on a link to display related
information.
The World Wide Web was conceived as a way of using the Internet—
the global network that interconnects computers around the world—to
share information stored as Web pages. But Web sites don’t depend on
the Internet—they can be (and often are) accessed just as well over a
local area network or private intranet. Remember, a Web site is just a
collection of files.
How does WebPlus work?
Overview 11
You’ll first compose your pages as a publication in WebPlus, then
publish the pages as a Web site.
Whether you’re looking for a business, organization, or personal Web
site, you’ll probably want to begin by exploring the Web Page
Wizards that come with WebPlus. Click through the Wizard screens,
make a few selections, and enter some basic information—and the
Wizard gets you started with a set of ready-to-publish Web pages. If
you prefer, you can start a new publication from scratch. Either way,
the next step is to spend some time customizing the pages with your
own text, graphics, and other content. The Companion will cover what
you need to know.
For editing your publication, WebPlus offers a set of intuitive tools and
a straightforward workspace that resembles a desktop publishing (DTP)
environment. You can easily import text or pictures, use the built-in
word processor, create colorful graphic shapes, and add hyperlinks and
hotspots that users can click to access other Web pages or send e-mail.
Once your content is in place, you can use a variety of proofing tools
and the Layout Checker Wizard to optimize the site before publishing
it.
Page 16
12 Overview
WebPlus gives you the option of previewing the site in your own Web
browser before publishing it to the Web.
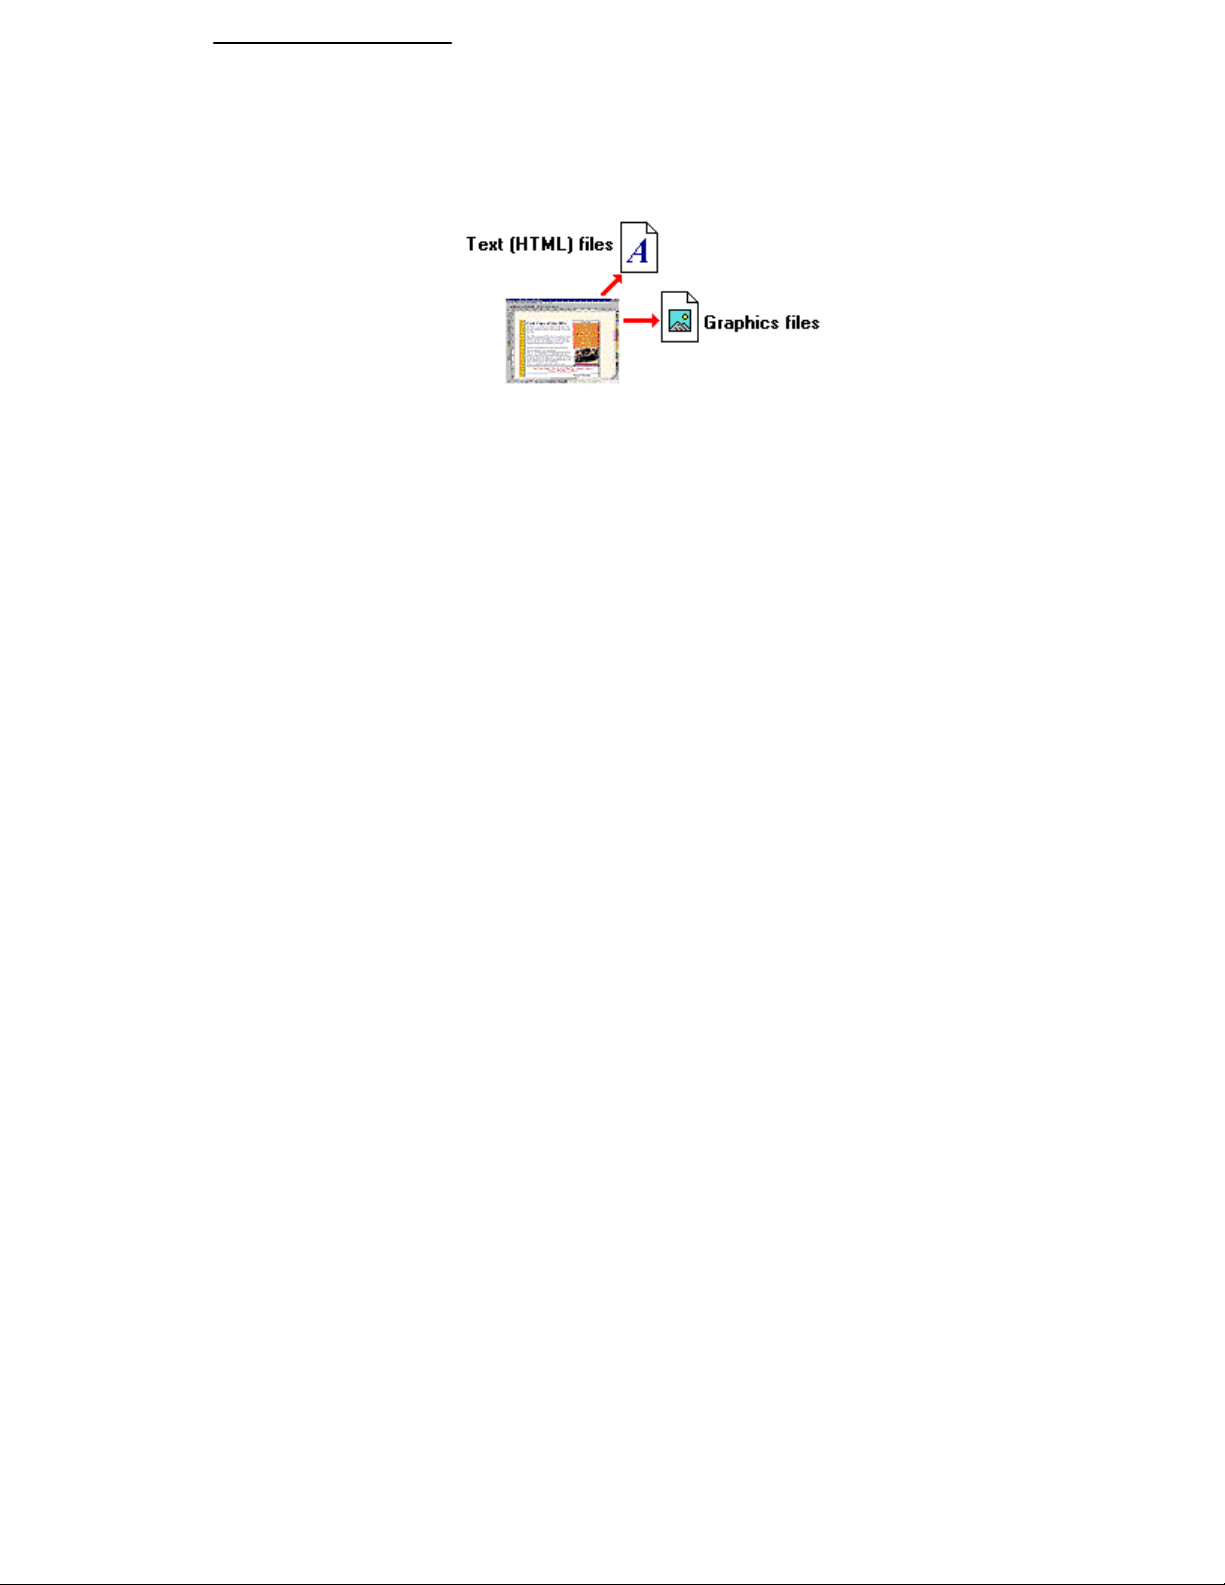
When you’re ready to publish, WebPlus takes the publication’s pages
and converts them to HTML and graphics (pictures). You never have to
worry about the HTML code itself.
How do I publish my Web site?
Publishing a site using WebPlus is a one-step operation that:
(1) converts your publication to files for the Web, and
(2) copies the Web files to a location you specify—either a local hard
disk or a Web host.
To publish to a local disk, you don’t even need a connection to the
Internet. Of course, you’ll need a Web browser to view your site.
To publish your site on the Web, you first need to register for your free
Web space so it will be available when you’re ready to publish. Simply
choose Free Web Space from the WebPlus Help menu and your
Web browser will take you to an introductory page.
You can also publish to an existing account elsewhere on the World
Wide Web, using WebPlus or a separate FTP utility. For details,
consult the online help topic, “Publishing to the World Wide Web.”
How should I get started?
You’ve already begun! Now, step through the chapters to learn how to
create and then customize a basic Web site. Be sure to follow the
instructions carefully. For support as you work, choose Help
Contents from the Help menu, then click Help on Help. There,
you’ll learn about the HintLine, the Visual Reference, and other built-in
learning aids.
Page 17

Getting Started
3
Page 18
Once WebPlus has been installed, you’ll be ready to start. Setup adds a
Serif WebPlus 6.0 item to the Programs submenu of the
Windows Start menu.
Use the Windows Start button to start WebPlus (or if WebPlus
is already running, choose New from the File menu) to display
the Startup Wizard (menu screen).
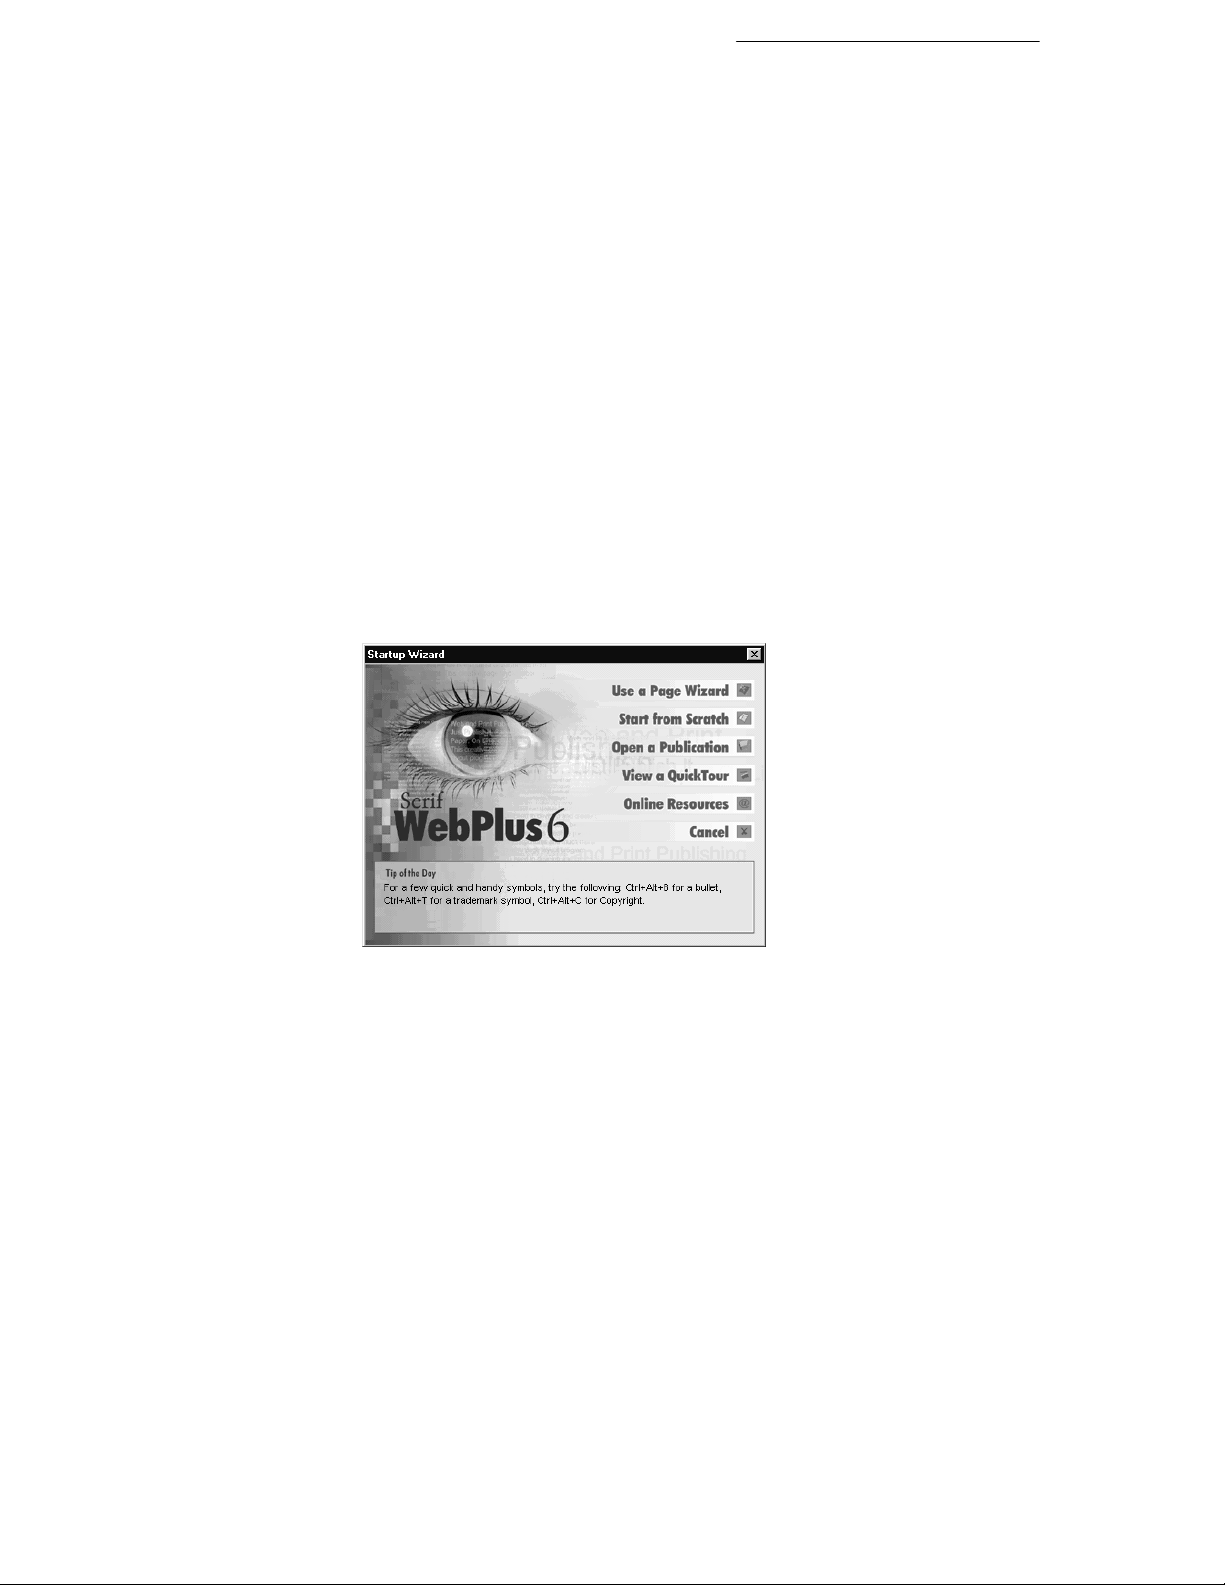
WebPlus launches, and you’ll see the Startup Wizard.
WebPlus Startup Wizard
Now you can see the normal starting screen. The Startup Wizard
presents five choices:
♦ Use a Page Wizard, to create an instant publication
♦ Start from Scratch, to get a blank page to work on
♦ Open a Publication, to edit your own WebPlus files
♦ View a QuickTour, to see the menu of introductory tutorials
♦ Online Resources, to access the Serif and WebPlus Web
sites
Getting Started 15
Whether you’re an old hand, or just getting started with WebPlus 6.0,
here’s a recommended sequence:
From the Startup Wizard, choose View a QuickTour. You’ll
see the menu of QuickTours (a screen from the online help
system). The list also includes links from each QuickTour to
closely related help topics.
Page 19
16 Getting Started
Before proceeding with a QuickTour, take a moment to see what
else is available in online help. Click the Contents button at the
upper left. The menu points you to the extensive Visual Reference
and How To sections, as well as to other more specialized pages.
Click Help on Help for some tips on how to proceed, tailored
to individual levels of expertise and experience. When you’re
done, you may want to branch out on your own—or you can tag
along as the rest of us continue this tour...
Click the Back button to retrace your steps to the QuickTours
menu.
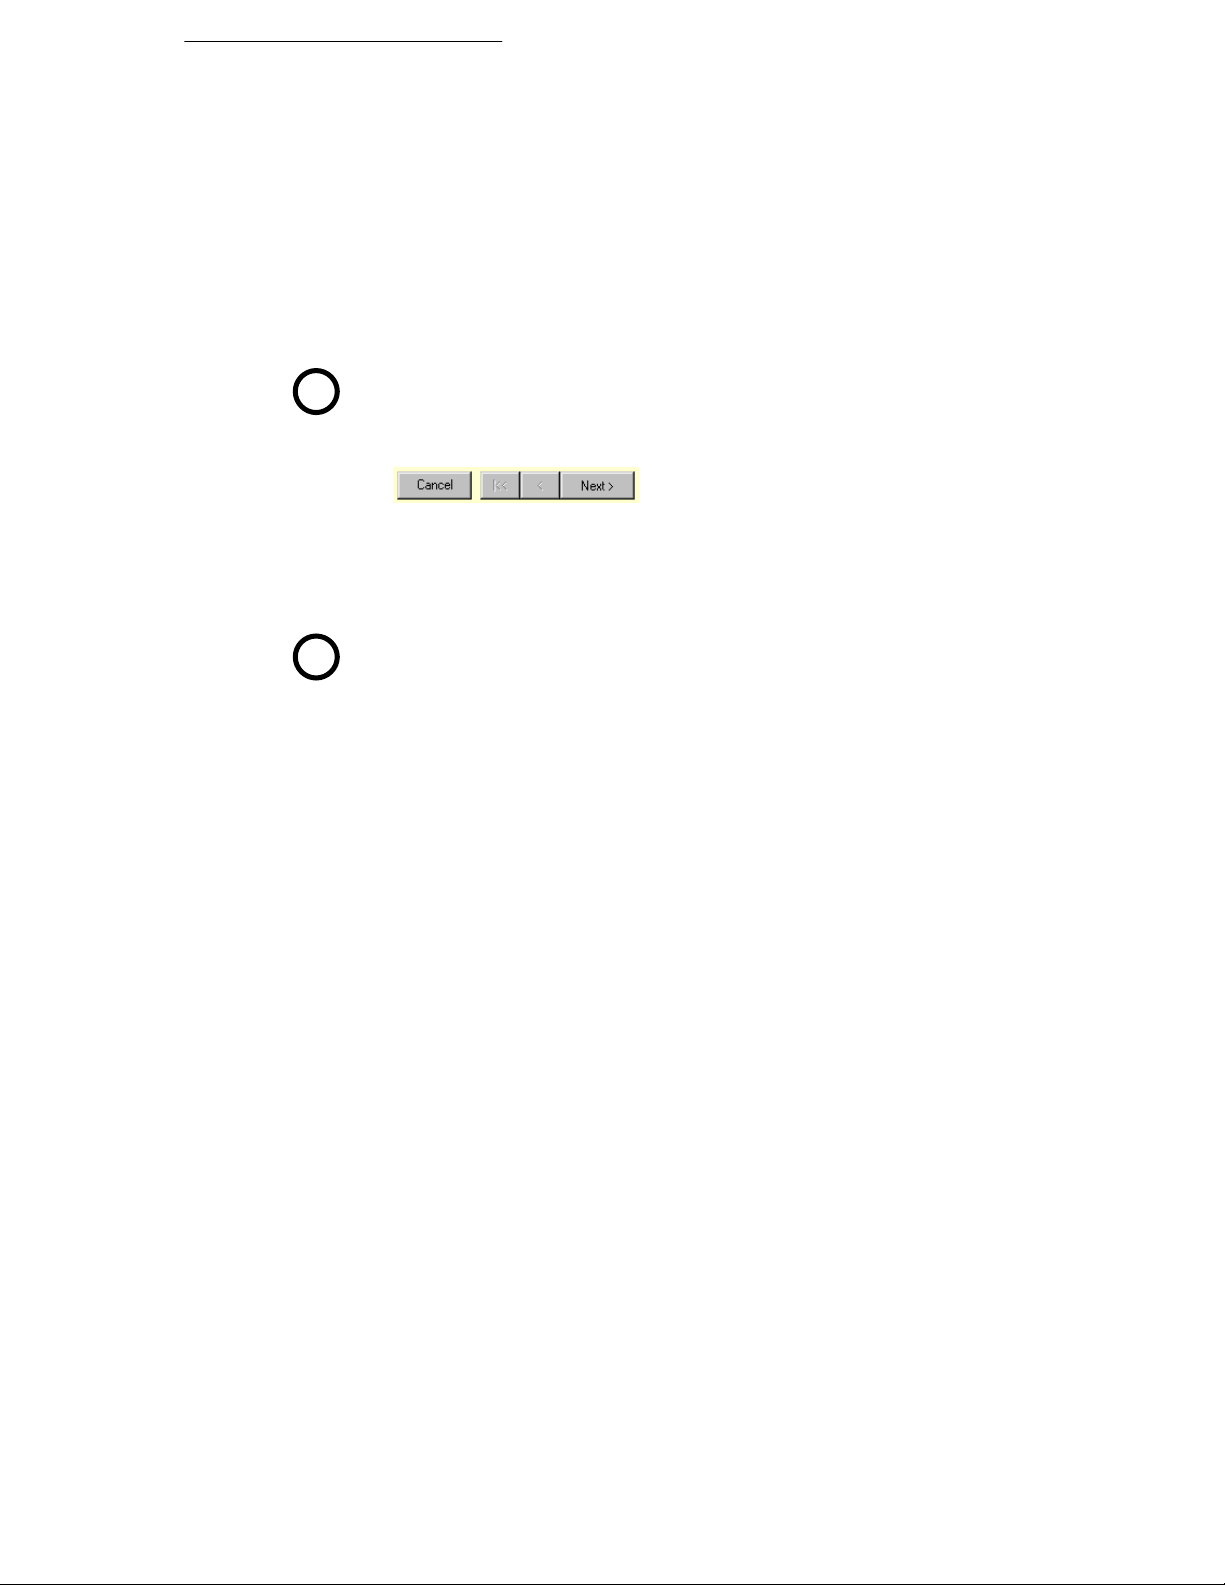
Now click the link for QuickTour 1, Introducing WebPlus
QT
6. From the first screen, click the Next button to step forward.
Use the Previous button to step back or the Begin button to
return to the first screen. Click Cancel to close a QuickTour.
The QuickTours follow a suggested sequence, as shown on the
menu screen. You can follow the sequence, branch to suggested
help topics to learn more, or sample the information in any order
you choose.
At this stage we’d recommend that you continue through
QT
QuickTour 2, Preparing Your Publication, which
(together with QuickTour 1) will provide you with a basic
overview of WebPlus procedures.
When you’re done viewing QuickTours, and wish to continue with
learning to use a Page Wizard, press Esc or click the Close (X)
button to dismiss the online help window, and return to the Startup
Wizard. (Depending how far you’ve navigated, you may need to
choose File/New to return to the Startup Wizard.)
Using a Page Wizard…
Page Wizards are built-in design assistants that speed you through the
process of creating professional Web sites. In this chapter, you’ll use a
Page Wizard and take a brief tour of the WebPlus environment. Then in
the following chapters, we’ll explain how to customize the various
elements of a Web site. The final chapter covers points you’ll need to
know if you literally start from scratch, with a “clean slate.” (Even if
that’s your preference, you should work through the Wizard-based
examples to get up to speed.)
Page 20
Getting Started 17
For demonstration purposes, we will be working with the Formal
Business Site Wizard. So at least for now, pretend you’re the
Webmaster for a small business—it’s OK to use your imagination!
Launch WebPlus or choose New... from the File menu.
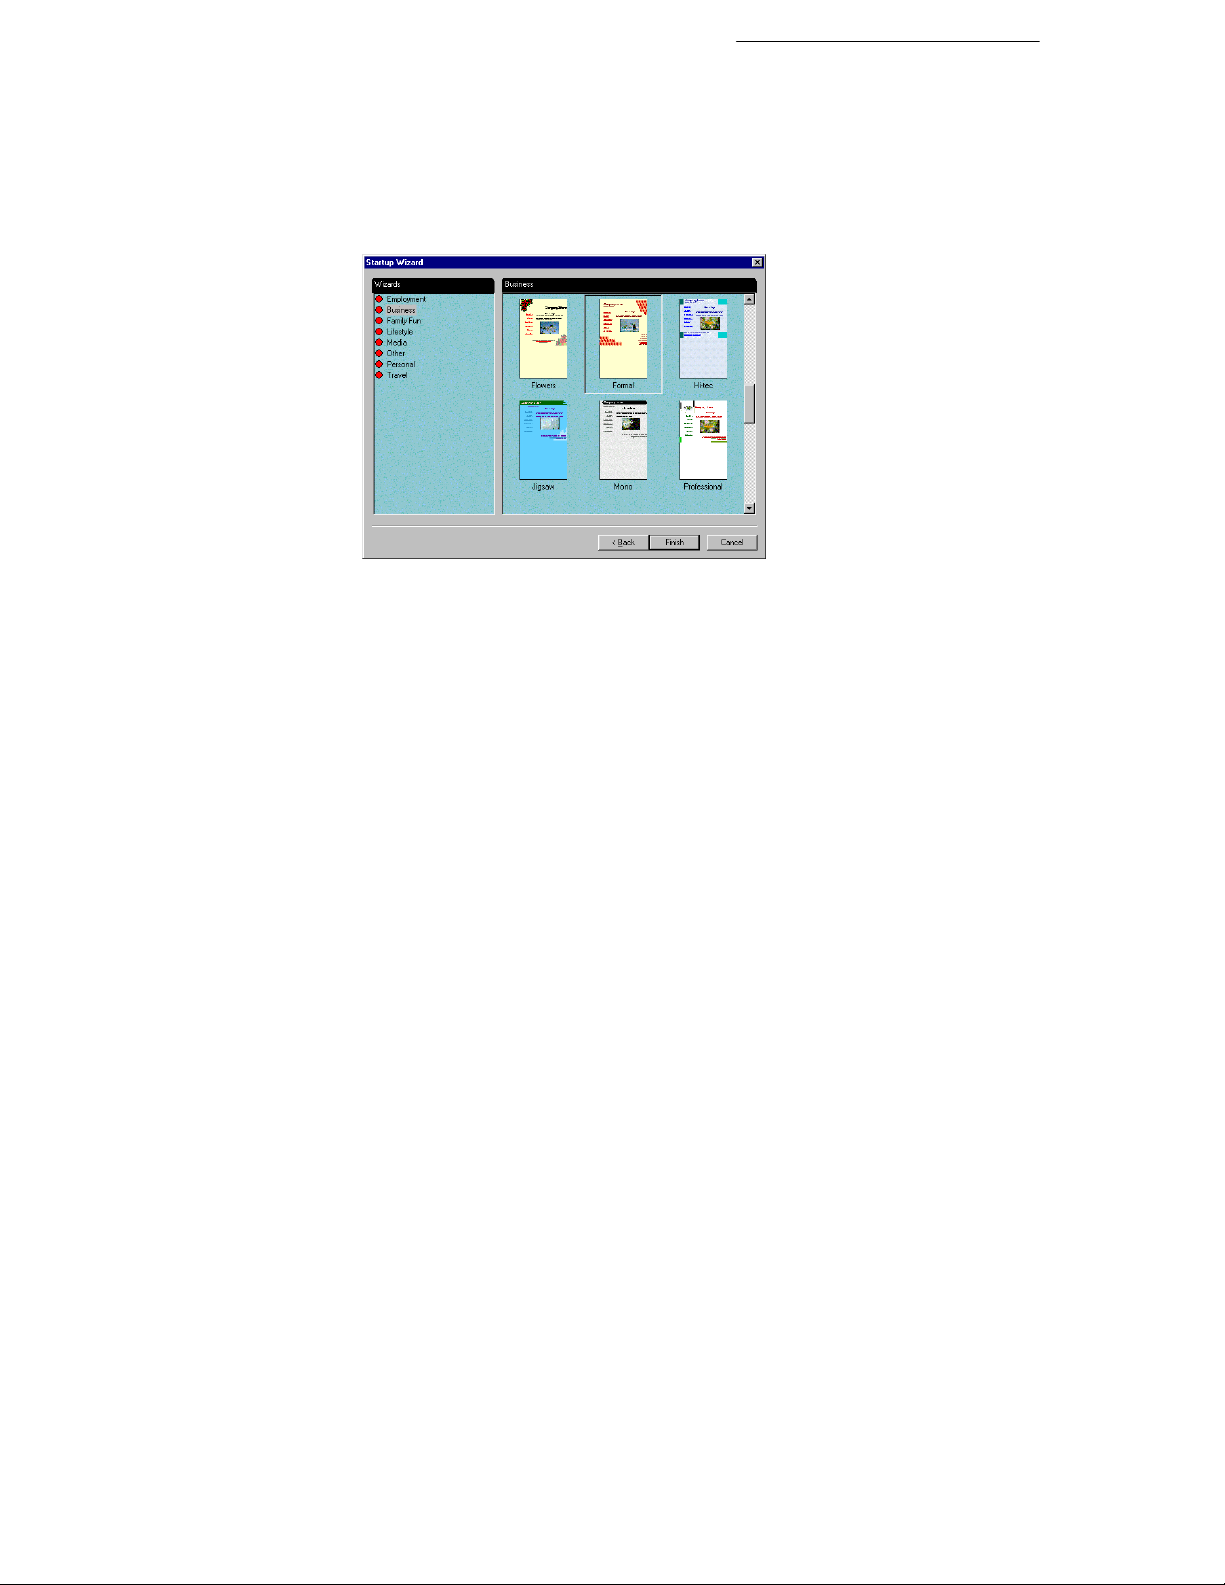
You'll see the Startup Wizard. Select Use a Page Wizard.
Click on Business in the list of Page Wizard categories on the
left hand side Page and then click on Formal in the list of
designs shown on the right hand side. Then click Finish.
WebPlus retrieves the Wizard and displays it in Wizard Preview mode.
Here’s where you can initially add your own information to the design.
Following the prompt at the upper right (“Type your company
details”), type into the three fields to replace the sample text with
your own. When you’re done, click the Next> button at the lower
right. To review a prior selection, click the <Back button.
As you step through the selection screens, you’ll see the publication
preview update to reflect your choices. You can change as much or as
little as you like at this point—it’s always possible to revisit the choices
later!
At the last Wizard step, you can click various thumbnails to sample
different color schemes for the site. Pick the one you prefer; we’ll
come back to color schemes later in the chapter.
Click Finish when you’re done, and the publication appears in
the WebPlus edit window.
Page 21
18 Getting Started
t
g
t
Choose Save... from the File menu and save the untitled
publication, using the folder and file name of your choice.
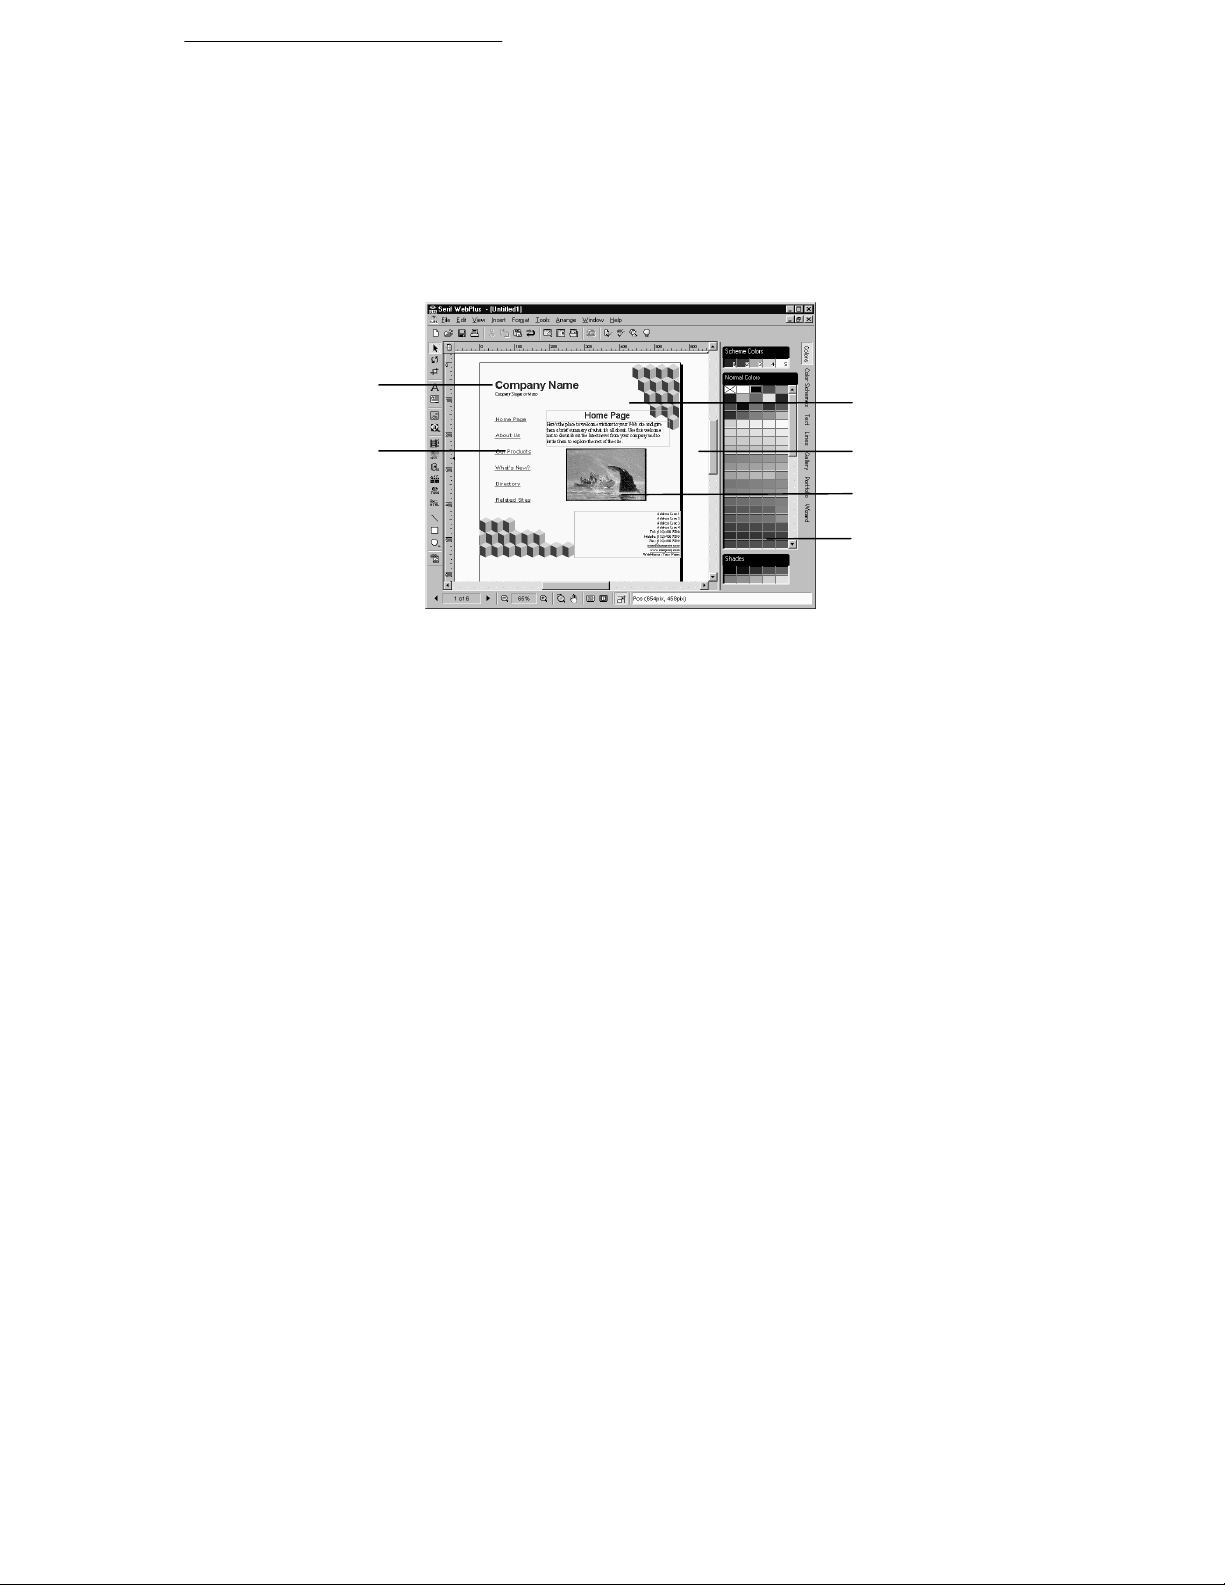
Take a look around
Let’s take a few moments to examine the publication that the Wizard
has created. In the process, you’ll become familiar with some of the
basic features of the WebPlus environment.
Frame Tex
Headin
Page Area
Free Tex
(with Hyperlinks)
Pasteboard
Area
Imported
Picture
Studio
(Colors panel)
Move the mouse pointer around the screen and you’ll see popup
tooltips that identify many items. Watch the HintLine window at
the lower right for capsule descriptions of each feature.
To access online help and resources, including QuickTours, use the
Help menu. Contents takes you to the main help menu screen, and
Index pops up the alphabetical list of help topics.
Right-clicking any toolbar, object, or page region brings up a context
menu of functions, and you can right-click just about any item in a
dialog box for a popup explanation.
The controls to the left of the HintLine let you set the page view and
other display options, and navigate through the publication.
Move the mouse pointer over the buttons on the HintLine toolbar,
noting the various controls for zooming, panning, and display.
Use these buttons to adjust the display until you can read the page
text. The workspace will appear approximately as shown above.
Page 22

Getting Started 19
Note that WebPlus displays one page of the six-page publication at a
time.
On the right side of the WebPlus window, you’ll see the new Studio—
actually a cluster of seven special-purpose panels. Let’s preview them
in sequence. Click each panel’s name to display it...
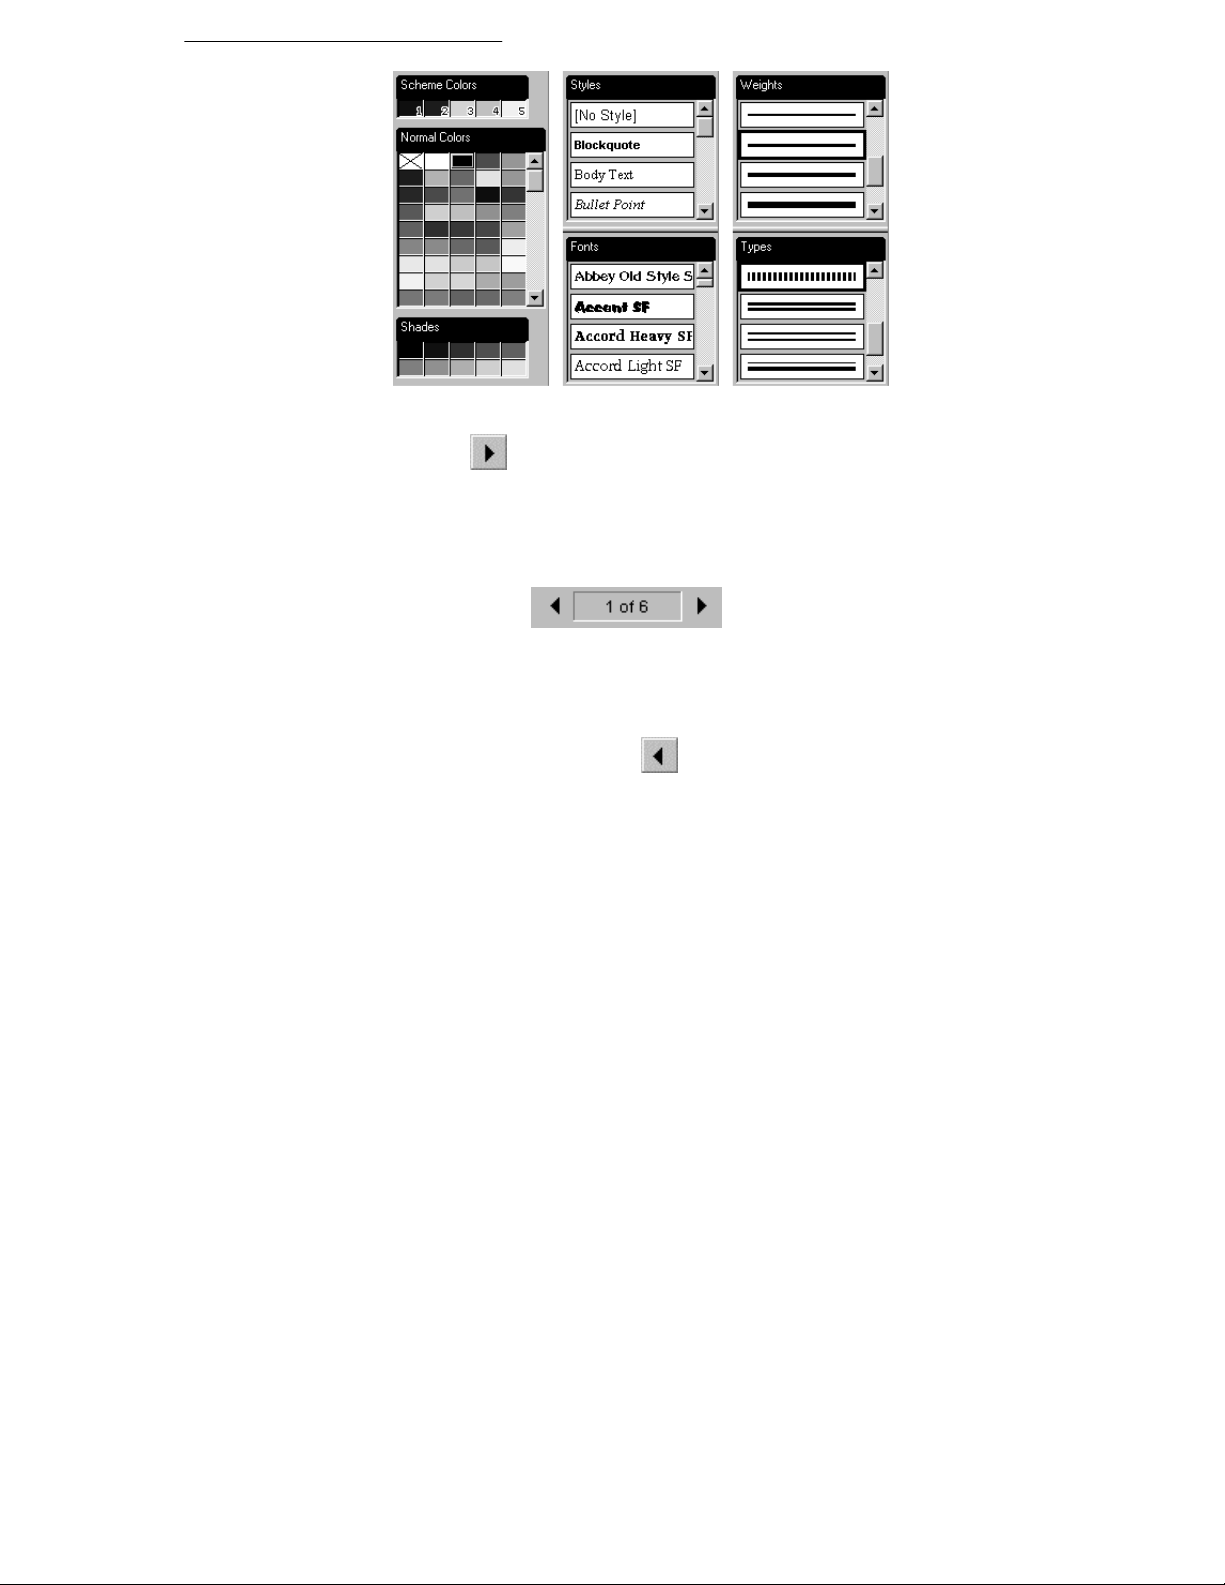
The Colors panel (see below) lets you apply color and/or
shading to an object.
The Color Schemes panel displays a list of available color
schemes that let you instantly revise colors in a Page Wizard
publication. You can extend a color scheme to new elements,
customize scheme colors, or create entirely new schemes!
The Text panel (see below) provides a visual preview and lets
you change the style and font of text objects.
The Lines panel (see below) lets you set the weight and type
of lines and shapes.
The Gallery includes a wide variety of predesigned
elements—graphics that you can drag and drop, then
customize or use as a starting point for your own designs.
The Portfolio is a container for storing design objects
(pictures, text blocks, and even unlinked text frames) you'd
like to reuse in different publications.
The Wizard panel lets you edit Gallery objects (see above) or
revisit choices you made when creating a publication using a
Page Wizard. And that’s exactly what we’ll do in a moment...
Page 23
20 Getting Started
The Studio’s Colors, Text, and Lines panels
Click the
Next Page button several times to view the
following pages. You can use the scrollbar at the right to view
more of a page. Note that the Wizard has inserted the information
you provided, and the rest of the text serves as a “placeholder,”
awaiting further changes.
Double-click the
Current Page box at
the lower left. Up pops the Pages dialog, with several more basic
controls—for adding one or more blank pages, adding a copy of
the current page, deleting one or more pages, or displaying a
particular page in the publication.
Tip: You can double-click the
Previous Page button to
display your first (Home) page, or the Next Page button to
display the last page.
When the time comes to build your actual Web site, you can use these
controls if you want more (or fewer) pages than the Wizard provided.
For now, leave the page count at six. However, if you want to
experiment with the Pages dialog—or if you accidentally make any
changes that you don’t want to keep—here are some “emergency”
options:
To revert to the previously saved copy of your publication, choose
Revert from the File menu. It’s a good idea to save your work
often!
Page 24
You can also reload any saved WebPlus publication by choosing
New from the File menu and selecting the Open Saved Work
option. You can work on any one publication at a time.
To undo the most recent change, press Ctrl+Z. (But you can’t undo a
page addition or deletion, so use Revert to do that.)
Customizing Wizard elements
If you’re following along, you’ll have the Studio’s Wizard panel
displayed at this point. (Otherwise, click Wizard on the right.) Now
we’ll see how easy it is to experiment with and modify a Page Wizard
publication.
The “Wizard Questions” group at the top of the Wizard panel lists the
categories of information that you can customize. Notice that each
category corresponds to one of the original Page Wizard steps. Intially,
the “Company Details” item is selected. Click Web Details.
The lower portion of the panel provides boxes where you can
review and/or re-enter the “answer text” corresponding to the
Wizard questions. Try typing “Welcome” for your opening page
title, then click anywhere else onscreen to update the publication.
Now click Color Scheme in the upper group. This presents you
with a list of named schemes (the same list you’ll find on the
regular Colors Schemes panel). Each publication has one
color scheme assigned to it.
Getting Started 21
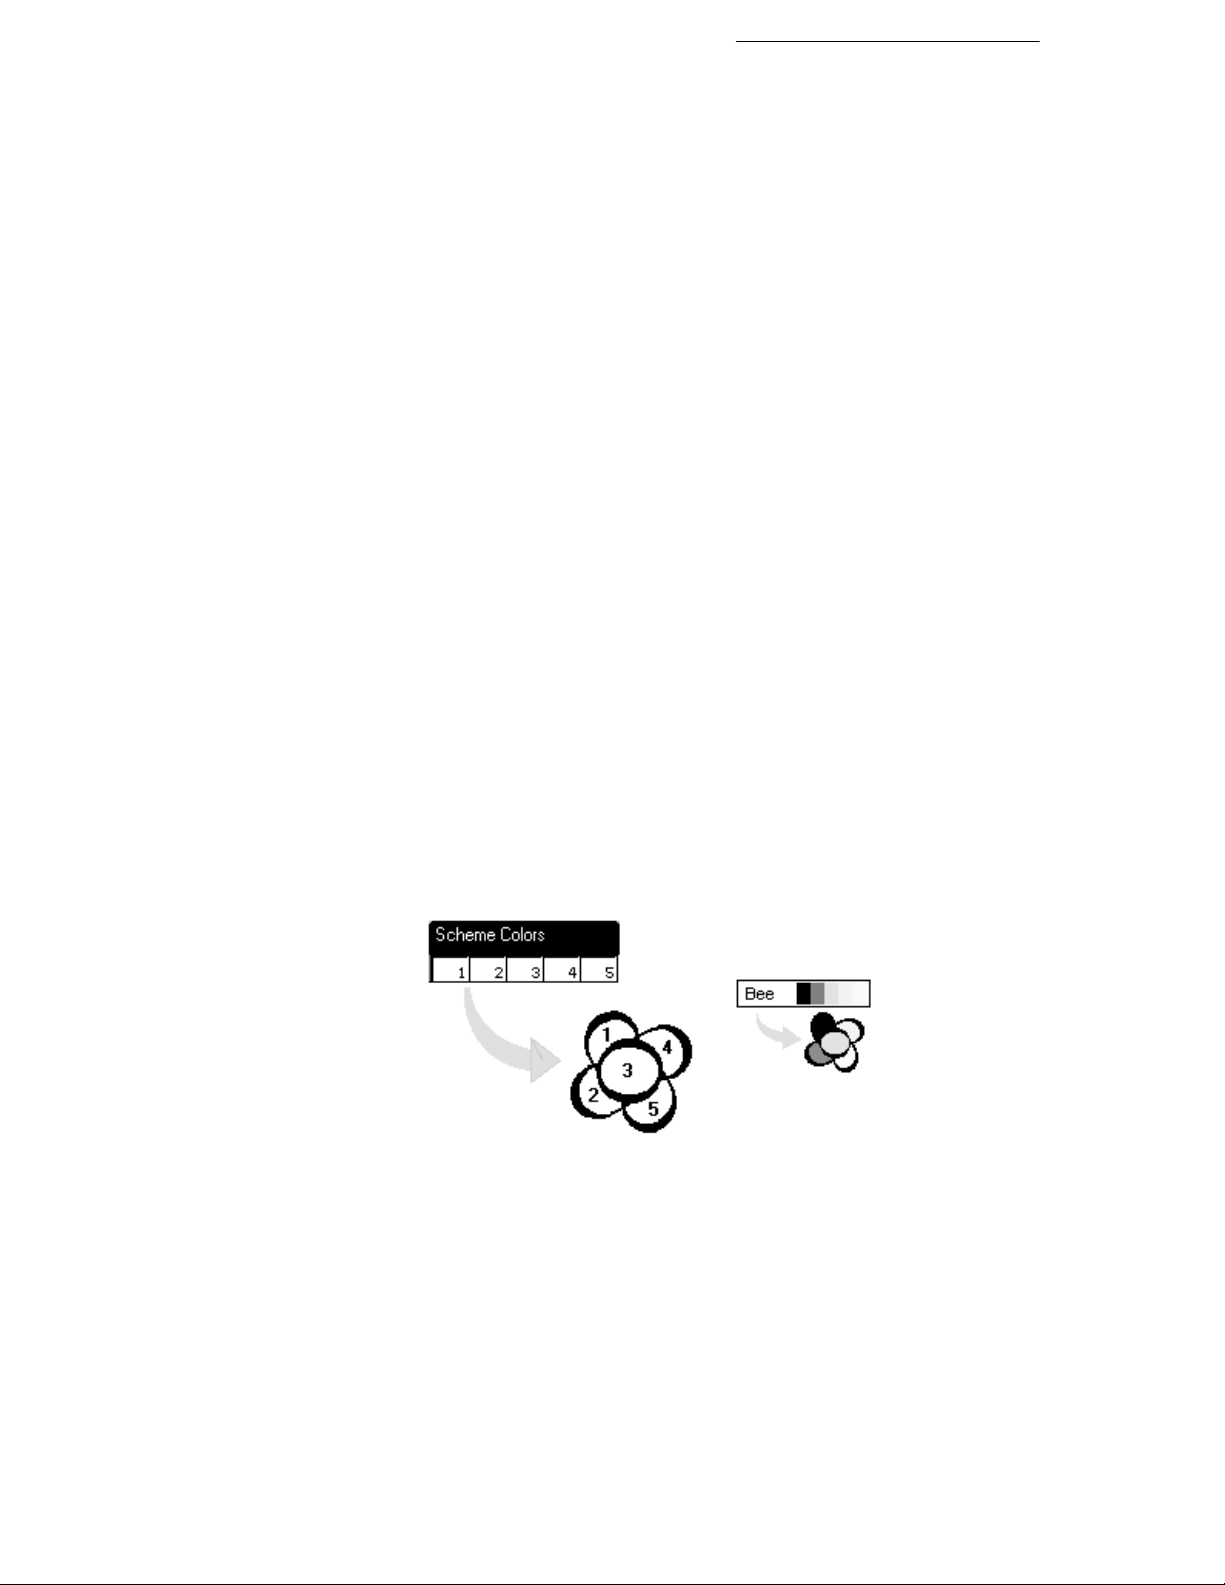
Color schemes are great time-savers and help to ensure consistent,
coordinated results. They work like a paint-by-numbers system using
five numbers. Instead of assigning a specific color to an element, you
can mark it with a scheme color number.
Page 25

22 Getting Started
Click the “Meadow” color scheme sample and notice that the
newsletter’s body text turns purple. Now click the “Mint” scheme
and the text turns black.
As you switch back and forth, look closely at the top portion of the
scheme samples, and you’ll see a group of five colors to the right
of the scheme name. Note that that in each case it’s the first of the
five scheme colors that’s being applied to the text.
In Page Wizard publications, body text has been marked with “Scheme
Color 1”. That means it takes on whichever color has been defined as
Scheme Color 1 in the current scheme.
Keep clicking different color schemes. Which element(s) have
been marked with Scheme Color 2? Scheme Color 3? If you need a
hint—look closely at the cube patterns.
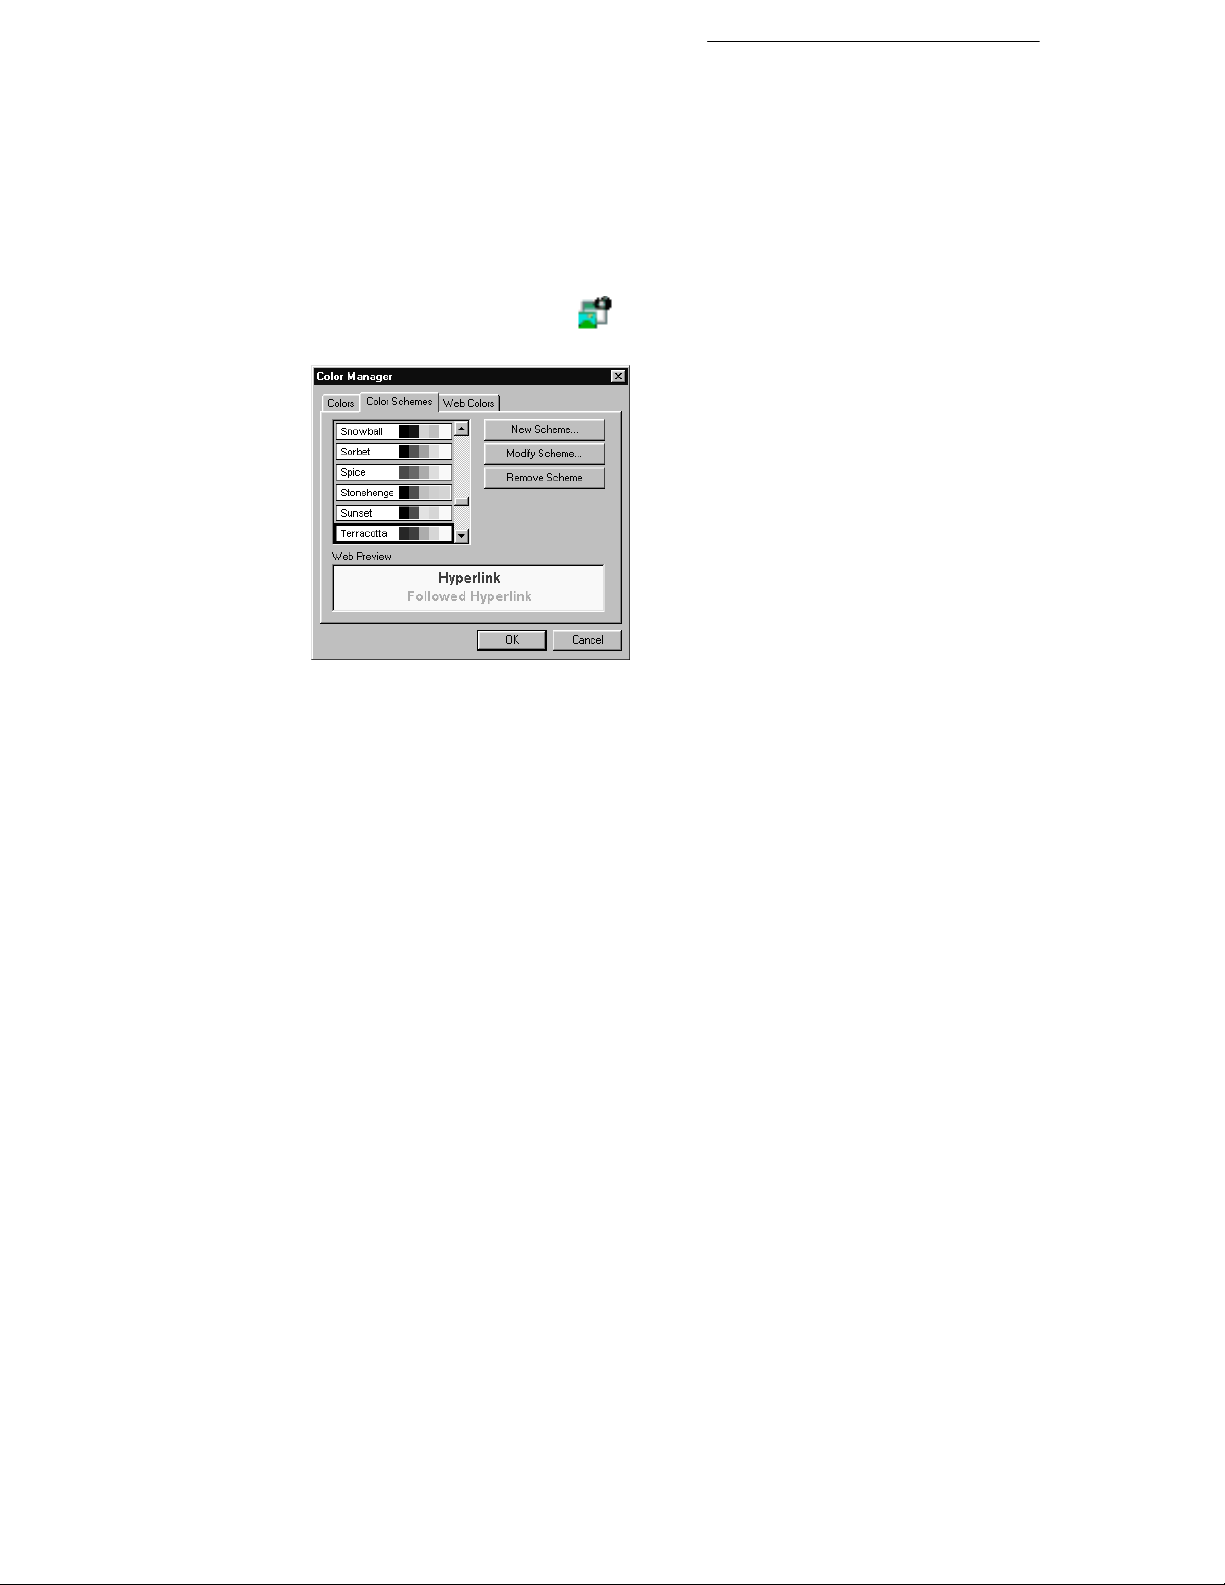
The bottom portion of each color scheme sample includes the so-called
“Web colors,” which we’ll discuss in the next chapter. You can
customize any or all of the colors within a scheme using the Color
Manager. (Display the Studio’s Color Schemes panel, right-click a
sample, and choose Color Manager....)
For more information and full-color examples, take a moment to view
QT
QuickTour 11, Colors and Color Schemes.
Now that you’ve successfully created and customized a Page Wizard
publication, you’re ready to proceed to the kinds of projects you have in
mind.
Page 26

For more help on the basics...
You’ve seen how easy it is to create the basic structure of a Web site
using a WebPlus Wizard. And you know how to find your way around
the workspace.
When you’re ready to construct your actual Web site, you’ll no doubt
want to learn about other options. By now you should have viewed
QuickTours 1 and 2. See online help for additional details.
Getting Started 23
?
For help on... Choose from the
Starting, saving,
closing publications
Overview of Web
site concepts
WebPlus menus and
toolbars
Setting up pages
Setting view options
Using layout tools
Help menu...
Contents / How To See topics in section “Work
Index Select “Web sites, getting
Contents / Visual
Reference
Contents / How To See topics in section “Work
Then...
with WebPlus Publications”
started”
Click a menu or toolbar name
with Pages”
Page 27

4
Working with Text
Page 28

Now that you’ve reviewed the pages the Page Wizard provided, and
had a chance to revise Wizard “answer text” using the Studio, it’s time
to look at how to add standard text and change the layout of text on the
page. It’s really not complicated at all.
Two kinds of text
Text in WebPlus is always contained in a box called a text object, and
you can drag these boxes (and their text) around to position them
anywhere on the page. The two kinds of text object are frame text and
free text.
♦ A free text object is always one box, standing alone. It’s ideal for
captions, labels, buttons, or short paragraphs.
♦ Frame text goes in a special box called a frame. Two or more
frames can be linked together so the enclosed text flows from the
first frame to the second, and so on—like a newspaper article with
multiple columns. Whether there’s a single frame or more than
one, the enclosed frame text is called a story. As a rule, choose
frames for body text with longer paragraphs.
Let’s begin by seeing how the Page Wizard has
utilized frame text.
Working with Text 27
Display your Home page (double-click the
Page button if necessary), and adjust the screen view so you can
read the page text.
Click the
You’ve just selected the Pointer tool—the basic tool for selecting,
moving, and resizing objects, including the boxes that contain text.
Using the Pointer tool, click the block of address and contact
information at the lower right.
Now click the paragraph starting with “Here’s the place...” just
below the page title.
In each case, clicking selects a text frame, displayed as a rectangle with
a blue outline and small black “handles.”
button at the top of the left toolbar.
Previous
Page 29

28 Working with Text
Notice the gray Link button on the selected frame’s bottom edge. The
button’s icon tells you about the frame and the story text it contains:
A square (as on the name/address frame) indicates a
frame with all its text displayed—either a standalone
frame or the last frame in a linked sequence.
A plus sign (as on the “Here’s the place” frame) shows
there’s more text in the story than the frame can display.
Extra text is stored in an invisible overflow area. You
can either make the frame larger or shorten the story.
A down arrow shows that the frame’s text continues into
a following linked frame.
Objects on the master page
Let’s take a brief detour to review a key WebPlus concept (covered in
QuickTour 2)...
Click the “Company Name” heading at the top of the page.
Nothing happens! Why not?
Click (once) on the
at the lower left. The screen display changes and the box now
indicates you’re working on the master page.
You can think of the master page as a background that’s shared
between all the pages of your site. When you switch to the master page,
objects on the page vanish, leaving only background objects. In this
case, that includes the heading and slogan (together in one text frame),
a graphic at the upper right, and six blocks of free text, each serving as
a hyperlink to other site pages. These are the common elements the
designer of this particular Wizard has determined should appear on
each page of the site.
While we’re on the master page, click a couple of the free text
blocks (e.g. “Welcome” or “About Us”) and note that they, like
text frames, display handles when selected. Unlike text frames, you
don’t see an outline around a selected free text object.
Now click the Current Page box again (once only) to return to
the page layer.
Current Page box
Page 30

Working with text objects
It’s easy to move or resize a text object. The appearance of the cursor
over the selected object tells you what will happen if you click and drag
at that point, and the technique is the same for either frame text or free
text.
Using the Pointer tool, select the “Here’s the place” text frame.
Position the mouse pointer over the frame so the MOVE cursor is
visible. Click and drag to move the frame a short distance, then
press Ctrl+Z to undo the move.
Position the pointer over the frame’s bottom middle handle and
you’ll see the SIZE cursor. Click and drag down a couple of
inches. Notice that there’s more text visible in the frame, and that
the frame object itself is on a layer behind the photo object. Press
Ctrl+Z.
For an introduction to the concept of layers in WebPlus, take a moment
QT
to view QuickTour 7, Layering.
Creating text objects
Working with Text 29
Next, we’ll look at how to create free text blocks and text frames.
Click the
which lets you edit text on the page or create new free text objects.
Scroll either left or right a few inches, so you can see the pale
yellow pasteboard region outside the page itself. Click with the
Text tool and drag out a marquee in a blank region, about half an
inch high and a couple of inches wide. You’ll see a blinking
cursor. That’s how easy it is to create a free text object!
Without clicking again, type a few words.
Select the Pointer tool. The blinking cursor vanishes and you now
see the handles of the free text block, corresponding to the
marquee you dragged out.
Tip: If you simply click on the page with the Text tool (as opposed to
dragging out a marquee) you’ll create a free text block with a default
width.
Creating a text frame is almost as simple as creating a free text block.
button on the left toolbar to select the Text tool,
Page 31

30 Working with Text
Click the button on the left toolbar to select the Frame tool.
Now locate some more empty space on the pasteboard, and click
and drag out a marquee where you want the new frame to go.
When you release the mouse button, an empty frame appears and
the Frame Wizard materializes to assist you in setting up the
frame.
Click the Next button four times, keeping the default options for
new frames (one column, no margins, etc.).
When you see the “Get text from what source?” prompt, click the
“Type directly into the frame” option (we’ll look at the other
options shortly.)
Click Next again, then click Finish. WebPlus switches to the
Text tool, with an insertion point in the frame. For now, type a few
phrases—we’ll return to this new frame in a moment.
Select the Pointer tool, and you’ll see handles around the text
you’ve just entered. (Notice that the borders of the enclosing frame
are not selected.) The selected block looks a lot like a block of free
text, except that it’s contained in a frame. And that’s an accurate
observation, as our next experiment will show...
Click the block of free text you created and drag it over this new
text frame. When you drag over the text block inside the frame,
you’ll see the block highlight and the Flow cursor appear.
Drop the text block and it will be inserted into the text frame below
the original block. You can drop free text into a frame, and place it
before or after an existing block. Watch the arrow on the Flow
cursor to see where the text will go—either above or below the
highlighted block. (Hold down the F2 key to toggle the action.)
Text drops before block Text drops after block
Now hold down the Ctrl key and select the block you’ve just
dropped into the frame. This time the COPY cursor appears, and
you can drag the block copy out onto the pasteboard, and drop it—
note that it becomes free text again!
Page 32

At this point, you might take some time to experiment with creating
more free and frame text objects. Don’t worry if you start to clutter up
the workspace. You can delete any object simply by selecting it and
pressing Delete. Remember that to select, move, or resize a text
object, you should use the Pointer tool. The Text tool is reserved for
editing the text contained in the box—not the box itself.
Editing text
Web Plus lets you edit text directly on the page, or with WritePlus, the
built-in text editor.
Working with Text 31
Click the
The Text tool displays an I-beam cursor that lets you click in any freeor frame-text paragraph for an insertion point. You can type into the
paragraph, drag to select characters, and use the formatting controls on
the top toolbar. Use the Pointer tool to select an individual paragraph
(as a separate text block) and carry out operations on the whole
paragraph.
Click in a sample block of free text, then try changing the font and
pointsize of its text using the controls on the top toolbar.
If you like, try clicking the Studio’s Text panel and using it to
alter the font by dragging a font name onto a block of text.
Now double-click the “Here’s the place” frame on the page.
Double-clicking on text launches WritePlus, with the text
displayed.
You can move the mouse pointer around the window to view tooltips
and hint text for the various buttons. Writing and proofing aids include
Find and Replace, Spelling Checker, AutoSpell, Thesaurus, and
AutoCorrect. Editing text with WritePlus is just like using a word
processor.
button to select the Text tool.
Note that the text in this frame is simply a placeholder for the text
you’ll be adding. You can type over the sample text, or select it all,
delete, and begin with an empty frame, as you wish.
Page 33

32 Working with Text
To update WebPlus with your changes, click the Accept
button. To abandon changes, click
Note: While editing on the page you cannot select text in more than
one text block at a time. To edit the whole story, use WritePlus.
For an illustrated overview of WritePlus, see QuickTour 3, Using
QT
WritePlus.
By the way, you may be wondering about the difference between
editing standard text and Page Wizard “answer” text. The key point is
that if you want to preserve answer fields, you should use the Wizard
panel to edit their text.
With the Text tool, click the first line in the name/address block at
the lower right, and drag down. Note that the whole line highlights.
Answer text is stored in fields, and when you select one of them the
whole field highlights—a sure sign that you're not dealing with
standard text! You cannot select only part of an answer text field.
However, you can use the Text tool (or WritePlus) to change the field’s
character or paragraph properties, or cut/copy/paste answer text fields
within the document if necessary.
Keep in mind that if you retype over answer text, you'll effectively
destroy the field. The new text you enter at that location will be
ordinary text and can no longer be updated via the Wizard panel.
Cancel.
Changing the ‘Web colors’
When you stepped through the Wizard to create the site we’ve been
working with, you chose one of several alternate color schemes. In the
previous chapter, we used the paint-by-numbers analogy to explain
about the five numbers you can use to mark elements in WebPlus, and
how each scheme includes five colors, which get applied to elements
with the corresponding number.
By convention, body text in Page Wizard publications is marked with
“Scheme Color 1.” That means it takes on whichever color has been
defined as Scheme Color 1 in the current scheme (the first of the five
colors shown at the top of the sample). In addition, each publication’s
color scheme also includes these special Web color settings:
Page 34
Working with Text 33
♦ The Hyperlink color applies to hyperlinked text before it's been
clicked on, while the same text after a Web visitor has clicked to
“follow” the link takes on the Followed Hyperlink color. (The
WebPlus sample displays these colors, but you’ll need to view the
published site in a browser to preview the actual effect.)
♦ A Web site's Background, which is applied to every page, can be
either a solid color or a tiled (repeated) picture, usually a bitmap
pattern. The tiled picture option works just like desktop
“wallpaper”—so a small bitmap can go a long way. The color
scheme sample shows
Importing text
Besides typing text on the page as free text or creating a story using
WritePlus, you can use your current word processor (such as Microsoft
Word) to create source files for your publication. Then you can cutand-paste using the Windows Clipboard or import the text directly.
Earlier, we saw that the Frame Wizard provides the option of importing
from a word processor file when you create a new frame. It’s also a
snap to import text into an existing frame. Let’s try it!
if the scheme uses a tiled bitmap.
You can modify the Web colors
within a scheme, or set a different
background bitmap, using the
Color Manager's Color Schemes
tab, in the same way that you'd
modify the scheme's five basic
colors. Display the Color
Manager, select the scheme name
in the list, and click the Modify
Scheme... button.
Using the pointer tool, select the “Here’s the place” frame (you’ll
see it outlined in blue when selected).
Page 35
34 Working with Text
Now right-click the frame and choose Insert text
file.... When the dialog reminds you that there’s already text
in the frame, click Replace. Using the file selection dialog, open
S
AMPLE.DOC in the SERIF/WP60/SAMPLES/ folder, either in your
main Program Files folder or on your WebPlus CD. WebPlus
imports the file and places it in the frame. (For now, decline the
AutoFit option, which would adjust the text size to fit the story
precisely in the visible frame area.)
If you wish, double-click the frame to launch WritePlus and briefly
inspect the new sample text at a glance. Items in red are unfamiliar
words identified by the AutoCorrect function.) You might try
applying some font, size, or style changes.
Before continuing to the next chapter, you may wish to save your
work.
For more help on working with text...
In this chapter, you’ve examined the placeholder text provided by the
Page Wizard and learned how to create, edit, and import both free text
and frame text. You know enough now to begin replacing the
placeholder text with your own content. In addition, you should now
have a grasp of how the Web color components of color schemes apply
to text.
As you work on your actual Web site, you’ll benefit from learning how
to link frames together, set defaults for new text, use shortcuts, insert
returns and special characters, and work with the various proofing
tools. For details on these and other text options, see online help.
?
For help on... Choose from the
Help menu...
Overview of
WebPlus text
Import text
Work with frames
and free text
Set text properties
Use templates and
named styles
Set defaults Index Select “default properties”
Use proofing tools Index Select from “proofing tools”
Index Select “text, overview”
Contents / How To See topics in section “Work
Contents / How To See topics in section “Format
Then...
with Text”
Characters and Paragraphs”
Page 36

Working with Text 35
If you’re interested in presenting text or numeric data on your Web
QT
pages, you’ll want to learn about TablePlus, the sophisticated table
editor that’s built into WebPlus. For an overview, see QuickTour 5,
Using TablePlus.
Page 37

5
Working with Graphics
and Animation
Page 38

Working with Graphics and Animation 39
In this chapter, we’ll continue exploring the pages the Page Wizard
provided—this time looking at pictures and graphic objects. Again, the
focus will be on how to swap the placeholder images the Wizard
installed for your own pictures, and how to create new graphic
elements.
Graphics in WebPlus
Page Wizards may incorporate several different types of graphic
objects into your publication. You can use the Pointer tool to select,
move, and resize them, just as with text objects.
On the Home page, click with the Pointer tool on the photo. Try
resizing it by dragging from one corner. Press Ctrl-Z to undo.
Now click in the center and drag it off to one side. Press Ctrl-Z
again.
TIP: Watch the HintLine as you drag an object, and it will tell you the
object’s properties.
Drag the photo down and to the left so it partially overlaps the
repeating cube pattern. Now click on the photo in the overlapping
region, and click again (slowly) a couple of times. Each time,
you’ll notice a different set of handles appear, as first the photo,
then the pattern, is selected.
When two objects overlap at a particular point, your first click at that
point selects the uppermost object. Your second click selects the object
below the first, and so on.
Note: If you’re working in the older HTML 3.2 mode (see Chapter 8),
overlapping objects will be converted to single graphics when the
publication is exported as a Web page. In this mode, WebPlus flags
overlapping objects with a red line border, and you should separate the
objects unless you want them exported as a graphic. (Overlap is not a
problem in the newer HTML 4.0 mode.)
Page 39

40 Working with Graphics and Animation
Importing a picture or animation
You’ll have no difficulty importing such items as metafile clipart,
bitmap photos, or animated GIFs. WebPlus can handle all the standard
formats. After being imported, each image is stored in the WebPlus
publication until you publish the site, at which time it’s exported using
one of the standard bitmap formats (GIF or JPG) that Web browsers
recognize. Let’s try importing.
Click the
Import Picture Wizard appears. Select the “From File” option and
click Next, then Finish.
Using the file selection dialog, open P
S
ERIF/WP60/SAMPLES/ folder.
Now you have two choices. You can either drag out a box region
on the page to set the size of the imported picture, or simply click
to insert the picture at a default size. Pick either one. The sample
picture (of a lion) will appear, and you can always resize it later by
dragging its handles.
WebPlus 6.0 includes a bonus collection of 20,000 WebArt images,
including arrows, bullets/buttons, icons, lines, and animations as well
as pictorial Web graphics. You can peruse the collection using your
Web browser, then drag and drop images directly into WebPlus. To
choose animations, use the Animated GIF Wizard. For details, search
for “WebArt” in the online help index.
Import Picture button on the left toolbar. The
HOTO1.BMP in the
Page 40
Working with Graphics and Animation 41
Note that the time it takes a visitor to load one of your Web pages is
directly related to the size of the page’s HTML file plus any
accompanying graphic files. Graphics require larger file sizes, and
hence slow down loading time. And even in compressed form, bitmap
files like the photo we’ve just imported tend to be much larger than
simple line or shape graphics (see below)—so use them sparingly!
Keep picture dimensions to the minimum needed to convey your point.
It’s always wise to plan your layouts so as to avoid large graphic areas.
Drawing basic lines and shapes
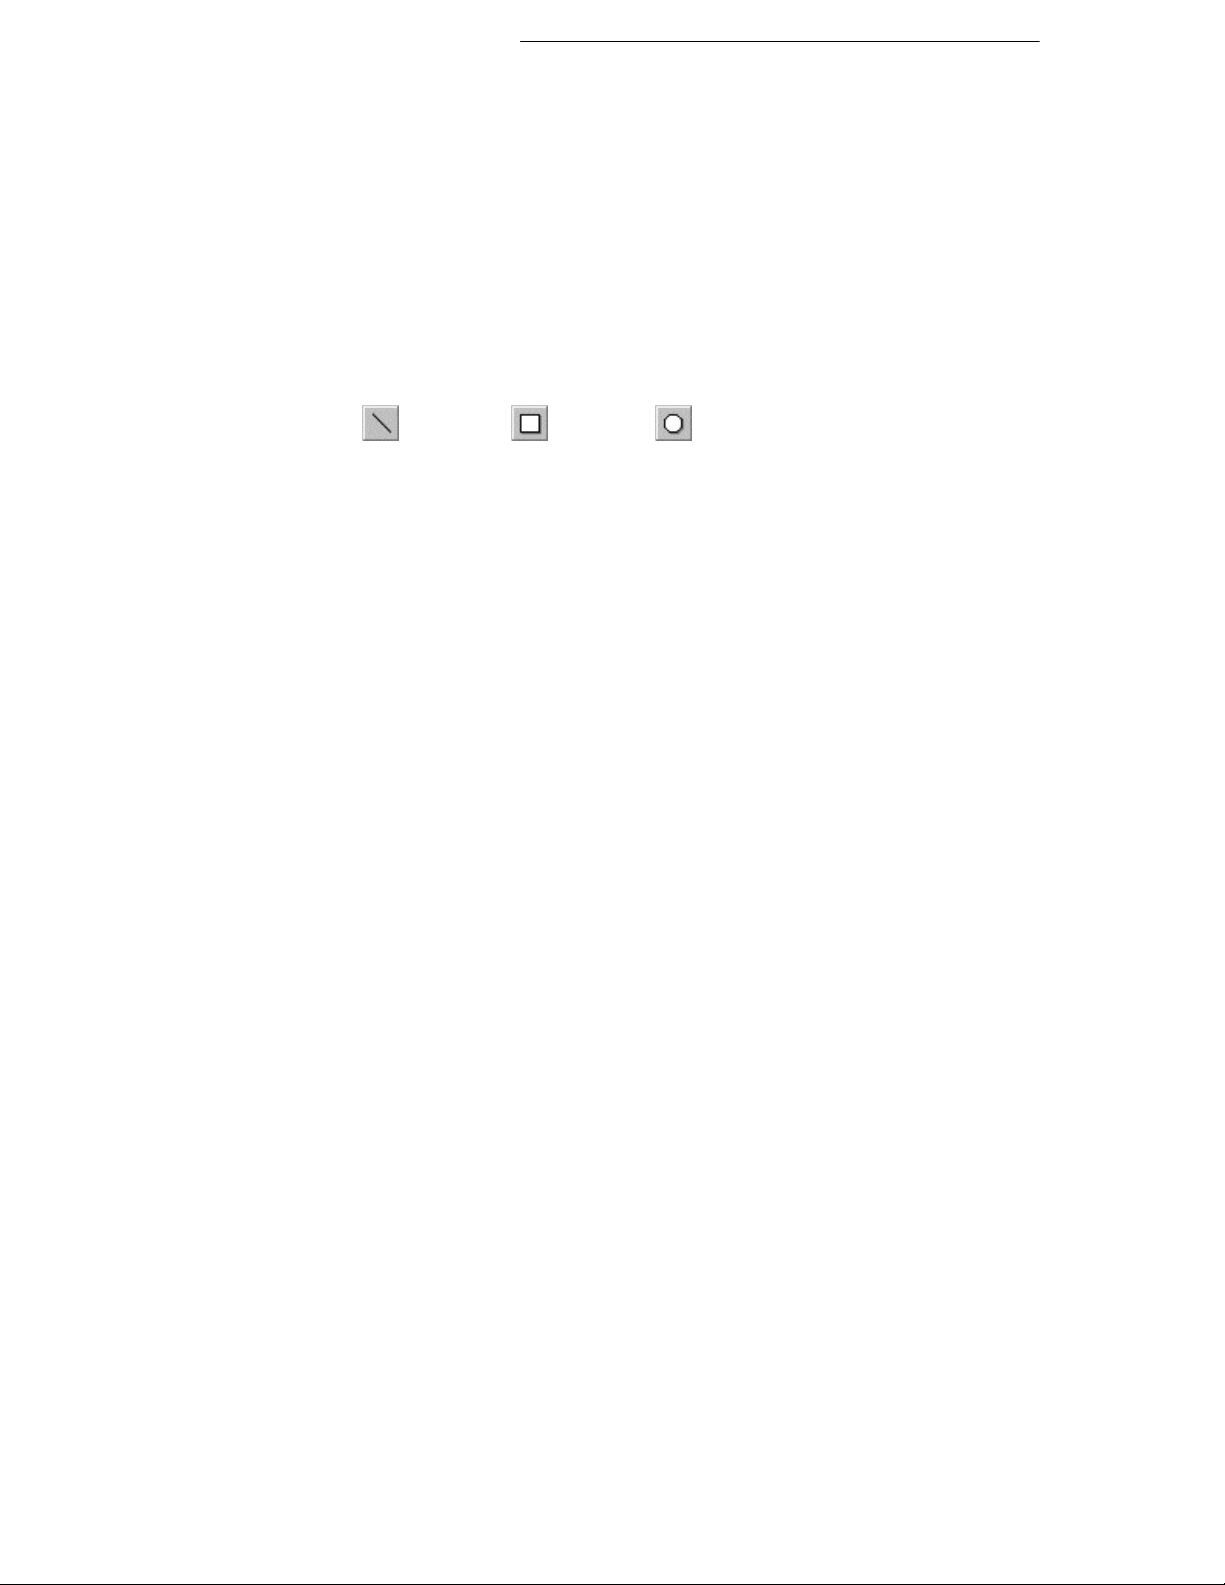
WebPlus provides three easy-to-use drawing tools. You’ll find them on
the left toolbar:
Line Box Shape (flyout)
With them, you can add both functional and decorative layout
elements—for example, clickable buttons or page dividers.
Click the Box button, then click and drag out a small box on the
screen.
Initially, the box will be simply an empty rectangle with a black line
border and a clear fill. The tool has reverted to the Pointer, and you can
use it to move or resize the box. The easiest way to change the object’s
line and fill properties is to use the Studio.
Display the Studio’s Lines panel. Try clicking samples in the
Weights group or the Types group to change the thickness or line
type of the box border. (You can drag and drop from a sample onto
any shape.)
Now display the Studio’s Colors panel. You can easily change
the box's line or fill color and/or shade by first right-clicking a
color sample, then choosing either Apply to Line or Apply
to Fill. (Left-clicking a sample applies the color or shade to the
selected object's fill.). For each base color you select, you can pick
from 10 shades of that color displayed in the Shades group.
In passing, right-click on the box itself and note that you have
Line... and Fill... options that let you adjust all Line or Fill
properties, including color. You’ll see a dialog with an array of
choices for setting the properties of the object’s line border.
Page 41
42 Working with Graphics and Animation
The Line button lets you draw lines, while
the Shape button offers a whole flyout of
possibilities, including ovals, polygons,
arrows, stars, callouts, and so on. To create a
button, try overlaying an unfilled shape on a
text block, then hyperlink the graphic (see
next chapter).
Other tools and techniques
You already know how to select, move, and resize objects. Here are
several additional tricks you can carry out on selected objects. Try them
out on your sample photo and box graphics!
Use the
QT
QT
handle. Select the object, then drag one of its handles. For details,
see QuickTour 9, Rotating and Flipping Objects.
Use the
then drag one of its handles inward.
To draw a shape with constrained dimensions—for example, a
square or circle—hold down the Shift key while drawing or
resizing it.
To add more than one object to a selection, hold down the Shift
key while selecting additional objects. This is handy for moving a
cluster of objects while keeping them aligned with each other.
You can click the
multiple selection to lock the objects together temporarily. This
saves you the trouble of having to select them all individually the
next time you want to do something to the whole group. To
separate (ungroup) the objects, click the button again. For details,
see QuickTour 6, Grouping Objects.
To duplicate an object, select it, then press and hold the Ctrl key
and drag out a copy.
Rotate tool to rotate an object around its top left
Crop tool to crop (or trim) objects. Select the object,
Group button that appears next to a
Page 42

Working with Graphics and Animation 43
To constrain the movement of an object to horizontal or vertical,
QT
QT
use the keyboard arrow keys to nudge the selection up, down, left,
or right. Alternatively, hold down the Shift key after you begin
dragging the object. For details, see QuickTour 8, Positioning
Objects.
Use the WebPlus layout tools—including rulers, guides, the dot
grid, and the Snapping button—to position and align items with
precision for a professional appearance. For details, see QuickTour
10, Precision Layout.
Adding animations
WebPlus lets you add two varieties of eye-catching animation effects to
any Web page: animated marquees (scrolling text banners) and GIF
animations. Using Wizards, you can preview the animation and/or
customize the effect. Once placed into your Web publication, the
animations appear static, but they will spring to life once the site has
been exported and a visitor views your page in a Web browser. Let’s
see how easy it is to create an animated GIF.
Click the
toolbar. The Animated GIF Wizard appears.
Click Next and select an animation category. We’ll leave you on
your own to browse through the collection. Just click a title on the
list, and watch the animation in the Wizard’s preview window.
When you’ve made your selection, click Next, then Finish.
Insert Animated GIF button on the left
Page 43

44 Working with Graphics and Animation
As when importing pictures, either drag out a size region on the
page or simply click once to insert the GIF. Keep in mind that
larger animations will take longer to display, and (if using HTML
3.2) avoid overlapping the GIF with another object.
The animation won’t move on the WebPlus page, which only displays
the first of the GIF’s multiple frames. But keep it on your page so it’s
available when it’s time to preview the Web site in your browser.
You may wish to try the animated marquee effect, too—click the
Insert Animated Marquee button on the left toolbar.
Before continuing to the next chapter, remember to save your
work.
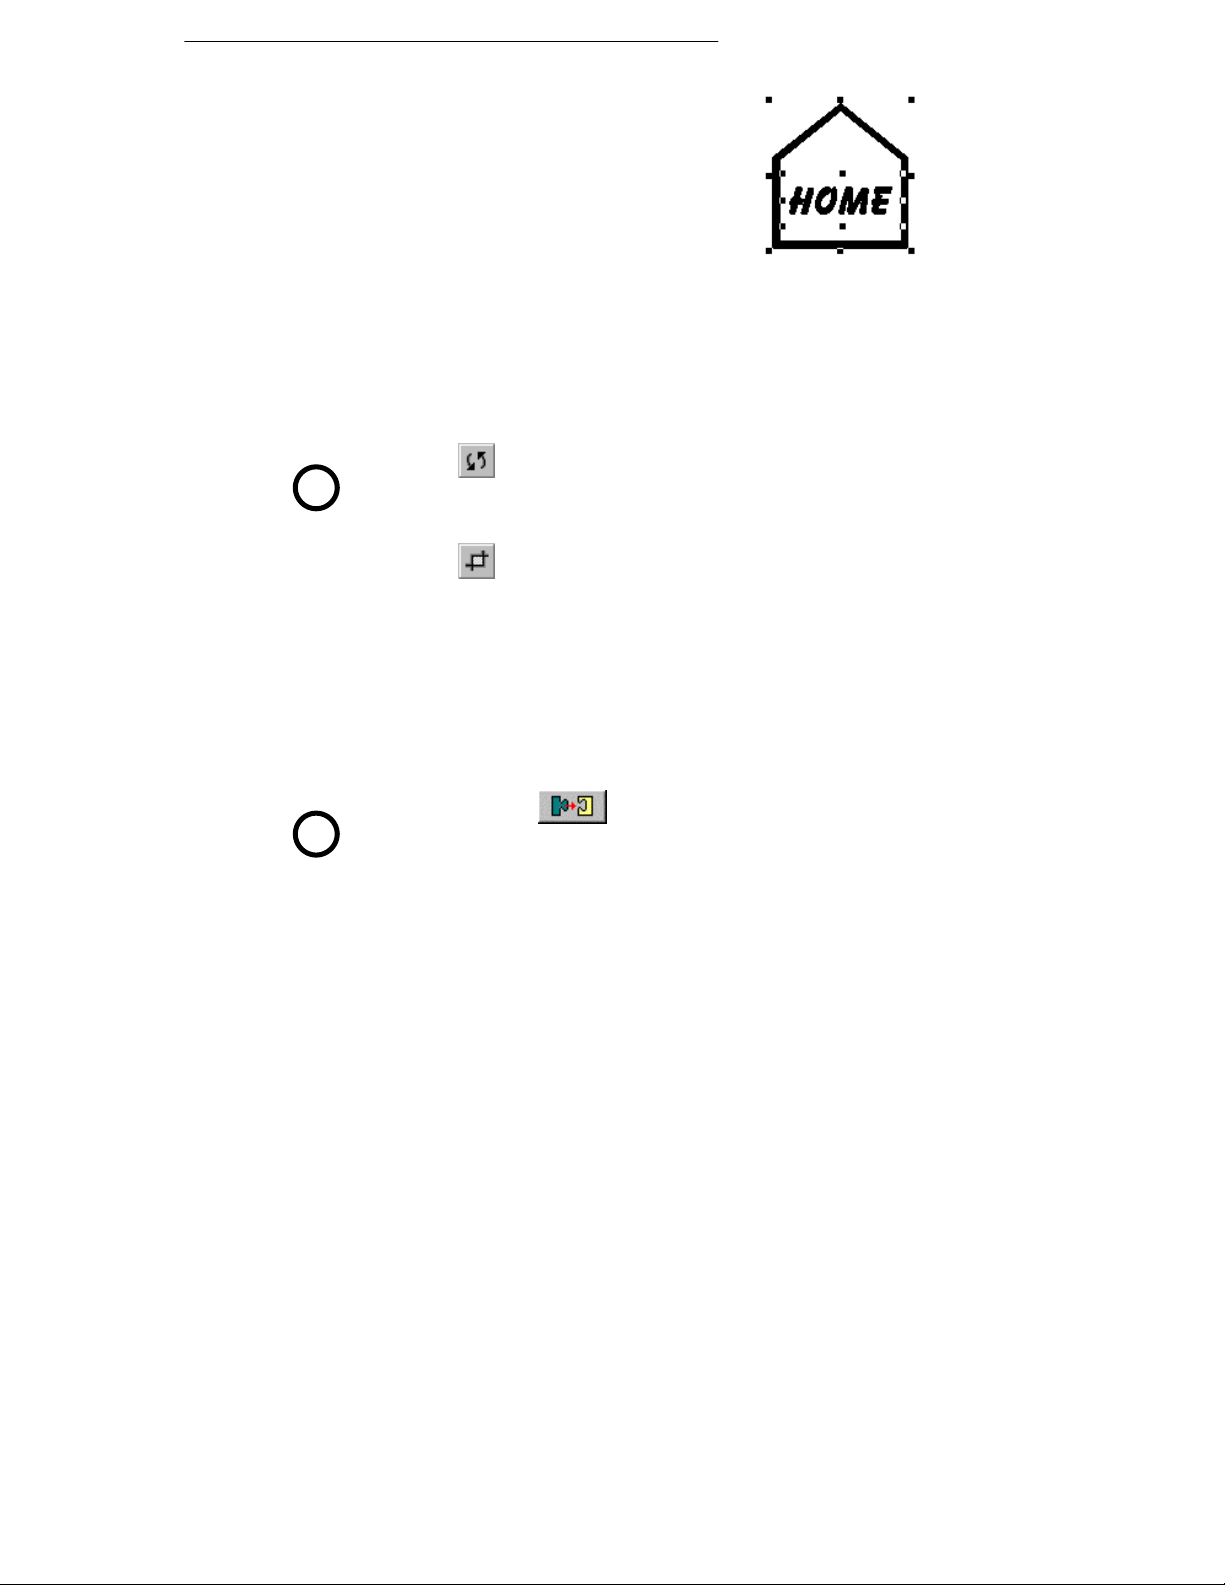
For more help on working with graphics
and animation...
In preparing your Web site, you may want
to take advantage of other WebPlus
design features, such as straight lines and
shapes, rotation and cropping, layering,
and Web image text tags. You’ll find
hundreds of animated GIFs and thousands
of WebArt images, and you can create
eye-catching designs with the LogoPlus
module (some examples are shown at
right)—plus you can work directly with
scanned or PhotoCD images.
QT
For an illustrated introduction to LogoPlus, see QuickTour 4, Using
LogoPlus.
?
For help on... Choose from the
Aligning
Grouping
Exporting
Cropping
Layering
Other object actions
Help menu...
Contents / How To See topics in section “Edit
Then...
Objects on the Page”
Page 44

Working with Graphics and Animation 45
Lines and shapes
Gallery and Portfolio
Importing images Index Select from “importing”
Setting image tags Index Select “Web sites, setting
Animation Index Select “animation effects”
Sound and video Index Select “sound” or “video”
Working with colors Contents / How To See topics in section “Work
Contents / How To See topics in section “Work
with Graphics, Animation,
and Multimedia”
picture display options”
with Colors and
Transparency”
Page 45

Working with
Hyperlinks and
Interactivity
6
Page 46

Working with Hyperlinks and Interactivity 49
In this chapter we’ll look at several ways you can enhance your
WebPlus pages to improve the quality and variety of the visitor’s
experience. If your site has more than one page, hyperlinking is
essential—it’s what enables visitors to navigate through your site—and
it’s easily accomplished. Adding Java and HTML is somewhat more
challenging, but if you’re technically inclined, WebPlus stands ready to
support your efforts.
Hyperlinking an object such as a box, a word, or a picture means that a
visitor to your Web site can click on the object to trigger an event. The
event might be:
♦ A jump to a Web page (either on your site or somewhere else on
the Web);
♦ The appearance of an e-mail composition window; or
♦ The display of a graphic or text file.
You can also place hyperlink hotspots over parts of the page. Let’s
begin by taking a look at hyperlinks in your Wizard-based publication.
Hyperlinking text
As a visual cue, hyperlinked words on Web pages are underlined.
Set your display so you can read the coumn of underlined text on
the left side of the Home page (page 1).
Click the
to the Master Page layer.
Choose the Text tool and single-click on the words “About Us.”
Because this is an “answer text” field, you’ll see an insertion point
just before or after the words.
Click the
The Hyperlinks dialog appears, and the words “About Us” are
highlighted because they already include a hyperlink. In the dialog, you
can see that the link’s destination is “A page in your publication”—
page 2 to be precise.
Click the drop-down list and inspect the other possible link
destinations. Note the Remove button that you could use to unlink
the selected text (if you wanted to), then click Cancel.
Insert Hyperlink button on the top toolbar.
Current Page box to switch
Page 47

50 Working with Hyperlinks and Interactivity
To create a new hyperlink in existing text, you would first select the
range of text you wanted to link, then click the Hyperlink button.
The same dialog would appear, and then linking would be simply a
matter of choosing the destination and clicking OK.
From a design standpoint, it makes sense to include a navigation
bar—a cluster of links to the various key pages on your site. Put it on
the Master Page, so the same links will appear on each page. Instead of
using separate blocks of free text, as in this Page Wizard, you might use
a single text frame across the top of your page, with the links
centered—for example:
However you design it, consider your navigation bar an essential
element. Users will expect it to be there to help them get around your
site. Again, it makes sense to plan your basic layouts ahead of time.
Hyperlinking graphics
Only a few additional words are required here, because the procedure
for linking graphic objects is the same as that for linking text. You just
select the object to be linked and click the Hyperlink button.
Click the Current Page box to switch back to the page layer.
With the Pointer tool, click on the photo to select it, then click the
Hyperlink button.
Again, you’ll see the Hyperlinks dialog. This is the technique you’d use
to hyperlink an entire object. Compare this with the hotspot method,
explained below.
Using hotspots
A hotspot is a transparent hyperlink region on a Web page. Usually
placed on top of bitmap pictures, hotspots act like buttons that respond
when clicked in a Web browser. They are especially useful if you want
the visitor to be able to click on different parts of a picture (such as a
graphic “menu” or map of your site). To give you an idea of how they
work, we’ll need to create one.
Click the
changes to a cross.
Let’s place a hotspot over the boat in the photo.
Hotspot button on the left toolbar. The cursor
Page 48
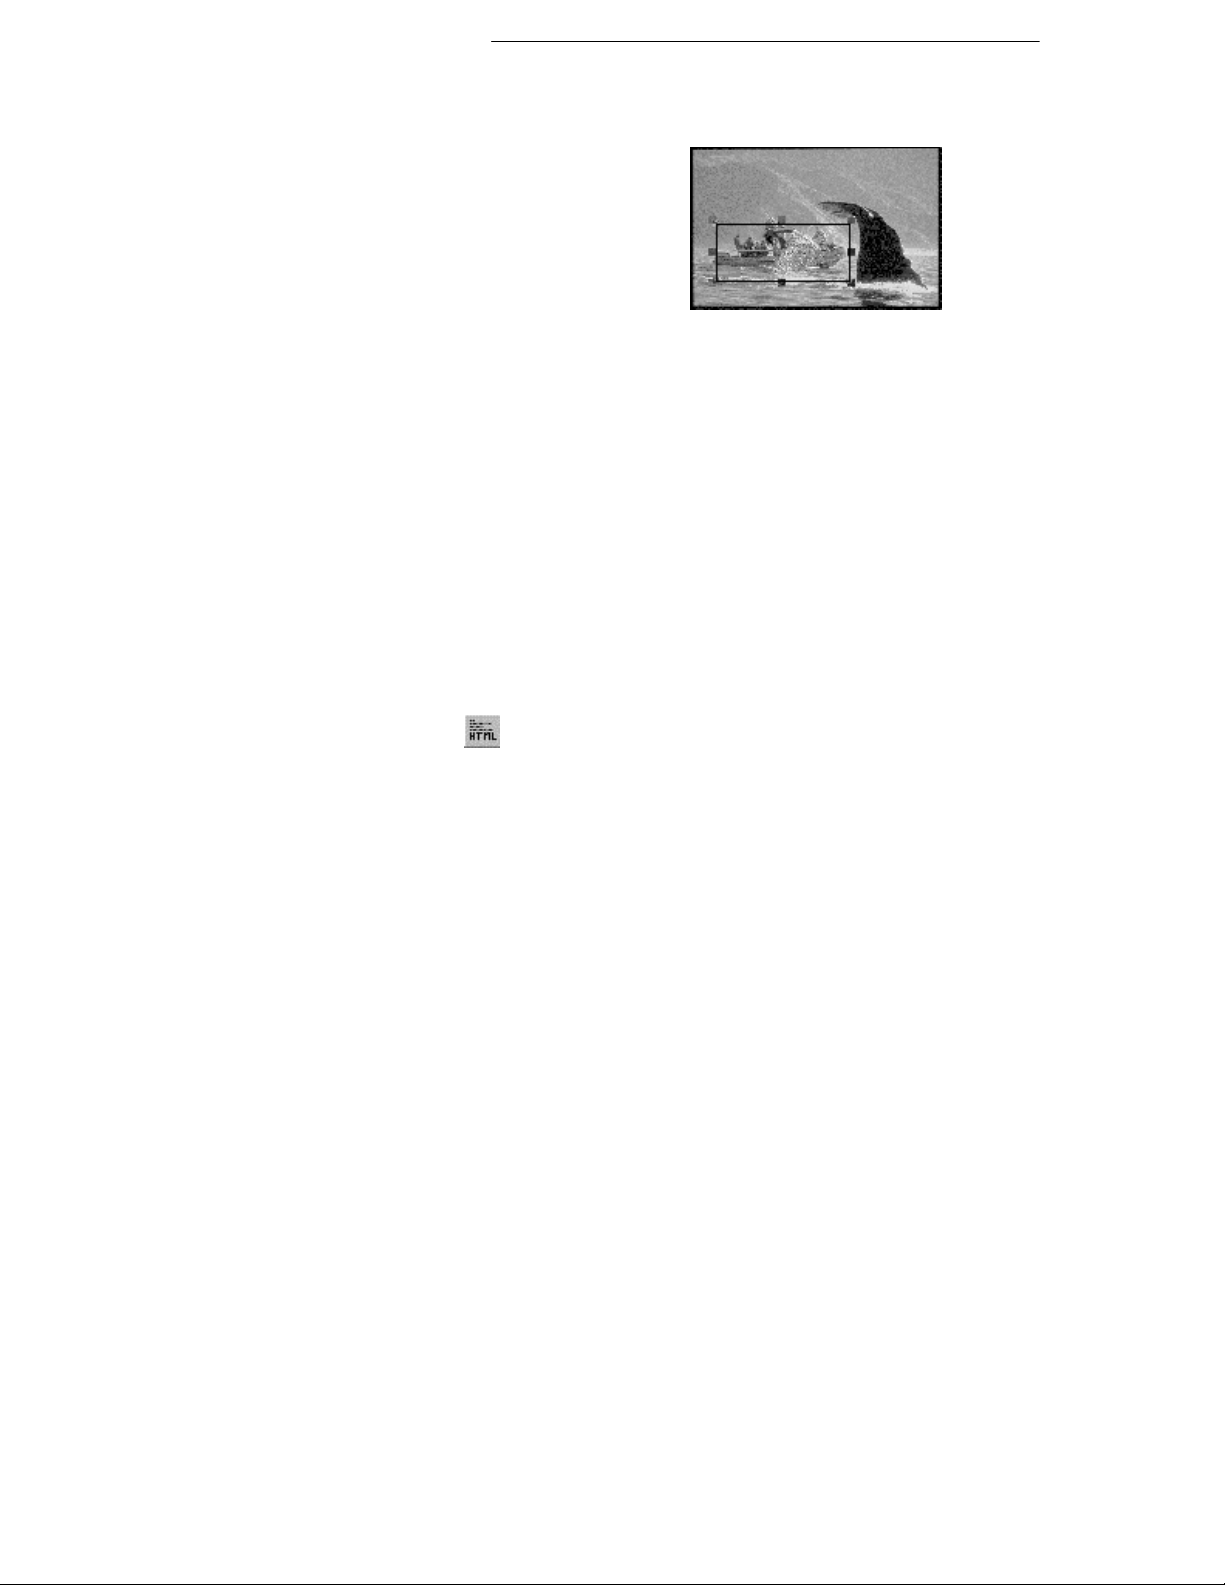
Working with Hyperlinks and Interactivity 51
Click slightly to the upper left of the boat, then drag down and
right to draw a box. (You can adjust it later.)
When you release the mouse button,
the familiar Hyperlinks dialog
appears. This time, it’s waiting for
you to provide a destination.
Select “A page in your
publication” and designate page 2
in the drop-down list. Click OK.
If necessary, you can use the Pointer tool to move or resize a hotspot,
like any graphic. There’s no limit to the number of hotspots you can
use. You can also add extra nodes to a hotspot, allowing it to be fit into
any irregular region; there’s more on this in online help.
About HTML and Java
HTML, of course, is the language “behind” basic Web pages—the
actual descriptive code that tells a browser what to display and where to
display it. While WebPlus doesn't support full-fledged HTML editing,
it does allow you to add extra HTML code to a page. Using this
approach, you can include HTML fragments generated by another
application, copied from another Web page, or perhaps that you've
written yourself.
Clicking the
you enter the HTML code. WebPlus inserts a marker into your
publication at the site where the code will run. Since you won't be able
to see the effect of the HTML until you preview the exported site, be
careful to position the marker correctly. You'll definitely want to check
your Web page in a browser!
Java is a cross-platform, object-oriented programming language used
to create mini-applications called applets that can be attached to Web
pages and that run when the page is viewed in a Web browser.
WebPlus lets you add Java applets to your Web publications. You don't
have to write your own! Plenty of applets are available online—for
example animation, interface components, live information updating,
two-way interaction, graphics rendering, live updating, streaming audio
and video, games, and many more.
Insert HTML button brings up a dialog that lets
Page 49
52 Working with Hyperlinks and Interactivity
Clicking the Insert Java button displays a dialog where you
list the applet’s component files as well as any necessary parameters (as
described in the applet's documentation) that specify exactly how the
applet should run. You don't necessarily need to understand the
underlying code, but it's essential to make sense of any "Read Me"
documentation that comes with the applet.
As with HTML, WebPlus inserts a marker into your publication at the
site where the code will run. The marker's dimensions probably won't
correspond exactly to those of the applet when it's running, so plan
your page layout accordingly, and the more preview tests you can run
(using various versions of different browsers), the better.
For more help on hyperlinks and interactivity
The fact is, you now know almost all there is to know about
hyperlinking and hotspots! When you’re building your Web site,
however, you may wish to use Tools/Hyperlink Manager...
to get a overview of all the links in your publication. You can see the
destinations at a glance, check URLs, and display any hyperlink for
closer inspection. For additional details, see online help.
?
For help on... Choose from the
Creating hyperlinks Index Select “hyperlinks, adding to
Setting hyperlink color Index Select “hyperlinks, setting
Creating and editing
hotspots
Hyperlink Manager Index Select “hyperlinks, using the
Adding Java Index Select “Java applets”
Adding HTML Index Select “HTML, adding code to
Help menu...
Index Select “hotspots”
Then...
Web page”
color of”
Hyperlink Manager”
Web pages”
Page 50

Previewing and
Publishing
7
Page 51
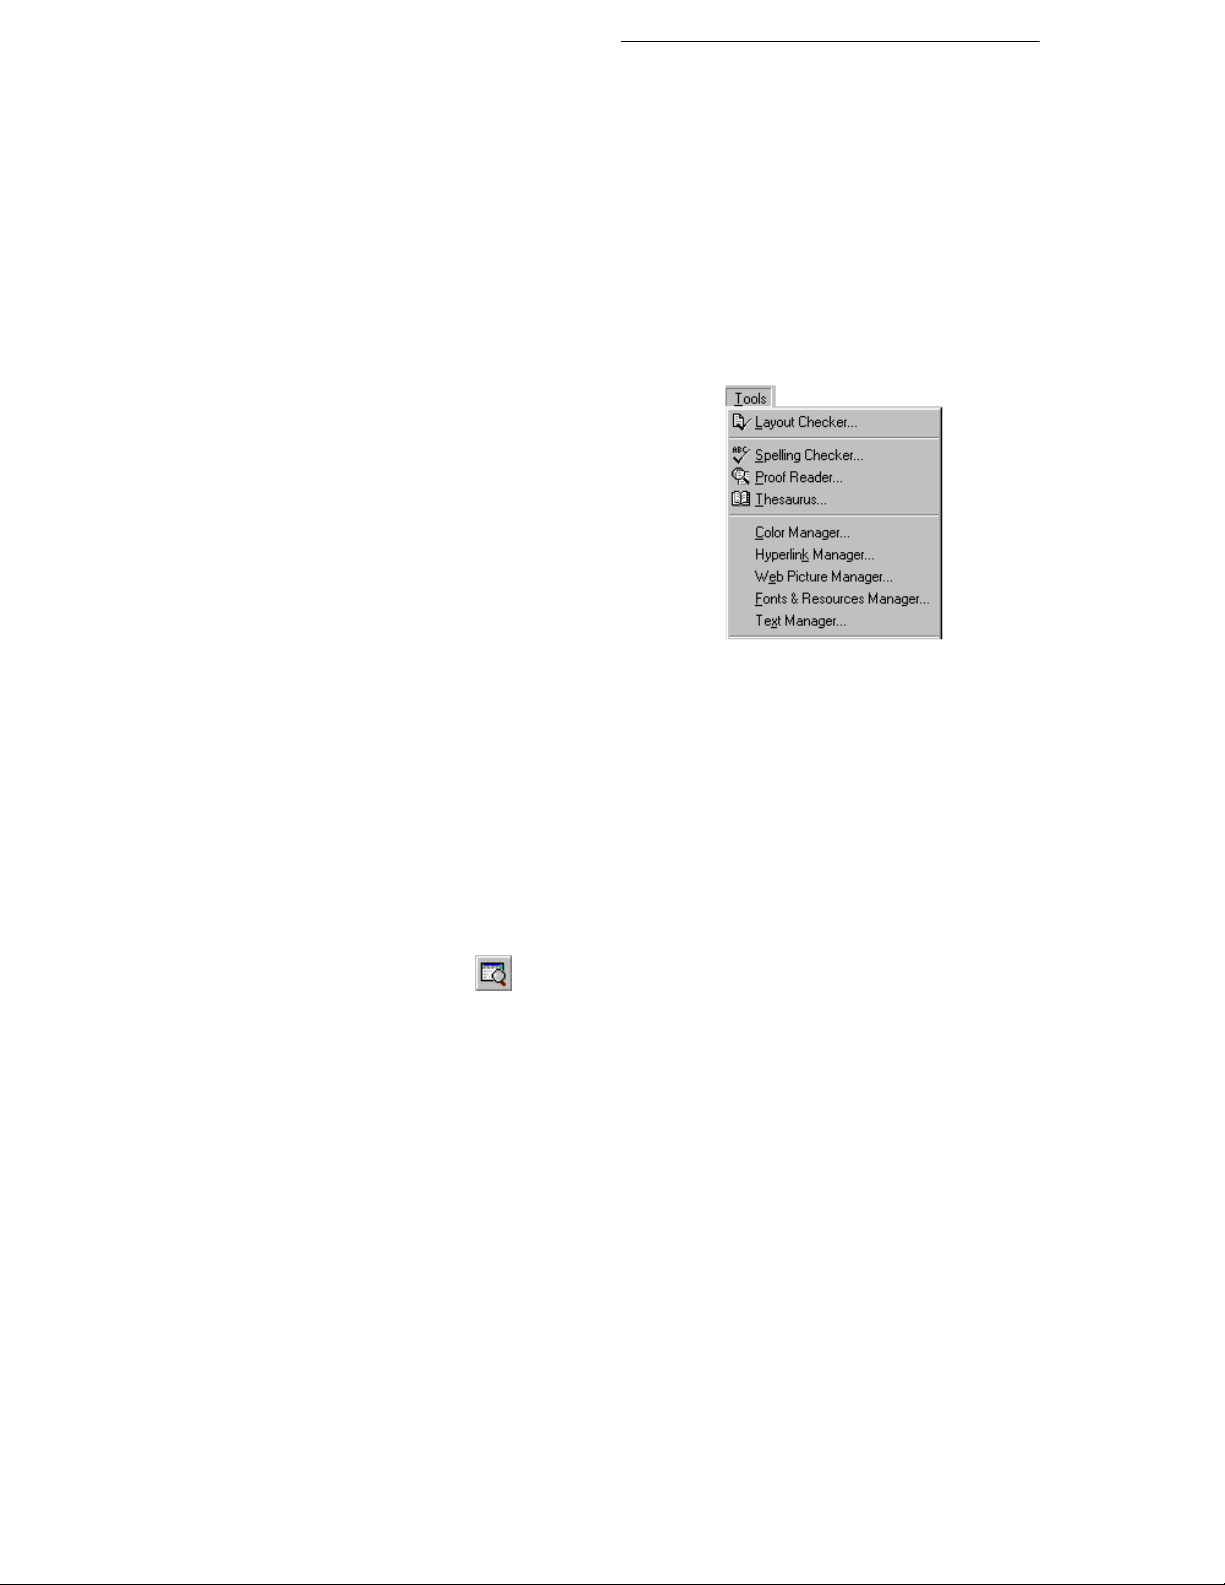
Previewing and Publishing 55
It’s time to rehearse the final phase of preparing your Web site! In this
previewing and publishing phase, as we’ve mentioned, WebPlus takes
the publication’s pages and converts them to HTML and graphics
(pictures) so that a Web browser can display them. You can publish
either to a local folder or to an Internet-based Web host. Previewing is
similar to publishing locally, except that the exported files are
temporary, intended for immediate viewing in your own Web browser.
Optimizing the publication
Before you preview or publish, it’s wise to take advantage of built-in
WebPlus tools for checking your publication’s content and structure.
You can run the Spelling Checker
Wizard, Proof Reader Wizard, and
Thesaurus to inspect and improve your
text. The Text Manager displays a list
of all the text stories and free text used in
your publication, and the Layout
Checker Wizard can locate (and often
correct) problems like objects off the
page, empty frames, or overlapping
objects. You’ll find full details on these
features in online help (see the note at
the end of the chapter).
Previewing the site
Previewing the site at least once before actually publishing it is
essential. Only by viewing the pages in a Web browser can you make
sure that headlines and body text appear the way you intended, page
elements fit properly, animations play at the right speed, and links
between pages make sense.
Although your Wizard-based publication probably still has a lot of its
original placeholder text and graphics, let’s try previewing it. (We’ll
assume you have a Web browser installed.)
Click the
toolbar.
In the dialog, check “All” as the page range, and click OK.
Preview Site in Browser button on the top
Page 52

56 Previewing and Publishing
The WebPlus publication is exported to a temporary folder, and your
Web browser launches, displaying the site’s Home page. (If your
system tries to connect to the Internet as the browser launches, you can
dismiss the connection dialog. No Web connection is required for
previewing.)
If you saved the animated GIF on the Home page, you’ll see it come
alive now!
As you move the mouse pointer over hyperlinks or hotspots, you’ll
see the cursor change to the familiar “hand.” Click the hotspot you
placed over the boat in the photo (notice that its border line is now
invisible), and you’ll jump to page 2.
Previewing gives you a chance to see the site the way your visitors will
experience it. Keep track of how fast your pages display in the browser,
and remember that the Web will certainly slow them down! Check out
each page and take notes on any problems, then go back to WebPlus
and make any necessary corrections.
You can preview just one page (or a range of pages) instead of all the
pages, by changing the setting in the Preview dialog. All previous
temporary files are deleted each time you preview. This means, for
example, that if you’ve already previewed the whole site, and then
choose to preview just one page (say, to check revisions), the
previously exported pages will no longer be available. If this is
inconvenient, you may wish to use the Publish to Folder method,
described next.
Publishing to a local folder
This option, like previewing, exports your publication pages to HTML
and graphics files. The key differences are:
Page 53
Previewing and Publishing 57
♦ You designate where the files should go, instead of having them
written out to temporary files, which are not really under your
control. As noted above, each time you run Preview Web Site,
even if you’re only previewing one page, your previous set of
temporary files disappears. When publishing to a folder, you have
the option of overwriting existing HTML files with the same name
(recommended); graphics are assigned new file names. Your site as
a whole remains intact.
♦ Your Web browser doesn’t launch automatically. Instead, you’re
given the option of launching it. If it’s already open, simply
decline the option, then switch to your browser’s window and use
its Reload or Refresh command to display the updated page.
Publishing to a local folder is another way of previewing your Web
site, and is also the way to share your site with others on a local area
network. You don’t need to try it right now, but here are the steps
involved in publishing to a local folder:
Click the
toolbar. In the dialog, locate the folder where you wish to store the
output files, or click New Folder... to create a new folder.
As for previewing, you can publish just one page or a range of
pages. If you’re using HTML 3.2, we recommend creating a
separate file for each page and left-aligning Web pages.
Accept or decline the option to launch your Web browser.
Publish Site to Folder button on the top
Publishing to the World Wide Web
WebPlus makes publishing to the World Wide Web almost as simple as
publishing to a local folder! As a WebPlus user, we’ve made it easy for
you to get free Web space and E-mail. Simply choose Free Web
Space from the Help menu to set up your account. That way you’ll
have your user name and password available when you’re ready to
publish to the Web.
When you’re finally ready to publish your Web site, here are the steps
to take:
Click the
toolbar to display the Web Publishing Options dialog.
Publish Site to Web button on the top
Page 54
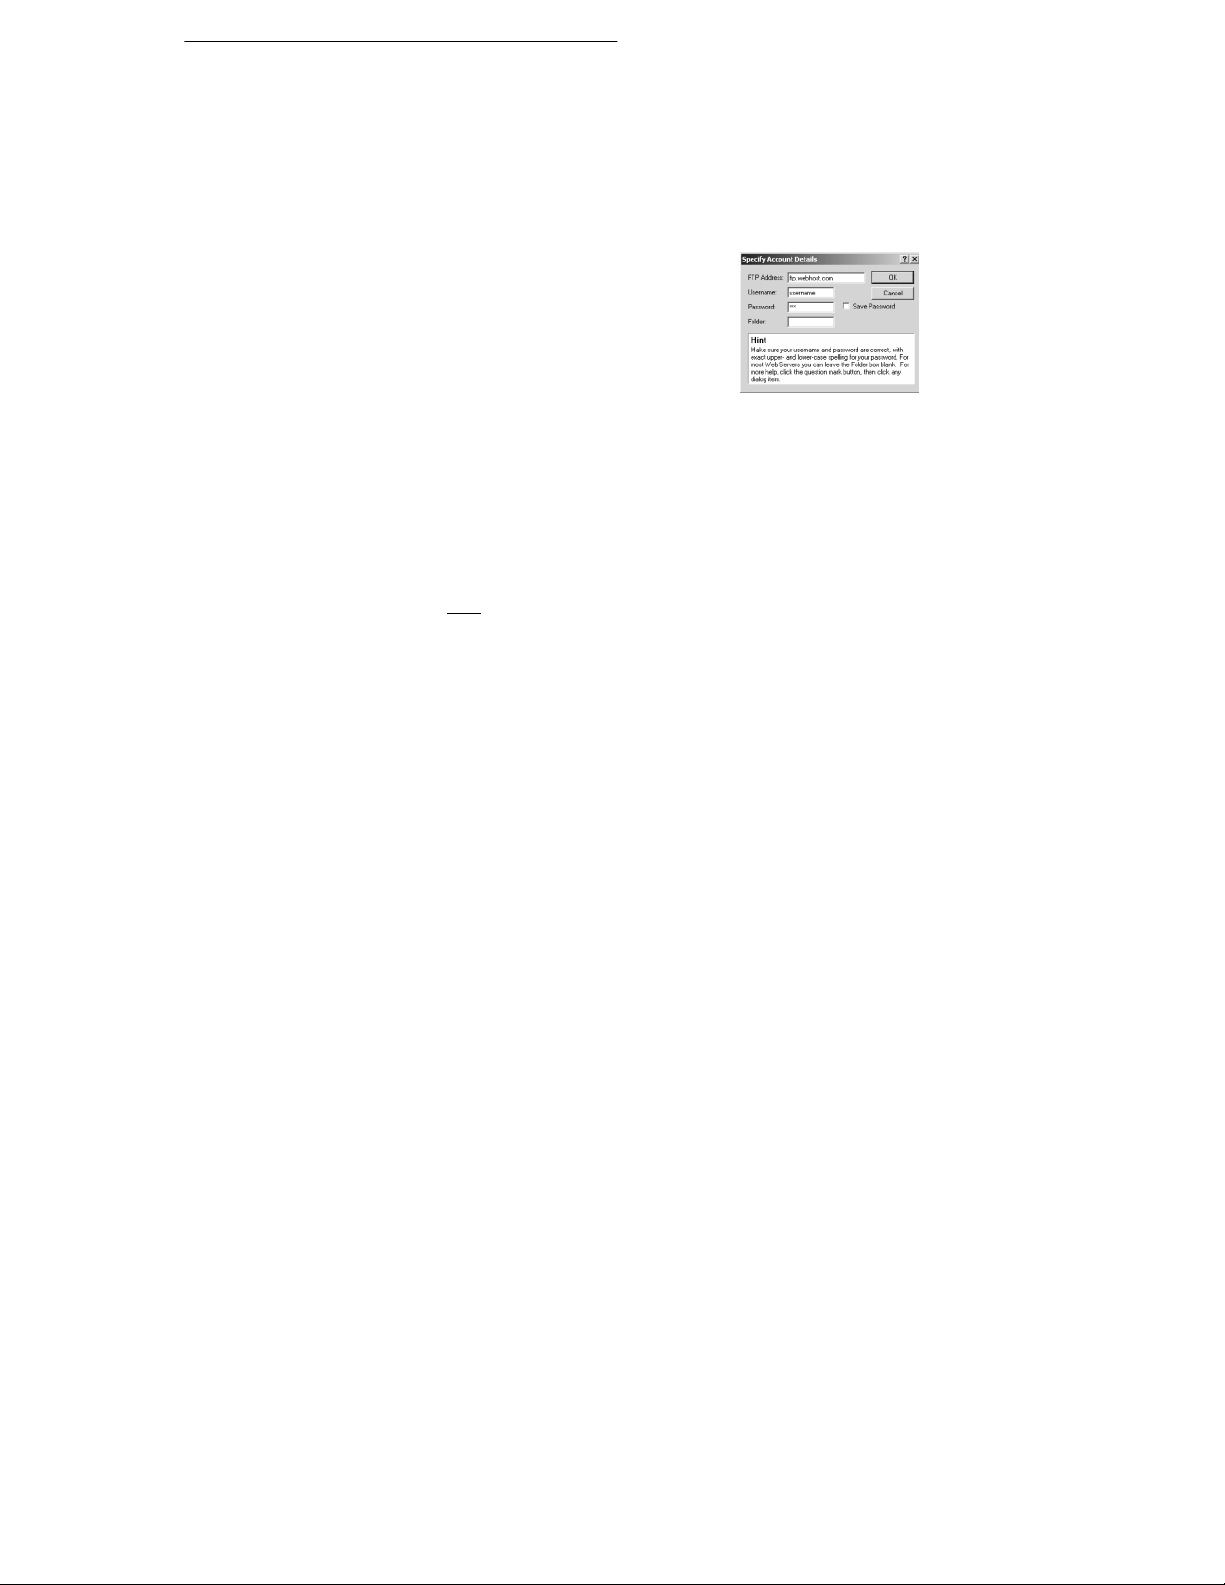
58 Previewing and Publishing
Specify the number of pages to publish and click OK. If you’re
exporting in HTML 3.2 format (see next chapter), set additional
choices if any. WebPlus exports the page(s) to temporary files, and
then the Account Details dialog appears.
Enter the FTP address of your Web host and your pre-assigned
Username and Password. Be sure to enter the password exactly as
given to you, using correct upper- and
lower-case spelling, or the host server
will not recognize it. For most Web
servers you can leave the Folder box
blank, otherwise enter the name of
publishing folder. Click OK.
WebPlus seeks an Internet connection or establishes a new one,
and connects to the remote server. Sometimes (for example with
online services such as AOL) you’ll need to use the service’s
proprietary log-on software to establish a connection. You’ll see a
message when all files have been successfully copied.
Now you’ll be able to see your page(s) “live” on the Web. Point
your Web browser to the URL that includes the path to the host
server plus
the folder to which you published.
Congratulate yourself!
Page 55

Previewing and Publishing 59
For more help on previewing and
publishing...
Before publishing your actual Web site, you’ll probably want to review
the WebPlus proofing options mentioned above, and learn about adding
search engine descriptors. Or you may want details on publishing to an
alternate Web server.
?
For help on... Choose from the
Help menu...
Printing, previewing,
and publishing the
Web site
Using proofing tools Index Select from “proofing tools”
Adding search engine
descriptors
Publishing to an
alternate server
Contents / How
To
Index Select “search engines”
Index Select “publishing Web sites,
Then...
See topics in section “Print,
Preview, and Publish to the
Web”
to World Wide Web” and
consult note on “Gathering
server information”
Page 56
8
Starting from Scratch
Page 57

Starting from Scratch 63
By now, we’ll assume you’ve worked through the Wizard-based
examples in the preceding chapters and have a preliminary knowledge
of WebPlus tools and techniques—although probably not too much
hands-on experience. You’ve seen that there are lots of ways to
customize the Wizard-based publications, and that approach may suit
your needs perfectly.
But don’t forget that besides offering a variety of Page Wizards,
WebPlus gives you the option of starting from scratch and composing
each page just as you want it. You may decide to take a hybrid
approach: study the Wizard layouts, learn from them, and then apply
what you’ve learned to a brand-new site of your own design.
If you’d like to start from scratch, here are the steps:
From the Startup Wizard, select the Start from Scratch
option. From within the program, choose New... from the File
menu or click the
publication will open with a blank page, and you’ll see the Page
Setup dialog.
Select a page size (either Standard or Wide), or define a custom
size by entering new values for Width and/or Height. Then click
OK.
Obviously, there’s no single formula for coming up with a successful
Web site. It may help to have a plan of attack, however, so the
following sections provide a brief outline of the process, along with
some suggestions to guide your efforts.
Step 1: Design
It probably goes without saying (but we’ll say it anyway) that before
starting a site from scratch, you should have mapped out on paper
exactly how many pages you’ll need, what the basic composition will
look like, and how the pages will be linked together.
New button on the top toolbar. The new
Page 58

64 Starting from Scratch
Unlike a magazine or newsletter, a Web site doesn’t depend on a linear
page sequence. It makes more sense to think of your site in spatial
terms, like a house that people will explore. You can generally assume
that visitors will come in through the front door (the Home page)—but
where they go after that depends on the links you’ve provided. These
are the corridors that connect the various rooms (sections) of the site.
Each room might have a few side doors, but don’t let the visitors get
lost! Graphic aids like a navigation bar, or clear labeling and/or colorcoding for the various sections of the site, can help immeasurably, but
only if you include them in your design scheme.
Page 59

You should ask yourself these basic questions:
♦ How many pages will you need?
♦ Which version of HTML will you use: 3.2 or 4.0? (See the section
on HTML later in this chapter.)
♦ What basic composition will you use?
♦ Where will the navigation bar go, and what will it look like? Do
you want to use a text-based navigation “header” or “footer”?
♦ What font will you use for headlines, body text, and captions?
♦ Which color scheme will you use, and will you customize its basic
colors or Web colors? (In Page Wizards, body text is marked with
Scheme Color 1, but you can depart from that convention.)
Step 2: Content
The success of your site probably depends more on high-quality
content than on any other single factor. As a rule, people will be
visiting your Web site because they’re interested in what you can tell
them or offer them. Your job is to make that reward as accessible as
possible, and make the site’s design quality integral to the experience.
You don’t want any elements that throw up barriers to access, or stand
out like sore thumbs to detract from the visitors’ positive response.
Starting from Scratch 65
Make sure you’ve reviewed the mechanics of working with text,
graphics, sound and video (if applicable), and hyperlinks before
focusing on these questions:
♦ Will you lay out text as frames, free text, or a mix of both?
♦ Given your basic page composition, how will you vary the layout
of each page?
♦ Where will your graphics come from? Will you be using any
photographs? Do you need to create shape graphics (lines, boxes,
ovals, etc.) in WebPlus?
♦ In addition to hyperlinks for your navigation bar and/or footer,
where else could you place links for users’ convenience? (Go
through your content once it’s on pages and place links to related
content.)
♦ How might you use animated GIFs and marquees to add interest
(especially on the Home page)?
Page 60

66 Starting from Scratch
Step 3: Finishing touches
Before publishing your site to the Web—in effect, throwing open the
front door and inviting the world—you’ll want to brush the cobwebs
from every corner. Review the advice in the preceding chapter, and
consider this checklist:
♦ Have you used the WebPlus proofing tools to enhance the quality
of your text?
♦ Have you run the Layout Checker to inspect for possible
problems?
♦ Have you specified a Web site title and added search engine
descriptors (in File/Web Site Properties...)?
♦ Have you previewed your site in a Web browser—preferably in
several different browsers?
♦ Have you reduced graphic file sizes to a minimum to improve load
time?
HTML 3.2 and 4.0
If you're used to working in a desktop publishing environment, you
may have to scale back your typographic expectations somewhat when
designing for the Web. With its built-in support for HTML 4.0,
however, WebPlus gives you considerably more freedom. It's useful to
compare HTML 4.0 to its predecessor, HTML 3.2.
With either format, you can in theory use any font you like. However,
if a specified font isn’t present on a visitor’s computer, an available
font will be substituted, with unpredictable results for your beautifully
designed layout! As a rule, stick with the standard Windows fonts
(Times New Roman, Arial, Courier New, and Symbol). To be sure, run
the Layout Checker, which will warn you if your publication uses other
fonts. You’ll have the option of converting each such instance to a
picture—which will ensure the non-standard font’s appearance is
preserved.
Page 61

Starting from Scratch 67
HTML 3.2 has the advantage of working on most browsers, but
constrains your page design options, especially with regard to object
placement. With HTML 3.2, WebPlus must construct Web pages using
complex tables. Each object must fit in a separate cell, and any objects
that overlap on the page must be converted to a single graphic, which
can greatly add to the file size of freeform layouts. If you’re working in
3.2 mode, WebPlus flags overlapping objects with a red line border. To
overcome the condition, simply drag the objects apart until the red line
disappears.
HTML 4.0 produces smaller, faster, higher-quality Web pages but can
only be viewed on Internet Explorer 3 and above, or Netscape
Navigator 4 and above. In laying out text, you can specify any point
size, use variable leading and letterspacing, and even justify
paragraphs! The result is a much closer WYSIWYG match between
what you see on-screen in WebPlus and what ends up in the Web
browser.
Because HTML 4.0 positions elements using absolute coordinates,
WebPlus can output your pages without using tables. Overlapping is no
longer as serious an issue in page design, and file sizes are reduced.
To sum up: Chances are good (and getting better all the time) that you
can safely adopt HTML 4.0 as your publishing standard. In the rapidlychanging environment of the Internet, users who stick with obsolete
browsers are few and far between. For this reason, HTML 4.0 is the
default choice in WebPlus. If necessary, you can switch between
HTML 4.0 and 3.2. Note that changing the HTML version does not
affect the structure of your WebPlus publication, only the format used
to publish it as a Web site.
Design tips and rules of thumb
♦ You may want to consider setting your monitor to use 256 colors
(rather than thousands or millions). This is because the GIF image
format, the standard for Web graphics, supports a maximum of 256
colors, as do many of the monitors in current use. By working at
this setting you’ll be able to preview how your page will look in
most users’ Web browsers. For predictable results, choose colors
from the built-in WebPlus palette (on the Studio’s Colors panel)
rather than inventing your own.
Page 62

68 Starting from Scratch
♦ The “performance” of your page is how long it takes for the whole
page, including text and graphics, to display completely in a Web
browser. Basically, it’s proportional to the total file size of its
graphics. As a rule of thumb, use 60K bytes per page as a
maximum.
♦ You can determine the actual size of your files by publishing one
page at a time to a local folder (using the Publish Site to
Folder button), then using Windows Explorer to examine the
contents of the folder. View the files by date and Shift-select the
most recent batch, then right-click and choose Properties to
see the aggregate byte count. Obviously, the lower the better.
♦ To reduce the total size of your graphics, aside from using fewer
graphics, make them no larger than they need to be to get your
point across. Since file size increases as the square of each
dimension, shrinking both height and width by 50% reduces the
file size by 75%.
♦ Reduce the number of colors in each image, and (except for
photos) save as GIF files using the lowest acceptable bit depth
your paint program will allow. Use a “Web-safe palette” when
possible; you’ll find one in the WebPlus Samples folder. You may
wish to explore the Web for details on this and other Web design
strategies.
♦ You’ll need to maintain the pages on your Web site, which isn’t
difficult with WebPlus—all the originals are right there in your
publication! As a reference, keep a list showing the page numbers
and the contents of each page. You can store the list on the
Pasteboard, or (for printing out) on the last page of your
publication, which is easy to access by double-clicking the Next
(right-arrow) button. (You can still publish the whole site; users
won’t be able to access the last page as long as there are no links to
it.)
Page 63

Starting from Scratch 69
♦ As you’re developing Web pages, you’ll probably need to carry
out some housekeeping tasks on your local hard drive. Note that
each time you publish one or more pages to a folder, a new set of
image files is generated (although duplicate .HTML file names are
overwritten). If you’re previewing pages this way, rather than
using Preview Site in Browser (which overwrites old
files), those GIF and JPG files can proliferate. It’s a good idea to
weed out the old ones periodically. You can sort your Explorer or
My Computer window contents by date, then use the “Modified”
attribute to determine which files to keep (i.e., the set most recently
published). For thorough cleanup, periodically publish the whole
site to a new folder and delete the old one.
♦ Think of your site as more than an electronic business card—think
of it as a newsletter with publication deadlines. Don’t let more than
two weeks go by without making visible changes. The changes
don’t have to be dramatic; the main thing is to reinforce the
perception that your site is dynamic, not static. The Home page
should change most often: add new links, or replace old graphics
with new ones. Add a new page or two, expanding the original
sections. (Be sure to post notice of the new features on the Home
page.) Revise the design of any pages that aren’t working the way
you expected.
♦ Visitors’ feedback is important. Be direct about asking for
comments, and make sure you’ve included an e-mail return link.
Challenge your users to respond! Give them some specific choices
to make (“Would you rather see A, B, or C on this page?”). Let
them feel they’re contributing.
♦ As a rule, keep the background and section organization intact so
as not to confuse repeat visitors. Sections that began as a single
page will require a section menu as soon as a few new pages have
been added. If you’ve got a navigation bar with a button already
linked to the original page, turn that target page into the menu page
to keep the link intact. From a site management standpoint, it’s
usually easier to switch content to a new page than to rewire
existing links. (You can see the content, but you can’t easily see
the links.)
Where should I go from here?
The answer should be self-evident: Get straight back to work with
WebPlus! Your own experience will be your best teacher. We’re proud
of WebPlus, and hope you enjoy using it to develop a Web site you can
be proud of, too.
Page 64

70 Starting from Scratch
Thanks for joining our product family... and here’s hoping we see you
online soon as a member of the Serif community!
 Loading...