

Page 1

Page 2

Contents
1. Welcome ............................................................................... 1
Welcome! ...................................................................................................... 3
New features ............................................................................................... 4
Installation ................................................................................................... 9
2. Getting Started ................................................................ 11
Startup Assistant .................................................................................... 13
Creating a publication from a design template ......................... 15
Starting a new publication from scratch....................................... 19
Opening existing publications.......................................................... 20
Saving your publication ...................................................................... 22
3. Pages ................................................................................... 23
Setting up a publication ...................................................................... 25
Adding, removing, and rearranging pages.................................. 28
Understanding master pages ............................................................ 30
Using page numbering ........................................................................ 35
Navigating pages ................................................................................... 36
Viewing pages ......................................................................................... 37
Working with layers............................................................................... 38
4. Assets for Creativity ........................................................ 41
Using assets .............................................................................................. 43
Browsing .................................................................................................... 45
Page 3

Contents
5. Manipulating Objects ..................................................... 49
Selecting an object ................................................................................ 51
Selecting multiple objects .................................................................. 52
Creating groups ...................................................................................... 53
Copying, pasting, and duplicating objects .................................. 54
Moving objects ....................................................................................... 55
Resizing objects ...................................................................................... 55
Ordering objects .................................................................................... 57
Aligning and distributing objects .................................................... 57
Rotating an object ................................................................................. 60
Anchoring objects to text ................................................................... 61
Updating and saving defaults ........................................................... 63
6. Text ....................................................................................... 65
Understanding text frames ................................................................ 67
Fitting text to frames ............................................................................ 74
Linking text frames ................................................................................ 76
Using artistic text ................................................................................... 78
Putting text on a path .......................................................................... 80
Editing text on the page ...................................................................... 82
Setting text properties ......................................................................... 84
Using fonts ................................................................................................ 85
Using text styles ...................................................................................... 87
Wrapping text.......................................................................................... 91
Creating a bulleted or numbered list ............................................. 92
Inserting user details ............................................................................ 95
Page 4

Contents
7. Tables, Charts, and Calendars ..................................... 97
Creating tables ........................................................................................ 99
Flowing tables ....................................................................................... 100
Using charts ............................................................................................ 103
Inserting a calendar ............................................................................. 111
8. Pictures ............................................................................. 113
Adding picture frames ....................................................................... 115
Adding pictures .................................................................................... 119
Cropping pictures ................................................................................ 121
Using Cutout Studio............................................................................ 124
Adjustments and effects ................................................................... 127
9. Lines and Shapes ........................................................... 129
Drawing and editing lines ................................................................ 131
Drawing and editing shapes ............................................................ 132
10. Effects and Styles ........................................................... 137
Applying effects .................................................................................... 139
Using the Shadow Tool ...................................................................... 144
Using object styles ............................................................................... 145
11. Colour, Fills, and Transparency ................................. 147
Applying solid fills ................................................................................ 149
Using colour schemes ........................................................................ 151
Gradient and bitmap fills .................................................................. 154
Working with transparency .............................................................. 160
Understanding blend modes .......................................................... 164
Page 5

Contents
12. Publishing and Sharing ............................................... 167
Preflight check ...................................................................................... 169
Interactive Print/PDF Preview ......................................................... 172
Printing basics ....................................................................................... 175
Publishing PDF files ............................................................................. 177
Creating a PDF bookmark list .......................................................... 180
Creating a PDF slideshow ................................................................. 181
Publishing as eBooks .......................................................................... 183
Exporting as a picture......................................................................... 188
13. Additional Information ............................................... 191
Contacting Serif .................................................................................... 193
Credits ...................................................................................................... 194
14. Index .................................................................................. 197
Page 6

Welcome
Page 7

2 Welcome
Page 8

Welcome 3
Welcome!
Welcome to PagePlus X7, the award-winning Desktop Publishing
(DTP) solution from Serif. PagePlus is the easiest way to get superior
publishing results, whether on your desktop or via professional printing.
It's simple for anyone to create, publish and share their designs as
outstanding printed documents, stunning PDFs, PDF slideshows,
tables/charts, modern eBooks or via web page.
To make life so much easier, PagePlus comes with an impressive
selection of design templates, creative content, and styles for you to
use. As a result, publishing to a professional standard is easily achievable
for experienced and inexperienced users alike! You'll also be able to
reuse existing content by importing PDF documents and word
processing documents. On the flipside, you'll be able to export drawn
objects to all the latest graphic file formats.
PagePlus X7 doesn't stop at superior publishing. Its range of design
studios makes PagePlus stand out from the crowd—Cutout Studio for
cutting pictures out from their backgrounds, LogoStudio for custom
logo design, and PhotoLab for powerful image adjustment and effect
combinations. You simply cannot afford to miss them!
Upgrading?
If you've upgraded from a previous version, this new edition of PagePlus
includes a host of exciting new features which keeps PagePlus ahead of
its competitors and at a fraction of the price! We hope you also enjoy the
additional power and performance edge.
Page 9

4 Welcome
Registration
Don't forget to register your new copy, using the Registration Wizard,
on the Help menu. That way, we can keep you informed of new
developments and future upgrades!
New features
• 64-bit operation for improved performance
PagePlus is fully optimized for operation on 64-bit computers,
and will automatically install for 64-bit operation accordingly.
• Feed-based Startup Assistant (see p. 13)
The new-look starting point for new publications provides a
wealth of constantly updating cross-product news and
PagePlus-specific learning resources (video tutorials, written
tutorials, help, and Tips & Tricks). The assistant keeps track of
unread articles so you won't miss a thing! An Open option also
gives you access to all your existing publications, based on
document history.
• Attractive eye-catching charts (see p. 103)
Present your PagePlus table in chart form using chart types
including Column, Bar, Line, Area, Pie, and Scatter Charts
(plus 3D variants of each). Charts can be modified and chart
series configured using the new Charts tab. For more chart
design freedom, the Chart Data tab lets you manipulate
standalone chart data (from scratch or derived from your
PagePlus table) to your liking. Apply different chart "type style" combinations in one click via the Styles tab.
Page 10

Performance
• Accelerated Graphics Technology
Performance and output quality are boosted by Serif's in-house
processing technology—benefit from lighting fast drawing.
Ease of Use
• Helpful guidance with Smart Hints
As you design your page, hints, warnings, tips, or general onscreen guidance appear on your page. You can control the
number of Smart Hints displayed for both new and existing
features.
• Easy access to 2D/3D effects (see p. 139)
Shadows, glows, feathers, blurs, and more can be easily accessed
on their own Effects tab. To complement these effects, a
powerful collection of 3D effects are also available. Adjust
individual settings for precise control or simply select preset
gallery thumbnails.
Welcome 5
• More powerful tab control
PagePlus now offers more flexible docking options, including
Auto Hide (to vertical sidebar), side-by-side docking, and
nested grouping. Docking indicator arrows help you dock to
top, bottom, left, or right of your workspace.
Colours
• Print-focused CMYK primary colour mode
For native CMYK design-to-print colour management,
PagePlus publications can now operate in CMYK primary
colour mode.
Page 11

6 Welcome
• Quick colour assignment with Colours toolbar (see p. 149)
The toolbar's Fill, Line, and Text buttons will remember the
last applied solid, gradient, or bitmap fill. This makes light
work of recolouring multiple objects.
• Blend modes for creative page design (see p. 164)
For more adventurous colour experimentation, apply blend
modes object-over-object for stunning results. Objects will also
blend to coloured backgrounds (transparent by default).
• Composite transparency and knockout groups
Assign transparency to a group using composite transparency!
As another transparency control, knockout groups prevent
overlapped, semi-transparent object areas from contributing
their transparency to overlapping objects.
• Composite blend modes and isolated blending
Like composite transparency, a composite blend mode affects a
group, after overlapping group objects are blended. For control
of blending scope, isolated blending restricts blending effects
to just the group (and not underlying objects).
• Automatic gradient fill swatches (see p. 154)
PagePlus offers an Automatic fill category which hosts linear
and radial swatches which are not based on fixed colours.
Instead, the currently selected object's solid fill is used.
• More gradient fills categories! (see p. 154)
The range of gradient fills available in PagePlus will be
expanded to include Radial, Plasma, Square, Three Colour,
and Four Colour fills.
Page 12

Pictures
• Repurpose vector images
Any metafile (SMF, WMF, EMF, or SVG) can be "broken apart"
via Tools>Convert To>Objects. Vector objects can then be
edited before optional re-exporting.
Tables
• Flowing linked tables (see p. 100)
Like text frames, a single table can be physically split by row or
column on the same page or over multiple pages. With the
separated rows and columns remaining linked, added rows and
columns will reflow within the table.
• Presets for number formatting
For easier to use number formatting in table cells, the new
Number Formatting dialog offers a selection of number
format types to apply. Cell references using number formatting
are more intuitive with no unnecessary formatting required.
Welcome 7
Publishing and Exporting
• Simpler PDF publishing (see p. 178)
A new and improved dialog offers only commonly used PDF
settings via selectable profiles; advanced settings are stored
under a collapsed More Options section if needed. PDF/X-3
compatibility is now provided via profile.
• ePub export (see p. 183)
ePub export is compliant with the epubcheck compliance-
checker tool, used by online services such as Apple iTunes and
BookBaby.
Page 13

8 Welcome
• New-look Export as Picture (see p. 188)
The improved Export as Picture feature previews your
exported image, with side-by-side comparisons of different
formats and panning support. Export all pages as separate
pictures, super sampling, SVG export, and export in greyscale
are all now possible.
and some enhancements on previous versions of PagePlus...
• The Pages tab lets you rearrange page order more easily via
drag and drop. When moved, page thumbnails offer a
suggested drop target.
• On PagePlus restart, optionally enable the Restore Last Session
feature to reopen previously opened publications (view settings
and current page display are preserved too!)
• Load a preset or custom workspace at any time from the Pages
context toolbar.
• Assign multiple master pages simply by using Ctrl-drag.
• Convert as picture now offers all the power of the Export as
Picture feature.
• Recolour picture options now include 'Recolour via HSL'
and 'Recolour via LAB'.
Page 14

Welcome 9
Installation
Installing PagePlus follows different procedures depending on whether
you are installing from disc or via download.
You can install your new version alongside previous versions and
use them independently.
32 or 64-bit PagePlus X7 installs to respective 32 or 64-bit
computers.
Installation procedure (from disc)
• Insert your purchased disc into your disc drive.
• If AutoPlay is enabled on the drive, this automatically
starts the Setup Wizard. Follow the on-screen
instructions for install.
-or-
• If AutoPlay is not enabled (or doesn't start the install
automatically), navigate to your program disc and
double-click autorun.exe.
Installation procedure (from download)
• From serif.com, when logged into your Serif account, follow
the on-screen instructions to download.
Page 15

10 Welcome
System Requirements
Minimum:
• Windows-based PC with DVD drive and mouse
• Operating systems:
Microsoft Windows® XP SP3 (32 bit)
Windows® Vista (32 or 64 bit)
Windows® 7 (32 or 64 bit)
Windows® 8 (32 or 64 bit)
• 512MB RAM (Windows® XP)
1GB RAM (Windows® Vista and 32-bit Windows 7® and 8)
2GB RAM (For 64-bit Windows® 7 and 8)
• 740MB free hard disk space
• 1024 x 768 monitor resolution (Use of Large Fonts may require
a higher resolution)
Additional disk resources and memory are required when editing large
and/or complex publications.
Optional:
• Windows-compatible printer
• TWAIN-compatible scanner and/or digital camera
• .NET 2.0 for text import filters (Word 2007/2010 +
OpenOffice) (installed by default)
• Internet account and connection required for accessing online
resources and .NET installation.
Page 16

Getting
Started
Page 17

12 Getting Started
Page 18
Getting Started 13
Startup Assistant
Once PagePlus has been installed, you're ready to start.
• For Windows Vista/7: Setup adds a Serif PagePlus X7 item to
the All Programs submenu of the Windows Start menu. Use
the Windows Start button to pop up the Start menu, click on
All Programs and then click Serif PagePlus X7.
• For Windows 8: The Setup routine during install adds a Serif
PagePlus X7 entry to the desktop. Use the Windows Start
button to pop up the desktop, and then click the PagePlus icon.
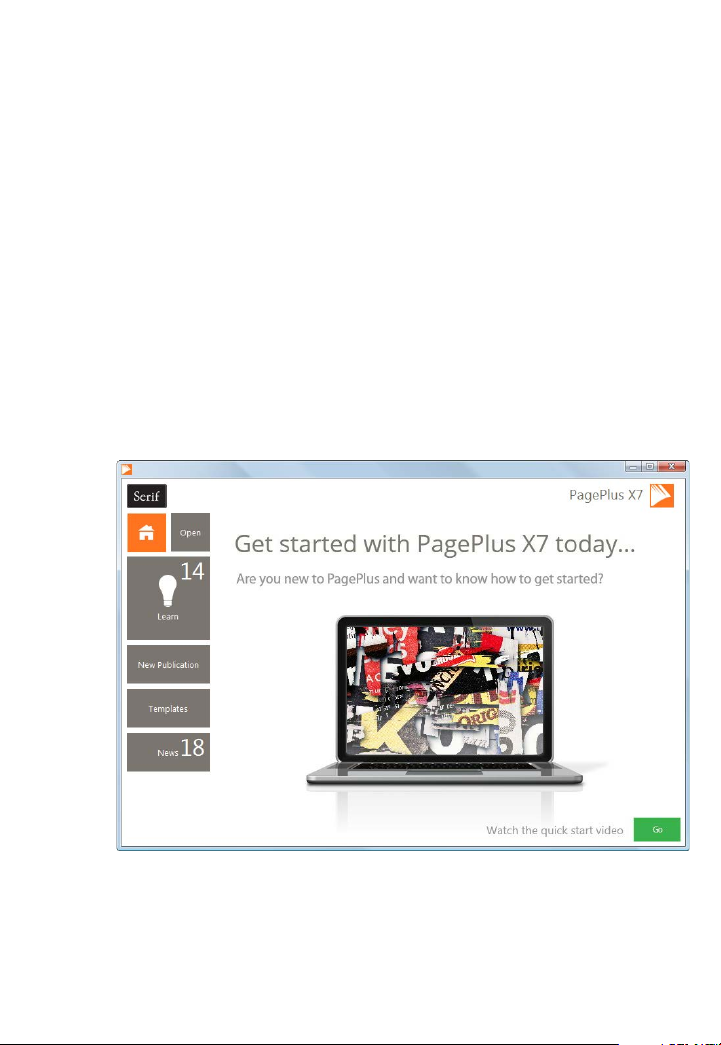
On program launch, the Startup Assistant is displayed which offers
different routes into PagePlus.
Page 19
14 Getting Started
Any time you access the Startup Assistant, the
Learn or News buttons indicate the number of
new articles to be view
number will decrease as you read each article in
the Learn or News pane.
When new articles arrive, these will be indicated
the next time you open the Startup Assistant.
Any new unread article arriving in the Learn or
News pane will display a "new" indicator in its
thumbnail.
The options are described as follows:
•
The default home page keeps you in touch with Serif
promotions and showcases articles (tutorials, etc.) You can also
view the PagePlus Overview and Quick Start video
• Open - to access PagePlus publications, PDF files, or BookPlus
files; also provides recent file history.
• Learn - for online video/written tutorials, help, tips & tricks,
and more—all via a constantly updating feed that can be
filtered by article Type. The Product Help and your PagePlus
X7 user guide are also provided.
• New Publication - creates a new publication from scratch,
based on a choice of page setups.
• Templates - creates a new publication based on one of many
design templates.
• News - for cross-product news, company news, articles, and
product announcements, using Serif's news feed.
ed (if available). This
Page 20

Getting Started 15
Once you've clicked on a new article the "new"
Don't forget to use the keyword Search box at the
indicator changes to a "read" indicator.
top-right of the Startup Assistant. This is an
incredibly powerful tool for filtering specific
publication names, Learn articles, page sizes,
theme layout names, or news articles.
To access the Startup Assistant when PagePlus is already running,
choose Startup Assistant from the File menu.
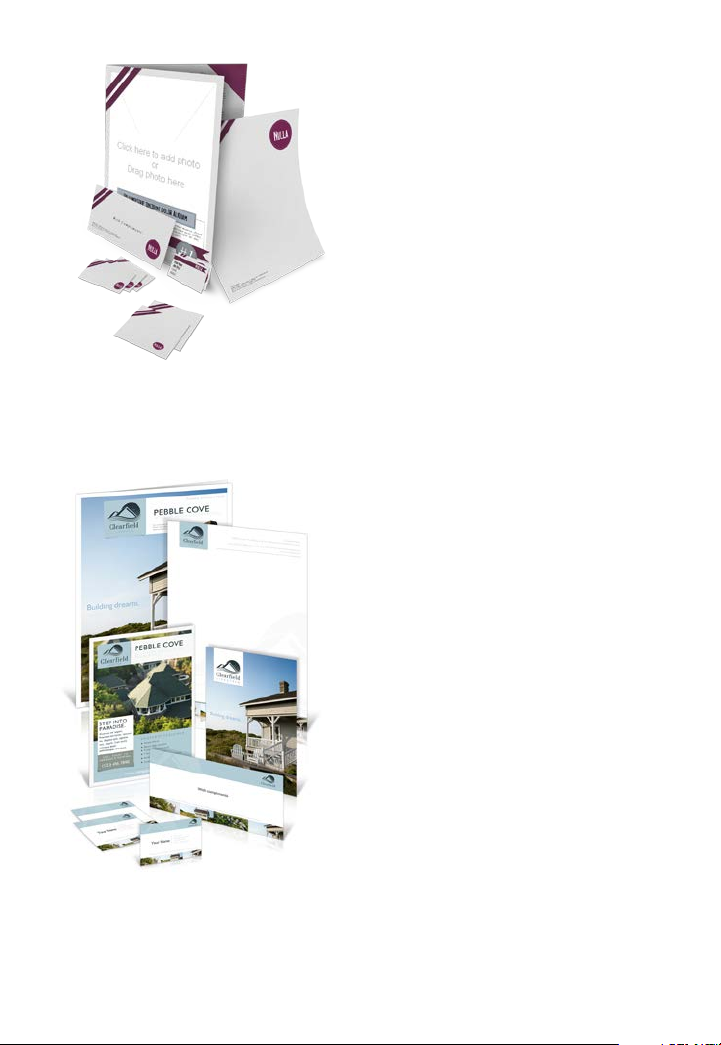
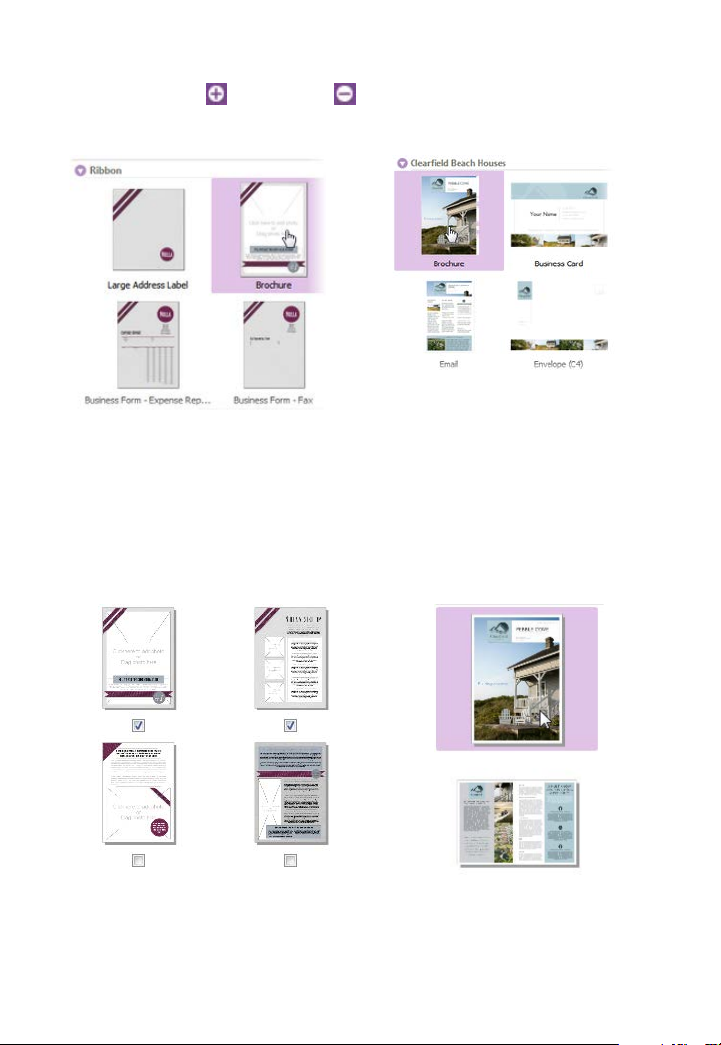
Creating a publication from a design template
PagePlus comes complete with a whole range of categorized design
templates which will speed you through the creation of all kinds of
publications for desktop or commercial printing!
Each template offers:
• Complementary design—Professionally designed layout with
high-visual impact.
• Schemes—choose a named colour scheme to apply a specific
look and feel.
Design templates come in two types—Theme Layouts, where you pick
your own pictures, or ready-to-go Pro Templates which are already
populated with pictures.
Page 21
16 Getting Started
Theme layouts
Ready-to-go Pro templates
offer a choice of
themes (e.g., Ribbon) on which
to base your publication
(Brochure, Business Card, Flyer,
Forms, Letterheads, Newsletter,
etc.) ; you'll get picture
placeholders instead of actual
pictures. Simply add your own
pictures to placeholders and
personalize placeholder text,
then publish.
You can also choose which page
layouts you want to base your
new publication on.
These are categorized templates
containing royalty-free photos
which can be adopted to fasttrack you to your completed
publication. You just need to
personalize placeholder text,
then publish.
Page 22
Getting Started 17
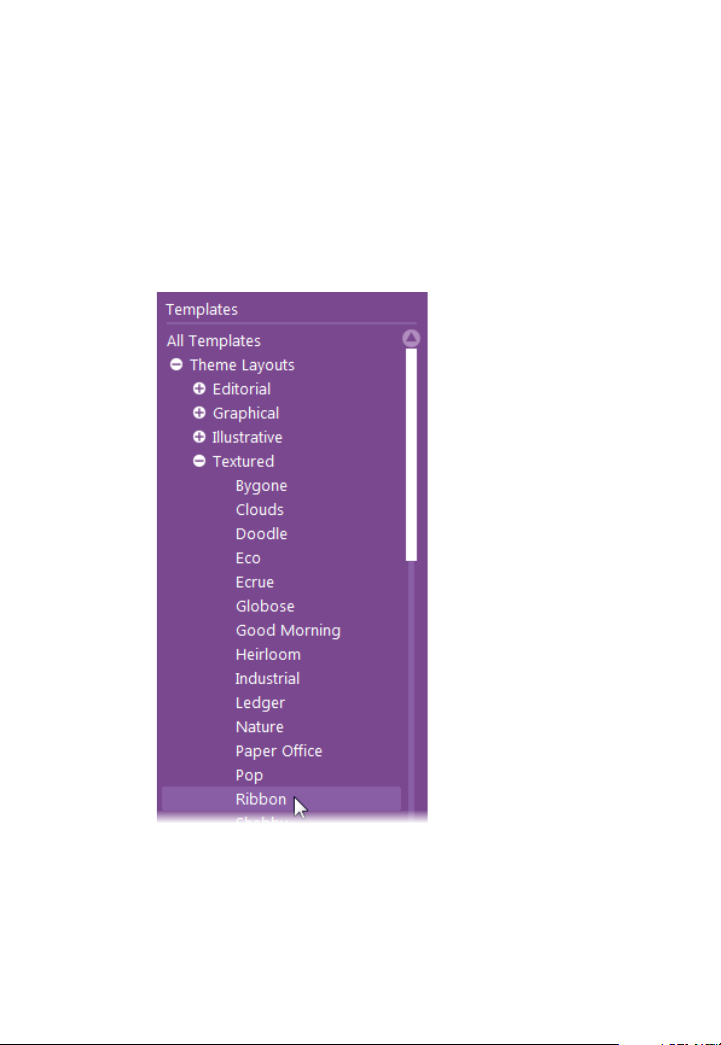
To create a publication from a design template:
1. Open PagePlus, or select Startup Assistant from the File menu.
2. Click Templates.
3. From the pane, select a Theme Layout or a design template
from the Pro Template Packs category. Select from the tree
menu in the left-hand pane.
Alternatively, simply choose a publication type from the same
list, e.g. Brochures, Business Cards, etc. Scroll down the menu
to display choices.
Page 23
18 Getting Started
Theme Layouts
Pro Design Templates
Theme Layouts
Pro Design Templates
4. Navigate the main window's categories and sub-categories
using the
Expand and Collapse buttons, then click your
chosen thumbnail.
5. Examine the page sample(s) on the right. For theme layouts
with multiple pages (e.g., brochures), you can choose which
pages you wish to be part of your publication by checking the
check box under each page. For design templates, simply review
the pages to be part of your publication.
Page 24

Getting Started 19
6. Pick a colour scheme from the drop-down list at the top of the
dialog. The page thumbnails refresh to reflect the new page's
appearance.
7. Click OK. The pages are added to your new publication.
Starting a new publication from scratch
Although design templates can simplify your design choices, you can
just as easily start out from scratch with a new, blank publication.
To start a new publication (via Startup Assistant):
1. Open PagePlus to display the Startup Assistant.
- or Select Startup Assistant from the File menu (during your
session).
2. Select New Publication.
3. From the main pane, navigate the document categories by
scrolling (click the
icon to expand if needed).
4. Click a publication thumbnail to create your new blank
publication.
Page 25
20 Getting Started
To create a publication using the default page type:
• During your PagePlus session, click
the Standard toolbar.
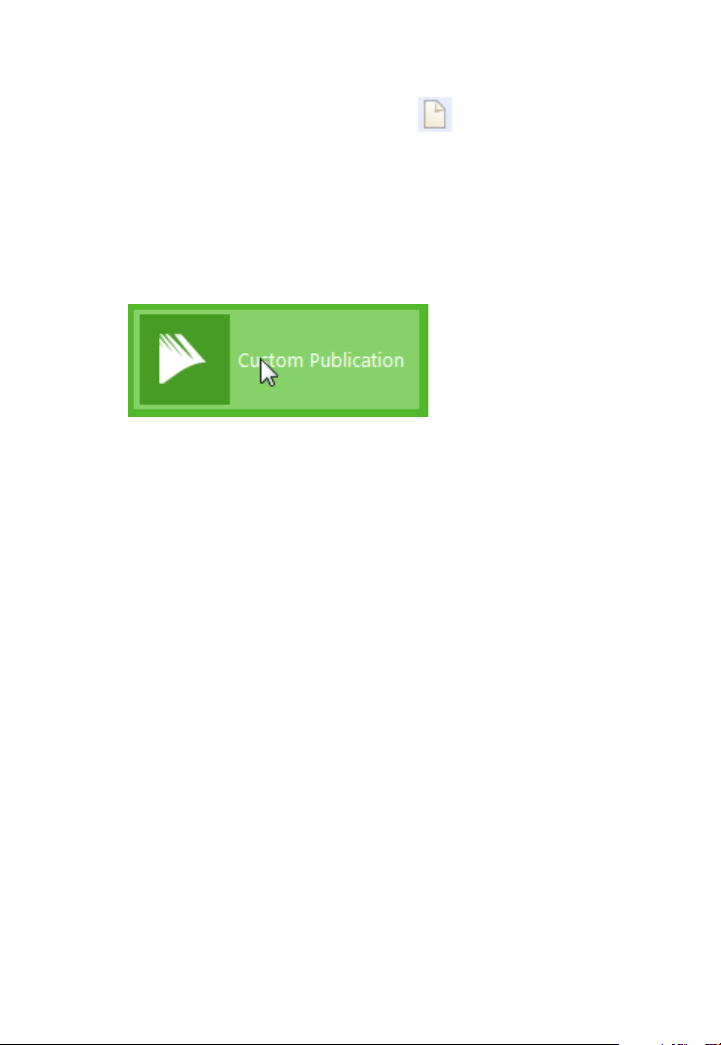
To create a custom publication:
1. From the Startup Assistant's New Publication pane, click
Custom Publication.
2. From the Publication Setup dialog, select a publication type,
size, and orientation.
3. Click OK.
New Publication on
Opening existing publications
You can open a PagePlus publication from the Startup Assistant,
Standard toolbar, or via the File menu.
It is also possible to open PDF files as new publications, or Import PDF
files and existing PagePlus files into currently open publications. (See
PagePlus Help for these import options.)
To open an existing publication (via Startup Assistant):
1. Open PagePlus to display the initial Startup Assistant.
- or Select Startup Assistant from the File menu (during your
session).
Page 26

Getting Started 21
2. Select Open.
3. Several options are possible:
i. For recently opened publications, select a thumbnail from
the main pane.
ii. The publication opens in your workspace.
- or -
i. For other PagePlus publications, PDF files, or BookPlus
files, select from the Browse My Computer pane.
Page 27

22 Getting Started
ii. From the dialog, locate and select your file, then click
Open.
To open existing publications (without Startup Assistant):
• Click
Open on the Standard toolbar.
Saving your publication
To save your work:
1. Click
2. To save under a different name, choose Save As from the File
menu.
Save on the Standard toolbar.
Unsaved publications have an asterisk after their name in the
PagePlus title bar, Publications toolbar, and Window menu.
Page 28

Pages
Page 29

24 Pages
Page 30

Pages 25
Setting up a publication
A publication's page size and orientation settings are fundamental to
your layout, and are defined when the new publication is first created,
either using a design template or as a new publication.
To adjust size/orientation of the current publication:
1. Select
Publication Setup from the Pages context toolbar.
2. Ensure the Paper menu option is selected. The other option,
Margins, lets you define non-printable Margin, Row, Column,
and Bleed Guides as design aids.
3. For a Regular/Booklet Publication, you can select a pre-
defined paper size, printer-derived paper size, or enter custom
values for page Width and Height, as well as setting the
orientation (Portrait or Landscape). For booklets only, select a
type from the Booklet drop-down list, which page to start on
(left/right), and if you require Facing pages (including Dual
master pages). PagePlus automatically performs imposition.
4. For other publication types, you can select: Small Publications
(for example, business cards, labels, etc.), Large Publications
(posters), or Folded Publications (cards).
• For Small publications, enable Paper and choose a
pre-defined option from the list, or for creating
Labels, enable the radio button and pick an Avery
label code which matches your labels.
• For Large and Folded publications, choose a pre-
defined option from the list (use the preview).
5. Click OK to accept the new dimensions. The updated settings
will be applied to the current publication.
Page 31

26 Pages
Once you've set up your publication, you can optionally include
repeated page elements on every page by creating master pages (p. 28).
Uniform and mixed page orientations
If you've changed your mind about the page orientation chosen at page
setup, you can change the page orientation uniformly across your
publication at any time.
To change all publication pages from portrait to landscape (or vice versa):
•
On the Pages context toolbar, click the down arrow on
the Publication Orientation button, then select Landscape
Publication (or Portrait Publication) from the flyout.
To change a page from portrait to landscape (or vice versa):
1. On the Pages tab, double-click to select a page.
Page 32

Pages 27
2. Click Change page orientation to swap between portrait
and landscape orientation.
- or -
From the Pages context toolbar, click the down arrow on
the Page orientation button, then select Landscape Page (or
Portrait Page) from the flyout.
You can repeat the procedure for any other selected page.
This feature is only applicable for publications using standard page
sizes (e.g., A4, A5, Letter, etc.)
Imposition
For press-ready output, you have the option to use imposition at the
PDF or print stage, allowing you to create a folded publication (e.g.,
booklet or greeting card) from a non-folding publication without having
to choose a folding publication in advance.
Page 33

28 Pages
Use the Pages tab to
Adding, removing, and rearranging pages
add/delete standard or
master pages, assign
master pages to standard
pages, and rearrange
standard pages using dragand-drop. You can also
change page orientations.
To add a single page:
1. On the Pages tab, click once to select a page in the Pages
window. The thumbnail that's shown as "selected" is
independent of the page you're currently working on. To work
on a particular page, double-click its thumbnail.
2. Click
Add to add a page (or master page) before the one
selected in the window.
- or To add a new page at the end of the publication, deselect all
pages by clicking in the neutral region of the lower window,
then click the Add button.
To add master pages:
For master pages, the above procedure applies but you need to click
Master Pages to open its window first.
Page 34

To delete a single page/master page:
1. On the Pages tab, select the page (or master page) to delete on
the appropriate window by clicking its thumbnail.
Pages 29
2. Click
To rearrange pages:
• On the Pages tab, in the lower Pages window, drag a page
thumbnail over another page thumbnail in the page sequence.
The page is added after the hovered over page thumbnail.
Remove.
Adding more template pages
Use the Assets tab's Asset Browser if you're looking to use some
additional template pages in your publication. See Browsing on p. 45.
You can drag-and-drop a page to replace (or add before/after) your
current page.
Currently used pages can be stored for future use by clicking Add
on the Assets tab's Pages category.
Page 35

30 Pages
Understanding master pages
Master pages provide a flexible way to store background elements that
you'd like to appear on more than one page—for example a logo,
background, header/footer, or border design.
(A) Page, (B) Master Page
The key concept here is that a particular master page is typically shared
by multiple pages, as illustrated below. By placing a design element on a
master page and then assigning several pages to use that master page,
you ensure that all the pages incorporate that element. Of course, each
individual page can have its own "foreground" elements.
Page 36

Pages 31
Master pages are available in every publication, but in a simple
publication you may not need to use any master pages—or you may
need only one master page. Facing pages and multiple master pages
prove valuable with longer, more complex publications.
If you're starting with a design template you may encounter one or
more master pages incorporated with the design.
Using the Pages tab or Page Manager, you can quickly add or delete
master pages; for example, you could set up different master pages for
"title" or "chapter divider" pages.
Assigning master pages
If you're only using one master page it is assigned to any newly created
page by default. However, if you're using multiple master pages you can
assign a different master page to a standard page, all, odd or even pages.
It's even possible to assign multiple master pages per page.
You'll need to create an additional master page first. See Adding,
removing, and rearranging pages on p. 28.
Each new page or master page consists of a single layer; a page
with a master page also shows the master page's Master Layer.
Page 37

32 Pages
• From the expanded
To assign a master page:
Master Pages window
in the Pages tab, drag
a master page onto a
target standard page
in the lower window.
Click Page Identifiers to indicate the master pages used on
the currently selected page(s). The master page is represented as a
letter on the Page, e.g. A, B, C, etc.
Assigning multiple master pages
Just like a regular page, the master page can have its own set of layers
associated with it, completely unique from the regular page! For a single
master page assigned to a page, on the Layers tab, you'll see a master
layer (e.g., 'Master Layer 1 [A]') as a separate entry. However, you can
assign additional master pages to your page for more powerful page
design.
Page 38

Pages 33
In the example above, a newly assigned master page B would add a new
master layer ('Master Layer 2 [B]') to the publication page's Layers tab.
For an introduction to the concept of layers, see Working with layers on
p. 38.
An additional master page needs to be created first. See Adding,
removing, and rearranging pages on p. 28.
To assign multiple master pages to a page:
• On the Pages tab, Ctrl-drag a master page thumbnail from the
Master Page window onto the chosen page's thumbnail in the
Pages window.
To jump to a master page from the selected publication page:
• Double-click on a Master Layer entry in the Layers tab.
The master page assigned to the master layer is displayed.
Facing pages and dual master pages
If you're using multi-page regular/booklet publications, you can assign
different master pages to the left and right publication pages (also called
Page 39

34 Pages
spreads) if necessary—master pages are assigned per page and not per
spread. For example (see below), a left-hand "body text" page might use
the left-side component of one master page (A), while a right-hand page
could use the right side of a different master page (B).
Editing master page objects
If you're editing pages which use master pages, master page objects will
contribute to your page design. These objects can be edited quickly and
easily from the page by using a control bar under the selected object.
• Click
Edit on Master Page to jump to the master page and
edit the object there.
Page 40

Pages 35
• Click Promote from Master Page to disconnect the object
from the master page and make it independently editable on
the publication page.
Using page numbering
Page number fields automatically display the current page number.
Typically, these fields are added automatically to the master page (so
they appear on every page) with the Header and Footers Wizard (Insert
menu), but you can insert a page number field anywhere in your master
page text.
You can change the style of page numbers, create mixed page number
formats, set starting page number(s), and control number continuation
across chapters and publication sections (all via Page Number Format
on the Format menu).
To insert a page number field:
1. Switch to the master page (if desired) by clicking
View
Master Pages on the Hintline.
2. With the Artistic Text Tool selected (Tools toolbar), click for
an insertion point to place the page number.
3. On the Insert menu, select Page Number from the
Information flyout.
You can also specify the First Page Number in the sequence (this will
appear on the first page of the publication). For example, Chapter Two
of a long publication might be in a separate file and begin numbering
with page 33.
Page 41

36 Pages
To set the first page number:
1. Uncheck Continue from previous chapter. PagePlus keeps this
checked by default so that number continuation is maintained
if your publication is to be part of a book.
2. Enter a different First Page Number.
For simple publications, it's likely that the same page format is used (e.g.,
Arabic numerals throughout). However, for more complex publications,
different formats can be used for different page ranges, with each page
range belonging to its own publication section. See PagePlus Help.
Navigating pages
To switch between pages:
•
To switch between current page and its master page:
• From the Hintline, click
On the Hintline, click Previous Page, Next
Page, First Page or Last Page.
- or -
Click in the Current Page box (e.g.,
page number you want to jump to.
- or On the Pages tab, double-click the page's thumbnail for the
page (or master page) you want to view.
Master Pages.
) and type the
Page 42

Pages 37
Viewing pages
Most of the PagePlus display is taken up by a page or "artwork" area and
a surrounding "pasteboard" area.
In PagePlus, the Page area (A) is where you add and position your text,
shapes, and pictures that you want to print. The Pasteboard area (B) is
where you generally keep any text, shapes, or pictures that are being
prepared or waiting to be positioned on the page area. Drag objects from
pasteboard to target page when ready.
PagePlus makes it easy to see exactly what you're working on—from a
wide view of multiple pages to a close-up view of a small region. For
example, you can use the scroll bars at the right and bottom of the main
window to move the page and pasteboard with respect to the main
window. If you're using a wheel mouse, you can scroll vertically by
rotating the wheel, or horizontally by Shift-scrolling. You can also pan
around the page by clicking the mouse wheel down and dragging.
Page 43

38 Pages
Magnifying pages
For magnification options, the Hintline toolbar provides the:
Zoom to Current option to zoom to a selected object, or to the
page width if no objects are selected.
Zoom Tool to zoom into an area defined by a drawn marquee
selection.
Pan Tool for moving around the zoomed-in page by dragging.
Current Zoom option to display or change the level of
magnification. To change, click to select from a flyout or enter a
custom percentage value directly.
Zoom Out and Zoom In tools so you can inspect and/or
edit the page at different levels of detail. Alternatively, use the Zoom
slider to alter the zoom level instead these buttons.
Working with layers
When you create a new publication from scratch or from some design
templates, the page(s) you create will initially consist of two layers—one
for the page (Layer 1) and one for the associated master page (see p. 30).
The layers can be seen within a hierarchical stack on the Layers tab.
One layer may be enough to accommodate the elements of a particular
layout, but you can create additional layers as needed for the page.
Page 44

Pages 39
Layer 2 from bottom to top.
on the page.
Multiple layers are useful for complex designs as you can concentrate on
one layer at a time without affecting objects on other layers.
A useful feature of the Layers tab is that you can see objects under the
layer on which they were created. By expanding the layer by clicking
these objects are displayed—with a click, they can be selected on the
page.
,
The above layer stack could represent the following:
Master Layer, Layer 1, and
To select a particular layer:
• Click a layer name. The layer entry shows a blue background.
Cumulative layers as seen
Page 45

40 Pages
To display master page layers:
• Double-click the master layer entry. The Layers tab now shows
the master page's layers and the master page is shown in the
workspace. See Understanding master pages on p. 30.
Adding, removing, and rearranging layers
Once you've created a page, it's easy to add, delete, and move layers.
To add a new layer to the current page or master page:
1. In the Layers tab, click
Add Layer.
2. You'll be prompted to give the new layer a name and set its
properties. When you've made your selections, click OK.
The new layer is inserted above the currently selected layer. If a layer is
not selected, the new layer is placed at the top of the stack.
To delete a layer:
• In the Layers tab, select the layer's name and click
Delete
Selected Layers.
To move a layer:
• In the Layers tab, drag a layer entry to a new position in the
layer stack.
To set layer properties on the tab:
• Click the
• Click the
• Click the
icon to hide/show the layer and any objects on it.
icon to exclude/include the layer in printouts.
icon to prevent/allow objects on the layer from
being selected/edited.
Page 46

Assets for
Creativity
Page 47

42 Assets for Creativity
Page 48

Assets for Creativity 43
Using assets
An asset is a general term for any object or page element that can be
added to your page to enhance its appearance, increase efficiency, or
personalize your design. Assets range from graphics, logos, pictures,
picture frames, and backgrounds (as shown below) to more complex
page content and entire pages.
To use assets, PagePlus provides the Assets tab, powered by both an
Asset Browser (p. 45) and Asset Manager (see PagePlus Help). The
former browses your assets stored within installed Asset Packs, the latter
lets you create and manage custom Asset Packs.
Theme Layout design templates come complete with their own
built-in assets, all themed to the publication's design. When you
start from a theme layout the Assets tab will be populated with
associated assets automatically!
Page 49

44 Assets for Creativity
Assets tab
Using the Assets tab
The
is a powerful design
resource that exclusively hosts your
browsed assets, ready for adding to your
publication page.
Assets can be placed into the following
categories.
• My Designs: Stores custom
assets dragged from the page.
• Graphics: Stores professional
clipart from Asset Packs.
• Pictures: Stores added pictures
from your hard disk (or from
Asset Pack, if containing
pictures).
• Picture Frames: Stores picture
frames from Asset Packs.
• Page Content: Stores page
content (pre-assembled from
various page objects) from
Asset Packs.
• Backgrounds: Stores
backgrounds from Asset Packs.
• Pages: Stores complete ready-
to-go pages from Asset Packs.
Page 50

Assets for Creativity 45
The tab also lets you create custom designs for reuse globally or just in
your publication. You'll be able to:
• Store your own designs to the tab's My Designs category for
global use.
• Store your own designs to any other tab's category for current
publication use.
• Create custom picture frames from drawn shapes.
• Create page backgrounds from pictures/filled page objects.
• Create custom page content (combinations of assets).
Although initially empty, the tab can be populated with assets of your
choice by using an Asset Browser.
The Asset Browser
The Asset Browser lets you browse by asset category and Asset Pack
(Pack Files), as well as search (by tag) for assets. Once displayed, the
asset can be selected for inclusion in the Assets tab.
The Asset Manager
Use the Asset Manager to create your own Asset Packs by using assets
from other Asset Packs and/or by importing pictures, graphics, or
backgrounds. You can tag assets and then save your custom asset pack.
Browsing
The Asset Browser offers professional ready-to-go designs that you can
use directly in your publication. These designs are provided in
categorized Asset Packs installed with PagePlus. You can browse these
packs and preview their contents, before adding assets to your
workspace.
Page 51

46 Assets for Creativity
To browse assets (by category):
1. From the Assets tab, click
Browse.
2. In the Asset Browser, select an asset category from the
Categories section. You'll see installed Asset Packs appear in
the main pane, stored under their Pack file names, e.g. Arctic.
3. Scroll through the asset packs to browse assets in each pack.
To browse assets (by Asset Pack):
1. From the Assets tab, click
Browse.
2. In the Asset Browser, on the left-hand side of the dialog, select
an asset pack name from the Pack Files section, e.g.,
Backgrounds. The Asset Pack will appear in the main pane.
3. The assets are categorized further in the main pane by the name
of the Asset Pack to which they belong, e.g., Fun. Scroll through
to browse the assets included in each Asset Pack.
Page 52

Assets for Creativity 47
Searching for assets
The search facility filters assets based on preset and custom tags applied
to all of the Asset Packs shown in the Asset Browser.
To apply a search filter:
• For a simple tag search, type the word or letter you want to
search for in the Search text box, situated at the top right of the
dialog. This is useful for retrieving assets with custom tags
attached.
Filtering assets
Filtering means that you can restrict the amount of assets on display.
• For category and/or pack file filtering, select a category or
pack file (or multiple instances using Ctrl-click). You can also
search for category and pack file combinations.
• For Smart tag filtering, select a tag
name from the Smart Tags section.
Smart tags let you filter assets logically
by subject matter using a hierarchical
and alphabetic tag structure.
• For single-tag filtering, select a tag
name from the Tags section of the Asset
Browser. (You may need to scroll down
the left-hand pane to view). Use Ctrlclick to manually select multiple tags.
Page 53

48 Assets for Creativity
Adding assets to your Assets tab
To add a specific asset:
• Select the category or pack file in the Asset Browser, and then
simply click the asset. A check mark shows on the thumbnail.
To add all assets:
• Click Add All
from the upper-right corner of each Asset
Pack's thumbnail gallery. Check marks will show on all
thumbnails.
With either method, asset(s) will be available to you from the Assets tab
when you close the Asset Browser.
Any asset stored in your Assets tab (but not added to the page) will
be available to you the next time you open your publication. Assets
can be made globally available by usings the pins ( and ) in
the relevant tab category. Custom designs can also be made global
by dragging page objects to the tab's My Designs category.
Adding assets to your page
To add an asset to the page:
• Click an asset's thumbnail in your chosen category and drag it
onto the page.
Page 54

Manipulating
Objects
Page 55

50 Manipulating Objects
Page 56

Manipulating Objects 51
Pointer Tool
or rotate
Lasso Tool
Selecting an object
Before you can change any object, you need to select it using one of a
choice of tools on the Tools toolbar.
Click to use the Pointer Tool to select, move, copy, resize
objects.
Click to use the Lasso Tool to draw a freeform region under which
any objects will become selected.
To select an object:
• Click on the "glowing" hovered-over object using one of the
tools shown above, to reveal a bounding box around the object.
If objects overlap, use the Alt key while clicking repeatedly until the
desired object is selected.
For precise object selection in more complex page designs, use
the Lasso Tool on the Tools toolbar.
Page 57

52 Manipulating Objects
To select a text object with the Pointer Tool:
• Clicking on a text object (artistic text or text frame) with the
Pointer Tool selects the object and also positions the blinking
text selection cursor within the object's text. In this mode, you
can edit the text (see p. 82).
• Double-, triple-, or quadruple-click to select a word, paragraph,
or all text.
• To select only the text frame, click the frame's bounding box.
• Clicking on a group selects the grouped object. Ctrl-click to
select an individual object within a group.
Selecting multiple objects
Selecting more than one object at a time (creating a multiple selection)
lets you:
• Position or resize all the objects at the same time.
• Create a group object from the multiple selection, which can
then be treated as a single object, with the option of restoring
the individual objects later. See Creating groups on p. 53.
To create a multiple selection:
• Drag a "marquee" box around the objects you want to select.
Page 58

Manipulating Objects 53
• Click the Group Objects button.
Alternatively, either hold down the Shift key and click each object
in turn.
To add or remove an object from a multiple selection:
• Hold down the Shift key and click the object to be added or
removed.
To deselect all objects in a multiple selection:
• Click in a blank area of the page.
Creating groups
You can easily turn a multiple selection into a group object. When
objects are grouped, you can position, resize, or rotate the objects all at
the same time.
To create a group from a multiple selection:
Page 59

54 Manipulating Objects
• Click the Ungroup Objects button.
To ungroup:
The group turns back to a multiple
selection.
To select an individual object within a group:
• Ctrl-click the object.
Copying, pasting, and duplicating objects
Besides using the Windows Clipboard to copy and paste objects, you can
duplicate objects easily using drag-and-drop.
To copy an object (or multiple selection) to the Windows Clipboard:
• Click
Copy on the Standard toolbar.
If you're using another Windows application, you can usually copy and
paste objects via the Clipboard.
To paste an object from the Clipboard:
• Click
Paste on the Standard toolbar.
The standard Paste command inserts the object at the insertion point or
(for a separate object) at the centre of the page.
Page 60

To duplicate an object:
1. Select the object, then press the Ctrl key.
Manipulating Objects 55
2. Drag the object via the
the page, then release the mouse button.
Move button to a new location on
Moving objects
To move an object (including a multiple selection):
• Drag the selected object(s) by using its
you see a move cursor over the button you can begin dragging.
Move button. Once
Resizing objects
PagePlus provides several methods for resizing single or grouped
objects.
To resize an object:
1. Select the object.
2. Click one of the selection handles and drag inwards or
outwards.
Page 61

56 Manipulating Objects
Dragging from an edge handle resizes in one dimension, by moving that
edge. Dragging from a corner handle resizes in two dimensions, by
moving two edges.
To resize freely:
• Drag from a corner (or line end) handle.
To constrain an object's dimensions when resizing:
• Hold the Shift key down and drag from a corner (or line end)
handle.
For shapes, this has the effect of keeping a square as a square, a circle as
a circle, etc.
For pictures, dimensions are constrained on dragging a corner
handle. Use Shift-drag to resize a picture freely.
To resize about the object centre instead, press the Ctrl key as you
drag edge or corner handles; Ctrl+Shift+drag to for a constrained
resize about the object centre.
You can also make fine resizing adjustments from the Transform
tab.
Page 62

Manipulating Objects 57
Ordering objects
On each layer, objects such as text frames, graphics, and pictures are
stacked in the order you create them, from back to front, with each new
object in front of the others.
For example, the left-most beige button above can be brought from the
back to the front of the object order.
To shift the selected object's position to the bottom or top of the stack:
• Click
Send to Back or Bring to Front on the Arrange
toolbar, respectively.
To shift the object's position one step toward the back or front:
• Click
Back One or Forward One on the Arrange
toolbar, respectively.
Aligning and distributing objects
Aligning and distributing objects gives your project a professional feel.
With PagePlus, you can align your objects in relation to each other or
the page using dynamic guides or the Align tab.
Page 63

58 Manipulating Objects
For example, a moving yellow square can be
Aligning with dynamic guides
As you draw, you can align any moving object with fixed objects on the
page using dynamic guides. By default, these red-coloured guides only
show as you move objects, suggesting possible objects that can aligned
and snapped to.
aligned to the left edge of a fixed blue square.
Aligning with the Align tab
Alignment involves taking a group of selected objects and aligning them
all in one operation by their top, bottom, left or right edges. You can also
distribute objects, so that your objects (as a multiple selection) are
spread evenly (optionally at spaced intervals).
To align the edges of two or more objects in a selection:
1. Using the Pointer Tool, Shift-click on all the objects you want
to align, or draw a marquee box around them, to create a
multiple selection.
2. Select the Align tab.
Page 64

Manipulating Objects 59
• Select from the Relative to
3. Select an option for vertical and/or horizontal alignment.
Choose Top, Bottom, Left, Right, Centre Horizontally or
Centre Vertically, i.e.
To distribute two or more objects across a selection:
• Choose
Space Evenly Across or Space Evenly Down
to spread selected objects uniformly between endmost objects
in the current selection (horizontally or vertically, respectively)
or by a set measurement (choose Spaced and set a value in any
measurement unit).
Rather than work within the current selection area you can align or
distribute to page margins (if set), page/spread edge, or last selected
object.
To align/distribute objects to page margins, edges, or across page spreads:
drop-down list to align the
selected object(s) within the
page Margins, Page edges, or
Spread (for facing pages) then
choose an align or distribute
button described above.
For more advanced alignment control, you can align multiple objects in
relation to your last selected object (select objects in turn with the Shift
key pressed) by using the Relative to: Last Selected drop-down list
option. The last selected object is shown with a darker bounding box
when compared to other selected objects.
For marquee selection, the lower-most object in the Z-order, i.e. on
the object's layer, is considered the last selected.
Page 65

60 Manipulating Objects
Rotating an object
You can rotate single and multiple objects, including pictures, text
objects, and groups using the object's rotation handle.
To rotate a selected object (using its rotation handle):
• Click and drag the rotation handle extending from the selection
box (use the Shift key while dragging for 15° rotation intervals).
To undo rotation (then restore the original orientation):
• Double-click the object's rotation handle.
• To restore the rotated position, double-click the rotation
handle again.
To change the rotation origin:
1. Click the object's rotation handle.
2. Move the rotation origin
away from its original position in
the centre of the object to any position on the object or page
(ideal for rotating grouped objects around a central point).
3. Drag the rotation handle to a new rotation angle—the object
will rotate about the new origin.
To reset the rotation origin, simply double-click it.
Page 66

To rotate an object 90 degrees left or right:
(A) Anchor point,
Manipulating Objects 61
• Select the object and click
Rotate Left or Rotate
Right on the Arrange toolbar.
Anchoring objects to text
If you're working with text frames you'll probably want to add
supporting shapes, pictures, tables, or even nested text frames within
your publication's text (artistic or frame text). Such objects can be
positioned either in relation to a position in your text (or other page
element) or be simply placed inline in your text. In either instance,
objects can then move with the text as you add further text content.
In PagePlus, this positioning is controlled by anchoring an object.
• Float with text. The object is positioned horizontally and
vertically relative to an
for pictures, pulled quotes, etc.
anchor point. This option is ideal
(B) Anchored object,
(C) Anchor properties
Pasted text (red box) causes
reflow
Page 67

62 Manipulating Objects
• Position inline as character. The anchored object is placed as a
character in the text and aligned in relation to the text that
surrounds it. The anchored object flows with the text as before.
• Detach from text. The anchored object is disconnected from
its anchor point, leaving a normal unanchored object.
PagePlus objects can be anchored to anywhere in your publication text,
but the floated object can be positioned in relation to indented text,
column, frame, page margin guides, the page itself, or most typically the
anchor point in a text frame.
For text frames, when the text reflows, the anchor point (and therefore
anchored object) reflows with the text. This allows supporting anchored
objects to always stay with supporting text as more text is added to the
frame.
To create an anchored object:
1. Position your unanchored object on the page.
2. Select Anchor Object from the Arrange menu.
3. From the dialog, choose a positioning option:
Either, for a floating object:
i. Enable Float with text. This is the default positioning
option.
ii. Click OK. The
Anchor point appears and your object
is now an anchored (showing an
icon).
Page 68

Manipulating Objects 63
Or, for an inline object:
i. Enable Position inline as character.
ii. Click OK. The object appears inline with text, and shows
Anchor Properties icon.
an
Frame text can wrap around floating anchored objects (see
Wrapping text; p. 91).
To view anchor properties:
1. Select an anchored object.
2. Click
object.
To disconnect an anchored object:
• Enable Detach from text.
Anchored Object Properties shown under the
Updating and saving defaults
Object defaults are the stored property settings PagePlus applies to
newly created objects such as:
• lines and shapes (line and fill colour, shade, pattern,
transparency, etc.)
• frames (margins, columns, etc.)
• text (i.e., font, size, colour, alignment, etc.). Defaults are saved
separately for artistic, shape, frame and table text.
Default settings are always local—that is, any changed defaults apply to
the current publication and are automatically saved with it, so they're in
effect next time you open that publication.
You can use the Save Defaults command to record the current defaults
Page 69

64 Manipulating Objects
as global settings that will be in effect for any new publication you
subsequently create.
To set local defaults for a particular type of object:
1. Create a single sample object and fine-tune its properties as
desired—or use an existing object that already has the right
properties.
2. Select the object that's the basis for the new defaults and from
the Format menu, select Update Object Default.
Or, for line and fill colours, including line styles:
1. With no object selected, choose the required line and/or fill
colours from the Colour or Swatches tab. Use the Line tab to set
a default line weight, style, and corner shape.
2. Draw your object on the page, which will automatically adopt
the newly defined default colours and styles.
To view and change default text properties:
1. From the Format menu, select Text Style Palette.
2. Double-click Default Text, then from the expanded list of text
types, choose an option (e.g., Artistic Text).
3. Click Modify to view current settings for the selected text type.
4. Use the Text Style dialog to alter character, paragraph, or other
properties.
To save all current defaults as global settings:
1. From the Tools menu, select Save Default Settings.
2. From the dialog, check options to update specific defaults.
3. Click Save to confirm that you want new publications to use
the checked object's defaults globally.
Page 70

Text
Page 71

66 Text
Page 72

Text 67
Understanding text frames
Typically, text in PagePlus goes into text frames, which work equally
well as containers for single words, standalone paragraphs, multipage
articles, or chapter text.
You can also use artistic text (see p. 78) for standalone text with
special effects, or table text (on p. 99) for row-and-column displays.
What's a text frame?
A text frame is a container (like a mini-page) in which the main text for
your publication is stored; in PagePlus, the frame text in the frame is
actually called a story.
The text frame can be sized and positioned in advance of, or after adding
body text. When you move a text frame, its story text moves with it.
When you resize a text frame, its story text reflows to the new
dimensions.
Perhaps the most important feature of text frames is the ability to flow
text between linked text frames on the same or different pages. See
Fitting text to frames on p. 74.
For now we'll look at a text frame as an object and the frame text
contained within a single frame.
Page 73

68 Text
Frame linking
Frames can be linked so that a single story continues from one frame to
another. But text frames can just as easily stand alone. Thus in any
publication, you can create text in a single frame, spread a story over
several frames, and/or include completely independent frames. By
placing text frames anywhere, in any order, you can build up newspaper
or newsletter style publications with a story flowing:
• between linked frames on the same page.
• between linked frames on different pages.
Page 74

Text 69
• from one column to another in the same frame.
Creating text frames
You add text frames and position them on the page as you would any
other object, in advance of adding text content.
To create a frame:
1. Select
Standard Text Frame on the Tools toolbar.
2. Click on the page or pasteboard to create a new frame at a
default size.
- or Drag out to place the text frame at your chosen dimensions.
To delete a frame:
• Select the frame—click its edge until a solid border appears—
and then press the Delete key.
You can select, move, and resize text frames just like other objects (see
p. 51, 55, and 55, respectively). When you select a frame's bounding box,
Page 75

70 Text
indicated by a solid border, you can manage the frame properties;
selecting inside a frame creates a blinking insertion point in the frame's
text (the frame's boundary box becomes hatched to indicate editing
mode). In this mode, you can edit the text. (For details, see Editing text
on the page on p. 82.)
PagePlus also lets you create a wide variety of shaped frames from closed
shapes or QuickShapes (see p. 132).
To create a frame (from a shape):
1. Draw a shape with a line tool or create a QuickShape.
2. Select Convert To>Shaped Text Frame from the Tools menu
(or use object's right-click menu).
- or -
Type directly onto the QuickShape to automatically create a
shaped frame.
Putting text into a frame
You can put text into a frame using one of the following methods:
WritePlus
story editor:
Importing
text:
Typing into
the frame:
With a selected frame, click
WritePlus on the Frame context toolbar.
Select the frame, then select Text File from the
Insert menu.
Select the Pointer Tool, then click for an insertion
point to type text straight into a frame, or edit
Edit story in
existing text. (See Editing text on the page on
p. 82.)
Page 76

Text 71
Pasting via the
At an insertion point in the text, press Ctrl+V.
Clipboard:
Drag and
drop:
Select text (e.g. in a word processor file), then drag
it onto the PagePlus page.
Adding pictures into a text frame
Pictures can be placed inline at any point in your story in a text frame,
with PagePlus prompting you to resize the picture to fit with the text
frames dimensions if it is too large.
If you add further story text before the picture, the inline picture will
move with the surrounding text.
To add a picture to a text frame:
1. Add an empty paragraph to your text frame at the point you
want to add your picture, i.e. press Return at the end of an
existing paragraph.
2. From the
Import Picture.
Picture flyout on the Tools toolbar, click
Page 77

72 Text
3. Navigate to your picture, select it and click Open.
4. If the picture dimensions exceed those of the text frame, click
Yes in the displayed dialog to scale down the picture.
Frame setup and layout
The frame layout controls how text will flow in the frame. The frame
can contain multiple columns. When a frame is selected, its column
margins appear as dashed grey guide lines if set in Frame Setup. Note
that unlike the page margin and row/column guides, which serve as
layout guides for placing page elements, the frame column guides
actually determine how text flows within each frame. Text won't flow
outside the column margins.
You can drag the column guides or use a dialog to adjust the top and
bottom column blinds and the left and right column margins.
(A) Column margins, (B) Column blinds.
To edit frame properties directly:
• Select the frame object, then drag column guide lines to adjust
the boundaries of the column.
Page 78

Text 73
(1)
(2)
(3)
The frame edge is clicked to show a selected bounding box (1), after
dragging inwards the column margin can be adjusted (2), and after
dragging downwards, the top margin blind can be moved (3).
To edit frame properties using a dialog:
1. Select the frame and click
Text Frame Setup on the Frame
context toolbar.
2. From the dialog, you can change the Number of columns,
Gutter distance between columns, Left Margin, Right Margin,
and enable/disable text wrapping around an object.
3. To change the column widths and blinds (top and bottom
frame margins), click a cell in the table and enter a new value.
Page 79

74 Text
Text Sizing
Fitting text to frames
Fitting story text precisely into a sequence of frames is part of the art of
laying out publications.
If there's too much story text to fit in a frame sequence, PagePlus stores
it in an invisible overflow area and the Link button on the last frame of
the sequence displays
; an AutoFlow button appears next to the
Link button. You might edit the story down or make more room for it
by adding an extra frame or two to the sequence. Clicking the AutoFlow
button adds additional frames and pages as needed (see below).
Once frames are in position it's still possible to control how text is
distributed throughout the frame(s) via tools on the Frame context
toolbar.
The
frame text scales through the text frame. These are "one-off"
flyout offers three tools for controlling how
operations (compared to the "continuous" Autofit options
shown below).
Fit Text
Click to scale the story's text size so it fits exactly into the
available frame(s); further text added to the frame will cause
text overflow. You can use this early on, to gauge how the
story fits, or near the end, to apply the finishing touch. Fit
Text first applies small point size changes, then small leading
changes, then adjustments to the paragraph space below
value, until the text fits.
Enlarge Text
Click to increase the story's text size one increment (approx.
2%).
Page 80

Text 75
The AutoFit Options flyout offers three autofit options which
Shrink Text
Click to reduce the story's text size one increment (approx.
2%).
Each frame's story text can adopt its own individual autofit setting as
follows:
continuously act upon a selected frame's story text.
No AutoFit
This is the normal mode of operation where, if selected, text
won't automatically scale throughout the selected text frame,
possibly leaving partly empty frames at the end of the frame
sequence.
Shrink Text on Overflow
If selected, extra text added to a selected frame will shrink all
frame text to avoid text overflow.
AutoFit
If selected, the frame will always scale text automatically by
adjusting text size (compare to Fit Text which fits text once, with
any additional text causing text overflow).
AutoFlow
When importing text, it's a good idea to take advantage of the AutoFlow
feature, which will automatically create text frames and pages until all
the text has been imported. This way, enough frames are created to
display the whole story. Then you can gauge just how much adjustment
will be needed to fit the story to the available "real estate" in your
publication.
Page 81

76 Text
No Overflow
If you add more text to a story while editing, or have reduced the size of
frame, you may find that an overflow condition crops up. In this case
you can decide whether to use AutoFit or click the frame's AutoFlow
button.
To AutoFlow story text on the page:
• Click
button.
If no other empty frames are detected, you'll be prompted to autoflow
text into a new frame(s) the same size as the original or to new frame(s)
sized to the page. If an empty frame exists anywhere in your publication,
PagePlus will detect the first empty frame and prompt to flow text into
this. At the dialogs, Click Yes to flow into frame or click No to let
PagePlus detect and jump to the next empty frame.
AutoFlow just to the left of the frame's Link
Linking text frames
When a text frame is selected, the frame includes a Link button at the
bottom right which denotes the state of the frame and its story text. It
also allows you to control how the frame's story flows to following
frames:
The frame is not linked to a following frame (it's
either a standalone frame or the last frame in a
sequence) and the frame is empty or the end of the
story text is visible.
Page 82

Text 77
Overflow
Continued
The populated frame is not linked (either
standalone or last frame) and there is additional
story text in the hidden overflow area.
An
Autoflow button also appears to the left of
the Link button.
The frame is linked to a following frame. The end of
the story text may be visible, or it may flow into the
following frame.
The button icon will be red if the final frame of the
sequence is overflowing, or green if there's no overflow.
There are two basic ways to set up a linked sequence of frames:
• You can link a sequence of empty frames, then import the text.
• You can import the text into a single frame, then create and
link additional frames into which the text automatically flows.
When frames are created by the AutoFlow option (for example
when importing text), they are automatically linked in sequence.
To create a link or reorder the links between existing frames, you can use
the Link button under the frame. Remember to watch the cursor, which
changes to indicate these operations.
• You can link to frames already containing text or are already in
a link sequence.
• If the frame was not part of a link sequence, its text is merged
into the selected text's story.
To link the selected frame to an existing frame:
1. Click the frame's Link button (showing
or .)
Page 83

78 Text
2. Click with the Textflow cursor on the frame to be linked to.
To link the selected frame to a newly drawn frame:
• As above, but instead of clicking a "target" frame, either click on
the page (for a default frame) or drag across the page (to create
a frame sized to your requirements). The latter is ideal for
quickly mapping out linked frames across different pages.
To unlink the selected frame from the sequence:
• Click on
the same frame.
Story text remains with the "old" frames. For example, if you detach the
second frame of a three-frame sequence, the story text remains in the
first and third frames, which are now linked into a two-frame story. The
detached frame is always empty.
Continued, then click with the Textflow cursor on
Using artistic text
Artistic text is standalone text you type directly onto a page. Especially
useful for headlines, pull quotes, and other special-purpose text, it's
easily formatted with the standard text tools.
Here are some differences between frame text and artistic text.
Page 84

• You can initially "draw" artistic text at a desired point size, and
drag it to adjust the size later. Frame text reflows in its frame
upon frame resize (but doesn't alter its text size).
• Artistic text can be applied to a path but frame text cannot.
• Artistic text won't automatically line wrap like frame text.
• Artistic text doesn't flow or link the way frame text does; the
Frame context toolbar's text-fitting functions aren't applicable
to artistic text.
To create artistic text:
Text 79
1. Choose the
2. Click on the page to make an insertion point from where you'll
begin typing.
3. Set initial text properties (style, font, point size, etc.) using the
Text context toolbar.
4. Start typing to create the artistic text using your chosen text
properties.
To resize or reproportion an artistic text object:
• To resize while maintaining the object's proportions, drag the
resize handles.
Artistic Text Tool from the Tools toolbar.
To resize freely, hold down the Shift key while dragging.
Page 85

80 Text
"Ordinary" straight-line artistic
To edit artistic text:
• Drag to select a range of text, creating a blue selection.
You can also double-click to select a word, or triple-click to select all
text.
Now you can type new text, apply character and paragraph formatting
(p. 84), edit the text in WritePlus, apply proofing options, and so on.
Putting text on a path
text is far from ordinary—but
you can extend its creative
possibilities even further by
flowing it along a curved path.
The resulting object has all the properties of artistic text, plus its path is a
Bézier curve that you can edit with the Pointer Tool as easily as any
other line! In addition, text on a path is editable in some unique ways, as
described below.
To apply a preset curved path to text:
1. Create an artistic text object.
Page 86

Text 81
2. With the text selected, on the Text context toolbar, click the
down arrow on the
Preset Text Paths flyout and choose a
preset path.
The text now flows along the specified path, e.g. for "Path - Top Circle".
To add artistic text along an existing line or shape:
1. Create a freehand, straight, or curved line (see Drawing and
editing lines on p. 131) or a shape (see Drawing and editing
shapes on p. 132).
2. Choose the
Artistic Text Tool from the Tools toolbar.
3. Bring the cursor very close to the line. When the cursor changes
to include a curve, click the mouse where you want the text to
begin. Your line appears as a dashed path with an insertion
point at its starting end.
4. Begin typing at the insertion point. Text flows along the line,
which has been converted to a path.
Page 87

82 Text
To fit existing text to an existing line or shape:
1. Create an artistic text object.
2. Create a freehand, straight, or curved line or a shape.
3. Select both objects. On the Tools menu, choose Fit Text to
Path. The text now flows along the specified path.
To remove the text path:
1. Select the path text object.
2. Click
flyout.
Path - None on the Text context toolbar's Path
Editing text on the page
You can use the Pointer Tool to edit frame text, table text, or artistic
text directly. On the page, you can select and enter text, set paragraph
indents and tab stops, change text properties, apply text styles, and use
Find and Replace.
Selecting and entering text
The selection of frame text, artistic text, and table text follows the
conventions of the most up-to-date word-processing tools. The selection
area is shaded in semi-transparent blue for clear editing.
Page 88

Text 83
Double-, triple- or quadruple-click selects a word, paragraph or all text,
respectively. You can also make use of the Ctrl-click or drag for
selection of non-adjacent words, the Shift key for ranges of text.
To edit text on the page:
1. Select the Pointer Tool, then click (or drag) in the text object. A
standard insertion point appears at the click position.
- or Select a single word, paragraph or portion of text.
2. Type to insert new text or overwrite selected text, respectively.
To start a new paragraph:
• Press the Return key.
To start a new line within the same paragraph (using a line break or soft return):
• Press Shift+Return.
To flow text to the next column (Column Break), frame (Frame Break) or page (Page Break):
• Press Ctrl+Return, Alt+Return or Ctrl+Shift+Return,
respectively.
The first two options apply only to frame text. You can use these
shortcuts or choose the items from the Insert>Break submenu.
To switch between insert mode and overwrite mode:
• Press the Insert key.
Page 89

84 Text
Checking your text
To ensure your artistic and frame text is error-free and the best copy
possible, use the Spell Checker, Proof Reader, and Thesaurus options
on the Tools menu.
For paragraph indents and tab stops, see PagePlus Help or consider
applying indents and tab stops as body text styles (p. 87).
Setting text properties
PagePlus gives you a high degree of typographic control over characters
and paragraphs.
To apply basic text formatting:
1. Select the text.
2. Use buttons on the Text context toolbar to change text style,
font, point size, attributes, paragraph alignment,
bullets/numbering, or level.
To clear local formatting (restore plain/default text properties):
1. Select a range of text with local formatting.
2. Click on the Clear Formatting option on the Text context
toolbar's text styles drop-down list (or Text Styles tab).
Page 90

Text 85
Using fonts
One of the most dramatic ways to change your publication's appearance
is to change the fonts used in your artistic text, frame text, or table text.
Font assignment is very simple in PagePlus, and can be done from the
Text context toolbar (when text is selected), Fonts tab (via View>Tabs),
or by modifying text styles (see p. 89) to use a chosen font.
Page 91

86 Text
Font assignment is also possible
, and your
Using the Fonts tab
via the Fonts tab, which also
provides following features:
• Assign fonts to be
Websafe or favourites.
• View most recently
used, Websafe
favourite fonts
simultaneously.
• Search for installed
fonts via search box.
• Hover-over preview of
fonts applied to your
document's text
(optional).
• Change a font for
another throughout
your publication or
website (by right-click
Select All).
The Fonts tab is switched off by
default. You can switch in on by
using View>Tabs.
Help.
Page 92

Using text styles
Styles can be
PagePlus lets you use named text styles (pre-defined or user-defined),
which can be applied to frame text, table text, artistic text, index text or
table of contents text. A text style is a set of character and/or paragraph
attributes saved as a group. When you apply a style to text, you apply the
whole group of attributes in just one step. For example, you could use
named paragraph styles for particular layout elements, such as "Heading
1" or "Body", and character styles to convey meaning, such as
"Emphasis", "Strong", or "Subtle Reference".
Text 87
applied to
characters or
paragraphs using
either the Text
context toolbar or
the Text Styles tab.
Both paragraph
and character
styles can be
managed from the
Text Style Palette.
Text style hierarchies
All paragraph or character text styles available in PagePlus are ultimately
based on the respective Normal and Default Paragraph Font text styles.
Page 93

88 Text
Paragraph styles Character styles
So why have this hierarchy of text styles? The key reason for this is the
ability to change a text style at any "level" in the hierarchy in order to
affect all "child" styles which belong to it.
Working with named styles
The named style of the currently selected text is
displayed in either the Text Styles tab or the Styles drop-down list on
the Text context toolbar. A character style (if one is applied locally) may
be shown; otherwise it indicates the paragraph style.
To apply a named style:
1. Using the Pointer Tool, click in a paragraph (if applying a
paragraph style) or select a range of text (if applying a character
style).
2. Display the Text Styles tab and select a style from the style list.
- or On the Text context toolbar, click the arrow to expand the
Styles drop-down list and select a style name.
Page 94

Text 89
The Text Style tab highlights the paragraph or character style applied to
any selected text.
As both paragraph and character formatting can be applied to the same
text, all of the current text's formatting is displayed in the Current
format box on the tab. In the example below, currently selected text has
a 'Strong' character style applied over a 'Body' paragraph style.
To update a named style using the properties of existing text:
1. Make your desired formatting changes to any text that uses a
named style.
2. On the Text Styles tab, right-click the style and choose Update
<style> to Match Selection.
All text using the named style takes on the new properties.
To modify an existing style:
1. From the Text Styles tab, select
Manage, then choose
Modify.
2. From the Text Style dialog, define (or change) the style name,
base style, and any character or paragraph attributes, tabs,
bullets, and drop caps.
3. Click OK to accept the style, or Cancel to abandon changes.
4. Click Apply to update text, or click Close to maintain the style
in the publication for future use.
Alternatively, choose Text Style Palette from the Format menu to
modify styles and to change text defaults (see p. 63).
Page 95

90 Text
Creating custom text styles
If required, you can create your own custom styles, either based on a
currently selected text style or from scratch. See PagePlus Help.
Removing local formatting
To return characters and/or paragraphs back to their original
formatting, click on Clear Formatting in the Text Styles tab. This is
great for reverting some formatting which hasn't quite worked out! You
can clear the formatting of selected characters, paragraphs, or both
depending on what text is currently selected.
Like Clear Formatting, you can use
Reapply Styles on the Text
Styles tab (or Text context toolbar) to clear all local overrides leaving the
default text. However, where Clear Formatting reverts the text to
Normal style, Reapply styles reverts the text back to its current name
style.
Page 96

Text 91
Wrapping text
PagePlus lets you wrap frame text around the contours of a separate
object, typically around a picture, shape, artistic text, table, or another
frame.
To wrap text around an object:
1. Select the object around which you want the text to wrap.
2. Click the
Wrap Settings button on the Arrange toolbar.
3. Select how text will wrap by clicking a sample.
4. Choose which side(s) the wrapping method will be applied.
5. Click OK.
Page 97

92 Text
Bulleted list
Numbered list
Multi-level list
In addition, you can specify the Distance from text: the "standoff"
between the object's wrap outline and adjacent text. (The wrap outline is
a contour that defines the object's edges for text wrapping purposes.)
Different object types have different initial wrap outlines.
You can manually adjust the wrap outline using the Curve context
toolbar for more precise text fitting. See PagePlus help for more
information.
Creating a bulleted or numbered list
You can turn a series of paragraphs into bulleted, numbered or multilevel lists. Bullets are especially useful when listing items of interest in
no specific order of preference, numbered lists for presenting step-bystep procedures (by number or letter), and multi-level lists for more
intelligent hierarchical lists with prefixed numbers, symbols, or a mix of
both, all with supporting optional text (see Using multi-level lists on
p. 94).
Lists can be applied to normal text (as local formatting) or to text styles
equally.
To create a simple bulleted or numbered list:
1. Select one or more paragraphs.
- or Click in a paragraph's text.
Page 98

2. Select Bulleted List or Numbered List from the Text
context toolbar.
To create a bulleted or numbered list (using presets):
1. Select one or more paragraphs.
- or Click in a paragraph's text.
2. Select Bullets and Numbering from the Format menu.
3. From the Text Style dialog's Bullets and Numbering menu
option, choose Bullet, Number, or Multi-Level from the Style
drop-down list.
4. Select one of the preset formats shown by default.
- or For a custom list, click the Details button to display, then alter
custom options.
5. Click OK to apply list formatting.
For number and multi-level lists, check Restart numbering to
restart numbering from the current cursor position in the list;
otherwise, leave the option unchecked.
Text 93
Page 99

94 Text
For multi-level lists you can set a different
level numbered
Using multi-level lists
character (symbol, text or number) to
display at each level of your list. Levels are
normally considered to be subordinate to
each other, where Level 1 (first level),
Level 2 (second), Level 3 (third), etc. are
of decreasing importance in the list. For
example, the simple multipassage of text opposite is arranged at
three levels.
If you apply a multi-level preset to a range of text you'll get a list with the
preset's Level 1 format applied by default. Unless you use text styles,
you'll have to change to levels 2, 3, 4, etc. to set the correct level for your
list entry.
Changing list levels on selected paragraphs:
• Click the
Increase Paragraph Indent or Decrease
Paragraph Indent button on the Text context toolbar to
increment or decrement the current level by one.
The multi-level presets offer some simple but commonly used schemes
for paragraph list formatting. However, if you want to create your own
lists or modify an existing list (your own or a preset), use the Details
button in the Text Style dialog when Multi-Level style is selected. See
PagePlus Help for more details.
Page 100

Text 95
Assigning bullets, numbers, and levels to styles
PagePlus lets you easily associate any bulleted, numbered or multi-level
list style (either preset or custom list) to an existing text style (see p. 87).
Inserting user details
When you create a publication from a design template for the first
time, you may be prompted to update your user details (Name,
Company, Telephone number, etc.) in a User Details dialog. These
details will automatically populate pre-defined text "fields" in your
publication, making it personalized.
PagePlus supports business sets (i.e., stored sets of user details) which
can be created per customer and applied to your publication. This lets
you create publication variants, with each differing just in their user
details. You can choose which set to use when you start with a new
design template (or at any time during your session).
 Loading...