

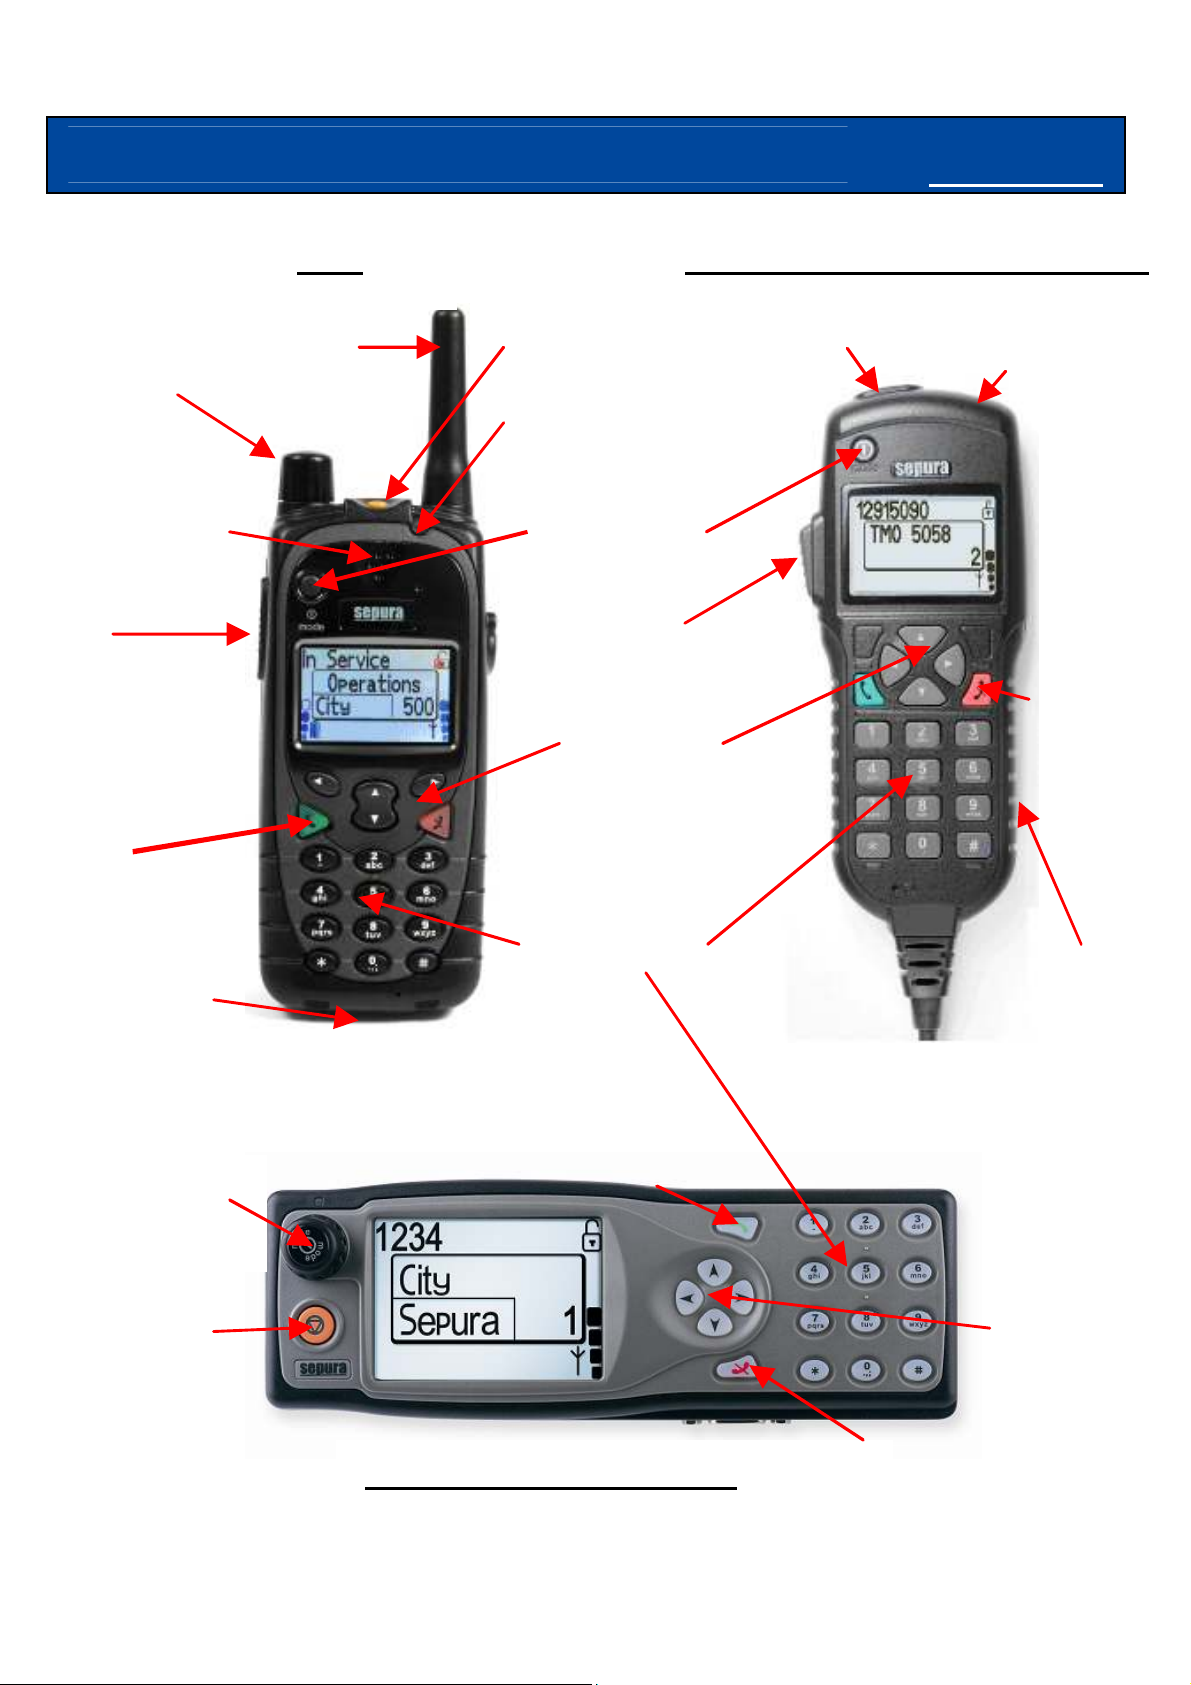
Quick Reference Guide
Antenna
Emergency
Tri-colour
Dupl
ex Earpiece
Mode Key
Navigation
Red
Alpha
-
Numeric
Green
Navi
-knob™
Emergency
Duplex
Navigation
Emergency
Earpiece and
SRH/SRG/HBC
Handset Based Console (HBC) SRH
sepura
Navi-knob™
and Half Duplex
Microphone
PTT
Telephone
Key
Key
LED
Navi-keys
Key
(On/Off)
PTT
Telephone
Key
Keys
Microphone
and Mode Key
Key
Keypad
Green Telephone Key
Standard Console (SRG)
Microphone
located on rear
of HBC
Red Telephone Key
Keys
Sepura plc,
Radio House, St Andrew’s Road,
Cambridge, CB4 1GR England
www.sepura.com
SPR-DOC-00228 Issue 3
© Sepura plc 2009

Switch On
Switch Off
Volume Adjust
Emergency Call
Change
Talkgroup
Change Folder
Talkgroup Call
Press the Mode Key.
Press & Hold the Mode Key.
Rotate the Navi-knob™ or press + and – Navi-keys.
Press and hold the Emergency Key.
Press the Mode Key once, and then rotate the Naviknob™ or use the Navi-keys to choose from the list of
talkgroups in the current folder, or dial the number of
the talkgroup using the keypad. Wait or press the
PTT to activate the new talkgroup.
Press the Mode Key once, and then use the Up and
Down Navigation Keys to select a talkgroup folder.
Then change the talkgroup as explained above.
Press the PTT.
Radio Call to
Individual
Telephone Call
Send Status
Menu Access
From the default screen:
Press the Down Navigation Key once to see the menus available;
Press the Left or Right Navigation Key to move across and select
the menus;
Dial the radio number and select (using
Up/Down Navigation Keys), then press PTT to start
the call.
Dial the required number and select (using
Up/Down Navigation Keys), and then press the
Green Telephone Key to start the call.
To end the call press the Red Telephone Key.
Press the Mode Button twice and then rotate the
Navi-knob™ or press the Navi-keys to select a status
value. Press PTT twice to send to the currently active
talkgroup. These messages can also be accessed
from the menu structure.
Press the Down Navigation Key to enter menu;
Press the Left or Right Navigation Key to move across the cards
within the menu.
Press and hold the Up Navigation Key to exit the menus and return to the
default screen. Alternatively, do nothing and the default screen will reappear
after a timeout.
Activating Menu Options
Some menu cards allow you to alter settings within the radio by checking or
unchecking a checkbox. Press the Green Telephone Key to activate a function
and ‘check’ its checkbox. Press the Red Telephone Key to deactivate a function
and ‘uncheck’ its checkbox. In the Network Selection Menu only one Network
can be activated, so the previous network is deactivated automatically.
Entering Text
Within menu cards that allow text entry, e.g. to send message;
Press and hold the Down Navigation Key to start editing;
Enter or edit your text as required from the keypad;
Press the Green Telephone Key to action your changes or the Red
Telephone Key to exit.
Activating Soft key Functions
Press and hold the required soft key.
(A list of soft key functions may be displayed on the Help key if programmed.)
Some soft keys are a “toggle” function, requiring no further action. Some are
navigation keys requiring a second action.
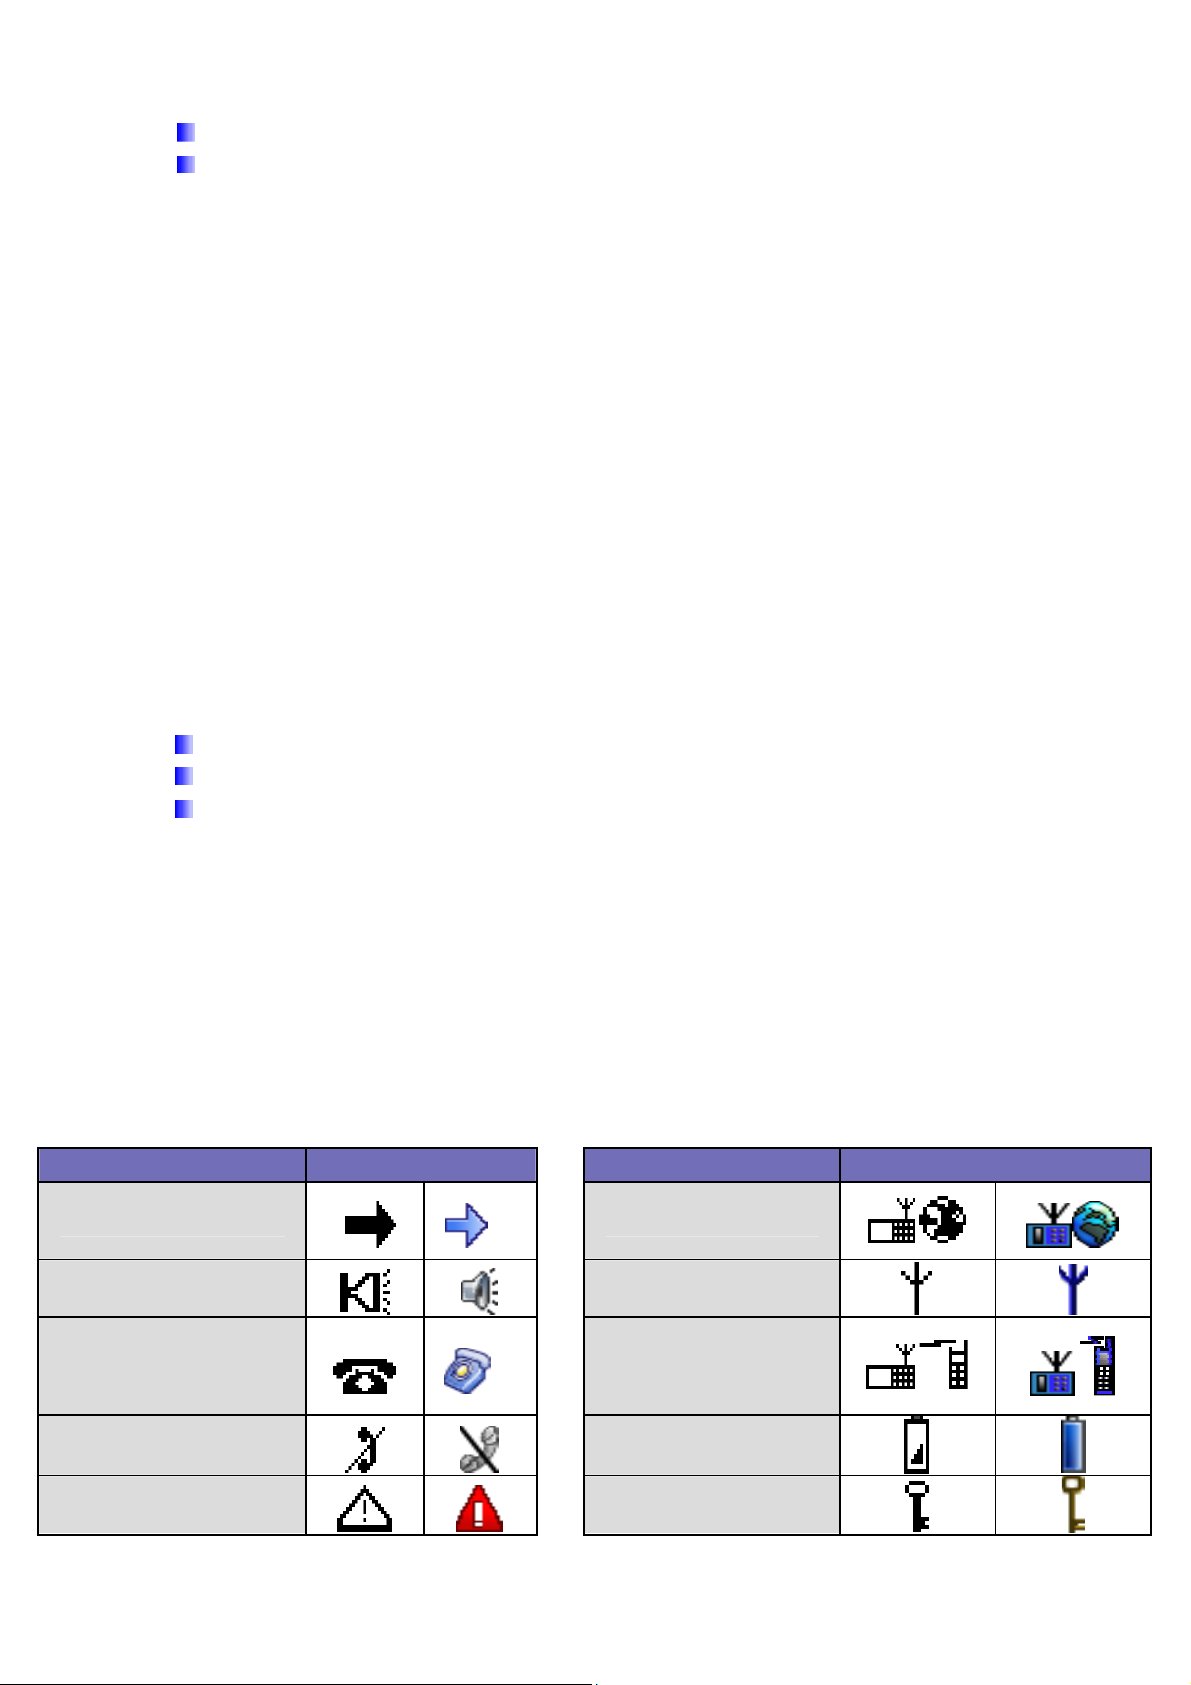
Icons
Description Icon Description Icon
Half duplex call
Broadcast call
Telephone type
call dialling
mode
Transmit Inhibit
Emergency call
DMO Gateway
Signal strength
DMO Repeater
found
Battery
Keypad Locked

Description Icon Description Icon
New message
Missed Call
Low battery
Lone Worker
Covert
Operation
Calls not
encrypted
Power from
charger
Paging Alert
Press ‘+‘ Navikey or turn Naviknob™
clockwise to
move cursor
Volume level
meter
Packet Data
session
Scanning
Radio Settings
WAP
Calls are E2E
encrypted
Telephone style
call
Messages
Press ‘–‘ Navikey or turn
Navi-knob™
anticlockwise
to move cursor
Communication
mismatch
DMO Repeater
Privacy Mode
Group Focus
GPS
TETRA type
dialling mode
Incoming Call
Folders
External Alerts
Function is
activated
Lone Worker
Alarm
Status
Messages
Directory
Call History
Message Store
GPS disabled
Radio
Information
Outgoing Call
Network
Selection
Short Data
Applications
Function not
activated
 Loading...