

Page 1
Travel
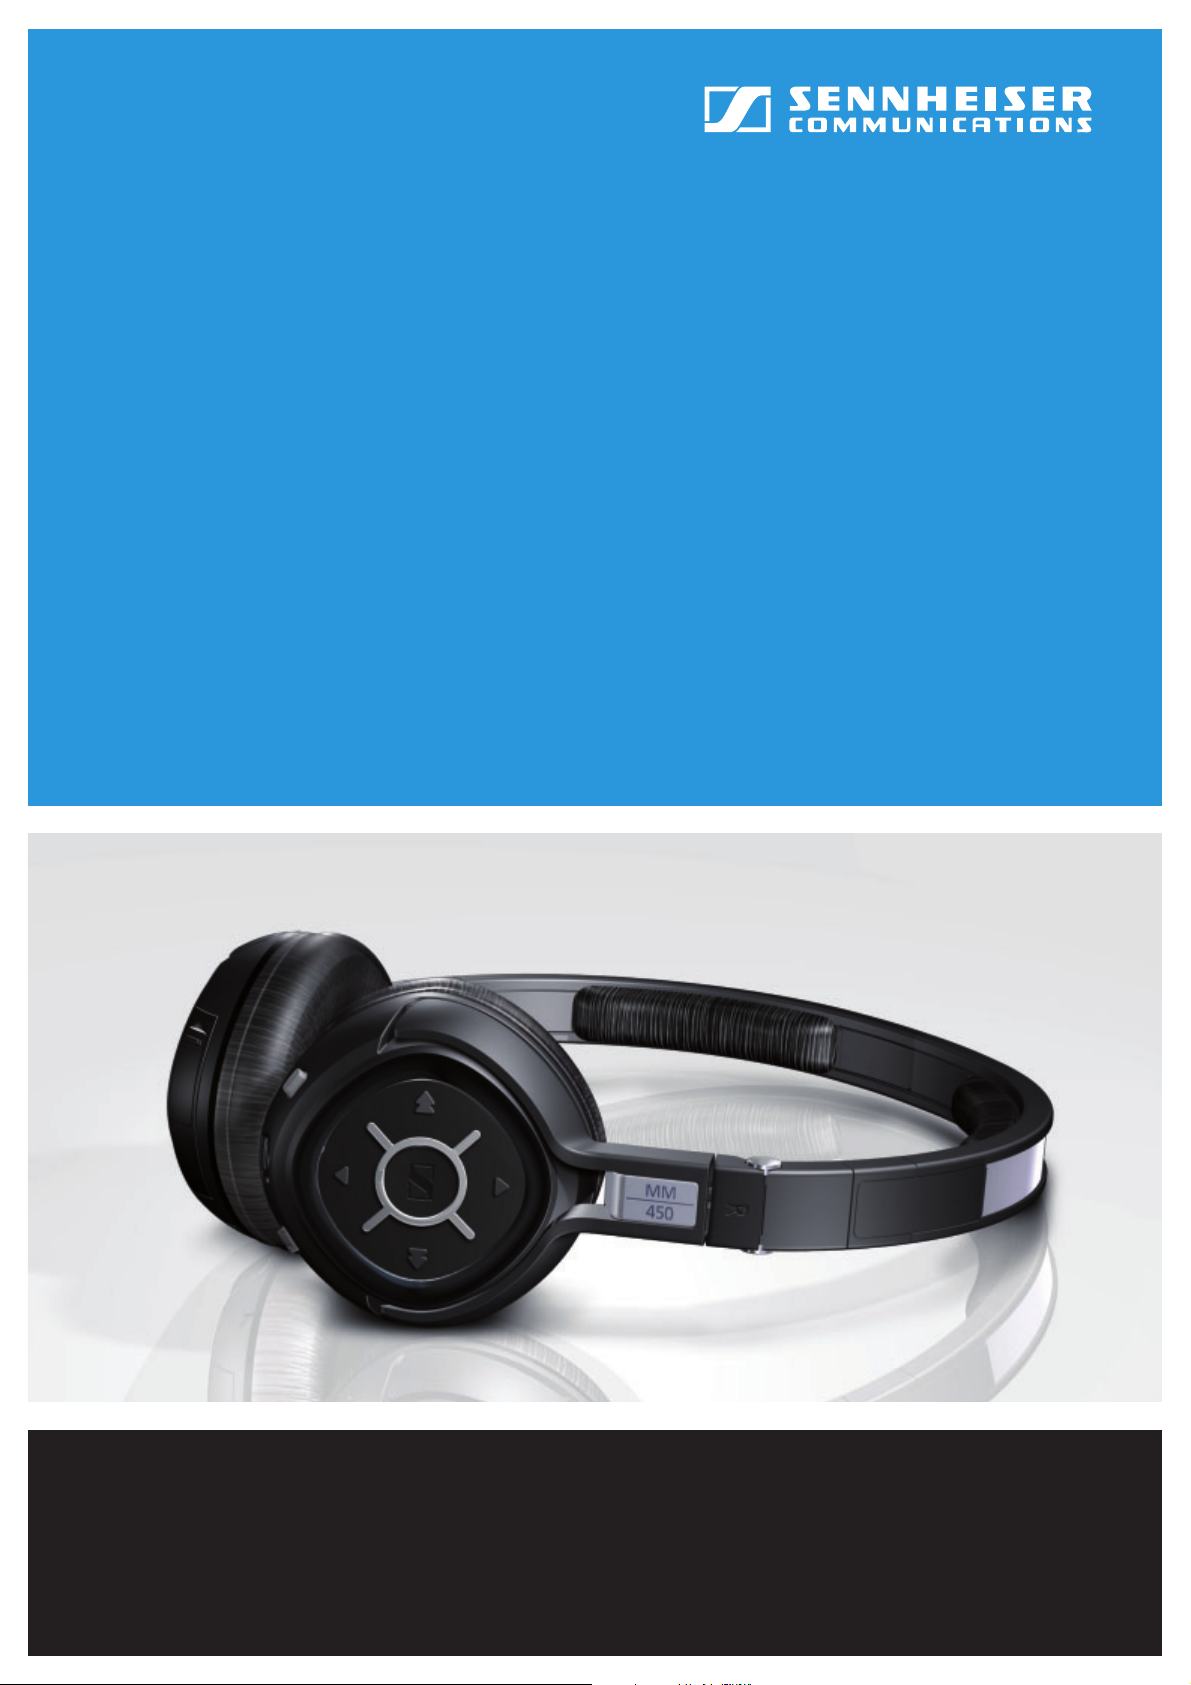
Silence For Your Aural Indulgence
MM 450
Instruction Manual
Page 2

Page 3

Contents
Contents
Important safety instructions .......................................................... 2
MM 450 ................................................................................................ 4
Delivery includes ................................................................................. 5
Product overview ................................................................................ 7
Putting the MM 450 into operation ................................................. 8
Charging the battery pack ................................................................. 8
Connecting the headset to the audio source .............................. 10
Connecting the audio cable ............................................................ 13
Adjusting the headband ................................................................. 14
Using the MM 450 ............................................................................ 15
Switching the headset on/off ........................................................ 15
Adjusting the headset to the listening situation ....................... 16
Changing the volume ....................................................................... 17
Remote-controlling connected devices from the headset ....... 18
Resetting the settings of the headset .......................................... 20
Transporting the MM 450 ................................................................ 21
Cleaning the MM 450 ....................................................................... 22
If a problem occurs ... ....................................................................... 23
Accessories and spare parts ............................................................ 24
Specifications .................................................................................... 25
Manufacturer Declarations .............................................................. 26
DE
EN
FR
IT
ES
NL
1
Page 4

Important safety instructions
Important safety instructions
• Please read these instructions carefully and completely before using
the headset.
• Make these instructions easily accessible to all users at all times.
Always include these instructions when passing the headset on to third
parties.
• Only use the headset in aircraft where wireless Bluetooth
sion is permitted.
• Do not use the headset in situations which require special attention
(e.g. in traffic or when performing skilled jobs).
• Always keep the headset dry and do not expose it to extreme temperatures (normal operating temperatures: 10°C to 35°C).
– Use the headset with care and store it in a clean, dust-free environ-
ment.
– Switch off the headset after use to conserve battery power. Remove
the batteries if the headset will not be used for extended periods of
time.
• The headset contains magnets that generate a magnetic field which
could cause dangerous interference with cardiac pacemakers and
implanted defibrillators. Keep the headset at least 1.2” (3 cm) from
cardiac pacemakers or implanted defibrillators.
• Please protect your hearing from high volume levels. Sennheiser headsets also sound exceptionally good at low volumes.
• Only use the supplied mains unit and charging cable.
• To reduce the risk of fire or electric shock, do not use the device and the
mains unit near water and do not expose them to rain or moisture.
• Unplug the mains unit from the wall socket
– to completely disconnect the device from the mains
– during lightning storms or
– when unused for long periods of time.
• Only operate the mains unit from the type of power source specified in
the chapter “Specifications” (page 25).
• Ensure that the mains unit is
– in a safe operating condition and easily accessible,
– properly plugged into the wall socket,
– only operated within the permissible temperature range,
– not covered or exposed to direct sunlight for longer periods of time
in order to prevent heat accumulation (see “Specifications” on
page 25).
• Do not operate the device and the mains unit near any heat sources.
• Only use attachments/accessories specified by Sennheiser.
®
transmis-
2
Page 5
Important safety instructions
Intended use of the headset
Intended use of the headset includes
• having read these instructions, especially the chapter “Important
safety instructions” on page 2,
• using the headset within the operating conditions and limitations
described in this instruction manual.
“Improper use” means using the headset other than as described in these
instructions, or under operating conditions which differ from those
described herein.
Safety instructions for the Lithium-Polymer battery pack
DE
EN
If abused or misused, the battery pack may leak. In extreme cases, it may
even present
• a heat hazard,
•a fire hazard,
• an explosion hazard,
• a smoke or gas hazard.
Please understand that Sennheiser does not accept liability for damage
arising from abuse or misuse.
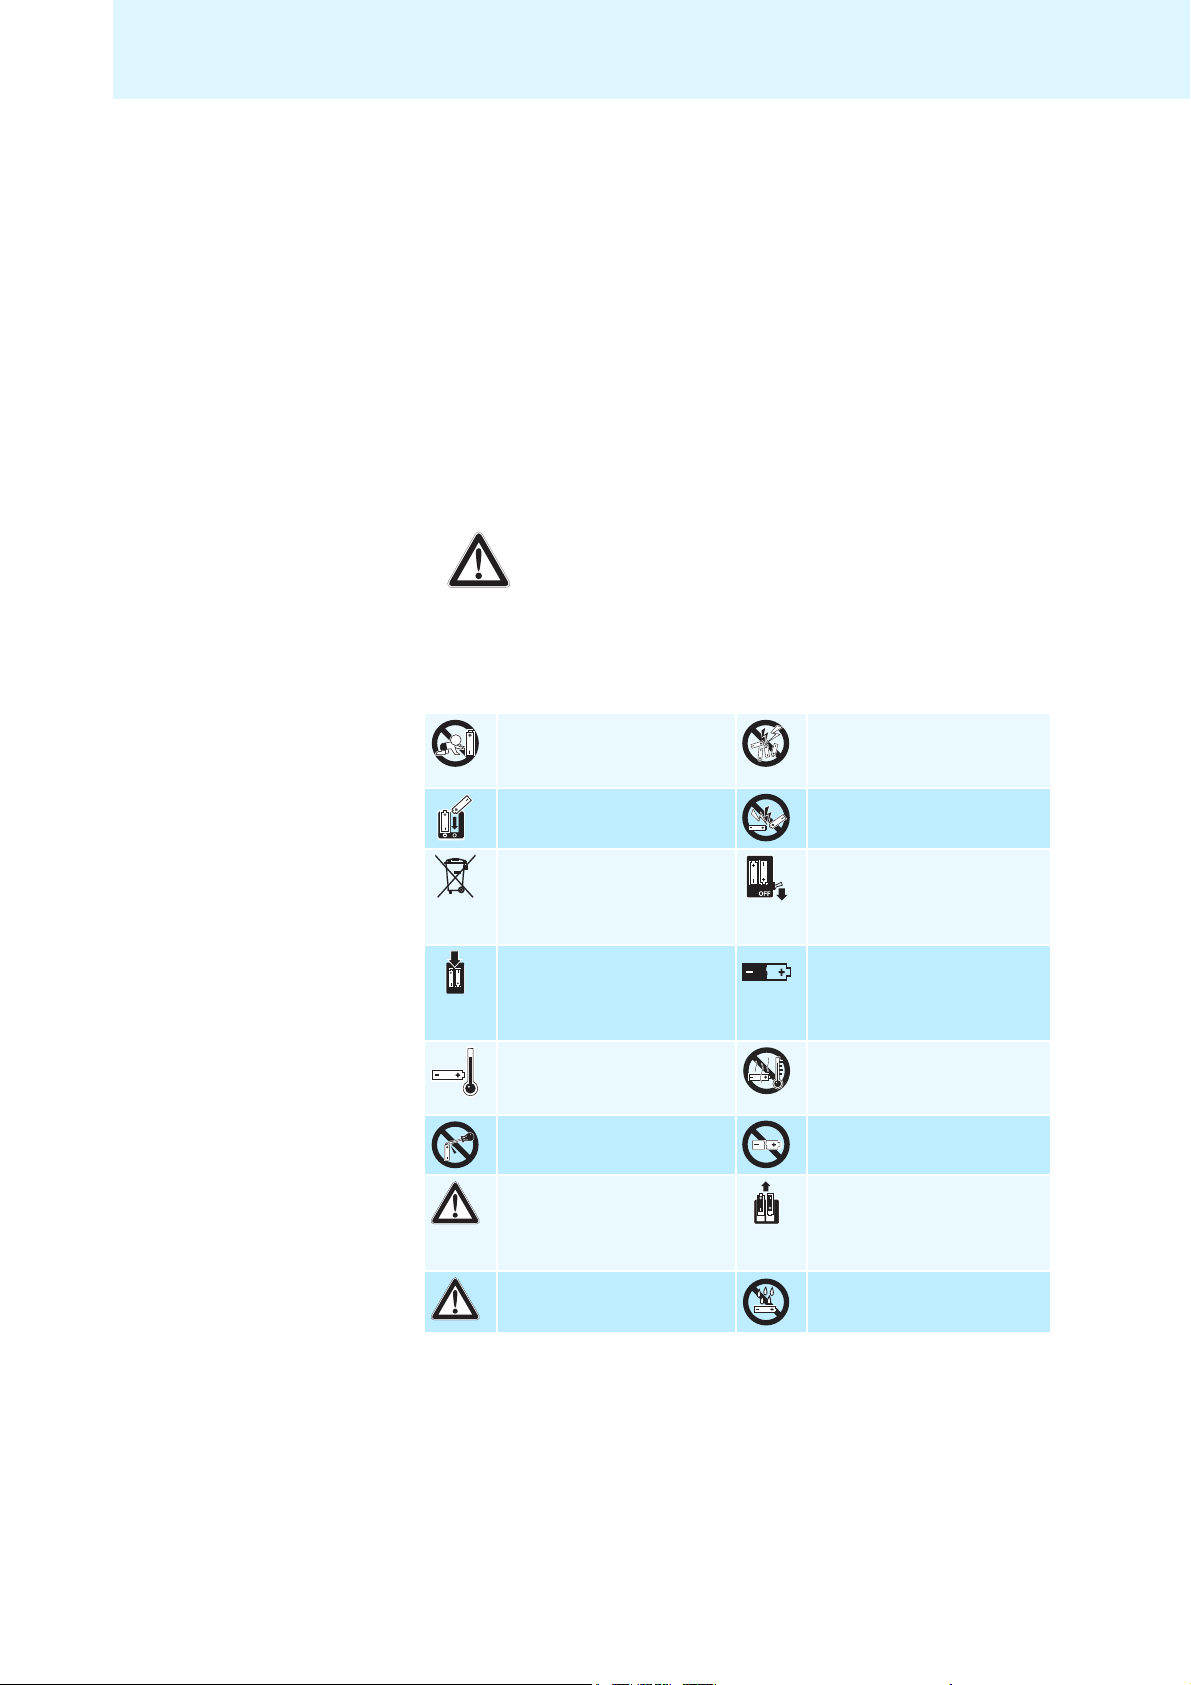
Keep away from children. Do not pack charged batteries
loose – danger of shorting
out/fire hazard.
Observe correct polarity. Do not short-circuit.
Dispose of the battery pack
at special collection points or
return it to your specialist
dealer.
Only charge the battery
pack with the appropriate
Sennheiser chargers.
Only charge the battery pack
at ambient temperatures
between 10°C and 40°C.
Do not mutilate or dismantle. Do not continue to use a
Switch battery pack-powered
devices off after use.
When not using the battery
pack for extended periods
of time, charge it regularly
(about every 3 months).
Do not heat above 70°C/
158°F, e.g. do not expose to
sunlight or throw into a fire.
defective battery pack.
FR
IT
ES
NL
Immediately remove the
battery pack from an obviously defective device.
Only use the original
Sennheiser battery pack.
When not using the device for
extended periods of time,
remove the battery pack from
the device.
Do not expose to moisture.
3
Page 6

MM 450
MM 450
The MM 450 headset provides undisturbed music enjoyment in noisy environments – even without the constrictions of cables. Its supra-aural, closed
design and the latest active noise compensation technology (NoiseGard)
make the MM 450 especially suitable for use with in-flight entertainment
systems. Due to its active and passive attenuation of ambient noise, it lets
you enjoy music even in noisy environments.
Bluetooth
The MM 450 complies with the new Bluetooth 2.1 standard. Via its
Bluetooth interface, it can be connected to a wide variety of Bluetooth
enabled devices. Bluetooth wireless technology allows the MM 450 to
communicate with your Bluetooth enabled device (e.g. mobile phone, MP3
player, PC or PDA) within a range of up to 10 meters.
NoiseGard
The NoiseGard active noise compensation system is based on the principle
of cancelling out sound using “anti-sound” (phase-inverted sound). Tiny
microphones pick up low-frequency ambient noise (up to 1 kHz) near the
ear. The NoiseGard electronics use this noise to generate a sound wave
which is the exact opposite (IE: at the same level but polarity reversed –
180° out-of-phase), the effect being that the polarity reversed signal
cancels most of the outside noise.
TalkThrough
The MM 450 headset has a TalkThrough function, which allows you to
communicate with other people without having to remove the headset.
When TalkThrough is activated, professional quality microphones
mounted on the outside of the headset pick up all acoustic signals in the
immediate vicinity. Annoying background noise, e.g. from turbine engines,
is electronically filtered out, only allowing the voice of the other person to
pass through the headset clearly.
Additional features
• Outstanding sound quality due to patented adaptive baffle damping
and Duofol diaphragms
• Optimum protection against ambient noise due to active and passive
noise attenuation
• Great for travel: comfortable, rugged and foldable headset construc-
tion with single-sided, detachable cable
• Without the detachable audio cable, the headset can be used as a
passive hearing protector
TM
4
Page 7

Delivery includes
1 MM 450 headset
1 BA 370 PX battery pack
1 USB charging cable
1 PSC 03R-050 mains unit with country adapters
1 audio cable (2.5 mm to 3.5 mm jack plug)
1 audio adapter (6.35 mm jack plug)
1 in-flight adapter (3.5 mm double mono jack plug)
1 transport case
1 quick start guide
1 CD ROM with
– detailed instruction manual (PDF file)
– interactive instruction manual
Delivery includes
DE
EN
FR
IT
ES
NL
5
Page 8
Delivery includes
Overview of the pictograms
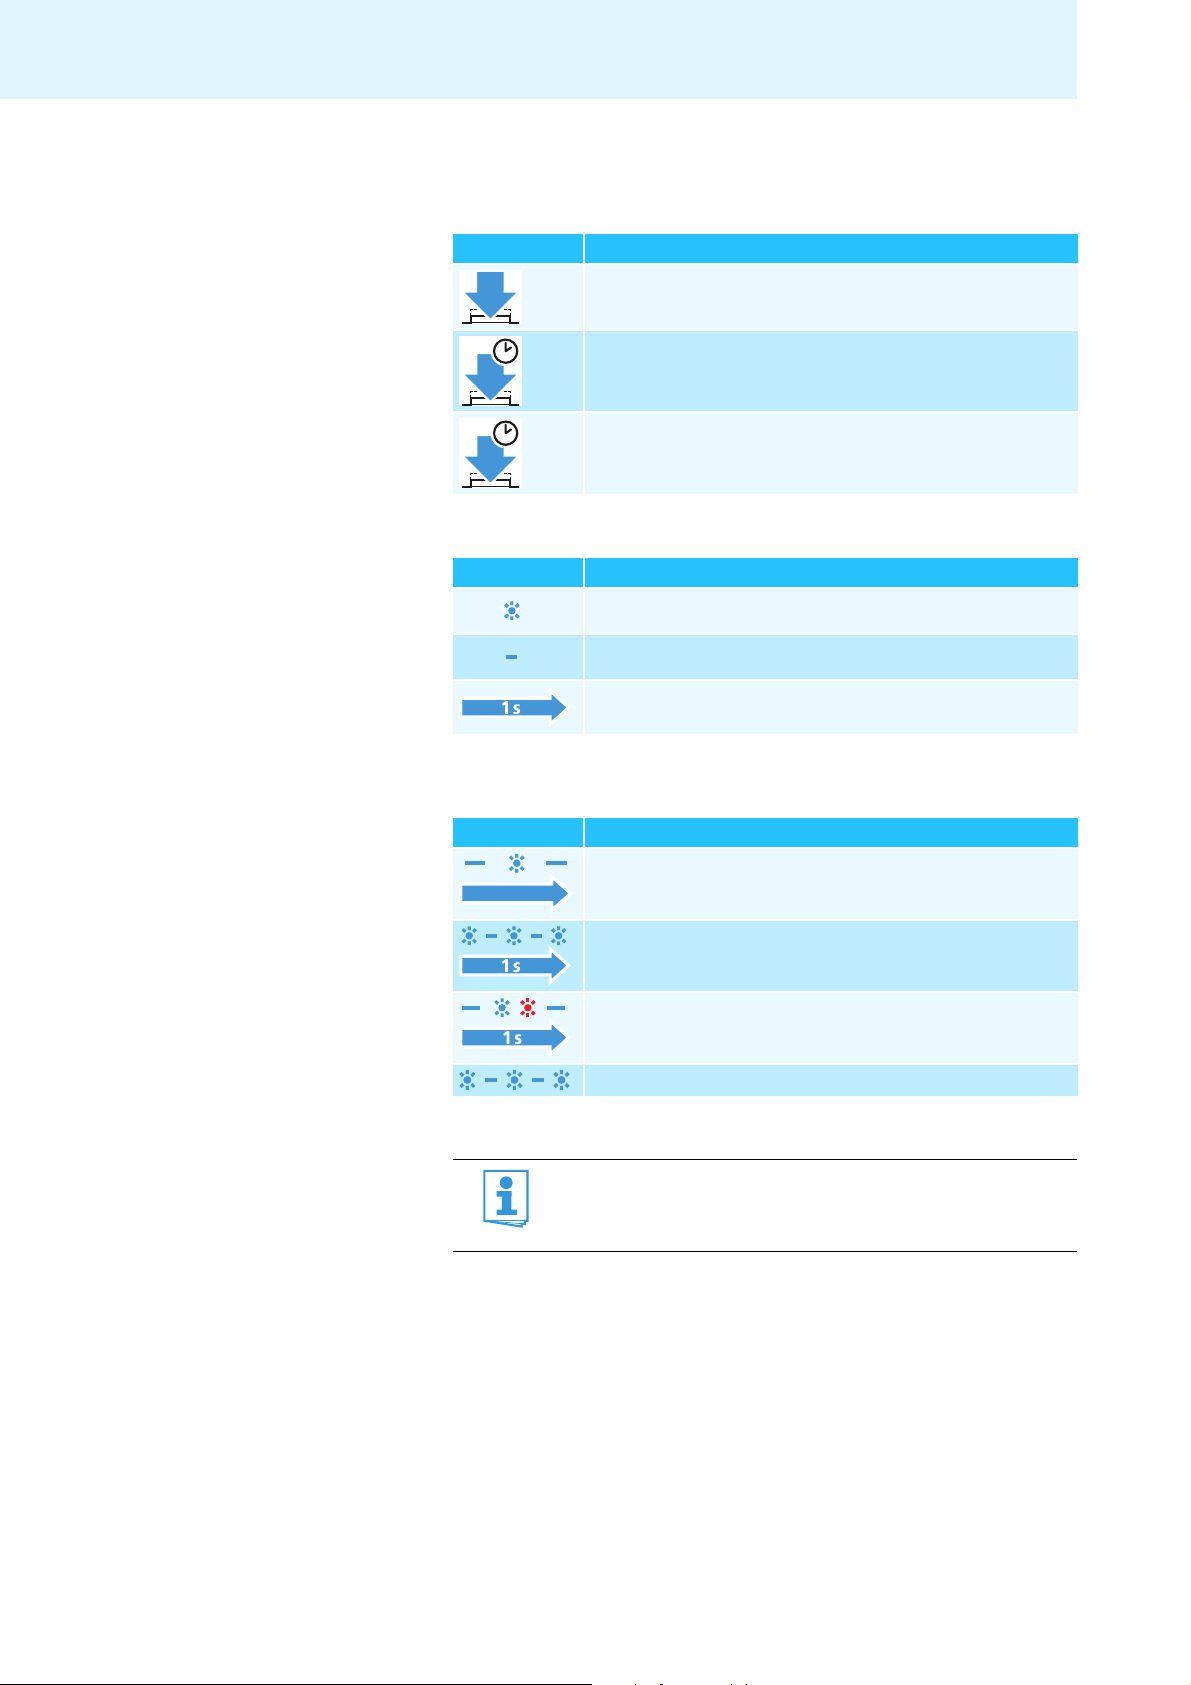
Meaning of the pictograms for pressing a button
Pictogram Meaning
Briefly press this button.
Keep this button pressed for 4 seconds.
4 s
Keep this button pressed until the desired setting is made or
the desired action is completed.
Meaning of the pictograms for the flashing of the LED
Pictogram Meaning
This pictogram symbolizes a flashing.
This pictogram symbolizes an interruption.
This pictogram symbolizes an interval.
Examples of some of the pictograms that are used throughout this instruction manual:
Pictogram Meaning
The LED flashes once every 3 seconds.
3s
The LED flashes 3 times per second.
The LED flashes in a rhythmic sequence.
The LED flashes blue 3 times and then goes off.
The pictogram “i”?
This note provides important information!
Notes marked with the pictogram “i” provide important information on the use of the headset.
6
Page 9

Product overview
쐃
Product overview
DE
A
EN
쐎
쐊
쐃 Headband 쐂 Earpad
쐇 Microphone 쐆 Socket for charging cable
쐋 NoiseGard button 쐊 Battery pack compartment
쐏 Socket for audio cable 쐎 Microphone
쐄 Bluetooth button
쐆
Operating panel
A
FR
IT
ES
NL
6
5
4
햲 Star LED 햵 Rewind button
햳 Fast-forward button 햶 Master button
햴 Volume button 햷 Volume button
1
2
3
7
Page 10

Putting the MM 450 into operation
3h
Putting the MM 450 into operation
Charging the battery pack
왘 Before using the battery pack for the first time, charge it for at least
3hours.
When charging the battery pack outside the headset, the LED 쐅 on the
battery pack lights up red. When the battery pack is fully charged, the
LED 쐅 on the battery pack lights up green.
쐅
1
3s
When the battery pack is almost flat, the Star LED 햲 on the headset
flashes red. You hear a short, negative acknowledgement tone.
Type of use Operating time
Using the headset with NoiseGard and Bluetooth technology 8 hours
Using the headset with NoiseGard only 20 hours
Using the headset with Bluetooth technology only 12 hours
The operating time of the battery pack depends on the device settings, the
listening situation and the audio sources used.
Conserving the battery power
Remove the battery pack if the headset will not be used for
extended periods of time.
Possibilities of charging the battery pack
a
쐈
b
EU
UK
8
US
AU
Page 11

Putting the MM 450 into operation
First, connect the charging cable 쐈 to the battery pack as described in
section a and then connect the charging cable 쐈 to a power source as
described in section b.
Connecting the charging cable to the battery pack
a
You can charge the battery pack either inside or outside the headset. This
is helpful if you are using a spare battery pack (to be ordered separately).
To charge the battery pack inside the headset:
왘 Open the battery pack compartment cover 쐊 on the left earcup.
왘 Connect the charging cable 쐈 to the socket for charging cable 쐆 on the
headset.
DE
EN
쐊
쐈
To charge the battery pack outside the headset:
왘 Open the battery pack compartment cover 쐊 on the left earcup.
왘 Press the button next to the battery pack compartment and remove
the battery pack.
쐆
왘 Connect the charging cable 쐈 to the socket for charging cable 쐆 on the
battery pack.
Connecting the charging cable to the mains unit, to a PC or to other USB
b
devices
In order to charge the battery pack, you can connect the charging cable to
either the USB socket of your PC or to the supplied mains unit or to other
USB devices.
To connect the charging cable to a PC:
왘 Connect the USB plug of the charging cable 쐈 to the USB socket of
your PC.
The battery pack is being charged. The LED 쐅 on the battery pack
쐅
lights up red.
To connect the charging cable to the mains unit:
왘 Connect the charging cable 쐈 to the mains unit.
왘 Plug the suitable country adapter onto the mains unit.
FR
IT
ES
NL
왘 Plug the mains unit into a wall socket.
The battery pack is being charged. The LED 쐅 on the battery pack
lights up red.
왘 After charging, unplug the mains unit from the wall socket.
If you have charged the battery pack outside the headset:
왘 Insert the charged battery pack into the headset’s battery pack
compartment until it locks into place.
왘 Close the battery pack compartment cover 쐊.
9
Page 12

Putting the MM 450 into operation
Connecting the headset to the audio source
CAUTION! Danger of malfunction!
The transmitted radio waves can impair the operation of
sensitive and unprotected devices.
왘 Only use the headset in aircraft where wireless Bluetooth
transmission is permitted or use the audio cable instead
(see “Connecting the audio cable” on page 13).
The headset complies with the Bluetooth 2.1 standard. In order that data
can be transmitted wirelessly using Bluetooth technology, you have to
register your headset with your audio source (pairing).
The headset can save the connection profiles of up to 5 Bluetooth devices
with which they have been paired. After switch-on, the headset automatically connects to one of these devices.
If you pair the headset with a sixth audio source, the saved connection
profile of the first Bluetooth device will be overwritten. If you want to
re-establish a connection with the first audio source, you have to pair the
headset with this audio source again.
If your audio source does not have a Bluetooth interface, use an optional
dongle (see “Accessories and spare parts” on page24). In addition to
adding Bluetooth capability to your audio source, this dongle uses apt-X, a
technology that ensures crisp, pure and full stereo sound. With apt-X,
Bluetooth can now offer wireless audio quality that is indistinguishable
from the highest quality wired connection.
For an optimum listening experience, your audio source has to
support the A2DP profile.
10
Page 13

Pairing the headset with an audio source
Putting the MM 450 into operation
1
1
1
1
1
5
5
3s
2s
왘 Press the Master button 햶 and keep it pressed until the Star LED 햲
flashes 3 times red.
The headset switches off (see “Switching the headset off” on page 15).
왘 Press the Master button 햶 and keep it pressed until the Star LED 햲
alternately flashes blue and red.
왘 On your audio source, activate the Bluetooth function “Add a new
device”.
왘 Proceed as described in the instruction manual of the audio source.
If a suitable audio source is found, the devices will exchange device identification information. The Star LED 햲 flashes 3 times blue and you hear an
ascending beep. The devices have identified each other and the headset is
paired with the audio source.
PIN code
When the audio source prompts for a password or PIN code,
enter the default PIN code “0000”.
If a connection is established, the Star LED 햲 continues to slowly
flash blue.
If no device is found within approx. 5 minutes, the Star LED 햲 flashes
3 times red and you hear a descending beep. The headset will then try for
3 minutes to connect to one of the 5 known audio sources. If this fails, the
headset automatically switches off.
DE
EN
FR
IT
ES
NL
1
5
2s
왘 In this case, repeat the necessary steps to pair the headset with the
audio source again.
Switching the “Bluetooth connection” flashing on/off
왘 Switch the headset off (see “Switching the headset off” on page 15).
To switch the “Bluetooth connection” flashing off:
왘 Press the Master button 햶 and keep it pressed until the Star LED 햲
alternately flashes blue and red.
왘 Press the Volume button 햴 for more than 3 seconds.
6
To switch the “Bluetooth connection” flashing on again:
왘 Press the Volume button 햷 for more than 3 seconds.
3
11
Page 14

Putting the MM 450 into operation
Disconnecting the Bluetooth connection
The Bluetooth button 쐄 is backlit, indicating the current
setting. The backlighting goes off after a short time to
conserve battery power.
왘 Press any button on the headset to display the current
setting of the Bluetooth function.
To disconnect the Bluetooth connection to the audio source, you can
switch off the headset or the Bluetooth function.
To switch the headset off:
1
5
왘 Press the Master button 햶 and keep it pressed until the Star LED 햲
flashes 3 times red.
You hear a descending beep. The Bluetooth connection is automatically
deactivated. The headset switches off.
To switch the Bluetooth function off:
왘 Press the Bluetooth button 쐄 and keep it pressed until the Star LED 햲
flashes 3 times red. You hear a descending beep.
The Bluetooth button 쐄 goes off. The Star LED 햲 flashes blue and the
Bluetooth function is switched off.
12
Page 15

Putting the MM 450 into operation
Connecting the audio cable
Connecting the audio cable
You can connect the headset to the audio source using the audio cable if
• you do not want to use the Bluetooth function,
• you are not allowed to use the Bluetooth function (some airlines do not
allow Bluetooth transmission)
or
• the battery pack is flat.
When the audio cable is connected to the headset, the
Bluetooth function cannot be switched on.
DE
EN
FR
1
1
씉
쐉
씈
If the headset is already connected to the audio source via the Bluetooth
interface, the Bluetooth connection is automatically disconnected when
you connect the audio cable. The Star LED 햲 flashes 3 times red and you
hear a descending beep.
왘 Connect the 2.5 mm jack plug of the audio cable to the socket 쐏 of the
headset.
왘 Connect the 3.5 mm jack plug of the audio cable 쐉 to
– the headphone socket of your audio source or
– the audio adapter for 6.35 mm jack socket 씈 if the 3.5 mm jack plug
of the audio cable is too small or
– the in-flight adapter 씉 if you want to use the headset with an
in-flight entertainment system.
When the audio cable is connected to your audio source, you hear the
sound from your audio source and the Star LED 햲 flashes blue.
Detaching the audio cable
If you want to use the headset only as a Bluetooth headset or as a passive
hearing protector, you can detach the audio cable 쐉.
왘 Pull the 2.5 mm jack plug of the audio cable 쐉 from the socket 쐏 of
the headset.
IT
ES
NL
When detaching the audio cable, the Bluetooth function is
not automatically switched on.
왘 Switch the Bluetooth function on again (see “Switching
the Bluetooth function on/off” on page 17).
13
Page 16

Putting the MM 450 into operation
Adjusting the headband
For optimum transmission quality, good noise attenuation and best
possible comfort, the headband has to be adjusted to properly fit your
head:
왘 Wear the headset so that the headband 쐃 runs over the top of your
head.
왘 Adjust the length of the headband so that
–the earpads쐂 rest comfortably against the ears,
– you feel even, gentle pressure around your ears,
– a snug fit of the headband 쐃 on the head is ensured.
왘 To ensure maximum noise attenuation, final adjustment is best made
in a noisy environment.
14
Page 17

Using the MM 450
5
Switching the headset on/off
Using the MM 450
1
CAUTION! Hearing damage due to high volumes!
Listening at high volume levels for long periods can lead to
permanent hearing defects. Please protect your hearing.
Sennheiser headsets also sound exceptionally good at low
volumes.
왘 Set the volume to a medium level.
Switching the headset on
왘 Press the Master button 햶 and keep it pressed until the Star LED 햲
flashes blue. You hear an ascending beep.
– When switching the headset on for the first time, it will automatically
go into pairing mode.
The headset is waiting to be paired with a Bluetooth enabled device
(see page 10).
– When the headset is already paired with an audio source, the
Bluetooth connection is automatically established. You hear an
ascending beep and then your audio source.
– When the headset is already paired with an audio source but the
audio source is switched off or out of range, the Star LED 햲 flashes
blue.
The headset will try for 3 minutes to connect to one of the 5 known
audio sources. If this fails, the headset automatically switches off.
DE
EN
FR
IT
ES
NL
1
5
Switching the headset off
왘 Press the Master button 햶 and keep it pressed until the Star LED 햲
flashes 3 times red.
You hear a descending beep. The Bluetooth connection is automatically
deactivated. The headset switches off.
15
Page 18

Using the MM 450
Adjusting the headset to the listening situation
The headset has a NoiseGard function, a Bluetooth function and a TalkThrough function. Depending on the listening situation, you can switch
these functions on or off.
Switching the NoiseGard function on/off
The NoiseGard button 쐋 is backlit, indicating the current
setting. The backlighting goes off after a short while in order
to conserve battery power.
왘 Press any button on the headset to display the current
setting of the NoiseGard active noise compensation.
The NoiseGard function has to be switched on to be active. If the NoiseGard
function is switched off, the MM 450 can also be used as a conventional
headset.
To switch the NoiseGard function on:
왘 Press the NoiseGard button 쐋 for 2 seconds.
2s
The button is backlit in red and the NoiseGard function is switched on.
To switch the NoiseGard function off:
왘 Press the NoiseGard button 쐋 for 2 seconds.
The red backlighting goes off and the NoiseGard function is
switched off.
Conserving the battery power
Switch the NoiseGard function off after use to conserve
battery power.
Switching the TalkThrough function on/off
The headset provides excellent attenuation of ambient noise. The TalkThrough function allows you to communicate undisturbed with other
people even when the NoiseGard function is switched on.
To switch the TalkThrough function on:
왘 Briefly press the NoiseGard button 쐋.
The Star LED 햲 lights up red. The TalkThrough function is switched on.
To switch the TalkThrough function off:
왘 Briefly press the NoiseGard button 쐋.
The Star LED 햲 goes off. The TalkThrough function is switched off.
16
Page 19

Using the MM 450
Switching the Bluetooth function on/off
Via the Bluetooth interface, the headset can be connected to a wide
variety of Bluetooth enabled devices.
To switch the Bluetooth function on:
왘 Press the Bluetooth button 쐄 and keep it pressed until the Star LED 햲
flashes 3 times blue. The Bluetooth function is switched on.
To switch the Bluetooth function off:
왘 Press the Bluetooth button 쐄 and keep it pressed until the Star LED 햲
flashes 3 times red. You hear a descending beep.
The Bluetooth button 쐄 goes off. The Star LED 햲 flashes blue and the
Bluetooth function is switched off.
Changing the volume
The MM 450 allows you to change the volume of the audio signal or the
volume of the TalkThrough function:
Button Duration Function Button Duration Function
Incrementally
increases the
volume
Continuously
1 s 1 s
If you press the respective button briefly, the volume is changed incrementally; if you hold down the button, the volume is changed continuously.
When the minimum or maximum volume is reached, you hear an acknowledgement tone.
increases the
volume
Incrementally
reduces the
volume
Continuously
reduces the
volume
DE
EN
FR
IT
ES
NL
17
Page 20

Using the MM 450
Remote-controlling connected devices from the headset
You can directly remote-control any device supporting the AVRCP profile
and connected to the MM 450 by using the buttons on the headset. Please
refer to the instruction manual of your audio source for information on
whether your device supports the AVRCP profile.
If your device does not support the AVRCP profile, you can use an optional
dongle. Using the iPod dongle or the USB dongle, you can remote-control
the connected devices from the headset.
Remote-controlling the audio source from the headset
If your headset has a Bluetooth connection to an audio source (e.g. iPod,
MP3 or CD player), you can use the MM 450 to remote-control the audio
source as follows:
Button Duration Function Button Duration Function
Incrementally
increases the
volume
Continuously
1 s 1 s
increases the
volume
Incrementally
reduces the
volume
Continuously
reduces the
volume
Skips to the
next track
Fast-forwards
1 s 1 s
the track
Plays and
repeats the
track
1 s
Skips to the
previous track
Rewinds the
track
Stops the track
(acknowledgement tone)
18
Page 21

Remote-controlling a mobile phone from the headset
Using the MM 450
1
If your headset has a Bluetooth connection to your mobile phone, the
Star LED 햲 on the headset flashes to indicate that the mobile phone is
ringing. The LED flashes 3 times blue. After a pause, the flashing is
repeated. You can also hear the ring tone of your mobile phone if your
mobile phone supports this function.
Switching the Bluetooth function off
If you press the Bluetooth button 쐄 too long, the Bluetooth
function switches off!
You can use the MM 450 to remote-control different functions of your
mobile phone.
If the mobile phones rings:
Button Duration Function
or Accepts the call
or Rejects the call
3s
or Ends the call
(acknowledgement tone)
DE
EN
FR
IT
ES
NL
If the mobile phone is switched on, does not ring and you do not make a
phone call:
Button Duration Function
Redials the last number (acknowledgement tone)
Activates voice dial (acknowledgement tone)
If you make a phone call:
Button Duration Function
Transfers the ongoing call back to the mobile phone
5s
Activates the muting function
3s
Any button Deactivates the muting function
(acknowledgement tone)
19
Page 22

Using the MM 450
5
Resetting the settings of the headset
You can reset the volume and connection settings of your headset to the
original settings. This allows you to prevent that other users of the
headset can access your Bluetooth enabled devices. You can then pair
5 new devices with the headset.
1
1
5
2s
왘 Press the Master button 햶 and keep it pressed until the Star LED 햲
flashes 3 times red. The headset switches off (see “Switching the
headset off” on page 15).
왘 Press the Master button 햶 and keep it pressed until the Star LED 햲
alternately flashes blue and red.
왘 Press the Bluetooth button 쐄 and keep it pressed until the settings of
5s
the headset are reset.
20
Page 23

Transporting the MM 450
Transporting the MM 450
For space-saving transportation, the headset can be folded up flatly and
compactly.
왘 Rotate the earcups by 90°.
왘 Tuck the earcups between the headband.
왘 Place the headset flat into the transport case.
Your accessories can be transported in the cover of the transport case:
– Audio adapter (6.35 mm jack plug)
– In-flight adapter (3.5 mm double mono jack)
DE
EN
FR
IT
ES
NL
21
Page 24

Cleaning the MM 450
Cleaning the MM 450
Cleaning the headset
CAUTION! Liquids can damage the electronics of the device!
Liquids entering the housing of the device can cause a shortcircuit and damage the electronics.
왘 Keep all liquids far away from the device.
왘 Do not use any cleansing agents or solvents.
For reasons of hygiene, you should clean the headset regularly:
왘 Before cleaning, make sure that the headset is not recharged via
the mains.
왘 Only use a soft, slightly damp cloth to clean the headset.
Replacing the earpads
You can replace the earpads. Spare earpads are available as accessories
(see “Accessories and spare parts” on page 24).
왘 Grasp the edge of the earpad 쐂 behind the earcup and peel it up and
away from the earcup.
왘 Slide the new earpad 쐂 onto the earcup.
쐂
22
Page 25

If a problem occurs ...
Problem Possible cause Solution
No operation
indicator –
headset cannot
be switched on
No audio signal
when the audio
cable is
connected
No audio signal
during Bluetooth
connection
Headset cannot
be paired
No audio signal
during NoiseGard operation
Headset does
not react to any
button press
Bluetooth
connection is
suddenly interrupted
The battery pack is flat. Recharge the battery pack
(page 8).
The jack plug of the
audio cable is not
properly connected.
The headset is switched
off.
The headset is not
paired with an audio
source.
The Bluetooth function
on the headset is
switched off.
The audio cable is
connected to the
headset.
The volume is adjusted
too low.
The pairing does not
work.
The audio source is
switched off.
The headset is switched
off.
The TalkThrough
function is switched on.
When in TalkThrough
mode, the audio signal
is not available.
The operation of the
headset is faulty.
The Bluetooth button
has been pressed too
long.
Check the connection to your
audio source (page 13).
Switch the headset on (page 15).
Check if the headset is paired.
If necessary, pair the headset with
the audio source again (page 10).
Switch the Bluetooth function on
the headset on (page 17).
The connection of the audio cable
automatically switches off the
Bluetooth connection. Remove the
audio cable and then switch the
Bluetooth function on again
(page 13).
Increase the volume (page 17).
Check if the audio source supports
the A2DP profile/the HSP/HFP
profile. If not, use one of the
optional dongles.
Switch the audio source on
(page 10).
Switch the headset on (page 15).
Switch the TalkThrough function
off (page 16).
Remove the battery pack
from the headset. Reinsert the
battery pack into the headset.
Switch the headset on again.
Switch the Bluetooth function on
(page 17).
If a problem occurs ...
DE
EN
FR
IT
ES
NL
23
Page 26

Accessories and spare parts
Accessories and spare parts
The following MM 450 accessories are available from your specialist
dealer:
Cat. No. Accessory/spare part
531404 Earpads, 1 pair
531405 Headband padding, 1 pair
521829 PSC 03R-050 mains unit with 4 country adapters
(EU/UK/US/AU)
531406 Audio cable
(2.5 mm jack plug to 3.5 mm jack plug)
525731 In-flight adapter
3.5 mm double mono jack plug
531407 USB cable
(microUSB to USB)
530695 BA 370 PX battery pack
502388 BTD 300 Audio
502390 BTD 300 USB
502389 BTD 300 i
24
Page 27

Specifications
Specifications
Transducer principle dynamic, closed
Ear coupling supra-aural
Frequency response 15–22,000 Hz
Nominal impedance
active/passive 590/100 Ω
Sound pressure level at
1 kHz and 1 Volt 107 dB SPL
THD at 1 kHz < 0.1%
Audio connector 3.5 mm stereo jack plug
Audio adapter 6.35 mm stereo jack plug
In-flight adapter 3.5 mm double mono jack plug
Cable length
Audio cable
Charging cable
Weight 105 g
BA 370 PX battery pack
Charging time
Operating time
Operating temperature range 0°C to +40°C
Storage temperature range –10°C to +70°C
Passive noise attenuation 25 dB
NoiseGard
active noise compensation 23 dB
1.4 m
0.8 m
3.7 V; 250 mAh Lithium-Polymer
3 hrs
8 hrs/12 hrs/20 hrs
DE
EN
FR
IT
ES
NL
PSC 03R-050 mains unit
Nominal input voltage 110–240 V~
Nominal input current max. 0.2 A
Mains frequency 50–60 Hz
Nominal output voltage 5 V
Nominal output current max. 0.5 A
Operating temperature range 0°C to +45°C
Storage temperature range −40°C to +85°C
Relative humidity 20 to 90% RH
Weight approx. 61 g
Bluetooth
Bluetooth
Range up to 10 m
Transmission frequency 2.4 GHz
Protocoles HSP, HPF, A2DP, AVRCP
Codec SBC
®
version 2.1 + EDR
25
Page 28

Manufacturer Declarations
Manufacturer Declarations
Warranty
Sennheiser Communications A/S gives a warranty of 24 months on this
product. For the current warranty conditions, please visit our web site at
www.sennheiser.com or contact your Sennheiser partner.
CE Declaration of Conformity
These devices comply with the basic requirements and other relevant
provisions of the following directives:
• R&TTE Directive (1999/5/EU)
• EMC Directive (2004/108/EU)
• Low Voltage Directive (2006/95/EU)
• RoHS Directive (2002/95/EU)
• WEEE Directive (2002/96/EU)
• Battery Directive (2006/66/EU)
The declaration is available on the internet at www.sennheiser.com. Before
putting the devices into operation, please observe the respective countryspecific regulations!
Statements regarding FCC and industry Canada
FC C Declara tion of C onformity (DoC)
SENNHEISER
Model No: MM 450
We,
Sennheiser Electronic Corporation
Strat. Marketing • Stefanie Reichert
One Enterprise Drive • Old Lyme •
CT 06371 • USA
Tel: + 1 (860) 434 9190, ext . 144
Fax : + 1 (860) 434 1759
declare the above device comply with t he requirements of Federal Communic ations Commis sion.
This device compli es with Part 15 of the FCC rules . Operation is s ubjected to t he following two c onditions :
1) This device may not cause harm ful interference, and
2) This device must accept any interference received, inc luding int erference that m ay c ause undesi red operation.
Responsible Party : John Falc one
This device complies with Part 15 of the FCC Rules and with RSS-210 of
Industry Canada. Operation is subject to the following two conditions:
(1) this device may not cause harmful interference, and (2) this device
must accept any interference received, including interference that may
cause undesired operation.
26
Page 29

Manufacturer Declarations
This equipment has been tested and found to comply with the limits for a
Class B digital device, pursuant to Part 15 of the FCC Rules. These limits are
designed to provide reasonable protection against harmful interference in
a residential installation. This equipment generates, uses and can radiate
radio frequency energy and, if not installed and used in accordance with
the instructions, may cause harmful interference to radio communications.
However, there is no guarantee that interference will not occur in a
particular installation. If this equipment does cause harmful interference
to radio or television reception, which can be determined by turning the
equipment off and on, the user is encouraged to try to correct the interference by one or more of the following measures:
• Reorient or relocate the receiving antenna.
• Increase the separation between the equipment and receiver.
• Connect the equipment into an outlet on a circuit different from that to
which the receiver is connected.
• Consult the dealer or an experienced radio/TV technician for help.
DE
EN
FR
This class B digital apparatus complies with the Canadian ICES-003.
Changes or modifications made to this equipment not expressly approved
by Sennheiser electronic Corp. may void the FCC authorization to operate
this equipment.
In compliance with:
USA FCC ID: DMOCBSSAB
Canada IC: 2099D – MMBTX
Europe
Trademarks
Sennheiser and NoiseGard
TM
are registered trademarks of Sennheiser
electronic GmbH & Co. KG.
The Bluetooth
®
word mark and logo are registered trademarks and are
owned by the Bluetooth SIG, Inc.
®
iPod
and iPhone® are registered trademarks of Apple Computer, Inc.
IT
ES
NL
27
Page 30

Sennheiser Communications A/S
6 Langager
2680 Solrød Strand
Denmark
Phone: +45 5618 0000
Fax: +45 5618 0099 Publ. 01/09
www.sennheisercommunications.com 532818/A02
 Loading...