

Page 1
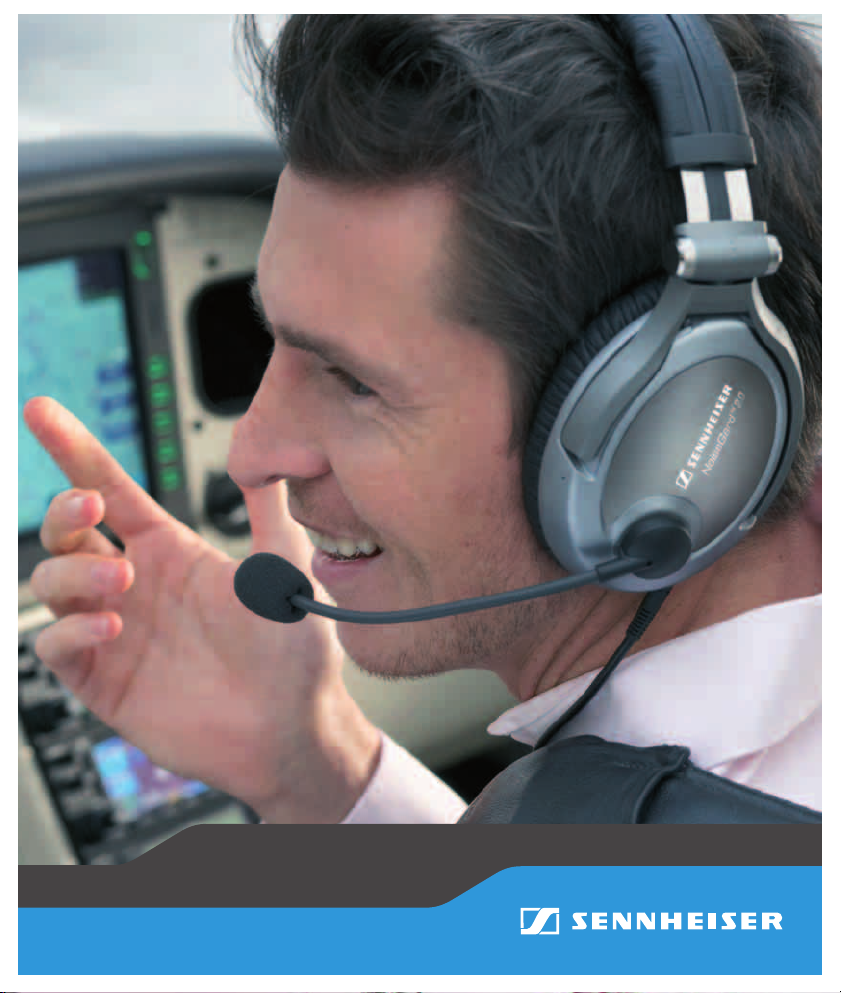
HMEC 250
Headset for
general aviation
Instruction manual
Page 2

Contents
Important safety instructions ...................................................2
Delivery includes ..........................................................................4
The HMEC 250 headset ...............................................................5
Operating elements .....................................................................7
Putting the headset into operation .........................................8
Inserting the batteries .......................................................... 8
Connecting the headset ........................................................ 8
Connecting a mobile telephone .......................................... 9
Connecting an additional audio player ........................... 10
Adjusting the microphone sensitivity ............................ 11
Switching between mono and stereo mode .................. 11
Using the headset .................................................................... 12
Attaching the cable clip ..................................................... 12
Adjusting the headset ....................................................... 12
Adjusting the microphone boom ..................................... 13
Adjusting the volume ........................................................ 13
Switching the TalkThrough function on/off .................. 14
Adjusting the volume of the TalkThrough function .... 14
Switching NoiseGard on/off ............................................. 15
Replacing the batteries ..................................................... 16
Folding up the headset ............................................................ 17
Care and maintenance ............................................................. 18
Replacing the ear pads ...................................................... 18
Replacing the wind shield ................................................. 19
Specifications ............................................................................ 20
Manufacturer declarations ..................................................... 22
1
Page 3

Important safety instructions
• Please read this instruction manual carefully and
completely before using the headset.
• Make these this instruction manual easily accessible to all
users at all times.
Always include this instruction manual when passing the
headset on to third parties.
• During flight operation, do not use the headset for
telephone calls.
• With the NoiseGard active noise compensation switched
on, typical aircraft sounds (for example, those from
engines, propellers, warning alarms, etc.) may sound
different to you. Before operating any aircraft, make sure
that, with NoiseGard switched on, you can hear and
recognize these sounds. Set the volume to safe levels that
do not interfere with your ability to hear critical sounds,
especially warning alarms and sounds resulting from
malfunction.
• The headset is capable of producing sound pressure levels
exceeding 85
maximum legally permissible level for continuous noise
exposure during the working day. Exposure to sounds of
higher volume levels or for longer durations can
permanently damage your hearing.
• Never repair or attempt to repair a defective headset
yourself. Contact your Sennheiser partner or the
Sennheiser Service Department.
• Only replace those parts of the headset whose
replacement is described in this instruction manual. All
other parts of the headset must be replaced by your
Sennheiser partner.
• Protect the headset from wetness. Use only a slightly
damp cloth to clean the headset. For information on how
to clean the headset, contact your Sennheiser partner.
dB(A). In many countries 85 dB(A) is the
2
Page 4
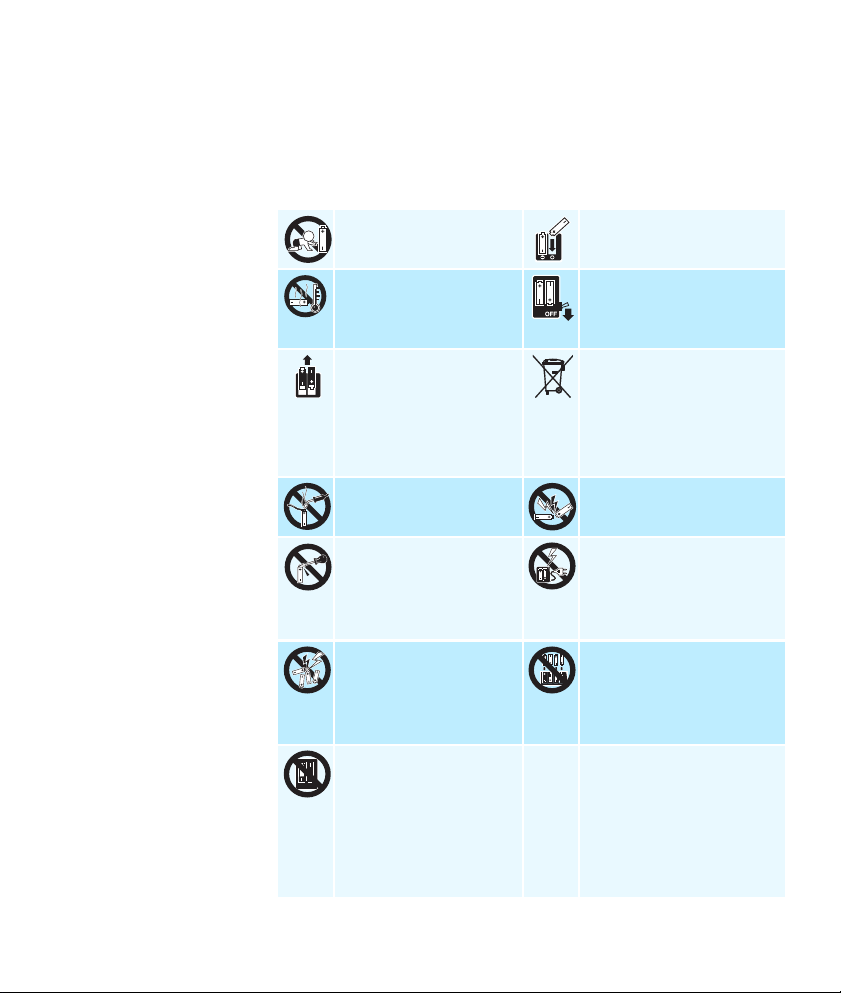
Safety instructions for batteries
If abused or misused, batteries may leak and, in extreme
cases, may even present an explosion and fire hazard.
Sennheiser does not accept any liability for damage arising
from abuse or misuse.
Keep batteries out of
reach of children.
Do not heat or
throw into fire.
Remove batteries
when the device
is not used for
extended periods
of time.
Do not solder. Do not short-circuit.
Do not mutilate or
dismantle.
Do not pack charged
batteries loose –
danger of shorting
out – fire hazard.
Do not mix old or
used batteries with
new ones. Do not
mix batteries of
different types
or brands.
Observe correct
polarity.
Switch off battery
powered devices when
not in use.
Dispose of exhausted
batteries at special
collection points or
return them to your
specialist dealer.
Do not attempt
to recharge
non-rechargeable
batteries.
Always remove flat or
exhausted batteries
from the device
immediately.
3
Page 5

Intended use of the headset
Intended use includes:
• having read this instruction manual, especially the
chapter
• using the headset within the operating conditions and
limitations described in this instruction manual.
“Improper use” means using the headset other than as
described in this instruction manual, or under operating
conditions which differ from those described herein.
“Important safety instructions” on page 2,
Delivery includes
Delivery of the HMEC 250 headset includes:
1 HMEC 250 headset
1soft case
1 HZC 08 cable clip
2 Wind and pop shields for MZW 46
1 audio-in cable for mobile telephones, length 0.6 m,
with two 2.5 mm jack plugs
1 audio-in cable for additional audio players, length 0.6 m,
with two 3.5 mm jack plugs
2 AAA size batteries
1 instruction manual
4
Page 6

The HMEC 250 headset
The HMEC 250 headset with NoiseGard 2.0 active noise
compensation features closed, dynamic, circumaural stereo
headphones. The HMEC 250 is a headset for general aviation
use.
NoiseGard 2.0
The NoiseGard 2.0 active noise compensation system is
based on the principle of cancelling out sound using “antisound” (phase-inverted sound). Tiny microphones pick up
low-frequency ambient noise (up to 1 kHz) near the ear. The
NoiseGard 2.0 electronics use this noise to generate a sound
wave which is the exact opposite (i.e.: at the same level but
polarity reversed – 180° out-of-phase), the result is that the
polarity reversed signal cancels most of the outside noise.
Fail safe operation
When the batteries are completely discharged, NoiseGard
automatically switches off. RT traffic (e.g. ATC) and
intercom will still be heard through the headphones.
Peak level protection
The peak level protection safeguards your ears from volume
peaks above 110 dB.
TalkThrough function (TT)
The TalkThrough function allows you to communicate with
the people around you while wearing the headset. The
NoiseGard active noise compensation and the peak level
protection remain unaffected by the TalkThrough function
and help to protect your hearing.
TM
5
Page 7

Additional features
• Outstanding transmission quality for clear communications
• Good passive attenuation of ambient noise
• Foldable design for space-saving storage and transportation
• Noise-compensating boom microphone ensures excellent
speech transmission
• Flexible microphone boom
• Separate left and right channel volume control
•Excellent comfort resulting from soft ear pads and headband padding
• Audio-input facility for external audio sources, such as
mobile phones, MP3 players
6
Page 8
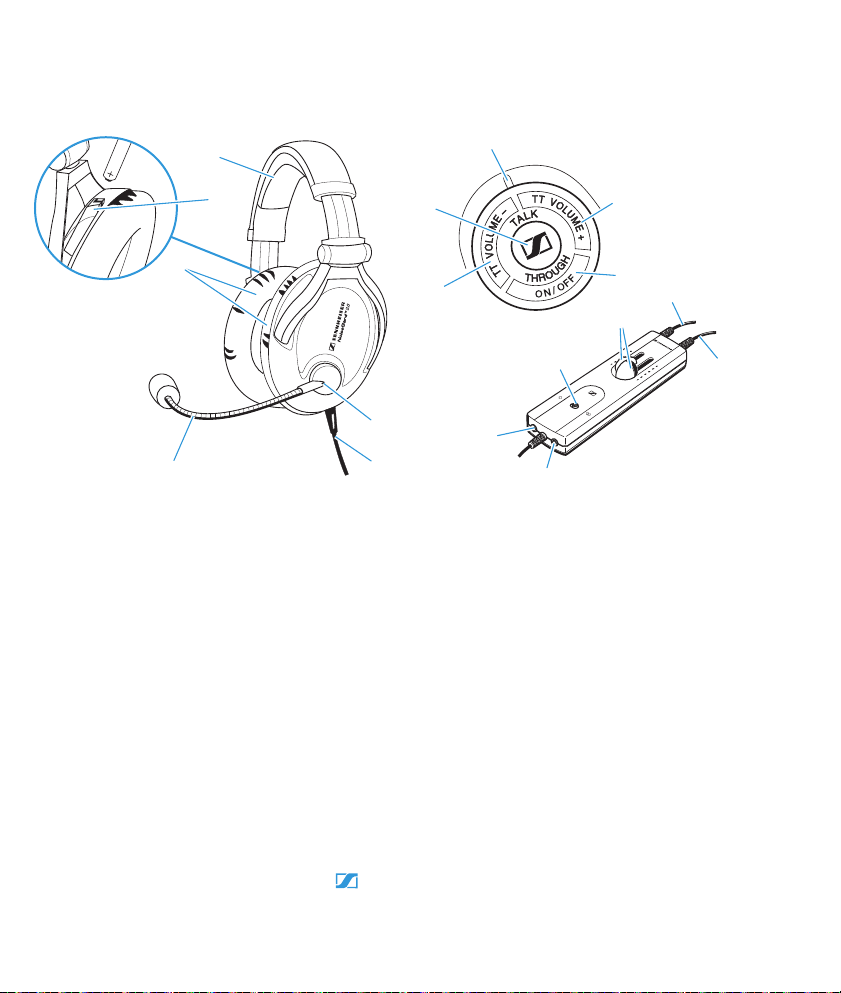
Operating elements
쐋
Headset
Microphone sensitivity control
Headset cable
Microphone boom
Ear pads, ergonomic
Headband
Battery compartment (on both sides)
Operating control integrated
in the headset
TT VOLUME + button (Talk Through)
ON/OFF button (NoiseGard)
TT VOLUME – button (Talk Through)
TALK THROUGH button (on/off)
LED (status display)
햴
Operating control integrated in the cable
Cable with microphone plug,
Cable with headphone plug,
3.5 mm jack socket for connecting an
2.5 mm jack socket for connecting a
Mono/stereo switch
Separate left and right channel
5.25 mm jack plug
¼” (6.35 mm) jack plug
additional audio player (3-pin)
mobile telephone (3-pin)
slide volume controls
7
Page 9

LED indications
Meanings of the LED :
LED Meaning
red NoiseGard is switched on
green TalkThrough is switched on
flashing Batteries are almost flat
Putting the headset into operation
Inserting the batteries
Insert the batteries into the battery compartments on the
left and right ear cups as follows:
왘 Open the battery compartment by pushing the catch
and open the cover.
왘 Insert the AAA size battery as shown.
왘 Close the battery compartment . The battery compart-
ment cover locks into place with an audible click.
Connecting the headset
The headset’s operating control features two cables with
one jack plug each.
왘 Connect the headset to the corresponding sockets of your
intercom.
8
Connector for connection to the
¼” (6.35 mm) jack plug headphone output
5.25 mm jack plug microphone input
Page 10

Connecting a mobile telephone
The 2.5 mm jack socket allows you to connect a mobile
telephone. For this purpose, the NoiseGard active noise
compensation must be switched on and the microphone
connector
A
suitable adapter for your mobile telephone with 2.5 mm
jack socket is available from your specialist dealer.
왘 Connect the audio cable to the 2.5 mm jack socket (3-pin)
socket on your mobile telephone (4-pin).
You can adjust the volume of the mobile telephone via
the headset’s operating control. However, the functions
of the mobile telephone cannot be controlled via the
headset’s operating control.
왘 Switch NoiseGard on (see “Switching NoiseGard on/off”
on page 15).
Audio from the mobile telephone and from the intercom
are heard simultaneously through the headset.
왘 Operate your mobile telephone as usual and observe the
manufacturers instructions.
must be connected to the aircraft intercom.
DANGER! Danger of accident due to reduced
attention!
Making telephone calls or operating the
mobile telephone limits your attention and
may cause accidents.
왘 During flight operation, do not use the
headset for telephone calls!
For the latest list of compatible mobile telephones,
please refer to the „Professional Audio“ >
„Aviation Headsets“ section on our website at
www.sennheiser.com.
on the operating control and to the corresponding jack
9
Page 11

Connecting an additional audio player
The 3.5 mm jack socket allows you to connect an
additional audio player (e.g. MP3 player)
DANGER! Danger of accident due to reduced
attention!
Listening to music or operating an audio
player limits your attention and may cause
accidents.
왘 During flight operation, do not use the
headset for listening to additional audio
sources!
Hearing damage due to high volumes!
This headset is capable of producing high
sound pressure levels. Higher volumes or
longer durations can damage your hearing!
왘 Set the volume to a medium level. Make
sure that you can hear critical
environmental sounds and warning
alarms!
왘 Connect the audio cable to the 3.5 mm jack socket
on the operating control and to the corresponding jack
socket on your audio player.
.
10
왘 Switch NoiseGard on (see “Switching NoiseGard on/off”
on page 15).
Audio from the additional audio source and from the
intercom are heard simultaneously through the headset.
왘 Operate the connected audio player as usual and observe
the manufacturers instructions.
Page 12

Adjusting the microphone sensitivity
The microphone sensitivity has been factory preset to
80
mV/Pa.
To change the input sensitivity of the microphone:
왘 Use a suitable slotted screwdriver.
왘 Turn the microphone sensitivity control as shown.
Switching between mono and stereo mode
The mono/stereo switch allows you to switch between
mono and stereo mode, depending on the intercom system.
Set the mono/stereo switch to the desired position:
– mono
– stereo
11
Page 13

Using the headset
Attaching the cable clip
The cable clip allows you to attach the headset cable to
your clothing so that the cable doesn’t hinder or distract
you.
Guide the headset cable through the cable clip as
shown.
Attach the cable clip to your clothing.
Adjusting the headset
Wear the headset so that
– the microphone boom is on the left side of the
mouth (see right/left labeling on the headband joints)
and
– the headband runs over the top of your head.
Adjust the length of the headband so that
– your ears are completely inside the ear pads ,
– you feel even, gentle pressure around your ears,
– a snug fit of the headband on the head is ensured.
In this way, optimum transmission quality, good noise
attenuation and best possible comfort is ensured.
To ensure sufficient noise attenuation, final adjustment is
best made in a noisy environment.
쐋
12
Page 14

Adjusting the microphone boom
쐋
Bend the microphone boom so that the microphone is
placed at the corner of the mouth. Maintain a distance of
approx. 2 cm between microphone and mouth.
Adjusting the volume
CAUTION! Hearing damage due to high volume
levels!
The headset is capable of producing high
sound pressure levels. Higher volumes or
longer durations can damage your hearing!
Adjust the volume to a medium level.
Make sure that you can hear critical
environmental sounds and warning
alarms.
You can adjust the volume directly on the intercom or via
the operating control integrated into the headset cable.
To adjust the volume for the left or right channel:
Slide one of the two volume controls
– upwards to increase the volume or
– downwards to reduce the volume.
13
Page 15

Switching the TalkThrough function on/off
햴
The HMEC 250 provides excellent attenuation of ambient
noise. In order to allow you to communicate undisturbed
with the people around you while wearing the headset,
the
HMEC 250 features a TalkThrough function.
Press the TALK THROUGH button to switch the
TalkThrough function on or off.
When the TalkThrough function is switched on, the LED
lights up green.
Adjusting the volume of the TalkThrough function
To increase the volume of the TalkThrough function:
Press the TT VOLUME + button .
To reduce the volume of the TalkThrough function:
Press the TT VOLUME – button .
If you change the volume with the TalkThrough
function switched on, the new volume setting is
saved and will be used as the default the next time
the TalkThrough function is activated.
14
Page 16

Switching NoiseGard on/off
To switch the NoiseGard active noise compensation on or off:
Press the ON/OFF button for approx. one second.
When NoiseGard is switched on:
–the LED lights up red and
– you can listen to music and make telephone calls at the
same time.
Fail safe operation When the batteries are completely discharged, NoiseGard
automatically switches off. RT traffic (e.g. ATC) and
intercom will still be heard through the headphones.
15
Page 17

Replacing the batteries
When the batteries are almost flat, the LED flashes. When
the batteries are completely discharged, NoiseGard
automatically switches off (fail safe operation). Replace the
batteries or the rechargeable batteries as follows:
Always replace the two batteries at the same time.
Open the battery compartment by pushing the catch
and open the cover.
Remove the battery.
Insert a new AAA size battery as shown.
Close the battery compartment . The battery
compartment cover locks into place with an audible click.
Remove the batteries from the battery
compartments if the headset will not be used for
extended periods of time.
16
Page 18

Folding up the headset
For space-saving transportation, the headset can be folded
up in different ways:
To fold up the headphones as flat as possible:
Rotate the ear cups by 90° and turn the microphone
boom flat as shown.
To fold up the headphones as compact as possible:
Fold the ear cups in as shown.
For safe transportation of the headset, use the supplied soft
case and fold the headset as follows:
Rotate the ear cups by 90°.
Turn the microphone boom flat as shown.
Pull out the right ear cup and then fold it in.
Place the headset flat into the soft case as shown.
The two AAA size batteries can be inserted into the two
straps at the side of the soft case.
The accessories can be transported in the cover of the soft
case:
– audio cable (two 3.5 mm jack plugs)
– audio cable (two 2.5 mm jack plugs)
–wind and pop shields
17
Page 19

Care and maintenance
CAUTION! Liquids can damage the electronics of the
headset!
Liquids entering the housing of the
headset can cause a short-circuit and
damage the electronics.
Only use a soft, slightly damp cloth to
clean the headset. Do not use any
solvents or cleansing agents.
Use a soft, slightly damp cloth to clean the headset from
time to time.
Replacing the ear pads
You can replace the ear pads. Spare ear pads are available as
accessories.
Accessories are available from your Sennheiser
partner. A list of suitable accessories can be found
on our website at
www.sennheiser.com > „Service & Support“.
18
Grasp the edge of the ear pad and peel it up and away
from the ear cup.
When removing the ear pads, it might be that a
black plastic ring remains on the ear cup. Remove
this ring before attaching the new ear pads.
Page 20

Attach the ear pad so that the side with the thicker
padding points downwards as shown.
Press the new ear pad onto the ear cup until it clicks
audibly into place. Repeat for the other ear cup.
Replacing the wind shield
You can replace the wind shield. The HMEC 250 is supplied
with a spare wind shield.
Carefully pull the wind shield from the microphone.
Slide-on the new wind shield and ensure that it fits
securely over the microphone.
19
Page 21

Specifications
General data
Weight without cable and
without batteries
Temperature range
(operation)
Temperature range
(storage)
Power supply for
NoiseGard
Operating time approx. 30 hours
Cable length 1.85 m
Headphone connector ¼” (6.35 mm) jack plug
Microphone connector 5.25 mm jack plug
Additional features • NoiseGard on/off
Headphones
Transducer principle dynamic, closed
Ear coupling circumaural
approx. 285 g
−10 to +55°C
−55 to +55°C
2 x 1.5 V AAA size battery or
2 x 1.2 V AAA size rechargeable battery
•TalkThrough on/off
• TalkThrough volume +/–
• mono/stereo switch
•line input
• mobile telephone input
• peak level protection
• fail safe operation
20
Page 22

Frequency response
(headphones)
Frequency response
(TalkThrough)
Nominal impedance passive 150 Ω mono/300 Ω stereo
Nominal impedance active 600 Ω mono/1.200 Ω stereo
Sound pressure level passive 98 dB at 1 kHz, 1 V
THD at 94 dB SPL < 1 %
Noise attenuation 13–34 dB passive attenuation, plus 16–25 dB active noise
Contact pressure approx. 8 N
Microphone incl. preamplifier
Type BKE 46
Transducer principle pre-polarized condenser microphone, noise-compensating
Frequency response 350–6,000 Hz
Output voltage 80 mV/Pa (factory preset) =
Terminating impedance 150–2,200 Ω
Supply voltage 8–16 V
8–28,000 Hz
300–5,000 Hz
active 100 dB at 1 kHz, 1 V
compensation at low frequencies
800 mV at 114 dB SPL –2 dB
(adjustable from 17–100 mV/Pa)
Connector assignment
¼” (6.35 mm) jack plug 5.25 mm jack plug
1 Audio Hi left
2 Audio Hi right
3 Audio Lo
1 not assigned
2 Microphone Hi
3 Microphone Lo
21
Page 23

Manufacturer declarations
Sennheiser and NoiseGardTM are registered trademarks of
Sennheiser electronic GmbH & Co. KG.
Warranty
Sennheiser electronic GmbH & Co. KG gives a warranty of
36
months on this product.
For the current warranty conditions, please visit our website
at www.sennheiser.com or contact your Sennheiser partner.
CE Declaration of Conformity
This equipment is in compliance with the essential
requirements and other relevant provisions of Directive
2004/108/EC.
The declaration is available at www.sennheiser.com.
Before putting the device into operation, please observe the
respective country-specific regulations!
Batteries
The supplied batteries can be recycled. Please dispose of
them as special waste or return them to your specialist
dealer. In order to protect the environment, only dispose of
exhausted batteries.
WEEE Declaration
Please dispose of this product by taking it to your local
collection point or recycling centre for such equipment.
22
Page 24

Sennheiser electronic GmbH & Co. KG
Am Labor 1, 30900 Wedemark, Germany
www.sennheiser.com
Printed in China, Publ. 05/10, 516578/A04
 Loading...