

Page 1
HME 43-3
HME 43-3S
Instruction manual
Page 2

Safety instructions
y Please read this instruction manual carefully and
completely before using the headset.
y Make this instruction manual easily accessible to all
users at all times.
y Always include this instruction manual when passing
the headset on to third parties.
y The headset is capable of producing sound pressure
levels exceeding 85 dB(A). In many countries 85 dB(A)
is the maximum legally permissible level for continuous
noise exposure during the working day. Exposure to
sounds of higher volume levels or for longer durations
can permanently damage your hearing!
y Never repair or attempt to repair a defective headset
yourself. Contact your Sennheiser agent or the
Sennheiser Service Department.
y Only replace those parts of the headset whose
replacement is described in this manual. All other parts
of the headset must be replaced by your Sennheiser
agent.
y Protect the headset from wetness. Use only a slightly
damp cloth to clean the headset. For information on
how to clean the headset, contact your Sennheiser
agent.
1
Page 3

Intended use of the headset
Intended use includes:
y having read this instruction manual especially the
chapter “Safety instructions”.
y using the headset within the operating conditions as
described in this instruction manual.
Improper use means using the headset other than as
described in this instruction manual, or under operating
conditions which differ from those described herein.
2
Page 4

The HME 43-3/HME 43-3S headset
The HME 43-3/HME 46-3S headset features dynamic
headphones. The noise-compensating microphone
ensures excellent speech transmission even in noisy
environments. Designed for air traffic control and other
communication purposes.
Features:
y Extremely lightweight
y Extremely comfortable to wear due to the patented
two-piece automatic headband and soft earpads
y ActiveGard™ safeguards you from the effects of an
acoustic burst
y Flexible microphone boom, can be worn on either left or
right-hand side
y Noise-compensating microphone ensures excellent
speech transmission
Delivery includes
1 HME 43-3/HME 43-3S headset
1 cable clip
1 carry bag
2 foam earpads HME 43
1 foam earpad HME 43
-3
-3S
1 wind and pop screen
1 instruction manual
3
Page 5
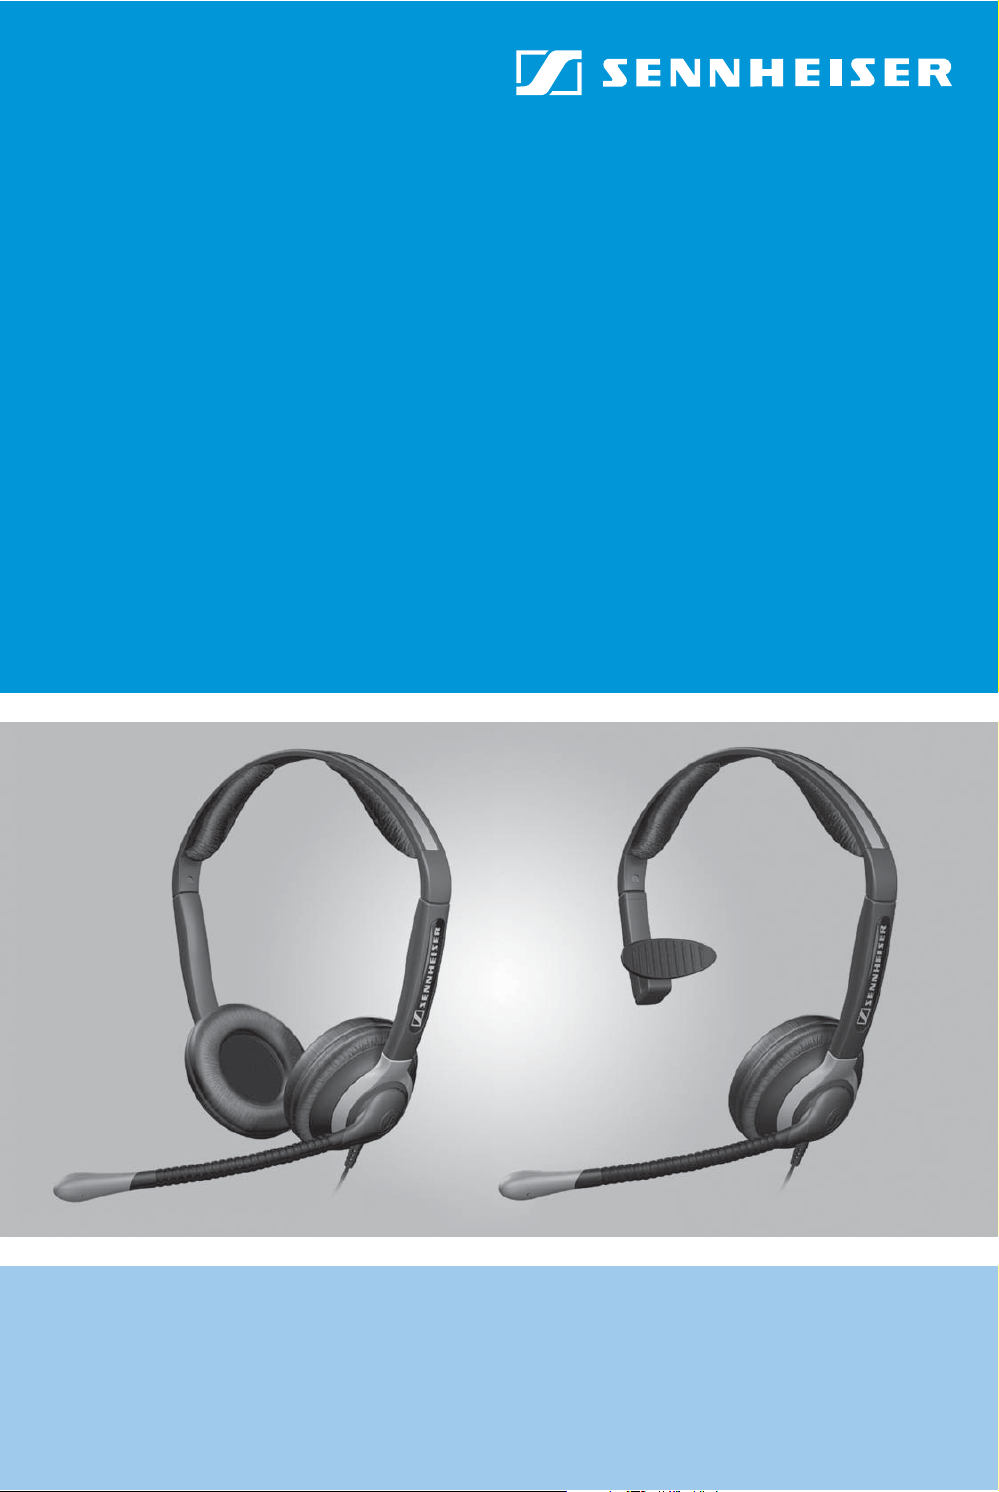
Operation
Wearing the headset
왘 Adjust the length of the headband to fit your head
size or shape.
Note:
The earpads should exert a slight pressure on the ears.
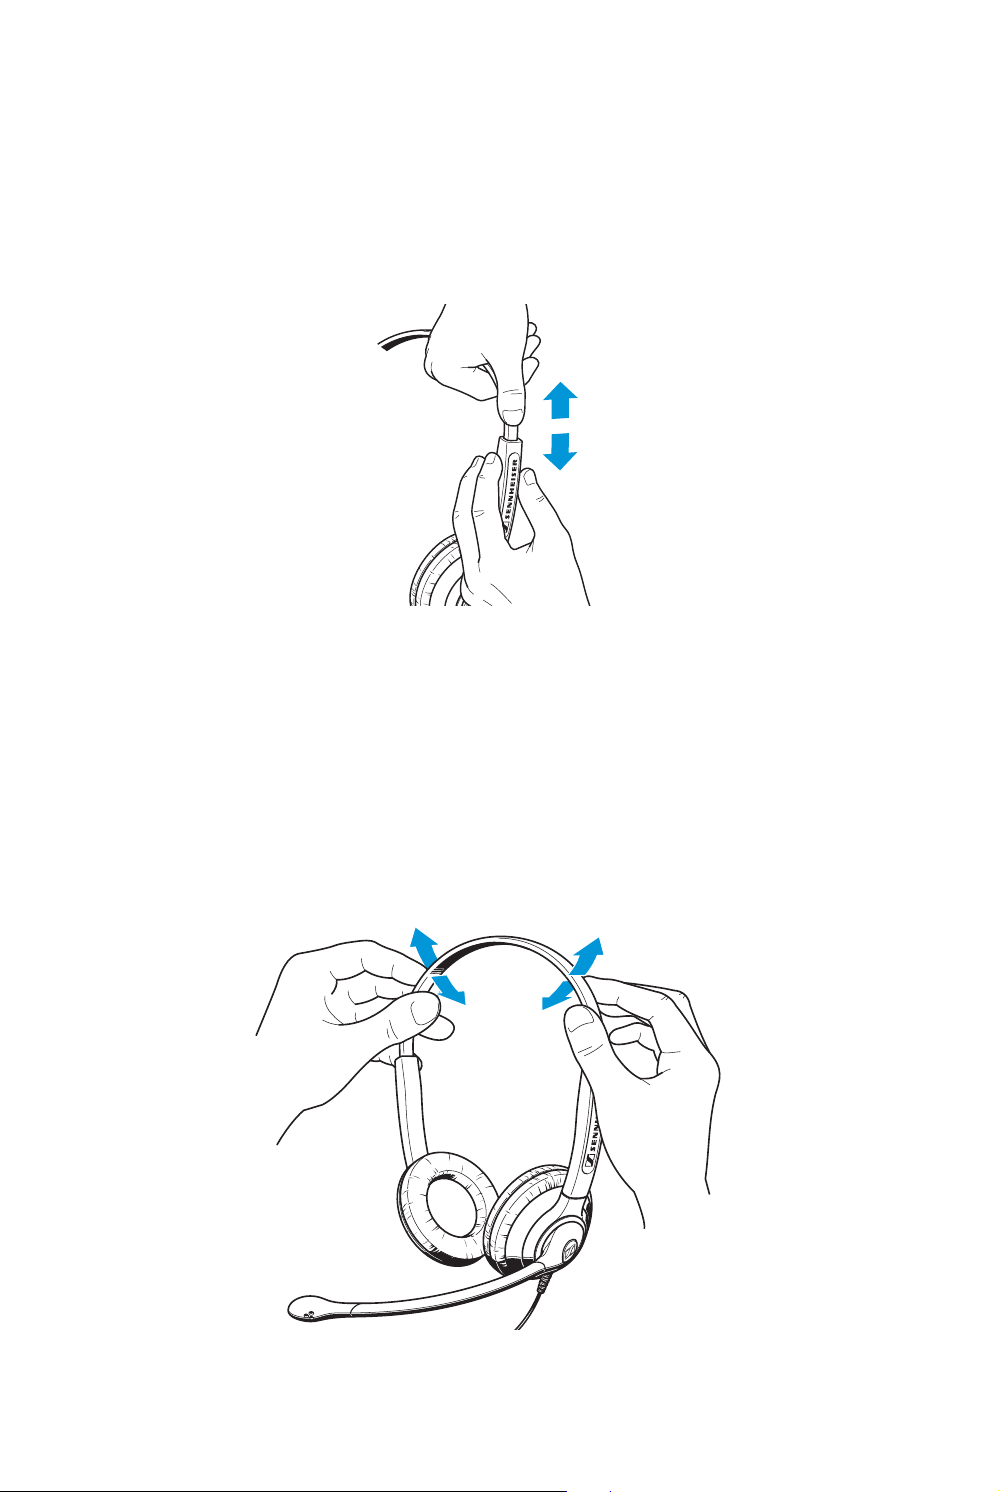
왘 Holding the headset with two hands, carefully bend
the headband to adjust it to a snug but comfortable
fit.
4
Page 6

Turning the microphone boom
The microphone boom can be rotated. This allows the
headset to be worn with the microphone boom
positioned on either the left or right-hand side of the
head.
Positioning the microphone
왘 Bend the flexible microphone boom so that the micro-
phone is placed at the corner of the mouth.
Note:
Maintain a distance of approx. 2 cm between
microphone and mouth.
5
Page 7

Replacing the wind screen
If the wind screen shows signs of wear such as tears or
holes, replace the wind screen.
왘 Pull the wind screen from the microphone.
왘 Gently slide-on the new wind screen.
Notes:
y In order to avoid pop noise, always use the
microphone with the supplied wind and pop screen!
y Ensure that the wind screen fits securely over the
microphone.
6
Page 8

Adjusting the volume directly on the audio system
CAUTION!
왘 Connect the headset to the corresponding sockets of
your audio system. Adjust the volume directly on the
audio system.
Hearing damage due to high volumes!
This headset is capable of producing high
sound pressure levels. Higher volumes or
longer durations can damage your hearing!
왘 Set the volume to a medium level. Make
sure that you can hear critical sounds such
as warning alarms.
Adjusting the microphone sensitivity
The microphone sensitivity has been factory pre-set to
300 mV/Pa.
왘 Remove the sticker as shown in the diagram.
왘 Change the microphone sensitivity by turning a
screwdriver in the direction of the arrow.
7
Page 9

Storage and transportation
왘 Turn the microphone into the position shown in the
diagram. Rotate the earcups by 90°.
왘 Use the supplied carrying bag for storage and
transportation.
8
Page 10

Care and maintenance
CAUTION!
Cleaning the headset
Use a soft, slightly damp cloth to clean the headset from
time to time. If the headset is very dirty, use a cloth
dampened with mild, soapy water.
Danger of short-circuit due to the ingress of
water!
Water entering the housing of the headset
can cause a short-circuit and damage the
electronics.
왘 Use only a slightly damp cloth to clean the
headset. Do not use any solvents or
cleansing agents.
9
Page 11

Replacing the earpads
CAUTION!
For reasons of hygiene, the earpads should be replaced
from time to time.
If you pull too sharply, or jerk them, you
may damage the new earpads.
왘 Grasp the edge of the foam earpad behind the earcup
as shown and peel it up and away from the earcup.
Slide the new earpad onto the earcup. Repeat for the
other earcup.
Cable assignment
Headset connector
10
Screen
red: Microphone+
white: Microphone–
green: Headphones–
black: Headphones+
Page 12

Product variants
Variant
(Cat. No.)
HME 43-3
502148
HME 43-3S
502593
Description Single-sided round
cable
Headset with
condenser mic
Single-sided
headset with
condenser mic
with open ends,
length 1.90 m
with open ends,
length 1.90 m
Accessories
Cable clip Cat. No. 091551
Leatherette earpads Cat. No. 091532
Foam earpads Cat. No. 091529
Wind screen Cat. No. 091540
Carry bag Cat. No. 517619
Headband padding (1 pair) Cat. No. 529726
Temple support
(HME 43-3S only)
Cat. No. 532729
11
Page 13

Specifications
General data
Model HME 43-3 HME 43-3S
Connection cable single-sided round cable,
length 1.90 m
Weight without cable approx. 95 g
Operating temperature –5 °C to +45 °C
Storage temperature –55 °C to +70 °C
Headphones
Transducer principle dynamic
Frequency response 100 Hz to 6,000 Hz
Sound pressure level
at 1 kHz/1 mW 94 dB SPL 103 dB SPL
at 1 kHz/1 V 102 dB SPL 107 dB SPL
Max. SPL
(ActiveGard™)
at 1 kHz 116 dB SPL 110 dB SPL
Ear coupling supra-aural, closed
THD
at 1 kHz < 1% at
105 dB SPL
Contact pressure approx. 1.5 N
< 1% at
102 dB SPL
Nominal impedance 150 :mono 300 :mono
Size of earcups
12
51 mm
Page 14

Microphone
Model BKE 43
Transducer principle pre-polarized condenser,
noise compensating
Frequency response 400 Hz to 4,500 Hz
Output voltage 300 mV/Pa at a distance of
approx. 2 cm (1") between
microphone and mouth
(factory pre-set);
adjustable from
40 to 500 mV/Pa
Supply voltage 8 to 16 V DC
Terminating
impedance
150 to 2,200 :
13
Page 15

Sennheiser electronic GmbH & Co. KG Printed in China
Am Labor 1, 30900 Wedemark, Germany Publ. 11/09
www.sennheiser.com 528263/A03
 Loading...