

Page 1

SPV 7771DUAL
SPV 7971DUAL
PORTABLE DVD PLAYER
USER’S MANUAL
Page 2

Table of Contents
Safety Precautions ................................................................................................................................................................................................ 2
Introduction ............................................................................................................................................................................................................ 5
Description of player ............................................................................................................................................................................................. 7
Main unit .......................................................................................................................................................................................................... 7
Side unit ........................................................................................................................................................................................................... 7
Remote control ................................................................................................................................................................................................ 8
Insert the battery ............................................................................................................................................................................................ 10
SETUP Menu Setting .......................................................................................................................................................................................... 11
General Setup Page ...................................................................................................................................................................................... 11
Audio Setup Page .......................................................................................................................................................................................... 11
Video Setup Page .......................................................................................................................................................................................... 12
Preference Setup Page ................................................................................................................................................................................. 13
Password Setup Page ................................................................................................................................................................................... 13
Settings menu of the side unit ........................................................................................................................................................................... 15
Parameters and specifi cations...........................................................................................................................................................................16
Maintenance and Service.................................................................................................................................................................................... 17
Troubleshooting tips ........................................................................................................................................................................................... 18
Before connecting, operating or adjusting this product, please read this user´s manual carefully and completely – contains important information
for safe and optimal use of all features and functions. Store the user´s manual in case you need it again.
EN
Page 3
Appendix to LCD Instruction Manual
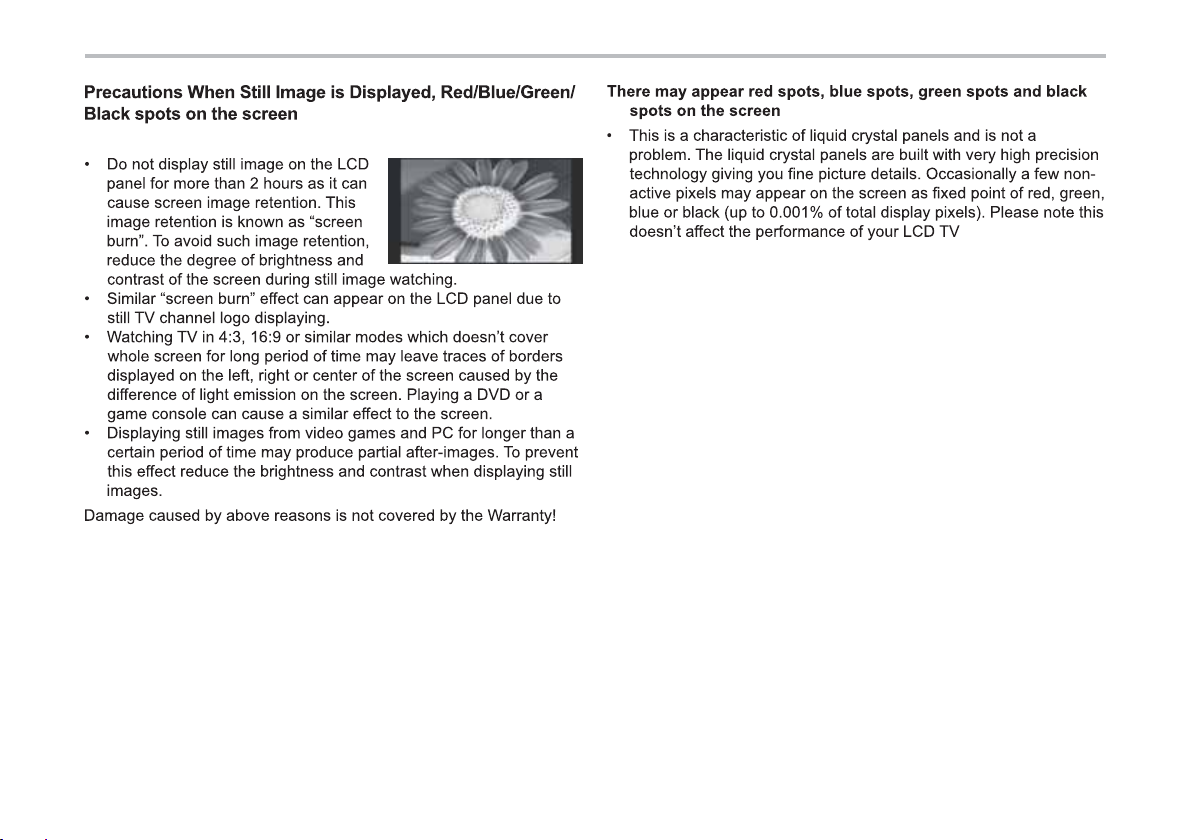
A still image may case permanent damage to screen
EN 1
Page 4
Safety Precautions
The device is a precision product taking advantage of the advances of
modern electronics, mechanics and optics and requires corresponding
2 EN
Page 5
Safety Precautions
EN 3
Page 6
Safety Precautions
charge strong impact over heat 40 °C
This item incorporates copy protection technology that is
protected by U.S. patents and other intellectual property rights
of Rovi Corporation. Reverse engineering and disassembly are
prohibited.
Due to wide offer of USB devices/SD/MC/MMS cards on the
market, we do not guarantee full compatibitity of the device with
all types USB sticks/SD/MC/MMS cards.
4 EN
Page 7
Introduction
The user’s manual contains information and instructions for the correct
installation, connection, setup, operation and service of this device.
• The identifi cation of buttons, connectors, and other control
and connection elements of the player are described using
CAPITAL LETTERS in the user’s manual.
• For all text information displayed on the screen of the player
or on the screen of the connected television the user’s manual
uses bold letters.
This manual provides information on the operation and maintenance
of your DVD player. Should the unit require service, contact
an authorized service location.
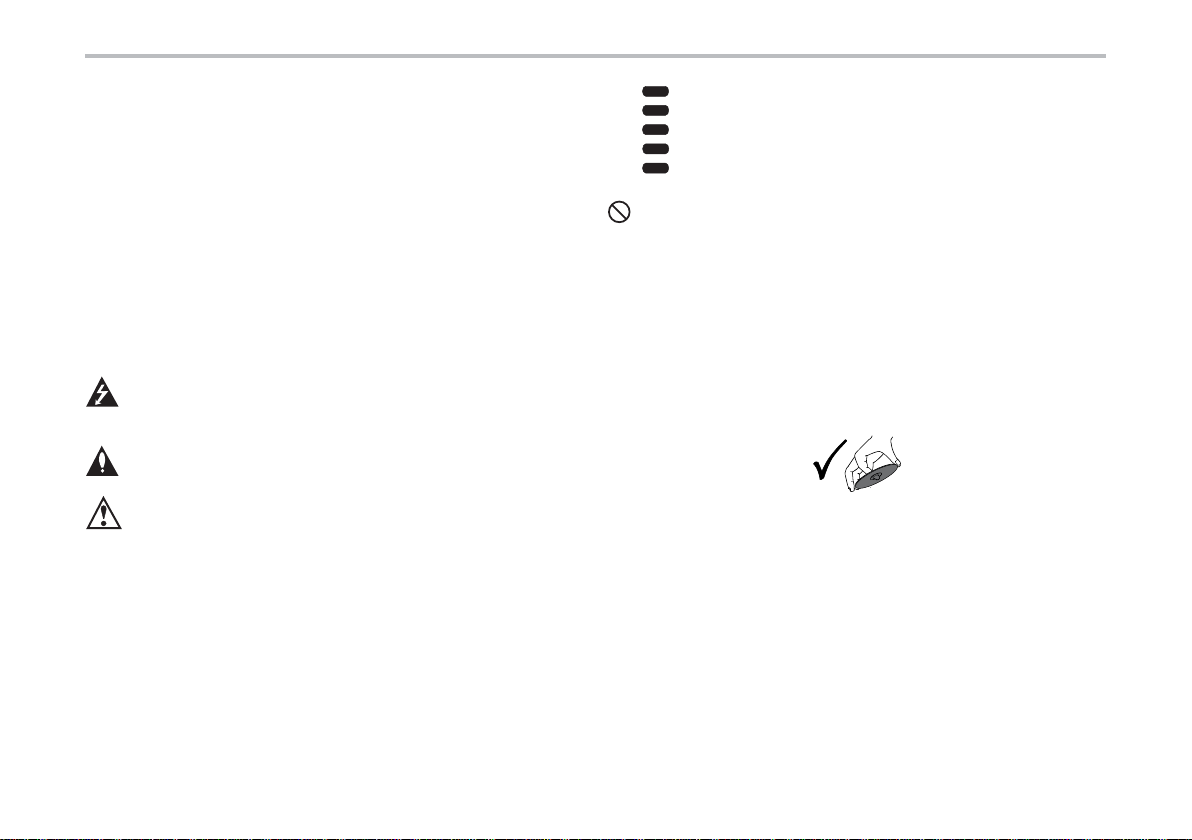
Symbol Used in this Manual
The lightning fl ash symbol alerts you to the presence
of dangerous voltage within the product enclosure that may
constitute a risk of electric shock.
The exclamation point alerts you to the presence of important
operating and maintenance/servicing instructions.
Indicates hazards likely to cause harm to the unit itself or other
material damage.
Note:
Indicates special notes and operating features.
Tip:
Indicates tips and hints for making the task easier. A section whose
title has one of the following symbols is applicable only to the disc
represented by the symbol.
DVD
DVD and fi nalized DVD±R/RW
VCD
Video CDs
CD
Audio CDs
MP3
MP3 Discs
JPEG
JPEG Discs
may appear on your TV display during operation and indicates
that the function explained in this owner‘s manual is not
available on that specifi c DVD video disc.
Notes on Discs
Handling Discs
• Do not touch the playback side of the disc. Hold the disc
by the edges so that fi ngerprints do not get on the surface.
Never stick paper or tape on the disc – for labelling discs use
special soft tip markers designed for this use, write on the side
of the disc with the label.
After playing, store the disc in its case. Do not expose the disc
to direct sunlight or source of heat and never leave it in a parked
car exposed to direct sunlight or near a heat source, do not leave
discs in closed vehicles parked in direct sunlight. Risk of disc
deformation.
EN 5
Page 8

Introduction
Cleaning Discs
• Fingerprints and dust on the disc can cause poor picture quality
and sound distortion. To remove them wipe the disc with a soft
lint free cloth before playing. When cleaning the disc proceed
from the centre directly to the edge (not in circular motion).
• Do not use vinyl record anti-static sprays, petrol, ethanol or other
solvents or thinners.
DVD (8 cm/12 cm disc)
Video CD (VCD) (8 cm/12 cm disc)
Audio CD (8 cm/12 cm disc)
Apart from the above mentioned disc types it is possible to play
DVD+/-R, DVD+/-RW, Kodak Picture CD, SVCD, CD-R with
recordings in CD format (CD audio copy), CD-R with compressed
music fi les in formats MP3, CD-R with image fi les in the
format JPEG. Playing of disc types not mentioned here is not
guaranteed.
RW
C0MPATIBLE
This indicates a product feature that is capable
of playing DVD-RW discs recorded with Video
Recording format.
Notes:
1. Depending on the recording media, recording method
(used PC program used for the disc recording) and its fi
nalisation, it is possible that it will not be possible to play some
CD-R or DVD+/-RW/R discs.
2. Do not attach any seal or label to either side (the labeled side
or the recorded side) of a disc.
3. Use the player to play only circular discs - when playing irregular
shaped discs there is a risk of damaging the disc or the player.
4. Some playback operations of DVDs and Video CDs may be
intentionally programmed by software manufacturers. This unit
plays DVDS and Video CDs according to disc content designed
by the software manufacturer, therefore some playback features
may not be available or other functions may be added.
Manufactured under license from Dolby Laboratories. „Dolby“,
„Pro Logic“, and the double-D symbol are trademarks of Dolby
Laboratories.
Region code
This player is designed for playing DVD video marked
with region code 2 or ALL (discs labelled in this way
2
can be played by all DVD players). The disc’s region
code is located on its label or cover, the player’s region
code is located on the back/bottom side of the player.
After inserting a DVD with a different region code than
mentioned above a message Check Region Code will be
displayed on the screen and DVD playback will be rejected
by the player.
6 EN
Page 9

Description of player
1
2
3
4
5
6
7
8
9
10
11
12
13
1
2
3
4
5
6
7
8
9
10
19
20
21
22
14
15
11
12
13
161718
Main unit
1. SD/MS/MMC
2. ON/OFF (Power switch)
(Headphone jack)
3.
4. AV OUT (AV output)
5. COAXIAL (Digital audio output)
6. USB
7. DC OUT (Direct current power output 9 – 12V)
Side unit
8. DC IN 9 – 12V connector (Direct current power input)
9. (Play / pause)
10. / Previous / up
11. / Down / next
12. (Stop)
13. SOURCE button (Source)
14. MODE (Mode) button
15. (Up)
16. (Down)
17. /VOL- (Left / decrease volume)
18. /VOL+ (Right / increase volume)
19. ON/OFF (Power switch)
20. AV IN (AV input)
21.
(Headphone jack)
22. DC IN (Direct current power input 9 – 12 V)
EN 7
Page 10

Description of player
Remote Control
STEP
12
5
678
9 0
SUBTITLE
TITLE
ENTER
SLOW
REPE AT
ZOOM
26
24
20
16
18
22
17
19
21
25
27
1. SOURCE button
DVD/CARD/USB.
2. MUTE button
Disable Audio output.
3. 0 – 9 Number buttons
Select numbered items in a menu.
4. DISPLAY button
Display the playtime and status information.
5. 10+ button
In order to select a track 10 or greater, fi rst press 10+button. For example;
select track 12, fi rst press 10+, and then press button number 2.
MUTE
10+
AUDIO
SOURCE
3
4
1
2
3
DISPLAY
MENU
/PBC
MODE
VOL+VOL-
5
7
9
23
13
15
4
6
8
10
11
12
14
6. MENU/PBC button
Return to DVD root menu (DVD).
PBC on/off switch. Only for VCD. For other discs, the function is
invalid.
7. AUDIO button
DVD
: Press AUDIO button repeatedly during playback to hear a
different audio language or audio track, if available.
MP3
CD
VCD
: Press AUDIO button repeatedly during playback
to hear a different audio channel (Left, Right, Mix, Stereo).
8. PLAY/PAUSE button
Press button once to pause playback, pressing button second
time will resume the playback.
9. ■ STOP button
When ■ button is pressed once, the unit records the stopped point
where the playback will resume if button is pressed after wards.
But if ■ button is pressed again instead of button, there will be no
resume function.
10. MODE button
Set LCD parameter (adjust brightness, contrast, saturation).
11. VOL + button
Increase volume.
12. button
Go to next chapter/track.
13. button
Go to the beginning of previous chapter/track.
14. button
Press button to allow skipping ahead at 5-level speed (X2 → X4
→ X8 → X16 → X32 → PLAY), press button to return to normal
playback.
8 EN
Page 11

Description of player
15. button
Press button to allow skipping back at 5-level speed (X2 → X4
→ X8 → X16 → X32 → PLAY), press button to return to normal
playback.
16. STEP button
Press STEP button once to pause playback. From this status, press
STEP button to advance one video frame.
17. SEARCH button
Go to time point, title or chapter you want in DVD mode.
18. SUBTITLE button
Press SUBTITLE button repeatedly during playback to hear a different
subtitle languages.
19. ANGLE button
DVD
: Press ANGLE button will change the view angle, on DVDs that
support this feature.
20. TITLE button
Return to DVD title menu.
21. ENTER button
Confi rm menu selection.
22. SETUP button
Accesses or removes setup menu.
23. VOL- button
Decrease volume.
24. REPEAT button
Press REPEAT button during playback to select a desired repeat
mode.
DVD
: you can play a chapter/title/off.
VCD
: you can play a single/all/off.
MP3
CD
: you can select repeat single/folder/off.
25. SLOW button
Press Slow button repeatedly to enter slow playback, and cycle
between different speeds. The speeds are: 1/2, 1/4, 1/8, 1/16 and
normal.
26. PROGRAM button
DVD
VCD
: The program function enables you to store your
favourite tracks from the disc. Press PROGRAM button, then
PROGRAM MENU will appear on screen, now you can use the
number key to direct input the titles, chapters or tracks number and
select PLAY option. To resume normal playback, press PROGRAM
button and select CLEAR option on the program menu.
27. ZOOM button
Use ZOOM to enlarge or shrink the video image.
1. Press ZOOM button during playback or still playback to activate
the Zoom function.
2. Each press of the ZOOM button changes the TV screen in the
following sequence:
2X → 3X → 4X → 1/2 → 1/3 → 1/4 → normal size
JPEG
: Use ZOOM to enlarge or shrink the picture.
1. Press ZOOM button.
2. Use button to enlarge, use button to shrink the picture.
Use /// buttons to move through the zoomed picture.
EN 9
Page 12

Description of player
Insert the battery
1. Open the battery door.
2. Insert battery.
Hole
Notes:
Remove battery during storage or when you are not using the DVD
player for a long time.
To control the device using the remote control, point the remote
control at the device and then press the button with the required
function. The maximum range of the remote control is about 5 meters
with a deviation of up to +/- 30° from the perpendicular direction to the
reception sensor of the remote control on the front side of the device.
The falling capacity of the batteries gradually reduces the remote
control range.
● There must be no solid obstacles in the area between the remote
control and the device when the remote control is being used.
● During standard use the lifetime of batteries in the remote control
is about 1 year. When the effective range of the remote control is
substantially reduced, or when there are problems with its use,
change both the batteries in the remote control.
● If you will not be using the remote control for a longer period of
time, take out both batteries from it - in this way you will prevent
potential damage caused by their leakage.
The incorrect use of batteries may cause the leakage of the electrolyte
and corrosion. To ensure that the remote control works correctly,
proceed according to the instructions below:
● Do not insert the batteries in the wrong direction.
● Do not recharge, heat, open or short the batteries.
● Do not throw batteries into a fi re.
● Do not leave discharged batteries in the remote control.
● Do not combine various types of batteries or new and old batteries.
● If you are not using the remote control for a longer period of time,
remove the batteries to prevent potential damage caused by a
subsequent battery leakage.
● If the remote control is not working correctly or its operational
range is reduced, change all batteries for new ones.
● If electrolyte leaks out from the batteries, have the remote control
cleaned by an authorised service centre.
The batteries must not be exposed to excessive heat, such as sun
radiation, fi re, etc.
10 EN
Page 13

Setup Menu Setting
Press SETUP button to enter the setup menu. Use direction buttons
/// to select the preferred item. After fi nishing settings, press
SETUP button again to normal display. The following menu items can
be changed:
GENERAL: Select the GENERAL SETUP PAGE menu.
AUDIO: Select the AUDIO SETUP PAGE menu.
VIDEO: Select the VIDEO SETUP PAGE menu.
PREFERENCE: Select the PREFERENCE SETUP PAGE menu.
PASSWORD: Select the PASSWORD SETUP PAGE menu.
General Setup Page
- - GENERALSETUP PAGE - -
TV DISPLAY WIDE
ANGLE MARK ON
OSD LANGUAGE ENG
CLOSED CAPTIONS ON
SCREEN SAVER ON
AUTO STANDBY
GOTO GENERAL SETUP PAGE
3 HOURS
4 HOURS
OFF
ON
OFF
ON
OFF
ENGLISH
FRENCH
GERMAN
ITALIAN
SPANISH
PORTUGUESE
TV Display
Select the aspect ratio of the playback picture.
4:3 PANSCAN: If you have a normal TV and want both sides of the
picture to be trimmed or formatted to fi t your TV screen.
4:3 LETTERBOX: If you have a normal TV. In this case, a wide
picture with black bands on the upper and lower portions of the TV
screen will be displayed.
16:9: wide screen display.
Wide Squeeze: Set screen mode to 4:3.
ON
OFF
4:3 PANSCAN
4:3 LETTERBOX
16:9
WIDE SQUEEZE
Angle Mark
It displays current angle setting information on the right hand corner of
the TFT screen if available on the disc.
OSD Language
You can select your own preferred language settings.
Closed Captions
Closed captions are data that are hidden in the video signal of some
discs. Before you select this function, please ensure that the disc
contains closed captions information and your TV set also has this
function.
Screen Saver
This function is used to turn the screen saver On or Off.
Auto Standby (Automatic stand-by)
This function makes it possible to automatically put the device into
standby mode after 3 or 4 hours.
3 HOURS (3 hours): The device will automatically go into standby
mode after 3 hours have passed from the time that any button was
pressed.
4 HOURS (4 hours): The device will automatically go into standby
mode after 4 hours have passed from the time that any button was
pressed.
OFF (Off): The automatic standby function will be deactivated.
EN 11
Page 14

Setup Menu Setting
Audio Setup Page
Downmix
This option allows you to set the stereo analog output of your DVD
Player.
● LT/RT: Select this option if your DVD Player is connected to a
Dolby Pro Logic decoder.
● Stereo: Select this option when output delivers sound from only
the two front speakers.
Dolby digital
The options included in Dolby Digital Setup are: “Dual Mono” and
“Dynamic”.
Dual Mono
● Stereo: Left mono sound will send output signals to Left speaker
and Right mono sound will send output signals to Right speaker.
● L-Mono: Left mono sound will send output signals to Left speaker
and Right speaker.
● R-Mono: Right mono sound will send output signals to Left
speaker and Right speaker.
● Mix-Mono: Left and Right mixed mono sound will send output
signals to Left and Right speakers.
Dynamic
Dynamic range compression.
Video Setup Page
- - VIDEO SETUP PAGE - -
BRIGHTNESS 00
CONTRAST 00
HUE 00
SATURATION 00
GOTO VIDEO SETUP PAGE
Set Sharpness, Brightness, Contrast, Hue, Saturation.
12 EN
Page 15

Setup Menu Setting
Preference Page
- - PREFERENCE SETUP PAGE - -
TV TYPE PAL
AUDIO ENG
SUBTITLE ENG
DISC MENU ENG
PARENTAL
MPEG4 SUBTITLE CENT.
DEFAULT
GOTO PREFERENCE PAGE
RESET
CENTRAL
EUROPEAN
RUSSIAN
LITHUANIAN
1 KID SAF
2 G
3 PG
4 PG13
5 PGR
6 R
7 NC17
8 ADULT
ENGLISH
FRENCH
GERMAN
ITALIAN
SPANISH
PORTUGUESE
OTHERS
ENGLISH
FRENCH
GERMAN
ITALIAN
SPANISH
PORTUGUESE
OFF
OTHERS
TV Type
Selecting the colour system that corresponds to your TV when AV
outputs. This DVD Player is compatible with both NTSC and PAL.
● PAL - Select this if the connected TV is PAL system. It will change
the video signal of a NTSC disc and output in PAL format.
● NTSC - Select this if the connected TV is NTSC system. It will
change the video signal of a PAL disc and output in NTSC format.
● Auto: Change the video signal output automatic according to the
playing disk format.
Audio
Select a language for audio (if available).
Subtitle
Select a language for subtitle (if available).
Disc Menu
Select a language for disc menu (if available).
Parental
Some DVDs may have a parental level assigned to the complete disc or to
certain scenes on the disc. This feature lets you set a playback limitation
level. The rating levels are from 1 to 8 and are country dependent. You
ENGLISH
FRENCH
GERMAN
ITALIAN
SPANISH
PORTUGUESE
OTHERS
PAL
AUTO
NTSC
can prohibit the playing of certain discs that are not suitable for your
children or have certain discs played with alternative scenes.
MPEG4 subtitle
Select the MPEG4 subtitle.
Default
Restore the factory setting.
Password Setup Page
- - PASSWORD SETUP PAGE - -
PASSWORD MODE ON
PASSWORD
GOTO PASSWORD SETUP PAGE
Password mode
Set password mode on/off. If set to off, change parental level will not
check password.
ON
OFF
EN 13
Page 16

Setup Menu Setting
Password
Select the menu password change page.
OLD PASSWORD
NEW PASSWORD
CONFIRM PWD
OK
OLD PASSWORD: Enter the OLD password, (factory setting is 1369),
and the cursor will jump automatically to NEW PASSWORD.
NEW PASSWORD: Enter the NEW password. Enter 4 digits from the
remote control unit numeric buttons, and the cursor will automatically
jump to CONFIRM PASSWORD.
CONFIRM PASSWORD: Confi rm the NEW password by entering
it again. If the confi rmation is incorrect, the cursor will stay in this
column. After entering, the correct new password again, the cursor will
jump automatically to OK.
OK: When cursor is on this button, press ENTER button to confi rm
setting.
Note:
If the password has been changed, the parental and disc lock code
will also be changed. The default password (1369) is always active
even the password has been changed.
14 EN
Page 17

Settings menu of the side unit
Picture (Picture)
PICTURE
BRIGHT
CONTRAST
COLOR
ENGLISH
RESET
Brightness (Brightness)
Set the brightness of the screen.
Contrast (Contrast)
Set the contrast of the screen.
Color (Colours)
Set the colours of the screen.
English (Language)
Set the OSD language.
PICTURE
SCREEN
10
10
10
16.9
Screen (Screen)
Set the side aspect ratio 16:9 or 4:3.
EN 15
Page 18

Parameters and specifi cations
Device parameters
Item Standard requirements
Power requirements AC 100 – 120 V, 50/60 Hz
Power consumption < 15 W
Operating humidity 5 % to 90 %
Output VIDEO OUT 1 Vp-p (75 Ω)
AUDIO OUT 1 Vp-p (1 KHz, 0 dB)
Audio Speaker: 2 x 1W, headphones output,
coaxial output
System
Laser Semiconductor laser, wave length 650 nm
Signal system NTSC / PAL
Frequency response 20 Hz to 20 kHz (1 dB)
Signal – to – noise ratio More than 80 dB (ANALOGUE OUT
connectors only)
Dynamic range More than 85 dB (DVD/CD)
Note:
Design and specifi cations are subject to change prior notice.
Battery Parameters
Battery Specifi cations
Output: 7.4 V
Charge/Discharge Time
Standard charge time: 3h – 4h
Storage and work circumstances
1. Storage circumstances Temperature Humidity
6 months -20 C – +45 C 65 ± 20%
1 week -20 C – +65 C 65 ± 20%
2. Work circumstances Temperature Humidity
Standard charge 0 C – +45 C 65 ± 20%
Standard discharge -20 C – +65 C 65 ± 20%
16 EN
Page 19

Maintenance and Service
Refer to the information in this chapter before contacting a service
technician.
● Protect the device against shocks of being hit of dropped
● We recommend that at least for the device´s warranty period
you keep the box and the packaging material. If transporting the
device, pack it up in the same way as it came from the factory.
● Keeping the exterior surfaces clean.
● Do not use sprays or volatile solvents near the device.
● Do not leave the device in contact with rubber or plastic for a long
time - risk of hard to remove stains. Do not use volatile substances
in the vicinity of the device, e.g. insecticides.
● To clean the device use a soft cloth, if the device is dirtier then you
can use a damp cloth with a lukewarm mild detergent solution.
● Do not use thinners or solvents - they may damage the surface
treatment of the device´s case.
● We recommend having the player professionally inspected and
cleaned after 1000 operational hours (depending on conditions
even sooner).
The DVD player is a high-tech, precision device. If the optical pickup
lens and disc drive parts are dirty or worn, the picture quality could
be diminished. Depending on the operating environment, regular
inspection and maintenance are recommended after every 1000 hours
of use. For details, please contact your nearest authorized service
centre.
EN 17
Page 20

Troubleshooting tips
Troubleshooting tips (Common)
● Before calling for service, you can check the following items on
symptoms and solutions.
No sound or distorted sound:
● Ensure that the equipment is connected properly.
● Ensure that the input settings for the TV and stereo system are proper.
No picture:
● Ensure that the equipment is connected properly.
● Ensure that the input setting for the TV is „video“.
● Ensure that the LCD is on.
No play:
● Condensation has formed: wait about 1 to 2 hours to allow the
player to dry out.
● This player can´t play discs other than DVDs, MP3s and CDs.
● The disc may be dirty and require cleaning.
● Ensure that the disc is installed with the label side up.
No remote control:
● Check the batteries are installed with the correct polarities (+&-).
● The batteries are depleted: replace them with new ones.
● Point the remote control unit at the remote control sensor and
operate.
● Remove the obstacles between the remote control unit and the
remote control sensor.
● Operate the remote control unit at a distance of not more than 8
meters from the remote control sensor.
No key operation (by the unit and/or the remote control) is effective:
● Turn the unit off and then back to on. Alternatively, turn off the unit,
disconnect the AC power cord and the re-connect it.
(The player may not be operating properly due to lightning, static
electricity or some other external factor.)
Battery does not work
● Check whether the battery is out of power or in proper connection.
Troubleshooting tips (DVD)
Play does not commence even when title is selected:
● Confi rm the „Rating“ settings.
Audio soundtrack and/or subtitle language is not the one
selected at the initial settings:
● If the audio soundtrack and/or subtitle language does not exist
on the disc, the language selected at the initial setting will not be
seen/heard.
No subtitles:
● Subtitles appear only with discs which contain them.
Alternative audio soundtrack (or subtitle) language fail to be
selected:
● An alternative language is not selected with discs which do not
contain more than one language.
● In the case of some discs, the alternative language cannot
be selected by operating the AUDIO or SUBTITLE button.
Try selecting it from the DVD menu if one is available.
Angle cannot be changed:
● This function is dependent on software availability. Even if a disc
has a number of angles recorded, these angles may be recorded
for specifi c scenes only.
18 EN
Page 21

Instructions for the correct disposal of the product
The original version is in the Czech language.
Address of the manufacturer: FAST ČR, a.s., Černokostelecká 1621, CZ-251 01 Říčany
Copyright © 2016, Fast ČR, a.s. 07/2016
EN 19
Page 22

EN
Warranty conditions
Warranty card is not a part of the device packaging.
This product is warranted for the period of 24 months from the date of purchase to the end-user. Warranty is limited to the following conditions. Warranty is referred
only to the customer goods using for common domestic use. The claim for ser vice can be applied either at dealer’s shop where the product was bought, or at below
mentioned authorized service shops. The end-user is obligated to set up a claim immediately when the defects appeared but only till the end of warranty period. The
end user is obligated to cooperate to certify the claiming defects. Only completed and clean (according to hygienic standards) product will be accepted. In case of
eligible warranty claim the warranty period will be prolonged by the period from the date of claim application till the date of taking over the product by end-user, or
the date the end-user is obligated to take it over. To obtain the service under this warranty, end-user is obligated to certify his claim with duly completed following
documents: receipt, certificate of warranty, certific ate of installation.
This warranty is void especially if apply as follows:
Defects which were put on sale.
Wear-out or damage caused by common use.
The product was damaged by unprofessional or wrong installation, used in contrary to the applicable instruction manual, used in contrary to legal enactment and
common process of use or used for another purpose which has been designed for.
The product was damaged by uncared-for or insufficient maintenance.
The product was damaged by dirt, accident of force majeure (natural disaster, fire, and flood).
Defects on functionality caused by low duality of signal, electromagnetic field interference etc.
The product was mechanically damaged (e.g. broken button, fall).
Damage caused by use of unsuitable media, fillings, expendable supplies (batteries) or by unsuitable working conditions (e.g. high temperatures, high humidity,
quakes).
Repair, modification or other failure action to the product by unauthorized person.
End-user did not prove enough his right to claim (time and place of purchase).
Data on presented documents differs from data on products.
Cases when the claiming product cannot be indentified according to the presented documents (e.g. the serial number or the warranty seal has been damaged).
Authorized service centers
Visit www.sencor.eu for detailed information about authorized service centers.
20 EN
 Loading...