

Page 1
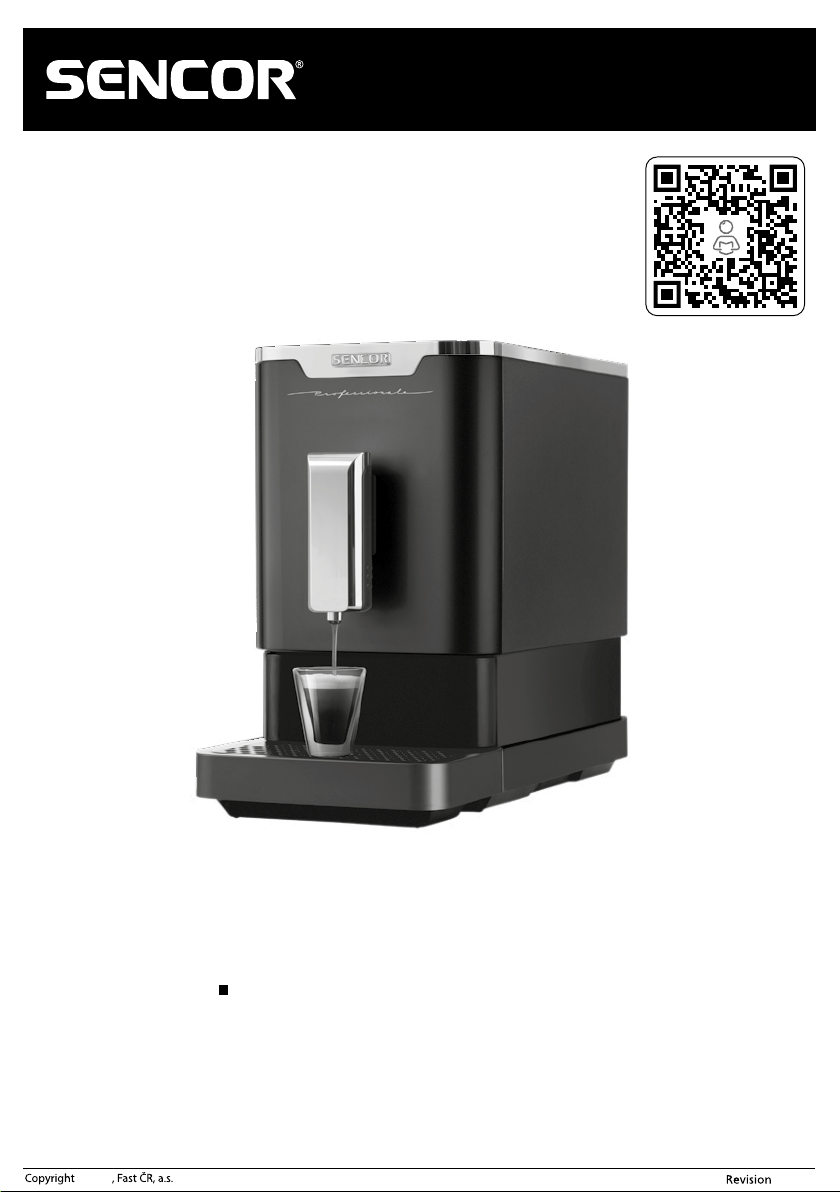
SES 7200BK
EN Automatic Espresso Machine
Translation of the original manual
© 2021
- 1 -
06/2021
Page 2
EN
Automatic Espresso Machine
Important safety instructions
READ CAREFULLY AND STORE FOR FUTURE USE.
General warnings
■ This appliance may not be used by children. Keep the appliance
and its power cord away from children.
■ The appliance may be used by persons with reduced physical,
sensory or mental capabilities or with alack of experience and
knowledge, if they are supervised or have been instructed
to use the appliance in a safe manner and understand the
potential dangers.
■ Children must not play with the appliance.
■ In the event that the power cord is damaged, have it repaired
at aprofessional service centre to prevent causing adangerous
situation. It is forbidden to use the appliance if it has adamaged
power cord.
■ Keep the appliance and its accessories in clean condition.
Clean and maintain it according to the instructions in chapter
Cleaning and maintenance. Never wash the appliance under
running water or submerge it in water or another liquid.
Warning:
Incorrect use may lead to injuries.
■ Always disconnect the appliance from the power supply when
leaving it without supervision and before assembly, disassembly
or cleaning.
■ This appliance is designed for household use only. It is not
intended for use in locations such as:
– kitchens in stores; offices and other workplaces;
– in agriculture;
© 2021
- 2 -
06/2021
Page 3
– guests of hotels, motels and other accommodation locations;
– in bed and breakfast establishments;
Warning:
Take care that water is not poured on the power plug.
Attention: Hot surface.
When using the appliance, its accessible surfaces may
heat up. Do not touch the hot surface.
■ Before connecting the appliance to apower socket, check that the rated voltage on its rating label matches the electrical voltage in the power socket.
■ Connect the appliance only to aproperly grounded socket. For safety reasons, we do not recommend using multi-socket adapters or extension cords.
■ Do not place the appliance on window sills, kitchen sink drainboards or unstable surfaces. Always place it on astable, even and dry surface.
■ Do not place the appliance on or near an electr ical or gas stove, or in the vicinity of an open flame.
■ Never use the appliance in the near vicinity of abath, shower or swimming pool.
■ Use the appliance only for the purposes for which it was designed.
■ Use the appliance according to the instructions in the user'smanual. Otherwise, injuries, damage to the appliance or adangerous situation may result.
■ Only use the appliance with the original accessories that came with it.
■ To ensure sufficient air circulation, free space of at least 15 cm must be maintained around and above the appliance when it is running.
■ Only use the top sur face of the appliance for warming cups. Do not use it as astorage rack.
■ Fill the water tank with clean cold water. Do not pour hot water or other liquids into it or place any items inside it.
■ Before turning on the appliance, check that:
– the drip tray together with the grate is installed in position;
– the water tank is filled with asufficient amount of water and is properly installed in position. The water level must not exceed the maximum mark.
■ When operating the appliance, be especially careful to avoid scalding by boiling water or steam.
■ The hot water function must not be used continuously, no more than one full water tank at atime.
■ Regularly inspect the water level in the water tank when using the appliance. When the water level falls below the minimum water level mark, add water.
Before adding water, first turn the appliance off and disconnect it from the power socket.
■ Use the built-in coffee grinder only for grinding coffee beans. Do not use it for any other purposes.
■ Ensure that no hair or other items enter the grinder while it is grinding. The coffee bean hopper lid should always be properly closed unless one is refilling
coffee beans or setting the fineness of the grind.
■ To protect the pump from damage, the appliance is equipped with abuilt-in thermal fuse that will disengage it when it runs empty. In the event that such
asituation occurs, disconnect the power cord from the power socket and allow the appliance to cool down for at least 30 minutes. Then you may continue
using it.
■ Do not move the appliance with acoffee cup located on the drip tray grate or with cups located on the cup warming surface.
■ Ensure that the power cord does not come into contact with water or ahot surface.
■ Disconnect the appliance from the power socket by pulling on the plug, never pulling on the power cord. Otherwise, this could damage the power cord or
the socket.
■ The appliance is equipped with aremovable power cord. If the power cord is damaged, it must replaced with anew original power cord.
■ Do not submerge the appliance, the power cord or the power plug in water or in any other liquid.
■ Prevent the power cord and power plug from coming into contact with water or another liquid.
■ Make sure that the removable power cord does not come into contact with water or moisture.
■ To avoid the danger of injury by electrical shock, do not repair the appliance yourself or make any adjustments to it. Have all repairs or adjustments performed
at an authorised service centre. By tampering with the appliance, you risk voiding your legal rights arising from unsatisfactory performance or quality warranty.
© 2021
- 3 -
06/2021
Page 4
SES 7200BK
A
B
1
78 9
© 2021
2 3 4 5 6
10 11 12
- 4 -
06/2021
Page 5
C1 C2 C3
D
F1
G1
E
F2
G2
H
© 2021
- 5 -
06/2021
Page 6
Automatic Espresso
Machine
EN
User'smanual
■ Prior to using this appliance, please read the user'smanual thoroughly, even in cases,
when one has already familiarised themselves with previous use of similar types of
appliances. Only use the appliance in the manner described in this user’smanual.
Keep this user'smanual in asafe place where it can be easily retrieved for future use.
■ We recommend saving the original cardboard box, packaging material, purchase
receipt and responsibility statement of the vendor or warranty card for at least the
duration of the legal liability for unsatisfactory performance or quality. In the event
of transportation, we recommend that you pack the appliance in the original box
from the manufacturer.
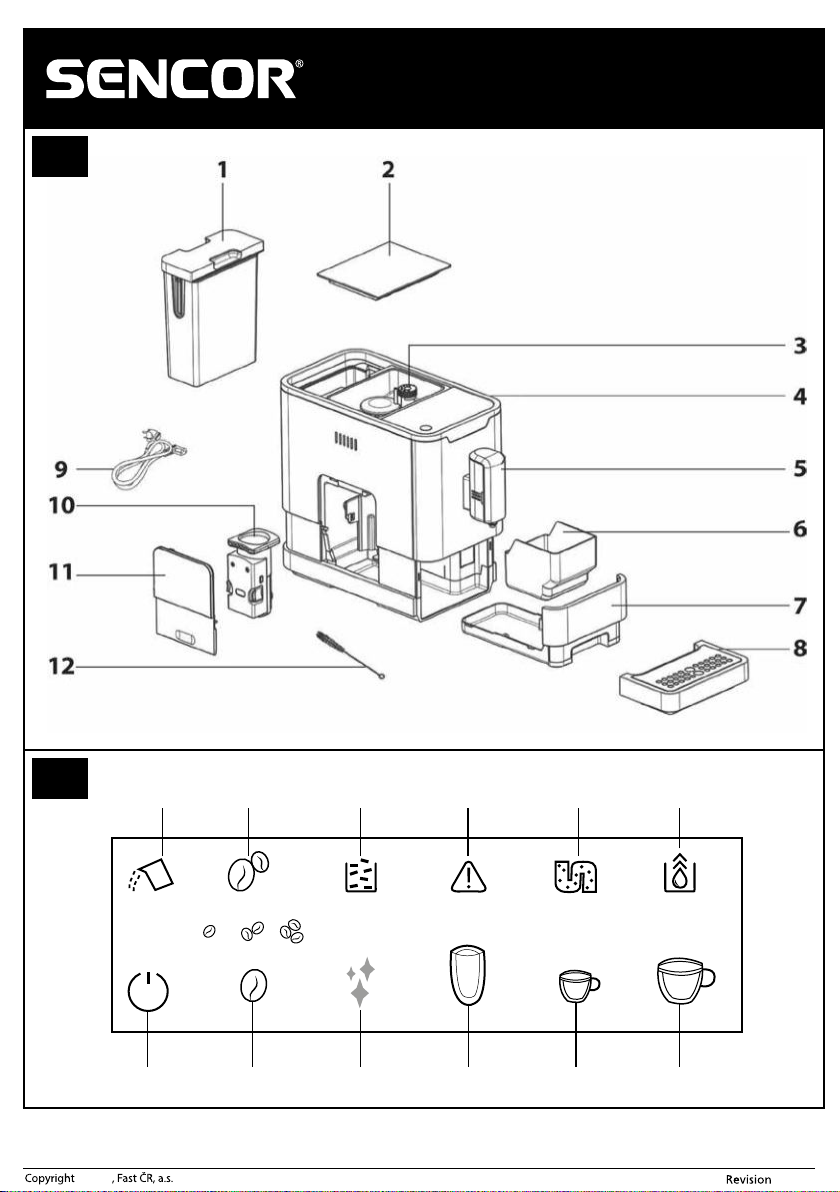
DESCRIPTION OF THE ESPRESSO MACHINE
A1 1.1-litre water tank
A2 Coffee bean hopper lid
A3 Coffee bean hopper, capacity 150g
Inside the hopper there is agrinder
with adjustable grinding fineness.
A4 Touch control panel with display
A5 Coffee and hot water brew head,
height adjustable.
DESCRIPTION OF THE TOUCH CONTROL PANEL
B1 Insufficient water in the water tank
indicator light or water tank not
installed in its location indicator
light.
B2 Insufficient amount of coffee beans
in the coffee bean hopper indicator
light
B3 Full coffee grounds container
indicator light (indicator is lit) or
the inner drip tray / coffee grounds
container is not correctly installed
indicator light (indicator is flashing)
B4 Steaming unit not inserted/installed
correctly indicator light (indicator is
lit) or service access door is open or
incorrectly installed indicator light
(indicator is flashing)
Note:
The compartment contains three packets of descaling agent.
BEFORE FIRST USE OF THE APPLIANCE
1. Remove all packaging materials from the appliance and remove any protective film,
promotional tags or labels.
2. Install the appliance on an even, dry and clean surface. Ensure that there is free
space around the appliance of at least 35 cm above the top part and 15 cm around
the sides.
3. Take out the water tank A1, rinse it out with clean water with the addition of asmall
amount of neutral dishwashing detergent. Then rinse it out thoroughly using clean
water, dry it and put it back in its place.
4. Properly attach the outer drip tray A8 to the appliance.
5. Wipe the outer surface of the appliance with alightly dampened cloth and then
wipe it thoroughly dry.
6. Fully unwind the removable power cord A9 and connect it to the corresponding
socket at the rear of the appliance.
7. To ensure optimal lifetime of the appliance, it is necessary to allow its internal
components to be rinsed out several times with hot water prior to first use. For
this purpose, use button B10, as described in chapter "Rinsing out the espresso
machine".
FILLING THE WATER TANK
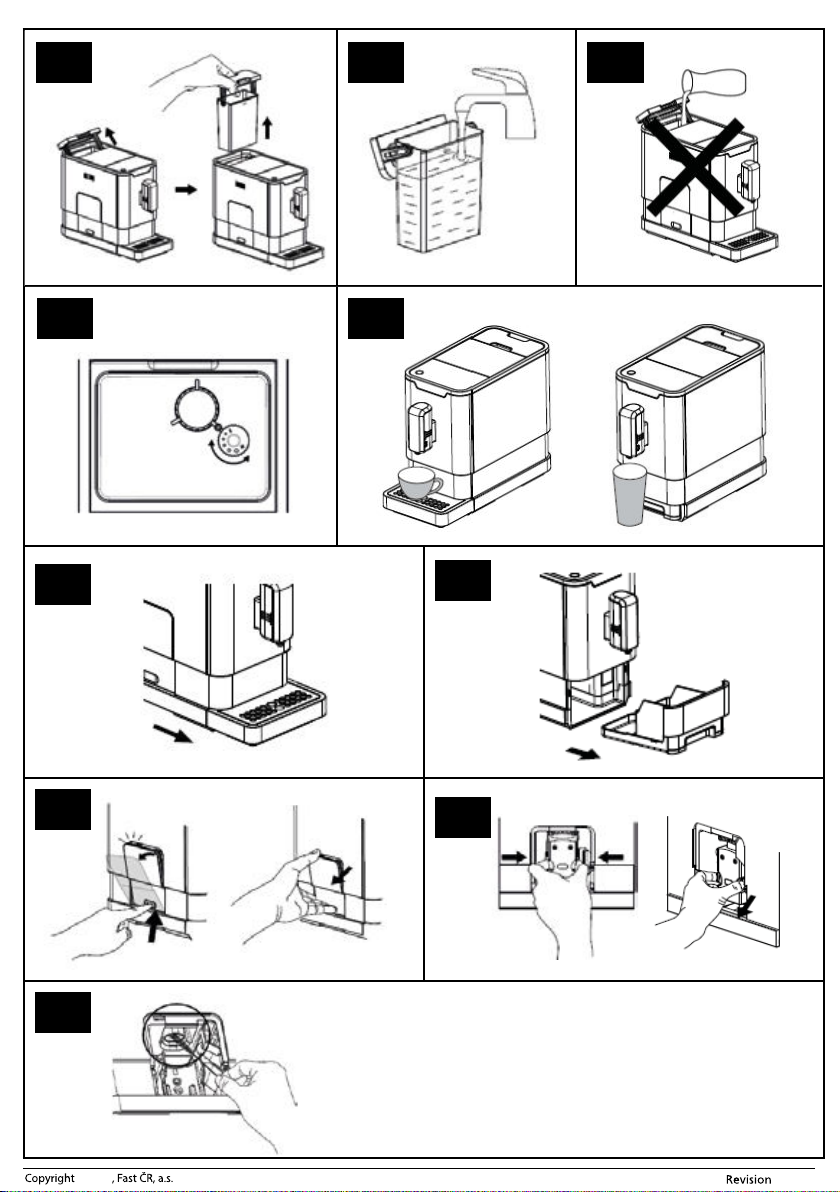
1. Grasp the water tank A1 by its lid. It also serves as a carry handle. Lift it up and
remove it from the rear part of the appliance, see figure C1.
2. Fill the water tank A1 with clean water up to the maximum water mark – see fig. C2,
and insert it back into the appliance. Make sure that the water tank A1 is properly
installed in its place.
Note:
The water that you pour into the water tank A1 should ideally be at
room temperature (approximately 25°C). Water that is too cold, could
negatively affect the final taste of the coffee beverage.
A6 Coffee grounds container
A7 Inner drip tray
A8 Outer drip tray
A9 Removable power cord
A10 Steaming unit
A11 Service access door
A12 Cleaning aid
B5 Descaling required indicator light
(indicator is lit) or descaling process
is running indicator light (indicator
is flashing)
B6 Drain internal lines function is
running
B7 On/Off touch button
B8 Ground coffee amount adjustment
touch button
B9 Quick clean touch button
B10 Dispense hot water touch button
B11 Brew espresso coffee touch button
B12 Brew lungo coffee touch button
Warning:
The water tank A1 has amaximum capacity of 1.1 litres of water.
Do not overfill it. Never fill the water tank A1 with warm or hot
water, sparkling water or other liquids such as, for example, milk.
This could damage the appliance. Never fill the water tank A1 by
pouring in the water while it is inserted inside the appliance (see
fig. C3). There is adanger of splashing the appliance or overfilling
3. Do not leave water in the water tank A1 for longer than one day. For brewing quality
fresh coffee, it is necessary to always use fresh water. Otherwise, the flavour of the
resulting beverage may be negatively affected.
FILLING THE COFFEE BEAN HOPPER
1. Remove the coffee bean hopper lid A2.
2. Pour roasted coffee beans into the coffee bean hopper A3 and close the lid A2. Do
not leave the lid of the coffee bean hopper A2 open, otherwise, the coffee beans will
lose their aroma more quickly.
CONTROLLING THE FINENESS OF GROUND COFFEE
1. Use the grinding fineness regulator located inside the coffee bean hopper A3 to set
the grinding fineness of the coffee beans in 5 levels, see figure D.
2. Turning the regulator towards the position marked with the plus symbol sets
acoarser grind, and turning it in the opposite direction sets afiner grind.
3. The fineness of the grind is set only while the grinder is running. Otherwise, you
could damage your appliance. For darker coffee beans, we recommend setting
acoarser grind, for lighter coloured coffee beans, we recommend afiner grind.
4. If the brewed coffee is flowing out very slowly, it means that the coffee grains are
too finely ground and it is necessary to set acoarser grind. On the other hand, if the
brewed coffee is flowing out too fast, it means that the coffee grains are too coarsely
ground and it is necessary to set afiner grind.
the water tank A1.
Note:
When the indicator light B1 is lit, it is necessary to refill the water tank
A1 with water. Fill the water tank A1 with water according to the above
instructions.
Warning:
The coffee bean hopper A3 has amaximum capacity of 150 g of
coffee beans. Do not overfill it. Never fill the coffee bean hopper
A3 with ground or instant coffee, caramelised or otherwise
specially modified coffee beans, cocoa beans or other items that
could result in damage to the appliance.
RECOMMENDATIONS FOR PURCHASING AND STORING
COFFEE
■ To reduce the storage time, purchase coffee beans in smaller packages.
■ Use fresh roasted coffee beans with a marked roasting date and consume them
within 3 weeks of the roasting date.
■ Store coffee beans in acool, dark and dry location, ideally in an air-tight container.
OPERATING THE ESPRESSO MACHINE
■ Make sure that the power cord connector A9 is connected to the appliance. Connect
the power cord plug A9 to a power socket. Make sure that the water tank A1 is
refilled with fresh water and that the coffee bean hopper A3 is filled with asufficient
quantity of coffee beans and that the appliance is properly assembled.
Note:
When refilling water and coffee beans, always follow the instructions
provided in chapter "Filling the water tank" and "Filling the coffee
bean hopper".
■ To start the appliance, press button
by mode.
■ When you have finished using the espresso machine, press button
it off.
Note:
The automatic espresso machine is equipped with an automatic shut-off
function for when it is idle. Based on the selected mode, the automatic
espresso machine will shut off after the preset time has elapsed. The
automatic shut-off time can be found in section"
Rinsing out the espresso machine
■ To ensure the optimal lifetime of the appliance, it is necessary to allow its internal
components to be rinsed out several times with hot water prior to first use.
1. Take out the outer drip tray A8 and place amug or bowl underneath the brewing
head A5, into which the espresso machine will dispense water. Adjust the height of
the brewing head A5 based on the size of the cup.
2. Press button
start dispensing hot water.
3. The dispensing of hot water will stop automatically and the button'sbacklight will
turn off.
4. To thoroughly rinse out the internal components, we recommend that the process is
repeated 3 to 4 times.
5. When the rinsing process is finished, pour the water out of the mug or bowl. Be
especially careful since the water is very hot. Install the outer drip tray A8 back in
place. Refill the water in the water tank A1 as necessary.
B10. The button'sbacklight will be lit and the espresso machine will
B7. The appliance will switch to the stand-
B7 to turn
Setting the mode".
© 2021
- 6 -
06/2021
Page 7
Note:
Perform the rinsing process also when you have not used the espresso
machine for an extended period of time. The pump will make anoise
during the water dispensing process. This is normal.
Brewing coffee
1. Place acup, mug or glass underneath the brewing head A5. Set the height of the
brewing head A5 by sliding it up or down depending on the size of your cup, mug
or glass – see figure E. If the cup or glass is too tall, you may remove the outer drip
tray A8. After removing the cup or glass, return the drip tray A8 to its place.
2. Press button
coffee. Press button to confirm.
3. The espresso machine will automatically start the coffee grinding, dosing and
tamping process, and will dispense it.
4. As soon as the espresso machine has finished dispensing the coffee, it will
automatically switch to the stand-by mode.
Dispensing hot water
1. Place acup, mug or glass underneath the brewing head A5. Set the height of the
brewing head A5 by sliding it up or down depending on the size of your cup, mug
or glass – see figure E. If the cup or glass is too tall, you may remove the outer drip
tray A8. After removing the cup or glass, return the drip tray A8 to its place.
2. Press button
3. The espresso machine will star t dispensing hot water.
4. When the espresso machine finishes dispensing the water, it will automatically
switch to the stand-by mode.
B11 to brew espresso coffee or button B12 to brew lungo
B10 and the button will be backlit.
USER SETTINGS
Setting the amount of ground coffee
■ Use the ground coffee amount adjustment when the brewed coffee is too strong
or too weak.
B8 serves to adjust the amount of ground coffee.
■ Button
■ Based on personal preferences, select the amount of ground coffee by repeatedly
pressing button
(approx. 10 g).
Setting the dispensed coffee / hot water volume
■ The espresso machine enables the amount of dispensed coffee or hot water to be
adjusted based on your preferences in the range 25 ml – 250 ml. The settings you
make will be saved to the memory of the espresso machine.
1. Place acup, mug or glass underneath the brewing head A5.
2. Turn on the espresso machine by pressing button
3. Hold down button
coffee) or
dispensing coffee or water.
4. When the button is released, the dispensing of coffee or water will stop. Abeep is
made and the set amount of coffee or water will be saved to the memory of the
espresso machine.
Setting the mode
■ The espresso machine can be set to an ECO mode, afast mode or the default factory
settings. In ECO mode, greater power savings are achieved. In the fast mode, the
coffee is prepared faster than with the default factory settings.
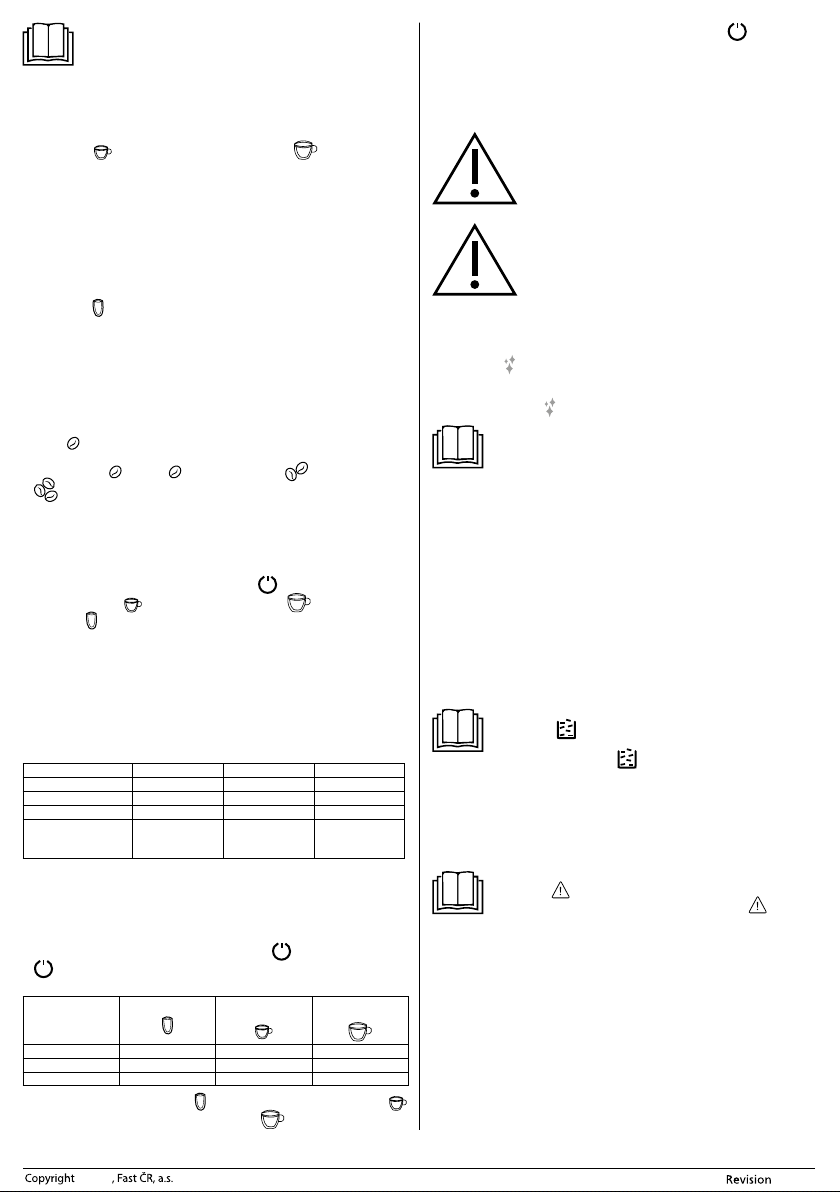
Indicator light Not lit Lit Lit
Pre-steam * Ye s No Yes
Automatic shut-off time
Option to set the
dispensed coffee
volume
*Note:
The pre-steam function means that the ground coffee is first steamed with asmall
amount of water. This will cause the coffee to swell and thereby when it is subsequently
fully steamed, its flavour will be developed fully, and its aromatic compounds and
essential oils will be fully extracted.
1. In the stand-by mode, press and hold down button
B7 will start flashing and at the same time other buttons will also be flashing or
lit depending on the mode that is set.
ECO mode Lit Flashing Flashing
Fast mode Flashing Lit Flashing
Default settings Flashing Flashing Lit
2. To set the ECO mode, press button B10, to set the fast mode, press button
B11 and to reset to default settings, press button
2beeps will be made. In the event that you attempt to set amode that is already set,
the appliance will not react to the button being pressed.
B8: small (approx. 7 g), medium (approx. 8 g) or large
B11 (to brew espresso coffee), B12 (to brew lungo
B10 (to dispense hot water). The espresso machine will start
ECO mode Fast mode Default settings
10 minutes 30 minutes 20 minutes
Yes Yes Yes
Hot water button
B7 .
Espresso coffee
button
B12. After setting amode,
B7 for 5 seconds. Button
Lungo coffee
button
© 2021
3. If you do not wish to change the mode settings, press button
or wait 5 seconds until the appliance automatically switches back to the stand-by
mode.
CLEANING AND MAINTENANCE
■ Disconnect the power plug from the power socket and allow the appliance to cool
down before cleaning it.
Warning:
For cleaning, do not use cleaning products with an abrasive effect,
solvents, etc. that could damage the appliance. No part of this
appliance is intended for washing in adishwasher.
Warning:
To prevent the risk of injury by electrical shock, do not submerge
the appliance, power cord or power plug in water or any another
liquid.
Quick clean
■ The quick clean function is suitable for quickly removing dirty material from the
brew head A5 and the tubing lines.
1. Place acup, mug or glass underneath the brewing head A5.
2. Press button
clean function. Water will automatically start flowing out of the brew head A5.
3. The quick clean process will automatically stop, however, it may also be stopped by
again pressing button
EVERYDAY CLEANING AND MAINTENANCE
■ Timely cleaning and maintenance is very important for operating the appliance and
extending its lifetime.
■ Before cleaning, turn off the appliance, disconnect it from the power socket and
allow it to cool down.
Drip tray and the coffee grounds container
■ Remove the outer drip tray A8 – see figure F1. Empty out all its contents over asink,
and wash it using clean water and then dry it thoroughly.
■ Be careful not to burn yourself when handling the drip tray A8. It may contain hot
water
■ Slide out the inner drip tray A7 with the coffee grounds container A6 – see figure F2.
■ Empty out the coffee grounds container A6 and wash it with clean water. Then
dry it thoroughly. Empty out the inner drip tray A7 and if dirty, wipe it with aclean
dampened cloth and then dry it thoroughly.
■ Install the inner drip tray A7, coffee grounds container A6 and the outer drip tray
A8 back in their place.
Steaming unit
■ Slide out and remove the service access door A11 – see figure G1. Press the
steaming unit A10 release buttons and take it out – see figure G2. Wash it under
running water and dry it out thoroughly.
■ Install the steaming unit A10
door A11.
Water tank
■ Take out the water tank A1, rinse it out with clean water with the addition of asmall
amount of neutral dishwashing detergent. Then rinse it out thoroughly using clean
water, dry it and put it back in its place.
Coffee bean hopper
■ Only clean the coffee bean hopper A3
not clean it with water.
Outer surface of the espresso machine
■ To clean the outer surface of the appliance, use a clean, lightly dampened cloth.
Then wipe everything so that it is thoroughly dry.
B9 once. The espresso machine will automatically start the quick
B9 .
Note:
We recommend starting the quick clean function after every use.
Note:
If the icon B3
means that the coffee grounds container A6 is full and needs to be
emptied out. If the icon B3
grounds container A6 is not inserted.
lights up while the espresso machine is running, it
starts flashing, it means that the coffee
properly in its place and attach the service access
Note:
If the icon B4
inserted in its place or is not correctly installed. If icon B4
the service access door A11 is open or incorrectly installed.
lights up, it means that the steaming unit A10 is not
with aclean, dry cloth or paper towel. Do
B7 once more,
- 7 -
is flashing,
06/2021
Page 8
DESCALING
■ If indicator B5
function.
■ The appliance will work best when the descaling function is used regularly, at least
once per month, or more frequently based on the hardness of the water that is
used. This will extend its lifetime and improve power efficiency because limescale
deposits negatively affect electricity consumption.
1. Fill the water tank A1 all the way to the maximum water mark according to the
instructions contained in chapter "Filling the water tank".
2. Add descaling agents specially intended for descaling espresso machine type
appliances into the water tank A1. These agents can normally be purchased in
specialised electrical appliance stores or in online stores. Follow the instructions on
the manufacturer'spackaging when dosing the purchased descaling agent.
3. I nsert the power plug into apower socket.
4. Place asufficiently large container underneath the brew head A5.
5. In the stand-by mode, simultaneously press and hold down buttons
B11 for 5 seconds. Abeep is made and the indicator light B5 and button
B11 will flash.
6. To start the descaling process, press button
7. The indicator light B5
prevent scalding by hot water or the escaping steam. Do not interrupt the process
in this phase.
8. Once the water in the water tank A1 is used up, the indicator light B1
button
tank A1 and fill it up to the maximum water mark with clean water. When the filled
water tank A1 is inserted back into the appliance, indicator light B1
off. The descaling process will continue to run.
9. When the self cleaning process is complete, the espresso machine will turn off
automatically.
DRAINING THE INTERNAL LINES
■ It is recommended to drain the internal lines when you plan on not using the
appliance for and extended period of time, before transporting it, etc.
1. In the stand-by mode, simultaneously press and hold down buttons
B12 for 5 seconds.
2. The indicator light B6
3. Remove the water tank A1 from the appliance. Indicator B6
signals that the draining of the internal lines is running.
4. When the internal line draining process is complete, the espresso machine will turn
off automatically.
CLEANING THE GROUND COFFEE OUTLET
■ During use, ground coffee may accumulate on the walls of the ground coffee outlet
and therefore it is necessary to clean it regularly (depending on the frequency of use).
1. Slide out and remove the service access door A11 – see figure G1. Press the
steaming unit A10 release buttons and take it out – see figure G2.
2. Carefully tilt the espresso machine and using brush A12, carefully remove any dirty
material from the walls of the ground coffee outlet – see figure H.
3. After cleaning it out, insert the steaming unit A10 and the ser vice access door A11
back in their place.
Storage
■ When not using the appliance for an extended period of time, disconnect the power
plug from the power socket, allow the appliance to cool down and clean it according
to the instructions provided above.
■ Before storing it, check that the appliance and all its accessories are thoroughly
clean and dry.
■ Store the appliance in a dry, clean and well-ventilated location not exposed to
extreme temperatures and out of children'sreach.
lights up during operation, it is necessary to start the descaling
Warning:
For descaling, do not use vinegar, etc. Otherwise, the appliance
could be damaged.
B7 and
B11 .
Note:
In the event that you wish to return to the stand-by mode at this stage,
press button
B11 will start flashing. Empty out the remaining contents of the water
Note:
If necessary, empty out the container underneath the brew head A5.
Nevertheless, be careful when handling the container since the water
inside may be very hot.
Note:
If you press button
return back to the stand-by mode.
B7.
will flash during the descaling process. Take care to
will turn
B7 and
will start flashing.
will be lit. This
B7 before taking out the water tank A1, you will
© 2021
and
TROUBLESHOOTING
■ The following table lists potential problems that may be encountered during the
use of the espresso machine. Nevertheless, if the problem persists, turn off the
espresso machine, disconnect the power plug from the power socket and contact
an authorised service centre.
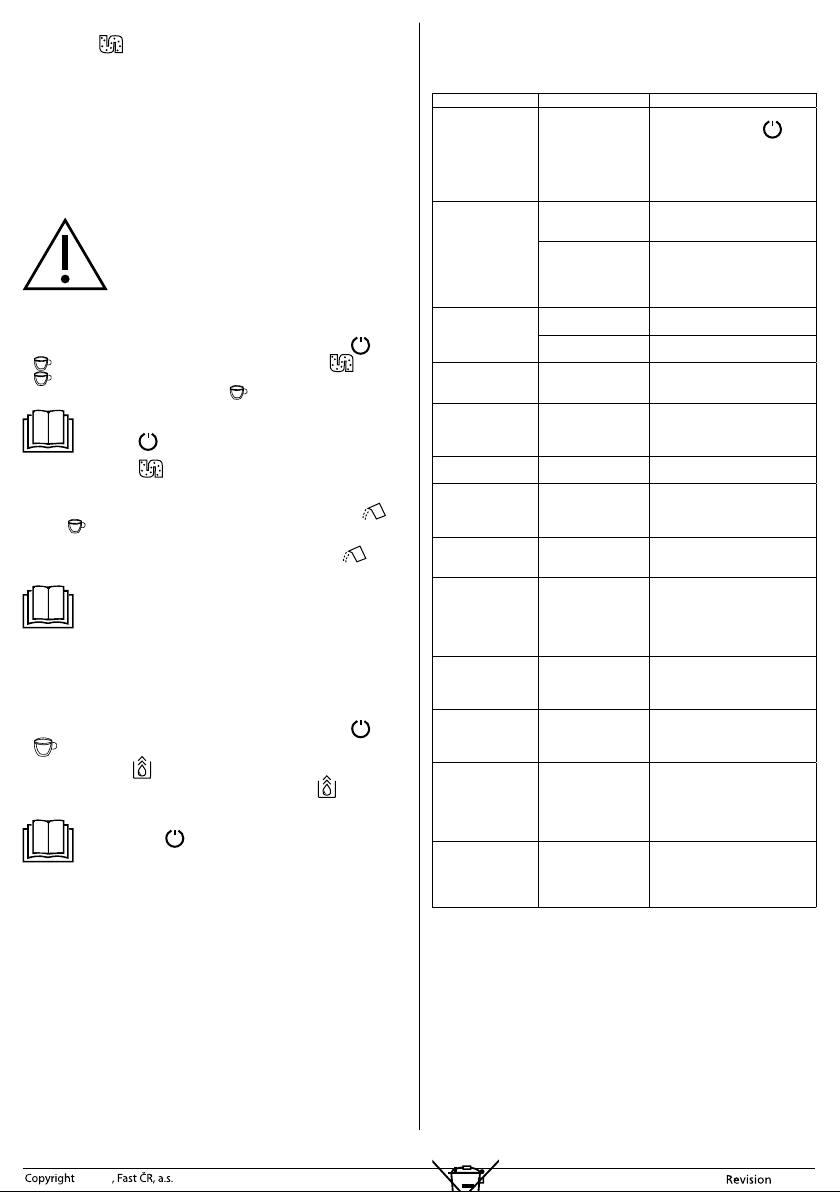
Problem Cause Solution
The appliance is not
working.
There is no response
when abutton
is pressed or the
response is delayed.
Coffee is not warm
enough.
Coffee is not flowing
out the spout.
The first cup does
not taste particularly
good.
The coffee lacks froth.
Touch buttons do not
function properly.
The appliance heats
up for too long.
The water tank A1
is removed or it is
running out of water,
but the respective
indicator light is not
signalling anything.
The inner drip tray A7
is filled with alarge
amount of water.
The coffee is
dispensed too slowly
or intermittently.
The insufficient coffee
beans indicator light is
flashing even though
there is asufficient
amount of coffee
beans in the hopper.
The descaling process
indicator is flashing
continuously even
after the descaling
process is finished.
TECHNICAL SPECIFICATIONS
Rated voltage range ........................................................................................................220 – 240 V~
Rated frequency.....................................................................................................................50 – 60 Hz
Rated power input ......................................................................................................1,235 – 1,470 W
Noise level ...................................................................................................................................75 dB(A)
The declared noise emission level of the appliance is 75 dB(A), which represents alevel
Aof acoustic power with respect to areference acoustic power of 1 pW.
We reserve the right to change text and technical specifications.
It is not connected to
apower socket.
Electromagnetic
interference of the
appliance is occurring.
The touch panel is
soiled.
Cups have not been
warmed up.
The steaming unit A10
is too cold.
Prior to this you used
the drain internal lines
function.
There is an insufficient
amount of ground
coffee inside the
steaming unit A10.
The coffee beans are
not fresh.
The touch buttons are
not pressed properly.
The appliance is soiled
by limescale deposits.
The area around the
connector at the
bottom of the water
tank A1 is damp
or wet.
The coffee is ground
too fine, which
prevents water from
flowing through.
The coffee is ground
too fine, which
prevents water from
flowing through.
The internal ground
coffee outlet is
clogged.
The descaling process
is not yet finished.
Connect it to aworking power
socket and press button
Check that the power cord is
properly connected to the socket
in the appliance and that the plug
is properly inserted in the power
socket.
Turn off the appliance and turn
it back on again after several
minutes.
Turn off the appliance, disconnect
it from the power socket and
clean the panel using aclean,
lightly dampened cloth and then
thoroughly wipe it dry.
Warm up the cups.
Flush it out three times before
brewing coffee.
Press the dispensing hot water
button until water starts flowing
from the spout.
Pour out of the first coffee that
you brewed. The next cup will now
be in order.
Use fresh coffee beans or try using
adifferent brand of coffee.
It is necessary to use the appliance
from the front. Press the bottom
part of the icon of the touch
button.
Descale it according to the
instructions contained in section
"Descaling".
Thoroughly dry out any moisture
or water in the vicinity of the
connector.
While the coffee grinder is running,
set acoarser grind level.
While the coffee grinder is running,
set acoarser grind level.
Clean out the ground coffee outlet
of the appliance according to the
instructions in section "Cleaning
the ground coffee outlet".
Please be patient and wait for the
process to finish. The appliance
will turn off automatically, please
do not turn off this appliance
manually.
INSTRUCTIONS AND INFORMATION REGARDING THE
DISPOSAL OF USED PACKAGING MATERIALS
Dispose of used packaging material at asite designated for waste in your municipality.
DISPOSAL OF USED ELECTRICAL AND ELECTRONIC
EQUIPMENT
- 8 -
This symbol on products or original documents means that used
B7.
06/2021
Page 9
electric or electronic products must not be added to ordinary municipal waste. For
proper disposal, renewal and recycling, hand over these products to determined
collection points. Alternatively, in some European Union states or other European
countries you may return your appliances to the local retailer when buying an
equivalent new appliance.
Correct disposal of this product helps save valuable natural resources and prevents
potential negative effects on the environment and human health, which could result
from improper waste disposal. Ask your local authorities or collection facility for more
details.
In accordance with national regulations penalties may be imposed for the incorrect
disposal of this type of waste.
For business entities in European Union states
If you want to dispose of electric or electronic equipment, ask your retailer or supplier
for the necessary information.
Disposal in other countries outside the European Union.
This symbol is valid in the European Union. If you wish to dispose of this product,
request the necessary information about the correct disposal method from the local
council or from your retailer.
This product meets all the basic requirements of EU directives related to
it.
© 2021
- 9 -
06/2021
 Loading...