

Page 1
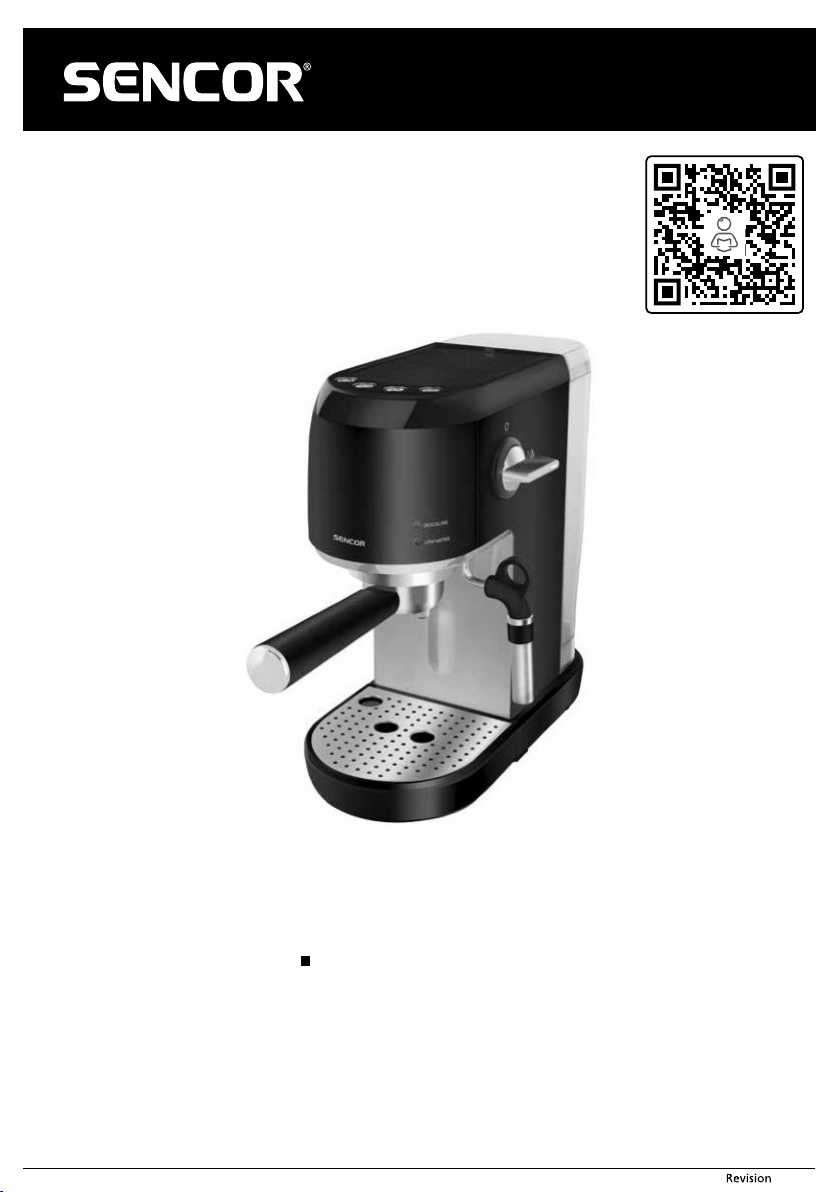
SES 4700BK
EN Espresso machine
Translation of the original manual
- 1 - Copyright © 2021, Fast ČR, a.s.
03/2021
Page 2
EN
Espresso machine
Important safety instructions
READ CAREFULLY AND STORE FOR FUTURE USE.
■ This appliance may be used by children 8 years of age and
older and by persons with physical or mental impairments or
by inexperienced persons, if they are properly supervised or have
been informed about how to use the product in asafe manner
and understand the potential dangers.
■ Children must not play with the appliance. Cleaning and
maintenance performed by the user must not be performed
by unsupervised children.
■ In the event that the power cord is damaged, have it repaired
at aprofessional service centre to prevent causing adangerous
situation. It is forbidden to use the appliance if it has adamaged
power cord.
■ This appliance is designed for household use only. It is not
intended for use in locations such as:
– sta kitchens in stores, oces and other workplaces;
– hotel or motel rooms and other living areas;
– agricultural farms;
– bed and breakfast establishments.
■ Do not submerge the appliance, the power cord or the power
plug in water or in any other liquid.
WARNING:
The hopper must not be opened during use.
- 2 - Copyright © 2021, Fast ČR, a.s.
03/2021
Page 3
■ Prevent the power cord and power plug from coming into
contact with water or another liquid.
■ Use the appliance according to the instructions in the
user'smanual. Otherwise, injuries, damage to the appliance or
adangerous situation may result.
Attention:
Hot surface.
■ As aresult of residual heat, accessible surfaces of the appliance are hot during its use and afterwards. Do not touch hot surfaces.
■ Before connecting the appliance to apower socket, check that the rated voltage on its rating label matches the electrical voltage in the power socket.
■ Connect the appliance only to aproperly grounded socket. For safety reasons, we do not recommend using multi-socket adapters or extension cords.
■ Do not place the appliance on window sills, kitchen sink drainboards or unstable surfaces. Always place it on astable, even and dry surface.
■ Do not place the appliance on or near an electrical or gas stove, or in the vicinity of an open flame.
■ Never use the appliance in the near vicinity of abath, shower or swimming pool.
■ Use the appliance only for the purposes for which it was designed.
■ Only use the appliance with the original accessories that came with it.
■ To ensure sufficient air circulation, free space of at least 15 cm must be maintained around and above the appliance when it is running.
■ Only use the top surface of the appliance for warming cups. Do not use it as astorage rack.
■ Fill the water tank with clean cold water. Do not pour hot water or other liquids into it or place any items inside it.
■ Before turning on the appliance, check that:
■ – the drip tray together with the grate is installed in position;
■ – the water tank is filled with asufficient amount of water and is properly installed in position. The water level must not exceed the maximum mark.
■ Before you begin brewing coffee, check that the portafilter is properly attached to the brew head. Pressure is created in the portafilter during the coffee
steaming process, so do not move it while it is running. Otherwise, this could result in adangerous situation.
Attention:
Incorrect use may lead to injuries.
■ When operating the appliance, be especially careful to avoid scalding by boiling water or steam.
■ Regularly inspect the water level in the water tank when using the appliance. When the water level falls below the minimum water level mark, add water.
Before adding water, first turn the appliance off and disconnect it from the power socket.
■ To protect the pump from damage, the appliance is equipped with abuilt-in thermal fuse that will disengage it when it runs empty. In the event that such
asituation occurs, disconnect the power cord from the power socket and allow the appliance to cool down for at least 30 minutes. Then you may continue
using it.
■ Always turn off the appliance and disconnect it from the power socket when not using it, when leaving it without supervision, before disassembling or
assembling it, before filling up the water tank, and before moving or cleaning it. Allow the appliance to cool down before cleaning or moving it. Do not move
the appliance with acoffee cup located on the drip tray grate or with cups located on the cup warming surface.
■ Keep the appliance and its accessories in clean condition. Clean and maintain it according to the instructions in chapter Cleaning and maintenance. Never
wash the appliance under running water or submerge it in water or another liquid.
■ Make sure that the power cord does not come into contact with ahot surface and prevent the power plug from coming into contact with water.
■ Disconnect the appliance from the power socket by pulling on the plug, never pulling on the power cord. Otherwise, this could damage the power cord or
the socket.
■ To avoid the danger of injury by electrical shock, do not repair the appliance yourself or make any adjustments to it. Have all repairs or adjustments performed
at an authorised service centre. By tampering with the appliance, you risk voiding your legal rights arising from unsatisfactory performance or quality warranty.
- 3 - Copyright © 2021, Fast ČR, a.s.
03/2021
Page 4
SES 4700BK
A
14
13
12
11
10
9
8
1 2 3 4
5
6
7
15
- 4 - Copyright © 2021, Fast ČR, a.s.
03/2021
Page 5
B
1 2 3 4
- 5 - Copyright © 2021, Fast ČR, a.s.
03/2021
Page 6
Espresso machine
EN
User'smanual
■ Prior to using this appliance, please read the user‘smanual thoroughly,
even in cases, when one has already familiarised themselves with
previous use of similar types of appliances. Only use the appliance in
the manner described in this user’smanual. Keep this user‘smanual in
asafe place where it can be easily retrieved for future use.
■ We recommend saving the original cardboard box, packaging
material, purchase receipt and responsibility statement of the vendor
or warranty card for at least the duration of the legal liability for
unsatisfactory performance or quality. In the event of transportation,
we recommend that you pack the appliance in the original box from
the manufacturer.
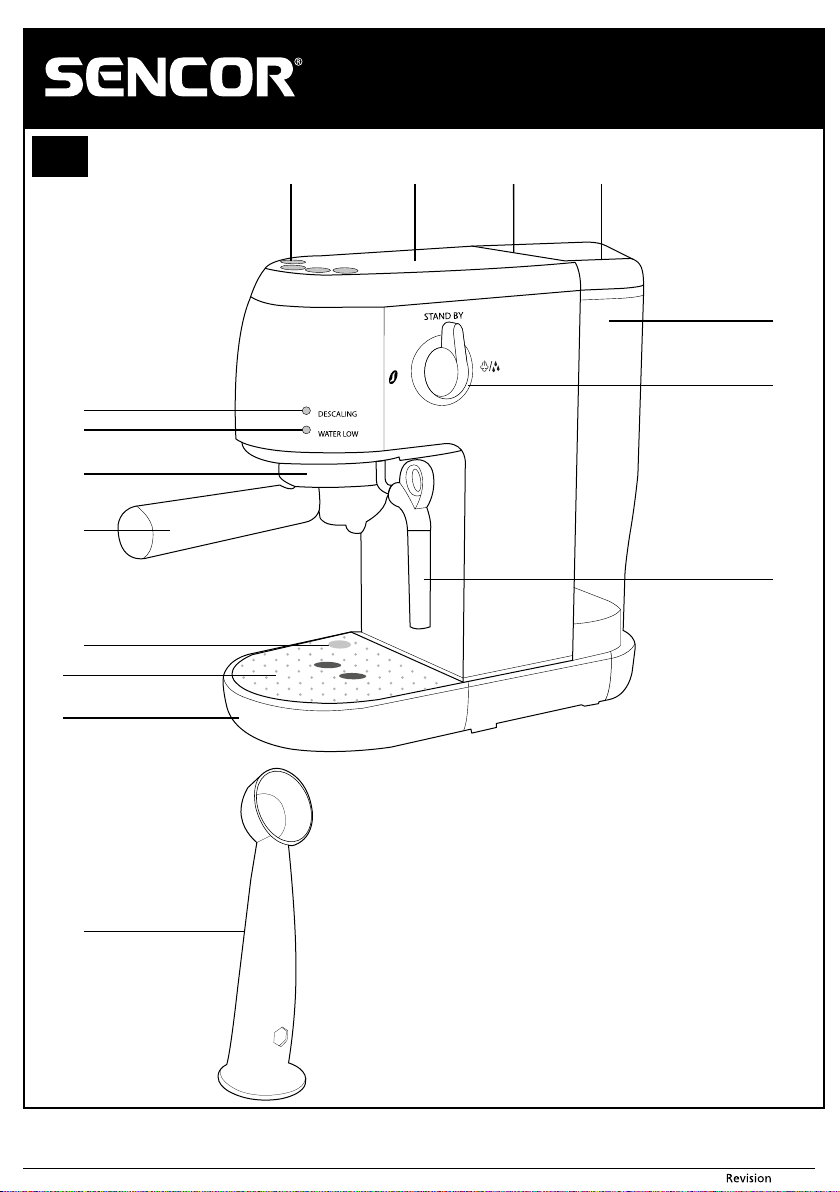
DESCRIPTION OF THE ESPRESSO MACHINE
A1 Control panel
A2 Cup warming surface
A3 Storage compartment cover
A4 Water tank lid
A5 Water tank
A6 Control knob
– turn off the function
– dispense steam / hot
water
A7 Steam nozzle with swivel
hot milk (HOT MILK) and
cappuccino (CAPPUCCINO)
Accessories (not shown)
Basket for brewing one cup of coffee
Basket for brewing two cups of coffee
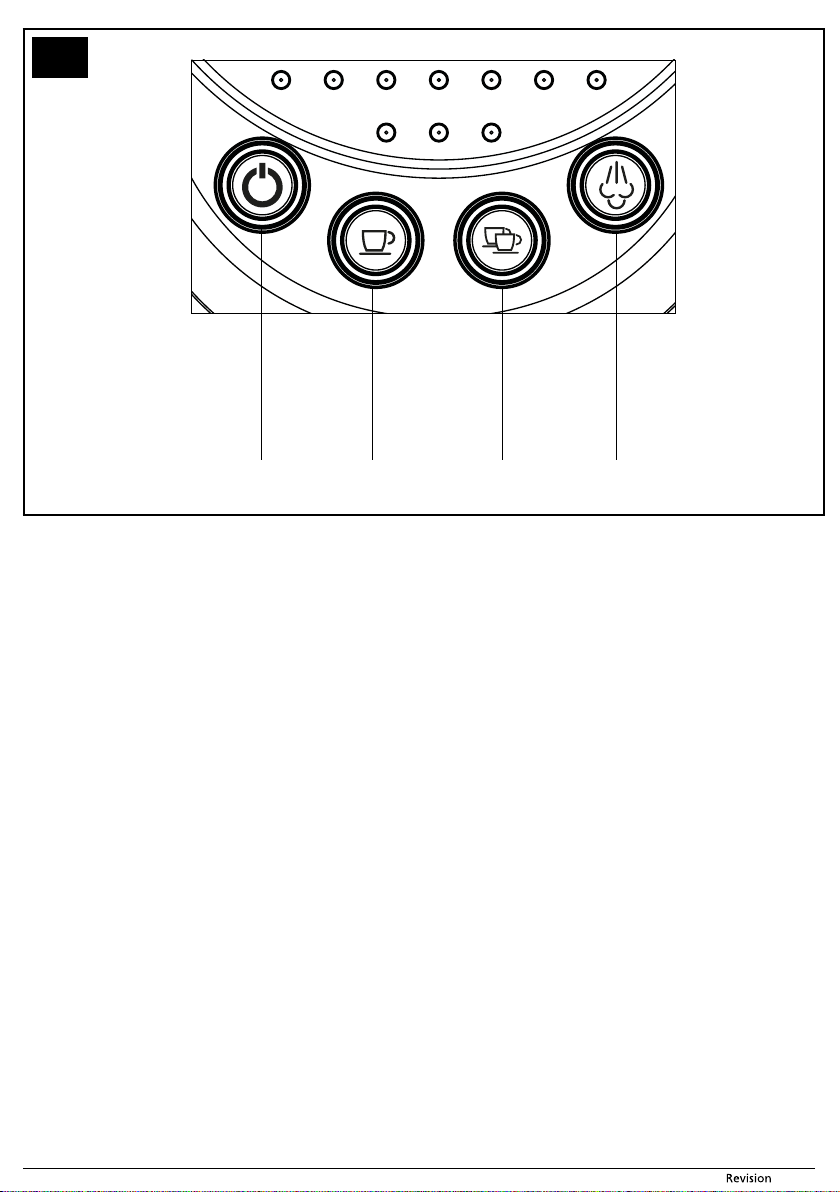
DESCRIPTION OF THE CONTROL BUTTONS
B1 On/Off button
B2 One-cup brew button
BEFORE FIRST USE
■ Remove all packaging materials from the appliance and remove any
protective film, promotional tags or labels.
■ Install the appliance on an even, dry and clean surface. Take out the
water tank A5, remove the lid A4, rinse it out with clean water with
the addition of a small amount of neutral dishwashing detergent.
Then rinse it out thoroughly using clean water, dry it and put it back
in its place.
■ Remove the drip tray A8 together with the grate A9. Wash using
clean water with the addition of asmall amount of neutral kitchen
detergent. Then rinse it out thoroughly using clean water, dry it and
put it back in its place.
■ Wipe the outer surface of the appliance with alightly dampened cloth
and then wipe it thoroughly dry.
■ To ensure the optimal lifetime of the appliance, it is necessary to allow
its internal components to be rinsed out several times with hot water
prior to first use. For this purpose, use button
described in chapter „Rinsing out the espresso machine“.
WATER HARDNESS SETTINGS
■ It is necessary to set the correct water hardness before using the
espresso machine. You can find out your water hardness from your
water utility company.
■ Check that the espresso machine is turned off and the power cord
plug is connected to a power socket.
■ Simultaneously hold down
The button of the previously set water hardness will start flashing.
■ Press the button corresponding to your water hardness – see table
below. The espresso machine will turn off and is ready for use.
dispensing mechanism
A8 Drip tray
A9 Drip tray grate
A10 Full drip tray indicator
A11 Portafilter
A12 Brew head
A13 Empty water tank indicator
light
A14 Descaling indicator light
A15 Coffee measuring cup with
tamper
Cleaning tool
B3 Two-cup brew button
B4 Steam dispensing button
B2 or B3, as
B1 , B2 and B3 for 5 seconds.
Button Water hardness
1 cup
2 cups
Steam
■ Do not leave water in the water tank A5 for longer than one day. For
brewing quality fresh coffee, it is necessary to always use fresh water.
Otherwise, the flavour of the resulting beverage may be negatively
affected.
■ When the indicator light A13 is lit, it is necessary to refill the water
tank with water. Remove the lid A4 and pour cold water into the water
tank A5.
TURNING ON THE ESPRESSO MACHINE
Make sure that the espresso machine is installed on an even, dry and
clean surface, that the water tank A5 is full and that the drip tray A8
with the grate A9 is installed. Make sure that the drip tray A8 is empty.
Unwind the power cord and insert the power plug into apower socket.
Press button
start flashing, which means that the espresso machine is heating up to
operating temperature.
When button
TURNING OFF THE ESPRESSO MACHINE
■ When you have finished using it, turn off the espresso machine
by pressing button
power socket. Allow the espresso machine to cool down and clean it
according to the instructions in chapter „Cleaning and maintenance“.
RINSING OUT THE ESPRESSO MACHINE
■ Turn on the espresso machine and wait until it heats up to operating
temperature.
■ Place abowl (at least 100 ml in capacity) underneath the brew head
A11.
■ Press button
the brew head A12.
■ Now turn the nozzle A7 so that it points into the bowl and turn the
control knob A6 to symbol
through the steam nozzle A7. Then turn the control knob A6 to
symbol
■ Pour out the water in the bowl. Be careful since the water in the bowl
may be very hot.
■ Now the espresso machine is ready for use.
low
medium 50–350mg/l every 12 litres
high
Note:
The water that you pour into the water tank A5 should
ideally be at room temperature (approximately 25 °C).
Water that is too cold, could negatively affect the final taste
of the coffee beverage.
Attention:
Always fill up to the maximum mark. Never overfill the
water tank A5. Never fill the water tank A5 with warm
or hot water, sparkling water or other liquids such as,
for example, milk. This could damage the appliance.
Attention:
When pouring water into the water tank A5, be very
careful not to pour it on to the espresso machine or
the power cord. Always fill up to the maximum mark.
B1 to turn on the espresso machine. Button B1 will
B1 stops flashing, the espresso machine is ready for use.
Note:
B1 may flash during operation, this is normal,
Button
since it indicates that the espresso machine is heating up
to operating temperature. It will not be possible to press
any other button while button
button
B1 stops flashing.
B2 or B3 and allow hot water to flow through
to end the hot water dispensing process.
up to
50mg/l
higher than
350mg/l
B1 and disconnect the power cord from the
and allow approx. 100 ml to flow
Amount of water for
descaling
every 20 litres
every 6 litres
B1 is flashing. Wait until
- 6 - Copyright © 2021, Fast ČR, a.s.
03/2021
Page 7
BREWING AN ESPRESSO
1. Select the correct basket for brewing coffee and insert it into the
portafilter A11. When brewing only one cup of coffee, use the onecup basket. When brewing two cups of coffee or when brewing
astronger coffee into acup, use the two-cup basket.
2. Using the measuring cup, fill the basket with ground coffee. When
using the one-cup basket, use one levelled measuring cup of
ground coffee. When using the two-cup basket, use two measuring
cups of coffee that are not completely filled to the edge.
3. Spread the ground coffee out evenly in the basket and tamp it
down properly. Correct tamping is important for brewing quality
coffee. If you tamp the coffee down with too much force, the
coffee will flow out very slowly and the resulting coffee will be very
strong. On the other hand, if you tamp the coffee down with too
little force, water will flow through the ground coffee very quickly
and the resulting coffee will be weak and bland.
4. After tamping down the coffee, remove any remaining coffee from
the edge of the portafilter.
5. Insert the portafilter A11 underneath the brew head A12 so that
the handle is aligned with the text “INSERT” on the brew head A12.
Insert the portafilter A11 into the brew head A12 and turn the
portafilter A11 to the right in the direction of the arrow until you
feel resistance.
6. Place acup or cups underneath the spout of the portafilter A11.
We recommend preheating the cups in advance. To preheat the
cups, you can use either hot water or place them on the cup
heating surface A2.
Press button B2 or B3 and the espresso machine will start
7.
the coffee brewing process. The backlight of the pressed button will
be lit and after afew seconds coffee will start flowing into the cup.
8. As soon as the preset amount of coffee flows into the cup / cups,
the espresso machine will stop automatically and the backlight of
the pressed button will turn off.
9. In order to remove the portafilter A11 from the brew head A12,
turn the portafilter handle to the left until the handle is aligned
with the text “INSERT”. Then remove the portafilter A11. Tap out
the coffee grounds in the basket into awaste bin, however you
may also compost it. Rinse out the used basket and portafilter
A11 under warm water and wipe dry. The portafilter A11 and the
basket will thereby be ready for further use.
BREWING CAPPUCCINO
1. Brew a cup of coffee according to the instructions in section
“BREWING ESPRESSO”. We recommend using alarger cup.
2. Press button B4 to turn on the steam dispensing function. Button
B1 will start flashing. As soon as it stops flashing, it will be
possible to use the steam dispensing function.
3. In the meantime, pour the required amount of milk into alarger
cup. Make sure that the cup is sufficiently large since frothed milk
may double or even triple in size. To achieve arich creamy froth, we
recommend using cold full-cream milk.
4. Turn the mechanism on the steam nozzle A7 so that the arrow
points to “CAPPUCCINO”.
5. Place an empty bowl underneath the steam nozzle A7 and turn
the control knob A6 to symbol
with water contained in the nozzle A7. Then turn the control knob
A6 to symbol
6. Now submerge the steam nozzle A7 into the milk so that the end
of the steam nozzle A7 is submerged only several millimetres
below the surface.
7. Turn the control knob A6 to symbol
steam. To achieve acreamier and silkier froth, place the end of the
steam nozzle A7 directly on the surface until the milk in the cup
starts to boil.
8. When the milk doubles in volume, submerge the steam nozzle A7
deeper into the cup to heat up the milk in the cup.
9. When the milk reaches the correct temperature (approx. 60 °C)
and it has asufficiently creamy froth, turn the control knob A6 to
symbol
10. Pour the frothed milk into the cup.
11. Wipe the steam nozzle A7 using alightly dampened sponge. For
hygiene reasons, turn on the dispensing of steam on for afew
seconds to remove any milk remaining inside the nozzle.
.
. Then take the nozzle A7 out of the milk.
so that you release any steam
and start dispensing
Warning:
The espresso machine will dispense steam for
a maximum of 60 seconds. Then the dispensing of
steam will stop automatically. This is asafety feature
that prevents the espresso machine from overheating.
HEATING MILK
1. Press button
Button
be possible to use the steam dispensing function.
2. In the meantime, pour the required amount of milk into alarger
cup.
3. Turn the mechanism on the steam nozzle A7 so that the arrow
points to “HOT MILK”.
4. Place an empty bowl underneath the steam nozzle A7 and turn
the control knob A6 to symbol
with water contained in the nozzle A7. Then turn the control knob
A6 to symbol
5. Now submerge the steam nozzle A7 into the milk.
6. Turn the control knob A6 to symbol
steam.
7. Carefully move the cup up and down to heat up the milk in the
cup.
8. When the milk reaches the correct temperature (approx. 60 °C),
turn the control knob A6 to symbol
of the milk.
9. Wipe the steam nozzle A7 using alightly dampened sponge. For
hygiene reasons, turn on the dispensing of steam on for afew
seconds to remove any milk remaining inside the nozzle.
DISPENSING HOT WATER
1. Underneath the steam nozzle A7 place acontainer into which the
hot water will flow.
2. Turn the control knob A6 to symbol
water.
3. When a sufficient amount of hot water has flowed into the cup,
turn the control knob A6 to symbol
PROGRAMMING THE COFFEE VOLUME
■ Based on personal preferences, you can adjust the volume of brewed
coffee.
■ The volume of the brewed coffee can be set for one or two cups
within the range specified in the table below.
1 cup 40 ml 20 ml 150 ml
2 cups 125 ml 40 ml 300 ml
- 7 - Copyright © 2021, Fast ČR, a.s.
B4, to turn on the steam dispensing function.
B1 will start flashing. As soon as it stops flashing, it will
so that you release any steam
.
and start dispensing
. Then take the nozzle A7 out
Warning:
The espresso machine will dispense steam for
a maximum of 60 seconds. Then the dispensing of
steam will stop automatically. This is asafety feature
that prevents the espresso machine from overheating.
Note:
The milk will not be frothed while the milk is heated up.
and start dispensing hot
.
Warning:
The espresso machine will dispense hot water for
a maximum of 60 seconds. Then the dispensing of
steam will stop automatically. This is asafety feature
that prevents the espresso machine from overheating.
Note:
The factory settings remain permanently set in memory
even when you adjust the volume of the brewed coffee.
If you need to restore the original settings, perform the
factory reset – see part “Restoring factory settings”.
Factory set value Minimum volume Maximum
volume
03/2021
Page 8
■ If you prefer the Long Black coffee style, adjust the volume of the
brewed coffee based on personal preferences so that you do not need
to dilute the coffee with hot water. The espresso machine will brew
the adjusted volume of brewed coffee automatically, nevertheless it
is necessary to adjust the amount of ground coffee to the newly set
volume so that the resulting coffee is not too weak.
Note:
If you have adjusted the volume of brewed coffee to the
maximum volume and occasionally need to brew an
espresso type coffee in asmaller volume of brewed coffee,
it will be necessary to perform afactory reset.
1. Inser t the strainer into the portafilter A11 (without ground coffee)
and then insert the portafilter A11 into the brew head A12. Place
acup or mug underneath the brew head A12.
2. Ensure that there is asufficient amount of water in the water tank
A5. The water must cover the minimum water level mark.
Programming the volume for asingle cup:
Hold down the one- cup brew button B2. Keep the button B2 held
down until your preferred amount of water flows into the cup or
mug. Releasing the button B2 will automatically stop the brewing
process and the new volume will be saved to memory.
3. Programming the volume for two cups:
Hold down the two-cup brew button B3. Keep the button B3 held
down until your preferred amount of water flows into the cup or
mug. Releasing the button B3 will automatically stop the brewing
process and the new volume will be saved to memory.
Note:
The adjusted brewed coffee amount will be saved to
memory until a factory reset is performed or until the
power cord plug is removed from the power socket.
Restoring factory settings
■ In the event that aproblem arises resulting from the settings you have
made, it is necessary to perform afactory reset.
Attention:
Restoring factory settings will delete all the settings
performed by you and restore them to the values set
at the factory. The set water hardness values will also
be deleted. Then it will be necessary to again perform
all the necessary settings.
1. Check that the power cord plug is connected to apower socket.
2. Check that the appliance is turned off.
3. Simultaneously hold down all four buttons (B1, B2, B3, B4) for 5
seconds until all the buttons start flashing. Then you can release
the buttons.
4. The factory reset has been per formed.
CLEANING AND MAINTENANCE
■ Disconnect the power plug from the power socket and allow the
appliance to cool down before cleaning it.
■ For cleaning, do not use cleaning products with an abrasive effect,
solvents, etc. that could damage the appliance. No part of this
appliance is intended for washing in adishwasher.
Warning:
To prevent the risk of injury by electrical shock, do not
submerge the appliance, power cord or power plug in
water or any another liquid.
Cleaning the drip tray and grate
■ Carefully remove the drip tray A8 together with the grate A9. Pour out
the water and rinse the drip tray A8 and grate A9 with warm water.
Wipe dry and then reinsert into the espresso machine.
■ In the event that the tray A8 and grate A9 are heavily soiled, wash
them in warm water with a small amount of neutral dishwashing
detergent, rinse them and wipe them dry.
Cleaning the baskets and the portafilter
■ Clean the baskets and the portafilter A11 after every use. Rinse out
the basket and portafilter A11 under warm water and wipe dry.
■ If the holes in the basket are clogged, clean them out using the
supplied cleaning tools.
Cleaning the brew head
■ After brewing approximately 200 coffees, it is necessary to rinse out
the brew head A12. Fill up the water tank A5 with cold water. Turn
on the espresso machine and wait until it heats up to operating
temperature.
■ Press button
flow through the brew head A12.
Cleaning the outer surface
■ Wipe the outer surface of the appliance with alightly dampened cloth
and then wipe it thoroughly dry.
Cleaning the water tank
■ At least once per month, clean out the water tank A5 and lid A4. Rinse
it out using clean water with the addition of asmall amount of neutral
kitchen detergent. Then rinse it out thoroughly using clean water, dry
it and put it back in its place.
Descaling
■ When the descaling indicator light A14 is lit, it is necessary to perform
the descaling process.
■ Use a descaling agent specifically intended for descaling espresso
machines that is commonly sold in retail chains.
1. Prepare the descaling agent according to the instructions on the
packaging of the descaling agent.
2. Pour the prepared solution into the water tank A5 up to the max.
mark.
3. Insert the plug on the power cord into apower socket and press
the button
start flashing, which means that the espresso machine is heating
up to operating temperature.
4. Make sure that the por tafilter A11 is not installed in the brew head
A12.
5. Place a container for capturing the water underneath the steam
nozzle A7.
6. When button
symbol
7. Allow the solution to flow out through the steam nozzle A7 until
the dispensing stops automatically.
8. Turn the control knob A6 to symbol
9. Now move the container underneath the brew head A12.
10. Press button
the solution through the brew head A12.
11. Wait until the dispensing process stops automatically.
12. Now move the container underneath the steam nozzle A7 and
repeat steps 6. – 11. until all the contents of the water tank A5 are
emptied and indicator light A13 is lit.
13. Take the water tank A5 out of the espresso machine, pour out the
remaining solution and fill the water tank A5 with fresh water up
to the max. mark.
14. Perform steps 6. – 11. to rinse out the espresso machine and
remove the remains of the solution from the internal components
of the espresso machine. We recommend that you pump out the
entire water tank A5.
15. Now the descaling process is finished.
16. To use the espresso machine again, it is necessary to reset the
descaling indicator light A14. While the espresso machine is
turned off, simultaneously hold down buttons
a time of 5 seconds. The descaling indicator light A14 will reset
- 8 - Copyright © 2021, Fast ČR, a.s.
B2 or B3 and allow about 0.5 litres of water to
Attention:
When rinsing it out, it is important that the portafilter
and basket are NOT inserted.
B1 to turn on the espresso machine. Button B1 will
B1 stops flashing, turn the control knob A6 to
and the heated solution will start being dispensed.
.
Note:
If necessary pour the solution out of the container.
Nevertheless, be very careful as the solution in the
container is very hot.
B3 and the espresso machine will start dispensing
B1 and B4 for
03/2021
Page 9
and will no longer be lit when the espresso machine is turned on
the next time. Otherwise, it will be necessary to perform the reset
again. After a successful reset, the espresso machine will again
start to measure the volume of consumed water so that it can
inform you about the next descaling.
Storage
■ When not using the appliance for an extended period of time,
disconnect the power plug from the power socket, allow the
appliance to cool down and clean it according to the instructions
provided above.
■ Before storing it, check that the appliance and all its accessories are
thoroughly clean and dry.
■ Store the appliance in adr y, clean and well-ventilated location not
exposed to extreme temperatures and out of children‘sreach.
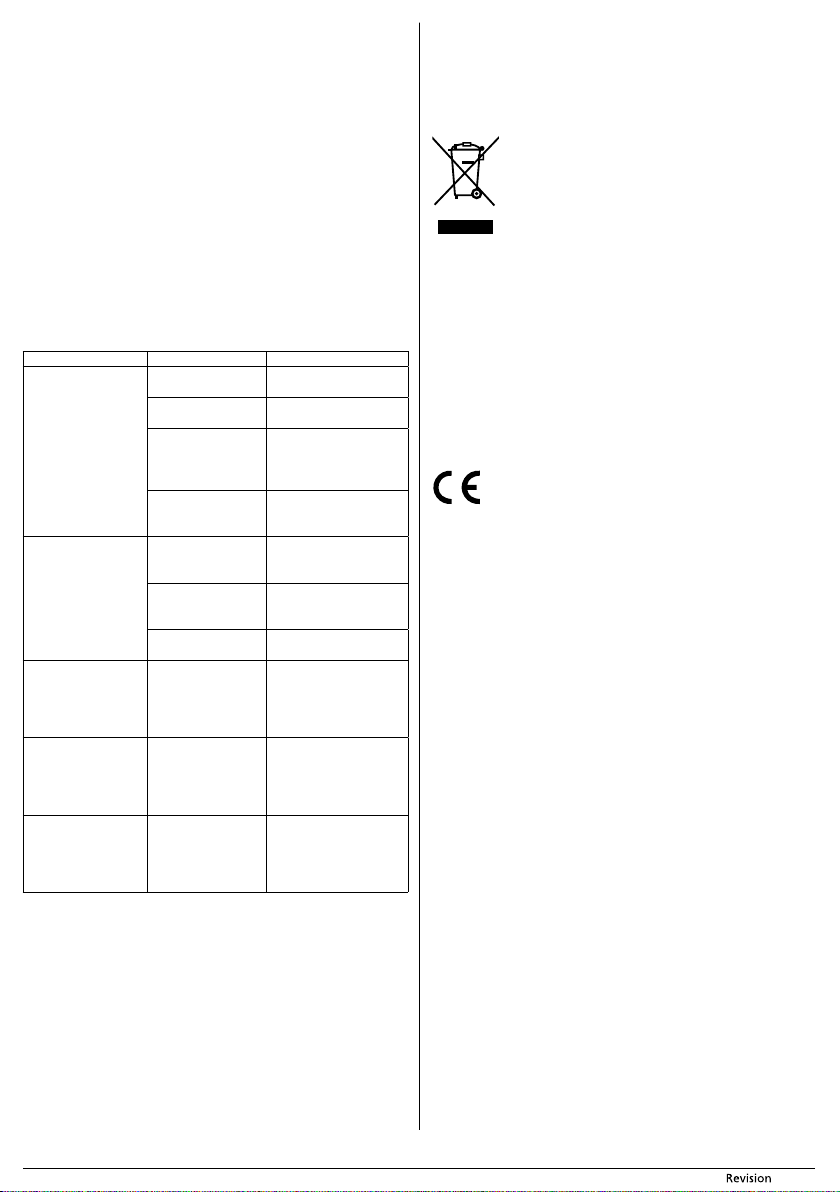
TROUBLESHOOTING
■ The following table lists potential problems that may be encountered
during the use of the espresso machine. Nevertheless, if the problem
persists, turn off the espresso machine, disconnect the power plug
from the power socket and contact an authorised service centre.
Problem Cause Solution
The espresso machine
is not dispensing
coffee.
Coffee is leaking
around the edge of the
portafilter.
It is not possible to
insert the portafilter
A11 into the brew
head A12.
After brewing coffee,
the basket jams in the
bottom part of the
brew head A12.
The espresso machine
is not working and
all the buttons are
flashing.
TECHNICAL SPECIFICATIONS
Rated voltage range .........................................................................220 – 240 V~
Rated frequency ..................................................................................... 50 – 60 Hz
Rated power input ......................................................................................1,400 W
Noise level ....................................................................................................75 dB(A)
The declared noise emission level of the appliance is 75 dB(A), which
represents a level A of acoustic power with respect to a reference
acoustic power of 1 pW.
We reserve the right to change text and technical specifications.
There is no water in
the water tank A5.
The holes in the
basket are clogged.
The water tank A5 is
not correctly seated
in the espresso
machine.
The espresso machine
is clogged with
limescale.
The portafilter A11 is
incorrectly inserted.
The gasket on the
brew head A12 is
damaged.
The holes in the
basket are clogged.
There is too much
coffee in the basket.
Fill the water tank A5 with
water.
Use acleaning tool and
clean out the basket.
Insert the water tank
A5 correctly to open
the input valve in the
espresso machine.
It is necessary to descale
the espresso machine.
Insert the portafilter A11
into the espresso machine
correctly.
Have the gasket replaced
at an authorised service
centre.
Use acleaning tool and
clean out the basket.
Use the measuring cup
to put coffee into the
portafilter and remove
any excess coffee from the
portafilter.
Reinsert the portafilter
A11 and start the coffee
brewing process. Then
remove the portafilter
A11 with the basket.
Turn off the espresso
machine, disconnect the
power plug from the power
socket and contact an
authorised service centre.
INSTRUCTIONS AND INFORMATION REGARDING THE
DISPOSAL OF USED PACKAGING MATERIALS
Dispose of used packaging material at site designated for waste in your
municipality.
DISPOSAL OF USED ELECTRICAL AND ELECTRONIC
EQUIPMENT
buying an equivalent new appliance.
Correct disposal of this product helps save valuable natural resources
and prevents potential negative effects on the environment and human
health, which could result from improper waste disposal. Ask your local
authorities or collection facility for more details.
In accordance with national regulations penalties may be imposed for
the incorrect disposal of this type of waste.
For business entities in European Union states
If you want to dispose of electric or electronic appliances, ask your
retailer or supplier for the necessary information.
Disposal in other countries outside the European Union.
This symbol is valid in the European Union. If you wish to dispose of this
product, request the necessary information about the correct disposal
method from the local council or from your retailer.
This symbol on products or original documents means
that used electric or electronic products must not be
added to ordinary municipal waste. For proper disposal,
renewal and recycling hand over these appliances to
determined collection points. Alternatively, in some
European Union states or other European countries you
may return your appliances to the local retailer when
This product meets all the basic requirements of EU
directives related to it.
- 9 - Copyright © 2021, Fast ČR, a.s.
03/2021
 Loading...