

Page 1
SHF200
Hardwood Flooring Cleat Nailer
Operating Instructions
Instrucciones de Operacion
Mode d’Emploi
Senco Brands, Inc.
4270 Ivy Pointe Blvd.
Cincinnati, OH 45245
1-800-543-4596
www.senco.com
Warnings for the safe use of this tool are included in this manual.
Los avisos para el uso seguro de esta herramienta están incluidos en este manual.
Les consignes pour l’utilisation en toute sécurité de cet outil se trouvent dans ce manuel.
NFD80D JUL 2, 2013
© 2013 by Senco Brands, Inc.
Page 2
EMPLOYER’S
RESPONSIBILITIES
Employer must enforce compliance
with the safety warnings and all
other instructions which accompany
this tool as shipped from the
manufacturer.
Keep this manual available
for use by all people
assigned to the use of this
tool.
For personal safety and
proper operation of this
tool, read and understand
all of these instructions
carefully.
RESPONSABILIDADES DEL
EMPLEADOR
El empleador debe hacer cumplir
las advertencias de seguridad y
todas las otras instrucciones que
acompañan a esta herramienta
como se la despacha desde el
fabricante.
Mantenga este manual disponible
para que lo usen todas
las personas destinadas a hacer
uso de esta herramienta.
Por razones de seguridad personal
y la adecuada operación de esta
herramienta, lea y comprenda todas
estas instrucciones cuidadosamente.
RESPONSABILITES DE
L’EMPLOYEUR
L’employeur doit faire appliquer
les consignes de sécurité et
toutes les autres instructions qui
accompagnent cet outil tel qu’il est
livré par son constructeur.
Ayez ce manuel à la disposition de
toutes les personnes chargées
d’utiliser cet outil.
Pour assurer la sécurité
personnelle et le bon
emploi de cet outil, lisez et
assimilez soigneusement
toutes ces instructions.
Table of Contents Tabla des Materias Table des Matieres
Safety Warnings...................... 3
Tool Use .....................................6
Maintenance............................ 9
Troubleshooting.................. 10
Accessories............................ 11
Specications........................ 11
Technical Specications.... 12
Limited Warranty................. 13
Avisos de Seguridad.............. 3
Use de la Herramienta...........6
Maintenimiento...................... 9
Identicación de Fallas...... 10
Accesorios.............................. 11
Especicaciones................... 11
Especicaciones Tecnicas. 12
Limited Warranty................. 13
Avertissements de sécurité...3
Utilisation d l’Outil....................6
Entretien...................................... 9
Dépannage.............................. 10
Accessoires............................... 11
Specications.......................... 11
Specications Techniques.. 12
Limited Warranty................... 13
2
Page 3
Safety Warnings Avisos
de seguridad
Avertissements
de sécurité
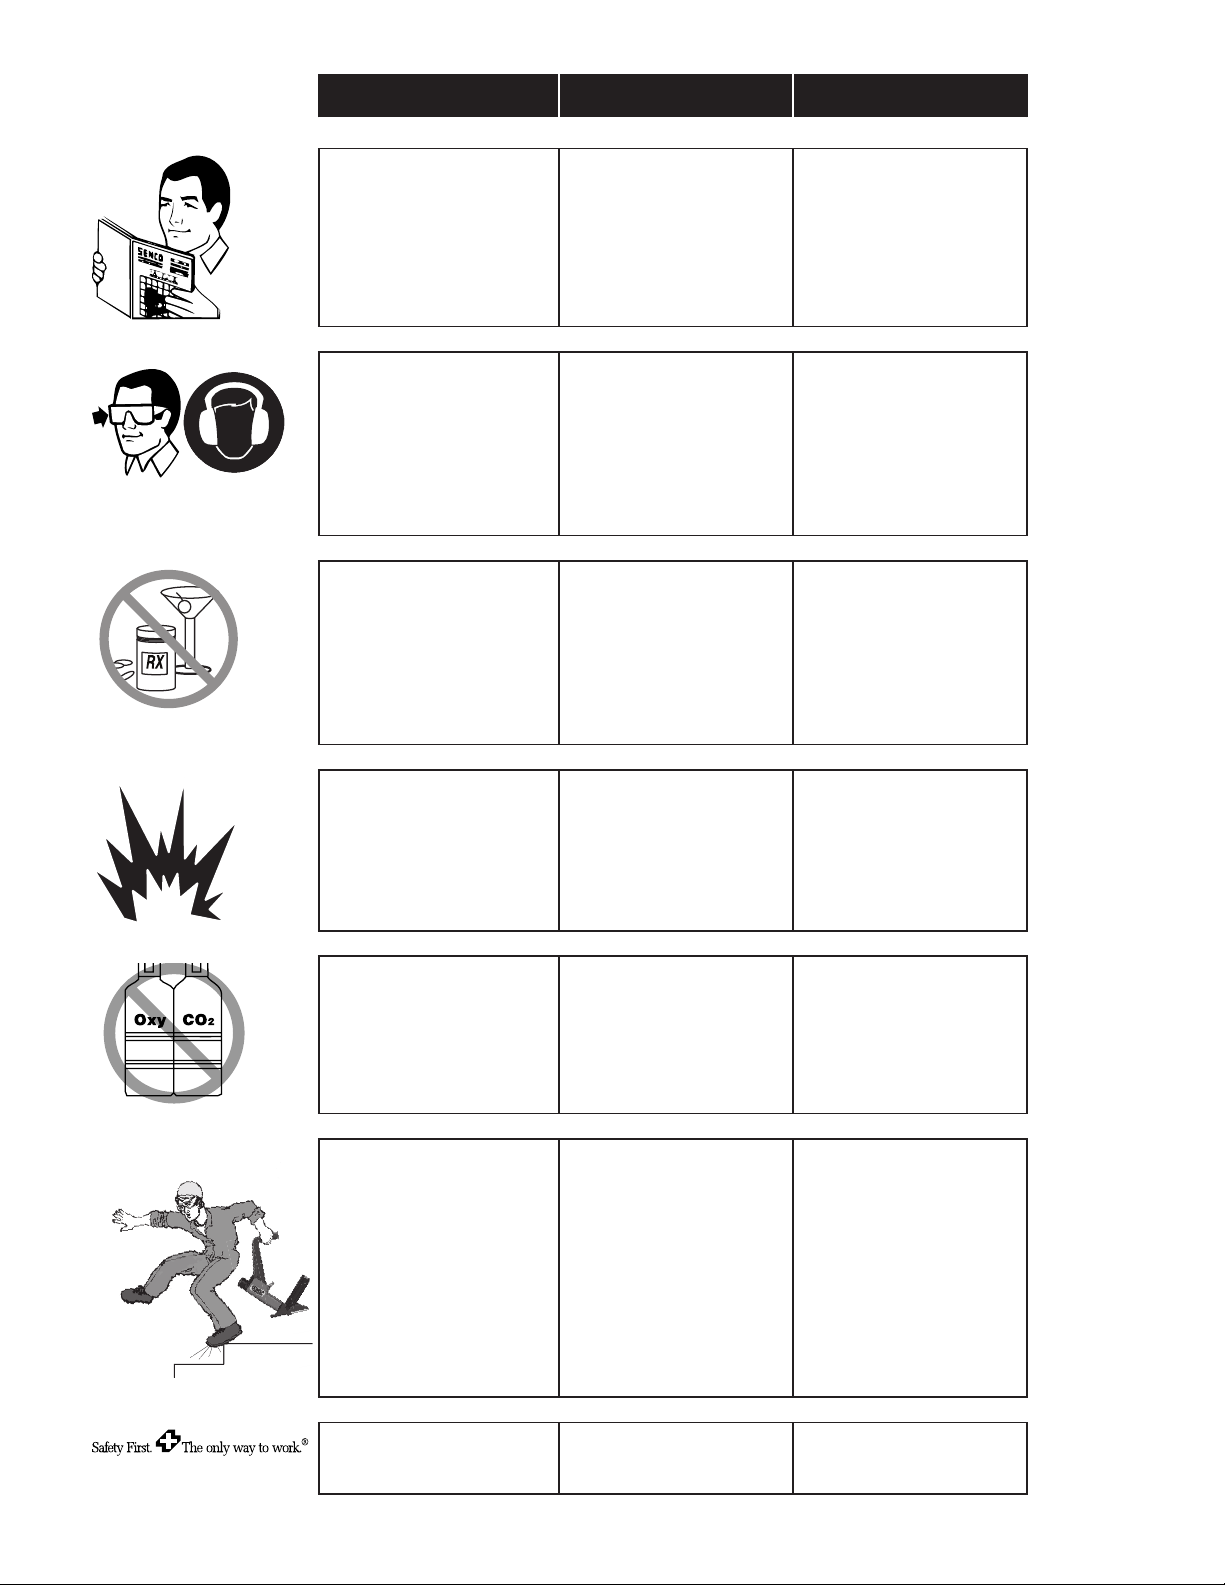
• Read and understand tool labels
and manual. Failure to follow
warnings could result in DEATH or
SERIOUS INJURY.
• Use safety equipment. Always wear
ANSI Z87.1 safety glasses with
permanently attached side shields.
Dust mask, non-skid safety shoes,
hard hat, or hearing protection
must be used for appropriate
conditions. Failure to do so could
result in personal injury.
• Stay alert, watch what you are
doing, and use common sense
when operating a power tool. Do
not use tool while tired or under
the inuence of drugs, alcohol,
or medication. A moment of
inattention while operating power
tools may result in serious personal
injury.
• Lea y comprenda las etiquetas
y el manual de la herramienta.
El incumplimiento de los avisos
puede provocar la MUERTE o
GRAVES LESIONES.
• Utilice equipos de seguridad.
Use siempre anteojos de
seguridad conforme a ANSI
Z87.1, con protecciones laterales
permanentemente colocadas.
En las condiciones en las que sea
necesario debe utilizarse máscara
antipolvo, zapatos de seguridad
antideslizantes, casco o protección
auditiva. No hacerlo podría
provocar lesiones personales.
• Al manejar una herramienta
eléctrica manténgase alerta, preste
atención a lo que está haciendo
y aplique el sentido común. No
utilice la herramienta cuando
esté cansado o bajo el efecto de
drogas, alcohol o medicamentos.
Un momento de falta de atención
mientras maniobra herramientas
eléctricas puede provocar graves
lesiones personales.
• Lire et assimiler les étiquettes et le
manuel de l’outil. Le non respect
des avertissements peut entraîner
des BLESSURES GRAVES OU
MORTELLES.
• Utiliser un équipement de sécurité.
Porter toujours des lunettes de
protection classe ANSI Z87.1 avec
leurs écrans latéraux montés
en permanence. Quand les
conditions le demandent, porter
masque à poussières, casque,
ou protection auditive. Ne pas
porter les protections adéquates
peut entraîner des préjudices
physiques.
• Rester attentif à ce qui est en train
de se faire, et utiliser le bon sens
en utilisant un outil motorisé. Ne
pas l’utiliser en cas de fatigue ou
sous l’inuence de drogues, alcool
ou médicaments. Un moment
d’inattention pendant l’utilisation
de l’outil motorisé peut entraîner
des blessures graves.
• EXPLOSION HAZARD Never use
tool in an explosive atmosphere
or in the presence of combustible
materials such as ammable liquids,
gases or dust.
• Never use oxygen, carbon dioxide
or any other bottled gas as a power
source for this tool; the tool will
explode and cause serious injury.
• Always place yourself in a rmly
balanced position when using or
handling the tool. Use this tool for
ooring installation, only.
• RIESGO DE EXPLOSIÓN Nunca
utilice la herramienta en una
atmósfera explosiva o en presencia
de materiales combustibles, como
líquidos, gases o polvo inamable.
• Nunca use oxígeno, anhídrido
carbónico o cualquier otro gas
embotellado como fuente de
fuerza para esta herramienta; la
herramienta explotará y producirá
lesiones graves.
• Siempre coloquese usted en una
posición rmemente equilibrada
cuando use o maneje la
herramienta. Use esta herramienta
sólo para instalar pisos.
• DANGER D’EXPLOSION Ne jamais
utiliser l’outil en atmosphère
explosive ou en présence de
matériaux combustibles tels que
les liquides, gaz ou poussières
inammables.
• N’utilisez jamais de l’oxygène,
du gaz carbonique ou tout autre
gaz en bouteille comme source
d’énergie pour cet outil ; cela
causerait l’explosion de l’outil et
entraînerait de graves blessures.
• Veiller à toujours être en position
stable pour toute utilisation
ou intervention sur l’appareil.
N’utilisez cet outil que pour
l’installation de plancher.
• For information on the “SENCO
Safety First Program,” contact your
SENCO representative.
• Para información sobre el
“Programa de SENCO la Seguridad
es Primero” comuníquese con su
representante de SENCO.
• Prendre contact avec votre
représentant SENCO tout
renseignement sur “Le Programme
SENCO de Première Urgence”.
3
Page 4

Safety Warnings
Avisos
de seguridad
Avertissements
de sécurité
• Always remove nger from trigger when
not driving fasteners. Never carry the tool
with nger on or under trigger. Tool will
eject a fastener if the ring valve bumper
is bumped.
• Always assume the tool contains
fasteners. Keep the tool pointed away
from yourself and others. No horseplay.
Respect the tool as a working implement.
• Use this tool for hardwood ooring
installation over sub-oor, only. Never use
it to install ooring directly over concrete.
• Siempre quite el dedo del gatillo
cuando no esté disparando clavos.
Nunca cargue la herramienta con el
dedo sobre o por debajo del gatillo. La
herramienta disparara un clavo si se
golpea el disparar parachoques válvula.
• Suponga siempre que la herramienta
contiene sujetadores. Mantenga
la herramienta de modo que no
apunte hacia usted u otras personas.
Absténgase de practicar juegos rudos o
bromas. Respete a la herramienta como
un implemento de trabajo.
• Use esta herramienta sólo para instalar
pisos de madera sobrea contrapisos.
Nunca la use para instalar pisos
directamente sobre concreto.
• Otez le doigt de la détente lorsque vous
n’enfoncez pas d’agrafes. Ne transportez
jamais l’outil avec le doigt sur la détente ;
l’outil tirera une agrafe si le tir pare-chocs
de la vanne par pression est heurté.
• Toujours supposer que l’outil contient
encore des clous. Ne pas le pointer
vers vous ou un tiers. Pas de brutalité.
Respecter l’outil comme instrument de
travail.
• Utiliser cet outil pour la poser de plancher
de bois franc sur un sous-plancher de
bois, seulement; jamais dans un sous
plancher trop dur à pénétrer tel le béton.
• Do not drive fasteners on top of other
fasteners or with the tool at too steep of
an angle; the fasteners can ricochet and
hurt someone.
• No dispare los sujetadores uno encima
uno del otro o con la herramienta en un
ángulo muy empinado; los sujetadores
pueden rebotar y herir a alguien.
• N’enfoncez pas des projectiles sur d’autres
projectiles ou avec l’outil à un angle trop
grand ; les projectiles peuvent ricocher et
blesser quelqu’un.
4
Page 5

Safety Warnings
Avisos
de seguridad
Avertissements
de sécurité
• Disconnect tool from air before doing tool
maintenance, clearing a jammed fastener,
leaving work area, moving tool to another
location, or handing the tool to another
person.
• Always maintain the tool rmly in its
working position (over the sub-oor)
when connecting air. Never leave the
tool laying down on its side while the
air supply is connected. always carry or
manipulate the tool by its handle.
• Desconecte la herramienta del aire
antes de darle mantenimiento a la
herramienta de arreglar un sujectador
atascado, de dejar le área de trabajo o
de mover la herramienta a otro lugar, o
entregar la herramienta a otro persona.
• Siempre mantenga la herramienta
rmemente en su posición de trabajo
(sobre el contrapiso) cuando conecte el
aire. Nunca deje la herramienta de lado
mientras se conecta el abastecimiento
de aire. Siempre lleve o manipule la
herramienta por el mango.
• Couper l’arrivée d’air comprimé avant
toute intervention sur l’outil (maintenance
ou dégagement d’un clou coincé) ou
avant de vous éloigner du secteur de
travail ou avant de déplacer l’appareil, ou
encore avant de le donner à une autre
personne.
• Maintenir l’outil fermement en position
de travail (sur le sous-plancher) lors du
raccordement à l’air. Ne laissez jamais
l’outil couché lorsqu’il est alimenté en
air comprimé. Transportez ou manipulez
toujours l’outil par la poignée.
• Make sure all screws and caps are
securely tightened at all times. Make daily
inspections for free movement of trigger.
Never use the tool if parts are missing or
damaged.
• Asegúrese de que todos los tornillos
y tapas estén asegurados en forma
apretada, en todo momento. Realize
inspecciones diarias asegurandose que
el Gatillo se mueven libremente. Nunca
use la herramienta si hay partes que
faltan o que están dañadas.
• Assurez-vous que tous les vis et
couvercles soient serrés en permanence.
Par une inspection journalière, assurezvous que la détente fonctionnent
librement. N’utilisez jamais l’outil si des
pièces manquent ou sont endommagées.
5
Page 6

Safety Warnings
Avisos
de seguridad
Avertissements
de sécurité
• Never use a tool that leaks air or
needs repair.
• Nunca use una herramienta que
tenga escapes de aire o que necesite
reparación.
• N’utilisez jamais un outil qui a des fuites
d’air ou qui a besoin d’être réparé.
Tool Use Use de la Herramienta Utilisation d l’Outil
• Read “Safety Warnings” before using tool. • Lea “Avisos de Seguridad” antes de usar
la herramienta.
• Avant d’utiliser l’outil, lisez “Consignes
de Securité.”
• With the tool sitting upright on the suboor, connect air to tool. Always carry or
manipulate the tool by its handle when
connected to air supply.
• To load:
With the tool sitting upright on the suboor, insert strip of fasteners into rear
of magazine. Use only genuine SENCO
fasteners.
• Con la herramienta apoyada
verticalmente sobre el contrapiso,
conecte el aire a la herramienta.
Siempre leve o manipule la
herramienta por el mango cuando esté
conectada al abastecimiento de aire.
• Para cargar:
Con la herramienta apoyada
verticalmente sobre el contra-piso,
inserte la tira de clavos en la parte de
atrás del cargador. Use soló clavos
SENCO genuinas.
• Maintenez l’outil debout sur le
sous-plancher et raccordez l’air l’air a
l’outil. Manipulez toujours l’outil par sa
poignée lorsqu’il est raccordé au réseau
d’air comprimé.
• Pour charger:
Maintenez l’outil debout sur le sousplancher et introduisez une bande de
clous dans le partie arrière du magasin.
Utilisez uniquement les clous d’origine
SENCO.
6
Page 7

Tool Use Use de la Herramienta Utilisation d l’Outil
• Pull the feeder shoe back, fully, and
slowly release it to engage behind the
fasteners. Jamming may occur if the
feeder clip is not engaged.
• Use the rubber face of the hammer to
put the ooring rmly in place.
• Tire hacia atrás completamente
hasta el clip de alimentación y
suéltelo lentamente para que se
enganche detrás de los clavos. La
herramienta podría trabarse si el clip de
alimentación no se engancha.
• Use la cara de goma del martillo para
poner el piso rmemente en su lugar.
• Tirez le coulisseau en arrière
complètement et relâchez le
doucement Jusqu’a ce qu’il s’appuie
derrière le clous. Les clous peuvent
se coincer si le coulisseau n’est pas
engager correctement derrière les
clous.
• Utilisez la face caoutchouté du marteau
pour installer le planches a clouer
fermement en place.
• The lip of the base should rest snugly
against the tongue of the ooring.
Downward pressure should be applied
to ensure proper seating of the fastener.
• Activate the tool by pressing the trigger
and lightly striking the head cap with the
RUBBER FACE of the hammer supplied
with the tool. Never strike the tool with
the metal end of the hammer.
• El labio del base debe descansar
ajustadamente contra la lengüeta del
piso. Deberá aplicarse presión hacia
abajo para asegurar el asentamiento
correcto del clavo.
• Active la herramienta pegándole
ligeramente a casquete con la CARA
DE GOMA del martillo que vino con
la herramienta. Nunca golpee la
herramienta con el extremo metálico
del martillo.
• Placer la lèvre de l’outil en contact
avec la languette de la planche de
bois. Appliquer une pression verticale
sur l’outil pour s’assurer un bon
positionnement du clou.
• Pour déclencher l’outil, frapper
légèrement sur le chapeau
du déclencheur avec la FACE
CAOUTCHOUTÉE du marteau fourni
avec l’outil. Frapper avec le cote
métallique du marteau endommagera
l’outil.
7
Page 8

Tool Use Use de la Herramienta Utilisation d l’Outil
• Should a fastener jam occur, disconnect
air supply.
• Release the feeder clip and remove
fasteners from the tool.
• Si se produce un atascamiento de un
clavo, desconecte el suministro de aire.
• Suelte el clip de alimentación y quite
los clavos de la herramienta.
• Au cas ou il se produirait un coinçage
de clous, coupez l’alimentation en air.
• Relâchez le coulisseau et faites le glisser
doucement vers l’avant. Enlever les
clous du magasin.
KB6449
KD0037
KD0030
To clear the jam:
1. Remove 4 KD0037 screws to separate
base assembly and guide body/
magazine assembly from main body.
2. Remove 4 KB6449 screws to separate
guide body from magazine assembly.
3. Remove 2 KD0030 screws to separate
guide body plate from magazine
assembly.
4. Remove jammed fastener.
5. Inspect feed assembly components for
wear and damage.
6. Reassemble in reverse.
Para despejar un atasco:
1. Retire los 4 tornillos para separar
KD0037 conjunto de base y conjunto
del cuerpo / revista guía del cuerpo
principal.
2. Retire los 4 tornillos KB6449 para
separar cuerpo de guía de la revista.
3. Retire los 2 tornillos KD0030 para
separar la placa de cuerpo del conjunto
de la revista.
4. Retire sujetador atascado.
5. Inspeccione alimentar a los
componentes del conjunto de desgaste
y daños.
6. Vuelva a montar en sentido inverso.
Pour dégager le bourrage:
1. Retirez les 4 vis KD0037 de séparer
l’assemblage de base et l’assemblage
de corps / le magazine guide de corps
principal.
2. Retirez les 4 vis KB6449 de séparer le
corps de guidage du magazine.
3. Retirez les 2 vis KD0030 de séparer
la plaque de corps de l’ensemble de
magasin.
4. Retirer clou coincé.
5. Inspectez les composants
d’assemblage alimentation pour l’usure
et les dommages.
6. Remontez dans l’ordre inverse.
8
Page 9

Maintenance
Maintenimiento
Entretien
• Read and understand “SAFETY
INSTRUCTIONS” manual shipped with
this tool before using tool.
• All screws should be kept tight. Loose
screws result in unsafe operation and
parts breakage.
• Squirt Senco pneumatic oil (5 to 10
drops) into the air inlet daily. (Depending
on frequency of tool use.) Other oils may
damage O-rings and other tool parts..
• Antes de usar la herramienta lea y
comprenda el manual “INSTRUCCIONES
DE SEGURIDAD” despachado con ella.
• Todos los tornillos tienen que
mantenerse apretados. Los tornillos
sueltos pueden producir una operación
no segura y quebraduras de partes.
• Aplique aceite neumático Senco (5 a
10 gotas) en la entrada de aire diario.
(Dependiendo en la frecuencia de uso.)
Otros aceites pueden dañar los anillos
en “O” y otras piezas de la herramienta.
• Lisez et assimilez le manuel
“INstructions de sécurité” livré avec cet
outil avant de l’utiliser.
• Toutes les vis doivent être maintenues
serrées à fond. Les vis desserrées
entraînent un manque de sûreté du
fonctionnement et la rupture de pièces.
• Avec une burette, placer 5 à 10 gouttes
d’huile pneumatique dans l’arrivée d’air
une fois par jour. (Dépend de l’intensité
de l’utilisation de l’appareil.) D’autres
huiles pourraient endommager les
joints toriques et d’autres pièces de
l’outil.
• Wipe tool clean daily and inspect for
wear. Use non-ammable cleaning
solutions only if necessary – DO NOT
SOAK.
• CAUTION: Such solutions may damage
O-rings and other tool parts.
• Limpie la herramienta de limpieza
todos los días y compruebe el
desgaste. Use productos de limpieza
no inamables sólo si es necesario - NO
LA REMOJE.
• PRECAUCIÓN: Tales soluciones pueden
dañar los empaques y otras partes de la
herramienta.
• Nettoyez l’outil chaque jour à l’aide
d’un chion et inspectez-le pour
déceler une éventuelle usure. Utilisez
uniquement des solvants non
inammables en cas de nécessité – NE
LE FAITES PAS TREMPER!
• ATTENTION : De tels produits peuvent
endommager les joints et d’autres
pièces de l’appareil.
9
Page 10

Troubleshooting Identicación de Fallas Dépannage
Repairs other than those described here
should be performed only by trained,
qualied personnel. Contact SENCO for
information at: 1-800-543-4596.
• Read section titled “Safety
WARNING
Warnings” before maintaining tool.
SYMPTOM:
• Air leak near top of tool/Sluggish
operation.
SOLUTION:
• Verify air supply / tighten screws.
SYMPTOM:
• Air leak near bottom of tool/ Poor
return.
SOLUTION:
• Clean tool / tighten screws.
Las reparaciones, fuera de aquellas
descritas aquí, deben de ser llevadas
a cabo solamente por personal entrenado y calicado. Póngase en contacto
con SENCO para información
1-800-543-4596.
• Lea la sección titulada “Avisos
ALERTA
de Seguridad” antes de darle
mantenimiento a la herramienta.
SÍNTOMA:
• El aire se escapa cerca de la parte
superior de la herramienta /
Operación lenta.
SOLUCIÓN:
• Apriete los tornillos / Verifique el
suministro de aire.
SÍNTOMA:
• El aire se fuga cerca de la parte
inferior de la herramienta / Mal
retorno.
SOLUCIÓN:
• Apriete los tornillos / Limpié la
herramienta.
AVERTISSEMENT
Les réparations autres que celles
décrites ici doivent être réalisées
uniquement par du personnel qualié
ayant reçu la formation appropriée.
Pour toute information, prenez contact
avec SENCO par téléphone en appelant Le Distributeur agréé.
• Lisez la section intitulée
“Consignes de Sécurité” avant
d’eectuer l’entretien de l’outil.
SYMPTÔME:
• Fuite d’air près du sommet de
l’outil / fonctionnement lent.
SOLUTION:
• Serrez les vis à fond / vérifiez
l’alimentation en air.
SYMPTÔME:
• Fuite d’air près de la base de l’outil
/ retour inadéquat.
SOLUTION:
• Serrez les vis à fond / nettoyez
l’outil.
10
EA0349
SYMPTOM:
• Broken or worn driver.
SOLUTION:
• Replace piston driver cylinder, kit
EA0349.
SYMPTOM:
• Other problems.
SOLUTION:
• Contact SENCO.
SÍNTOMA:
• Conductor roto o desgastado.
SOLUCIÓN:
• Cambie el cilindro de pistón
conductor, kit EA0349.
SÍNTOMA:
• Otros problemas.
SOLUCIÓN:
• Póngase en contacto con SENCO.
SYMPTÔME:
• Conducteur cassé ou usé.
SOLUTION:
• Remplacez le vérin de pilote de
piston, kit EA0349.
SYMPTÔME:
• Autres problèmes.
SOLUTION:
• Prenez contact avec SENCO.
Page 11

Accessories Accesorios Accessoires
SENCO oers a full line of
accessories for your SENCO tools,
including:
• Air Compressors
• Hoses
• Couplers
• Fittings
• Safety Glasses
• Pressure Gauges
• Lubricants
• Regulators
• Filters
For more information or a
complete illustrated catalogue of
SENCO accessories, ask your
representative for #MK336.
SENCO ofrece una línea
completa de Accesorios para sus
herramientas SENCO, incluyendo:
• Compresores de Aire
• Manguera
• Conectores Rapidos
• Conectores
• Anteojos De Seguridad
• Manometros
• Lubricantes
• Reguladores
• Filtros
Para mas informacion ó un pour
recevoir un catalogo completo
ilustrado de los Accesorios SENCO,
pregunte a su representante pour el
numero MK336.
SENCO ore une gamme
étendue d’accessoires pour vos
outils SENCO y compris:
• Compresseurs
• Tuyauterie flexible
• Coupleurs
• Raccords
• Lunettes de sécurité
• Manomètres
• Lubrifiants
• Régulateurs
• Filtres
Pour plus d’informations ou pour
recevoir un catalogue détaillé
des accessoires proposés par
SENCO, prenez contact avec votre
représentant SENCO (référence
catalogue : #MK336).
Specications Especicaciones Specications
SHF200 Hardwood Flooring Cleat Nailer - drives 16 gauge, SENCO L Style, 1 ½-2 inch Head Flooring Cleat
Nails
0.63”
7.3mm
0.63”
1.6mm
1.5 - 2.0”
38mm - 50mm
11
Page 12

TECHNICAL SPECIFICATIONS
Minimum to maximum operating pressure (psi)
Air Consumption (60 cycles per minute)
Air Inlet (inches)
Maximum Speed (cycles per second)
Weight (lbs)
Fastener Capacity
Tool size: Height (inches)
Tool size: Length (inches)
Tool size: Width: Main Body (inches)
ESPECIFICACIONES TECNICAS
Presión de operación mínima y máxima
Consumo de aire (60 ciclos por minuto)
Entrada de aire (inches)
Velocidad máxima (ciclos por segundo)
Peso (kg)
Capacidad de grapas por cargador
Tamaño de la herramienta: Altura
Tamaño de la herramienta: Longitud
Tamaño de la herramienta: Ancho (Cuerpo)
(mm)
(mm)
(mm)
70-120
2.52 SCFM
3/8 in NPT
2
10.1
107
21.5
17.8
3.1
4,8 - 8,3
2.52 SCFM
3/8 in NPT
2
4,6
107
546.1
452.1
78.7
SPECIFICATIONS TECHNIQUES
Pression de travail min. et max. (BAR)
Consommation d’air (60 cycles par minute)
Admission d’air (inches)
Vitesse maximum (cycles par seconde)
Poids (kg)
Capacité de projectiles par magasin
Dimensions de l’outil: hauteur (mm)
Dimensions de l’outil: longueur (mm)
Dimensions de l’outil: largeur: corps de l’appa-
reil) (mm)
4,8 - 8,3
2.52 SCFM
3/8 in NPT
2
4,6
107
546.1
452.1
78.7
12
Page 13

Limited Warranty
SENCO® Pneumatic, DuraSpin®, Cordless Tools
& Compressors
Senco Products, Inc. (“SENCO”) designs and constructs its products using the highest standards of material and workmanship. SENCO
warrants to the original retail purchaser that the following products will be free from defects in material or workmanship for the warranty
period specified below:
SENCO® XP Series-Red Cap SENCO PRO Series SENCO Compressors SENCO PC1194
Flooring Jack
Five years One year One year One year
SENCO® XP Series-Black Cap SENCO DuraSpin® SENCO Cordless Hand Nailers
Two Years One year Two years One Year
SENCO FP502 SENCO Reconditioned Products Gas Cordless
Two Years One Year Two Years
During the warranty period (which begins on the purchase date), SENCO will repair or replace, at SENCO’s option and expense, any product or part that
is defective in materials or workmanship after examination by a S ENCO Authorized Wa rranty Service Center, subject to the exceptions, exclusions and
limitations descri bed belo w. An y replacement pro duct or part will carry a warranty for the balance of the w arranty period appli cable to the replaced
product or pa rt. A DATED SALE S RECEIPT OR PROOF OF PURCHASE FROM THE ORIGI NAL RETAIL PURC HASER IS REQUIRED TO MAK E A
WARRANTY CLAIM. Product registration can be accomplished through on-line Product Registration at www.senco.com or by completing and r eturning
the postage paid product re gistration form included with your Oper ator’s manual/p arts chart inform ation, found inside the pr oduct carton. To make a
warranty claim, you must return t he product, with proper receipt/proof of purchase and return transportation charges prepaid, t o a SENCO Auth orized
Warranty Service Center. A list o f SENCO Authorized Warranty Service Centers can be found at www.senco.com
or by calling 1-80 0-543-4596 toll free.
SENCO will perform its obligations under this warranty, within a reasonable time after approval of the warranty claim.
Wheelbarrow Compressors:
1. Subject to the exceptions, exclusions and limitations described below, SENCO warrants that the compressor pump will be free from defects in
materials and workmanship for two years after the purchase date.
2. Defective parts of the compressor pump not subject to normal wear and tear will be repaired or replaced, at SENCO's option, during the two
year warranty period. If SENCO determines that repair or replacement is not feasible, SENCO will refund the purchase price less reasonable
depreciation based on actual use.
SENCO Cordless:
1. Subject to the exceptions, exclusions and limitations described below, SENCO warrants that the SENCO Cordless tool will be free from
defects in materials and workmanship for two years after the purchase date.
2. Subject to the exceptions, exclusions and limitations described below, SENCO warrants that the batteries and chargers used with SENCO
Cordless tools will be free from defects in material and workmanship for one year after the purchase date.
WARRANTY EXCLUSIONS
The following warranty exclusions apply:
1. Normal wear parts are not covered under this warranty. Normal wear parts include, for example, isolators, drive belts, air filters, rubber o-rings,
seals, driver blades, piston stops, piston/driver assembly, and fuel stems.
2. This warranty does not cover parts damaged due to normal wear, misapplication, misuse, accidents, operation at other than recommended
speeds or voltage (electric units only), improper storage, or damage resulting during shipping.
3. Products used in production/industrial applications as defined by SENCO are excluded from this warranty.
4. Labor charges or loss or damage resulting from improper operation, maintenance or repairs are not covered by this warranty.
5. SENCO does not warrant the Wheelbarrow Compressor Engine/Motor, but the Compressor Engine/Motor may be covered under a warranty
offered by its manufacturer.
GENERAL WARRANTY CONDITIONS
This warranty will be honored, only if:
A. Clean, dry, regulated compressed air has been used, at air pressure not exceeding the maximum indicated on the tool casting;
B. No evidence of abuse, abnormal conditions, accident, neglect, misuse or improper modifications or storage of the product; and
C. No Deviation from operating instructions, specifications, and maintenance schedules exists (read Operator Manual for use, specifications, and
maintenance instructions).
THIS WARRAN TY IS T HE ON LY WARRAN TY ON THE PR ODUCT, AN D SENCO DISC LAIMS ALL OTHE R WARRANTIE S. AN Y IMPLIE D
WARRANTIES WILL BE LIMITED IN DURATION TO THE APPLICABLE WARRANTY PERIOD SPECIFIED ABOVE. SOME STATES DO NOT ALLOW
LIMITATIONS ON HOW LONG AN IMPLIED WARRANTY LASTS, SO THE ABOVE LIMITATION MAY NOT APPL Y TO YOU. YOUR REMEDIES ARE
SOLELY AND E XCLUSIVELY AS STATED ABOVE. SENCO SHALL IN NO EVENT BE LIABLE FO R INCIDENTAL, CO NSEQUENTIAL, INDIRECT,
OR SPECIAL DAMAGES. SOME STATES DO NOT ALLOW THE EXCLUSION OR LIMITATION OF INCIDENTAL O R CONSEQUENTIAL DAMAGES,
SO THE AB OVE LIMITATI ON OR EXCL USION MA Y NOT A PPLY TO YOU. IN NO EVENT, WHETHER A S A RESULT OF A BREACH O F
CONTRACT, WARRANT Y, TORT (IN CLUDING NE GLIGENCE) OR OTHERWISE, SHALL SENCO ’S LIABI LITY EXCEED THE PRICE OF THE
PRODUCT WHI CH HAS G IVEN RISE TO THE CLAIM OR LIABILITY. ANY LIABILITY CONNECTED WITH THE USE O F THIS PRO DUCT SHALL
TERMINATE UPON THE EXPIRATION OF THE WARRANTY PERIOD SPECI FIED ABOVE. NO E MPLOYEE OR REPRESENTATIVE OF SENCO OR
ANY DISTRIBUTOR OR DEALER IS AUTHORIZED TO MAKE ANY CHANGE OR MODIFICATION TO THIS WARRANTY.
This warranty gives you specific legal rights, and you may also have other rights which vary from state to state.
REPLACEMENT OF TOOL DUE TO NATURAL DISASTER
SENCO will replace an y tool destroyed by an Act of God such as flood, eart hquake, hurricane o r other disaster resulting only from the forces of natu re.
Such a cla im w ill be honored pro vided that su ch original retail purchaser had previously submitted a completed w arranty registration card for the tool,
and then submits proof of ow nership and an acceptable statement de scribing such Act of God documented b y an insurance carrier, police department,
or other official governmental source. To obtain instructions for filing a claim call 1-800-543-4596.
CUSTOMER SATISFACTION
One hundred percent customer satisfaction is our #1 goal. If for an y reason the product does not pe rform to the original purchaser’s satisfaction, it can
be returned to the place of purchase within thirty days with dated sales receipt for a full refund of the purchase price.
©2010 by SENCO Brands, INC.
CINCINNATI, OHIO 45245 USA
www.senco.com
051208
13
 Loading...