

Seip TS MINI,TS MIDI STEEL Instructions Manual
TS MINI/TS MIDI STEEL REMOTE INSTRUCTIONS
HEALTH & SAFETY: THESE PROCEDURES ARE TO BE
CARRIED OUT BY A COMPETENT PERSON ONLY
PROGRAMMING A REMOTE
Situation 1
You have got at least one working remote and want to register the new remote to
be used in addition:
1) Open the garage door at least half way and
close it again using the existing remote
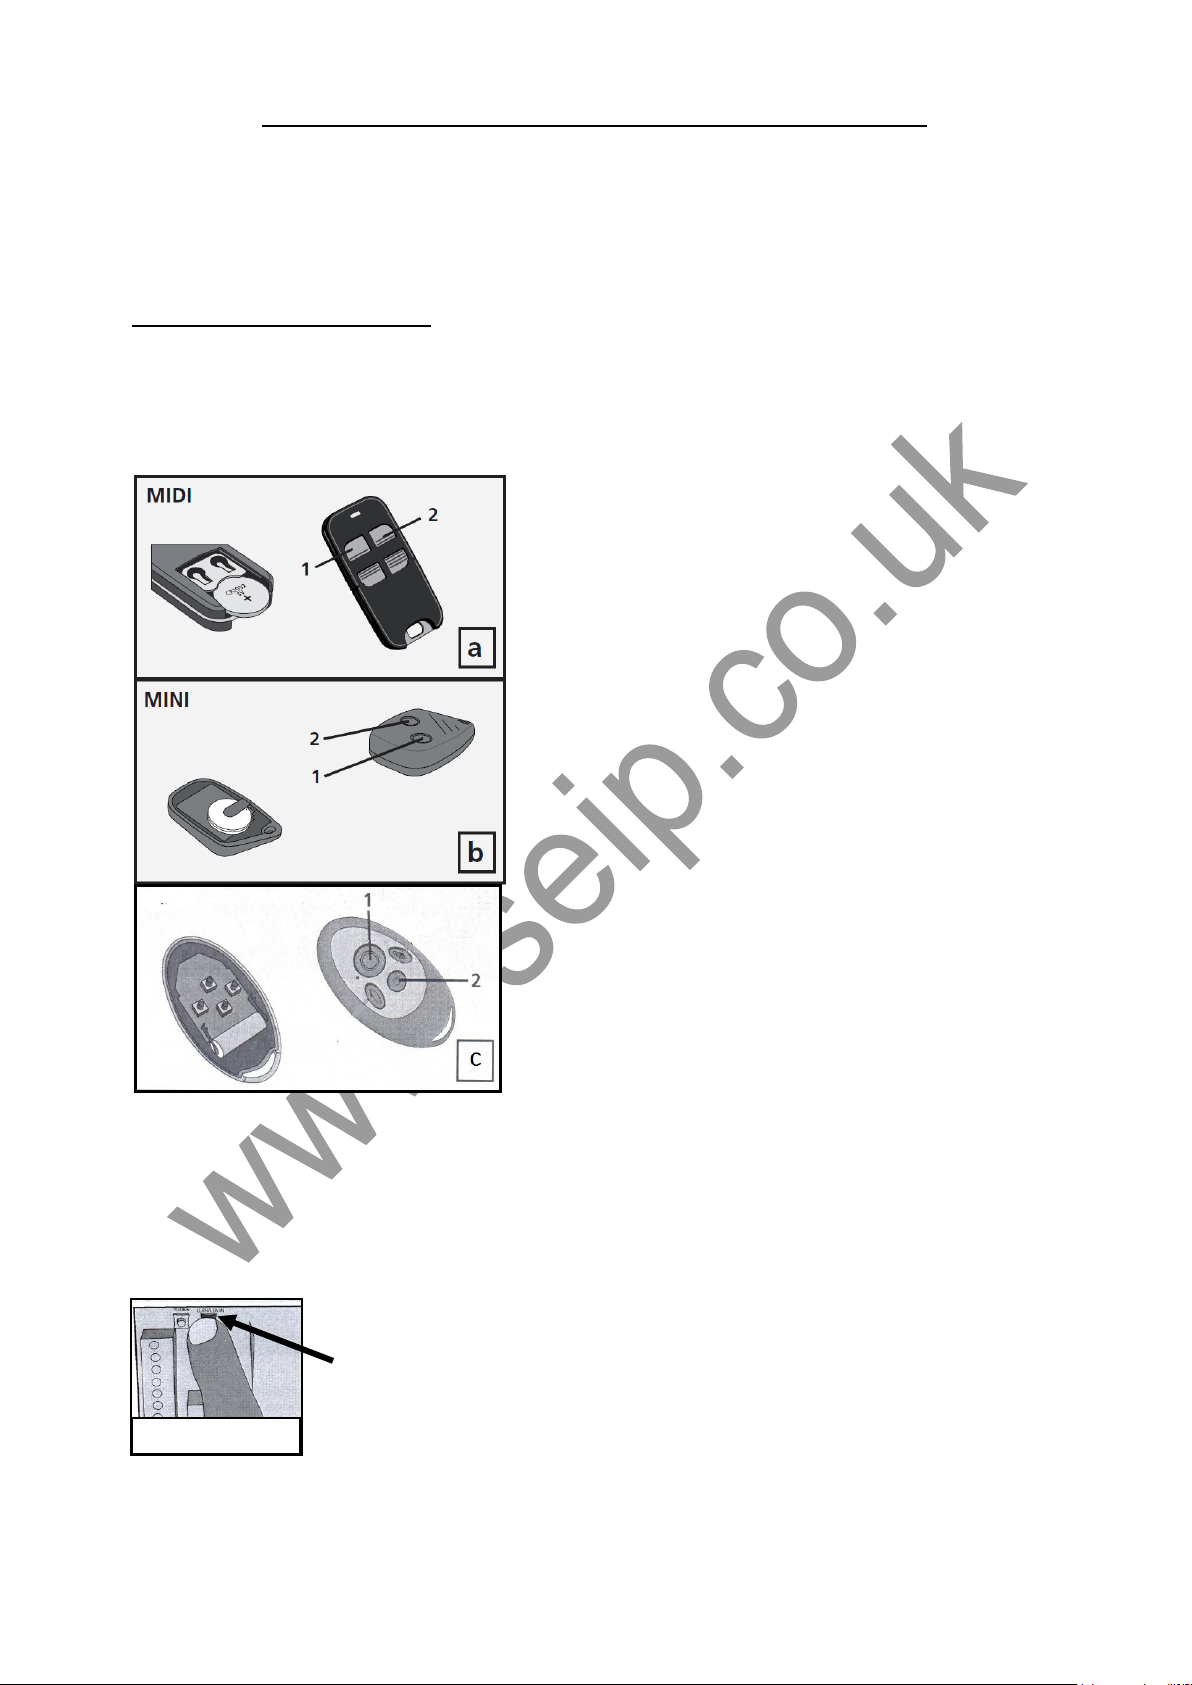
2) You now have 10 seconds to press buttons 1
and 2 on the existing remote simultaneously
for approx. 3 seconds. (shown in picture A
B & C)
3) The light bulb on the operator will start
flashing – now release the two buttons
4) Take the new remote and press the button
you want to use for the operator and the
operators light bulb will stop flashing
5) On the next push of the button on the new
remote the door will operate.
Situation 2
You do not have a working remote:
1) Open the operator’s plastic cover (one Philips screw will need to be undone for TS75
and TS100 operators or remove the rear plastic cover for TM and RP series
operators)
2) Press the RED learn button on the printed circuit board for
approx. 3 seconds (shown in picture C) until the light bulb on
the operator starts flashing then release the button
3) Take the new remote and press the button you would like to use
4) The light bulb on the operator will stop flashing
5) On the next push of the button on the new remote the door will
operate
P.T.O
Batteries
TS Midi Steel SKR433-3 Part number. B43A023004-3
a
1 x 3V battery is supplied
CR2032
TS Mini SKRJ433 Part number. B43A024002
b
2 x 3V batteries are supplied
CR1616
Old batteries must be disposed as to national regulations
Picture D
HEALTH & SAFETY: THESE PROCEDURES ARE TO
BE CARRIED OUT BY A COMPETENT PERSON ONLY
Situation 3
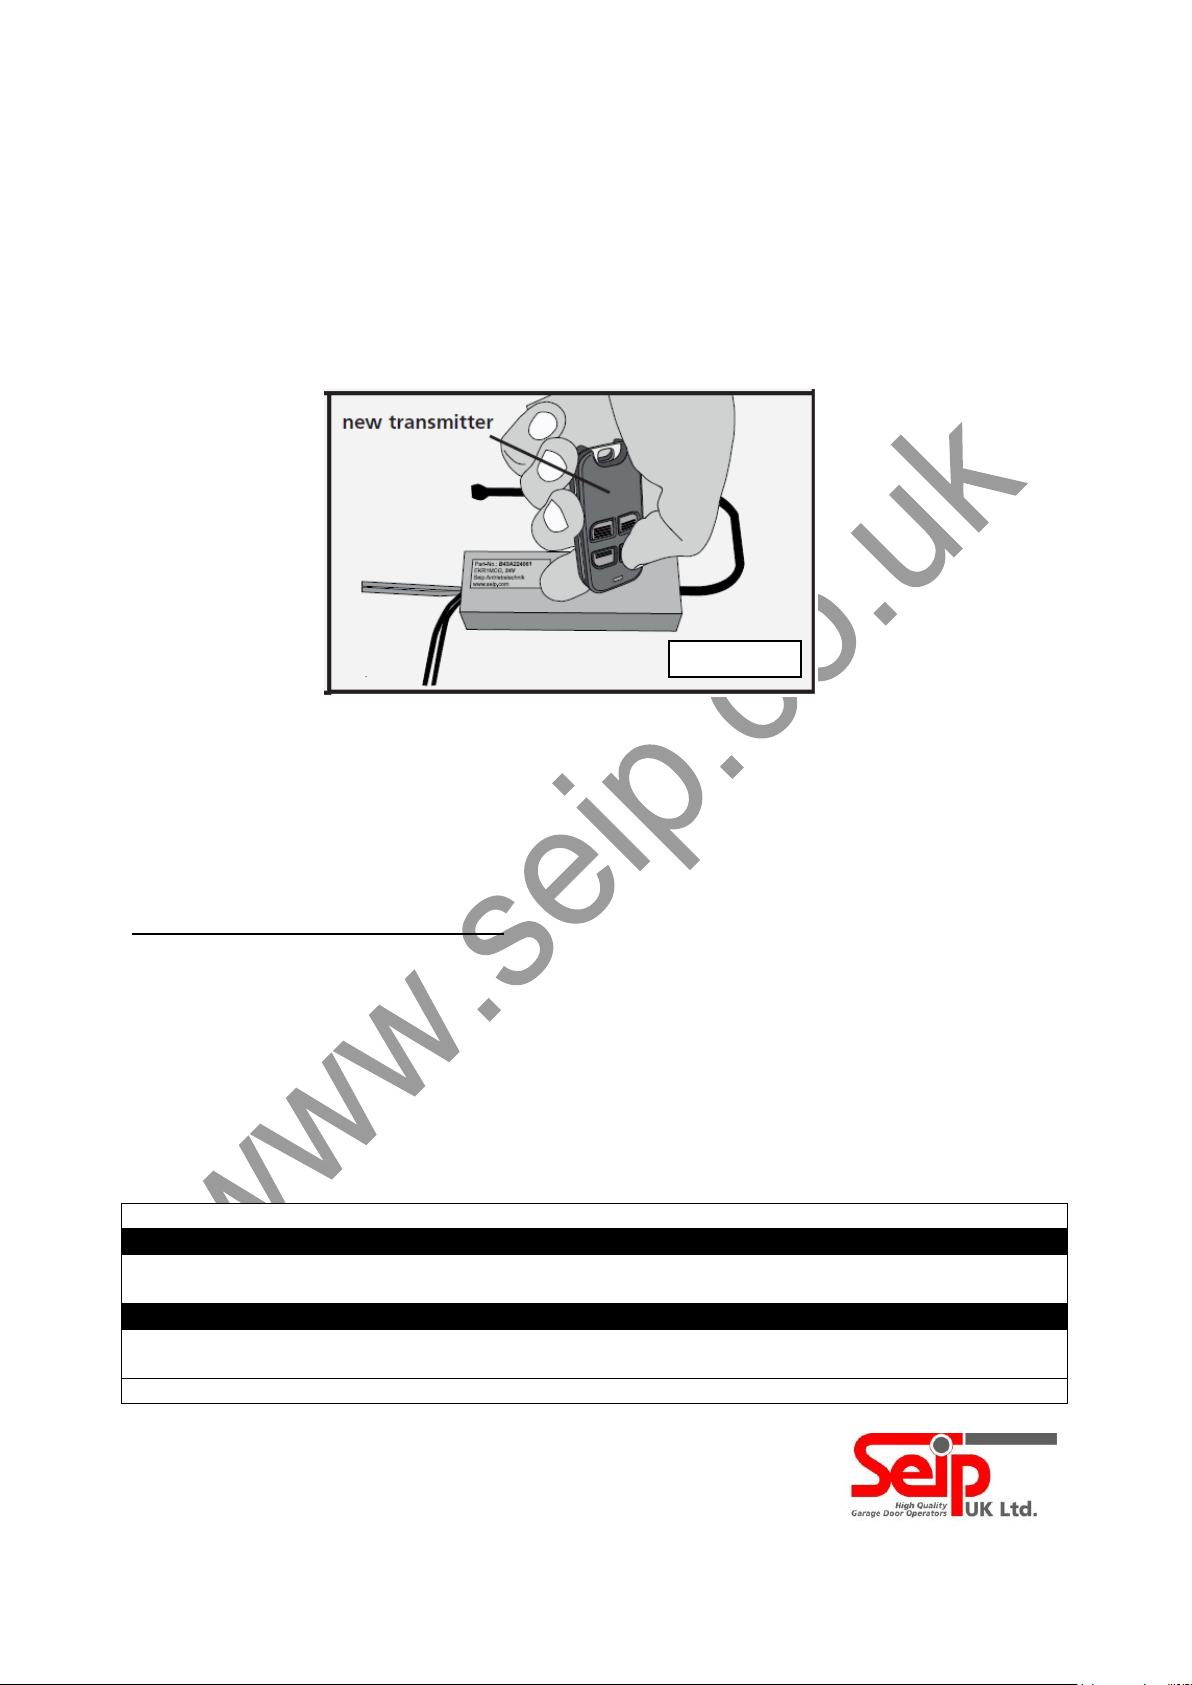
When you are using an operator with an external mini receiver:
1) Hold the new remote so it is physically touching the plastic case on the external
mini receiver by the black antenna wire (shown in picture D)
2) Press the selected button that you wish to use on the new remote (e.g. shown in
the picture) until the LED lamp on the external mini receiver comes on. Now
release the button of the new remote immediately (shown in picture D)
3) Press the same button again on the new remote. The LED lamp will now switch off.
This is the button you will use for operation.
CLEARING THE REMOTE MEMORY
In the event of lost or stolen remotes it is recommended that you clear the memory
1) Open the operator’s plastic cover (one Philips screw will need to be undone for TS75
and TS100 operators or remove the rear plastic cover for TM and RP series operators)
2) Press the RED learn button on the printed circuit board for approx. 15 seconds until
the LED lamp next to the RED learn button comes on then release the button
3) The operators memory is now cleared so any previously programmed remotes will
be wiped
 Loading...