

Page 1
User Guide for the users of the
garage door operators
Please read this user guide before using your operator.
Please read carefully the security advises on the following pages!
Please ll in the serial number of your operator:
(You will nd the serial number on your operator)
Factory controlled by:
(The number describes the person who
made the nal controls on this operator)
English
TM 60
TS 75
TS 100
Page 2
Please read these safety instructions carefully for your own
safety and the safety of others!
Your Seip TS door operator is up to the latest safety standards and
provides a high level of safety in use. Following the instructions on
this page will ensure a long term, trouble free operation.
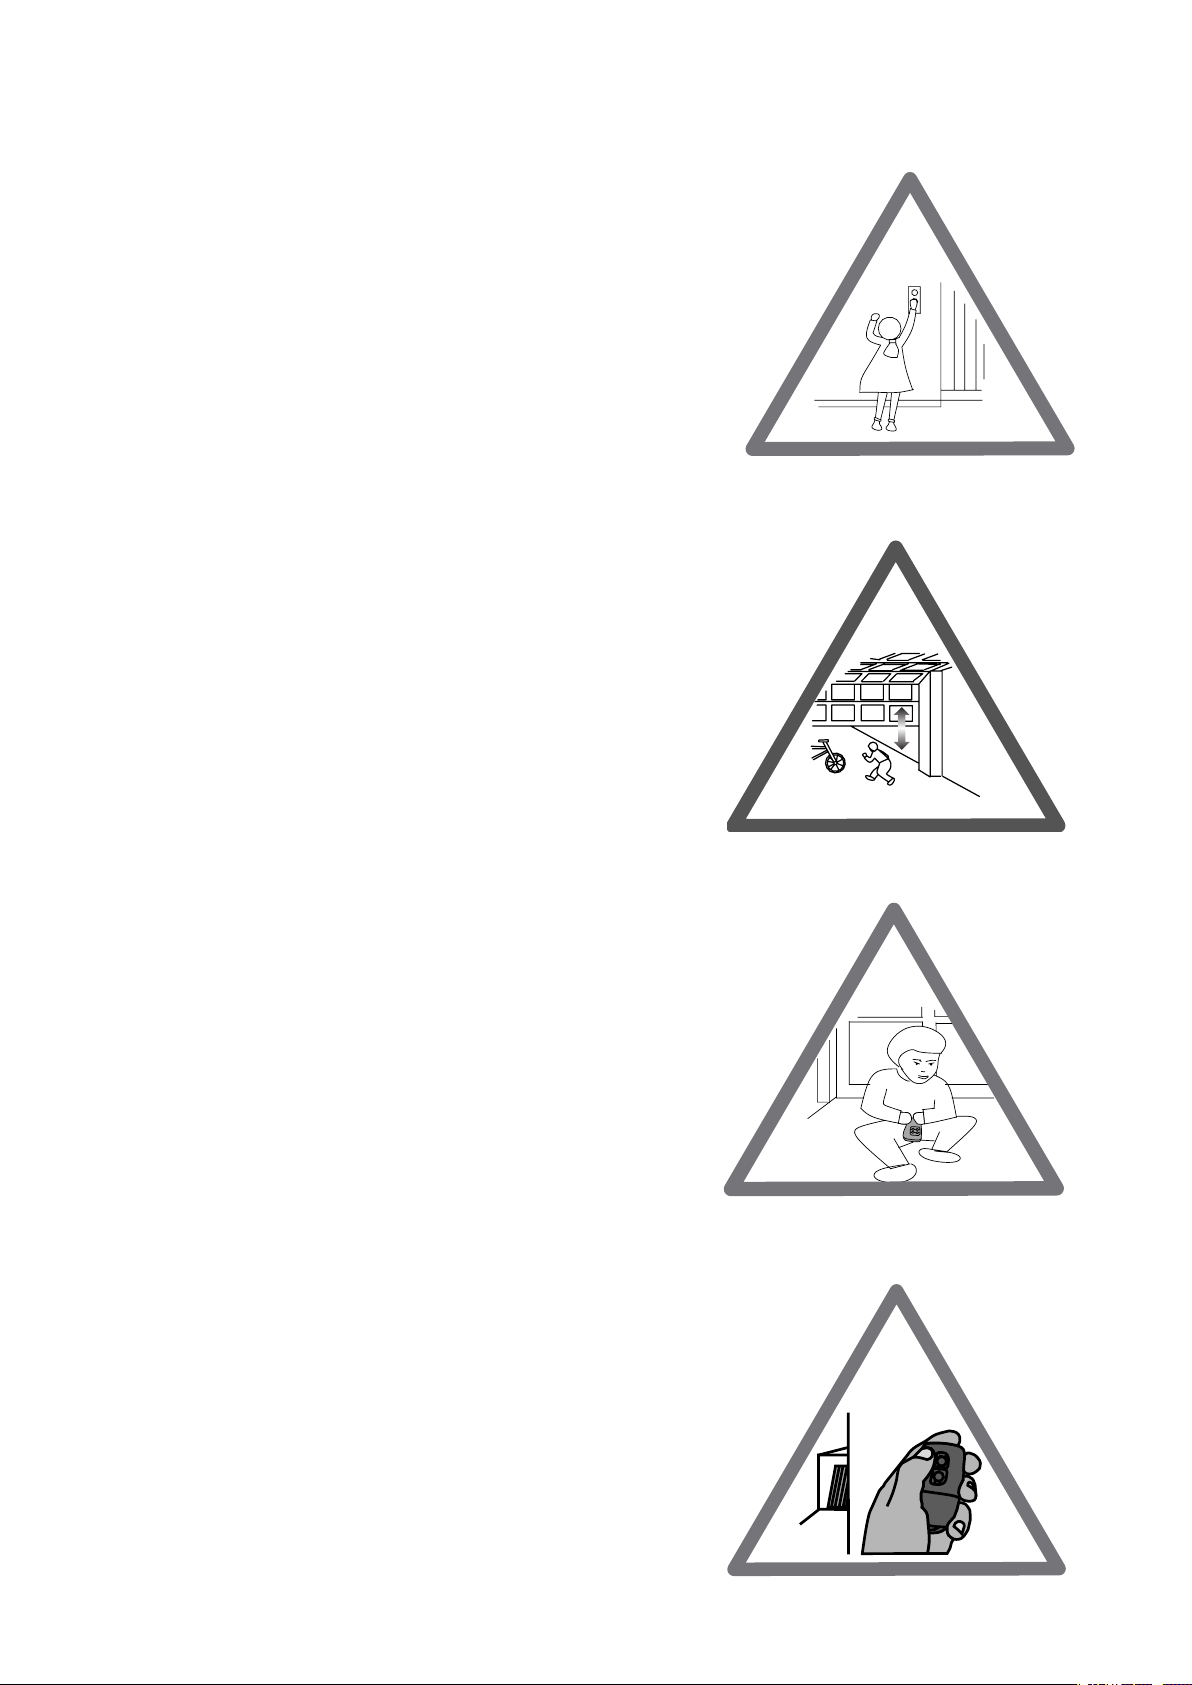
- A garage door operator is not a toy - do not allow children
to play with it. Keep the hand-transmitter out of reach of
children!
- Only use the hand-transmitter when you can see the garage door! If the garage door cannot be seen, you could acciden-
tally close the door whilst a car or person is passing by!
- When stowing the hand-transmitter please take care that
it is not activated accidentally! Be aware that the buttons
could be hit inadvertently and always stow the hand-transmitter
with its buttons facing upwards.
- Whilst entering the garage, store the hand-transmitter
safely so that nobody can activate the operator - intentionally or accidentally! Your garage door may be above your cars
roof and you may not be aware that the door has started moving.
- Always watch the moving door and keep persons away
until the garage door is either completely opened or closed!
- Do not leave any obstacles in the garage doors operating
range! Obstacles such as bicycles left momentarily could be
damaged when the operator is activated by another user!
- The emergency release must be used with care when the
garage door is opened - the door might fall down if the
springs are broken! Before using the emergency release on an
opened door your must ensure that neither persons nor obstacles
are within the doors moving range.
- Check the installation regularly for damages.
- Check the automatic reversion monthly using a 40 mm
high obstacle. Check the function every time adjustments or
changes are made to the garage door.
- Should problems occur with your remote-control then please contact your dealer. Repairs should only be carried out
by an authorised dealer.
- The light bulb may be exchanged by taking off the operators‘ front cover. Please unplug the power cord before
taking off the front cover!
- The remaining parts of the operator may only be opened
by authorised personnel!
Important Safety Instructions for the Users
Page 3
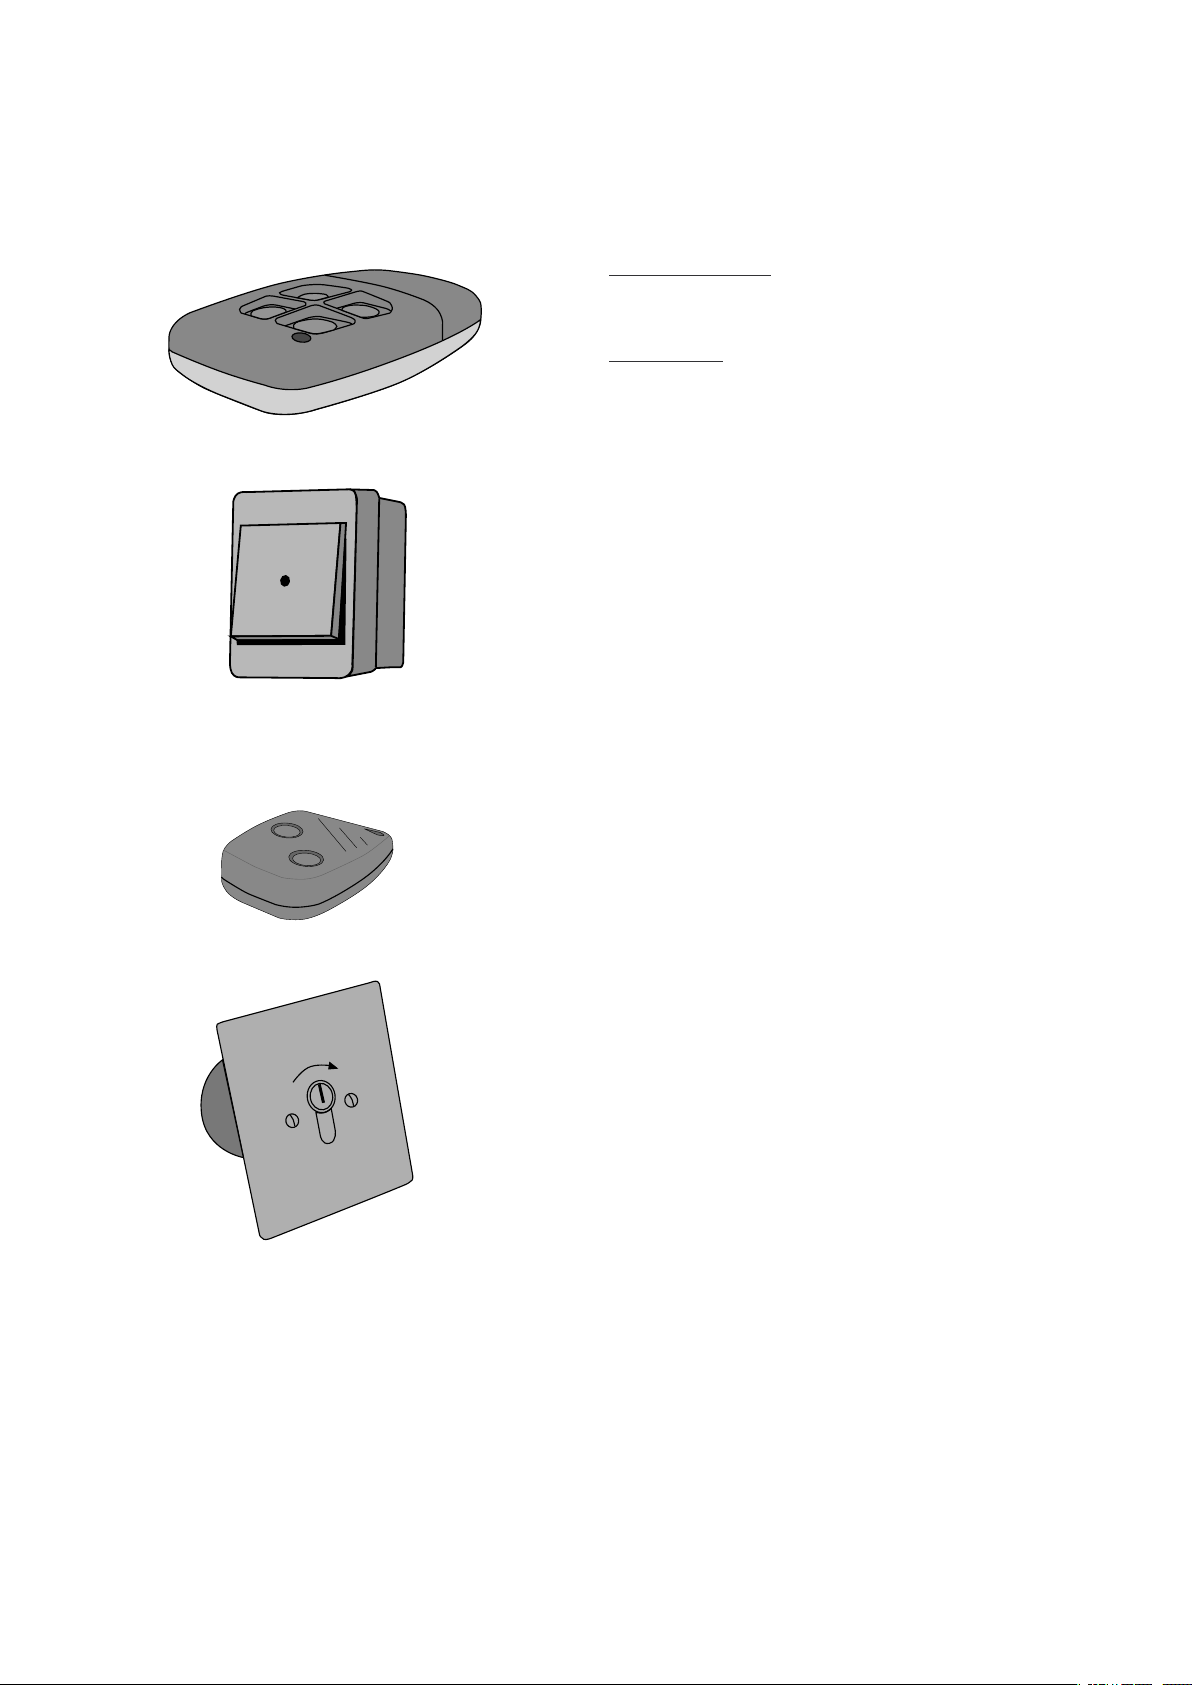
Devices
There are different devices available to activate your operator.
Standard Equipment:
- MIDI hand transmitter (4-channel)
- Wall push button
Optional Extra:
- Key switch
- MINI hand transmitter (2-channel)
- Code Lock
- other devices (for example special entry systems)
The devices may be used alongside each other.
Usage
The operator follows the principle OPEN-STOP-CLOSE. This principle is valid for any device.
Starting from closing position of the door this means:
First impulse: the door opens
Second impulse: the door stops
Third impulse: the door closes
Fourth impulse: the door stops
Fifth impulse: the door opens
and so on.
Usually it will not be necessary to stop the operator during operation - unless you realise there is an unexpected obstacle within the
doors range.
Please also refer to the Safety Instructions on page 2.
The operator registers an obstacle by touching it - the garage
door hits the obstacle and reverses to set the obstacle free again.
Dependant on the make of the garage door slight damages might
occur on obstacles - a cars paintwork might become scratched.
With an additional security device like a photocell (optional extra)
the operator will stop as soon as an obstacle is recognised by the
photocell. Should the door be in the opening position the operator will only close the door once the obstacle has been removed
from the photocells range. With such a device contact between
the garage door and any obstacle is usually avoided.
4-channel MIDI transmitter, 433 MHz
(standard equipment)
Wall push-button, IP 44
(standard equipment)
2-channel MINI transmitter,
433 MHz (optional extra)
Key switch
(optinal extra)
Using the Operator
Page 4

Programming the Hand Transmitters
Basics
As a standard the operator is equipped with a 433 MHz AM
remote control set. The coding is done via rolling code - the code
is changed after each impulse; receiver and transmitter agree completely automatic about the next code to be used. New codes will
be chosen out of a pool of billions of possible codes.
Your operator is equipped with our standard remote control set
when you hand transmitters looks like the one shown on the right
hand side. The 4-channel MIDI transmitter is standard equipment,
the 2-channel MINI transmitter is available as an optional.
If your operator is equipped with another remote control set,
please refer to the manufacturers instructions for programming.
Programming Transmitter and Receiver
To use a hand transmitter it must rst be registered (programmed)
by the receiver. Only one hand transmitter button can be used for
one receiver.
Registering the rst hand transmitter
The rst hand transmitter (e.g. no hand transmitter has been
registered for the receiver, yet) must be learned directly via the
operators‘ main electronic:
1. Press the LERN/LEARN button on the main electronic for approx.
3 seconds until the operator’s light starts blinking and release the
LERN/LEARN button.
2. Press the hand transmitter button you want to register to the
receiver - the operators’ light stops blinking when the transmitters’ signal was received. The transmitter is now registered.
Registering additional hand transmitters
When at least one hand transmitter has been registered by the
receiver you may program additional hand transmitters from a
distance:
1. The garage door must be closed
2. Open the garage door approx. 50 cm and close it again.
3. After the garage door is closed you have got 10 seconds to
press the buttons 1+2 simultaneously on the registered hand
transmitter - the operator’s light then starts blinking.
4. The light will keep blinking for another 10 seconds - during that
period of time you must press the button on the new hand transmitter which you want to use with the operator. Once the new
transmitter is registered the operator’s light stops blinking.
The procedure must be repeated for each new hand transmitter.
Clearing the receivers‘ memory
Keep the LERN/LEARN button pressed for approx. 15 sec.. The
operators‘ light and the red LED „Diag“ will start blinking after 3
seconds. After another 10 seconds the red LED „DIAG“ will glow
constantly. You can then release the LERN/LEARN button.
All previousely programmed hand transmitters are now
cleared from the receivers‘ memory.
Quick reference: programming the rst hand transmitter
1.) Keep the LERN/LEARN
button pressed for approx.
3 sec.
The operators‘ light will start
blinking
2.) Press the hand transmitter button you want to use
The operators‘ light stops
blinking - the transmitter was
succesfully programmed
Quick reference: Programming additional hand transmitters from a distance
Remark: additional hand transmitters can be programmed
either like the rst transmitter or from a distance as explained
below:
1.) Open the garage door
for approx. 50 cm and close
it again
After the garage door is closed
you have got 10 seconds to proceede to step 2)
2.) Press buttons 1+2
simultaneousely on any
registered transmitter for
3 sec.
The operators‘ begins blinking
- release the hand transmitters‘
buttons
3.) Take the new hand
transmitter and press the
button you want to use
shortly
The operators‘ light stops
blinking - the hand transmitter
was successfully programmed
Page 5

1
2
3
4
4-channel MIDI transmitter,
433 MHz, rolling code
2-channel MINI transmitter (optional extra),
433 MHz, rolling code
Battery
Usable types of batteries: A23, 23A, 23L, EL12, VR 22 and
MN 21
Voltage: 12V
Used batteries must be disposed of according to national
laws!
Two batteries, type CR1616 or DL1616 are required.
Voltage: 2* 3V (=6V)
Used batteries must be disposed of according to national
laws!
Two Batteries
Criterias inuencing the range
The TS operators are equipped with a high quality remote
control set as a standard!
Nevertheless the remote control is the part of the operator which
might be inuenced by circumstances in the surroundings of the
garage. With our standard remote control you might reach a
range of more than 100 meters. In areas with high disturbancies
the range will still be approx. 50 meters.
The range might be inuenced by:
- old batteries in the hand transmitter - if you should experience
a problem with the range, please change the batteries rst. The
lower the batteries run the lower the range will be.
- Building materials of the garage
In a garage made of concrete and steel you might reach a lower
range than in an ordinary garage build of stone. The more steel
was used for the walls the shorter the range of your remote-control.
Remote-control activity in the area
Radio and television transmitters close to your garage might
reduce the range.
Older baby-phones
Especially older baby-phones might inuence the range of the
remote control severely. These devices send strong signals via the
houses internal power supply net. These signals also intrude other
devices via the wall plug, as eg the operator.
It is extreemely unlikely that the range will drop to an unacceptable distance. If, however, problems should occure we will like to
be helpful.
Please avoid to drop the hand transmitter - parts could
be damaged inside the transmitter. That might lead to
malfunctions!
Additional Information
Use with a HomeLink© System
The HomeLink© System is becoming more and more popular in
private households. Most frequently it is being used in cars - the
HomeLink© module is integrated in the car. It allows the driver to
activate the door operator with a push of button which is installed
in his car. Once programmed, the driver does not need the hand
transmitter to access the garage with his car.
The standard remote control supplied with the TS-series is compatible with HomeLink© systems manufactured by end of year
2002 / beginning of year 2003 (subject to technical alterations).
The procedure how to program the HomeLink© device is described in the car‘s manual - please refer to those instructions.
(Basic information on programming: you rst must register
the hand transmitter with the operator. The HomeLink©
system will then learn the code from the hand transmitter).
Page 6

Most occuring problems are not necessarily caused by the operator but by
the garage door.
Your TS-operator is equipped with an automatic force measurement. During the installation the operator memorises how much force it needs to
open and close your garage door.
Changes to the door weight caused by the weather (the door might go
out of alignment slightly due to hot or cold weather conditions) will not
affect the operation of your door operator.
The operator will also adjust itself to the normal and slow changes of your
garage doors‘ performance caused by ageing.
In contrast, rapid changes to the weight of the garage door will be recognised by the operator - the operator will then behave as if it had registered
an obstacle. In CLOSING directionthis means that the operator stops and
reverses into opening direction to release a supposed obstacle.
In OPENING direction it means that the operator will stop and reverse a
few centimetres into closing direction to release a supposed obstacle. During the soft-stop period in CLOSING direction the operator will reverse for
a few centimetres - the door will always remain open a few centimetres.
Rapid changes normally occur when:
- a spring of your garage door is broken; especially when the springs are
covered by protectors you might not recognize the damage
- mechanical damages to the garage door happened (e.g. by hitting the
door with a car)
- a new surface was attached to the garage door or the whole door was
exchanged (e.g. an increase of the doors‘ weight)
In all of these cases the garage door needs to be maintained - please
contact your dealer.
When the operators‘ light is blinking
The operator is also equipped with an error system - if an error should
occur then the operators‘ light will start blinking when you try to activate
it. The blinking light refers to errors caused by external devices - the following steps only need to be followed if any of the devices mentioned are
connected to your operator:
- check all security devices connected to your operator (photocell, security
beam or hatch door switch)
- check, that all obstacles are removed from the photo cells‘ range of
observation
- check if there is dirt on photo cell; clean if necessary
- check if the hatch door is closed
If the operators‘ light is still blinking after checking all devices then please
contact your dealer. The dealer will also nd it helpful if you counted the
number of blinks given by the operators‘ light - it may give a hint concerning the problem.
In case of a power failure
You can disconnect your garage door from the operator using the emergency release. The emergency release is tted to your operator in either
way shown on the diagrams on the right.
If your garage door is the only entrance to your garage then you can
disconnect the operator by using your garage doors lock and handle.
Unlock the door and turn the handle - the operator will be disconnected
automatically and you can open your door by hand.
If you have got a seperate entrance to your garage then you can enter
your garage and pull the cord hanging down in front of your garage door.
The operator will be disconnected and the door can be opened by hand.
ATTENTION: It might be dangerous disconnecting the operator from
an open garage door. If the doors‘ springs are damaged or the door
is not well balanced then it might drop down - there is a high risk
of injuries and damages!
If, however, you cannot avoid disconnecting the operator from an open
garage door then you must make sure that there is no one within the
range of the garage door before using the emergency release!
Should a problem occur ....
Page 7

Grombacher Straße 83
75045 Walzbachtal-Jöhlingen
Germany
www.seip.com
We,
Wir,
Seip Antriebstechnik GmbH
Grombacher Straße 83, 75045 Walzbachtal-Jöhlingen, Deutschland
hereby declare, that the following products comply to the mentioned EC-regulations.
erklären hiermit, daß die nachfolgenden genannten Produkte den unten angegebenen
EG-Richtlinien entsprechen.
EC Declaration of Conrmity
Low-Voltage Directive 73/23/EEC
and amendments
Electro-Magnetical Compatibility 89/336/EEC
and amendments
EG-Konformitätserklärung
im Sinne der EG-Richtlinien
Niederspannungsrichtlinie 73/23/EWG
mit Änderungen
Elektromagnetische Verträglichkeit 89/336/EWG
mit Änderungen
Peter Seip, Geschäftsführer, Walzbachtal-Jöhlingen, 16.06.2003
Document No. AN-16062003
Dokument Nr. AN-16062003
GmbH
Type of Product / Produktart Garage Door Operator / Torantrieb
Product Name / Modell TM 60, TS 75, TS 100, SE 130 TS
Approved according to 89/336/EEC and 73/23/EEC / Geprüft nach 89/336/EWG und 73/23/EWG
Referring EC-regulations: / Angewandte harmonisierte Normen:
Electromagnetic Compatibility /
Elektromagnetische Verträglichkeit
EN 61000-3-2:2000
Limits for harmonic current emissions /
Grenzwerte für Oberschwingströme
EN 61000-3-3:1995 + Corrigendum:1997 + A1:2001
Limitation of voltage changes, voltage uctuations and icker in publik low-voltage supply systems /
Grenzwerte für Spannungsschwankungen und Flicker
EN 61000-6-3:2001
Emission standard for residential, commercial and light-industrial environments /
Störaussendung für Wohnbereich, Geschäfts- und Gewerbereiche sowie Kleinbetriebe
EN 61000-6-2:2001
Generic standards - Immunity for industrial environments
Fachgrundnorm - Störfestigkeit - Industriebereich
Low-Voltage Directive /
Niederspannungsrichtlinie
EN 60335-2-95:2001-7
Particular requirements for drives for vertically moving garage doors for residential use /
Anforderungen für Antriebe von Garagentoren mit Senkrechtbewegung zur Verwendung im Wohnbereich
EN 60335-1:1994 + A1:1996 + A2:2000 + A11:1995 + A12:1996 + A13:1998 + A14:1998 + A15:2000 +
A16:2001
Safety of household and similar electrical appliances /
Sicherheit elektrischer Geräte für den Hausgebrauch
Safety in Use /
Nutzungssicherheit
EN 12453:2000
Safety in use of power operated doors, requirements /
Nutzungssicherheit kraftbetätigter Tore, Anforderungen
EN 12445:2000
Safety in use of power operated doors, Test methods /
Nutzungssicherheit kraftbetätigter Tore, Prüfverfahren
Page 8

EC Declaration of Conrmity
in accordance with the Radio and Telecommunications
Terminal Equipment Act (FTEG) and Directive 1999/5/EC
(R&TTE Directive)
EG-Konformitätserklärung
gemäß dem Gesetz über Funkanlagen und Telekomm
unikationsendeinrichtungen (FTEG) und der Richtlinie
1999/5/EG (R&TTE)
We,
Wir,
Seip Antriebstechnik GmbH
Grombacher Straße 83, 75045 Walzbachtal-Jöhlingen, Deutschland
declare that the product
erklären, daß das Produkt
SKR 433
Code B43A023004
Hand Transmitter as remote control for garage door operators
Handsender als Fernbedienung für Garagentorantriebe
(Short Range Device)
(Funkgerät geringer Reichweite (SRD))
complies with the essential requirements of §3 and the other relevant provisions of the FTEG (Article 3 of the R&TTE Directive), when
used for its intended purpose.
bei bestimmungsgemäßer Verwendung den grundlegenden Anforderungen des §3 und den übrigen einschlägigen Bestimmungen des
FTEG (Artikel 3 der R&TTE) entspricht.
§3(1)1, (Article 3(1)a)) does not refer to this type of product.
§3(1)1, Artikel 3(1)a) bezieht sich nicht auf diesen Produkttyp, es gibt hierzu keine Norm
Protection requirement concerning electromagnetic compatibility §3(1)(2), (Article 3(1)(b))
Schutzanforderungen in Bezug auf die elektromagnetische Verträglichkeit §3(1)2, Artikel 3(1)b))
EN 300 220-1/1997
EN 300 683/1997
EMV / EMC Directive 89/336/EEC;92/31/EEC;93/68/EEC
Grombacher Straße 83
75045 Walzbachtal-Jöhlingen
Germany
www.seip.com
Peter Seip, Geschäftsführer, Walzbachtal-Jöhlingen, 16.06.2003
Document No. FU-16062003
Dokument Nr. FU-16062003
GmbH
 Loading...