

Seiko QR-550 Operation Manual

QUARTZ TIME RECORDER
OPERATION MANUAL
INTRODUCTION
Thank you for purchasing our Quartz Time Recorder. For safe and
proper operation, please carefully read this manual before using it
and save it for reference.
The details of this Operation Manual are subject to change without previous
notification.
This Operation Manual has been prepared with the utmost care to cover all aspects of
the time recorder's use.
If you feel, however, that some explanations are inadequate, unclear, or difficult to
understand, please do not hesitate to contact the dealer or the shop from which you
have purchased your Time Recorder.
Be sure to use your Time Recorder after you have fully understood the hardware and
software specifications and limits.
No part of this publication may be reproduced, stored in a retrieval system, or
transmitted, in any form or by any means, mechanical, photocopying, recording or
otherwise.
Replace battery with TOSHIBA, part no. CR 2450 THC only.
Use of another battery may present a risk of fire on explosion.
Place the time recorder at the position close to the wall outlet so that it is easily
accessible to disconnect.
Bescheinigung des Herstellers/Importeurs
Dies Gerät entspricht den Bedingungen der Niederspannungs-Vorschrift
73/23/EEC und dem EMVG nach 89/336/EEC.
This unit complies with the Low Voltage Directive 73/23/EEC and the
EMC Directive 89/336/EEC.
Maschinenl ärminformationsverordnung 3. GSGV, 18.01.1991:
Der arbeitsplatzbezogene Schalldruckpegel beträgt 70 dB (A) oder
weniger gemäß ISO 7779.
Die zugeho¨rige Steckdose muß nahe beim Gerät angebracht und leicht
zugänglich sein.
1.
2.
3.
4.

TABLE OF CONTENTS
PRECAUTIONS
FEATURES
BEFORE USING THE TIME RECORDER
Accessories
Location of Controls
Installing Ribbon Cassette
Mounting Unit on Wall
Environmental Conditions
DAILY OPERATIONS
SETTING
Preparation for setting
Setting Pay Ending and Card
Setting the Date and the Time, 1/60 or 1/100 printing,
the 12/24 HOUR format
Setting the Day Advance Time
Setting the Daylight Saving Time (D.S.T.)
Setting the Time Table Program
Setting Number of Seconds for External Time Signal
Resetting
CONNECTING EXTERNAL TIME SIGNAL
INSERTING Ni-Cd BATTERY
TROUBLESHOOTING
SPECIFICATIONS
TIME CARD SPECIFICATIONS
1.
2.
3.
4.
5.
6.
7.
8.
9.
10.
1
3
4
4
4
5
6
6
7
8
8
9
12
14
15
18
25
26
27
28
29
30
31
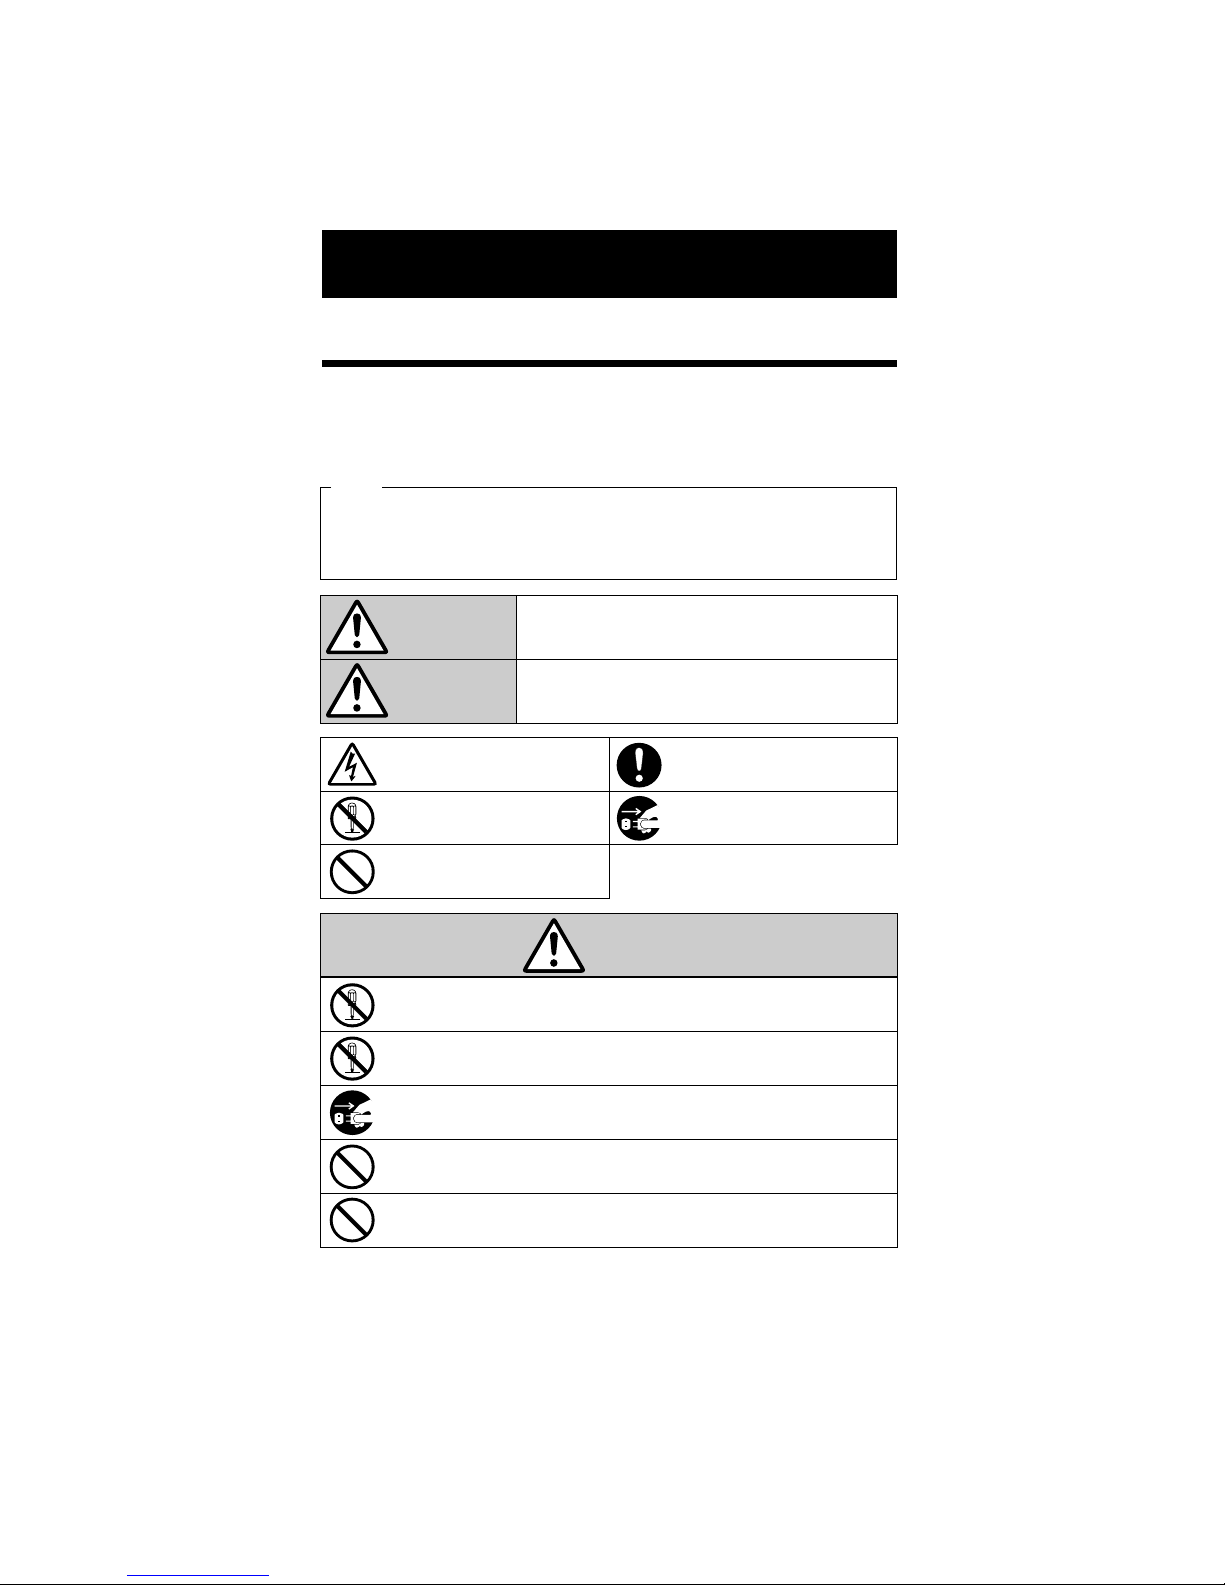
1. PRECAUTIONS
Signs
Various warnings and cautions are provided throughout this manual along with signs.
Remember each sign and its explanation listed below for your safety and proper
operation of the unit.
Caution
Warning
Improper handling may cause electric
shock DANGER.
DO NOT disassemble the unit.
Don't sign.
Must-Do sign.
Be sure to remove the line cord plug
from the outlet.
Do not disassemble the unit. There is a high voltage present inside, possibly leading to an
electric shock.
Do not use any voltage of the power source other than designated.
Do not share a single outlet with another plug. These may lead to fire or shock hazards.
Do not damage, break, or modify the power cord. Do not put a heavy object on, yank, or
forcefully bend the cord, either. These may damage the cord, possibly resulting in a fire or
electric shock.
If any anomaly occurs, for example, heat or smoke is generated or obnoxious odor is emitted,
unplug the unit immediately and contact your dealer for servicing. There is a danger that
further use may cause a fire or electric shock.
Do not modify the unit. Modifications may cause a fire and/or electric shock.
1
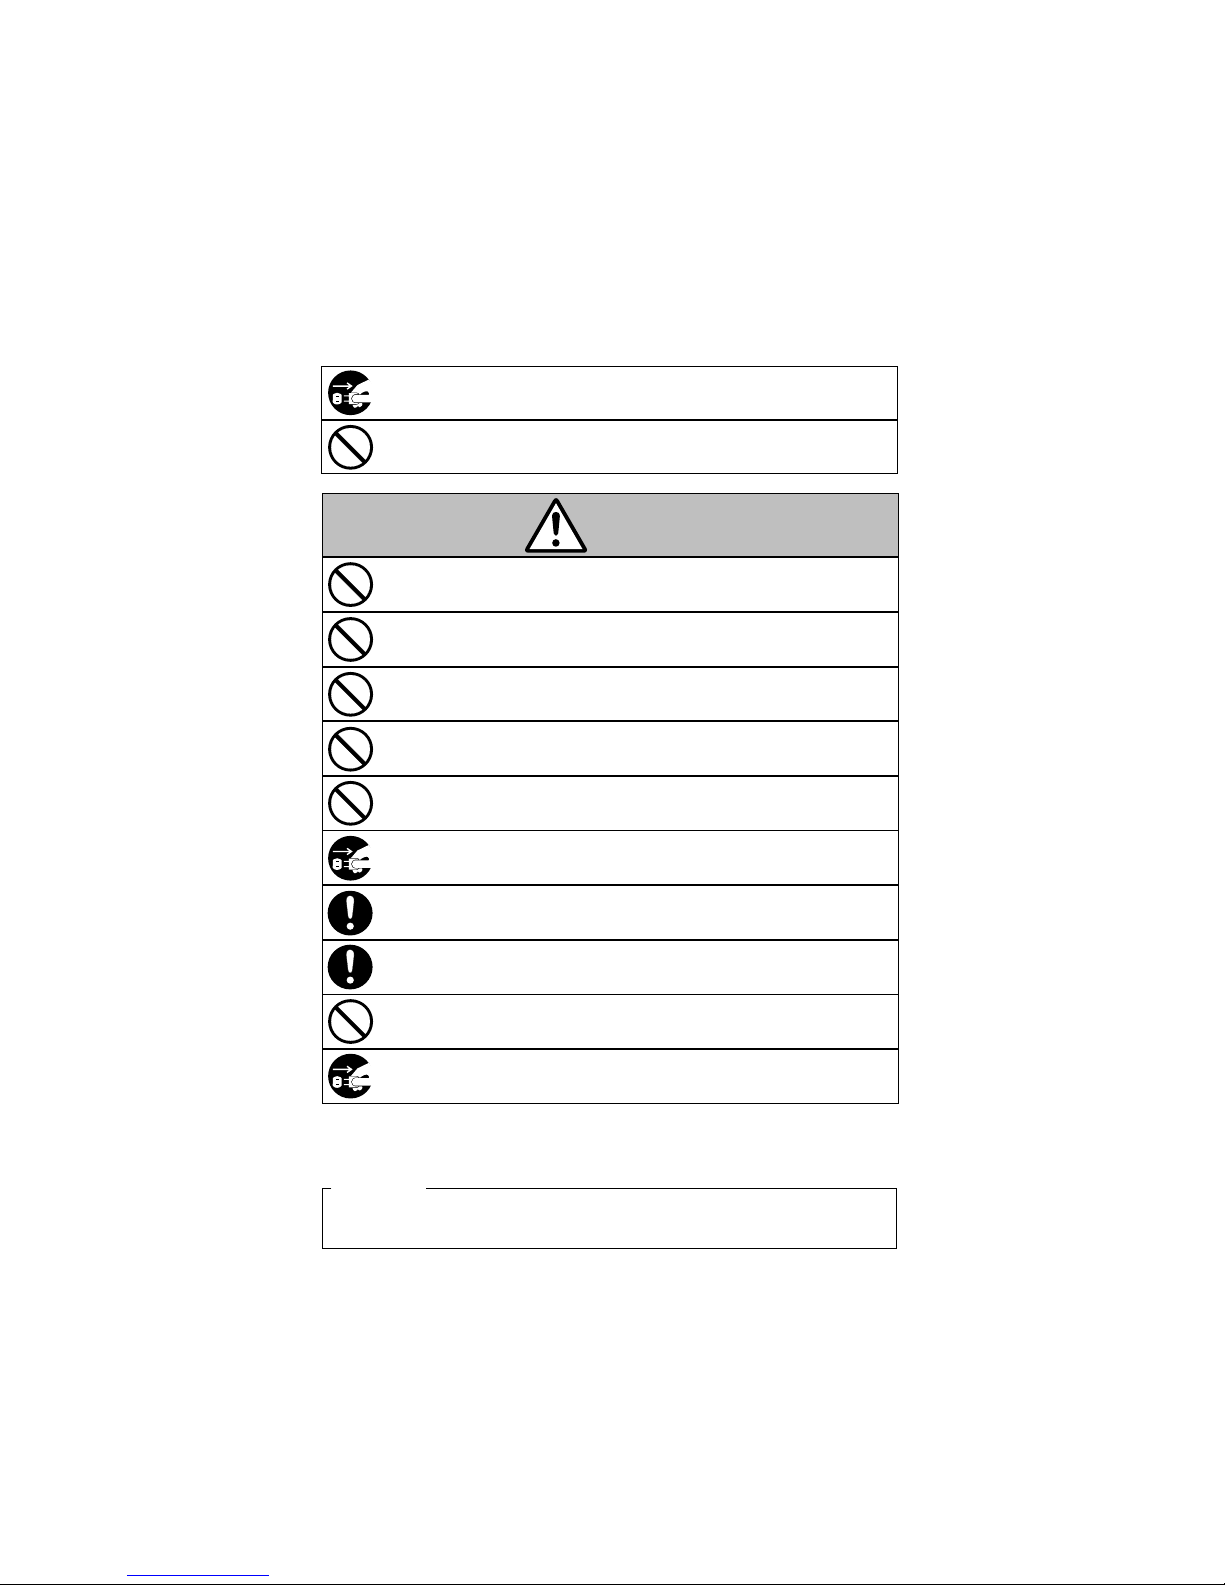
Warning
Improper handling may cause bodily accidents including
death and serious injury.
Improper handling may harm the human body or material.
This operation manual is prepared for safe and proper use of the unit.
Please follow all the instructions to avoid possible danger to yourself
or others and damage to the unit.
2
If foreign matter should get in the unit (including a piece of metal, water, or liquid),
disconnect the plug from the outlet immediately and contact your dealer for servicing. There
is a danger that further use may cause a fire or electric shock.
Do not place the unit on an uneven or tilted surface. This may result in injuries due to the unit
dropping or falling off.
Do not put a water-filled container or a metal object on top of the unit. If water is spilled or
the metallic object slips inside, a fire or shock hazard may be caused.
Do not place the unit near kitchen counter or humidifier. Oil, smoke, or steam generating
from them may cause fire or shock hazards.
Do not yank the power cord to disconnect from the outlet. Hold the plug with your hand to do
so, or the cord may be damaged, possibly leading to a fire or electric shock.
Remove the line cord plug from the outlet before transferring the unit, or it may damage the
cord, possibly leading to a fire or electric shock.
Make sure to insert the power plug as far as it will go. Improper insertion of the plug may
develop fire or shock hazards.
Do not insert or drop any other time card than specified into the slot. Such misuse may cause
a fire or electric shock.
If the unit should be dropped or the case be broken, unplug the unit and contact your dealer
for servicing. Further use may lead to a fire or shock hazard.
Be careful not to contact the print head as you may get hurt or burned .
Do not install the unit in a humid or dusty environment. It may cause a fire or electric shock.
Do not plug or unplug the unit with a wet hand. You may get an electric shock.
Daily Care
For cleaning, turn the power off and wipe the case clean of dust and dirt with a dry
cloth, etc.
Caution

2. FEATURES
The time table program provides the following functions:
•Automatic switching between black and red printing
The two-color printing system makes it possible to easily see an
employee's in and out time.
•Automatic activation of an external time signal
The unit can be programmed to externally putout a signal when
it's time to start or quit, or for breaks.
•Automatic switching among six print columns (Columns 1-6)
The auto-switching function of a column to print records in
prevents punching failure or error.
It has selectable three pay periods, weekly, bi-weekly or monthly
pay period system.
Monthly card automatically sense the front or back of the card,
therefore assuring no erroneous date printing.
If the closing date for payroll processing does not fall on the end
of a month, the unit can be set to any desired closing date.
The day advance time function makes it possible to print out on
the same line of a time card for the previous working day even
when leaving the office after midnight.
An easy-to-see analog clock is provided on its front for users'
convenience.
User-friendly operation and easy setting enhances users' comfort.
3
•
•
•
•
•
•
•
4
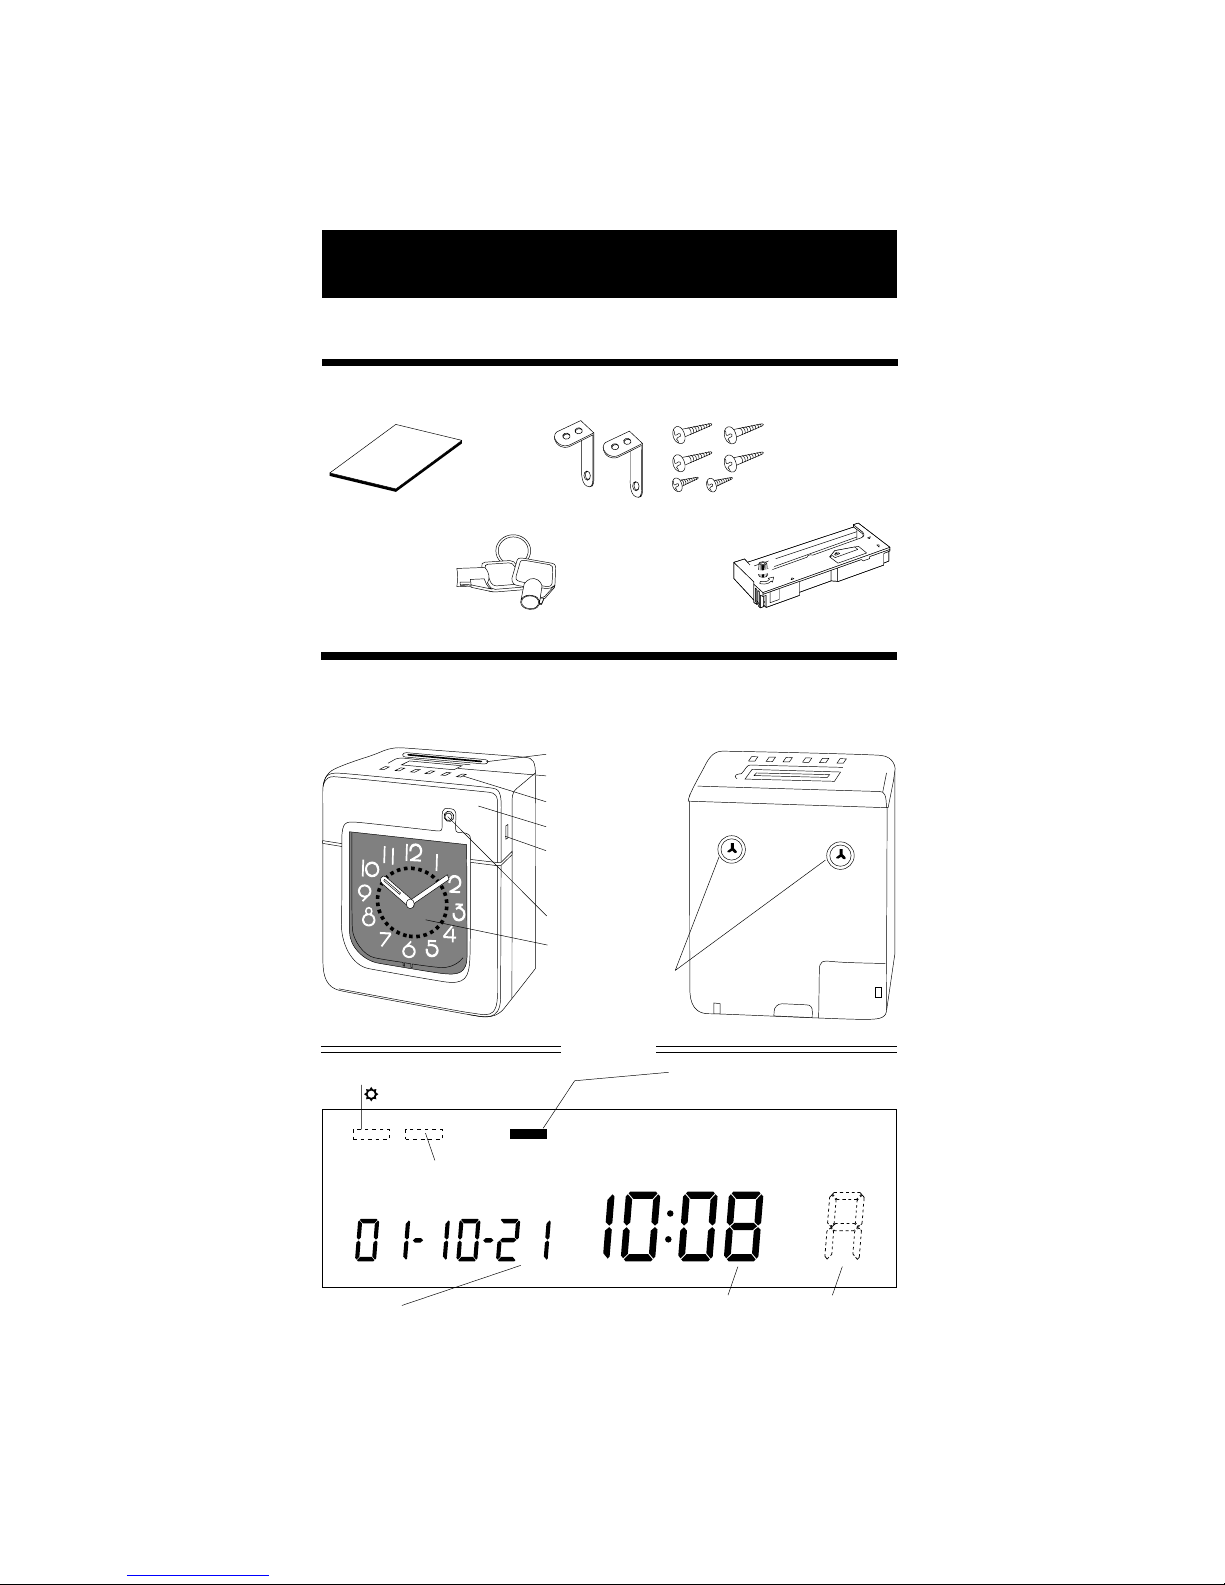
Location of Controls
<Display>
<Front view> <Back view>
Daylight saving time indication
Current date
SU MO TU WE TH FR SA
Day of the week indication
Current time
AM or PM
3.
BEFORE USING TIME RECORDER
Accessories
Operation Manual Wall mount fittings
Ribbon cassette
Keys
Card slot
Display
Control button
Panel cover
Analog clock
Panel open button
(at both sides
of the unit)
Key hole
Wall-mounting
hole
12Hr.
12 HOUR indication

Panel cover
5
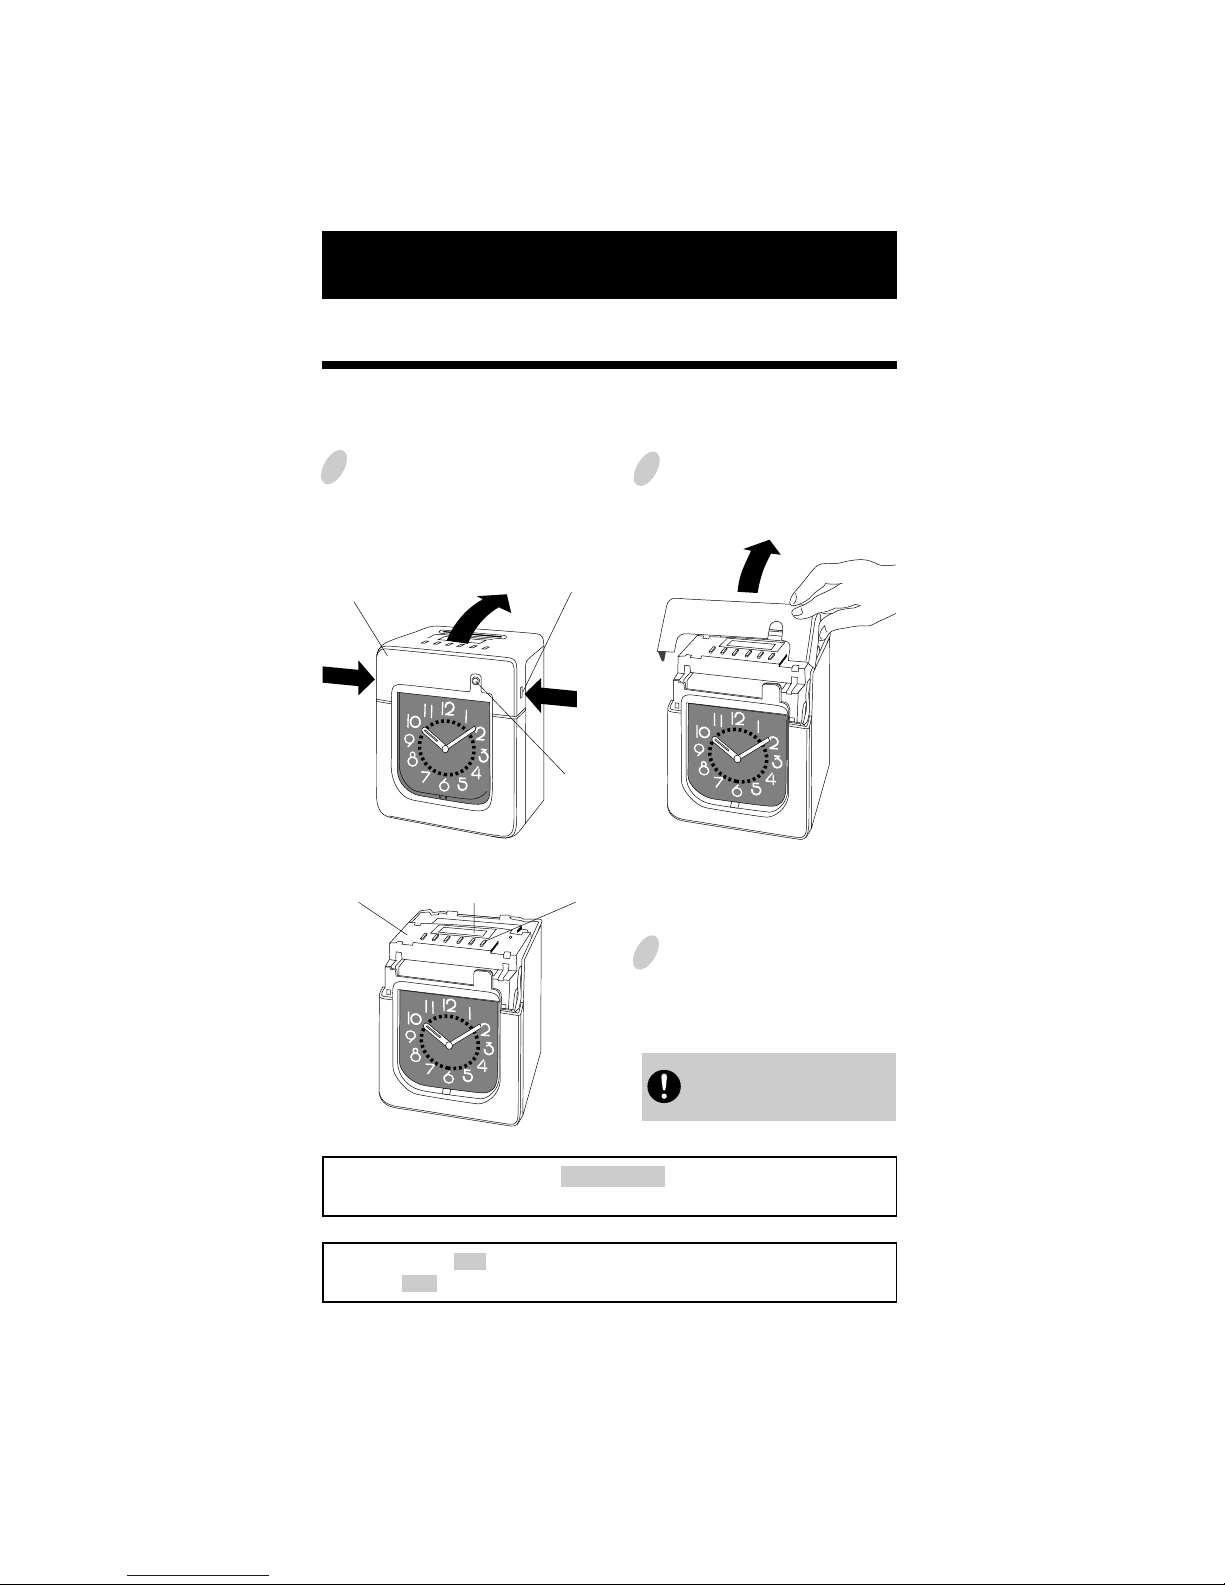
Installing Ribbon Cassette
1 Unlock the unit. While holding
down the panel open buttons at both
sides of the unit, lift the panel cover
away from you.
2 Turn the knob on the cassette in the
arrow-indicated direction to make the
ribbon taut.
To insert the ribbon cassette inside
the unit, lift the panel house away from
you first. Then thread the ribbon
between the ribbon mask and the print
head. Slide the latch on the lower side
of the cassette into projections on the
unit. Then let the cassette snap into
place.
When having difficulty inserting the
ribbon, insert it while turning the knob.
Make sure that the ribbon is placed
between the print head and the ribbon
mask as illustrated in the figure at left.
3
Put the panel cover on the hook at
the back of the unit. Lower it toward
this side to close and lock the unit.
Panel cover
Panel open button
(at both sides of the unit)
Key hole
Panel house
Ribbon cassette
Print head
Print head
Ribbon
Ribbon mask

6
Mounting Unit on Wall
The unit can be mounted on a wall using the supplied mounting fittings. To mount the
unit on a wall, take the following steps:
The supplied screws are intended
for use on a thick wooden wall or
wooden column. Do not use
them on any other materials.
There is a danger that the unit
may come off etc.
1 Install the two larger screws into a wall
10 cm (3.94") apart. Be sure to keep about
3 mm (0.12") of the screw head out of the
wall.
2 Mount the wall mount fittings
as shown on the right.
Environmental Conditions
Avoid placing the unit in environments that are:
•
humid or dusty
•
exposed to direct sunshine
•
subject to frequent or continuous vibrations
•
outside the temperature range between -5˚ and 45˚C
•
affected by chemicals or ozone
3.94" (10cm)
0.12"
(3mm)

7
Once the AC line cord is plugged into the outlet, the unit can be used immediately as
basic operation has been pre-set at the factory, including the time and the closing date.
See 3 BEFORE USING TIME RECORDER.
Do not let any metallic object get into the slot including paper clips. Do not
forcefully push in a card, either. These may cause the unit to malfunction.
4. DAILY OPERATIONS
It is easy to operate the unit. Just insert a time card. The card is then automatically
pulled in, printed and then ejected.
The unit is designed to print in black on the first column when no time table program
is set. Usually it is necessary to set the time table program in order to automatically
print colors and to change columns to print records in. For a temporary change of a
column, however, manual operation is also available: just push the button for any
desired column before inserting a time card.
The button for the column selected lights up.
If any setting needs to be changed, such as for a closing date or other items, See 5
SETTING.
8
To prepare for setting:
5. SETTING
Preparation for setting
1 Unlock the unit. While holding down
the panel open buttons at both sides of the
unit and lift the panel cover away from
you.
2 Remove the panel cover.
3 Make settings using the display and
control buttons at the panel house.
Panel house
Control buttonDisplay
Be sure to make settings with
the power on.
Make sure to press SET at the completion of each setting. Contents are NOT stored in
memory if SET is not pressed.
Upon opening the panel cover, the PAY ENDING button lights up and the unit is in
the pay ending setting mode.
Panel cover
Key hole
Panel open button
(at both sides of the unit)
 Loading...