Sega PC GAMES TOTAL WAR ERAS User Manual
COMING NOVEMBER 2006
COMING NOVEMBER 2006
Visit www.totalwar.com to register and
receive exclusive inside information from
www.totalwar.com
© 2005 The Creative Assembly Limited. Total War, Medieval: Total War, and the Total War logo are trade marks or registered trade marks of The Creative
Assembly Limited in the United Kingdom and/or other countries. SEGA is registered in the U.S. Patent and Trademark Office. SEGA and the SEGA logo are
Key code Medieval: Total War / Viking Invasion
Key code Rome: Total War / Barbarian Invasion / Alexander
either trade marks or registered trade marks of SEGA Corporation. All rights reserved.
The Creative Assembly.
HEALTH ISSUES
SSEEGGAA PPCC DDIISSCC –– NNOOTTEESS OONN UUSSEE
* Also read the manual of your personal computer.
* The game discs may not be used for rental business.
* Unauthorized copying of this manual is prohibited.
* Unauthorized copying and reverse engineering of this
software is prohibited.
Use this software in a well-lit room, staying a good distance away
from the monitor or TV screen to not overtax your eyes. Take breaks
of 10 to 20 minutes every hour, and do not play when you are tired
or short on sleep. Prolonged use or playing too close to the monitor
or television screen may cause a decline in visual acuity.
In rare instances, stimulation from strong light or flashing when
staring at a monitor or television screen can cause temporary muscular convulsions or loss of consciousness for some people. If you
experience any of these symptoms, consult a doctor before playing
this game. If you experience any dizziness, nausea, or motion-sickness while playing this game, stop the game immediately. Consult a
doctor when any discomfort continues.
PRODUCT CARE
Handle the game discs with care to prevent scratches or dirt on either
side of the discs. Do not bend the discs or enlarge their center holes.
Clean the discs with a soft cloth, such as a lens cleaning cloth. Wipe
lightly, moving in a radial pattern outward from the center hole towards
the edge. Never clean the discs with paint thinner, benzene, or other
harsh chemicals.
Do not write or attach labels to either side of the discs.
Store the discs in their original case after playing. Do not store the discs
in a hot or humid location.
The Total War: ERAS game discs contain software for use on a
personal computer. Please do not play the discs on an ordinary
CD player, as this may damage the headphones or speakers.
LIMITED W ARRANTY:
SEGA of America, Inc. warrants to the original consumer purchaser that the
game disc or cartridge shall be free from defects in material and workmanship for a period of 90-days from the original date of purchase. If a defect
covered by this limited warranty occurs during this 90-day warranty period,
the defective game disc or cartridge will be replaced free of charge. This
limited warranty does not apply if the defects have been caused by negligence, accident, unreasonable use, modification, tampering, or any other
causes not related to defective materials or manufacturing workmanship.
This limited warranty does not apply to used software or to software
acquired through private transactions between individuals or purchased
from online auction sites. Please retain the original, or a photocopy, of your
dated sales receipt to establish the date of purchase for in-warranty
replacement. For replacement, return the product, with its original packaging and receipt, to the retailer from which the software was originally purchased. In the event that you cannot obtain a replacement from the retailer,
please contact SEGA to obtain support.
Obtaining technical support/service
To receive additional support, including troubleshooting assistance,
please contact SEGA at:
• Website: www.sega.com/support
• E-mail: support@sega.com
• T elephone: 1-800-USA-SEGA
LIMITATIONS ON WARRANTY
ANY APPLICABLE IMPLIED WARRANTIES, INCLUDING WARRANTIES OF
MERCHANTABILITY AND FITNESS FOR A PARTICULAR PURPOSE, ARE
HEREBY LIMITED TO 90 DAYS FROM THE DATE OF PURCHASE AND ARE
SUBJECT TO THE CONDITIONS SET FORTH HEREIN. IN NO EVENT SHALL
SEGA OF AMERICA, INC., BE LIABLE FOR CONSEQUENTIAL OR INCIDENTAL DAMAGES RESULTING FROM THE BREACH OF ANY EXPRESS OR
IMPLIED WARRANTIES. THE PROVISIONS OF THIS LIMITED WARRANTY
ARE VALID IN THE UNITED STATES AND CANADA ONLY. SOME STATES DO
NOT ALLOW LIMITATIONS ON HOW LONG AN IMPLIED WARRANTY
LASTS, OR EXCLUSION OF CONSEQUENTIAL OR INCIDENTAL DAMAGES,
SO THE ABOVE LIMITATION OR EXCLUSION MAY NOT APPLY TO YOU. THIS
WARRANTY PROVIDES YOU WITH SPECIFIC LEGAL RIGHTS. YOU MAY
HAVE OTHER RIGHTS THAT VARY FROM STATE TO STATE.
To register this product, please go to www.sega.com
TWE_MCV_inside.qxp 5/18/06 3:53 PM Page 2

LIMITED W ARRANTY:
SEGA of America, Inc. warrants to the original consumer purchaser that the
game disc or cartridge shall be free from defects in material and workmanship for a period of 90-days from the original date of purchase. If a defect
covered by this limited warranty occurs during this 90-day warranty period,
the defective game disc or cartridge will be replaced free of charge. This
limited warranty does not apply if the defects have been caused by negligence, accident, unreasonable use, modification, tampering, or any other
causes not related to defective materials or manufacturing workmanship.
This limited warranty does not apply to used software or to software
acquired through private transactions between individuals or purchased
from online auction sites. Please retain the original, or a photocopy, of your
dated sales receipt to establish the date of purchase for in-warranty
replacement. For replacement, return the product, with its original packaging and receipt, to the retailer from which the software was originally purchased. In the event that you cannot obtain a replacement from the retailer,
please contact SEGA to obtain support.
Obtaining technical support/service
To receive additional support, including troubleshooting assistance,
please contact SEGA at:
• Website: www.sega.com/support
• E-mail: support@sega.com
• T elephone: 1-800-USA-SEGA
LIMITATIONS ON WARRANTY
ANY APPLICABLE IMPLIED WARRANTIES, INCLUDING WARRANTIES OF
MERCHANTABILITY AND FITNESS FOR A PARTICULAR PURPOSE, ARE
HEREBY LIMITED TO 90 DAYS FROM THE DATE OF PURCHASE AND ARE
SUBJECT TO THE CONDITIONS SET FORTH HEREIN. IN NO EVENT SHALL
SEGA OF AMERICA, INC., BE LIABLE FOR CONSEQUENTIAL OR INCIDENTAL DAMAGES RESULTING FROM THE BREACH OF ANY EXPRESS OR
IMPLIED WARRANTIES. THE PROVISIONS OF THIS LIMITED WARRANTY
ARE VALID IN THE UNITED STATES AND CANADA ONLY. SOME STATES DO
NOT ALLOW LIMITATIONS ON HOW LONG AN IMPLIED WARRANTY
LASTS, OR EXCLUSION OF CONSEQUENTIAL OR INCIDENTAL DAMAGES,
SO THE ABOVE LIMITATION OR EXCLUSION MAY NOT APPLY TO YOU. THIS
WARRANTY PROVIDES YOU WITH SPECIFIC LEGAL RIGHTS. YOU MAY
HAVE OTHER RIGHTS THAT VARY FROM STATE TO STATE.
To register this product, please go to www.sega.com

IINNSSTTRRUUCCTTIIOONNSS
IINNSSTTRRUUCCTTIIOONNSS
STWE Game Manual EN 5/10/06 8:57 AM Page 1
EASY INSTALL GUIDE – YOUR GUIDE
TO TROUBLE FREE GAMING!
SYSTEM REQUIREMENTS
Minimum Configuration (Software mode)
• Windows® 98 and 2000, XP (Windows 95, ME and NT are not
supported)
• Intel® Pentium® 233 MHz with MMX or equivalent processor
• 32MB RAM
• DVD-ROM drive using 32-bit Windows 98/2000/XP driver
• 2000 MB free hard disk space plus space for saved games
(additional space required for Windows swap-file and DirectX™
8.0a installation).
• 4 MB PCI or AGP DirectX 9.0c compatible video card
• DirectX 9.0c compatible sound card
• Keyboard
• Mouse
Note: Microsoft® Media Player 9.0 is required (this can be
downloaded from http://www.microsoft.com).
Recommended Configuration
• 300 MHz or faster Pentium processor
• 64MB RAM
• DVD-ROM drive using 32-bit Windows 98/2000/XP driver
• 16 MB PCI or AGP video card with full Direct3D™ support and
DirectX 9.0c compatible driver.
1
STWE Game Manual EN 5/10/06 8:57 AM Page 2
STARTING THE GAME
1. Start the Windows operating system.
2. Insert the Shogun: Total War™ – Gold Edition DVD into your
DVD-ROM drive. The Autorun menu appears.
Note: If the Autorun menu does not appear automatically, click START
then RUN … In the dialog box type D:\launch.ex e then click OK.
(Substitute the correct letter of your DVD-ROM drive if other than
‘D:’). The Autorun menu appears.
3. Click PLAY SHOGUN – TOTAL WAR. The introduction video
appears, followed by the Main Menu screen. Please see the on-disc
Shogun: Total War™ – Gold Edition manual for full game play
instructions.
• If the Shogun: Total War™ - Gold Edition DVD is already in your
DVD-ROM drive, double-click the Shogun: Total War shortcut icon
on your desktop. Alternatively, click Start\Programs\Total
War\Shogun - Total War - Gold Edition\Shogun - Total War Gold Edition.
Main Menu
Here you can determine the type of game you wish to play, undertake
a Tutorial or define a variety of settings to optimize the per formance
of the game on your computer. From the Main Menu you can choose
to take part in Single Player or Multiplayer games, set game Options
or Quit the game and return to Windows.
PLAY GAME: Begin a single player game choosing from four
different game types.
LOAD GAME: Load a previously saved game. See Load Saved
Games on p.5.
TUTORIAL: Familiarize yourself with Shogun: Total War™’s battle interface.
OPTIONS: Adjust Audio, Video, Gameplay, Control setups and
Performance and access the Map Editor.
CREDITS: View the Credits.
QUIT: Quit Shogun: Total War™ – Gold Edition and exit to Windows.
• To proceed, click on the desired option.
3
INSTALLING THE GAME
1. Insert the Shogun: Total War™ - Gold Edition DVD into your PC.
The Autorun menu appears.
Note: If the Autorun menu does not appear automatically, click
START then RUN… In the dialog box type D:\Launch.exe then
click OK. (Substitute the correct letter of your DVD-ROM drive if
other than ‘D:’). The Autorun menu appears.
2. Click INSTALL from the launcher menu. The Setup program guides
you through the Shogun: Total War™ - Gold Edition installation.
3. The Choose Setup Language window appears. Choose from
English, French, German or Spanish, and click NEXT to continue.
4. The Welcome Dialog box appears, click NEXT to continue.
5. The License Agreement window appears. If you choose to AGREE
to the terms and conditions, click NEXT to continue.
6. The Choose Destination Location window appears, this is the
location to which the Shogun: Total War™ - Gold Edition files will
be copied. Click NEXT to install the game at the default location
of C:\Program Files\The Creative Assembly\Shogun - Total War
- Gold Edition.
To choose another location to install the game, click CHANGE…
and select a folder in the Choose Folder dialog box. Click OK to
confirm, then click NEXT to continue.
7. The Ready to Install the Program window appears. Click INSTALL
to begin copying files.
8. Click YES if you want a Shogun: Total War™ - Gold Edition
shortcut icon placed on your desktop.
9. The Installshield Wizard Complete window appears, click FINISH
to exit.
The launcher menu reappears. Click PLAY SHOGUN - TOTAL WAR
to run the game.
2
STWE Game Manual EN 5/10/06 8:57 AM Page 2
Custom Battle
Choose one of 7 daimyo in the Sengoku Jidai era or command Mongol
or Japanese forces in the period of Mongol invasion and engage in a
fully-customizable epic single battle in glorious real time.
Note: See the Unit Types section of the on-disc Game Play Manual for full
descriptions of the units available to you in the two historical timeframes.
Historical Battles
Take the place of one of the four most important daimyo in Japanese
history in a selection of pre-set battles. Command the armies of the
four great daimyo – Oda Nobunaga, Takeda Shingen, Tokugawa Ieyasu
or Toyotomi Hideyoshi. You may also take part in pre-set battles
against the Mongol invaders and one battle set during the Japanese
invasion of Korea under Toyotomi Hideyoshi.
• This style of game takes place on the battlefield and does not
contain the Strategy Map element.
Tip: Read the description of the battle before you begin. Victory
may come a little easier if you are forewarned.
Historical Campaigns
The three historical campaigns cover famous battles in the rise to
power of the Three Unifiers of Japan – Oda Nobunaga, Tokugawa
Ieyasu and Toyotomi Hideyoshi – along with a set of four battles
detailing the path Kublai Khan’s invasion of Japan might have taken
had the weather not conspired against his invasion fleet. There are
three battles fought by Oda Nobunaga in his pursuit of the
Shogunate, and six battles in the campaigns of Tokugawa Ieyasu and
Toyotomi Hideyoshi as they fought for overall control of Japan and
Total Victor y.
• This style of game includes both the Strategy Map and real time battles.
Load Saved Games
1. Click LOAD GAME in the Main Menu – the Load Game menu
appears.
To load a saved game, click to highlight the game you want to
load, then click LOAD. Alternatively, double-click the saved
game name.
• You may also sort multiple saved games by name and date.
• If you are short of hard disk space, you can delete a saved game
by selecting it from the list and clicking DELETE THIS SAVE
GAME.
5
SINGLE PLAYER GAME
Choose from four modes of play in the Play Game menu:
FULL CAMPAIGN: Select a clan and conquer the whole of Japan to
become supreme ruler of Japan, the Shogun, or rewrite history as
the leader of the Mongol invasion, as you battle to conquer
Japan’s fearsome samurai armies.
CUSTOM BATTLE: Engage in a fully-customizable single battle.
HISTORICAL BATTLES: Take part in some of Medieval Japan’s
greatest single battles.
HISTORICAL CAMPAIGNS: Equal the achievements of Japan’s
greatest daimyo in their famous series of battles.
• Highlight and click the game mode of your choice.
Returning to the Main Menu
To return to the Main Menu at any time, click the Folded over
page at the bottom of a menu screen.
Note: Any changes you have made to video, game, audio and
other options are retained for the game you are about to play.
Full Campaign
Select one of seven clans and fight a campaign that may extend over
80 years or more in the Sengoku Jidai period or, alternatively, select
the Mongol invaders or the Hojo defenders in 13th century Japan.
• This style of game includes both the Strategy Map and real-time
battles.
Winning the Game in Campaign Mode
The game ends when you and your clan have united Japan beneath
the might of your Samurai armies or you die leaving no heir to take
on the mantle of daimyo (in which case you have lost!).
Winning the Game in the Mongol Campaign
The game ends when the Mongols have conquered all provinces on
the map, or when a Hojo army recaptures the last Mongol
controlled province.
4
STWE Game Manual EN 5/10/06 8:57 AM Page 4
View ‘ghost’ unit destination..................................................................SPACEBAR
Select all units ..........................................................................................CTRL + A
Deselect unit ..........................................................................Left-click another unit
Deselect all units ..........................................................................................ENTER
Select all cavalry (works within currently selected group) ......................CTRL + C
Select all missile firing units ....................................................................CTRL + M
Select all hand-to-hand units ..................................................................CTRL + H
Set a waypoint..............................................................SHIFT + left-click on terrain
Show current waypoints for selected unit/s ..................................................SHIFT
Grouping units
Toggle selection of multiple units ..................................................CTRL + left-click
Create temporary group..........................Hold CTRL + left-click units, then press G
Save current selection of units as a group ....................CTRL + SHIFT + ‘number’
Select pre-defined group................................................................CTRL + ‘number ’
Drag box to select units on battlefield ......................CTRL + right-click and drag
Select all units of that type (e.g. all Yari Ashigaru) ..CTRL + double left-click unit
Commands
Open drop down menu ................................................................Right-click on unit
Change Selected unit/s Formation ............................Left-click and drag out ‘ghost’
Forced move with fixed facing..........................................................Alt + left-click
Force hand-to-hand attack (Missile units)........................................Alt + left click
Change unit facing to look at ..........................Alt + right-click (+ drag if desired)
Note: This command may not be queued
HOT KEYS – unit orders
• Select unit(s) then press the following hotkey:
Rally ....................................................R, then left-click on the battlefield to define
Rally point for your army
Note: Option available only when the Rally symbol is active
Rout ..........................................................................................................CTRL + O
Group / Ungroup ....................................................................................................G
Close Formation ....................................................................................................C
Loose Formation ....................................................................................................L
Wedge Formation ................................................................................................W
Melee Mode - Engage at will ................................................................................E
Melee Mode - Hold Formation ..............................................................................F
Melee Mode - Skirmish ..........................................................................................S
Hold Position ........................................................................................................H
Auto Fire (Fire at will)............................................................................................A
Withdraw from battle ..............................................................................CTRL + W
Run/Walk (Quick March) ........................CTRL + R (Toggle selected units between
the two movement speeds)
Halt. Forget all orders ..........................................................................BACKSPACE
Group Formation Shortcuts............................................................Number keys 1-9
Battle Mode – Miscellaneous controls
Pause game (orders may still be given)..................................................P or Pause
Summarize Victory Conditions in battle ............................................Press F1 twice
Toggle between normal and maximum game speed ................................CTRL + T
Send chat message (Multiplayer only) ..................................................................T
Cancel current action/Quit Game........................................................................ESC
7
KEYBOARD COMMANDS
Strategy Map
Scroll around Map ..................................................Arrow keys or Mouse Scrolling
Zoom to a new area of Map ................................................Left-click the mini-map
New Season..............................................Enter or left-click the END TURN button
Skip the scenic tour ................................................................................SPACEBAR
Go to In Game menu ..........................................................................................ESC
Show buildings in a province ....................................................Left-click (Province)
Show units available in a castle ....................................................Left-click (Castle)
View units under a general ............................................................Left-click (Piece)
View Info on provinces, castles, pieces, buildings or units ......Right-click the item
Display level of region loyalty ........................Shift (Green = loyal, Amber = loyalty
uncertain, Red = rebellious)
Select unit ..................................................................................................Left-click
Move unit ..............................................................................Left-click, drag & drop
Note: Valid moves are highlighted - valid moves over multiple turns highlighted in yellow.
Create new Army ......................................Left-click, drag and drop unit from Army
review panel
Merge Armies ......................................Drag and drop Army piece onto target Army
piece
Merge units ............................................Drag and drop unit into another unit in the
Army review panel
Upgrade/Retrain units................................Drag unit into box in unit Training Queue
Destroy Building ................................Destroy Selected Building button – note some
money is recovered
Disband unit..................................................................Destroy Selected unit button
Assign mission (Strategic units)........Left-click, drag & drop on a target piece (e.g.
enemy General)
Battle Mode
Navigation
Move camera ..................................................Move mouse to edge of screen or use
UP/DOWN/LEFT/RIGHT arrow keys
Speed up camera ....................................Hold SHIFT + mouse or number pad arrow
keys
Lock camera speed to fastest setting ......Press Caps Lock (Press again to return to
normal speed)
Click on ground to look at that point (3D mode) ..................................Right-click
Mouselook (if selected)..............................Right-click and hold and move mouse in
desired view direction
Set new camera position and direction (Software mode)........Right-click and drag
Move camera elevation UP/DOWN..............Asterisk/Forward Slash (Num Key Pad)
Tilt camera angle UP/DOWN ..........................Plus sign/Minus sign (Num Key Pad)
Go to start position........................................................................................HOME
Selecting & Moving units
Select unit ..........................................................................................Left-click unit
Move unit..................................................................................Left-click destination
Focus Camera on unit ................................................Double left-click unit/unit flag
Attack ......................................................................................Left-click enemy unit
Run/Charge ......................................................Double left-click ground/enemy unit
6
STWE Game Manual EN 5/10/06 8:57 AM Page 6
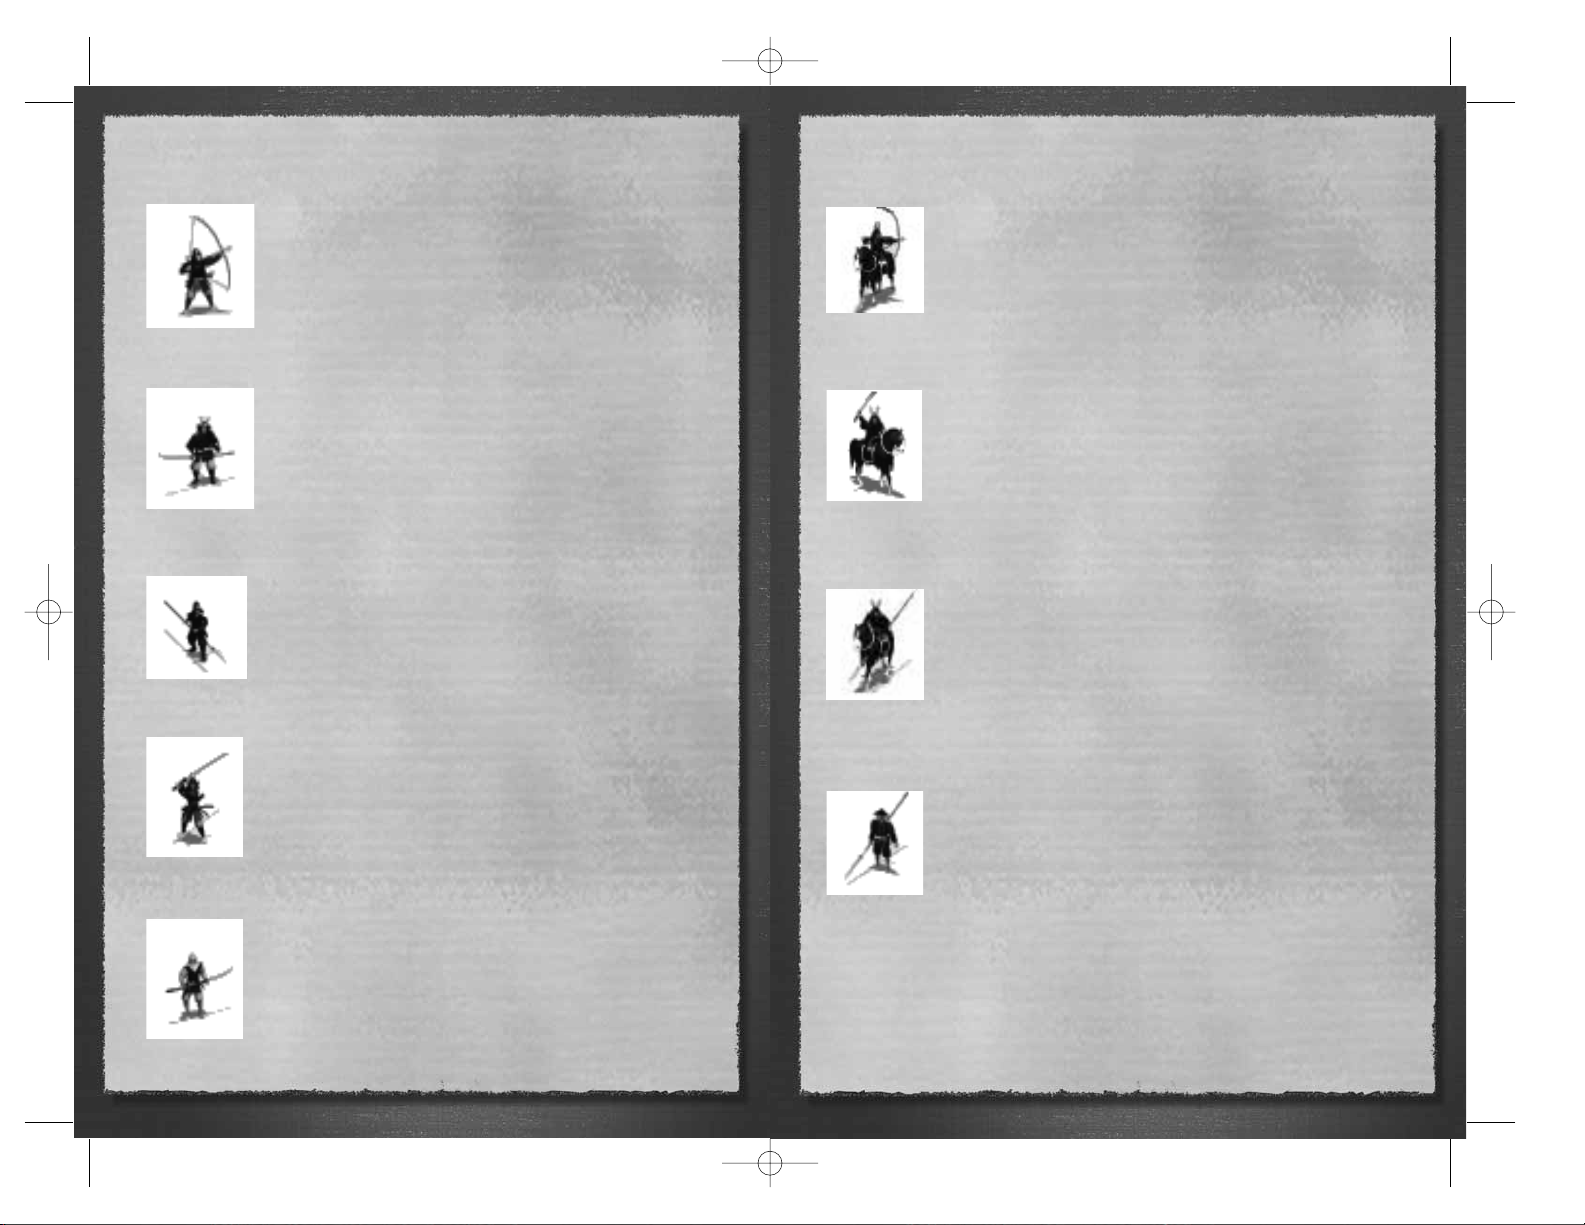
cavalry archers
Requires: Horse Dojo and Archery Dojo
A mounted Samurai with sword and bow. They are fast, flexible, and
pack a nasty sting from medium range. They are best employed in
harrying poorly defended troops at close quarters and standing off
and peppering slower units with bow fire.
Heavy Cavalry
Requires: Famous Horse Dojo and Armory
Mounted Samurai equipped with heavy armor and swords. These
human and equine war machines are the feared elite of the Samurai
army and are highly effective as defensive units and utterly deadly
when used offensively. Only long spears and guns are effective against
them.
Yari Cavalry
Requires: Spear Dojo and Horse Dojo
These mounted samurai, armed with spears, are not as heavily
armored as heavy cavalry is, but they make up for this with additional
speed. They are very useful as a strike force against enemy units who
are poor in hand-to-hand combat or for chasing down retreating
enemies.
Yari Ashigaru
Requires: Spear Dojo
The standard Ashigaru is equipped with light armor and a Yari - a long
spear. They are conscripted peasants and, as such, are poorly trained.
The wall of spears which they can present to the enemy make them
singularly effective against enemy cavalry, as long as they can hold
formation. When their fear of the enemy exceeds their fear of their
masters, they often waver. This unit is unavailable in the Mongol
Invasion campaign.
9
Samurai Archers
Requires: Archery Dojo
These are the standard Samurai foot soldiers. Their main weapon is
the bow but, should it be necessary, they can fight, hand-to-hand
with their katana. With experience, they can become the fearless,
ruthlessly efficient cornerstone of your forces.
Naginata Samurai
Requires: Famous Spear Dojo and Armoury
Samurai foot soldiers equipped with heavy armour and Naginata -
short pole arms. They are very strong defensively and are resistant
to missile fire but they are quite slow.
Yari Samurai
Requires: Spear Dojo
The Yari is a long spear, making these troops very effective defending
against mounted opponents. So long as the unit remains well
ordered, they are good against most troop types.
No Dachi Samurai
Requires: Sword Dojo
The No-Dachi is a huge two-handed sword, and, accordingly, the
stout troops that wield them are most deadly. They don’t defend well,
but are great for breaking enemy formations and routing troops who
are wavering.
Warrior Monks
Requires: Buddhist Temple
These Buddhist fanatics carry a portable shrine as their unit standard,
which makes enemy Buddhist troops most reluctant to engage them.
Christian troops do not suffer this same reluctance. This unit is
unavailable in the Mongol Invasion campaign.
8
STWE Game Manual EN 5/10/06 8:57 AM Page 8
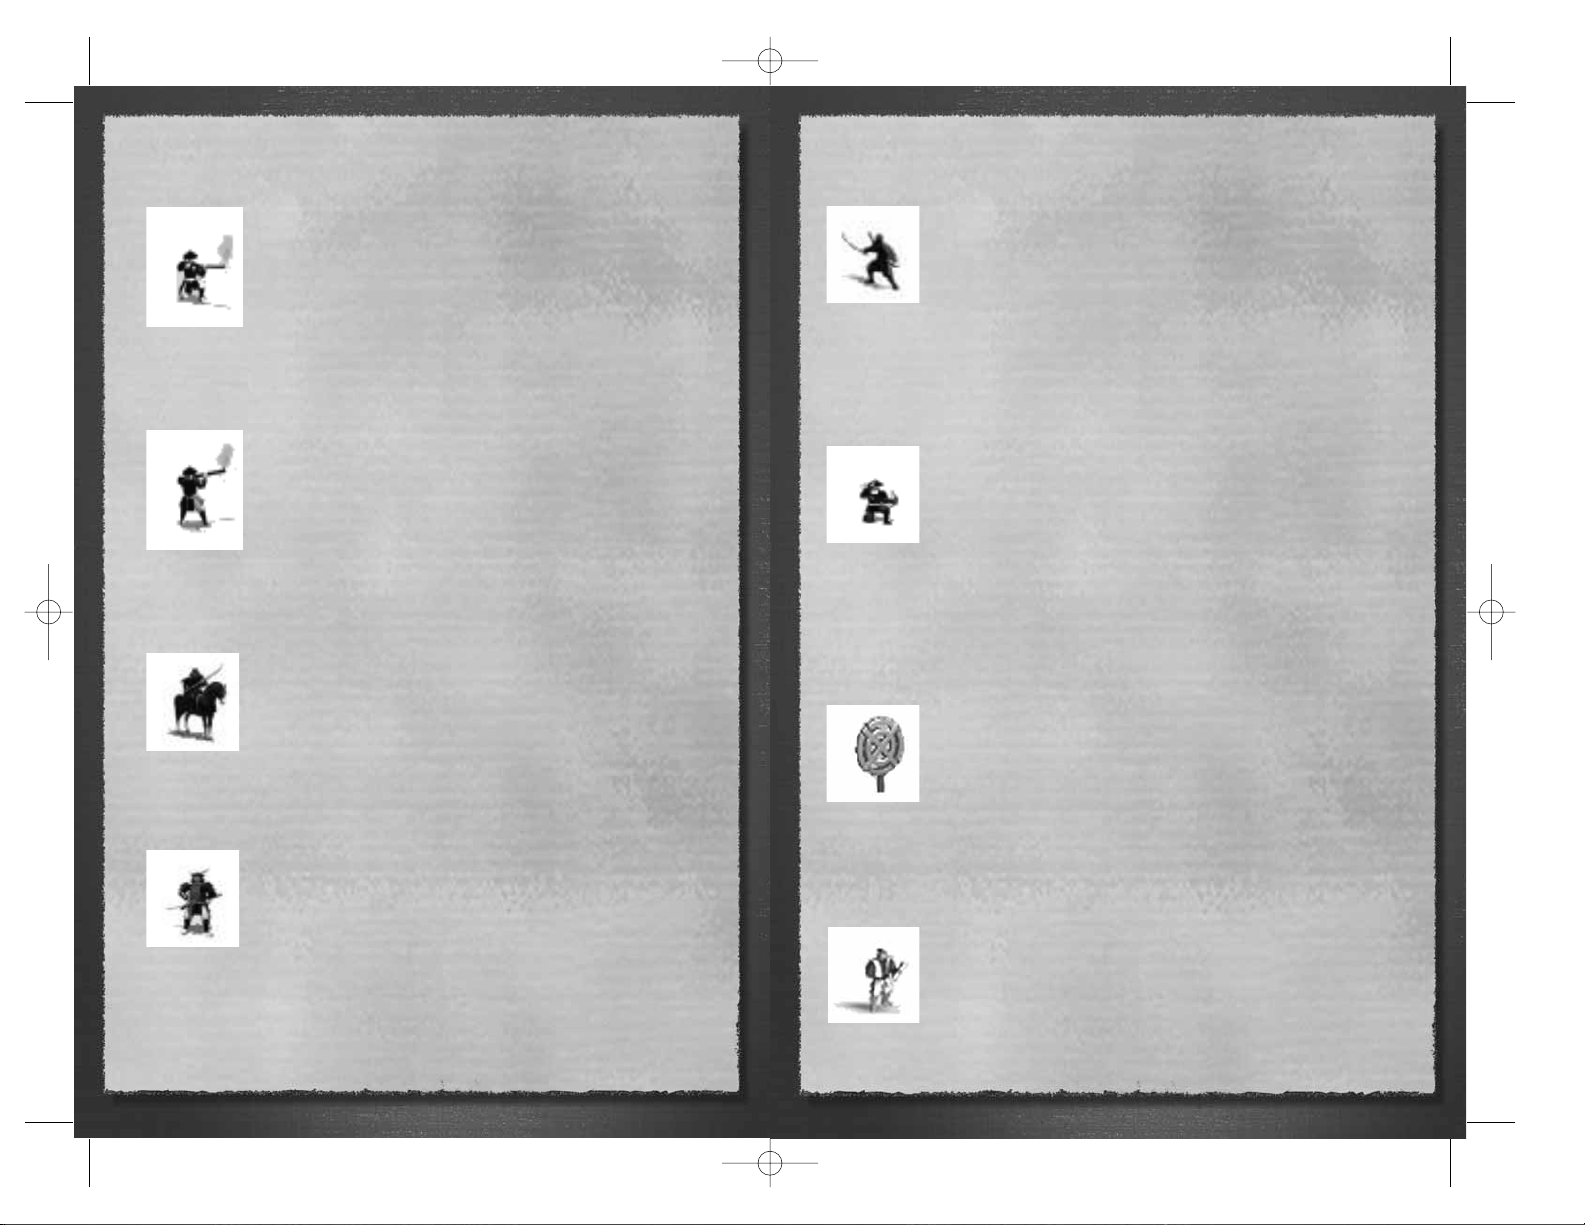
Battlefield Ninja
Requires: Battlefield Ninja dojo
Unlike the other ninja in the game who operate as “strategic” pieces
and carry out assassinations, Battlefield Ninja do exactly what their
name suggests: they can be deployed like any other unit on the
battlefield. They do, however, have the ability to hide, and are invisible
to enemy troops until they are very close. They are armed with bows and swords,
and can be a deadly ambushing force. This unit is unavailable in the Mongol Invasion
campaign.
Ashigaru Crossbowmen
Requires: Archery Dojo
This unit is only available to the Hojo clan in the Mongol Invasion
campaign, and historical campaigns and battles set in the same period.
Unlike a bow, a crossbow doesn’t require long training for the user, or
continual practice to maintain skill and strength. Virtually anyone can
be taught to use one but it can be slow and clumsy to fire. Ashigaru Crossbowmen are
cheap to produce, and are fairly deadly missile troops (even if their rate of fire is a
little slow). However they are rather ineffective in a melee. If other troops manage to
engage them, the Ashigaru Crossbowmen will perish in large numbers!
Taisho
Requires: Nothing
A Taisho (or general) is required to lead a group of units into battle. As
he gains in rank and experience he adds to the combat ability and
morale of all his troops. Normal Taisho can be leaders of any unit
type. They can be identified in battle by their special standards. Note:
If you take your daimyo onto the battlefield, he appears on the battlefield with a small
group of Heavy Cavalry bodyguards.
Emissary
Requires: Tranquil Garden
These are Samurai trained in all the traditional arts and used as
diplomats. They are sent to enemy daimyo on missions to propose
treaties and to gather information on enemy armies and defenses. All
Emissaries gain experience each time their mission succeeds.
Experience is their only defense against Ninja Attack.
11
Arquebus Ashigaru
Requires: Trading Post
Conscripted foot soldiers equipped with simple arquebuses
(muskets). They are effective at longer range than archers are and
only the heaviest armor has a chance of stopping their shot at short
range. However, they are very poor in hand-to-hand combat. This
unit is unavailable in the Mongol Invasion campaign.
Note: The Arquebusiers will only fire their weapons in very light rain at a reduced rate
and accuracy. Heavier rain will render their weapons useless.
Musketeer Ashigaru
Requires: Port and Trading Post (Dutch) or Port, Trading Post and Gun
Factory (Portuguese)
These are improved Ashigaru who benefit from contact with the
European traders. With a longer range and a higher rate of fire, they
can be employed in the front lines of an army formation. Like the
Aquebusiers they can only fire their weapons in very light rain at a
reduced rate and accuracy. Heavier rain will render their weapons useless. This unit is
unavailable in the Mongol Invasion campaign.
Naginata Cavalry
Requires: Famous Horse Dojo and Spear Dojo
A further refinement of heavy cavalry came about when samurai began
using the naginata from horseback. This gave them many of the
advantages of a sword, but with the reach of a spear! Naginata Cavalry
can only be trained in a province where the Horse Dojo has already
been improved and there is also a Spear Dojo. They are very useful as a strike force
against many enemies.
Kensai
Requires: Legendary Sword Dojo
Kensai is the Japanese term for “sword saints”, the almost superhuman
masters of the sword that only years of training and dedication can
produce. These men are capable of taking on many opponents at once
and emerging victorious and often untouched. Kensai, as masters of
swordsmanship, can only be trained at the most exalted of dojo: a Legendary Sword
Dojo. They appear on the battlefield as single warriors, but don’t be deceived — they
are truly deadly and can carve a path through entire units of lesser men!
10
STWE Game Manual EN 5/10/06 8:57 AM Page 10
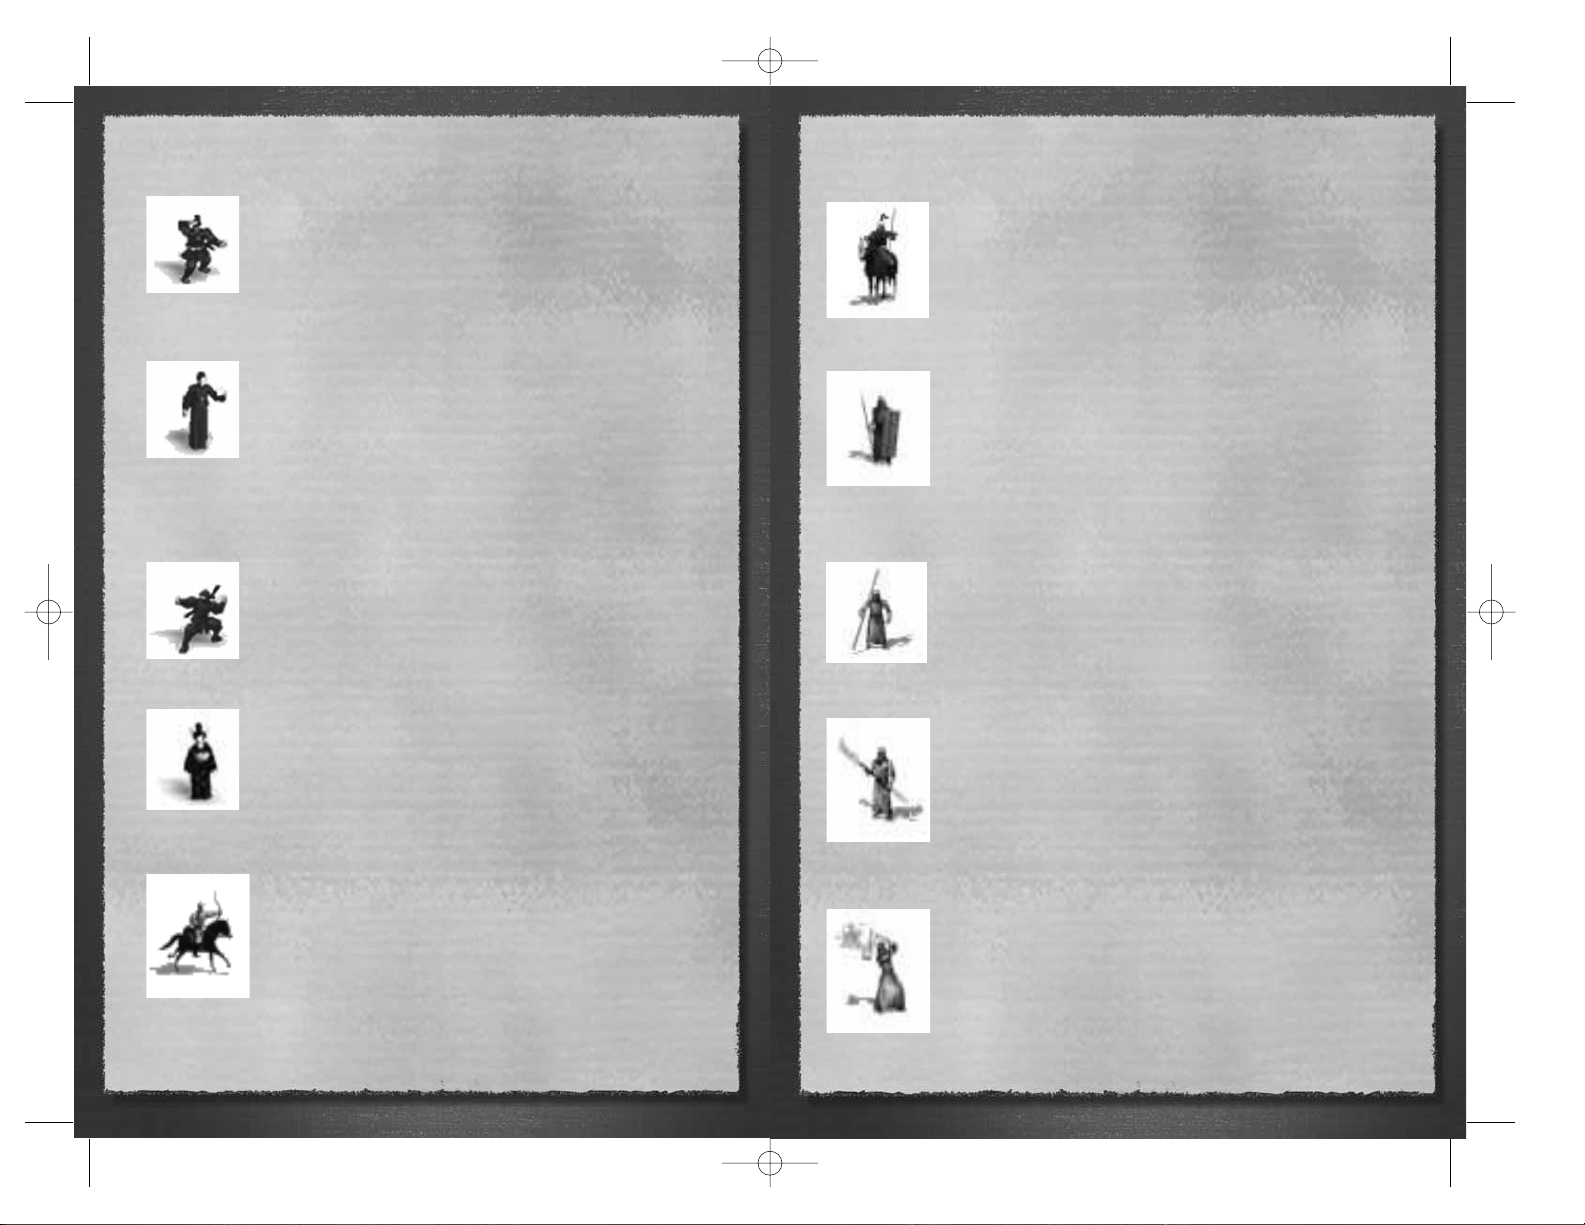
12 13
Mongol Heavy Cavalry
Requires: nothing
Mongol Heavy Cavalry are intended to break lesser troops through
shock and impact. All superb horsemen, these heavy cavalrymen are
armed with spears and well protected by armor and shields. They
are best used to attack infantry formations and to ride down units
that are already on the point of breaking.
Mongol Skirmishers
Requires: nothing
These Skirmishers are heavily armored troops who carry javelins,
shields and swords, although they are not at their best in hand-tohand combat. They should attack with a hail of javelins, while their
armor allows them to survive (in theory) any return missile fire.
Their javelins can be devastating weapons at short range, but the
skirmishers only carry a limited number.
Mongol Spearmen
Requires: nothing
Mongol spearmen are, like their Japanese counterparts, a good
defensive force against cavalry. In terms of quality, they are not as
expert or well trained as Yari Samurai but can be relied on to give a
good account of themselves in most circumstances.
Mongol Guardsmen
Requires: nothing
Guardsmen are the assault infantry units available to the Mongols.
Although relatively slow moving, they are better armed and
equipped than Mongol Spearmen, and are armed with a large glaivelike pole arm. This is a broad-bladed cutting weapon on a pole
anything up to 2.5 meters in length, but it isn’t quite as effective as
the samurai naginata.
Thunder-bombers
Requires: nothing
Thunder-bombers need nerve and skill to use their grenades
properly — or a complete lack of fear and common sense! These
weapons are devastating but have a very short range, and there are
no guarantees that only the enemy will be blown to bits! Thunderbombers could easily blow themselves or nearby friendly units to
pieces as well. They are also very vulnerable in melee.
Shinobi
Requires: Tea House
Shinobi are spies. In an enemy province they can provide information
about enemy armies and defenses, while also encouraging discontent
among the peasants, which can lead to revolt. In your own province
they can act as counterspies, seeking out enemy spies. In addition,
they can also increase the loyalty of your own peasants.
Priest
Requires: Church
These Jesuit-trained priests are excellent emissaries when dealing with
Christian daimyo. While sending a Priest is no guarantee that a
proposed treaty will be accepted, at least you won’t get his head sent
back in a bag. Unless, of course, the enemy Daiymo is Buddhist! Jesuit
Priests also help to spread the influence of Christianity to any
provinces that they visit. This unit is unavailable in the Mongol Invasion
campaign.
Ninja
Requires: Ninja House
The Ninja is trained from birth for spying and assassination. Enemy
daimyo, Taisho, Unit Leaders and Emissaries are all possible targets.
The more senior the target, the lower the chance of success. A Ninja’s
experience and effectiveness increases each time he makes a kill.
The Legendary Geisha
Requires: Geisha House
The Legendary Geisha is a master assassin. The enemy daimyo knows
well enough what a Geisha is capable of, but protocol prevents him
from acting against her openly. Commissioning a very experienced
Ninja is an accepted method of ridding the daimyo of this beautiful
hindrance.
Mongol Light Cavalry
Requires: nothing
These are among the finest horse archers the world has ever seen.
They are intended to harass and ambush enemies, and are ideally
suited to hit-and-run tactics. Their superior maneuverability gives
them the ability to mass swiftly, attack, withdraw and then repeat
this cycle as often as needed. They are neither heavily armed nor
armored and do not fight well in a melee.
STWE Game Manual EN 5/10/06 8:57 AM Page 12
14
STWE Game Manual EN 5/10/06 8:57 AM Page 14
HHIISSTTOORRYY
HHIISSTTOORRYY
STWE HISTORY EN 5/10/06 8:55 AM Page 1
17
Introduction..............................................................................................18
1
: The Daimyo In Shogun:
Total War....................................................................................................................20
2: Formations ............................................................................................................24
Army units ..........................................................................................25
Castles & Siege Warfare ......................................................................33
Artillery In Japan ................................................................................34
Naval Forces In Japan ........................................................................35
Strategic Units In Shogun: Total War ..................................................35
3: The Land Of The Daimyo ....................................................................39
Rebellions, Peasant, Revolts & Ronin ..................................................42
Military Buildings in Shogun: Total War ..............................................45
4: Three Samurai Campaigns ..................................................54
The Battles of Oda Nobunaga, 1560-1575 ........................................55
The Battles of Toyotomi Hideyoshi, 1582-1590 ................................55
The Battles of Tokugawa Ieyasu, 1564-1600 ....................................56
5: The Mongols ......................................................................................58
Who were the Mongols?......................................................................58
Temujin ................................................................................................58
Kublai Khan ........................................................................................59
The Invasion of Japan ..........................................................................60
Mongol Military Units ..........................................................................63
Credits..................................................................................................66
STWE HISTORY EN 5/10/06 8:55 AM Page 2
18
19
Introduction
“If you know your enemy and know yourself, you will not be imperilled by a
hundred battles. If you do not know the others but do know yourself, you will win
one and lose one. If you do not know the enemy and do not know yourselves you
will be in danger in every battle.”
— Sun Tzu, The Art of War
Much of Shogun: Total War™ — Gold Edition is set in the Sengoku period of Japanese
history. Now, unless you’re a Japanese historian and recognise that this means “The
Country at War”, that probably doesn’t mean very much to you. By the time you’re
playing the game (and if you’ve read at least some of this manual), you will realise that
this is one of the most dramatic and exciting times in the history of Japan. In fact, it’s
one of the most dramatic and exciting periods of history anywhere in the world!
“Act after having made assessments. The one who first knows the measure of far
and near wins — this is the rule of armed struggle.”
— Sun Tzu, The Art of War
In the space of a little of over one hundred years, samurai armies fought for control of
Japan. They were lead by the daimyo, a group of hugely powerful warlords who
would have been kings and princes in their own right anywhere else in the world.
Some of the daimyo were undoubtedly heroes, and some were undoubtedly utter
monsters, but all of them were vastly ambitious! You’re about to be pitched into the
middle of this epic struggle between the daimyo. The prize is to become shogun, the
military ruler of Japan, and the controller of the nation’s destiny. The shogun is a more
powerful man than the Emperor himself. The reward is tremendous, but the price of
failure is death for you and your adopted clan!
“To perceive victory when it is known to all is not really skilful… It does not take
much strength to lift a hair, it does not take sharp eyes to see the sun and moon,
it does not take sharp ears to hear the thunderclap.”
— Sun Tzu, The Art of War
History and warfare doesn’t happen by accident. You’ll understand the game much
better if you read at least some of this manual. You don’t have to remember
everything (there’s no test on this stuff, we promise), but if you do know why daimyo
A hates daimyo B but is willing to do a deal with clan C, you’ll have a lot more fun
while you’re playing. At the very least, it’ll explain who all these people are, and who
knows, it might even help you win Shogun: Total War — Gold edition! Think like a
daimyo, and you’ll win like a daimyo!
“Those who know when to fight and when not to fight are victorious.”
— Sun Tzu, The Art of War
The game has been designed and programmed to think like the daimyo and follow the
ideas of Sun Tzu, the Chinese author of The Art of War. If you do the same and follow
his principles of warfare, you will triumph and end up as the new shogun!
“When on surrounded ground, plot. When on deadly ground, fight.”
— Sun Tzu, The Art of War
So trust no one. Keep your friends close… but remember to keep your enemies
closer still!
STWE HISTORY EN 5/10/06 8:55 AM Page 18
21
20
1: The Daimyo In Shogun:
Total War
“Leadership is a matter of intelligence, trustworthiness, justice, courage and
authority.”
— Sun Tzu, The Art of War
It’s traditional for Japanese names to be given as the family name first, followed by the
individual’s given name, so Tokugawa Ieyasu is actually “Ieyasu of the family/clan of
Tokugawa”. By and large, family and clan loyalties were the most important
relationships between the “big players” in this period of Japanese history, which makes
it slightly easier to keep track of the different factions in Shogun: Total War - Gold
Edition! If people share the same family name, they’re generally on the same side. As
we’ve seen, this doesn’t stop some daimyo and samurai plotting against their
overlords, relatives and friends as well as everyone else, of course!
When the action starts in Shogun: Total War - Gold Edition, the daimyo warlords are
well established in their home fiefdoms, and each has a realistic expectation of success
in the war to come. All the clans have a reasonably equal chance of being the next
shogun family at the start of play. There are many candidates who could become
shogun, but only if they have the skill to succeed in war and the will to prevail over
their enemies!
“If you do not know the plans of your competitors, you cannot make informed
alliances.”
— Sun Tzu, The Art of War
In reality, Tokugawa Ieyasu (who was held hostage during his childhood by Imagawa
Yoshimoto in the list below) eventually came to prominence by astute political
manoeuvring and great military skill. His family lasted as shoguns for 250 years, but
there’s no reason for your version of history to turn out that way! It’s up to you to
steer your chosen family to the Shogunate, with all your enemies crushed and your
clan in power. The Imagawa/Tokugawa don’t have to be the winners… unless you are
their warlord and ruthless enough to take them to final victory!
The following great daimyo, then, are leading their respective clans:
Hojo
Hojo Ujitsuna — Ujitsuna would like to be
heir to a proud tradition. The Hojo had been the shoguns of
Japan, brought peace and prosperity and even driven away the
Mongol hordes! Ujitsuna and his sons are powerful daimyo
and will struggle for many years against the Takeda and Uesugi
clans. In fact, the founder of the clan, Hojo Soun, was a lowly
samurai adventurer who overthrew the old order in his home
province and took an old name as his own. His descendants
are equally ruthless!
Imagawa
Imagawa Yoshimoto — Under Yoshimoto, the Imagawa
clan managed to gain control of Mikawa, Totomi and
Suruga provinces. However, a move into Owari brought
him into conflict with Oda Nobunaga (the son of
Nobuhide, below) and Yoshimoto was defeated and killed
at the battle of Okehazama. Once he was gone, the clan’s
power declined rapidly.
Mori
Mori Motonari — Originally vassals of Ouchi Yoshitaka,
the Mori family came to dominate the Inland Sea of Japan
for around 50 years and fight the Amako. When the Ouchi
were overthrown Motonari seized the opportunity and
defeated all rivals to their territory. With his power base
secured, he continued to expand his families’ holdings with
successes against the Amako, although his grandson and
successor was to be opposed by the generals of Oda
Nobunaga.
STWE HISTORY EN 5/10/06 8:55 AM Page 20
22
23
Oda
Oda Nobuhide — The father of the more famous
Oda Nobunaga, and a relative of the Taira clan who
had once ruled Japan. Nobuhide lead his clan to
victory against the Imagawa (above) at Azukizaka in
1542 and paved the way for his children to rise to
prominence. His most famous son, Nobunaga, was a
greedy, utterly ruthless man who nevertheless
became the archetypal daimyo general of the period
and the power behind the last of the Ashikaga
shoguns.
Shimazu
Shimazu Takahisa — Based in the southern part of
Kyushu, Takahisa led the Shimazu clan in an able and
innovative fashion. He was the first of the daimyo to
equip his soldiers with European arquebuses on a large
scale, and the first to win a victory with them in his
attack on Kajiki Castle in Osumi province. After his
death the family fortunes declined, and they chose to
support Ishida Mitsunari at the Battle of Sekigahara
which lead to their eventual downfall.
Takeda
Takeda Nobutora —Nobutora seems to have been a
mostly able ruler of Kai province, but favored his
younger son as his successor, which lead the elder,
Takeda (Harunobu) Shingen, to revolt. Nobutora then
had to suffer the indignity of being held prisoner by a
neighboring lord by his own son’s orders! Despite this
seemingly poor beginning, Shingen became one of the
ablest of the daimyo. He was also the subject of
Kagemusha, Akira Kurosawa’s epic samurai movie —
and the movie is an excellent source of hints and tips
for double-dealing in the game!
Uesugi
Uesugi Tomooki — Tomooki spent much of his time
at war with the neighboring Hojo clan. His branch of
the Uesugi family (the Ogigyatsu) came to a premature
end when his son, Tomosada, was killed in battle in
1545 against the Hojo while trying to retake Kawagoe
castle. The other branch of the family, the Yamanouchi,
lasted longer and eventually fared better. Uesugi
Kagekatsu switched sides to the Tokugawa after
Sekigahara and was rewarded for his new found loyalty
with the valuable Yonezawa fief. The Uesugi also had a
long-running dispute with the Takeda clan.
STWE HISTORY EN 5/10/06 8:55 AM Page 22
24
25
2: Formations
“The victorious general gets his troops to go into battle as if he was directing a
massive flood of water into a deep canyon. This is a matter of formation.”
— Sun Tzu, The Art of War
Getting an army organized on the field of battle was an important drill that every
general would have had his troops practice. The process of getting an army out of a
marching column and into some kind of battle line was helped because there were
standard formations for an army about to enter battle. The following six were
recommended battle formations that every army would know how to apply when
entering a fight.
All formations were based on older Chinese ideas for deploying armies, and all of
them had elements in common. The taisho, or general, was always near the centre of
his army, where his command skills could be best used to control his followers.
Cavalry — and this meant exclusively samurai — were positioned where they could
charge against vulnerable enemy units. A skirmish line of brave samurai and ashigaru
missile-armed troops were in a forward position to harass and break up the enemy’s
ordered ranks as they approached. Most importantly, there would be a substantial
contingent held in the rear as a tactical reserve to be committed at a battle-winning
moment.
Ganko — This is a flexible and powerful formation that can quickly change
into a defensive pattern called onryo by a series of pre-arranged moves.
The units of samurai could be pulled back at an angle to make the second
formation.
Gyorin — Effectively this is a “blunt arrowhead” formation similar to the
hoshi. Typically, an army that was badly outnumbered by its opponents
would use this formation.
Hoen — This was a keyhole-shaped formation that was widely regarded as
the best counter to the hoshi arrowhead. The enemy drawn into the
centre and destroyed in detail.
Hoshi — This is an attacking formation, and regarded as one of the
strongest. The arrowhead brings the maximum pressure to bear against a
small portion of the enemy battle line.
Kakuyoku — This is another strong formation that can be quickly changed
to suit the emerging battle situation. As it stands, the kakuyoku is equally
good for offence or defense. Without too many movements by the
component units, the entire army could be changed into a hoshi and sent
against the enemy.
Koyaku — Another flexible formation that, thanks to the split vanguard, is
capable of absorbing an enemy initial attack for long enough for the
enemy’s true intentions to become plain. Once they were, the army could
adapt its tactics to match.
Army units
“The consummation of forming an army is to arrive at formlessness. When you
have no form, spies cannot find anything out and the enemy cannot produce a
strategy.”
— Sun Tzu, The Art of War
All the units below are included in Shogun: Total War - Gold Edition. All the units will be
produced at a stockade or castle of one kind or another within the producing clan’s
domains. Some units also require that the castle be upgraded with specialist weapon
makers or dojo — specialized training establishments.
A clan’s resources must be sufficient to pay the cost of the unit in koku. Some of these
units might seem “cheap”, but that’s only until you remember that a koku is the
quantity of rice used to feed one man for a whole year. That’s not to say that a unit of
cavalry archers needs several warehouses full of rice to keep them going, but that this
is the level of wealth that’s needed to pay for their training and upkeep. Remember
that not all the clans necessarily get their money in rice from the peasants.
The Takeda were lucky enough to own a gold mine, while other clans made money by
taxing trade with the Chinese mainland. Koku, however, are a good standard measure
for wealth in Shogun: Total War - Gold Edition.
An army is made up of a mixture of unit types, simply because each style of fighting
has its own strengths and weaknesses. A skilled general takes into account the
strengths of each kind of unit while being aware of their weaknesses. By making sure
that the weaknesses of one sort of unit are screened or compensated by another unit,
a strong army can be built up.
“Those who use an army skillfully do not raise troops twice and do not provide
food three times.”
— Sun Tzu, The Art of War
The exact mix of units in an army depends on the personal command style of the
daimyo in charge. The Takeda clan, for example, used to include quite a high
proportion of cavalry in their armies because it was their standard (and often
successful!) tactic to begin a battle with a full-blown cavalry charge into the enemy.
The shock effect of this cavalry charge often demoralized an opposing force before
the real battle began, making victory an easier proposition. The mix of units in your
army when playing Shogun: Total War – Gold Edition will depend on the tactics that
you want to try out, what opponents are fielding against you, and what units you can
afford to train.
A good taisho also kept his army intact as far as possible. There was little point in
winning a battle if the victory has cost too much blood. Because warriors in Shogun:
Total War gain experience when they fight, it is a sensible policy to try and keep
STWE HISTORY EN 5/10/06 8:55 AM Page 24
26
casualties to a minimum. Units that are bled white in battles not only lose soldiers;
they also lose valuable combat effectiveness as the knowledge of how to fight — and
win — dies with the warriors who are killed.
“Getting soldiers to fight by letting the force of momentum work is like rolling
rocks or logs… When troops are skillfully led into battle the momentum is like
that of round rocks rolling down a high mountain. This is force.”
— Sun Tzu, The Art of War
Finally, when looking at these different types of soldier, remember that the samurai
were the living embodiment of a simple military principle. Weapons are useless unless
used well, and the warriors carrying the swords and guns are more important than the
weapons they carry. It almost goes without saying that a unit of samurai is much better
in terms of quality than any ashigaru force, no matter what their armaments. Both,
however, are necessary when building an army because having many “cheaper” men is
often useful in battle and in holding ground once it is taken.
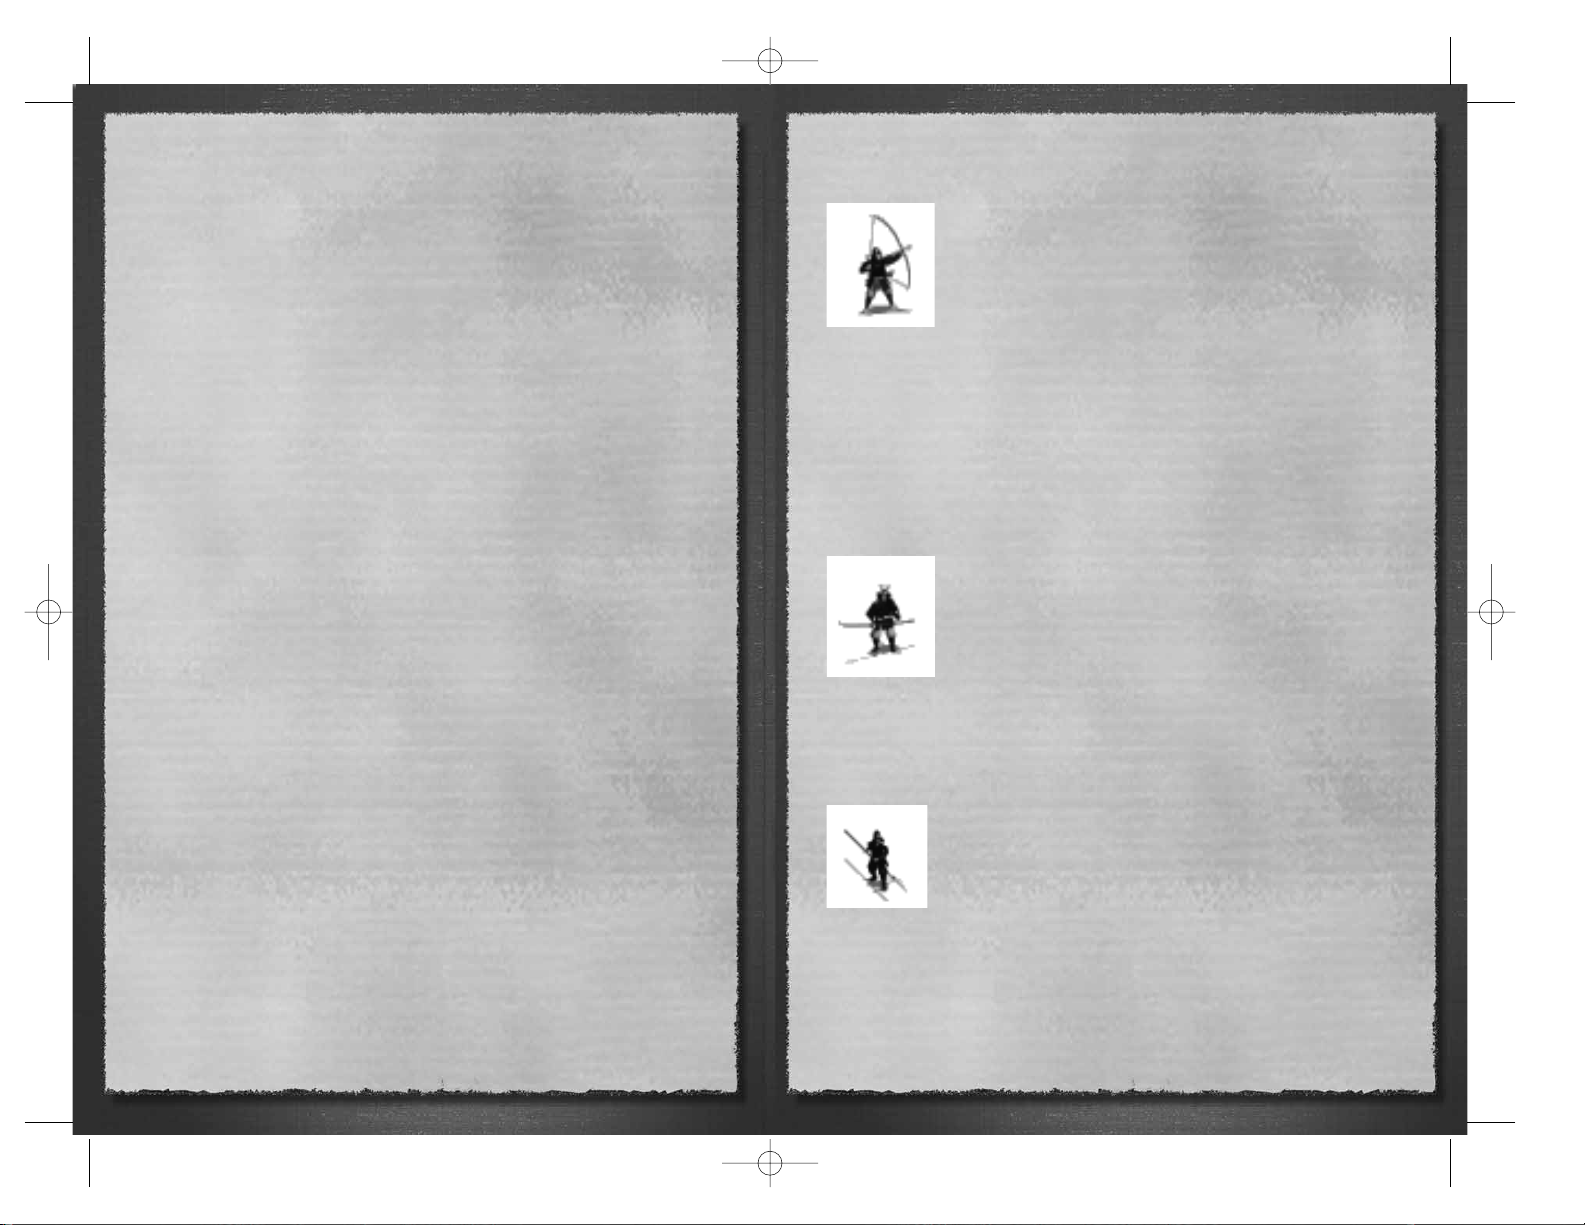
Samurai Archers
These troops are among the most useful in Shogun: Total War as
they can be trained quickly and are relatively inexpensive. They are
extremely useful in any army. As samurai, their morale and
fighting skills are excellent. They are also armed with both bows
and swords, meaning that they can stand off and shower enemy
forces with arrows, then close in and fight hand-to-hand when
needed. Their armor is also of good quality and their morale as
samurai is exceptional, making these among the most useful soldiers daimyo can have
under their command, especially early in the game.
Most clan armies will include a good number of these units simply because of these all
round abilities.
“Standing your ground to wait for the enemy who is far away, waiting for the
weary in comfort, waiting for the hungry with full stomachs, is mastering strength.”
— Sun Tzu, The Art of War
Naginata Samurai
The naginata is a dangerous weapon in the hands of a samurai.
Its reach may not be as long as a yari, but it is “handier” for
close combat and has a greater attack range than a sword. This
makes it a terrible weapon to face: for example, a single sweep
from a naginata can neatly decapitate a charging horseman or
cripple his horse. In either case, the horseman has been
defeated!
Samurai who used the naginata often used heavier armor than was usual which makes
them a little less mobile than other samurai units. It does, however, give them
defensive bonuses in combat.
Yari Samurai
The yari is a long spear tipped with a razor sharp blade. Originally,
this was simply a slightly sturdier version of the lance-like spear
used by mounted samurai, but over the years it became a different
and heavier weapon. Once battle had been joined samurai
equipped with the yari were equally adept in close combat as long
as the unit kept good order in its ranks.
Yari samurai are extremely effective against cavalry. It is, after all, very difficult to force
even the best-trained cavalry horses to charge into a mass of spear points! Thus, they
tend to be used “defensively”. In an ideal world, the enemy would be tempted into
charging onto the spears, dashing themselves to pieces against a foe which who is just
a few meters away beyond the range of a sword swing.
27
STWE HISTORY EN 5/10/06 8:55 AM Page 26
28
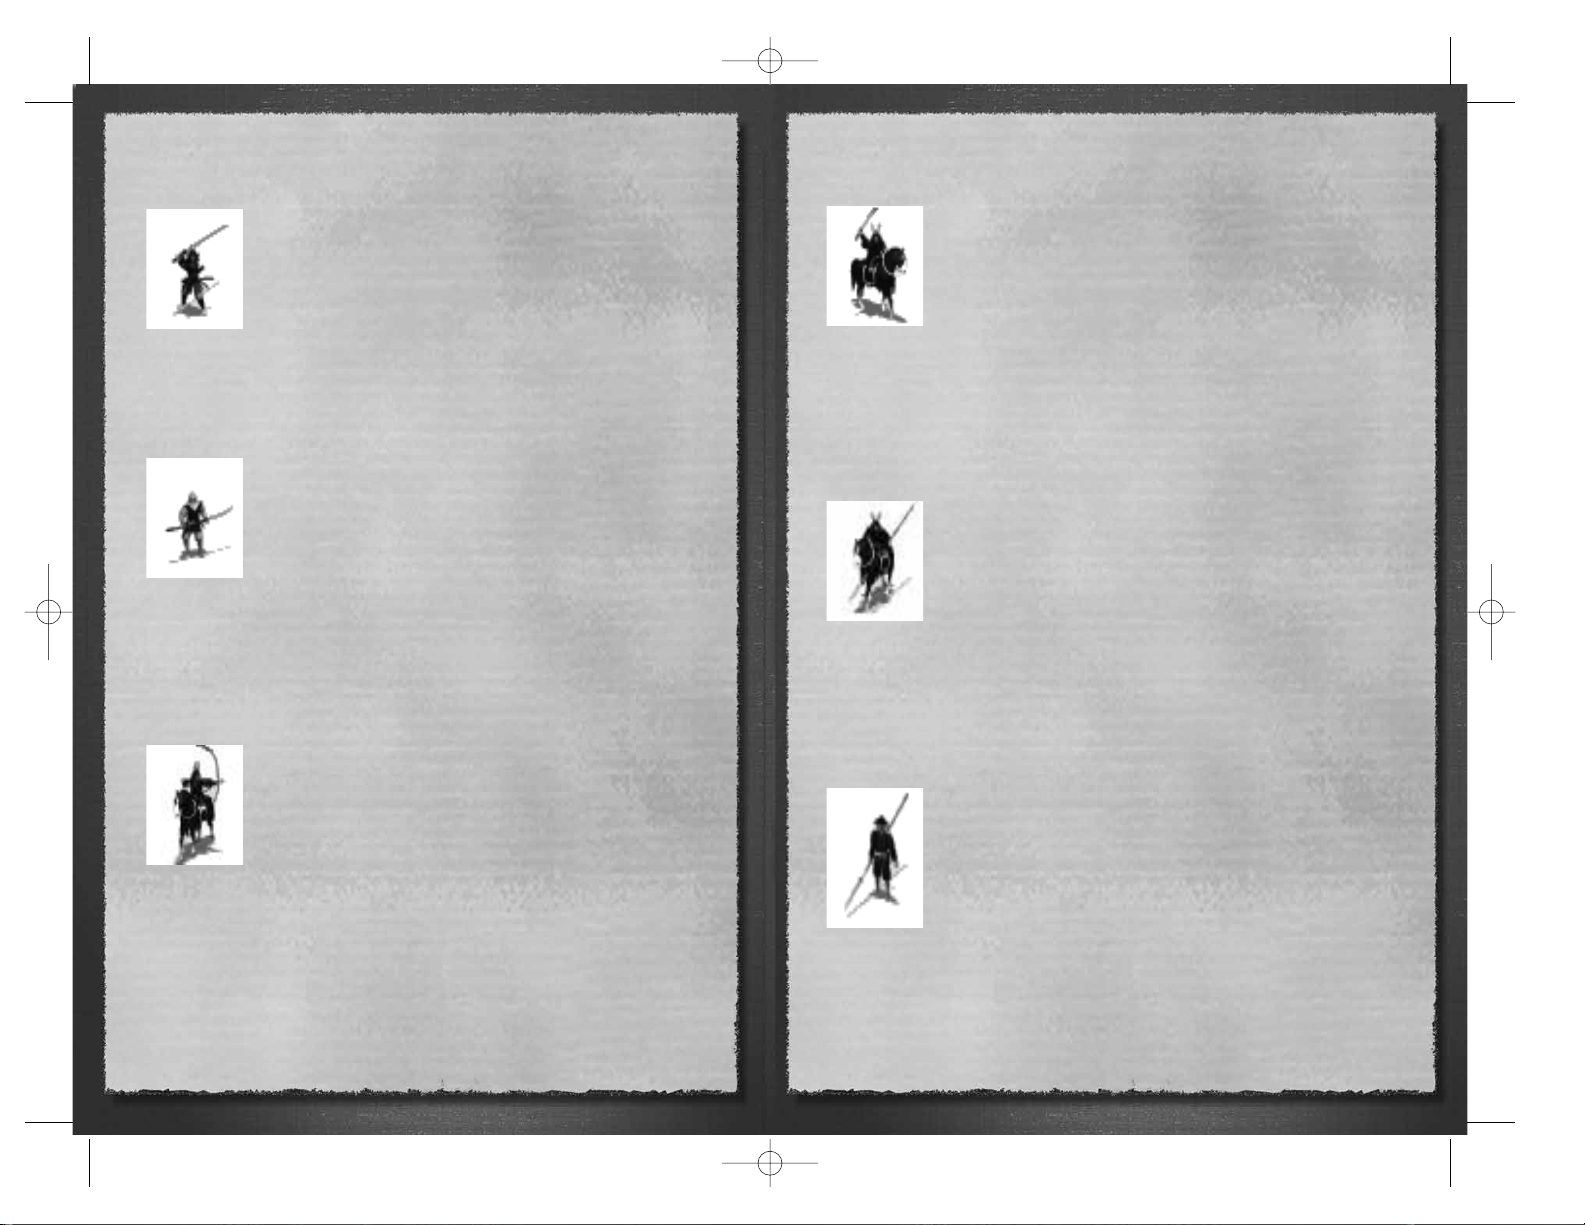
No Dachi Samurai
Every samurai carried two swords as a mark of his class. Samurai
armed with the no dachi went one better, as this was a large twohanded sword that could cut down almost any opponent when
used with skill. Samurai armed with the no dachi are used as shock
troops to break into enemy formations.
They can also be used very effectively against troops whose morale
is already suspect — an attack by a unit swinging two-handed
swords can cause even the sternest heart to quail! No dachi samurai, then, are superb
when used to take an attack to the enemy, but they are less effective when used
defensively.
Warrior Monks
Religious certainty and samurai training are a potent combination.
The sohei — Buddhist warrior monks — had a tradition of getting
involved in wars that didn’t necessarily concern them. Many
monasteries also had a tradition of producing brave and fanatical
warriors, men who were certain that death on a battlefield would
not mean defeat, disgrace and failure but a certain place in paradise.
A unit of warrior monks is a powerful fighting force, motivated as it
is by religious devotion. It also uses a “portable shrine” in place of a battle flag as its
standard. The presence of this shrine makes other troops reluctant to attack them, if
only because of the potential sacrilege. However, Christian samurai units (that may
existent after the arrival of the Portuguese in 1542 and the subsequent appearance of
the Jesuits) don’t suffer any penalties when attacking warrior monks.
cavalry archers
Armed with swords and bows, cavalry archers are a potent
skirmishing force. Being mounted, they have excellent mobility;
being armed with bows, they can shower opponents with arrows;
being armed with swords, they can close with the enemy; being
samurai, they are dedicated and fearless!
However, cavalry archers lack the “weight” to charge home
successfully against properly organized defenders, but against poorly
positioned, badly managed or already “wobbly” troops they can be deadly. They can
be used to harass the enemy with missile weapons, maneuvered to threaten
vulnerable flanks, or sent in to break wavering troops.
As with all cavalry, however, cavalry archers need careful handling when going up
against arquebusiers. They can be quickly shot to pieces.
“Attack without warning where the enemy is not expecting it, and while his spirit
is undecided follow up your advantage and, having the lead, defeat him.”
— Miyamoto Musashi, The Book of Five Rings, The Fire Book
Heavy Cavalry
Heavily armed and armored, these samurai are an elite. Able to
take nearly any enemy and win, they have the speed, weight and
power to be powerful shock troops when they can come to grips
with an enemy. Relatively speaking, they are less effective against
troops armed with yari (who can hold them off at a distance beyond
the swing of a katana), and against arquebus-armed ashigaru.
“Relatively”, however, is the key word here. If heavy cavalry are in
close combat against anyone, they will do severe damage to their opponents. Heavy
cavalry are also well able to defend against most attacks. Nearly all clan armies will
include heavy cavalry. They are simply too threatening not to include in an army.
Historically, the Takeda clan made great use of cavalry to deliver a punishing charge in
the first few moments of a battle.
Yari Cavalry
These samurai shock troops fall somewhere between their light
and heavy comrades in arms. They can be used to break infantry
formations, as their lances give them a reasonable “reach” in
combat. The lance used by mounted samurai is the direct
“ancestor” of the yari carried by infantry. It is, however, shorter and
lighter than the foot samurai and ashigaru version of the spear, but
it does mean that lancers are at less of a disadvantage against yari-
armed warriors.
Overall, they are potent units, but lack the defensive bonuses of the heavy samurai
cavalry. Again, they are forces that need to be carefully handled when attacking
arquebusiers. If a charge is poorly timed, any cavalry unit will be shot to pieces before
it can attack itself.
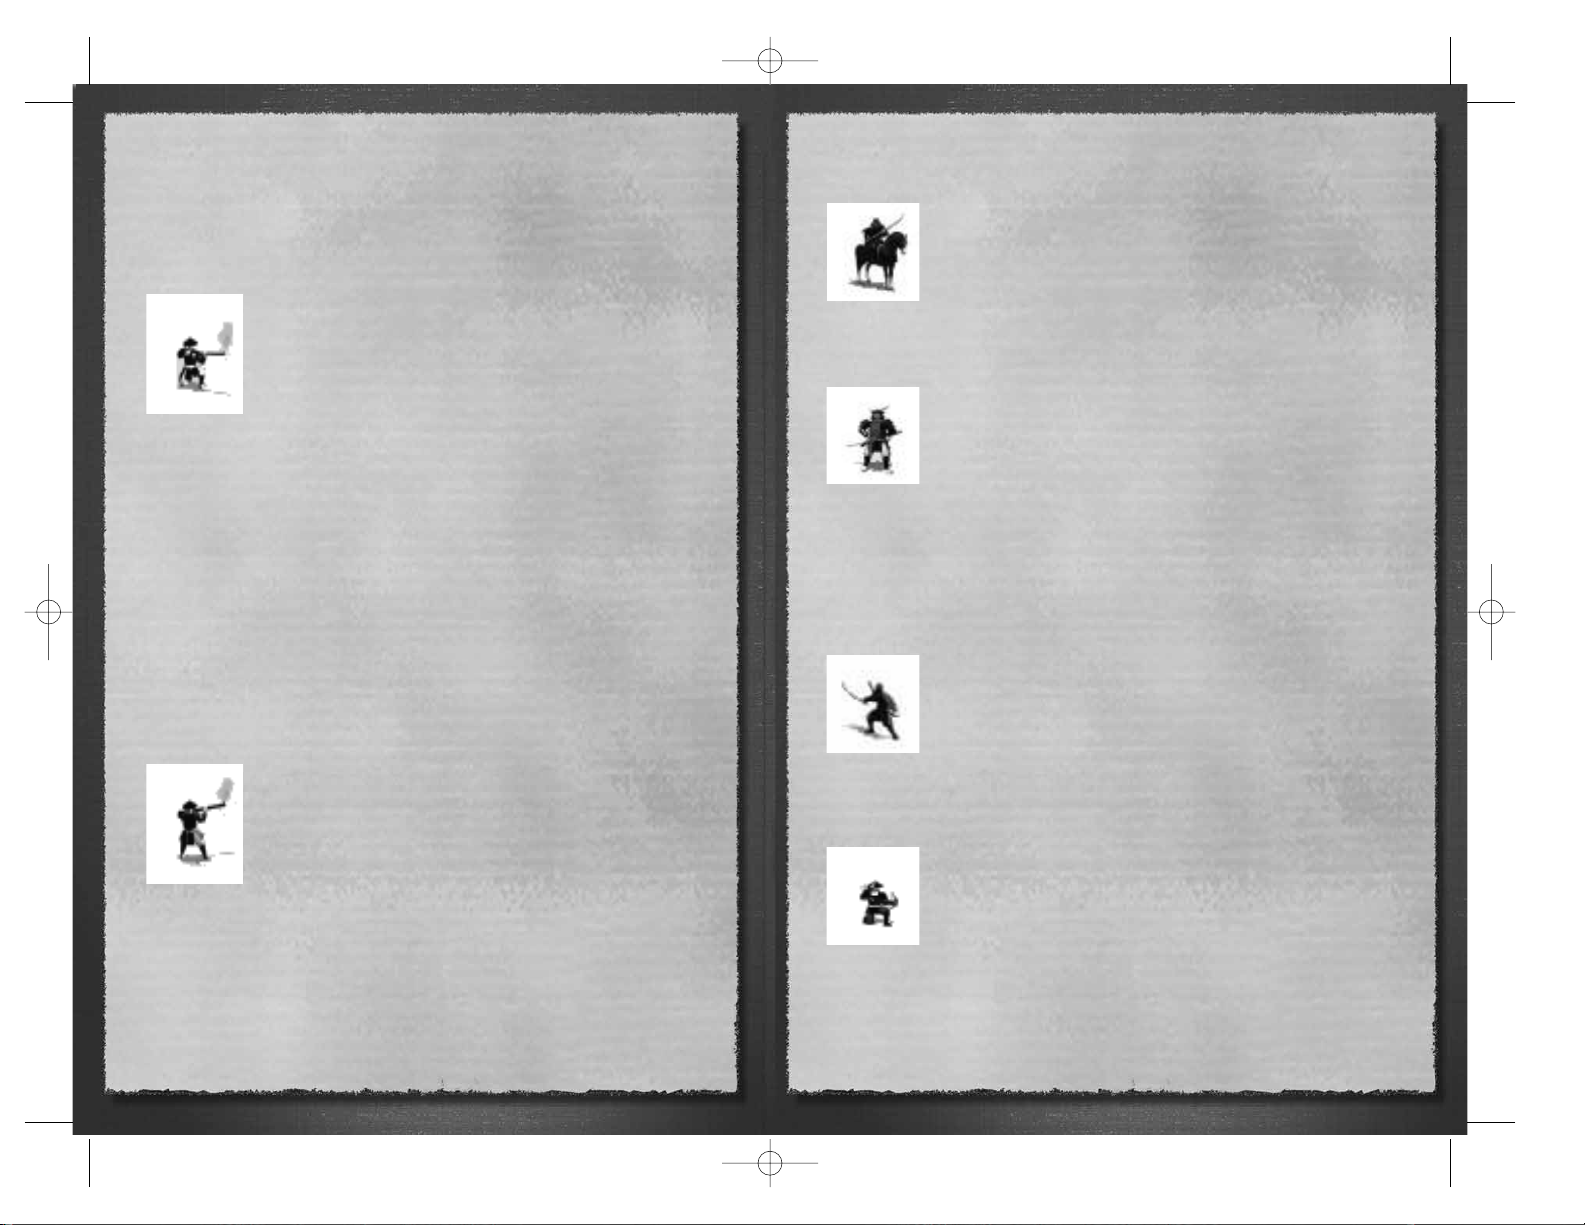
Yari Ashigaru
At the start of play in Shogun: Total War, most clans will receive
a yari ashigaru unit “free of charge” as the start of their army.
The yari, or long spear, was popular as a weapon among the
daimyo for their ashigaru because it was relatively easy to train
large numbers of peasants to use it. Learning to hold a spear
(and point it in the right direction) doesn’t take anything like as
much time as learning to use a sword properly!
Yari Ashigaru should not be compared directly to samurai warriors
armed in a similar fashion. Ashigaru fighting ability, morale and general levels of
equipment are markedly inferior to those of true samurai. On the other hand, the
ashigaru are relatively cheap soldiers and can be trained in great numbers quite
quickly. Ashigaru soldiers of this type are usually present in clan armies in considerable
numbers for just these reasons.
29
STWE HISTORY EN 5/10/06 8:55 AM Page 28
30
As with many European “pike and shot” armies, yari-armed troops were used to
create a “wall” of spear points for other soldiers to shelter behind. It takes some time
to ready an arquebus and the enemy can be kept at bay during reloading by yariequipped troops.
Arquebus Ashigaru
The coming of the arquebus in 1542 led to a revolution in the way
that clan armies were armed and organized. Properly used in large
numbers, arquebuses could be devastating missile weapons, even
though it was out-ranged by, and slower than, a traditional bow.
Early arquebuses were very heavy, and often needed a stake-like
support for the barrels. In turn, this made them cumbersome to
move and deploy, as they certainly couldn’t be used without such
supports. This also means that arquebus-armed ashigaru aren’t
very effective in hand-to-hand combat. Their firepower can inflict heavy casualties on
anyone who comes near, but if the enemy gets close enough, the arquebus-armed
ashigaru are at a huge disadvantage in hand-to-hand combat. They will, quite simply,
be cut to pieces.
Because arquebus-armed ashigaru require a trading post to be constructed in a clan’s
domain, they can only be produced after the arrival of European traders in Japan: the
Portuguese arrive in 1542, while the Dutch land in 1561. European traders were quite
happy to sell guns to the daimyo warlords, but their European gun makers were at the
other end of a very long and hazardous sea voyage. Local gunsmiths did manage to
copy European arquebuses, but not immediately in large quantities. This is part of the
reason for the relatively long training time for arquebus-armed ashigaru. It’s not hard
to teach troops to use the weapons, but getting hold of enough arquebuses plus good
quality powder and shot can be headache!
Musketeer Ashigaru
Qualitative improvements in gunpowder weapons and (just as
importantly) their tactical use mean that later in the Sengoku
period — and in Shogun: Total War — an improved form of
arquebus-armed ashigaru can be trained for inclusion in your army.
These troops have a slightly greater range with their gunfire and a
higher rate of fire. By this point the arquebus has become a more
refined and — most importantly — a lighter weapon that can be
aimed without the need for an extra support.
Note: Clearly, arquebus-carrying units are not available in campaigns. from the
Mongol invasion era.
The term "musketeer" isn’t strictly correct because these ashigaru aren’t technically
armed with muskets as such but with a lighter, improved type of arquebus. However,
"Slimmed-Down-But-Improved Arquebus Ashigaru" is a bit of a mouthful for a unit
title!
NAGINATA CAVALRY
A further refinement of heavy cavalry came about when samurai began
using naginata polearms from horseback. This gave them many of the
advantages of a sword, with the reach of a spear!
Naginata Cavalry can only be trained at a location where there is a
Famous Horse Dojo (i.e. one that has already been improved) and a
Spear Dojo.
KENSAI
Kensai is the term for "sword saints", the almost superhuman masters
of the sword that only years of training and dedication can produce.
Although he lived at the end of the Sengoku period, Miyamoto Musashi
was one such figure. These men were capable of taking on many
opponents at once and emerging victorious and often untouched. Few
nations have ever produced such skilled swordsmen, and possibly only
the very greatest fencing masters in Europe could ever be judged to have the same
level of skill with their chosen weaponry.
Kensai, as masters of swordsmanship, can only be trained at the most exalted of dojo:
a Legendary Sword Dojo. They appear on the battlefield as single warriors, but don’t
be deceived — they are truly deadly!
BATTLEFIELD NINJA
Unlike the other ninja in the game who operate as "strategic" pieces
and carry out assassinations, Battlefield Ninja do exactly what their
name suggests: they can be deployed like any other troops on the field
of combat.
Well, perhaps not quite like any other troops, since they have superior
stealth abilities and can therefore hide very effectively from enemy forces. As such,
their position is only revealed when they finally attack.
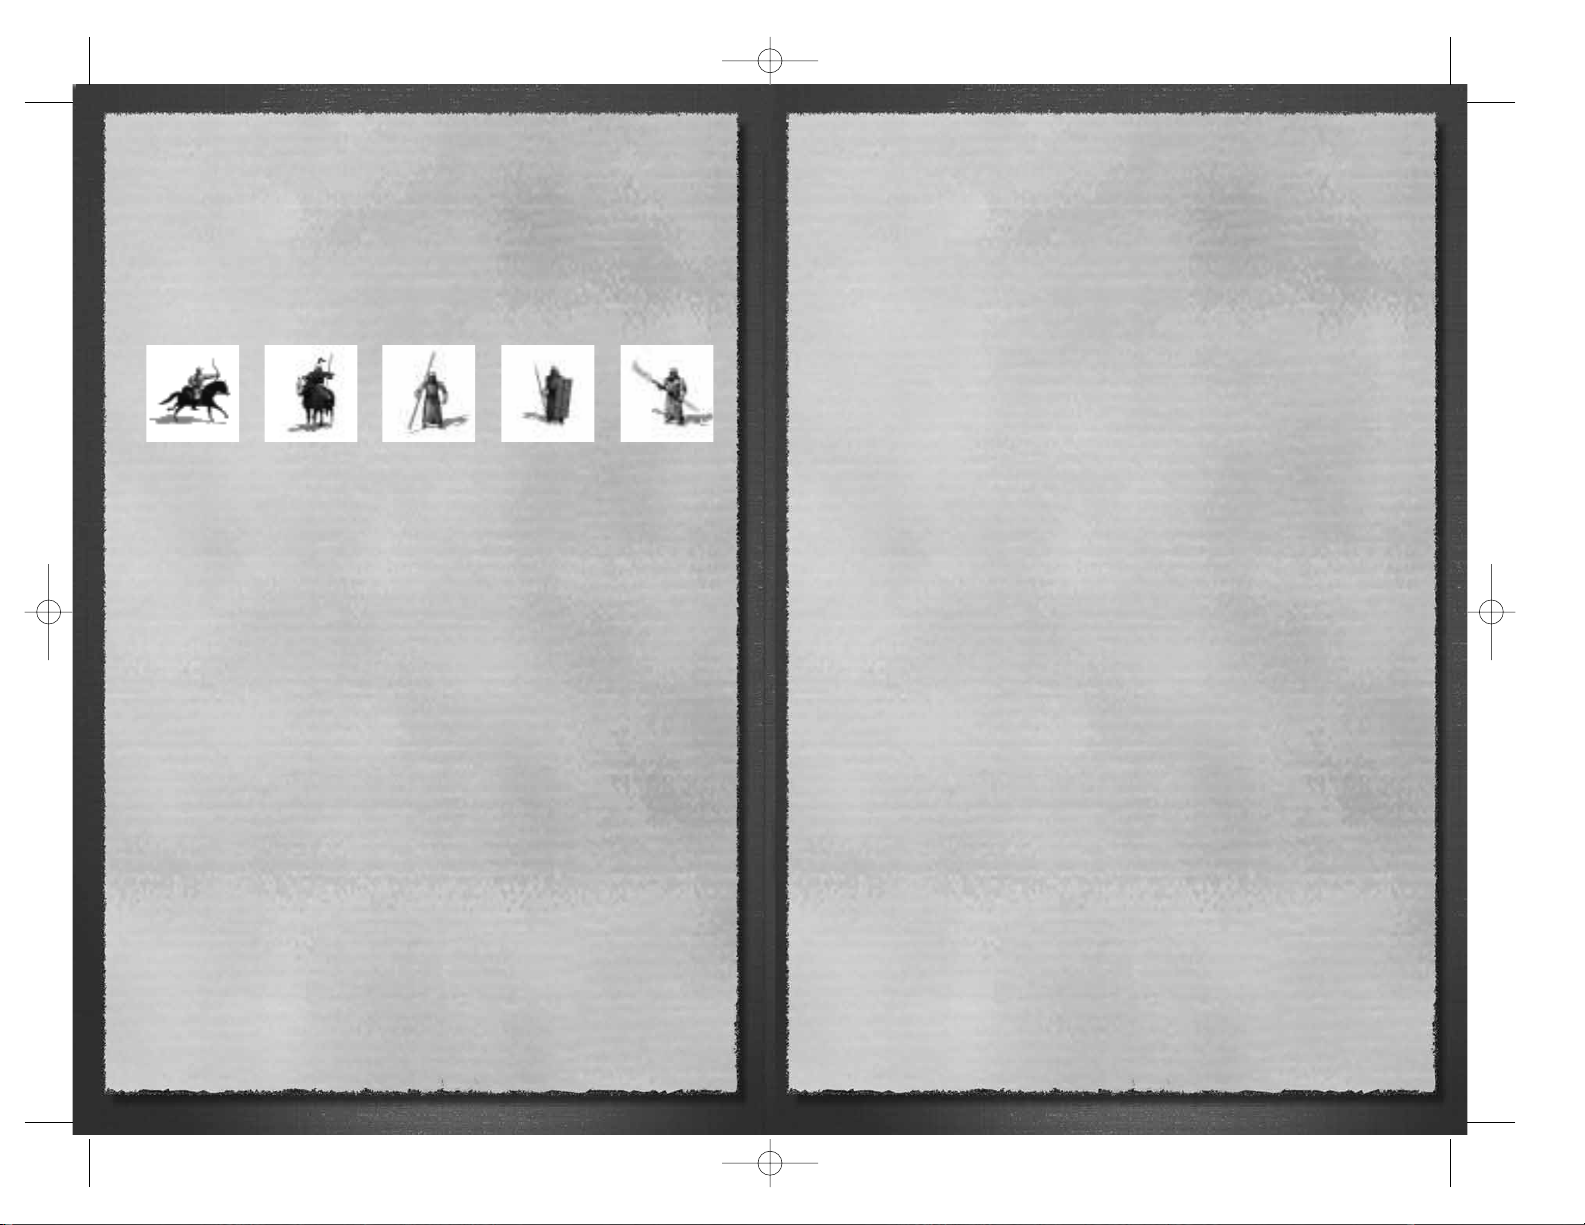
ASHIGARU CROSSBOWMEN
Ashigaru rossbowmen are described in more detail in the section on
The Mongols, as they only appeared in that historical time period.
Their training requires a Bow Dojo.
31
STWE HISTORY EN 5/10/06 8:55 AM Page 30
32
MONGOL UNITS
All the Mongol units are described in the section on The Mongols, as they only appear
in battles and campaigns of that historical period.
All the Mongol troop types land as reinforcements in Japan, spirited across the ocean
from mainland Asia. The Mongols never train new units on the map, so there are no
building requirements for them.
Castles & Siege Warfare
Throughout Japanese history, warfare nearly always involved castles. Shogun: Total War
— Gold Edition includes both castles and the battles that were fought over them.
In Shogun: Total War - Gold Edition, you won’t have to sit and watch a long siege, as
all the details will be handled for you by the strategic game system. If your forces
invade a province with a castle, they will have to fight the province’s garrison as
always, but victory doesn’t automatically take control of the province.
Instead, the defeated defenders retreat into the castle and the province becomes
contested by the two daimyo. This stops either side getting any tax income from the
province, but it also stops the defender building any new military units there as well.
As long as there is an attacking army in the contested province, the castle is besieged.
You, as commander of your clan, don’t have to worry about the details of the siege. As
long as the castle is besieged, the defending troops will suffer attrition losses as they
starve or your own men conduct small-scale attacks. This is a slow but fairly certain
method of taking a castle. Of course, you can always order an assault that will result in
another tactical battle or decide that a siege is going to take too long and try a
different strategic approach.
It might look like the defenders, on the other hand, have no choice but to sit there
and wait to be starved out, but there are options for them too in Shogun: Total War -
Gold Edition. The first of these is, naturally enough, just to sit there and hope the
attackers give up! This may, however, be only postponing the inevitable. The
defenders can sally forth and fight it out on the battlefield, but defeat will let the
attackers into the castle. Alternately, the defenders can also be aided by another
friendly army acting as a relief column to raise the siege. The arrival of a relief column
will also trigger another tactical battle in the province.
Assuming that the attackers are successful, they will gain control of the castle, but it
will have been damaged as a result of the siege. This may mean that some of the
castle improvements (as explained later) will not function until the castle is fully
repaired.
As you can see, castles are hugely useful in slowing down the advance of an attacking
army because it will take time to besiege or assault a castle. This is quite apart from
the benefits they give to their owners as training grounds for new troop units.
Historical Castles
Castles in historical Japan were naturally built to be defensible when under siege, and
nearly all the early castles in Japan were built in the most awkward places (for the
attacker) that could be found. Early castles were almost always wooden stockades
with a few stone reinforcements. Hilltops and even mountaintops were fortified, and
the nearby availability of suitable wood and stone undoubtedly helped the builders.
Unlike in Europe, the defenders were lucky in one respect.
They never had to worry about lots of siege machines other than battering rams. The
33
STWE HISTORY EN 5/10/06 8:55 AM Page 32

34
techniques of taking a castle were simple and rather brutal: the attacking army
surrounded the castle, attempted to burn it down with fire arrows and, at some point,
mounted an infantry assault over the walls or against its gate. By and large, the
defenders only had to wait out the siege and hope that their enemy would give up as
his troops deserted or disease took its toll. Often, however, the defenders didn’t wait
around for the attackers to leave. Japanese history is full of accounts of samurai leaving
the safety of their castles to take the fight to the enemy, often with mixed results.
By the Sengoku period, castles had been built along the same principles for centuries,
and siege techniques hadn’t changed all that much either. After all, there was no real
need to change a design that worked. A tradition of building stone castles was never
really developed before the Sengoku period, possibly for the good reason that Japan is
one huge earthquake zone, but also because it simply wasn’t really necessary. A good
set of compromises between wood and stone did eventually emerge, with stone being
used to create “artificial hills” on top of which castles were built.
The key feature in castle design, its defense and in siege warfare remained the range
of a fire arrow. The ability to burn down a castle was all-important, as was the ability
to keep the defenders far enough away from vulnerable internal buildings so that they
couldn’t burn them down. All this changed, of course, with the introduction of
firearms. Now both defender and attacker had to take into account snipers, as well as
larger siege guns, of which there were some in Japan.
One thing didn’t change during the Sengoku period, and that was the same willingness
of the defenders to charge out of the castle to meet their enemies on an open field.
Given the influence of bushido upon a samurai’s actions, it is less surprising that so
many chose to fight in the open than act in a completely defensive fashion!
Some castles of the Sengoku period could be enormous. Toyotomi Hideyoshi’s
fortress at Osaka was truly vast, and the equal of any defensive structure in the world
at the time. It used the river nearby as part of its defenses, and had defensive outer
walls some 18 kilometers long. Within, a series of baileys meant that an attacker was
forced to besiege one inner wall after another to have any hope of taking the place.
Artillery In Japan
In the eyes of a 16th or 17th century European general one thing would seem to be
missing from a samurai army. Where is the field artillery? In Europe, gunpowder
weapons were expensive to manufacture and difficult to use, at least when first
created, so artillery was in use before handguns became common.
In Japan, however, matters were largely reversed. This was thanks to earlier Imperial
edicts against wheeled transport of all kinds. Japan had become a society where
everyone walked, or rode on horseback or was carried by palanquin.
Without a good, wheeled carriage, it is very nearly impossible (and definitely
impractical) to move field guns around open countryside. Try carrying a car’s back axle
and transmission across a muddy field while (a) several hundred people try to kill you
and (b) you try to keep the whole thing dry and then you’ll have some idea of the
practical difficulties of dealing with artillery on a samurai battlefield!
The daimyo took to arquebuses with enthusiasm, but artillery never really got used as
a separate “weapon system” for the battlefield. There were large guns but these were
used in siege warfare. Changes in castle building techniques mostly kept ahead of
artillery practices. This is why large field guns haven’t been included in Shogun: Total
War - Gold Edition. Artillery pieces just weren’t that significant in Japanese battlefield
warfare at this time.
Note: You can play with gunpowder if you undertake any of the Mongol invasion
scenarios! You’ll have the opportunity of unleashing the fear of the difficult to use, but
deadly, Korean Thunder bombers upon your opposition!
Naval Forces In Japan
It would be fair to say that that the samurai were never consummate masters of naval
combat, because they never really needed to become expert sailors. A fleet wasn’t
going to make its owner the shogun, but a samurai army might just do the job!
Warships were built and used, but they weren’t really a decisive factor in the Sengoku
period. As a result, Shogun: Total War - Gold Edition doesn’t include naval forces.
During the game you can build shipyards in coastal provinces, but these are needed
for transport and trade between the main islands of Japan.
Strategic Units In Shogun:
Total War
In Shogun: Total War - Gold Editionthe following units are deployed on the strategic
map of Japan. With the exception of the taisho, a general, they don’t appear on tactical
battlefields. They do have skills and abilities that a wise daimyo is well advised to use
to full advantage, as you’ll see!
Taisho
Drawn from the ranks of the most able
samurai, a taisho is a general given
command of part (or all) of a clan’s army.
The taisho shows the position of the army
on the strategic map of Japan, and he is
also present on any battlefield involving
units under his command. On a
battlefield, a taisho has a small group of
bodyguards (his hatamoto) to protect him.
A general has an influence on all the units
under his command.
As he gains honor and experience, the units a taisho commands receive bonuses to
their morale.
Generals can be killed on the battlefield by enemy troops and they are also vulnerable
35
STWE HISTORY EN 5/10/06 8:55 AM Page 34
36
to ninja assassination attempts. Taisho are definitely assets worth using (and
protecting) on the battlefield.
Emissary
Emissaries are samurai who have been
specially selected for their loyalty and given
training to be courtiers as well as warriors.
Their diplomatic skills have been honed to
a fine pitch, and they can be trusted to
treat daimyo with respect and honor
when negotiating with them. Every time an
emissary succeeds in a diplomatic mission,
his experience increases; this both
increases his chances of success in future
and makes him slightly less vulnerable to
assassination attempts by ninja.
Finally, there is always the risk that an emissary will not only fail in his diplomatic
mission, but that he will become a “rejection note” himself. One possible result of
sending an emissary to see a daimyo is that his head — and just his head — will be
sent back! This definitely means “no!” whatever the question!
Ninja
Ninja are spies and assassins par excellence.
It’s a foolish daimyo that doesn’t at least
consider using ninja against his rivals. Ninja
can be sent out to kill important people in
other clans, including emissaries, taisho and
the daimyo himself. The more important a
target the ninja is sent against, the lower
his chances of success. Master and
legendary ninja who have already carried
out many successful missions can also be
used during sieges.
They can sneak into a castle and open the gates for the attackers!
Each time a ninja manages to complete a mission he gains experience and will have a
higher chance of success the next time he is sent out — assuming that he isn’t caught
and executed (in some appropriately horrible fashion) by the opposition, of course!
Shinobi
The shinobi is a spy, sent into enemy
territory to gain information and cause
dissent. Without owning a province, a
daimyo in Shogun: Total War won’t have
access to any information about that
province unless, that is, he sends a shinobi
to spy out the land. This spy can give
reports on the value of the province (its
productive value), any improvements that
have been built there, and some military
information too.
The other purpose of a shinobi is to encourage revolt against the province’s overlord.
A province that revolts doesn’t automatically change allegiance, but instead it becomes
independent with its own standing army of peasants and ronin.
Used “defensively” a shinobi acts as a kind of secret policeman, making sure that the
daimyo’s enemies never get the chance to spread dissent and dissatisfaction to the
peasants in a province. Endless rebellions can, of course, destroy the domain of a
daimyo just as surely as an army marching across it.
The Legendary Geisha
The Legendary Geisha is the supreme
diplomat, spy and assassin. She can be sent
as an emissary to see another daimyo, but
while in his castle also acts as a spy,
obtaining information normally only
available to ninja sent as spies. What’s
almost insulting to the “victim” daimyo is
that he knows that the Legendary Geisha
is up to no good, but can do nothing about
it other than having her assassinated by a
ninja of his own! It’s worth remembering
that geisha were not openly prostitutes or courtesans, but “educated escorts and
entertainers” — the perfect people for overhearing sensitive information…
37
STWE HISTORY EN 5/10/06 8:55 AM Page 36
38
Jesuit Priest
Jesuit priests can be used as emissaries, and
are especially effective when used in this
fashion on diplomatic missions aimed at
securing treaties with Christian rulers. No
matter what the result of his diplomatic
mission, a Jesuit will never be killed and
his head sent home in a bag by a Christian
daimyo. A Buddhist daimyo, however, is
under no obligation to respect the sanctity
of the church or its representatives!
3: THE LAND OF THE
DAIMYO
“Terrain is to be assessed in terms of distance, difficulty or ease of travel,
dimension and safety.”
— Sun Tzu, The Art of War
Land has always been at a premium in Japan.
The basis for nearly all wealth and prestige in
feudal Japan was land and the rice that the
peasantry grew. It’s worth remembering that
the population of Japan was greater than that
of the whole of Medieval Western Europe
— Japan has always been a relatively
crowded nation, and this has given extra
impetus to the demand for land.
The country itself is made up of four main
islands: northern Hokkaido, the main island
Honshu, and the smaller islands of Shikoku and Kyushu. Shogun: Total War - Gold
Edition doesn’t include Hokkaido for the simple reason that control of this island
wasn’t strategically or tactically important during the Sengoku period. It was still
largely a cold, barbaric “backwater”, inhabited by the Ainu people, the original
inhabitants of Japan. Honshu was the most important of the islands (and remains so to
this day). It was control of the provinces of Honshu that brought victory to the
Tokugawa clan. It would, however, be a mistake to dismiss Shikoku and Kyushu as
irrelevant, as powerful daimyo arose on both islands. The straits around those islands
make superb protective moats behind which quite a powerful army can be trained!
“A victorious army first wins and then seeks battle. A defeated army first battles
and then seeks victory.”
— Sun Tzu, The Art of War
The Asian mainland is just far enough away to the west to be “inconvenient” for
invading armies, as the Mongols found out to their cost. This allowed the daimyo to
fight each other without really having to worry about the arrival of a Chinese or
Mongol army in their midst, eager to take advantage of a Japanese civil war. Perhaps
the Sengoku period would never have happened if the daimyo had been forced to
consider external threats. Then again, the Ancient Greek cities squabbled continuously
even though the Persian Empire regularly tried to invade.
39
STWE HISTORY EN 5/10/06 8:55 AM Page 38

40
PROVINCES
Even given the scale of the strategic game in Shogun: Total War - Gold Edition, the
provinces are functionally different. Each province in the game is valuable in itself
because of the money (measured in rice koku) that it produces, because of its
strategic position and because of the prestige that ownership gives the controlling
daimyo. This is true no matter where the province happens to lie. The daimyo sets
the tax rate across his whole realm, but rich and properly developed provinces
obviously give the maximum tax income. At the same time, a daimyo has to be careful
in balancing his obvious need for money to pay for his armies, fortifications, spies, and
all the rest against the risk of starting a peasant rebellion. The Ikki defense leagues of
peasants and ji-samurai are not going to remain loyal forever if their overlords do
nothing but squeeze them for taxes!
A province like Yamato or Hida on the main island of Honshu is useful strategically
because it allows its owners to attack in many directions; this same strategic
usefulness can also be a liability to a weak overlord because the same province can be
overrun from all sides. Conversely, one of the provinces on Kyushu is excellent
defensively, but isolated from the centre of Japan with many (often heavily) defended
provinces between it and the centre of power in Kyoto. Both kinds of province have
their uses to skilled daimyo that think in larger terms than just winning the next battle.
“A wise general strives to feed off the enemy’s land. Each bushel of food taken
from the enemy is equivalent to twenty carried from home.”
— Sun Tzu, The Art of War
Provinces also differ from one another in one other important respect. In Shogun: Total
War - Gold Edition many provinces have what can be termed a “special ability”. Some
provinces contain gold or other valuable mineral wealth that can be mined, for
example. Others are home to natural horsemen (and so cavalry units are easy to
produce there) or have a tradition of producing ninja assassins. It’s a good idea to
decide if the special conditions in a province make it worth capturing, either because it
will further your own plans or deprive an enemy of a valuable resource.
You can use a shinobi to discover the details of a province before you attack it. Both
the strategic position of a province and its revenue need to be considered before it is
added to your holdings! There is, of course, a double benefit to attacking enemy
provinces. Not only do you get the use of the territory, your opponent is deprived of
its income and many improvements that he has built there. Taking a province actually
shifts the balance of power by “two provinces’ worth” in favor of the conqueror (plus
one for the conqueror, minus one for the defeated party), and may open up further
strategic opportunities to divide an enemy’s domain.
One of the other nice things about capturing a province is that you also capture any
castle that happens to be there.
As you’ve already seen, though, it’s not necessarily a fast or easy process to capture a
castle. You’ll either need to fight at least two battles or starve the garrison into
submission through a protracted siege. Naturally, the castle itself will be damaged in
the process of being captured (it will be reduced by one level, in fact), but this is often
much cheaper than having to build a new structure from scratch. Any military
structures associated with the castle will also be captured, unless the castle itself is no
longer prestigious enough to be a home for them. Thus, taking a province can also
slow or cripple an enemy’s war production and give your own production capacity an
almost-instant boost too!
Improving Provinces
In addition to being great commanders, the daimyo were also great landowners. They
had to be, as maintaining an army in the field was a hugely expensive proposition. Like
all sensible landlords, the daimyo kept an eye on their holdings and regularly invested
in schemes to increase their worth and, in the process, the taxes that they could raise
from a province.
In Shogun: Total War - Gold Edition, you can also improve provinces by spending koku
on them. Any province can have its farmlands upgraded at least once (and up to four
times in most cases) to produce more annual revenue. Provinces with mineral wealth
can also have mines built in them. There’s nothing quite as useful as finding gold or
other mineral riches in your domain! This was what allowed the Takeda clan to be so
mild in their taxes and yet build up a substantial cavalry army.
One thing that doesn’t need improvement is the permanent garrison that is found in
every province. Even without having an army in the field, a daimyo can rely on a
“scratch force” of local peasants, ashigaru and ji-samurai to protect his interests.
Effectively, these people become an extra couple of units on any battlefield when a
daimyo is on his own territory. Even when a daimyo doesn’t control a province, it’s
garrison remains in place to protect their own homes.
41
STWE HISTORY EN 5/10/06 8:55 AM Page 40
42
Watchtowers & Border Forts
There are two “non-economic” improvements that a daimyo can make in Shogun:
Total War - Gold Edition. Firstly, he can build a watchtower in any province that he
controls. This doesn’t help defend the province, but it does act as a permanent spy in
all the adjacent provinces. Secondly, he can build a border fort, which acts as a
permanent counterspy in the province where it is built. This stops enemy spies from
obtaining any information about the province. Watchtowers and border forts also help
improve the loyalty of the local peasants.
Disasters
Japan has always been a country where
Nature can turn on the works of mankind
and destroy them in an instant. There is
always the risk that an earthquake can strike
and wipe out some or all of the buildings
and improvements in a province.
Fortunately, earthquakes aren’t very
common.
Equally dangerous and expensive when they
do strike are typhoons (the word itself is a
direct transliteration from Japanese). These
terrible storms can sweep across the Pacific and make landfall with damaging effects in
coastal provinces. However, the western coast of Japan faces China and the seas there
simply aren’t big enough for these storms to really get going. As a result, the western
coastal provinces are safe from any typhoons.
Rebellions, Peasant Revolts
& Ronin
Not all provinces in the game are actually commanded by one of the daimyo. Just as in
the historical Japan, there are provinces where the Ikko-ikki have kicked out their
overlords, or where more generalized peasant revolts have taken place.
Every province in Shogun: Total War - Gold Edition has a loyalty rating. This measures
how the peasants and ji-samurai feel towards their current ruler, and it can be affected
by a number of factors. Nothing is likely to cause more damage to loyalty in the long
run than consistently high taxes. It’s a great way to raise income, but keeping the tax
rate too high can lead to unrest. After the arrival and spread of Christianity, religion
can also have an effect on the people’s loyalty, as you’ll see in a later section.
Rebellions also have a nasty tendency to spread if left unchecked, as peasants in one
province will see that their near neighbors are getting away with rebelling and try it
themselves. Just to make life difficult, peasants can sometimes rebel if their harvests
have been poor or a natural disaster has struck. After all, it is better from their point
of view to keep all of a poor harvest and face a daimyo’s wrath than starve to death
after handing over most of a poor harvest in taxes.
At the same time, there are things that a daimyo can and will do to make his provinces
happier with his leadership. On the military front, keeping a garrison in a province
helps suppress some disloyalty, and is very useful in itself as a “tripwire” force should
any of your neighbors decide to invade. Shinobi can also be used as “secret
policemen” to weed out malcontents in a province and suppress dissent as well.
Border forts and watchtowers will also make the peasants feel better about their lot:
at least they can see that their taxes are being spent on something to protect them,
and not just on a daimyo’s fancy army. Likewise, spending money to make the
peasant’s lives better in the long run by improving their farms also makes a daimyo
popular.
There’s also one other factor in whether rebellion breaks out or not: a just-conquered
province is likely to rebel and declare loyalty to its former owner if the peasants are
given half a chance. Not keeping a garrison force (and possibly a shinobi) in a recently
conquered province is likely to cause a revolt. A “change of ownership” takes five
years or so to take hold in the hearts and minds of the local population in a province,
so bear this in mind when setting tax rates and moving troops around.
Sooner or later, however, it’s likely that someone, somewhere will revolt when you’re
playing Shogun: Total War - Gold Edition. Depending on the cause of the revolt, it may
turn out to be a direct threat or a problem that can be ignored for a little while (but
not too long, remembering that rebellion can spread!).
The least dangerous revolt, from a daimyo’s viewpoint, is a peasant rebellion. This
causes the Ikki in the appropriate province to raise an army of ashigaru spearmen to
defend their homes. With a bit of care, a samurai army should be able to crush this
kind of rebellion.
Religious rebellions are slightly more dangerous, in that they tend to produce better
quality field armies of fanatical believers. A rebellion by Christians puts a militant
samurai army in the field and these troops are often supported by ashigaru
arquebusiers. A Buddhist Ikko-ikki revolt, on the other hand, doesn’t have any
arquebusiers (as these are a “Christian” weapon), but it can have substantial numbers
of warrior monks in its army. In both cases, these can be tricky revolts to put down
quickly because of the quality and quantity of the rebel forces involved.
Finally, and only in recently conquered provinces, there is the risk that a “loyalist” (to
the old daimyo) faction will take control of the province. This can be a double-edged
sword, depending upon whether you are the victim of the rebellion or the daimyo for
whom the loyalists have declared. If you’re the victim, as soon as a province begins a
loyalist revolt, you’ll find yourself facing a new samurai army loyal to the previous
daimyo. If you benefit from the loyalist revolt, you’ll suddenly find yourself in a control
of a brand new samurai army in your old province!
Finally, after the death of a daimyo (without any heir) his domain doesn’t simply
disappear. It dissolves into independent “mini-statelets” under the control of ronin, the
daimyo’s former soldiers.
43
STWE HISTORY EN 5/10/06 8:55 AM Page 42
44
These soldiers might look like rebels, but they are actually self-interested warriors
only after extending their own powers. They can be among the most dangerous
“independent” forces in Shogun: Total War - Gold Edition, but fortunately the ronin
don’t tend to be that coordinated in their actions. The ronin in each province will
generally act in selfishly and not come to the aid of any neighboring ronin who are
currently being attacked.
Religion
Sooner or later every daimyo in Shogun:
TotalWar - Gold Edition will have to make a
decision about his religious convictions, and
this can have profound consequences on the
loyalty of his people. The arrival of Roman
Catholic Christianity with the Portuguese, and
in particular the arrival of the Jesuits, made
sure that the accommodation between
Buddhism, Shinto and Zen that had been
arrived at in Japan would have to change.
The Society of Jesus — the Jesuits — had
been formed in Europe as “soldiers of the Counter-Reformation” to defeat the rise of
Protestantism on all levels. They were not
only a militant order, but were often superb scholars, consummate diplomats and very
occasionally good soldiers as well. Jesuits were often involved in journeys of
exploration simply because they made such superb papal representatives.
In Japan their martial spirit was immediately appealing to the samurai, and this was a
legacy from their founder, Ignatius Loyola, who had been a military man.
Christianity, however, demanded that other belief systems be put aside, and the old
compromises were not acceptable to true believers. As a result, friction grew up
between the followers of the new religion and the more militant elements of the older
faith, Buddhism.
In Shogun: Total War - Gold Edition this tension is reflected in the damage that can be
done to the loyalty of a province if the religion of the majority of its population doesn’t
match that of its ruling daimyo. Simply put, a Buddhist daimyo has an easier time in
ruling (and collecting taxes from) a predominantly Buddhist population. The same
holds true for Christian daimyo and Christian populations, of course.
Each religion brings its own benefits: becoming a Christian daimyo gives easier access
to guns earlier in the game (at least until the arrival of the Dutch traders, who don’t
care about much except a man’s gold). Remaining as a Buddhist allows fanatical and
skilled warrior monks to be used in a daimyo’s armies.
In either case, the majority religious affiliation of a province will tend to drift towards
the faith that is “in charge” (i.e. the faith of the province’s daimyo), and be affected by
nearby Christian Churches and Buddhist Temples, which influence nearby populations
into supporting the appropriate faith.
And finally (on this subject) as was noted earlier, it’s quite possible for religious
differences between a daimyo and his people to become a key factor in triggering a
rebellion!
Military Buildings in Shogun:
Total War
Japanese buildings have always been constructed with the need to withstand
earthquakes in mind. The wooden construction used for traditional buildings was a
sensible and practical solution to preventing earthquake damage. A lighter, wooden
building stood a better chance of “giving” and moving with a quake rather than simply
falling down!
This isn’t to say that stone buildings didn’t exist in Japan. Stone construction came
about as a response to the arrival of gunpowder on a large scale. As in the rest of the
world, Japanese castles began as purely defensive structures and only gradually
became homes as well as fortresses. Over the years castles became increasingly
elaborate as military tactics developed. The best of the Japanese castles built at the
end of the Sengoku period were certainly the equal — if not the superior in terms of
comfort and facilities — of any fortresses in the rest of the world at the time.
Before rockets and cannon arrived in Japan, the main method of attacking a castle was
to shoot fire arrows into it and hope that the fire caught. By and large, with wooden
buildings within archery range, this was a tactic that worked. With the arrival of stone
curtain walls, the inner defenses were kept beyond the range of the enemy fire
arrows.
45
STWE HISTORY EN 5/10/06 8:55 AM Page 44
46
“Those skilled at the unorthodox are infinite as heaven and earth, and as
inexhaustible as great rivers. When they come to an end, they begin again, like
days and months. They die and are reborn, like the four seasons.”
— Sun Tzu, The Art of War
Shogun: Total War - Gold Edition doesn’t include the battles that arose from siege
warfare because the long, slow business of laying siege to a castle doesn’t make a very
exciting game. Sieges are covered in the strategic game in a straightforward fashion so
that you don’t have to worry about the details. Siege warfare was often neither heroic
nor dramatic. In fact, most of the time it was a fairly squalid affair. If you want to
imagine what a siege would have been like, think of the most overcrowded camping
holiday you’ve ever had or heard about, with utterly dreadful food, no toilets, no
reliable fresh water, constant bad weather, no chance to wash for weeks on end and
no chance to move somewhere more interesting. Now add in random bouts of illness
(caused by the food, bad water, bad weather, lack of hygiene and overcrowding) and
random episodes of small-scale violence when the people you are besieging try to kill
you or you try to break in and kill them.
Of course, none of the intricacies (and boredom) of siege warfare mattered on many
occasions. At Osaka in 1615, for example (and at other sieges), the troops inside the
castle left the protection of the walls to fight it out with the enemy on an open
battlefield. Sometimes this was a good move, breaking the siege in one climactic
action. At other times, such as Osaka Castle, it simply meant the defenders were cut
down outside the walls rather than being starved or slaughtered within them.
Samurai Castles
There are four levels of castles in Shogun Total War, but they all perform the same
function. They are the bases for armies and the visible signs of the daimyos’ power,
honor and control of provinces. Without a castle to act as an
administrative centre, no other military structure can be built in
a province. The simplest (and cheapest) castle type in the game
is the castle (castle 1). All other types of castle are
developments of the basic castle. A castle is roughly the
equivalent of a wealthy landowner’s fortified manor house.
At the other end of the scale, the citadel
(castle 4) is a truly awe-inspiring structure equal in scale and
grandeur to Osaka Castle.
In all probability, there won’t be more than one or two citadels
built during the course of a single game of Shogun: Total War -
Gold Edition. As well as their more obvious defenses, Japanese
castles were also designed with tricks and traps to defeat ninja assassins. All castles
add to the honor and prestige of their owners. They are visible symbols of wealth,
power and permanence and as such send a powerful message to friends and enemies
alike just by “being”.
Each type of castle can have a number of military buildings
and functions attached to it, as described below. As a general
rule, the larger and more prestigious a castle is, the better the
quality of its associated buildings, and the better their
products. A small stockade, for example, can only have the
most basic type of each building attached to it, while the
larger castles attract master and legendary
craftsmen and sensei to work in them.
These highly trained individuals help to
train better quality troops and a greater
variety of them too.
In Shogun: Total War - Gold Edition, you’ll probably find that it is
wise to create one or two large castles within your domain that
act as specialized “centers of excellence” for one or two kinds of
fighting unit, rather than create a castle in every province and
hope to make them all perfect. Remember that it’s quite easy
to run out of money: harvests and taxes come once a year,
but the money can be spent all the year round! Remember too, that castles and the
military buildings can only support your efforts to become shogun. In order to win,
you’ll need soldiers, not just the places to train them!
“There are routes not to be followed, armies not to be attacked, citadels not be
besieged, territory not to be fought over, civilian instructions not to be obeyed…”
— Sun Tzu, The Art of War
Armory
Samurai nearly always provided their own armor and
weaponry. The same, however, was not true of the ashigaru
who were drawn from the lower, poorer classes. The
importance of providing standardized equipment to their
soldiers was realized by the more astute daimyo during the
Sengoku period. Apart from the obvious benefits of making
sure that their troops were properly equipped, there was an additional benefit in
terms of creating an esprit de corps among the ashigaru.
In Shogun: Total War - Gold Edition, an armory improves the armor values of any units
trained at the castle where it is located. An armory can also be improved to famous or
legendary status in larger castles with subsequent armor benefits for units.
“The important thing in war is victory, not persistence.”
— Sun Tzu, The Art of War
47
STWE HISTORY EN 5/10/06 8:55 AM Page 46
48
Bow Dojo
Samurai originally defined themselves by their skills at
archery, especially archery from horseback. The magnificent
asymmetrical longbows of the samurai needed highly skilled
craftsmen to construct them. It was in the interests of every
lord to make sure that such craftsmanship was encouraged
— and well paid — in his domain, and that the sensei needed
to train men to use them were also available. A bow dojo is
also one of the fundamental military improvements that can
be constructed at any castle.
By the Sengoku period, archery was beginning to fall out of favor, a process that would
accelerate with the arrival of the arquebus. A Bow Dojo allows the castle where it is
located to produce Samurai Archers, and it can be improved to famous or legendary
status in larger castles, allowing the training of higher honor Samurai Archers.
“When you know sky and earth, victory is inexhaustible.”
— Sun Tzu, The Art of War
Church And Cathedral
The Portuguese not only brought advanced military
technology in the shape of guns, they also imported a religion
as well: Roman Catholicism. The Jesuits who came to Japan
spread a very militant variety of Christianity, as they were
formed in Europe as “soldiers of the Counter-Reformation”.
Their leader, Loyola, had been a military man and he imbued
the whole order with a martial spirit that was appealing to the
samurai. Within a few years of their arrival, the Jesuits had converted substantial
sections of the local population. The persecutions of the Tokugawa shogunate lay in
the future.
With a flock of converts, the Jesuits lost little time in making
sure that there were churches for the newly faithful as a
visible sign of their influence. Daimyo who build Jesuit
Churches must have adopted Christianity as their religion.
Once built, Churches help to spread the doctrine of
Christianity to the local population, increasing the number of
Christians in nearby provinces and, in the long term,
reducing the chance of a religious revolt. A church allows the training of Priests. It can
be eventually improved to become a Cathedral, which has consequently greater
power in spreading Christianity.
Geisha House
When all the trappings of culture have been built at a castle (a
Temple, a Tranquil Garden and a Legendary Tea House), a
daimyo can add the final flourish: a Geisha House. These can
only be built at the very largest castles, and help train Geishas
for use as spies and messengers.
Gun Factory
Once knowledge of arquebuses was generally available, the
daimyo wasted little time in setting up their own craftsmen to
make them. The European weapons were perfectly acceptable,
of course, but rather expensive after traveling halfway round
the world. Within a remarkably short space of time Japanese
armorers had mastered all the skills they needed and were producing arquebuses that
were as good as anything from abroad.
In Shogun: Total War - Gold Edition a Gun Factory can only be created at the largest of
castles.
Horse dojo
Cavalry require large numbers of horses, both for use in
battle and for transport. A battle is a frightening and confusing
experience for a man let alone an animal, and training a horse
so that it was willing to charge the enemy took time and skill.
Horses were also trained to kick and bite foes. This means
that a samurai warrior would require at least two horses and
probably more. A battle-hardened animal was too valuable
(and probably dangerous) to be ridden simply as a means of getting from A to B, so
the samurai would need at least one more ordinary riding animal to get him to a
battle.
A Horse Dojo cannot be built at a basic castle (level 1 Castle), but it does require a
Bow or Spear Dojo to have been built on the same site. It can be upgraded to famous
and legendary status. A Horse Dojo will produce Cavalry Archers and Yari Cavalry.
With an Armory, a Master Horse Dojo can also train Heavy Cavalry.
“Fight going down hill, not climbing up.”
— Sun Tzu, The Art of War
49
STWE HISTORY EN 5/10/06 8:55 AM Page 48
 Loading...