

Page 1
1
TABLE OF CONTENTS
Ave! Welcome to
Rome: Total War
™................................... 4
Installation ....................................................... 4
How to Install
Rome: Total War
.................................. 4
CDKeys..................................................... 5
So You Don’t Want to Read the Manual? .................................. 5
Experienced Total War™ Players Start Here! ................................ 5
Starting Play ..................................................... 7
The Main Menu ............................................... 7
The Single Player Menu .......................................... 7
Multiplayer Menu .............................................. 8
Load Game Menu .............................................. 8
Options Menu ................................................. 9
The Prologue .....................................................10
Advisors ........................................................10
Asking for Advice ..............................................11
Campaigns .......................................................11
How to Get Started with the Imperial Campaign .........................11
How to Get Started .............................................12
How to Play a Turn in the Campaign Game ............................15
How to Deal with Messages and Events ...............................17
The Marius Event ..............................................17
How to Use Armies .................................................18
Moving .....................................................18
Selecting the Next Piece ..........................................19
Terrain ......................................................19
Ambushes ....................................................20
Attacking ....................................................20
Attacking with Supporting Armies ...................................21
Multiple Attacks ...............................................21
Merging Armies ...............................................21
Splitting Armies . . . . . . . . . . . . . . . . . . . . . . ..........................22
Merging Units .................................................22
Unit Experience . . . . . . . . . . . . . . . . . . . . . . ..........................23
Generals and Governors ..........................................23
Captains .....................................................24
Recruiting Mercenaries ...........................................24
Building Forts and Watchtowers ....................................24
How to Run Settlements .............................................25
Settlements and the Control Panel ...................................26
The Settlement Scroll ............................................27
Who Gets to be Governor? ........................................29
Building Construction ...........................................29
Repairing Buildings .............................................30
The Building Information Scroll .....................................30
The Settlement Details Scroll .......................................30
The Trade Scroll and Province Resources ...............................31
The Building Browser and the Technology Tree ..........................32
Wonders of the World ...........................................32
Trouble in Settlements ...........................................32
1
RTW_PC_UK_32599.260.UK_MG1_v6 12/5/05 4:02 PM Page 1
Page 2
2
WELCOME TO ROME: TOTAL WAR –
BARBARIAN INVASION . . . . . . . . . . . . . . . . . . . . . . . . . .82
INSTALLATION . . . . . . . . . . . . . . . . . . . . . . . . . . . . . . . .83
WHAT'S NEW? . . . . . . . . . . . . . . . . . . . . . . . . . . . . . . . . .84
How to Win . . . . . . . . . . . . . . . . . . . . . . . . . . . . . . . . . . . . . . . . . . .
87
GAME FEATURES . . . . . . . . . . . . . . . . . . . . . . . . . . . . . .87
Romans and the Senate . . . . . . . . . . . . . . . . . . . . . . . . . . . . . . . . .
87
Hordes . . . . . . . . . . . . . . . . . . . . . . . . . . . . . . . . . . . . . . . . . . . . . . .
87
Religion . . . . . . . . . . . . . . . . . . . . . . . . . . . . . . . . . . . . . . . . . . . . . .92
Battlefield Abilities . . . . . . . . . . . . . . . . . . . . . . . . . . . . . . . . . . . . .
96
Generals . . . . . . . . . . . . . . . . . . . . . . . . . . . . . . . . . . . . . . . . . . . . . .
98
Rebellions & Civil Wars . . . . . . . . . . . . . . . . . . . . . . . . . . . . . . . .
100
Factions Emerging During Play . . . . . . . . . . . . . . . . . . . . . . . . . .
100
Night Battles . . . . . . . . . . . . . . . . . . . . . . . . . . . . . . . . . . . . . . . . .
102
Custom Battle & Multiplayer Preset Armies . . . . . . . . . . . . . . . .
103
Appendices . . . . . . . . . . . . . . . . . . . . . . . . . . . . . . . . . . . . . . . . . .
104
CREDITS . . . . . . . . . . . . . . . . . . . . . . . . . . . . . . . . . . . . .
10
6
LICENCE TO USE THE GAME SOFTWARE . . . . . . . . .107
WARRANTY . . . . . . . . . . . . . . . . . . . . . . . . . . . . . . . . . .10
7
PRODUCT SUPPORT . . . . . . . . . . . . . . . . . . . . . . . . . . .10
7
CONTENTS
Changing Your Mind ............................................32
How to Train Units .................................................33
The Recruitment Tab ............................................33
How to Besiege a Settlement or Fort .................................36
Conquering Settlements . .........................................37
How to Break a Siege ...........................................37
How to Use Fleets ..............................................38
How to Use Spies ..............................................40
How to Use Diplomats ...........................................40
How to Use Assassins ...........................................42
How to Auto-Manage Settlements . . . ................................42
How Not to Go Broke ...........................................43
How to Manage Your Faction ......................................43
Retinues: Ancillary Characters ......................................46
How to Deal with the Senate ......................................47
How to Get Help ...............................................48
How to Change Game Options During Play ............................48
Battles ..........................................................49
The Battle Deployment Scroll ......................................49
Attackers and Defenders .........................................49
How to Deploy Your Troops .......................................50
How to Use the Battlefield Control Panel ..............................51
How to Control the Battlefield Camera ...............................55
How to Move and Attack .........................................56
Changing Unit Formation .........................................58
Changing Unit Facing ...........................................58
Waypoints ...................................................58
Unit Activity ..................................................59
Orders for Artillery Units .........................................60
How to Use More Than One Unit . . . ................................60
Grouping Units ................................................61
How to Get the Most from Unit Abilities ..............................62
How to Assault a Settlement or Fort .................................65
HowtoDealwithAmbushes.......................................69
How to Use Reinforcements and Allies ................................69
Custom Battles . . ..................................................71
Choosing Conditions ............................................71
Customise Battle ...............................................73
Customise Army ...............................................74
Multiplayer Games .................................................76
Setting Up a Multiplayer Battle . ....................................77
Hosting a Game ...............................................77
Joining a Game ................................................78
After a Battle .................................................78
Customer Support ..................................................79
Software License Agreement ...........................................80
3
RTW_PC_UK_32599.260.UK_MG1_v6 12/5/05 4:02 PM Page 2
Page 3

5
4
CD Keys
Your copy of the game came with a CD ke y, which is located on the back of the
manual. When you install the game, you’ll need to type in this key. Your CD key is
unique and without it, you won’t be able to play the game. Please enter the key
exactly as it appears on the back of the manual.
Keep your CD key safe and private in case you need to reinstall the game. Do not
give your CD key to anyone else because it may impair your ability to play
multiplayer games. If you lose your CD ke y, you will not be issued another one.
SO YOU DON’T WANT TO
READ THE MANUAL?
We think reading the manual is probably a good idea. If you’ve never played a
Total War
™
game before, then the manual is full of information you’ll find helpful.
But perhaps none of that is for you, Mighty Caesar!
So instead of reading the manual—but before you begin conquering the world—
we’d like you to do one thing: play through the
Prologue
. We also recommend
that you read the Prologue section of the manual and the section on
Advisors
as well.
When the game starts, left-click on
SINGLE PLAYER
and then left-click on
PROLOGUE
. Just read the introductory screen, click on the
arrow
in the lower-
right corner and follow the instructions and advice you’re given. In no time at all,
your enemies will quiver in fear!
The Prologue introduces the basics of gameplay. You can go back to it later for more
information. Good luck—and may the goddesses Fortuna and Victoria
favour you!
EXPERIENCED TOTA L WAR
PLAYERS START HERE!
If you’ve already played
Medieval: Total War
™
or
Shogun: Total War
™
,
you’ll be tempted to jump straight into playing
Rome: Total War
. After all, you
know how all this works! It’s a
Total War
game! It’s going to be
easy-peasy!
If you jump straight into
Rome: Total War
, you’ll find things have changed since
Medieval: Total War
. Shortly afterward, you may find that a barbarian is
drinking from your skull, and laughing.
AVE! WELCOME TO
ROME: TOTA L WAR
™
Rome: Total War
is a game of epic real-time warfare, empire building, politics and
treachery covering hundreds of years from the Punic Wars to the rise of the Roman
Emperors—from 270 BC to around 14 AD. It was during this period that Rome
conquered the Mediterranean world and much of Europe, and established an empire that
was to last for centuries, one that has echoes even today. This is the world of Hannibal,
Julius Caesar, Cleopatra and a thousand others. This is a world of soldiers, gladiators,
emperors, tyrants, monsters and fools. It’s a rich, exciting world, awaiting a
conqueror—you!
INSTALLATION
Please make sure your computer system uses Windows®98SE or a later Windows
version.
Rome: Total War
is not compatible with Windows 98 or earlier or other
operating systems.
Rome: Total War
also requires the latest DirectX®9.0b-
compatible drivers for your CD-ROM drive, sound card and video card, as well as any
other peripherals. If you have problems running the program, old drivers are the most
likely cause.
How to Install Rome: Total War
1. Before installing, close all other applications.
2 . Insert the
Rome: Total War
CD 1 into your CD-ROM drive. If you have
Autoplay enabled, the title screen will be displayed. If Autoplay is
not enabled, simply double-click on
My Computer
and then double-click on
your
CD-ROM drive
to launch the game installer. On the title
screen, click the
Install
button to begin and then follow the
on-screen instructions.
3 . After
Rome: Total War
is installed, your computer will install Microsoft
DirectX 9.0b if needed. When DirectX installation is complete, you may
need to restart your computer. For more information on DirectX 9.0b, see
the relevant Help file.
4. Now you can run
Rome: Total War
from the Start menu or by clicking
Play
on the CD title screen. Please note that you must have a
Rome: Total War
CD in your CD-ROM drive at all times to play the game.
5
RTW_PC_UK_32599.260.UK_MG1_v6 12/5/05 4:02 PM Page 4
Page 4
The most important changes in
Rome: Total War
are:
•
Left-click
on a unit to select it and then
right-click
on where you want it to
go. This is true on the campaign map and in battle.
• On the campaign map, ever y agent, army and fleet has a movement allowance.
When selected, these pieces are surrounded by a highlighted area that shows how
far they can move.
• Family members can hire mercenaries when they ’r e out in th e field. They can also
build watchtowers and forts. Both of these cost money.
• Armies, agents and fleets are no longer simply “in” a province or sea area.
Instead, each army, agent and fleet occupies a specific place on the map. Just
standing in the same province isn’t enough to start a battle. You’ll need to move
into an enemy army or settlement to attack. Likewise, you’ll need to move an
agent onto another piece to use its special abilities.
• Fleets now carry armies and agents. Move onto a fleet to board it; order the fleet
onto a coastal square to disembark passengers.
• An advisor pops up from time to time with hints and tips about the game and
what’s going on. We recommend paying attention!
• What can be produced at a settlement is closely tied to the size of the settlement
and the level of government. Units can only be trained when there are men in a
settlement to fill the ranks.
• When you’re playing as a Roman faction, you have allies (the Senate and two
other families) at the start of the game. Sooner or later, other Romans will turn
on you in a struggle for ultimate power in Rome. Of course, you can get your
“retaliation” in first!
• The Senate will give you missions from time to time if you’re playing
as a Roman faction. It’s usually worth finishing these missions for potential
rewards and to keep the goodwill of the Senate.
• Clicking on the
Help
(question mark) button on information scrolls brings up in-
game help. The
Help
button and the advisors are of great use when learning the
game.
OK, you’ve resisted the urge for conquest and plunder long enough! Now go play the
game! Good luck with your conquests! Put not your trust in Greeks, Gauls or
Carthaginians! And when facing elephants in battle…try not to panic!
6
STARTING PLAY
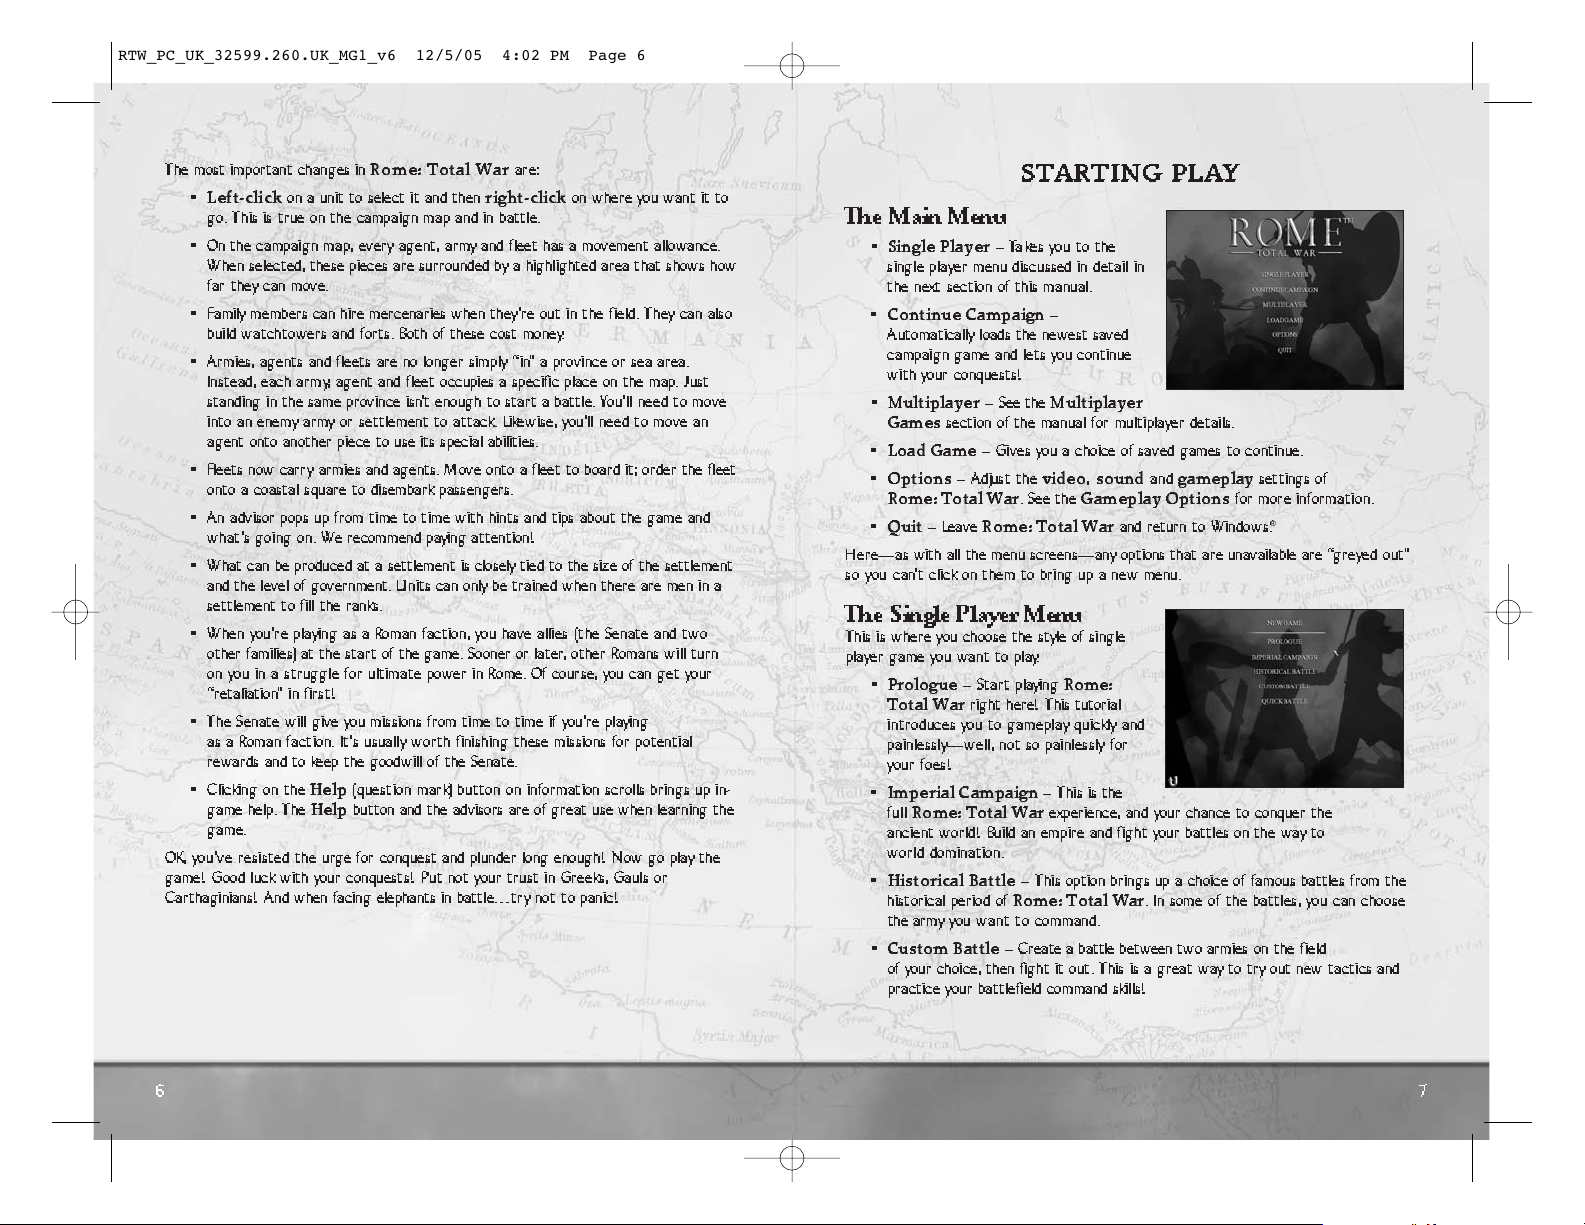
The Main Menu
•
Single Player
– Ta kes you to the
single player menu discussed in detail in
the next section of this manual.
•
Continue Campaign
–
Automatically loads the newest saved
campaign game and lets you continue
with your conquests!
•
Multiplayer
– See the
Multiplayer
Games
section of the manual for multiplayer details.
•
Load Game
– Gives you a choice of saved games to continue.
•
Options
– Adjust the
video,sound
and
gameplay
settings of
Rome: Total War
. See the
Gameplay Options
for more informat i o n .
•
Quit
– Leave
Rome: Total War
and return to Windows®.
Here—as with all the menu screens—any options that are unavailable are “greyed out”
so you ca n’t click on them to bring up a new menu.
The Single Player Menu
This is where you choose the style of single
player game you want to play.
•
Prologue
– Start playing
Rome:
T otal Wa r
right here! This tutorial
introduces you to gameplay quickly and
painlessly—well, not so painlessly for
your foes!
•
Imperial Campaign
– This is the
full
Rome: Total War
experience, and your chance to conquer the
ancient world! Build an empire and fight your battles on the way to
world domination.
•
Historical Battle
– This option brings up a choice of famous battles from the
historical period of
Rome: Total War
. In some of the battles, you can choose
the army you want to command.
•
Custom Battle
– Create a battle between two armies on the field
of your choice, then fight it out. This is a great way to try out new tactics and
practice your battlefield command skills!
7
RTW_PC_UK_32599.260.UK_MG1_v6 12/5/05 4:02 PM Page 6
Page 5
•
Quick Battle
– The fastest way of fighting a battle in
Rome: Total War
.
You’re given command of an army and must drive your enemy from the field—a
true test of command ability!
Clicking on the
U-shaped
arrow in the lower left corner returns you to the previous
menu. This return arrow appears on many screens in the game and always takes you
back to the previous screen. The
Backspace
key also takes you back to the previous
menu wherever you see the U-shaped “go back” arrow on-screen.
Options that are unavailable appear in grey.
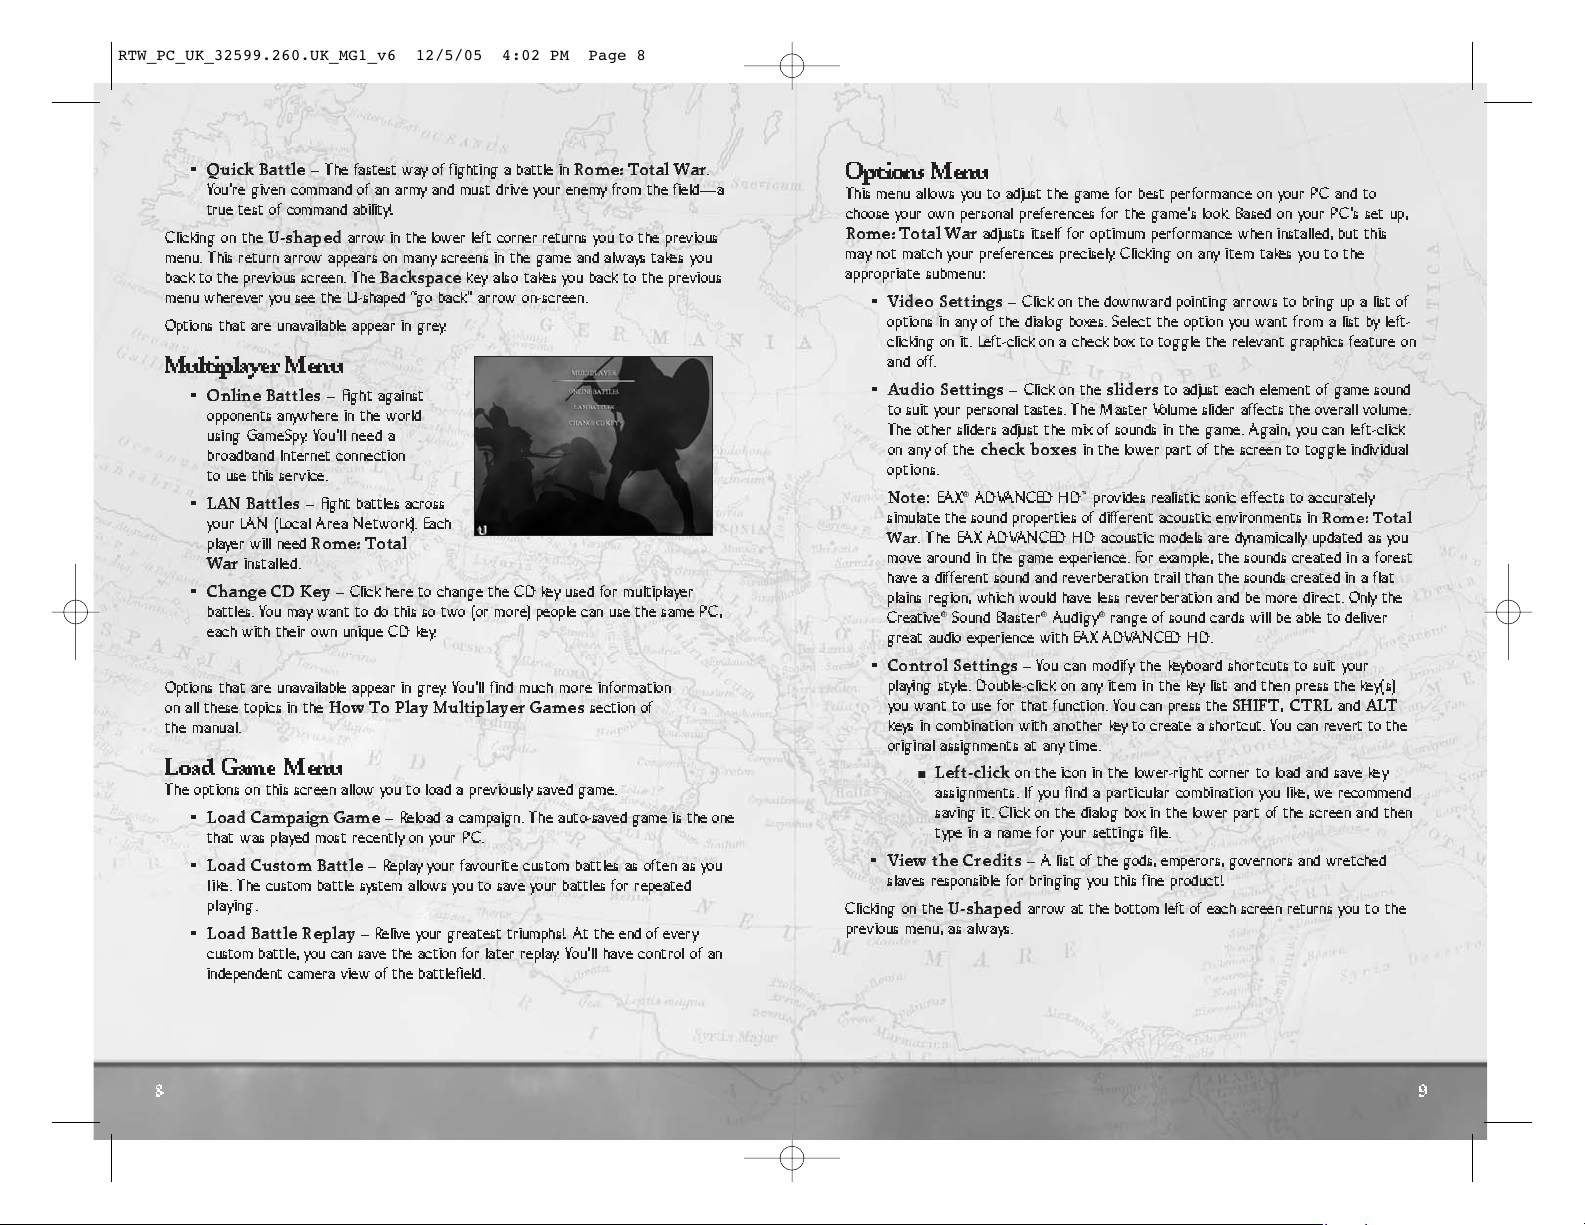
Multiplayer Menu
•
Online Battles
– Fight against
opponents anywhere in the world
using GameSpy. You’ll need a
broadband Internet connection
to use this service.
•
LAN Battles
– Fight battles across
your LAN (Local Area Network). Each
player will need
Rome: Total
War
installed.
•
Change CD Key
– Click here to change the CD key used for multiplayer
battles. You may want to do this so two (or more) people can use the same PC,
each with their own unique CD key.
Options that are unavailable appear in grey. You’ll find much more information
on all these topics in the
How To Play Multiplayer Games
section of
the manual.
Load Game Menu
The options on this screen allow you to load a previously saved game.
•
Load Campaign Game
– Reload a campaign. The auto-saved game is the one
that was played most recently on your PC.
•
Load Custom Battle
– Replay your favourite custom battles as often as you
like. The custom battle system allows you to save your battles for repeated
playing.
•
Load Battle Replay
– Relive your greatest triumphs! At the end of ever y
custom battle, you can save the action for later replay. You’ll have control of an
independent camera view of the battlefield.
8
9
Options Menu
This menu allows you to adjust the game for best performance on your PC and to
choose your own personal preferences for the game’s look. Based on your PC’s set up,
Rome: Total War
adjusts itself for optimum performance when installed, but this
may not match your preferences precisely. Clicking on any item takes you to the
appropriate submenu:
•
Video Settings
– Click on the downward pointing arrows to bring up a list of
options in any of the dialog boxes. Select the option you want from a list by left-
clicking on it. Left-click on a check box to toggle the relevant graphics feature on
and off.
•
Audio Settings
– Click on the
sliders
to adjust each element of game sound
to suit your personal tastes. The Master Volume slider affects the overall volume.
The other sliders adjust the mix of sounds in the game. Again, you can left-click
on any of the
check boxes
in the lower part of the screen to toggle individual
options.
Note
: EAX®ADVANCED HD™provides realistic sonic effects to accurately
simulate the sound properties of different acoustic environments in
Rome: Total
War
. The EAX A DVANCED HD acoustic models are dynamically updated as you
move around in the game experience. For example, the sounds created in a forest
have a different sound and reverberation trail than the sounds created in a flat
plains region, which would have less reverberation and be more direct. Only the
Creative
®
Sound Blaster®Audigy®range of sound cards will be able to deliver
great audio experience with EAX ADVANCED HD.
•
Control Settings
– You can modify t he keyboard shortcuts to suit your
playing style. Double-click on any item in the key list and then press the key(s)
you want to use for that function. You can press the
SHIFT,CTRL
and
ALT
keys in combination with another key to create a shortcut. You can revert to the
original assignments at any time.
Left-click
on the icon in the lower-right corn er to load and save key
assignments. If you find a particular combination you like, we recommend
saving it. Click on the dialog box in the lower part of the screen and then
type in a name for your settings file.
•
View the Credits
– A list of the gods, emperors, governors and wretched
slaves responsible for bringing you this fine product!
Clicking on the
U-shaped
arrow at the bottom left of each screen retur n s you to t h e
previous menu, as always.
RTW_PC_UK_32599.260.UK_MG1_v6 12/5/05 4:02 PM Page 8
Page 6
THE PROLOGUE
The “Sons of Mars” campaign is an introduction to the world of
Rome: Total War
.
It’s your task to lead the Julii family to a position of power by conquering Rome’s
neighbours. This is the way to greatness in
Rome: Total War
—attack external
enemies and gain credit for doing so.
When you’re ready, click on the arrow in the lower-right corner of the scree n to begin.
You’ll start the game with one of your advisors, Victoria, telling you a little about
herself and her tasks in the game. All you need to do to start playing is follow her
instructions and advice.
If you decide you don’t want to play the Prologue through to its conclusion, you can
press the
ESC
key to bring up the Campaign Exit Menu scroll, but we recommend
playing the Prologue through at least once.
ADVISORS
The advisors are your most useful aid when learning to play
Rome: Total War
(as
you already know if you’ve played the Prologue).
The advisors in the game are your first place to go for help when playing, and they ’r e
watching what’s going on so they can pop up at appropriate times and give you helpful
hints, tips and general information.
Victoria
(named after the Roman goddess of victory) is the campaign
advisor. She can advise you about production, recruitment, managing
your empire, diplomacy, dealing with the Senate, trade and so on.
Centurion Marcus
is the battlefield advisor. Apart from offering his
opinion about enemy tactics, he’ll keep an eye out for potential
problems such as putting units into dangerous situations: he doesn’ t
l ike it when cavalry are ordered straight onto
spear points!
When an advisor has something important to tell you, their portrait will
glow. Click on the
advisor
to see their comments.
The
Speech
button toggles the on-screen text of the current piece of
advice. In some cases, you can ask the advisor not to repeat a particular
piece of advice by clicking on the check box below the text.
Click on the
Show Me How
button to have the advisor demonstrate how
to carr y out an action in the game.
10
The
magnifying glass
button shows you the location that is relevant
to the advice being offered.
The
X
button dismisses an advisor. Pressing the
ESC
key also
dismisses them.
Buttons that are not appropriate for the advice being offered are always greyed
out and cannot be selected. Sometimes, for example, there isn’t anything that you
need to be shown how to do.
Asking ForAdvice
There are several panels in the campaign game that include an advisor
button. You can click on this button to get relevant advice on what you
can do next in the game. For example, you’ll be told what Victoria
considers to be the best unit to train if you click on the
advisor
button on the Recruitment Panel.
Advice Preferences
After you’ve been playing for a while, you may feel you don’t need any more
advice. Go to the
Options
menu at the start of play or press
ESC
when on the
campaign map and select
Options
from the
Game End
menu. You’ll have the
ability to alter the level of advice.
Change the level of advice you get by going to the
Game Settings
menu and
choosing an appropriate level of advice from
hightonone
. Your advisors
remember what they’ v e already told you, so if you want to hear advice again,
click on the
Reset Advisor
check box on the same menu. Once you’ve done
that, the advisors will assume you’re a new player and offer information and
hints accordingly.
CAMPAIGNS
Gameplay in
Rome: Total War
divides neatly into
Campaigns
and
Battles
.
These two parts of the game are closely linked, so actions you take in the
campaign game such as constructing buildings, training units or appointing
generals have major effects on the battlefield. This part of the manual concern s
itself with
Campaigns
. Later, we’ll discuss
Battles
and how to get the most out
of them.
How to Get Started with the Imperial Campaign
The
Imperial Campaign
menu allows you to select and set all the options you
might want in a campaign game: who you’re controlling, how hard the game is to
play and how you want to win. This screen allows you to do the following:
11
RTW_PC_UK_32599.260.UK_MG1_v6 12/5/05 4:02 PM Page 10
Page 7
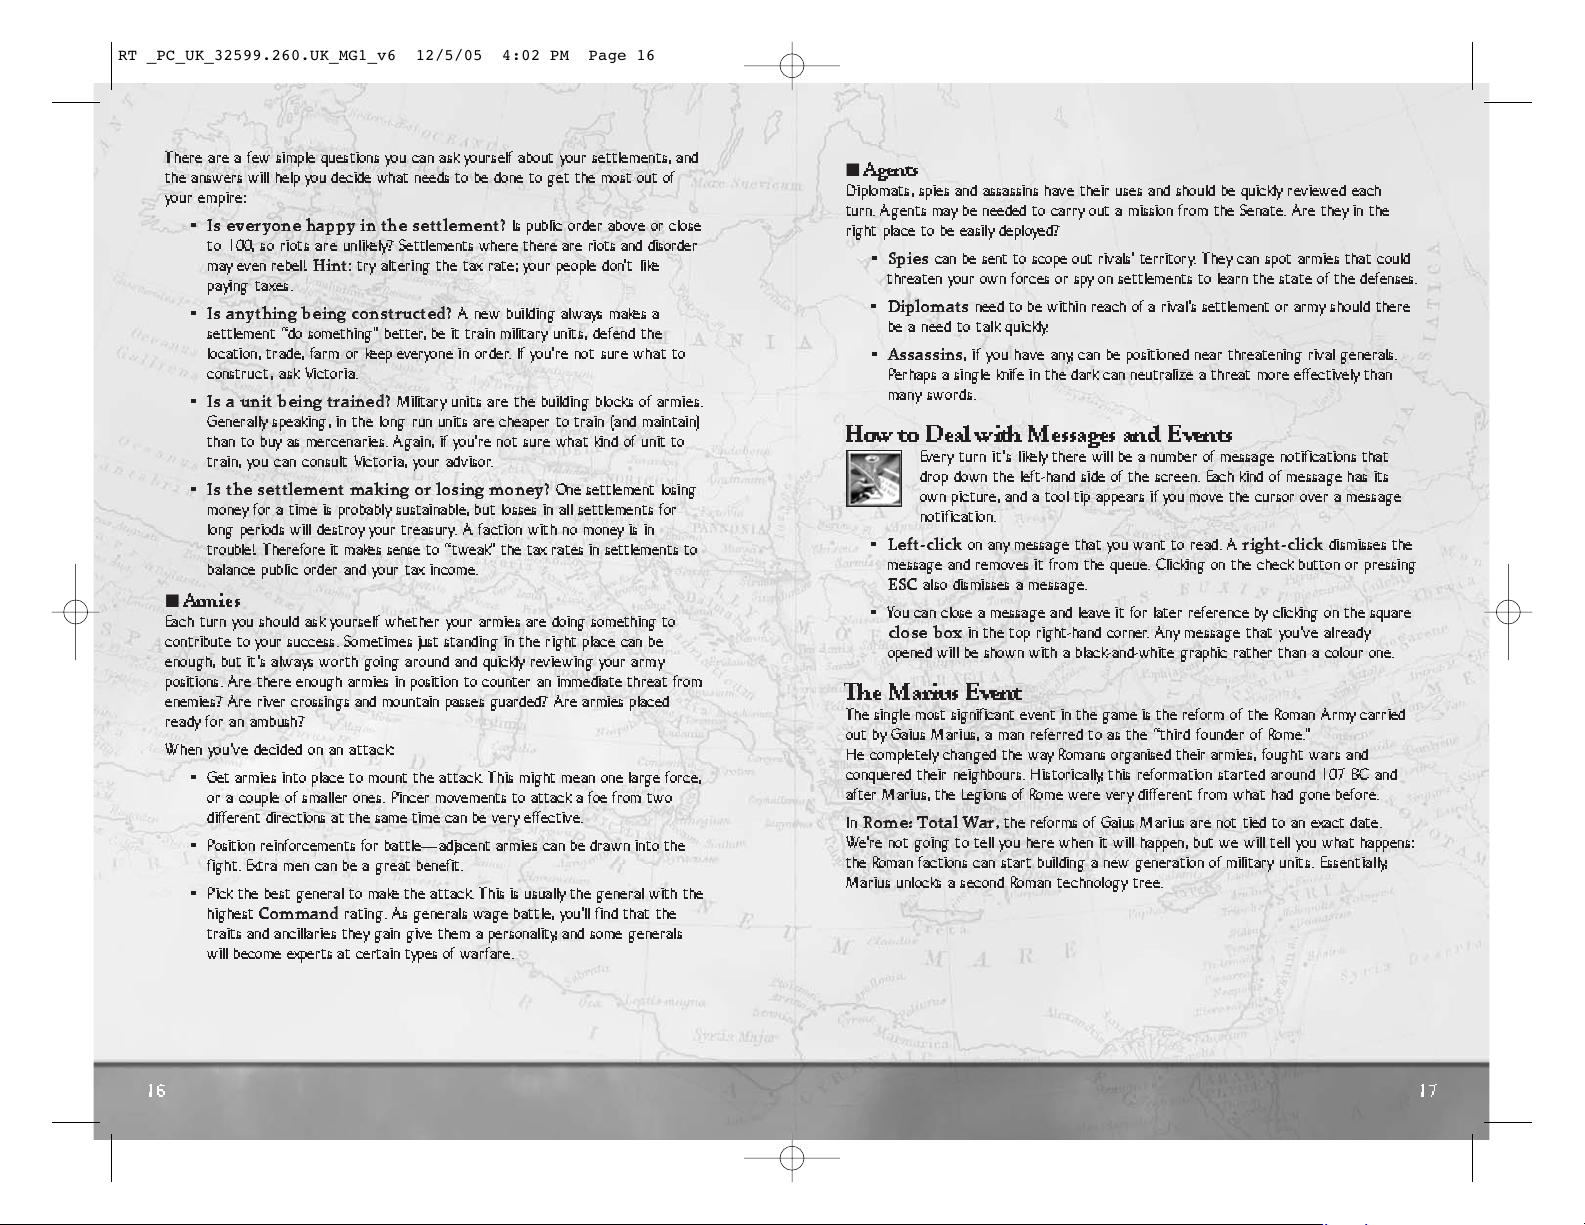
Everything on-screen is there to help you ru n
your soon-to-be magnificent empire. The
screen is divided into two main areas: a view
of the campaign map and the Control Panel at
the bottom of the screen.
M o ving Y ou r Viewpoint
You can change your view of the campaign
map in many different ways:
• Move the mouse cursor to the edge of
the screen (without clicking), and your
view down onto the campaign map will slide in that direction.
• Use the 1, 2, 3 and 5 number keys on your keyboard to move your viewpoint
around. The arrow keys also do the job.
• Use your mouse wheel (if you have one) to zoom in and out on the map.
•
Left-click
on the mini-map to move to that part of the campaign map.
• As you move the cursor around the campaign map, tool tips appear that identify
and explain terrain features and pieces on the map.
What You See
When the game starts, the view down onto the campaign map is always centreed on
your capital. Your forces and agents are positioned somewhere within your borders,
which are marked with your faction colour.
•
Dark areas
on the map are those you can’t “see” because you don’t have
armies or agents nearby.
• Each
settlement
you know about has its name displayed, along with a banner
showing ownership. Some banners include an indication about the garrison’ s
strength. Your own settlements have a summar y beneath the name, showing at-a-
glance information. One of these will be your capital—your best settlement and
worth defending!
•
Armies
are shown as soldiers with banners to show the strength of the army.
Some armies have stars indicating the command ability of
the general.
•
Agents
are spies, diplomats and assassins.
•
Ships
represent fleets. These are used to keep trade routes free of pirates, carry
armies overseas and attack enemy fleets.
Whenever you select something, the
Control Panel
at the bottom of the screen
changes.
13
12
• Select your
Advice Level
for the coming campaign from the dropdown
list that’s displayed when you click on the down arrow in the text box.
We recommend you leave this on
High
until you’re comfortable playing
the game.
• Select
Campaign Difficulty
and
Battle Difficulty
from the appropriate
dropdown lists. You can pick the level of challenge in each
part of the game, and the two don’t have to be set the same.
• Click on the
Arcade Style Battles
check box if you want battles to be
simplified and action-oriented. Many realism settings are turn e d off
automatically if you choose this option.
• Click on the
Short Campaign
check box if you only want to focus on
destroying or outliving certain factions rather than conquering the entire map.
• Click on one of the
Faction Shield
icons on the right to choose the people
you’ll lead to greatness, glory and a mighty empire! The map changes to
show where they start, and the text gives you a quick over view of their
strengths and foibles. When you first start to play, you can only select one of
the Roman factions, but others will become available in later games.
• Click on the
arrow
in the lower-right corner to start play.
How to Win
If you’re playing as one of the Roman factions, the Brutii, Julli or Scipii, the basic
victory condition for the game is to conquer Rome and much of the world. This isn’t
as easy as it sounds. You’ll find yourself fighting against the forces of the Senate
and the other Roman factions.
If you’re playing as any other non-Roman faction, the basic victory condition is very
simple: conquer the world!
If y ou d o n’t want to play the game for quite so long, click on the
Short
Campaign
check box.
Once you’ve made up your mind, start playing! When you win, peasants cheer,
trumpets sound and (probably) an angel gets his wings. And you have the
inestimable pleasure of having crushed your enemies, seen them driven before you
and heard the lamentations of their women. Cool, huh?
HowtoGetStarted
When you start a
Rome: Total War
campaign, there’s a lot to take in. The
Advisors
built into the game are there to help, but there’s still a wealth of
information to think about. So, where to start?
RTW_PC_UK_32599.260.UK_MG1_v6 12/5/05 4:02 PM Page 12
Page 8
15
14
• For tabs that show military
units,shipsoragents
, you can select an
individual
unit card
in the review panel by
left-clicking
on it. You can
then drag and drop a selected item onto a spot in the game world, and
the forces or agents involved will move there.
• You c an make multiple selections by holding down the
CTRL
key and
repeatedly
left-clicking
on individual unit cards until you have as many
as you want. You can also press
Ctrl + A
to select all units.
• You can also make multiple selections by selecting one unit card, then
holding down the
SHIFT
key and selecting a second unit card. All the
unit cards between the first and second clicks will be selected.
How to Play a T urn in the Campaign Game
Rome: Total War
is a game that repays a bit of thought on the road to
victory. It’s a good idea to have some general strategy in mind of what you’d
li ke to do: ask yourself, for example, when do you want to attack the Gauls?
Where? Wil l you invade Sicily? Or head into the Balkan provinces? Answers to
questions like these help to set targets to work toward.
With some kind of underlying plan, even if it’s as straightforward as “defend
what’s mine,” you can approach each turn with a goal in mind and do things to
make your growing empire stronger and more successful.
Senate Missions
As a Roman faction, from time to time you’ll receive missions from the Senate.
It’s up to you whether or not you carry out their wishes.
When deciding whether or not to listen to the Senate, it’s worth asking if you
have the resources and time to do the mission.
• If you’ve been asked to conquer some place, can you do it without
weakening your forces elsewhere? Or is the place worth conquering as a
step to something greater?
• If you’ve been asked to make a diplomatic deal with a faction, do you
want the other faction to feel safe for awhile? A trade deal, for example,
can also bring in extra cash!
Of course, nobody’s forcing you to obey, so if you want to ignore the Senate,
you can. If you do, the Senate will use its powers against your faction. See
How to Deal with the Senate
for more informat i o n .
Settlements
For each turn—at least to start with—it’s a good idea to check all your
settlements and look after them carefully. When your empire isn’t very big,
you need to squeeze maximum value out of each settlement that you have!
If you want to find out the name of a province or region, first left-click on an
empty space on the game world map (to deselect ever ything). Then right-click and
hold on an empty space in the province you’re interested in. The underlying terrain,
the owning faction icon and the province name will be displayed.
Getting to Grips with the Control Panel
In the campaign game, the control panel is an important element in controlling
your empire. As you select and use different game elements, the panel changes to
present you with the right options and information.
Everything—the round buttons and the tabs—on the control panel has an
associated tool tip to explain its job.
The
mini-map
shows the whole game world. When the cursor is on a mini-map
province, the name and faction ownership of the province is displayed as a tool tip.
(You need some kind of presence or you need to have diplomatically exchanged
map information.)
The Review Panel Tabs
There are four tabs above the central Review Panel. These allow you to shift
between elements of a settlement, army or fleet, or you can
right-click
on the
tabs to bring up summaries for your entire empire:
•
Right-click
on the
army/navy
tab (the left-most one) to bring up the
Military Forces Scroll
. This is a list of all your forces. Right-click on any
army or navy in the list to see more details.
•
Right-click
on the
town/city
tab (second left) to bring up the
Settlements List
. Right-click on any town or city in this list to see the
relevant details.
• Right-click on the
agents
tab (third from the left) to bring up the
Agents
Scroll
.
Right-click
on any of these characters to see their details.
• The fourth tab has no right-click function.
The Review Panel
The central Review Panel (along with the large building and training buttons)
changes depending upon whether an army, fleet or settlement is selected.
• The
tabs
along the top of the panel allow you to look at different aspects
of the selected game world item, and you can right-click on a tab to bring
up faction-wide summaries.
•
Right-click
on any unit card in a review panel to bring up
further inform a t i o n .
• If a tab is greyed out, there’s nothing relevant to see with the selected unit,
fleet, settlement or agent.
RTW_PC_UK_32599.260.UK_MG1_v6 12/5/05 4:02 PM Page 14
Page 9
17
16
Agents
Diplomats, spies and assassins have their uses and should be quickly reviewed each
turn. Agents may be needed to carr y out a mission from the Senate. Are they in the
right place to be easily deployed?
•
Spies
can be sent to scope out rivals’ territory. They can spot armies that could
threaten your own forces or spy on settlements to learn the state of the defenses.
•
Diplomats
need to be within reach of a rival’s settlement or army should there
be a need to talk quickly.
•
Assassins
, if you have any, can be positioned near threatening rival generals.
Perhaps a single knife in the dark can neutralize a threat more effectively than
many swords.
How to Deal with Messages and Events
Every turn it’s likely there will be a number of message notifications that
drop down the left-hand side of the screen. Each kind of message has its
own picture, and a tool tip appears if you move the cursor over a message
notification.
•
Left-click
on any message that you want to read. A
right-click
dismisses the
message and removes it from the queue. Clicking on the check button or pressing
ESC
also dismisses a message.
• You can close a message and leave it for later reference by clicking on the square
close box
in the top right-hand corner. Any message that you’ve already
opened will be shown with a black-and-white graphic rather than a colour one.
The Marius Event
The single most significant event in the game is the reform of the Roman Army carried
out by Gaius Marius, a man referred to as the “third founder of Rome.”
He completely changed the way Romans organised their armies, fought wars and
conquered their neighbours. Historically, this reformation started around 107 BC and
after Marius, the Legions of Rome were ver y different from what had gone before.
In
Rome: Total War,
the reforms of Gaius Marius are not tied to an exact date.
We’re not going to tell you here when it will happen, but we will tell you what happens:
the Roman factions can start building a new generation of military units. Essentially,
Marius unlocks a second Roman technology tree.
There are a few simple questions you can ask yourself about your settlements, and
the answers will help you decide what needs to be done to get the most out of
your empire:
•
Is everyone happy in the settlement?
Is public order above or close
to 100, so riots are unlikely? Settlements where there are riots and disorder
may even rebel!
Hint
: try altering the tax rate; your people don’t li ke
paying taxes.
•
Is anything being constructed?
A new building always makes a
settlement “do something” better, be it train military units, defend the
location, trade, farm or keep everyone in order. If you’re not sure what to
construct, ask Victoria.
•
Is a unit being trained?
Military units are the building blocks of armies.
Generally speaking, in the long run units are cheaper to train (and maintain)
than to buy as mercenaries. Again, if you’re not sure what kind of unit to
train, you can consult Victoria, your advisor.
•
Is the settlement making or losing money?
One settlement losing
money for a time is probably sustainable, but losses in all settlements for
long periods will destroy your treasury. A faction with no money is in
trouble! Therefore it makes sense to “tweak” the tax rates in settlements to
balance public order and your tax income.
Armies
Each turn you should ask yourself whether your armies are doing something to
contribute to your success. Sometimes just standing in the right place can be
enough, but it’s always worth going around and quickly reviewing your army
positions. Are there enough armies in position to counter an immediate threat from
enemies? Are river crossings and mountain passes guarded? Are armies placed
ready for an ambush?
When you’ve decided on an attack:
• Get armies into place to mount the attack. This might mean one large force,
or a couple of smaller ones. Pincer movements to attack a foe from two
different directions at the same time can be very effective.
• Position reinforcements for battle—adjacent armies can be drawn into the
fight. Extra men can be a great benefit.
• Pick the best general to make the attack. This is usually the general with the
highest
Command
rating. As generals wage battle, you’ll find that the
traits and ancillaries they gain give them a personality, and some generals
will become experts at certain types of warfare.
RTW_PC_UK_32599.260.UK_MG1_v6 12/5/05 4:02 PM Page 16
Page 10

19
18
Right-click
on a friendly settlement (not an allied settlement) to merge the
army with the settlement garrison (if any). The army will move into the
settlement, and if the army has a general and the settlement doesn’t have a
governor, the general will be automatically appointed as the new govern or.
See the
How to Run Settlements
section for more informati o n .
• Red highlighted areas are in enemy zones of control, which means they’re
adjacent to a non-allied arm y. Moving into a red zone ends further movement for
an army. You do n’t have to attack when in a zone of control.
• It’s possible to right-click beyond the green highlighted area, in which case it’ll
take two (or more) turns for an army to reach its destination. Assuming the army
is given no new orders and isn’t ambushed, it’ll continue marching. The route is
shown as a multicoloured line, with each colour representing one turn’ s
movement.
• Armies that cannot move have a red circle around them.
• Armies are shown as kneeling figures when they’re hidden and ready to
ambush
any passing enemies.
Selecting the Ne xt Piece
You can select armies, fleets, agents and/or settlements in any order you wish by
clicking on them on the campaign map.
• To select the next force, agent or city,
click on the arrows on either side of the
name in the right-hand section of the
Control Panel, just above the end of
turn button.
• The vertical “thermometer” bar on t he
right shows the movement points
remaining for that piece.
Terrain
If you want to find out the terrain in a particular area, first
left-click
on an empty
space on the game world map (to deselect everything). Then
right-click and hold
on an empty space in the province you’re interested in. This tells you the terrain type of
the location, the owning faction and the province name.
• The terrain determines whether your armies can move into a location and
determines the kind of battlefield you’ll fight on in that area.
• Some terrain—such as mountains—are simply impassable to armies. You’ll need
to find passes or routes around blocking terrain.
HOW TO USE ARMIES
Armies are the basic “pieces” in the campaign game.
Each army contains up to 20 military
units
; any
collection of military units is an army that moves and
fights together. Armies are ordered around the campaign
map; units are ordered around the battlefield.
The figure on the game map gives you basic information about the army:
•
Generals
or captains command armies. We’ll discuss the major differences
between generals and captains later.
•
Captains
are lesser leaders, given temporary command of an arm y. These
armies are always shown as foot soldiers (without cloaks) appropriate to
their faction.
• The banner colour and symbol shows the owning faction.
• The dark colour that “fills” the banner shows the army strength: the
stronger the army, the bigger the filled area.
• Any gold stars show the command rating of the general (0-10). The larger
the number of stars, the better the general.
M o ving
Select an army by left-clicking on it.
• The highlighted area shows every place the army can move to during the
current turn . All actions (moves and attacks) cost movement points and as
these are used up, the distance an army can move for the remainder of the
turn reduces.
•
Right-click
on the spot where you want an army to g o. A large arrow
shows the proposed route for the army.
•
Right-click and drag
to show the route changing for an arm y as it s
destination changes.
Right-click
on an enemy, neutral piece or location to
attack
it. The
cursor will change into a sword to show an attack is possible. Attacking
a neutral faction is, by definition, a declaration of war on that faction.
Right-click
on a friendly army (not an ally!) to merge the moving
army into the stationary one. We’ll talk more about merging armies
in a moment.
RTW_PC_UK_32599.260.UK_MG1_v6 12/5/05 4:02 PM Page 18
Page 11

21
20
You can
withdraw
from your attack.
If you’re attacking a settlement or fort, see the
How to Besiege a Settlement
or Fort
section of the manual.
Attacking with Sup porting Armies
Reinforcements can join an attack. When a battle is auto-resolved, their strength is
simply taken into account. When a battle is fought out in detail, their effects are
more significant:
• When one army attacks, any other friendly army (yours, or one belonging
to an ally) that is adjacent to the army or settlement under attack can
become reinforcements.
• The army that attacks is the one you directly control. Make sure that your
forces are all in the red zone of control of an enemy army, or cancel the
attack and then move up another army to act as reinforcements before
giving battle.
• Any adjacent army that’s commanded by a general will always be under AI
control on the battlefield. Yo u w on’t be able to issue commands to units under
the general’s command.
• Any adjacent army that’s commanded by a captain will reinforce your army
on the battlefield on a unit-by-unit basis. Remembering that there’s a limit of
20 units per army, reinforcements will appear when a slot in your army is
available, either through casualties or because a unit has run away.
• Reinforcements on the battlefield always appear from the direction that
matches their position on the campaign map. If a supporting army is behind
an enemy army (but still adjacent to the enemy), it’ll appear on the battlefield
in the enemy rear.
Multiple Attacks
As long as an army keeps winning, it can keep moving forward and attacking.
Depending on casualties (and other factors), it may be able to attack two or three
times during a turn.
M erging Armies
Move an army onto another friendly (same faction) army or
settlement to merge the two forces. It may be useful to
merge units before merging armies. You can’t merge units
while you’re merging armies.
• The general with the highest Command rating is
usually in charge of a merged army. When an army led by a captain is merged
with a general’s army, the captain is reduced to the ranks and disappears.
• River crossings are marked on the campaign map by fords or bridges (after
roads have been constructed). These are the only places where armies can
cross, and are, thus, strategically important.
• Armies can hide in wooded areas and ambush passing enemies.
Wise commanders choose their ground carefully to make the most of troops, so it’s
worth checking out the terrain near mountain passes, river crossings and other
“choke points” where the enemy must pass.
Ambushes
Armies can ambush passing enemy armies on the campaign map.
• Armies that can carry o u t a m b ushes ar e a l w ays shown kneeling down in the
woods, even at the start of a game turn .
• Armies belonging to other factions that are lying in ambush aren’t shown on
the map until the ambush is sprung!
• If your army is ambushed, its movement is halted and it must fight a battle.
This can be auto-resolved or fought on the battlefield. The ambushed arm y is
usually at a severe disadvantage!
Attacking
When you have an army selected,
right-click
on the enemy army or settlement
you wish to attack:
• The
Battle Deployment Scroll
will appear. This
gives a breakdown of your forces and the enemy
arrayed against you.
• The most important piece of information is the
strength comparison
in the centre of the scroll.
Move the cursor over the crossed swords to see the
odds for the coming battle.
• Reinforcements are also listed, drawn from adjacent armies.
See
Attacking with Supporting Armies
on the next page.
You can fight the battle for yourself, taking control of your units on the
battlefield. This gives you the most control and is—we think—the most fun!
You can have the PC work out the result for you. Casualties may be
heavier than if you fight the battle, and you can’t protect your general
from harm.
RTW_PC_UK_32599.260.UK_MG1_v6 12/5/05 4:02 PM Page 20
Page 12

23
22
• The dragged unit may vanish if all its men are used in this way. Any “spare”
men remain in their original unit.
• You can auto-merge depleted units by pressing the
M
key.
Unit Experience
Be careful when combining units since troops with low (or no) experience can dilute
a high experience unit and reduce its perfo rmance in combat. The number and
colour of the
chevrons
on the unit card in the
Review Panel
show unit
experience
. A unit with experience can be relied on in combat, and will usually
beat an otherwise identical unit. Chevrons can also be gained by units under
generals with high command values, or as a result of good training facilities
(buildings).
•
No chevrons
indicate the unit has little or no experience.
• One, two and three
bronze chevrons
show the unit has been “blooded”
in combat.
• One, two and three
silver chevrons
show the unit is composed of
soldiers who have seen much hard fighting.
• One, two and three
gold chevrons
show the unit is composed of tough,
grizzled veterans who know the business of war inside and out. A unit with
three gold chevrons
is l ikely to be one that’s worth its weight in gold
to a commander!
Generals and Governors
Generals are named characters, members of the ruling family of a
faction who command. They can have traits and gain a retinue of
attached ancillar y characters to help them in their work.
• Each general has a bodyguard unit. Casualties taken by the
bodyguard are slowly replaced over time. The size of the
bodyguard depends on the rank and experience of the general. The type of
bodyguard depends on the faction, the date in the game and so forth.
• Generals who end a turn in a settlement without a governor become the
governor. When there’s a choice, the general with the highest management
ability is always the governor.
• The best general in a settlement is the commander of the garrison. His
military abilities are used in siege battles.
• A governor who leaves a settlement becomes a general.
If there are more than 20 units (total, in both armies) involved in the merging,
then the Merge Armies scroll appears.
• Select the units you want to move to the other army. You can ma ke multiple
selections by holding down the
CTRL
key as you left-click.
• Some units may be greyed out. These have moved as far as they can this
turn, and therefore can’t move (merge) to another army.
• Click on the transfer arrow button in the middle of the scroll once you’re
happy with the army compositions. You can also drag-and-drop units
between the two armies on this scroll.
• Once you’re happy with the merged armies, click on the check box in the
lower right-hand corner of the scroll.
Splitting Armies
From time to time, you may want to split a force
or move part of a garrison out of a settlement
or fort.
• Select the units you want to move using their unit cards in the Review Panel
in the centre of the Control Panel at the bottom of the screen.
• You can use the
SHIFT
and
CTRL
keys while selecting to make
multiple selections.
•
Either
move the cursor to the spot you want the selected units to go.
A “ghost” army will be shown in the cursor position.
•
Or
drag-and-drop the selected units from the Review Panel to an appropriate
location in the game world.
• In both cases, the “son” army marches to the new location.
M erging Units
After a battle there’s a good chance your forces have taken some casualties. Some
units may have been reduced to only a few men. No matter how few men a unit
contains, it still uses one of the 20 slots in an army roster. This results in armies
that are full of units yet contain few men.
• Units can be increased in numerical strength by merging them or by
retraining at a settlement. See the Retraining Units section on page 35.
• Merging units must be of the same type. Drag one unit onto another in the
Review Panel, and the two will merge. The men in the unit being dropped are
added to the target unit.
RTW_PC_UK_32599.260.UK_MG1_v6 12/5/05 4:03 PM Page 22
Page 13

C aptains
Captains are limited, temporary leaders of armies. They’re selected
from the ranks when an army needs a leader and a named character
isn’t available to be a general. When a general joins the army, the
captain return s to the ranks.
Captains cannot:
• Recruit mercenaries
• Build forts and watchtowers
• Govern settlements
When a settlement without a governor is besieged, a captain leads the garrison.
R ecruiting Mercenaries
While a general is outside a city, he can recruit mercenaries from the local
province. Click on the
Recruit Mercenaries
button in the Control Pan e l .
When there are no mercenaries available, the button is greyed out.
• This brings up the
Army Details Scroll
, showing the general and the list of
available mercenaries.
•
Left-click
on any mercenary unit to select it and add it to the queue of
mercenaries to be hired. You can deselect a mercenary unit for hiring by left-
clicking on it once again.
•
Right-click
on a mercenary to bring up details.
When you’re satisfied with your hiring choices, click on the
Hire Queued
Units
button on the left of the scroll. Unlike a faction’s own troops who have
to be trained for at least a turn before they appear, mercenaries instantly appear
as part of the army in the review panel.
Building Forts and Watchtowers
Only an army under the command of a general can build watchtowers and/or forts.
When this is not possible, this button is greyed out.
Clicking on the
Construction
button while not in a settlement brings up the
Field Construction
scroll. From here, you can select either a
watchtower
or a
fort
. Each has a denarii cost associated with it.
• Watchtowers are permanent structures that extend your field of view.
• Forts require a garrison to remain in play. If the fort is empty when the end of
turn button is pressed, it will fall into disrepair and be removed from the map.
The constructing army can leave a unit to keep the fort going, or another force
(or even an agent) can move in; all will preserve the fort for future use.
• Forts have no “nationality.” If one faction constructs a fort and leaves it empty,
another faction’s forces can move into the fort and take it over.
24
• A general can build as many watchtowers and/or forts as you want in a single
turn, limited only by his ability to move to a new site.
Forts can be extremely useful in defending strategic “choke points” such as mountain
passes: an enemy will have to lay siege to the fort to advance. It’s even possible to
build a “wall” of forts to isolate an area.
HOW TO RUN SETTLEMENTS
Settlements are centrally important in your efforts to conquer the world. They generate
income through taxes. Military units are trained there. And without taking enemy
settlements, you’re unlikely to win the game.
Each settlement is the regional capital of the
province it occupies: the faction that owns a
settlement also owns the associated province.
All the resources—trade goods, for example—
shown on the campaign map in a province are
available for use by the settlement.
You can move the cursor over a resource to see
a relevant tool tip.
The size of a settlement—whether it’s a village, town, large town or a minor, large or
huge city—is determined by the size of the population. The larger the population, the
bigger the settlement. Settlement size and defenses are shown on the campaign map.
A settlement can only take advantage of its large population if it has the right
government building at its (metaphorical) centre. Without the right administration,
advanced structures cannot be built. There’s a chain from
population
to
governmenttobuilding constructiontotraining military units
for each
settlement. Without settlements to generate units, you won’t have armies
to command!
Use
Ctrl+T
to toggle city names and details on and off. The details are a summary
of the activity in the settlement:
• The city
name
and its status are shown on the top line: for example, a
city that is
revolting
or has
plague
will have an appropriate icon next
to its name.
This is the
income
generated by the settlement. It’s possible for a settlement
to lose money every turn if the income is less than its upkeep costs.
The face icon represents the overall happiness of the settlement population.
25
RTW_PC_UK_32599.260.UK_MG1_v6 12/5/05 4:03 PM Page 24
Page 14

•
Left-click
on the
Training Button
to open the
Recruitment tab
on the
settlement scroll. This allows you to issue orders to train new units, ships and
agents in the settlement. When a unit is being trained, it appears here.
Otherwise, the button shows that the settlement is ready to receive training
orders. You can click on the Retrain tab to show retrainable units.
The
review panels
in the centre show various details of the settlement, depending on
which tab has been selected.
• The left tab shows the
garrison units
in the settlement, along with any
governor and his bodyguard.
Right-click
on a unit card to bring up
information. The governor of a settlement is always shown with a “management
scroll” on his portrait. “Visiting” generals are shown with stars on their portraits
in the review panel.
• The second tab shows the existing buildings in the settlement.
Right-
click
on any of the building pictures to bring up the
Building
Information Scroll
.
• The third tab shows any
visitors
—agents of your faction—in the settlement.
Right-click
on any of the agents to bring up the appropriate character scroll.
• The fourth tab (passengers on a fleet), is not used for settlements.
In the right-hand section of the Control Panel are two large buttons with the town
name alongside:
• Click on the arrows on either side of the name to move
between settlements.
The Settlement Scroll
The
Settlement Scroll
is the key to getting information
about, and issuing orders to, a settlement.
The large arrows on either side of the settlement name
allow you to scroll between settlements quickly.
The main part of the
Settlement Scroll
is divided into
four areas:
• The top part of the scroll shows the Governor’ s
Details (if there’s a governo r in residence).
Depending on difficulty settings, without a governor, a settlement is always
auto-managed for you. The govern o r ’s attributes have an effect on how well the
settlement is run.
27
26
Green—
Happy; the people are pleased with your government ,
happy to pay taxes and generally secure in their lives. Dissent and
rebellion are far from their thoughts.
Yellow—
Contented; most of the people are indifferent to your rule,
feeling neither committed to, nor hatred for, your cause. They pay
their taxes, but do not feel happy.
Blue—
Disillusioned; the people are generally unhappy and likely to
become rebellious unless remedial action is taken. They resent paying
money to your treasury.
Red—
Rebellious; the people are on the edge of revolt against
your rule.
This icon shows whether or not the
population
of the settlement is
increasing or not.
Green
indicates the population is growing.
Amber/Orange
indicates the population is stable. It’s worth
having a look at a settlement to see what’s not going well as far as
population growth is concerned.
Red
indicates the population is falling. This is a matter for concern
because if everything’s working, the number of people in a
settlement will increase.
This icon appears if a unit is being
trained
in the settlement.
This icon appears if a building is being
constructed
or repaired in
the settlement.
A “gears” icon appears when the settlement is being auto-managed.
Settlements and the Control
Panel
A
left-click
on one of your settlements
selects it, and the
Control Panel
at the
bottom of the screen changes to show the
contents of the selected settlement.
The construction and training buttons are in the Control Panel:
Left-click
on the Construction Button to open the construction
tab within the
Settlement Scroll
. This allows you to issue
orders for new buildings in the settlement. When construction is
underway, the button shows what’s being built. Otherwise, the
button is “empty. ”
RTW_PC_UK_32599.260.UK_MG1_v6 12/5/05 4:03 PM Page 26
Page 15

29
28
Who Gets to be Governor?
The first named character to enter a settlement will be the governor as a right. His
abilities are used to modify how well the settlement is being run.
• His unit card is marked with a scroll to show his status.
• Other generals (if any) in the settlement are shown with
silver stars
on
their unit cards.
• During a siege, the general with the best command rating will be treated as
the commanding general (and this need not be the governor). If the faction
leader is present, he always outranks any other general regardless of his
actual command rating.
• However, when a named character (a general, not a captain) moves into a
settlement, he will be appointed as the new governor if hi s
management
ability is higher than that of the current incumbent.
• It’s possible for the governorship to change hands many times if several
characters move into a settlement in a single turn.
Building Construction
All building construction work uses two resources: time and money.
• The number of different buildings shown as construction options depends on
the size of the settlement and what you’ve already built.
• If y o u don’t have the money, y o u won’t be able to construct some buildings.
Buildings that are beyond your means are greyed out.
•
Left-click
on a building under the
Construction tab
to add it to the
Construction Queue
. The money to pay for the building is immediately
deducted from your treasury.
•
Left-click
on a building in the
Construction Queue
to cancel the
construction order. The building will reappear under the
Construction tab
in case you want to construct it later.
• When the
Construction Queue
is full, buildings under the
Construction tab
will be greyed out.
• Buildings in the
Construction Queue
are completed in left-to-right order.
You can alter the order by dragging-and-dropping the building pictures until
you’re happy.
•
Right-click
on a building in options or the queue to bring up the relevant
Building Information Scroll.
• The next section shows the
Settlement Details
. This displays a summary
of all the important statistics for the settlement, along with icons that show
whether or not the settlement is revolting, under siege and/or infected with
plague. You’ll also see a population requirement for the settlement to grow in
size; this will not be shown if the settlement has reached its maximum size.
• The next section allows you to
Set Policies
for the settlement. When auto-
management is off, you’ll be given the choice to alter the tax rate in the
settlement. The tax rate you set affects how much money you earn from the
settlement (income), how happy your people are feeling (public order), the
population and the population growth rate.
The tax rates vary from low to very high; try adjusting the tax rates and
seeing what happens to income, public order and growth. These four values
determine how well your settlement functions.
Some factions can have amphitheaters and circuses in settlements, so you’ll
also have the choice of how often games or races are thrown to amuse
the people.
• The Orders section has four tabs for Construction, Recruitment, Repair and
Retraining. For the moment, we’ll concentrate on Construct io n an d Repair.
This is where you order building works for your settlement. The Recruitment
and Retraining Tabs are dealt with in the How to Train Units section. Tab s
that can’t be selected are greyed out.
Down the left-hand side of this scroll is a set of buttons that control the settlement
and give you more information:
This button brings up a more detailed analysis of your settlement.
This brings up a scroll showing you the buildings in the settlement
arranged according to their position on the game’s technology tree. This
is useful for reviewing progress and planning future civic developments.
Click here to ask Victoria what to construct. She’ll suggest a building and
give reasons for her choice.
Click here to centre the campaign map view on the settlement. Frontier
settlements have different priorities than those closer to the core of
your empire.
RTW_PC_UK_32599.260.UK_MG1_v6 12/5/05 4:03 PM Page 28
Page 16

Left-click
this button to bring you down into a battlefield view of your
settlement. It can be a great help in letting you get a feel for the streets
and defenses.
Left-click
this button to bring up the
Trade Summary Scroll
and see
how your settlement is generating taxable income.
Left-click
on this button to make this settlement your capital.
This is where all new Generals and reward units from the Senate
will appear.
The Trade Scroll and Province Resources
There are two ways to raise the income from a settlement: O ne is to change the tax
rate (through the
Settlement Scroll
) ; The other is to improve the economic
structures in a settlement.
There are three potential generators of taxable income:
trade,farming
and
mining
.
All of these can be improved by constructing buildings, although all rely on resources in
the province.
• Any
resources
in the surrounding province will be traded automatically,
if only within the local settlement. Slaves and grain are moved between
settlements automatically as required.
•
Mines
are needed to extract mineral wealth from a province. These need to be
constructed like any other building.
•
Farming improvements
increase the income from farming and the growth
rate of a settlement as more food is generated. However, not all provinces are
equally fertile, so don’t expect farms to have the same affect in all parts of the
world. That said, a settlement always benefits from farming improvements.
•
Trader
-type buildings in a settlement improve the efficiency of trade and the
amount of money it generates.
•A
port
(and its subsequent upgrades) allows trade goods to be moved more
efficiently and in greater numbers. Ports always appear on the coastline of the
province, although they’re part of the settlement. They also help train naval
units. Landlocked provinces cannot have ports.
•
Roads
allow trade goods to be carried to neighboring settlements automatically.
They also allow the faster movement of armies.
31
30
•
Shrines and Temple s
are special cases. You may be offered a choice of
temple for construction. Once you’ve added a temple to the Queue, the other
temples will be removed as construction choices. Each settlement can only
have one temple, and they are mutually exclusive. It’s possible to destroy a
temple and start over with a shrine to a different god.
R epairing Buildings
Buildings can be damaged through natural disasters and during siege assaults. It’s
quite possible to damage a town without taking it, and the longer an assault takes,
the more “collateral damage” is done. Left-click on the
Repair tab
to see which
buildings need work.
• Repairing buildings works in a very similar fashion to new construction. The
cost of repairs is usually substantially less than the cost of a new building,
both in terms of cash and of time.
• Instead of being presented with construction options, there is a collection of
buildings needing repair
.
•
Left-click
on any damaged building to add it to the construction queue.
It can be dragged and dropped into the queue and left-clicked to cancel the
work as described above for new construction work.
The Building Information Scroll
This shows information about a given building. You can find out what each group of
buildings does through the
Building Browser Scroll
.
The
Building Information Scroll
allows you to destroy buildings. This is on
this scroll to stop you from doing it accidentally!
Click on this button to
destroy
the building. You’ll receive a proportion—
around a third—of the cost of the building as a refund into your treasury.
The Settlement Details Scroll
This scroll allows you to review the settlement in detail, and
see what factors are contributing to the overall
population
growth, public order
and settlement
income
.
• For each of these three areas, the positive factors are
shown above the negative factors. Move the cursor
over each icon and a tool tip appears telling you what
it represents.
• The other important, perhaps vital, piece of
information presented here is the length of time that the settlement can
withstand a siege. This represents the surplus food that the settlement
has stored.
RTW_PC_UK_32599.260.UK_MG1_v6 12/5/05 4:03 PM Page 30
Page 17

33
32
HOW TO TRAIN UNITS
Armies in
Rome: Total War
are made up of one or more militar y units under
the command of a
general
(a member of the ruling family) or a lesser
captain
(a commander drawn from the ranks).
One class of units can never be trained: general’s bodyguard units. These are given
free with every new member of the ruling family of a faction. They can, however,
be retrained and equipped with better quality weapons. A general’s bodyguard is
disbanded when the general dies.
Training all other units uses three resources: time, money and men. Every unit
takes at least one turn to train, has a cash cost and uses population from the
settlement where it’s trained. Units also cost money for salary, supplies and
equipment after they have been trained. This
upkeep
cost is automatically paid,
and can become a significant expenditure each turn!
The militar y buildings in a settlement determine what units can be trained there.
The
Building Browser Scroll
shows what buildings produce units.
Barbarian factions have a different set of buildings in their technology tree, but the
principle remains the same.
•A
left-click
on one of your settlements selects the settlement, and the
Control Panel
at the bottom of the screen changes to reflect the
contents of the selected settlement.
• Click on the left-most tab above the central
Review Panel
to show the
settlement garrison. This allows you to review the troops already present in
the settlement. (A
right-click
on this tab produces the
Military Forces
Scroll
: a list of all your existing armies).
On the right-hand side of the
Control Panel
are two large buttons.
Click on the lower recruitment button to open the Settlement Scroll with
the
Recruitment tab
selected.
The Recruitment Tab
As you’ll see, this is very similar to the
Construction tab
.
• The Recruitment tab is where you order new units to be trained in your
settlement. Immediately below is the
Recruitment Queue
, which shows
training in progress.
Down the left-hand side of this scroll is a set of buttons that are described
in the
How To Run Settlements
section.
Click here to ask Victoria about what unit to train. She’ll suggest a unit
and give reasons for her choice.
The Building Bro wser and the Technology Tree
The
Rome: Total War
package includes a printed technology tree for the Roman
factions in the game. All factions, however, follow a technology tree, some of
which are very different from that of the Romans. The
Building Browser
Scroll
allows you to review a settlement’s progress through the technology tree.
• Buildings in full colour have been completed. Greyed-out buildings are either
not yet built or unavailable for the settlement.
• The Building Browser shows the
government
building you need
before
you can construct other buildings at the same level.
•
Right-click
on any building (including those not yet built) to bring up the
relevant
Building Information Scroll
.
• All buildings keep, or improve on, the abilities of earlier structures.
Wonders of the World
Some provinces contain wonders of the ancient world. Capturing the settlement in
the province gives you control of the wonder, and these grant empire-wide benefits.
If you lose control of the settlement (and the province), you lose the benefit for
owning the wonder.
Tr ouble in Settlements
Settlements are not always good places to live, and sometimes the people
will ma ke their feelings clear by
revolting
. Victoria, your advisor, will warn
you that problems are developing and suggest solutions, but prevention is
sometimes better than cure. You can reduce the tax rate, send troops to quell
dissent, send a better (or indeed any) governor and, if time permits, construct
buildings that have a positive effect on public order.
Sieges have to be endured or broken. See the section on
How to Break a
Siege
on page 36 for more information.
Plague is, perhaps, the worst thing that can happen to a settlement, and
a sign of the gods’ disfavour! A settlement that’s a squalid place to live is
more likely to suffer plague than somewhere that’s wholesome. Again, some
buildings—such as sewers—have a positive effect on public health and lessen the
likelihood of a plague.
Changing Y o u rMin d
Construction orders are only executed when the end of turn button is pressed.
Before then, you can undo any changes you have made.
RTW_PC_UK_32599.260.UK_MG1_v6 12/5/05 4:03 PM Page 32
Page 18

35
34
Settlement Rally Point s
Units trained in a settlement are usually added to the garrison. When the garrison is
full, the newly trained unit appears outside the settlement. Naval units (ships) always
appear in the harbor on the province’s coast. When the harbor is full, they appear
outside the harbor.
However, it’s possible to set up a
rally point
: a location somewhere on the campaign
game map where all units are sent after they’ve been trained in a settlement. This can
be very useful if the front line in a war is a long way from your main cities—troops will
be automatically sent to the war:
•
Select
the settlement by
left-clicking
on it.
• Move the cursor to the point on the campaign map where you want newly
trained troops from that settlement to gather.
• Hold down the
ALT
key and
right-click
to confirm the rally point. A blue
marching route for the units will be shown on the map.
• Several settlements can share the same destination as a rally point. Simply set up
the rally point for each settlement in turn. This is an excellent way of building an
army quickly.
Naval rally points
can be set up in a similar way:
• Left-click on the harbor of the port to select it, and then hold down the
ALT
key
and
right-click
to set the naval rally point to another location. All newly
produced ships will sail to this location.
You can reset rally points at any time by repeating the process.
Unit Training and Experience
The men used to create units are raw recruits without experience. Unless there are
special circumstances (such as the governor having a personality trait related to
training), new units have no experience.
A rmour and Weapon Quality
Blacksmiths improve the quality of weapons and armour available in a settlement. Units
with better quality weapons and/or armour have this shown on their
unit cards.
• Bronze (+1), Silver (+2) and Gold (+3)
sword icons
show improved
quality weapons.
• Bronze (+1), Silver (+2) and Gold (+3)
shield icons
show improved
quality armour.
R etraining Units
Click on the
Retraining tab
to see units in a garrison that are eligible to be
retrained. Retraining can be carried out if a unit meets one or both of the
following conditions:
• The unit is numerically
under strength
: it has ta ken losses and has fewer men
in its ranks than when it was originally trained. Under-strength units that are
The Recruitment Queue
Military units require three resources when they’ re trained: money, time and men
to fill the ranks (money is also needed for ongoing upkeep costs):
• The number of different unit types shown under the
Recruitment tab
depends on the military buildings in the settlement.
• If yo u don’t have the money, you w o n’t be able to add units to the Queue.
Units beyond your means are greyed out.
• Diplomats, spies and assassins are treated as one-man units.
• All boats and ships are treated as militar y units, but they appear at the port
in the settlement’s province.
• Units may also be greyed out if there are insufficient “spare” men in the
settlement population to fill the ranks.
•
Left-click
on a unit under the
Recruitment tab
to add it to the
Recruitment Queue
.
• The left-most unit in the queue is shaded red to show that training has
begun, and the number of turns until training is complete are shown. The
shading is removed as progress is made.
•
Left-click
on a unit in the
Recruitment Queue
to cancel the training
order. The unit will disappear from the recruitment queue.
• Up to nine units can be in the
Recruitment Queue
. When the queue is
full, units under the
Recruitment tab
will be greyed out.
• You can order the training of as many identical units as you like. Unl ike
settlement buildings, units are not unique.
• Units in the Recruitment Queue are trained in left-to-right order. You can
alter the order of training by dragging-and-dropping the unit cards.
• A word of warning! If you remove the left-most unit in the queue, any
progress to date will be cancelled, even if you move it back to its position
at the head of the queue!
•
Right-click
on a unit card to bring up the relevant
Unit
Information Scroll
.
The Unit Information Scroll
This Scroll shows historical background and the unit’s game effects, including the
all-important training and upkeep costs.
The
Unit Information Scroll
also allows you to disband your units. This
saves the upkeep costs of the unit.
Click on this button to disband the unit. If the unit is disbanded in a
settlement, the men are added to the settlement population.
RTW_PC_UK_32599.260.UK_MG1_v6 12/5/05 4:03 PM Page 34
Page 19

There will be times when you want to stop besieging a settlement. Simply select
the besieging army and move it away from the settlement. The siege will be
lifted automatically. You can also click on the
Lift Siege
button on the
Siege
Details Scroll
. Any siege equipment that your troops have constructed will
be abandoned and lost to you.
Conquering Settlements
There are three ways a settlement can fall to you as a conqueror:
• By being starved into submission through a siege.
• By an assault, played out on the battlefield.
• By an assault that is auto-resolved in your favour.
Once a settlement has fallen, you have a choice about what to do with it and the people
who live there:
•
Occupy the settlement—
You’ll make some profit from looting, but
the settlement will be relatively undamaged. The number of people in the
settlement will be unchanged, although they may be resentful towards
their conqueror.
•
Enslave the population—
Some looting occurs, but the main effect is to
ship people from the newly conquered settlement to other settlements in your
empire as slaves. Only settlements with a governor can gain population this way.
This can be an excellent way of boosting the population in your important
settlements, as well as making sure the newly conquered settlement is less likely
to revolt.
•
Exterminate the population—
The people are put to the sword, reducing
the population of the settlement immediately. Immediate looting takes place on a
large scale, too. This brutal policy can be useful when conquering people
belonging to a faction with a very different culture from your own. Income from
the settlement will be massively reduced until the population grows once more.
You also have the option of auto-managing the settlement and leaving it to the game to
run it for you.
How to Break a Siege
There are two ways of breaking a siege:
sallying forth
with the garrison and sending
a
relief force.
• While under siege, the garrison can’t leave and new forces can’t enter the
settlement. The settlement is cut off by the besiegers.
37
36
retrained may have any battle experience diluted by the raw recruits who enter
their ranks.
• The unit has
inferior quality
weapons and/or armour compared to those
currently available in the settlement. For example, a unit trained where there’s no
blacksmith moves to a settlement where there’s a foundry. The unit is eligible for
retraining because better weapons are available.
Retraining costs money and time. The unit is removed from the garrison during
retraining, and has no public order effects.
Mercenaries can never have their numbers replenished, but their weapons and armour
can be upgraded.
Changing You rMind About Unit Training
You can alter training orders as often as you like during a turn. The orders are only
executed when the
end of turn
button is pressed.
How to Besiege a Settlement or Fort
Sieges start automatically whenever an army attacks (right-click) a settlement. A
besieged settlement is shown with a line of sharpened stakes around it. Only friendly
forces or allies can joint besiege a settlement or fort; two or more neutral forces cannot
besiege the same location.
• The
Siege Details Scroll
shows you all the information you need to control a
siege: the cities’ defenses, your siege equipment and the time the settlement can
hold out.
• In most cases, you’ll need to construct siege equipment to break down the
settlement walls: rams, ladders, towers or saps. You won’t be able to start an
assault if you haven’t constructed some siege gear.
• Click on the items you want to build to add them to the build queue. Adding
items to your build queue uses up build points. Your army ’s remaining movement
points and your generals’ attributes, traits and ancillaries influence the number of
build points you get on this screen. Build points are generated each new turn.
• Yo u w on’t need to construct any siege equipment for settlements that don’t have
walls. You can assault these immediately, or choose to wait for the defenders’
food supplies to run o ut .
When you’re ready to attack, click on the Assault button. You’ll see the
Battle
Deployment Scroll
, and from here fighting a siege is very similar to
fighting any other battle. You have the choice of resolving the siege auto-
matically, fighting it out on the battlefield or withdrawing. If you decide to
fight it out, remember that a siege requires you to break into an enemy
settlement and take the central plaza or square. Killing the enemy isn’t always
enough to secure victory! Auto-resolution will simply tell you whether or not
your assault was successful.
RTW_PC_UK_32599.260.UK_MG1_v6 12/5/05 4:03 PM Page 36
Page 20

39
•To
sally out
, select any units in the garrison and
right-click
on the besieging
army. The
Battle Deployment Scroll
will be displayed so that you can see
the odds and decide whether or not to auto-resolve the fight. Any adjacent
friendly armies will appear as reinforcements in the battle (allied armies will
always be controlled by the AI). You will have control of the garrison for the sally
battle.
•A
relief force
is another army that attacks the besieging force. In this case,
the garrison appears as reinforcements (again, allied armies are always controlled
by the AI).
• During a sally battle, the besieging army may attempt to break into the
settlement and capture it. After all, gates that open to let defenders out also let
attackers in…
• In both cases, the garrison (sallying force) or the relief force must be victorious to
drive away the enemy and break the siege. In either case, it can sometimes be
worthwhile to target any siege equipment that the besieging army has
constructed. Its loss may delay their final assault.
How toUse Fleets
Naval pieces in the campaign game are called fleets.
Every fleet has an admiral. Like a general, he has a leadership value and can gain
personality traits that have an effect on his fleet’s ability. Unlike a general, he’s
permanently attached to his fleet.
• When a fleet is selected, a green movement area surrounds it. The fleet can move
to any point within this zone during its turn. Coastal squares are included in this
zone when there are passengers on the fleet, as they could disembark into one of
these land squares.
• Red spaces in the movement zone are adjacent to non-allied fleets.
• You can order a fleet to move beyond the green zone, in which case it will
remember its orders, and a coloured line shows where the fleet’s headed. Each
colour segment shows a turn’s worth of movement.
• The
Review Panel
in the centre at the bottom of the screen changes to show
the ships in the fleet along with passengers onboard.
Naval Combat
The naval combat system in
Rome:Total War
is abstract and auto-resolved.
To start a naval battle,
left-click
on your fleet to select it, and
right-click
on the
fleet you wish to attack.
• Fleets that lose ships in combat lose any militar y units or characters that the lost
ship(s) happened to be carrying.
38
• The command rating of the fleet’s admiral influences its fortunes in battle.
• After combat, the losing fleet will either sink or pull away from the
victorious enemy.
Passengers on Fleets
If you want an army or agent to board a fleet, select the land-based piece (army or
character) and move the cursor over your fleet. The cursor will change to a boarding
symbol to show that this move is possible.
•
Right-click
to confirm the boarding order. From now on, orders to the fleet
will include its passengers. By the way, movement points used by passengers
before they join a fleet limits the movement of the fleet.
• To disembark passengers, select the fleet and then
right-click
on a coast.
Everybody aboard a fleet will disembark at this spot. Any and all agents—
assassins, diplomats and spies—will be attached to a disembarked army.
• If you want to partially unload a fleet, select the units or agent(s) in the
review panel and then
right-click
on the campaign map on the coastal area
where you want them to disembark.
Blockades
It’s possible to blockade an enemy port and cut its trade links with the outside
world. The blockaded faction will not receive some trading income each turn the
blockade is in force:
• Select an army or a fleet, then
right-click
on the port you wish to blockade.
A barrier will be placed around the port to show a blockade is in force.
• You can lift a blockade by moving your fleet away.
• You can break enemy blockades by successfully attacking the blockading fleet.
Victor y will break the blockade.
Splitting & Merging Fleets
If you want to split a fleet, select the ships you want to form a new fleet in the
Review Panel
and then drag and drop them to the destination for your new fleet.
They will automatically leave and a new admiral will be appointed for the new fleet.
Any passengers stay with the “parent” fleet.
To merge two fleets, simply move one fleet to the location of another. If the two
fleets have more than 20 ships total, you’ll be given the chance to decide exactly
which ship ends up in each fleet.
Fleets as “Bridges”
It is possible for land forces or characters to board a fleet and then disembark on
the same turn .
RTW_PC_UK_32599.260.UK_MG1_v6 12/5/05 4:03 PM Page 38
Page 21

41
40
• Diplomats can be attached to your armies like other characters. Simply move
them to the same location as an army. This ma kes it slightly safer for them to
travel. They can be removed from the army b y clicking on the
Characters
tab,
selecting the diplomat and then
right-clicking
a spot on the game map.
The Diplomacy Scroll
You’ll see the
Diplomacy Scroll
every time you send a
diplomat to negotiate with another faction. You’ll also see
it when a rival’s diplomat comes to you with an offer of
friendship (or even to threaten you).
The
Diplomacy Scroll
summarizes your current
relationship with another faction, including earlier treaties,
and allows you to make new deals. The centre panel is the treaty that’s being proposed.
Build up a treaty by selecting items from the two lists:
•
Left-click
on offer and demand items in the lists to add them to the treaty.
These include land, cash and information.
•
Left-click
on an item already in the treaty to remove it.
• The offers and demands do not have to be balanced, but treaties that are
unbalanced will be rejected more often than ones with some give-and-take.
When you’re happy with terms, click on the
Offer
button below the treaty
text. The other party will respond. He’ll do one of three things:
refuse
outright,
accept
immediately or
make a counter-offe r
.
If you’re offering money, territory or ma p information and not asking for
anything in return, these can be a gift. Offers to attack other factions can also
be a gift.
• It’s quite possible that your proposed treaty was interesting, but not quite what
the opposition wanted. In this case, they ’ l l make a
counter-offer
to you.
• Once a counter-offer treaty is on the table, you can accept it or make your own
proposals in response as a
counter-offer
. Again, you can change the treaty
by clicking on either offers or demands and on the treaty itself (delete items).
• It’s quite possible for negotiations to go through several rounds of offer and
counter-offer before a deal is reached. Be mindful, though, that not everyone’s
patience is endless and one man’s haggling is another man’s waste of time!
Storm s
Storms can cause fleets to lose ships. It’s possible that a fleet can be entirely
dashed to pieces by a particularly bad storm. Ships in coastal waters are in less
danger during storms than ships far out to sea. Any ship that’s sunk is lost with
any militar y units it was carry ing.
How to Use Spies
Spies are trained in settlements that have a market (or larger trade
building). They are your eyes and ears in rivals’ territory, and act as
counterspies and secret police officers in your own lands.
When a spy can spy against a rival, the cursor changes. A spy can only carry o u t
one spying attempt per turn.
Move a spy into a rival’s settlement to obtain information. An infiltrated
spy can cause unrest and open the gates during a siege. There’s a chance
the spy will be caught and killed.
• Move a spy to the same location as a rival’s
army
to obtain information
about the army and its commander. The accuracy and completeness of the
information depends on the ability of the spy.
• Move a spy to the same location as a rival’s agent to obtain information
about that spy, diplomat or assassin.
Spies can be used to counter enemy agents and their activities:
• Spies always see enemy spies who would otherwise remain invisible.
• Spies can be attached to your own armies by moving them onto an arm y.
Simply move them to the same location as an army. A spy can be removed
from the army by c licking on t h e
Characters tab
, selecting the spy and
then
right-clicking
a spot on the game map.
• Spies can be moved into one of your settlements to act as counterspies and
to keep the local troublemakers under observation. This improves public
order in the settlement.
Over the course of time, a spy’s abilities may improve and he may gain various
traits as a result of his missions—assuming he lives, of course!
How to Use Diplomats
Diplomats are trained in settlements that have a
governor’s villa
,
warlord’s hold
(barbarians only) or larger government structure.
It’s their job to broker all kinds of deals and treaties. They can also
offer bribes to rival forces.
Move a diplomat onto a rival’s settlement, army or diplomat to begin
negotiations.The cursor changes to show a spot in the campaign world
where negotiations are possible if a diplomat moves there.
RTW_PC_UK_32599.260.UK_MG1_v6 12/5/05 4:03 PM Page 40
Page 22

43
42
•
Military
—Buildings that train or upgrade troops are constructed.
•
Defensive
—Walls are given priority.
•
Cultural
—Temples, amphitheaters, arenas, academies and other buildings that
make people feel happy are favoured.
The amount of money invested in new buildings is determined by the overall
AI
spending policy
, which is set on the Faction tab of the Over views scroll. The
Overviews scroll can be accessed by left-clicking on your Faction icon in the lower-right
corner of the control panel.
When auto-management is off, you’ll be given the choice to alter the
tax rate
in the
settlement.
Ho wNot to Go Broke
Simply put: have more income than expenditure. Running out of money is a sure way of
losing the game. Without money, no new buildings can be constructed, no new troops
recruited and existing forces cannot be paid.
Low-Level Tax Management
Each settlement with a governor can have its own
tax rate
, varying from
very high
to
low
. This is changed in the
set policies
section of the
Settlement Scroll
.
•
Left-click
on the arrows on either side of the tax rate to change it.
• As you change the tax rate, you’ll see the settlement’s income, public order and
population growth change. In general, the lower the taxes, the happier the people
are likely to be!
Click on the
Show Settlement Details
button if you want
to see the contribution that taxes make to the overall state of
the settlement.
Click on the
Financial tab
on the Faction Overview (click on the faction symbol in
the Control Panel) to see a financial projection for the current turn .
The
End of Tu rn Report
Scroll gives you the details of the last turn’ s
actual spending.
These two reports allow you to review the current state of your treasury. You can also
make sure your AI assistants aren’t spending money too quickly by altering the AI
Spend Policy on the Faction tab of the Overviews scroll.
How to Manage YourFaction
Clicking on the faction symbol in the lower right-hand corner of the Control Panel
brings up the
Faction Overview
.
How toUse Assassins
Assassins are trained in settlements that have a forum, agora or bazaar
or larger trading structure. Assassins can assassinate characters or
sabotage buildings.
• Move an assassin onto an enemy army, settlement or agent to attempt a
mission. An assassin can only attempt one mission per turn . I t doesn’t matter
when during the turn the mission occurs.
•An
assassination
can be carried out on any character at the location. You’ll
be presented with a target list including a chance of success for each “hit.”
Sabotage
missions can only be carried out in settlements. You’ll be given
the choice of an assassination (if there’s a character in the settlement) or
sabotage. Again, you ’ll be prese nt ed with a target list on the
Select
Mission Target
Scroll
, including a chance of success for the mission.
Unrecognized buildings in a settlement appear as “
?
” which can be sabotaged.
Use the tabs to move between the assassination and sabotage targets.
Left-click
on the target and then click on the assassination or sabotage
buttons. You can always cancel the mission by clicking on the “
X
” button.
• There are no guarantees that an assassin will succeed. Assassins who fail might
get killed in the process.
How to Auto-Manage Settlements
Settlements in
Rome: Total War
can be left to run themselves if you prefer to
concentrate on the military side of the game.
If a settlement doesn’t have a governor it’ll be auto-managed. Moving the last
character out of a settlement turns auto-management on.
When you conquer a settlement, you’re given the option of auto-managing it. The
conquering general can be the governor, but the settlement can still be left to look
after itself.
The Settlement Scroll
In the
set policies
section of the scroll, click on the
Auto-manage
check box to
toggle auto-management on and off.
When it’s on, you’ll have the chance to pick a
build policy
for the settlement. This
gives the administrators some basic guidance on where they should concentrate their
spending. The policies are all straightforward:
•
Balanced
—Results in a well-rounded settlement.
•
Financial
—Trade and income-producing buildings are favoured.
RTW_PC_UK_32599.260.UK_MG1_v6 12/5/05 4:03 PM Page 42
Page 23

The Faction Overviews Scroll
This scroll is the key to understanding all the political, diplomatic and financial details
of your faction. Click on any of the tabs across the top of the scroll to bring up the
Senate details, Diplomacy details, Financial details and/or Faction overiew.
The Faction overview allows you to set global auto-management options for your
entire faction. These are the underlying defaults for any settlement that’s being auto-
managed:
• Click the
Automate All Production
tick box if you want
auto-management to do everything for you. If not you can:
• Click
Enable Auto Train Units
if you want the game to produce the best
available militar y forces.
• Click
Enable Auto Construct Buildings
if you want the game to manage
the building policy in settlements.
• The
AI Spend Policy Slider
lets you set the relative balance between
building up your cash reserves and immediate spending.
Three buttons in the lower left-hand corner bring up more information about
your faction:
Faction Rankings
—A summary graph that shows you how well each
faction is doing compared to the others.
Family Tree
—A convenient summary of your faction’s available senior
personnel: your generals, their wives and their children.
Click here to bring up the
Senate Officials Scroll
. This is discussed in
greater detail shortly.
Faction Ranking Scroll
This scroll gives you a way of seeing your progress in the
game and comparing your strength with that of your rivals
in several different ways. The graph shows your faction’ s
power over time as an
absolute
value; it doesn’t show
the proportion of the world’s “power” that you control.
• The ranking choice allows you to choose an aspect
of your faction’s power: production, territorial,
financial, population and overall.
• The faction choice lets you choose which collection of factions you wish to
compare: your own, all factions, the top five, neighboring factions or a custom
selection.
45
44
• You can click on the faction symbols to toggle the graph lines on and off for
any particular faction(s). This can be very useful when reviewing your
progress in a war.
Family Tree Scroll
The family tree scroll shows all the important characters in
your faction—the men who can be generals and governors.
It also allows you to decide who’ll be the faction
leader’s he i r.
• Portraits in colour are living characters. Characters
shown in grey are dead.
• The most important characters are the
faction
leader
and the
faction heir
; their status is
marked on their portraits.
• All the larger portraits are generals and governors in your faction. Move the
cursor over a portrait to see the character’s name and abilities. The smaller
portraits are sisters, wives and children.
Left-click on any large portrait, and two buttons in the lower left of the screen
become available.
The
Set Faction Heir
button allows you to designate the heir to your
faction leader.
The
Show Me
button displays the character’s location on the current
campaign map.
New Members of the Family
In the normal course of events, sons and daughters will be born to various
members of the family. As sons come of age, they’ll become available for use as
generals and governors. All new characters (including adopted sons and those who
marry into the ruling family) always appear in the faction capital. Daughters
become available for marriage when they come of age.
Adoptions and Marriages
Unmarried sons in your family will find wives and, hopefully, start producing a new
generation of leaders without you having to worr y about it.
From time to time—when there’s an eligible woman in the family—a suitable
husband will appear. If you accept him for marriage into your family, he’s adopted,
too, and treated like any other male family member.
Attributes
All family characters have three attributes that affect their perfo rmance in the
game. These are
command,management
and
influence
, and they’re
measured on a scale of 0 (poor) to 10 (almost divinely inspired):
RTW_PC_UK_32599.260.UK_MG1_v6 12/5/05 4:03 PM Page 44
Page 24

47
46
How to Deal with the Senate
In
Rome: Total War
, the Roman empire is represented by four factions (you cannot
play the Senate). They are all on the same “side” when it comes to dealing with non-
Romans, but one faction will eventually take control of the whole empire. At the start,
the Senate and other Roman factions are not hostile. You don’t need to worr y about
being stabbed in the back by another Roman faction. At some point, it’ll become
inevitable that you’ll have to march on Rome and stake your claim to be imperator
(emperor) of the Roman world. The other Roman factions will be working toward the
same goal. It’s therefore likely a civil war will break out. An attack on Rome will only
succeed if you have a strong military force and your faction is popular with the Senate
and People of Rome.
Senate Missions
At the start of each turn, event messages appear on the left-hand side of the screen.
Among these can be messages from the Senate requesting you perfo rm a mission of
some kind.
These missions are intended to further the interests of Rome, not just your faction.
While what’s good for Rome is often the same as what’s good for you, it may not
always be the case. The Senate also sets a time limit for these missions.
As you carry out Senate missions and your faction becomes stronger, the tasks the
Senate asks you to perform will become more challenging—and the rewards for
carrying out the wishes of the Senate grow!
The Senate Overview
This summarizes all Roman politics in one place. Click on the tabs to review policy,
missions or the floor (your popularity).
The
Senate policy
section of this scroll gives you information on the senate’s attitude
toward all non-Roman factions in the game. Left-click on a faction symbol to see what
the Senate thinks of a faction.
The
Senate missions
section of the scroll gives you a list of outstanding missions
that you may want to complete. It’s entirely your decision whether these missions are
carried out or not. Factions that carr y out mis sions will be well regarded by the Senate.
Click on a mission to select it, and then click on this button to centre the campaign
map on the target for an outstanding mission.
The
Senate floor
shows your popularity with the senate and with the plebs or
plebeians—the ordinary Romans in the street.
•
Command
is the ability the character has to lead and inspire men in battle.
High command has a positive effect on the morale and fighting quality of
soldiers. A low command rating has some effect, and is definitely better than no
command rating at all.
•
Management
is the ability of the character to run a settlement and conduct
the business of government.
•
Influence
is the ability of the character to sway others by argument and the
force of personality. This has an effect on public order when a character with
influence is a governor.
Other characters in the game also have attributes:
•
Admirals
have command ratings, but only for sea battles.
•
Diplomats
have influence, and this affects their chances of successfully
negotiating with another faction.
•
Spies and assassins
have subterfuge ratings. Subterfuge is a measure of
sneakiness, double-dealing and underhandedness.
Retinues: Ancillary Characters
Retinues are made up from ancillary characters. These are the assistants, aides,
secretaries, mistresses, fixers, lackeys, drinking buddies and assorted hangers-on that
always seem to be found with great men. Ancillaries are added to a retinue as a result
of game events. We’ve also included a few famous historical characters as ancillaries—if
you can find them, maybe they’ll help your cause!
Ancillaries usually give bonuses and penalties to a character in the same way as
character traits. Unlike traits, ancillaries can usually be moved between characters, but
some combinations are not allowed.
• The two characters must be part of the same army or in the same settlement.
•
Right-click
on the unit card in the review panel that represents the general
with the ancillary.
• Drag and drop the ancillary you want to move from the scroll onto the unit card
of the receiving character in the Review Panel .
Character Traits: Vices and Virtues
Over time, characters pick up a variety of personality quirks and traits. Some
of these are good and some are bad, but if a man is worthy, he’ll develop a good
character.
A man who runs from battle or is left to rot in a provincial backwater may develop a
nasty personality! It’s probably a good idea to have a look at your characters every
once in a while to make sure they don’t have a taste for the good life (at your expense),
or turn into blood-soaked loonies!
RTW_PC_UK_32599.260.UK_MG1_v6 12/5/05 4:03 PM Page 46
Page 25

49
48
• Your popularity with the Senate rises if you carry out Senate missions and if you
conquer foreign territory to add to the glory of Rome! The Senate also takes into
account your military might and the threat you represent to them.
• Your popularity with the plebs rises as you conquer new lands for Rome (for your
own faction, in fact). The plebeians love a winner!
The Senate Officials Scroll
This is a list of all the characters in the game that have been honored with positions of
responsibility by the Senate. Only Romans can hold senate offices.
Each of the offices grants benefits to the holder while he has the office. Each office also
gives benefits to former holders—the honor of being trusted by the senate stays with a
man forever.
Senate offices are divided among the Senate itself and the three Roman factions
according to the popularity of each faction on the senate floor.
A single character can hold only one office at a time. He may be given more than one
office during his life, and gain the benefits of being an ex-office holder for each one, as
well as the benefit of his current office.
•
Left-click
on a character in the list to centre the campaign game map on his
position in the world.
•
Right-click
on a character to bring up his details so you can examine his traits
and retinue.
HowtoGetHelp
In many places you’ll see a “?” button. Click on it to get help. If the advisor is already
on-screen and highlighted, you’ll have to read the current advice or dismiss the advisor
to see the help information. Victoria is pretty clever, but she ca n only tell you one thing
at a time!
How to Change Game Options During Play
Pressing
ESC
when no scroll is visible brings up the
Game Options
menu.
•For
game,audio
and
video options
, use the sliders and check boxes to alter
the settings to suit your personal preferences.
•
Load Game
and
Save Game
allow you to save your position and reload it
later (or even undo some terrible calamity by stepping back to an earlier game
date, not that you’d ever cheat like this, oh no).
49
BATTLES
This part of the manual concerns itself exclusively with the battle side of play and how
to get the most out of commanding your troops. The two halves of the game are linked
on many levels. The campaign game determines where a battle takes place and the units
present; results in the battle game affect the campaign. Generals can earn traits as a
result of their behavior in battle. Cities can be won and lost, and a brilliant victory in
the field can mean the conquest of new lands!
The Battle Deployment Scroll
When you have an army selected on the campaign map, right-click on a non-allied army
or settlement to attack. This brings up the Battle Deployment Scroll:
• The strength comparison bar in the centre of the scroll gives you the overall
battle odds. Move
the cursor over the crossed swords to see the
exact odds.
• Reinforcements are also listed (and taken into account in the odds calculation).
These are drawn from armies that are adjacent to the site of the battle or siege.
Click here to take control of your units on the battlefield. What happens after you
click this button is what’s covered in this part of the manual!
You can have the game work out the battle result. Autoresolving a
battle is speedy, but casualties may be heavy and you can’t protect valuable
generals.
Click here to cancel the battle. When you do this, your army will withdraw some
distance to a safe location.
Attackers and Defenders
In every campaign battle, there’s an attacking army and a defending army. During
sieges, the besieging army is usually the attacker. The only exception to this is when the
defenders sally out or a relief force attacks the besiegers. In this case, the besieging
army is the defender. Attacking and defending armies use different victory conditions
and deployment rul es .
Victory
Generally, in a field battle you need to drive the enemy from the battlefield to win. You
can press the
ESC
key and select
Exit Battle
at any time to end a battle.
• Victor y m ay require killing many enemy troops, although a crisis of morale (the
death of a general) will make the enemy flee the battle.
RTW_PC_UK_32599.260.UK_MG1_v6 12/5/05 4:03 PM Page 48
Page 26

51
•Asan
attacker
, there may be a time limit. If you haven’t defeated the enemy
before the timer expires, you lose the battle.
•Asa
defender
, the timer works in your favour. Remain on the field until time
runs out and the attacker is automatically defeated.
• During a siege assault, victory is determined by control of the central square or
plaza in the settlement. The attackers must take this plaza before the
timer expires.
• During a battle, you can press
F1
to see information about the battle, including
the victor y conditions.
Ho w to Deploy You r Troops
At the start of the battle, you may be given a chance to deploy your troops.
•Asan
attacker
, your army always deploys on a section of the battlefield that
matches the line of its approach on the campaign map. March onto a battlefield
from the north, and that’s where your forces will deploy.
•Asa
defender
, you’ll deploy in a complementary area of the battlefield.
•
Reinforcements
always appear on the edge of the battlefield that matches
their position on the campaign map. It can be very worthwhile to position armies
on the campaign map on the flanks or in the rear of an enemy before you attack.
Reading the Ground
When a battle begins, you’ll see a camera flyby of the battlefield to give you an idea of
how the land lies. The deployment areas for your troops and the enemy will be shown
outlined in the faction colours.
The General’s Speech Before Battle
Your general will give a rousing speech to his men. It’s worth listening to the speech
because the general may include one or two useful hints about the state of the
battlefield, the enemy and any tactical ruses that might work.
W aiting Before a Battle
If you’re the
attacker
, you can wait before starting the battle. If the weather isn’t
right, just click the
Wait
button. There’s a chance the weather won’t change, but you
can’t postpone a fight forever waiting for the perfect day:
• Battles fought in bad weather—rain, snow, sandstorms and so forth—will be
more tiring for your troops and for the enemy.
• Wet weather is likely to have a negative impact on bow-armed units (bows and
bowstrings do not like damp conditions).
• Mist, fog and sandstorms can make it difficult to find the enemy.
As the
defender
, you have to fight with the weather your attacker has decided is
good enough—for his purposes!
50
An
ambush
gives you no chance of choosing the weather for the battle.
Changing You r Deployment
The game places your units on the field in a sensible formation, but it may not be
exactly what you want. Click on Start Deployment to rearrange your battle lines:
• You are never forced to change deployment.
• You cannot re-deploy your army if you’re ambushed—and your army will be in a
marching column, not drawn up for battle!
• Units must be positioned within the boundaries of your deployment zone. This is
the area on the map bordered by your faction colour.
•
Left-click
on a unit or its card in the
Control Panel
, and then
right-
click
on the ground you want it to occupy.
• You can select multiple units for deployment.
CTRL
and
left-click
on the units (on the battlefield) or unit cards (in
the Control Panel) you want to select.
CTRL
and
double-click
on a unit card (in the Control Panel) to select
all units of the same type in your arm y.
Left-click
and
drag
on the battlefield to create a box around the units
you want. All units within the box will be selected.
• Deploy multiple units by
right-clicking
on the ground you want them to
occupy. You can right-click and drag the units out into a line.
When you’re happy with your deployments, click on
Start Battle
.
Battle Advice
As soon as the battle begins, your military advisor appears with an opinion about enemy
tactics for the upcoming fight. You’ll find this information useful in formulating your
own plans.
How to Use the Battlefield Control Panel
The battlefield control panel is divided into three main sections:
• On the left are the mini-map, game speed controls and army strength
ratio bar.
• In the centre are the unit cards, each of which represents one of your units on
the battlefield.
• On the right are the controls for individual units, groups of units and the army as
a whole.
RTW_PC_UK_32599.260.UK_MG1_v6 12/5/05 4:03 PM Page 50
Page 27

53
52
53
The View Onto the Battlefield
All your units on the battlefield carry a banner in your faction colour and symbol for
easy identification.
• Click on the large banner to select the unit—this can be quite useful in the
middle of tense hand-to-hand fighting.
• Some units also carry smaller flags showing your faction colour and symbol.
These show a combination of a unit’s experience and upgrades to weaponry
and armor. The more small flags a unit carries, the more fearsome it will be in
combat!
•
General’s bodyguard
units carry square banners that are quite different
from other units. It’s always possible to see at a glance where a general can
be found.
• Any
captain
leading an army is similarly shown by the square banner carried
by his unit. However, because he’s a captain and not a general, he won’t be
personally leading a bodyguard unit and could be part of any kind of unit,
even humble peasants!
• Terrain has exactly the effects you would expect in real life: units can hide in
wooded terrain, marching through river fords slows your troops, marching in
snow makes men tired and so on.
• Out-of-bounds on the map is marked by a red line that’s visible when the
camera is close to the battlefield’s edge. Units cannot be ordered beyond this
line, but they will go there when routing or withdrawing.
The Mini-Map
The mini-map gives you a view directly down onto the battlefield. Terrain on the
battlefield is taken from the campaign map location. You’ll see distant mountains,
the sea and even volcanoes beyond the battlefield.
• The mini-map is always oriented with north at the top.
• The arrowheads in faction colours show the position and facing of units on
the battlefield.
• Selected units are always highlighted on the mini-map.
• The two blue lines show the current view onto the battlefield.
• The shadowed area at the edge of the mini-map is out of bounds during a
battle. Units may only enter this part of the map if they’re withdrawing from
battle or running away like frightened bunnies (or “routing,” to use the
technical term).
You can zoom in and out of the mini-map using these buttons to change the
map scale.
The other data and controls in this section of the panel are:
The
hourglass
shows how much time remains before the battle ends. If
you speed up play, the timer speeds up, too.
• Just above the game speed controls, the
kill bar
shows the relative success
or failure of your army in disposing of the enemy.
Click on one of these four buttons to pause or play the game at
normal, twice and three times speed. You can also press the
P
key to
pause and un-pause the game. Orders can be issued to units while the
game is paused.
The Review Panel
Each of the cards in this section represents one unit on the battlefield. When a card
is highlighted, all men in the unit on the battlefield are highlighted with a green
chevron at their feet.
The number is the current number of men in the unit. This number turns
red as the unit takes casualties. The artwork shows the unit type—in this
case, a unit of Hastati.
Large portrait unit cards are generals and their bodyguards. A gold star on
the unit card identifies the commanding general. Other generals have a
silver star.
Units that have gained experience and/or improved weapons or armor have
chevrons, swords and/or shield markers. Here, the chevrons show the
experience, while the sword shows these Triarii carry improved weaponry.
All units armed with missiles have a bar that shows their current
ammunition status. This bar always starts full, and as the unit fires
missiles, the bar empties.
Artillery units have an ammunition bar, just like other missile units. The
number on the card is the
number of men
and each artillery piece
requires a minimum number of men as crew.
Units can be grouped together during battle. By clicking on the
tab, all units in a group can be selected and controlled as one.
Unit cards can have action icons superimposed to show what the unit
is currently doing.
RTW_PC_UK_32599.260.UK_MG1_v6 12/5/05 4:03 PM Page 52
Page 28

54
Army and Unit Controls
In the left section of the control panel are the controls for individual units and
groups of units. As with any part of the game, tool tips are displayed when you
move the cursor over relevant items:
Clicking on the portrait of your commanding general immediately moves
the camera to a position behind the generals’ unit. A banner is displayed
here when the army is under the command of a captain.
Click here to
stop
the orders being carried out by the selected unit(s).
You can also press the
backspace
key.
Click here to
group
the selected units. This button is greyed out unless
multiple units have been selected.
This button replaces the
linking
button when a group is selected.
Click here to toggle computer control for the group, and the game will
independently issue orders to the units once you’ve given the group
some orders.
Click here to make the selected unit(s)
withdraw
from battle in good
order. The units will retreat into the out-of-bounds area. A unit given
withdrawal orders can be recalled until the point it leaves play.
Click here to toggle the unit formation from tight to loose. This alters
the spacing between men within the selected unit(s).
Click here to toggle skirmish mode on and off. A unit set to skirmish will
seek to keep a safe distance between itself and the enemy (usually the
range of its missile weapons). If a unit cannot skirmish, this button is
greyed out.
Click here to toggle the
fire at will
button. When fire at will is on,
selected missile-armed units will fire at nearby targets without further
orders. When a unit without missiles is selected, this button is greyed out
and unavailable.
These buttons are reserved for a variety of
special abilities, depending on the type of unit
currently selected.
Click here to set the selected unit(s) to guard mode. When guard mode is
toggled on, the unit(s) holds position and formation at all costs, and lets
the enemy come to them. A unit on guard will not pursue fleeing enemies.
This can be useful for holding an important location (such as a gateway).
Click here when a unit is selected to toggle the unit’s speed
between walking and running. A unit that runs tires more
quickly than one that marches.
When a group of units is selected, click here to bring up the
group
formations
buttons. See
How to Use Groups and Group
Formations
for more information on these and how they work.
How to Control the Battlefield Camera
The default for the battlefield camera in
Rome: Total War
is an RTS-style
camera, which can be controlled by the mouse or keyboard controls. (There’s also
a second mode that will be discussed in a moment):
• Moving the cursor to the edge of the screen alters the camera view. The
cursor changes shape to show that the view can be altered.
Moving the cursor to the
toporbottom
(i.e., the bottom of
the control panel) of the screen makes the camera
track
forward and backward. The angle of view does not change.
Moving the cursor to the right and left edge of the screen
makes the camera
pan
(spin on its vertical axis) without
changing its position or height.
Moving the cursor to the right and left edges of the
control
panel
makes the camera
track
(strafe) left and right
without changing the viewing angle.
• The
mouse wheel
(if your mouse has one) alters the camera height.
The camera automatically
pans
(tilts) downward as its height is raised
above the battlefield.
• The / and * keys (slash/divide and asterisk/multiply) on the numeric keypad
also alter the camera height in the same fashion.
• The – and + keys (minus and plus) on the numeric keypad alter the camera
tilt without altering its height.
• Clicking the centre (third) button on the mouse zooms the camera viewpoint
to look at the unit nearest the cursor while the button is held down. (On
some mice, the mouse wheel acts as the centre button).
• The cursor arrow keys on the keyboard
track
the camera view left, right,
forward and back without changing the viewing angle. Left-click on the
55
RTW_PC_UK_32599.260.UK_MG1_v6 12/5/05 4:03 PM Page 54
 Loading...