

Page 1
Features:
Kit Includes:
®
RA-4961-K1Q
Wireless Alert System
Manual
• Wireless Receiver (RA-4961Q) • Wireless Pushbutton (RA-4961-PBQ)
• Up to 1,000ft (305m) transmission range*
• 18 Programmable ringtones
• Connect up to 4 wireless transmitter
accessories
• Audible and visual alert via built-in
speaker and flashing light
* Transmission range will vary depending on installation and operating environment.
• Wall or desktop mountable
• Output terminals for optional auxiliary
device
• Each channel independently
programmable
Page 2
CBA Wireless Alert System
Table of Contents
:
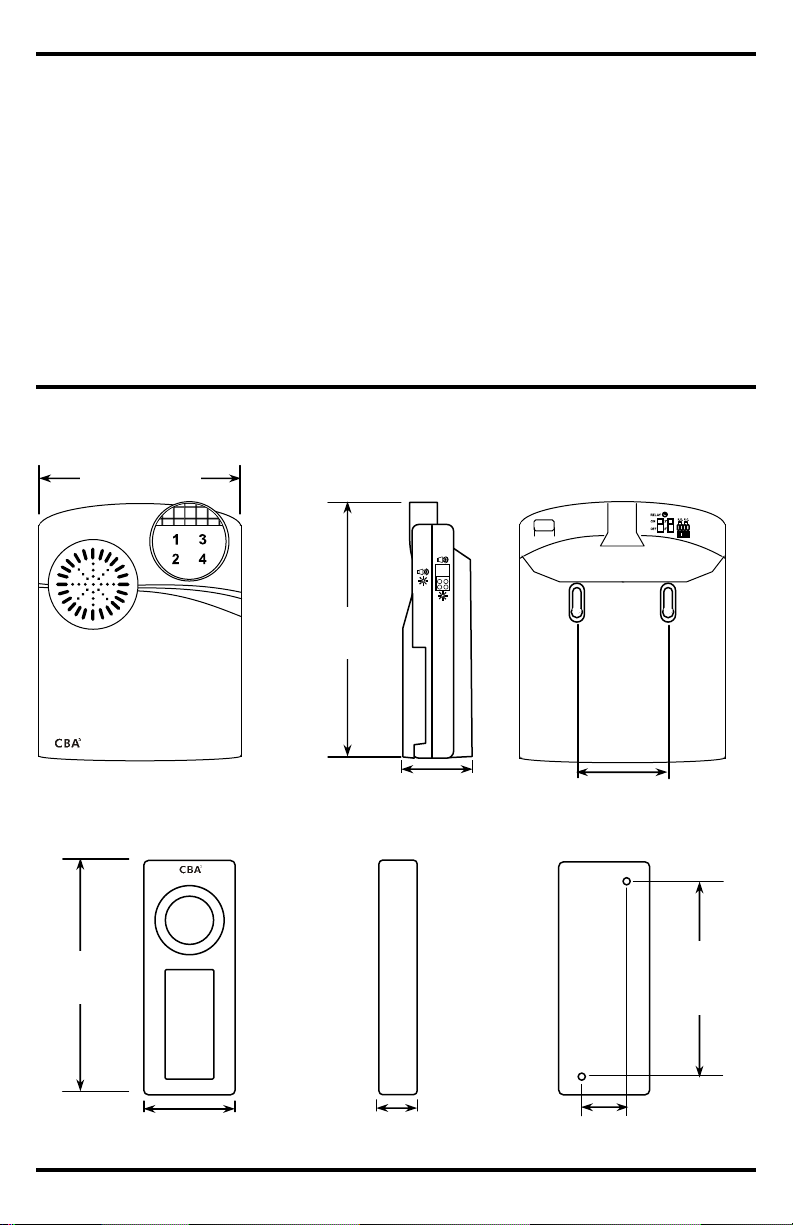
Dimensions:
Dimensions
................................
............
2
Pairing
Accessories
...............................
6
Pushbutton
51/4" (133
mm)
65/8"
19/16"
Receiver
21/8"
(54
mm)
37/16"
/16"
(18mm)
15/16"
/16"
(18mm)
31/16"
Parts List ................................................ 3
Specifications ........................................ 3
Overview ................................................ 4
Installing the Receiver ........................... 5
Installing the Pushbutton ....................... 5
Replacing the Pushbutton Battery ......... 6
Deleting Paired Accessories ................. 7
Changing the Ringtone and Volume ..... 7
Setting the Notification Mode ................ 7
Wiring an Auxiliary Device ..................... 8
Optional Accessories ............................. 8
Warranty ................................................ 8
(169mm)
RESET
(40mm)
(87mm)
11
(34mm)
2 SECO-LARM U.S.A., Inc.
11
(78mm)
Page 3
CBA Wireless Alert System
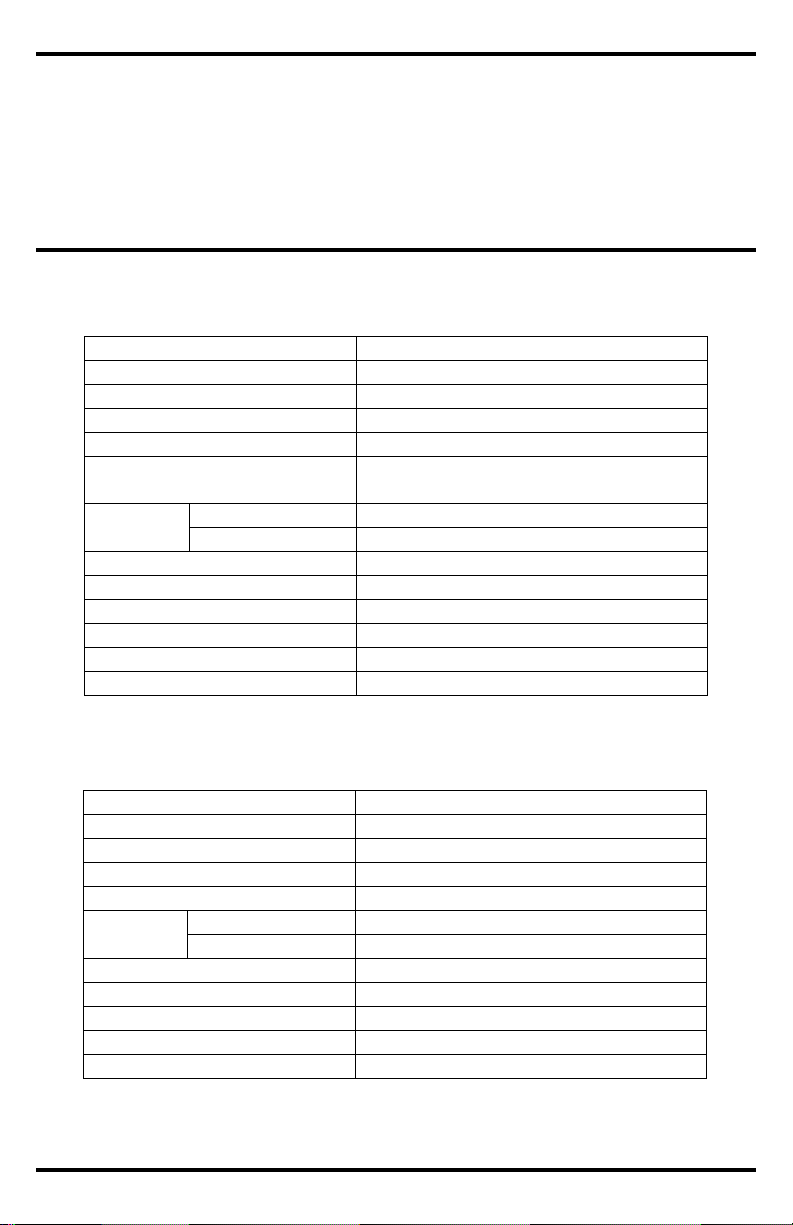
Specifications:
Model n
umber
RA-
4961Q
Frequency
914.8MH
z
Channels
4
Accessories per channel
1
Relay o
utput
(Channel 4 only)
1
(Form C Relay), 1A@50VDC
3 "C"
batteries or 6VDC power adapter
Current
Standby
0.3mA
Max 220mA
Estimated battery l
ife 27
0 days (3 triggers/day)
Receiver low battery indicator
Notification LED flashes every 5 seconds
Accessory low battery indicator
Zone LED for accessory blinks
continuously
Sound level (dB)
Up to
96dB@
1ft(
30cm
)
Operating temperature
32º~140º F (0º~60º C)
Dimensions
51/4"
x19/16"
x65/8" (133x40x169
mm)
Model n
umber
RA-
4961-PBQ
Frequency
914.8MH
z
Transmission r
ange*
Up to 1,000ft
(305m)
Channel
s 1
Power
supply
CR2032 Battery
(included)
Current
Standby
0.2µA
Active
16mA
Estimated battery l
ife 400 days (3 triggers/day)
Low battery
indicator
Zone LED on receiver blinks continuously
IP rating
IP45
Operating temperature
-4
º~140º F (
-20º~
60º C)
Dimensions
15/16"
x11/16"x37/16" (34x18x87
mm)
Receiver
(RA-4961Q)
Pushbutton
(RA-4961-PBQ)
1x Wireless alert receiver
(RA-4961Q)
Parts List:
1x Wireless pushbutton (RA-4961-PBQ)
1x Manual
1x CR2032 battery for wireless pushbutton (RA-4961Q batteries not included)
Power supply
draw
(Both not included)
draw
*Transmission range will vary depending on installation and operating environment.
SECO-LARM U.S.A., Inc. 3
Page 4

CBA Wireless Alert System
Overview:
Receiver
Pushbutton
Notification
Channel
Channel
Tone
Relay
switches
Wi
ring
terminal
RESET
Battery
holder
Front (Cover off)
Speaker Notification light
notification
Open the front cover.
Side
selection
switch
Reset button
Battery compartment
Rear
6VDC Input
Mounting holes
Volume control
select
select
button
button
Front (Cover on)
Front (Cover off)
Pushbutton Activation LED
4 SECO-LARM U.S.A., Inc.
Page 5

CBA Wireless Alert System
Installing the Receiver:
1. Open the
front cover of the receiver unit.
(observing correct
Low battery is indicated
Installing the
Pushbutton
:
1. Remove
the front cover of the pushbutton by inserting a paperclip in the notch at the top of the
3. Once the pushbutton has been mounted, snap the front cover onto the unit.
Insert paperclip
Mounting
holes
2. Determine how the receiver will be powered. Either insert three "C" batteries
polarity, not included) or connect to 6VDC power supply (not included).
when the notification light flashes once every 5 seconds.
3. Program pushbutton and any other accessories (see Pairing Accessories pg. 6).
4. Receiver may either be placed on a table or other surface, or it may be mounted on a wall.
For Wall Mounting
1. Hold the receiver unit against the wall to get an idea of where the receiver should be installed.
2. Install 2 screws (not included) on the wall 25/16" (58mm) apart.
3. Hang the receiver on the screws.
Receiver
Table
Receiver
Wall
unit. Push down on the paperclip with force and pull the top of the front cover from the
pushbutton.
2. Mount the pushbutton to a wall or other surface using screws (not included) through the two
mounting holes.
in notch
Remove cover
SECO-LARM U.S.A., Inc. 5
Page 6

CBA Wireless Alert System
Replacing the Pushbutton Battery:
1. Remove the front cover of the pushbutton by inserting a paperclip in the notch at the
top of the
y into the battery holder, making sure to observe correct polarity (positive
Insert paperc
lip
Battery
P
airing
Accessories:
1. Enter programming mode by holding down the
c
hannel
select button until
the C
hannel 1
LED
Note:
Low battery for this and other accessories is shown on the receiver. When an accessory
Channel
select
Tone
button
unit. Push down on the paperclip with force and pull the top of the front cover from the
pushbutton.
2. If there is a previous battery installed, use a fingernail or small object to remove the battery
from the battery holder.
3. Slide a CR2032 batter
faces out).
4. Snap the front cover onto the pushbutton.
in notch
Remove cover
holder
battery is low, the zone LED for that accessory will blink continuously.
flashes on the channel notification panel.
2. Press the channel select button to cycle through channels until the desired channel is selected.
3. Press the tone select button to cycle through ringtones until the desired ringtone is selected.
4. Trigger the pushbutton or other accessory. Once the accessory is triggered, the receiver will
beep indicating the units have been paired. If another channel lights up, this accessory is
already programmed on the indicated channel.
Note: If pairing an accessory to a channel that is already paired with another accessory, the
original paired accessory will be deleted.
5. Press the channel select button to move to the next channel or to exit paring mode.
Note: If no activity for 30 seconds the receiver will automatically exit pairing mode.
select
button
6 SECO-LARM U.S.A., Inc.
Page 7

CBA Wireless Alert System
Deleting Paired Accessories
:
1. Enter programming mode by holding
the
select button to cycle
Note:
The reset button is used to res
e
t a channel after it has been triggered. It is
not used to
Tone
button
Channel
select
button
Changing the Ringtone and Volume
:
1. Enter programming mode by holding
Tone
button
Channel
select
button
Setting the Notification Mode:
1. The wireless alert rec
eiver has three modes
– Audible
When the switch is flipped to Visual Alarm the receiver's
Audible Alarm
Audi
ble &
Visual Alarm
down the channel select button until
Channel 1 LED flashes on the channel
notification panel.
2. Press the channel
through channels until the desired
channel is selected.
3. Press and hold the channel select and
tone select buttons simultaneously until
a beep is heard and the channel LED
flashes. Press channel select button to
exit pairing mode. If no actions within
30 seconds, the receiver will
automatically exit the pairing mode.
clear any programming.
down the channel select button until
the Channel 1 LED flashes on the
channel notification panel.
2. Press the channel select button to cycle
through channels until the desired
channel is selected.
3. Press the tone select button to cycle
through ringtones until the desired
ringtone is selected.
4. Press the channel select button to exit
programming mode.
5. To adjust volume, use a small
screwdriver to adjust the volume knob.
select
Volume
select
Alarm, Visual Alarm, and Audible and Visual Alarm.
2. When the Notification selection switch is flipped to
Audible Alarm the receiver speaker will sound and the
zone LED will light up.
3. When the switch is flipped to Audible and Visual Alarm
the receiver's speaker will sound, the notification LED
will light up, and the zone LED will light up.
4.
notification LED will flash and the zone LED will light up.
SECO-LARM U.S.A., Inc. 7
Visual Alarm
(Default)
Page 8

CBA Wireless Alert System
Optional Accessories
:
Wireless
Wireless
Wireless
Wireless
Wireless
Wireless
Wiring an Auxiliary Device:
1. To connect an auxiliary notification device to channel 4, flip the left
(
relay)
switch to
"ON".
Note:
Default positions are "OFF" (rel
ay) and "2" (time).
NOTICE
:
However, the
LARM reserves the right to
Trademarks
or copied, in whole or
LIMITED
WARRANTY:
LARM product is warranted against defects in material and workmanship while
LARM’s obligation is limited to
This Warranty
is void if damage is caused by or attributed to acts of God, physical or electrical misuse or abuse, neglect, repair or
LARM determines that such
The sole
purchaser’s exclusive remedy, shall be limited to the replacement or repair only, at
LARM be liable for any special, collateral, incidental, or consequential
SECO
-
LARM
TERMINALS
COM
2. Flip the right (time) switch to 2 for a 2-second activation time or 5 for a 5-second activation time.
3. Wire the auxiliary device to the wiring terminal according to the diagram below.
4. When channel 4 is activated, the auxiliary device will also be triggered.
COM
N.O.
N.C.
1A@50VDC
Outdoor PIR
Sensor
RA-4961-DSQ
Mailbox/Tilt
Sensor
RA-4961-MBQ
Magnetic
Contact
RA-4961-MCQ
FCC COMPLIANCE STATEMENT: RA-4961-PBQ FCC ID: YAHDCX-800
THIS DEVICE COMPLIES WITH PART 15 OF THE FCC RULES. OPERATION IS SUBJECT TO THE FOLLOWING TWO
CONDITIONS: (1) THIS DEVICE MAY NOT CAUSE HARMFUL INTERFERENCE AND (2) THIS DEVICE MUST ACCEPT
ANY INTERFERENCE RECEIVED, INCLUDING INTERFERENCE THAT MAY CAUSE UNDESIRED OPERATION. Notice:
The changes or modifications not expressly approved by the party responsible for compliance could void the user’s authority
to operate the equipment. IMPORTANT NOTE: To comply with the FCC RF exposure compliance requirements, no change
to the antenna or the device is permitted. Any change to the antenna or the device could result in the device exceeding the
RF exposure requirements and void user’s authority to operate the device.
Indoor PIR
Sensor
RA-4961-PRQ
Pushbutton
RA-4961-PBQ
Vibrating
Receiver
RA-4961-VPQ
used in normal service for one (1) year from the date of sale to the original customer. SECOthe repair or replacement of any defective part if the unit is returned, transportation prepaid, to SECO-LARM.
alteration, improper or abnormal usage, or faulty installation, or if for any other reason SECOequipment is not operating properly as a result of causes other than defects in material and workmanship.
obligation of SECO-LARM and the
SECO-LARM’s option. In no event shall SECOpersonal or property damage of any kind to the purchaser or anyone else.
SECO-LARM policy is one of continual development and improvement. For this reason, SECOchange specifications without notice. SECO-LARM is also not responsible for misprints or typographical errors.
are the property of SECO-LARM USA Inc. or their respective owners.
Copyright © 2015 SECO-LARM U.S.A., Inc. All rights reserved. This material may not be reproduced
in part, without the written permission of SECO-LARM.
The information and specifications printed in this manual are current at the time of publication.
16842 Millikan Avenue, Irvine, CA 92606 Website: www.seco-larm.com
Phone: (949) 261-2999 | (800) 662-0800 Email: sales@seco-larm.com
8 SECO-LARM U.S.A., Inc.
This SECO-
®
U.S.A., Inc.
PIHVK1
MiRA-4961-K1Q_151001.doc
 Loading...