

Page 1

OWNER'S MANUAL
ENFORCER
100LB • 100LB - 4
100CB • 100CB - 4
(315 MHz) (433.92 MHz)
Remote Controlled
Vehicle Security System
®
SECO-LARM® U.S.A., INC.
16842 Millikan Avenue
Irvine, California 92606
FILE: MOE100CFB.PMD/JAN2005
ORDER PART#760-930-1/058
Page 2

ENFORCER 100LB/100CB Owner's Manual
CONGRATULATIONS
From the moment you purchased this ENFORCER Vehicle Security System, you became a part of the
SECO-LARM family. You started taking advantage of over 34 years of advanced engineering. You
joined a team of engineers, technicians, designers, and people like yourself who know how
important protecting your car is. You discovered the SECO-LARM difference.
This difference is important because the ENFORCER is more than just an alarm. It's a complete
security and convenience system. It's like having your personal security guard and butler on call in
your car, 24 hours a day.
Keep in mind that the best security systems will not work properly without careful installation.
Therefore, the ENFORCER is designed for installation by your professional SECO-LARM dealer. He
understands both his alarms and your needs, and will work hard to ensure the ENFORCER does its
job for you. Welcome to the family: SECO-LARM, your dealer, and you!
IMPORTANT
This ENFORCER security system contains many innovative features and unique functions. Please
read this Owners Manual carefully in order to understand all of this alarm’s security and convenience
features. Some features may require the addition of sensors or accessories not included with this
alarm. Please consult your professional SECO-LARM dealer.
NOTICE
The information and specifications printed in this manual are current at the time of publication.
However, the SECO-LARM policy is one of continual development and improvement. For this reason,
SECO-LARM reserves the right to change specifications without notice. SECO-LARM is also not
responsible for misprints or typographical errors.
Copyright © 2005 SECO-LARM® U.S.A., Inc. All rights reserved. This material may not be
reproduced or copied, in whole or in part, without the written permission of SECO-LARM. This
vehicle security system is protected by patents in the U.S.A., Great Britain, Germany, Hungary,
Taiwan, China, Japan, and Korea. Other U.S.A. and international patents are pending.
INSTRUCTIONS TO THE USER
This equipment has been tested and found to comply with the limits for a Class B digital device,
pursuant to Part 15 of the FCC Rules. These limits are designed to provide reasonable protection
against harmful interference in a residential installation. This equipment generates, uses, and can
radiate radio frequency energy and, if not installed and used in accordance with the instructions,
may cause harmful interference to radio communications. However, there is no guarantee that
interference will not occur in a particular installation. If this equipment does cause harmful
interference to radio or television reception, which can be determined by turning the equipment off
and on, the user is encouraged to try to correct the interference by one of more of the following
measures:
* Reorient or relocate the receiving antenna.
* Increase the separation between the equipment and receiver.
* Connect the equipment into an outlet on a circuit different from that to which the receiver is connected.
* Consult the dealer or an experienced radio/TV technician for help.
This equipment has been certified to comply with the limits for a Class B computing device, pursuant
to FCC Rules. In order to maintain compliance with FCC regulations, shielded cables must be used
with this equipment. Operation with non-approved equipment or unshielded cables is likely to result
in interference to radio and TV reception. The user is cautioned that changes and modifications
made to the equipment without the approval of manufacturer could void the user's authority to
operate this equipment.
This device complies with FCC Rules Part 15. Operation is subject to the following two conditions:
(1) This device may not cause harmful interference, and (2) this device must accept any interference
that may be received, including interference that may cause undesired operation.
Page 2
SECO-LARM U.S.A., Inc.
Page 3
ENFORCER 100LB/100CB Owner's Manual
TABLE OF CONTENTS
Transmitter Functions ................................... 3
ENFORCER 100LB or ENFORCER 100CB? .... 3
Arming ......................................................... 4
Armed .......................................................... 4
Sensor Bypass .............................................. 5
Zone Bypass ................................................. 5
2nd Channel Output..................................... 5
Total Protection ............................................ 6
Disarming .................................................... 6
Emergency Disarm ....................................... 6
Valet ............................................................. 7
Patented Stay-safe Disarm .......................... 7
Chirp Delete (Silent arm/disarm) ................ 8
Emergency Call for Help (Panic) .................. 8
Power Door Locks ........................................ 8
Anti-Carjack Protection (optional) ............... 9
Tamper Indicator & Trigger Zone ID ............11
Ignition-Controlled Power Door Lock ..........10
Other Features ............................................. 10
Appendix 1 — Understanding the Siren Chirps
& Light Flashes .......................................11
Appendix 2 — Understanding the LED
flashes .................................................... 12
Appendix 3 — Programmable Features .... 12
Dual-stage Shock Sensor ............................. 7
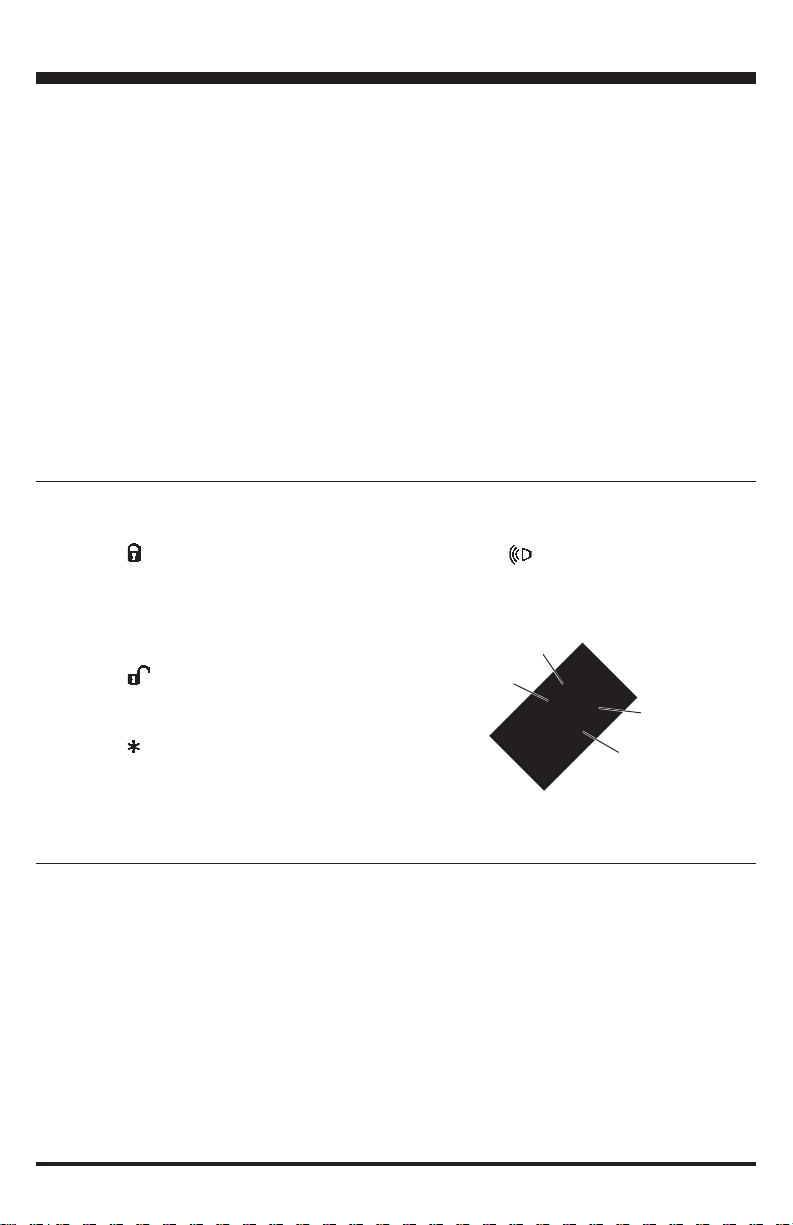
TRANSMITTER FUNCTIONS
1. Press the button to:
z Arm the alarm.
z Lock power door locks.
z Reset the alarm.
z Bypass an open zone.
2. Press the
z Disarm the alarm.
z Unlock power door locks.
3.
Press the button to:
z Operate channel 2 (such as popping
the trunk or rolling up the windows).
z Silently arm or disarm the alarm.
z Bypass the alarm’s sensors.
button to:
4. Press the
button to:
z Turn the siren ON in an emergency.
Lock
Auxiliary
Unlock
Panic
ENFORCER 100LB OR ENFORCER 100CB?
These two models offer the same convenience and protection features and have the same
operation. The only difference is that the ENFORCER 100CB features CODEBUMP
anti-codehopping technology. This means that the transmitter's code changes each time you
press one of its buttons to prevent thieves from using a code-grabbing device to copy the code.
Page 3
Page 4

ENFORCER 100LB/100CB Owner's Manual
ARMING
There are two different ways to arm your alarm.
Tell your dealer which is best for you:
Active Arming
Turn your ignition OFF. Close all the doors.
Then press the
and parking lights flash once, the alarm is
fully armed and the doors lock.
If the siren chirps 3 times, the alarm is either
waiting for the vehicle's delayed domelights
to turn OFF (if your vehicle is so equipped),
or it is telling you that one of the alarm's
zones (a door, or the hood or trunk) is either
open or is not functioning properly. (See
ZONE BYPASS, page 5). Also, check to
make sure your car's domelight switch was
not left in the ON position. These chirps can
be programmed off. See page 11.
Passive arming
Turn your ignition OFF, and open a door to
exit the car. When the last door is closed
(and the domelight turns OFF, if your car
has delayed domelights), the siren chirps
and parking lights flash once. The LED
flashes quickly during the 30-second
arming countdown, after which the siren
chirps and parking lights flash once more to
confirm the alarm is completely armed.
If you wish, you can open a door during the
arming countdown, and keep it open for as
long as needed. The LED turns OFF while
the door is opened. Close the last door,
and the siren will chirp and parking lights
button. If the siren chirps
flash once to show the 30-second arming
countdown has started again. The LED
will also begin to flash quickly.
If you close the last open door, and the
siren does not chirp and parking lights do
not flash, you know that one or more
openings are not closed properly. This is
SECO-LARM’s patented Quick and Quiet
Testing (Q.Q.T.), and it prevents you
from thinking your alarm is armed when it
may not be. In this case, double-check
that all the doors, as well as the hood and
trunk, are closed properly, and that your
vehicle’s domelights are OFF. If you
cannot locate the problem, but need to
arm the alarm, then press the
immediately arm the alarm and bypass
whatever zone is open (see ZONE
BYPASS, page 5).
NOTE — Under passive arming, you can
force your alarm to arm immediately any time
during the 30-second arming countdown by
pressing the
NOTE — Make sure your car’s domelight
switch is not in the ON position when you
arm your alarm either actively or passively,
otherwise the alarm may not arm properly if
the domelight switch is left ON.
NOTE — There are references to opening or
closing a door throughout this manual.
“Door” also includes your hood and trunk, if
they are protected. Consult your dealer.
button.
button to
ARMED
When the 30-sec. arming countdown ends, or
when the
alarm, the siren chirps and parking lights flash
Page 4
button is pressed to arm the
once, and the LED starts flashing to
show the alarm is armed.
SECO-LARM U.S.A., Inc.
Page 5

ENFORCER 100LB/100CB Owner's Manual
SENSOR BYPASS
This is useful if you know, based on
experience, that your shock sensor (or other
add-on sensors) will false trigger, such as
when you park near a construction site.
Should you wish to bypass your alarm's
sensors, first press the
alarm (even if the alarm is set for passive
arming). The siren chirps and the parking
lights flash once (three times if a zone is
bypassed) to confirm armed. Within three
seconds, press the
three times and the parking lights flash three
times to confirm sensors are bypassed. The
sensors are automatically restored the next
button to arm the
button. The siren chirps
ZONE BYPASS
When you press the
alarm, and the alarm responds with three
chirps and three parking light flashes, there
are two possibilities:
A. Delayed domelights — Delayed
domelights do not immediately turn OFF
when you close your car door. This is
normal. The alarm should protect all
doors once the domelights turn OFF.
B. A zone was bypassed — In other words,
the alarm has armed, but a door may not
be protected (either because it is open, or
because its pin switch is broken). If the
bypassed door is later closed, it will be
button to arm the
→
→
time the
NOTE — The chirps to confirm sensor bypass
will not sound if chirp delete is engaged.
However, the parking lights will still flash
three times. See CHIRP DELETE, page 8.
If your alarm indicates a bypassed zone, find
the cause as soon as possible to ensure your
vehicle is completely protected. For instance,
if your driver’s door is not properly closed
when you arm your alarm, a thief may be
able to open any door without setting off the
alarm.
NOTE — The chirps to confirm zone bypass
will not sound if chirp delete is engaged.
However, the parking lights will still flash three
times. See CHIRP DELETE, page 8.
button is pressed.
restored.
2nd CHANNEL OUTPUT
Your transmitter has an extra channel to
control optional accessories.
2nd channel is commonly used to "pop" the
trunk. To use, press the
seconds, either while the ignition is ON and
any door is opened, or while the ignition is
OFF. The alarm will disarm first to prevent the
button for two
siren from sounding.
(NOTE — If no doors
are connected directly to
your alarm, the 2nd
channel will not operate
with the ignition ON. Ask
your dealer for details.)
Page 5
Page 6

ENFORCER 100LB/100CB Owner's Manual
TOTAL PROTECTION
While your alarm is armed, your car is
protected in the following ways:
z Potential thieves or vandals will be warned
by the flashing LED.
z If a thief opens a door, the alarm
immediately sounds the siren and flashes
the parking lights for 30 seconds. If the
opened door is not closed and current
sensing has not been selected, the siren
and lights will trigger up to four 30-second
cycles, after which the alarm will rearm.
z Turning the ignition key ON will trigger the
alarm for 30 seconds.
z The starter disable prevents the car from
being started.
z ANTI-CARJACK (optional) is triggered if
someone opens and closes a door while
DISARMING
To disarm the alarm, press the button. The
siren chirps twice, the parking lights flash
twice, and the LED turns OFF. What happens
next depends on how your alarm is set (ask
your dealer):
Alarm set for active arming with Secure
Lock
OFF
The alarm is now completely disarmed.
Alarm set for active arming with Secure
TM
ON
Lock
The system will automatically rearm and
relock the doors 30 seconds later unless a
door is opened during this time. This
the ignition is ON.
z If the shock sensor detects light taps on the
car, it will trigger the pre-intrusion alert (the
siren chirps five times and the parking
lights flash five times) to warn potential
thieves and vandals. However, if it detects
a strong shock to the car, such as shock
caused by prying the trunk open, it will
trigger the alarm for 30 seconds. (See
DUAL-STAGE SHOCK SENSOR, page 7)
z Optional SECO-LARM shock, motion,
glass-break, and microwave sensors will
offer your alarm additional protection.
Ask your SECO-LARM dealer.
prevents accidental disarming. During
this 30-second period, the LED flashes
quickly.
Alarm set for passive arming
The system will automatically rearm itself
30 seconds later. If a door is opened, the
system temporarily disarms. Closing the
open door will again cause the system to
enter the 30-second rearm period.
NOTE — If set for Secure Lock
will lock when the system rearms. Otherwise,
the doors do not automatically relock.
, the doors
EMERGENCY DISARM
If you lose your transmitter, you can disarm
your alarm with the ignition key and the
“VEL” switch. While your alarm is either
armed or triggered, turn the ignition switch
ON. Within 15 seconds, press and release
the VEL switch three times. The siren and the
flashing lights stop if the alarm was
triggered, and then chirp and flash two
times. (Ask your dealer where the VEL button
Page 6
is hidden.)
NOTE — If you use emergency disarm, just turn
the ignition OFF and close the doors when you
leave your car, and the alarm arms automatically.
Next time you open a door, you will have 10
seconds of quiet to turn the ignition switch ON
and press the VEL button three times to disarm
the alarm. This feature is cancelled next time
you use your transmitter to arm or disarm your
alarm.
SECO-LARM U.S.A., Inc.
Page 7

ENFORCER 100LB/100CB Owner's Manual
VALET
Sometimes you may not wish your alarm to
arm when you leave your vehicle. (For
instance, if you leave your car with a valet
attendant, you may not want to teach him
how the alarm operates.) If your alarm is set
for active (manual) arming, this is easy —
don’t press the
not arm. However, if your alarm is set to arm
passively, use the valet mode to prevent it
from arming.
To enter valet, first disarm the alarm and turn
the ignition ON. Within 15 seconds, press
and release the VEL switch three times. The
button, and the alarm will
alarm is now in the valet mode. The siren
chirps and the parking lights flash once to
confirm.
To exit valet, just turn the ignition ON and,
within 15 seconds, press and release the VEL
switch three times. The siren chirps twice and
the parking lights flash twice to confirm that
valet is exited and the alarm is now disarmed.
If you press the
valet, the doors will lock or unlock, and the
parking lights will flash four times. The
alarm's emergency call for help and 2nd
channel output operate normally.
PATENTED STAY-SAFE DISARM
Any time your alarm is triggered (the siren is
sounding and the parking lights are flashing),
press the
button of the remote once to shut
the siren and flashing parking lights OFF
while the alarm stays completely armed.
or while the alarm is in
DUAL-STAGE SHOCK SENSOR
Your alarm includes a patented dual-stage
shock sensor.
The first stage (pre-intrusion alert) warns
thieves the alarm is armed. For instance, the
alarm will chirp three times and the parking
lights will flash three times if the sensor detects
a light bump to the vehicle. However, if a thief
attacks the car with sufficient force, the alarm
will trigger. (Your dealer can make the shock
sensor more or less sensitive to attack,
depending on your vehicle.)
NOTE — The shock sensor (and other add-on
sensors, and current sensing) will not trigger
the alarm until 4 seconds after the alarm is
armed.
Page 7
Page 8

ENFORCER 100LB/100CB Owner's Manual
CHIRP DELETE (silent arm/disarm)
There are times, especially at night, when you may
not want to hear the siren chirps. There are 2 ways
to delete chirps:
A. One-time delete — Just press the
time before you need the chirps deleted. For
instance, press the button before you press the
button to arm the alarm, and the chirps will
not sound, but the parking lights will still flash.
The chirps are restored the next time you press
any transmitter button.
B. Permanent delete — Your dealer can program
your alarm to delete the chirps on a permanent
basis.
NOTE — Either method deletes the arm, disarm, preintrusion, zone bypass, sensor bypass, emergency
disarm, valet, and tamper chirps. However, they do
not affect the flashing parking lights.
button any
Silent Arm
→
→
Silent Disarm
→
→
EMERGENCY CALL FOR HELP (Panic)
To trigger the alarm in an emergency, press
button for 2 seconds. The siren
the
sounds and the parking lights flash for about
30 seconds. The alarm and door lock/unlock
status do not change.
Stop the siren and the parking lights any time
by pressing any of the four buttons.
Note:
1. The alarm will be in the armed mode and
the doors will lock if the
exit the panic mode.
button is used to
2. The alarm will be in the disarmed mode
and the doors will unlock if the
is used to exit panic mode.
3. The alarm will be in the disarmed mode,
the doors will lock, and channel 2 output
will be activated if the
exit panic mode
4. The alarm and the door locks will return
to their original mode if the
used to exit panic mode.
button
button is used to
button is
POWER DOOR LOCKS
With this optional feature, your alarm can
automatically lock the doors when the
is pressed to arm the alarm and unlock the
doors when the
the alarm. For extra security, they lock
automatically if the alarm is triggered.
(Exception — See EMERGENCY CALL FOR
HELP above)
button is pressed to disarm
Page 8
button
Your alarm can also be programmed for
ignition-controlled operation. The doors can
be set to automatically lock when you turn the
ignition ON, and unlock when you turn the
ignition OFF.
NOTE — Under passive arming, and when
the SecureLock
doors automatically lock after the 30-second
exit delay is over and the alarm arms.
TM
function is enabled, the
SECO-LARM U.S.A., Inc.
Page 9

ENFORCER 100LB/100CB Owner's Manual
ANTI-CARJACK PROTECTION (optional)
A. Enabling the ANTI-CARJACK function:
If the ANTI-CARJACK toggle switch is not
installed, you cannot use the ANTI-CARJACK
function (please ask your dealer).
To enable the ANTI-CARJACK
function, put the ANTICARJACK toggle switch to the
ON position. If the ANTI-CARJACK
toggle switch is OFF, the ANTI-CARJACK
function cannot be entered.
Once the ANTI-CARJACK function is
enabled, you can disable it by turning the
ANTI-CARJACK toggle switch OFF. However,
this must be done before you turn the
ignition ON.
B. Stages of the ANTI-CARJACK mode:
1. Stage 1
a. ANTI-CARJACK is triggered if
someone opens and closes a door
while the ignition is ON. Once
ANTI-CARJACK is triggered, turning
OFF the ANTI-CARJACK toggle switch
will have no affect. At this point, Stage
1 begins. Stage 1 lasts for up to 30
seconds.
b. During the 30 seconds, the LED flashes
rapidly.
c. Pressing the VEL switch one
time during the 30 seconds
exits ANTI-CARJACK. Once
ANTI-CARJACK is exited, the
LED turns OFF.
d. If the ignition is switched
OFF at any time during the
30 seconds without first
pressing the VEL switch, Stage 1’s
30-second countdown will pause, but
ANTI-CARJACK will not exit.
The LED will turn OFF. The next time
the ignition is turned ON, Stage 1’s 30second countdown will pick up where it
left off.
2. Stage 2
a. Once Stage 1 ends, Stage 2
begins. Stage 2 also lasts for
up to 30 seconds.
b. While in Stage 2, the
LED continues to flash
rapidly, the parking
lights flash, and the
siren continuously
chirps.
c. Pressing the VEL switch at any
time during this stage exits ANTICARJACK provided the ignition is
still ON. (If the ignition is turned
OFF before pressingthe VEL switch,
the alarm jumps to Stage 3, see
below.) Once ANTI-CARJACK
is exited, the lights stop flashing,
the siren stops chirping, and the
LED turns OFF. The alarm can now
be used as normal.
3. Stage 3
a. Once Stage 2 ends,
Stage 3 immediately
begins.
b. While in Stage 3, the LED
remains rapidly flashing, and
the parking lights continue to
flash. However, the siren sound
changes from chirping to a full
blast (sound continuously). The
lights flash and the siren sounds
until the emergency disarm
procedure is performed or until 30
seconds after the ignition is turned
OFF.
c. The starter disable output is
engaged. This means
that turning the ignition
OFF or pressing the
VEL switch one time will have no
effect. The emergency disarm
procedure must be performed in
order to exit ANTI-CARJACK and
start the engine.
Page 9
Page 10

ENFORCER 100LB/100CB Owner's Manual
TAMPER INDICATORS & TRIGGER ZONE ID
If your alarm was triggered when you were
away, the siren will chirp two times and the
parking lights flash seven times when you
disarm your alarm. The LED flashes in quick
cycles to show where the car was violated as
follows:
z 1 flash — The ignition was turned on.
z 2 flashes — The alarm was triggered via
panic.
z 3 flashes — The shock sensor or other
add-on sensor was triggered.
z 4 flashes — A door was
opened.
z 5 flashes — The hood
or trunk was opened.
z 6 flashes — Current sensing was
triggered.
These “memory” flashes automatically reset
when the ignition is turned ON.
IGNITION-CONTROLLED POWER DOOR LOCKS
Your alarm can be programmed for ignition-controlled operation (doors lock when you turn the
ignition ON, and/or unlock when the ignition is turned OFF). Consult your dealer.
OTHER FEATURES
• Starter disable — With this optional
feature, while your alarm is armed, your car
will not start, even if a thief has your keys.
• Dual-power protection (DPP) — Helps
keep your alarm powered even if a thief cuts
the alarm’s main power line. (Optional —
ask your dealer.)
• Double Pulse Lock/Unlock — For vehicles
that requires two pulse signals to arm/lock &
disarm/unlock.
Page 10
SECO-LARM U.S.A., Inc.
Page 11

ENFORCER 100LB/100CB Owner's Manual
Appendix 1 — UNDERSTANDING THE SIREN
CHIRPS AND LIGHT FLASHES
A. 1 chirp/flash:
z When the
alarm is armed.
z When a door is closed, the alarm will
arm in 30 seconds (passive arming).
z 30 seconds after the ignition switch is
turned OFF and all doors are closed
(or delayed domelights turn OFF), the
alarm is armed (passive arming).
z Successfully entered the valet mode.
B. 2 chirps/flashes:
z When the
alarm is disarmed.
z Successfully exited the valet mode.
C. 3 chirps/flashes:
z When pressing the
alarm, indicates the alarm arms even
though it is not set properly (door not
closed, or broken switch, or domelight
is still ON.
NOTE: If the delayed domelights are
ON when the
siren will chirp 3 times. This gives the
impression that the door is open when
it may really be closed.
z When pressing the
by the button, indicates sensor is
bypassed.
z Completed emergency disarm.
z Pre-intrusion warns potential thieves or
vandals who trigger the first stage of
any dual-stage sensor that is
connected to the alarm.
button is pressed, the
button is pressed, the
button to arm the
button is pressed, the
button followed
D. 4 flashes only:
z When the
during the valet mode.
E. 2 Chirps/ 7 flashes:
z When pressing the
disarm the alarm, indicates the alarm
was triggered.
NOTE — The chirps for arm, disarm, zone
bypass, sensor bypass, emergency disarm,
valet, and tamper can be deleted. (Ask your
dealer.)
or button is pressed
button to
Page 11
Page 12

ENFORCER 100LB/100CB Owner's Manual
Appendix 2 — UNDERSTANDING THE LED
FLASHES
A. Arming indicator — Flashes quickly
during the 30-second rearm to show
passive arming countdown.
B. Door open indicator — OFF when a
hardwired door is opened during the
30-second rearm or passive arming
countdown.
C. Armed indicator — Flashes when the
alarm is armed.
D. Disarmed indicator — OFF when the
alarm is disarmed.
E. Tamper and triggered zone ID —
Flashes one or more times after the
alarm is disarmed to indicate which
zone was triggered.
F. RF reception indicator — ON while
any transmitter button is pressed.
G. Valet mode indicator — Flashes slowly
to indicate system is in valet mode.
H. Anti-Carjack — Rapid flashes to
indicate the system is in the anticarjack mode.
Appendix 3 — PROGRAMMABLE FEATURES
Programmable features allow you to customize your alarm. Your dealer can program them when
the alarm is installed.
z Permanent chirp delete — Can permanently disable the siren’s chirps. See page 8.
z Passive/active arming — Alarm is default at active arming. Press the
alarm. In passive arming, the alarm arms itself when you turn the ignition OFF and close the
last open door.
z Current sensing — Program the alarm for switch sensing only, or for both current and switch
sensing. Alarm is default at current and switch sensing.
z Ignition-controlled door lock and unlock — Can be set to lock and/or unlock the doors
automatically when the ignition is turned ON and/or OFF.
z Double Pulse Lock/Unlock — Alarm default is set at single pulse lock/unlock. Some vehicles
require a double pulse.
z 0.5/3.5-sec. door lock/unlock time — Alarm default is set at 0.5 sec.
TM
z SecureLock
arming mode, then the doors will automatically lock once the alarm arms. See page 8.
(Automatic Locking) - If this feature has been enabled under the automatic
Page 12
button to arm the
SECO-LARM U.S.A., Inc.
 Loading...