

SeaLand VacuFlush 3600 Series Owner's Manual

®
SeaLand
VACUUM TOILET
OWNER’S MANUAL
VacuFlush® 3600 Series All-Ceramic Toilets
3606 3609
IMPORTANT NOTICE
VacuFlush sanitation systems
must be installed according to
Dometic’s recommended procedures.
Do not attempt installation without
rst contacting a SeaLand
Certied Dealer, your nearest
Parts Distributor (see page 19),
or Dometic.
WARNING
!
This manual must be read and understood before installation, adjustment,
service, or maintenance is performed.
Modication of this product can result
in property damage.
Dometic Sanitation Corporation
13128 State Rt 226, PO Box 38
Big Prairie, OH 44611
SeaLand Product Customer Service: 1-800-321-9886
(8:00 a.m. - 5:00 p.m. ET)
1
TABLE OF CONTENTS
Toilet Model Identication . . . . . . . . . . . . . . . . . 2
Important Information Before Operation . . . . . . 3
Toilet Control Switches . . . . . . . . . . . . . . . . . . . 3
Operating Instructions . . . . . . . . . . . . . . . . . . . . 4
Proper Toilet Bowl Cleaning . . . . . . . . . . . . . . . 5
Winterizing . . . . . . . . . . . . . . . . . . . . . . . . . . . . 5
Flush Operation Timing Chart . . . . . . . . . . . . . . 5
Maintenance Schedule . . . . . . . . . . . . . . . . . . . 6
On-Board Spare Parts . . . . . . . . . . . . . . . . . . . . 6
Sanitation System Components . . . . . . . . . 6 – 8
Ordering Parts . . . . . . . . . . . . . . . . . . . . . . . . . . 8
WARNING – ELECTRICAL SYSTEM.
Turn off electrical power before servicing.
WARNING – MOTOR STARTS AUTOMATICALLY.
Turn off electrical power before servicing.
Deodorants and Special Tissue . . . . . . . . . . . . 9
Marine Sanitation Regulations . . . . . . . . . . . . . 9
Flush Mechanism Components . . . . . . . . . . . . 10
Manual Flush Override . . . . . . . . . . . . . . . . . . .11
Toilet System Electrical Specications . . . . . . .11
Troubleshooting . . . . . . . . . . . . . . . . . . . . 12 – 15
System Wiring Diagrams . . . . . . . . . . . . . 16 – 18
Customer Service . . . . . . . . . . . . . . . . . . . . . . 19
Warranty . . . . . . . . . . . . . . . . . . . . . . . . . . . . . 20
CAUTION –
System may contain vacuum after shut-down.
Read and understand the complete contents of this manual before operating or servicing the sanitation
system. Failure to follow any precautions may result in damage to the sanitation system.
TOILET MODEL IDENTIFICATION
The model identication label is located under the toilet
seat. It will show the model number and serial number.
DOMETIC CORPORATION
P.O. BOX 38, 13128 STATE RT 226 (800) 321-9886
BIG PRAIRIE, OH 44611 USA
MODEL NO. 000
SERIAL NUMBER
000000
Dometic, SeaLand, VacuFlush and Flush and Forget are registered trademarks
of Dometic Corporation.
2
IMPORTANT INFORMATION BEFORE OPERATION
1. Fill freshwater tank and add deodorant to holding tank through toilet bowl.
2. Make sure all guests understand the operation of the toilet system and the ushing instruction label is easy for
guests to read. This label is located under the seat, and is easily read when the seat is raised.
3. Remember the vacuum pump starts automatically. Shut off the toilet system before servicing and do not leave the
boat with toilet system breaker on.
4.
Never use drain openers, alcohol, solvents, etc. in the system.
5. If the system does not function properly, refer to the Troubleshooting section of this manual and repair as
necessary. If problem persists, contact your local SeaLand dealer or see the Customer Service section of this
manual.
FLUSH and FORGET® OPERATION
1. To add water to the toilet before
using (if necessary), press “Add
Water” button until desired water
level is reached.
2. To flush toilet, press “Flus h”
button. Water will ow into bowl
for two seconds, then ush ball
will open. Toilet will not flush
again until “OK to Flush” light
is on.
3. Do no t dispose of san itar y
napkins or other non-dissolving
items in toilet, such as facial
tissue or paper towels. These
items can cause plugging of the
sanitation system.
ADD W A T E R FLUSH
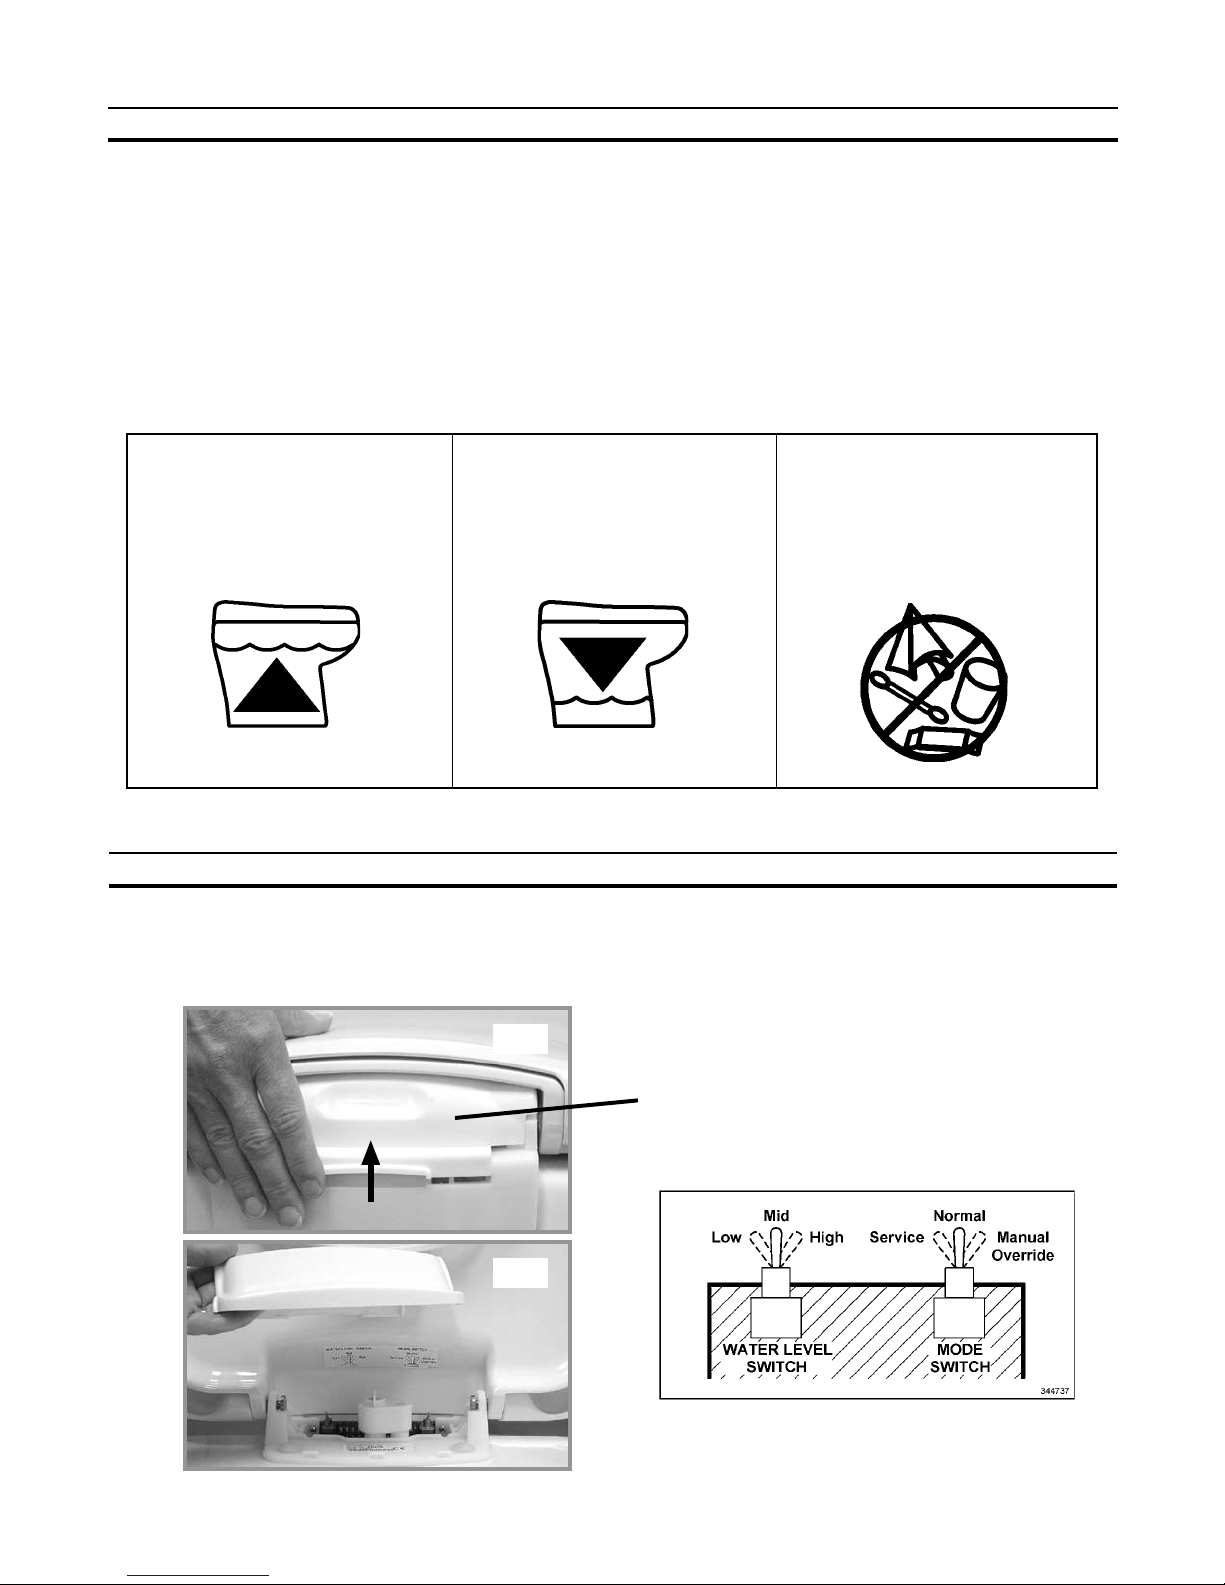
TOILET CONTROL SWITCHES
Water Level and Mode control switches are located under the control module access cover which is under the toilet
seat. Remove the cover by unlatching the cover tab behind the toilet seat (Fig. A), then, with the toilet seat raised
up and tilted forward slightly, lift up the cover (Fig. B). The control switch label (see below) is found under the seat
behind the access cover.
Fig. A
CONTROL MODULE ACCESS COVER
CONTROL SWITCHES
Fig. B
3

OPERATING INSTRUCTIONS
1. Adding More Water To Toilet Bowl
Press the “Add Water” switch until the desired water level is attained. To prevent overowing the toilet, a timer
limits the amount of water that can be added.
2. Flushing The Toilet
When the ush panel’s green “OK to Flush” light is on, and the red “Do Not Flush” light is off, press the “Flush”
switch down for a moment then release it. Holding the switch down will not prolong the ush cycle nor start a new
ush cycle. The switch must be allowed to return to the “off” position and the vacuum must be allowed to recharge
before another ush cycle can be initiated. A full holding tank will also prevent the toilet from ushing.
3. Selecting Automatic Water Rell Levels:
The Water Level switch is located under the control module access cover on the left side of the board. There are
three water rell levels available. The microprocessor-controlled water valve will rell the toilet bowl according
to your water level selection. To reinstall the access cover. set the cover over the control module and press the
push-pins into the grommets located in the toilet seat mounting bracket.
LOW Level
Use this setting to conserve water. This position may be desirable to reduce the chance of water splashing out
of the bowl during rough travel conditions. If more water is needed for ushing, press the “Add Water” ush
switch. Water ow will stop after nine seconds to prevent overow.
MID Level
Use this position to keep the toilet bowl clean, especially when family and friends may be using the toilet. If
more water is still needed for ushing, pressing the “Add Water” ush switch will provide up to six seconds of
additional water rell time.
HIGH Level
Use this position if the MID level does not provide a clean toilet bowl. This position is not recommended while
underway. If more water is still desirable for ushing, pressing the “Add Water” ush switch will provide up to
three seconds of additional water rell time.
4. Mode Switch
The Mode switch is located on the right side of the control module. It lets you switch between three function
settings:
NORMAL
Use this setting for ushing the toilet.
SERVICE
Use this position for cleaning the toilet bowl and ush ball seal. The ush ball will open automatically and remain
open in this position. Pressing the “Add Water” ush switch provides water. You may want to turn off power
to the vacuum generator or vacuum pump when in the SERVICE position for long periods of time to prevent
unnecessary vacuum pump operation.
Note: The control module allows 15 seconds of water ow for cleaning. If more water is required, return
the switch to the NORMAL position then back to the SERVICE position.
MANUAL OVERRIDE
Use this position to ush the toilet in the event of power or battery failure. The OVERRIDE position releases the
ush valve motor brake, and allows manual opening of the ush ball via the access hole in the left side of the
vitreous china base. Remove the large plug in the left side of the toilet, insert a large, at-bladed screwdriver
into the slot of the motor shaft, and turn counterclockwise to open the ush ball.
Return the switch to the SERVICE position, then to the NORMAL position to reset the control circuit in the
toilet.
4
AUTOMATIC FLUSH OPERATION TIMING CHART
Flush and Forget® Cycle Time
Water Valve
Low Rell
Mid Rell
Flush Valve
Begin Opening for 0.1 sec.
High Rell
Wait for 0.2 sec.
Continue Opening
Held Open
Closing Time
Additional “Add Water” Time Allowance
1
0 2.5
2
5 1284
7
6 13 159 143
Flush Cycle In Seconds
“Add Water” Time Limits
Water Valve
Low Position
Mid Position
High Position
Service Position
1
0 2.5
2 16
5 1284
“Add Water” Time In Seconds
7
6 13 159 143
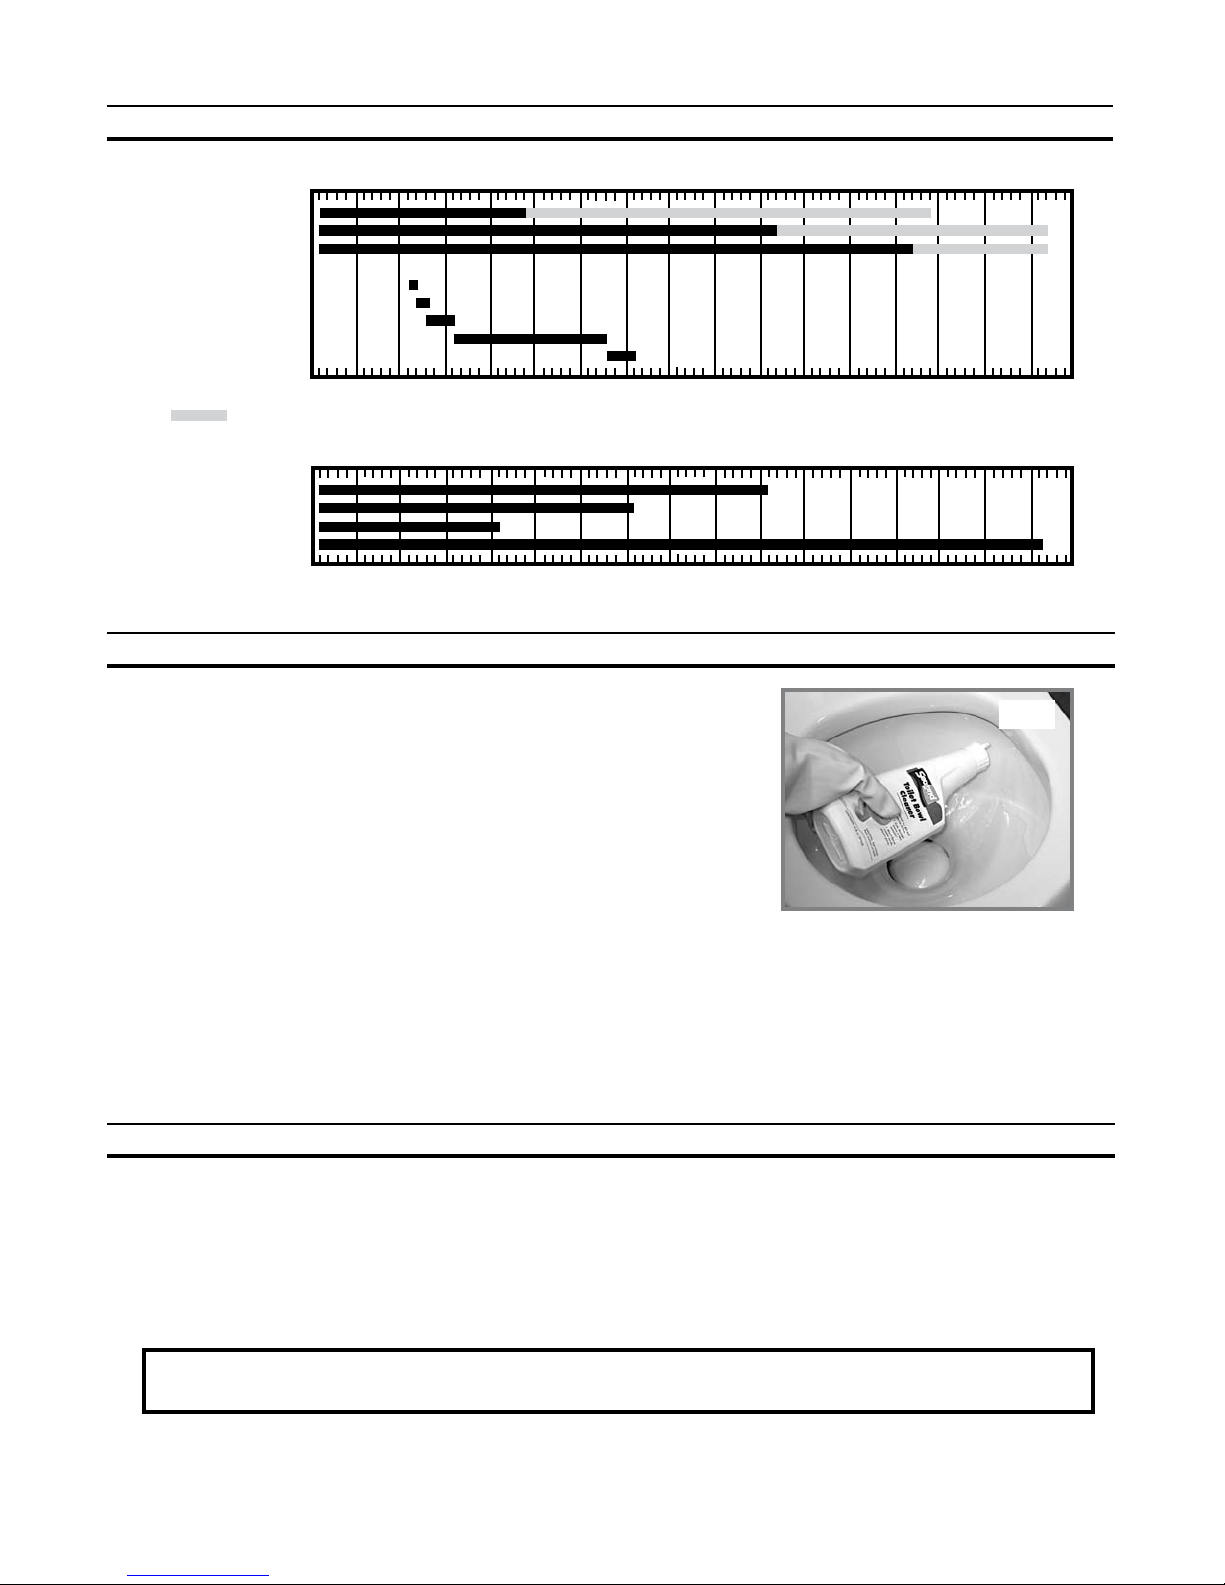
PROPER TOILET BOWL CLEANING
For stubborn stains, use SeaLand® Toilet Bowl Cleaner (Fig. C). It’s manufactured especially for use with SeaLand toilets. In certain locations where water
is hard, a build-up of lime may dull the toilet bowl nish. Restore the shine
with this SeaLand cleaner. If you cannot nd it in your area, contact Dometic
for your nearest dealer. If the cleaner is not available, you can also use most
non-abrasive bathroom and toilet bowl cleaners (Bar Keeper's Friend® spray
cleaner, Clorox® toilet bowl cleaner, SaniFlush® toilet bowl cleaner, etc.).
Please follow label instructions.
10
10
11
16
11
Fig. C
To avoid damaging the Teon®-coated seal, DO NOT USE:
– abrasives (Comet®, Soft Scrub® cleansers etc.)
– caustic chemicals (Drano® clog remover, etc.)
– lubricants and cleaners containing alcohols or petroleum distillates
(Pam® cooking spray, Pine-Sol® cleaner, WD-40® lubricant, etc.).
® Bar Keepers Friend is a registered trademark of SerVaas Laboratories Inc.
® Clorox, Pine-Sol and Soft Scrub are registered trademarks of The Clorox Co.
® Comet is a registered trademark of Prestige Brands International.
® Drano is a registered trademark of S.C. Johnson & Son Inc.
® Pam is a registered trademark of ConAgra Foods.
® Sani-Flush is a registered trademark of Reckitt Benckiser Inc.
® Teon is a registered trademark of DuPont Co.
® WD-40 is a registered trademark of WD-40 Company.
WINTERIZING
At the end of each boating season, the VacuFlush toilet system must be winterized for storage. The following procedure
should be used:
1. Pump out holding tank.
2. Thoroughly ush system with fresh water.
3. Drain freshwater tank.
4. Add freshwater antifreeze to freshwater tank.
CAUTION: The use of freshwater antifreeze that contains alcohol will result in damage to your sanitation
system. Only use propylene glycol freshwater antifreeze that does not contain alcohol.
5. Flush freshwater antifreeze and water mixture through toilet
and into the waste holding tank. Each installation is different
so amounts may vary. User discretion is required to assure
adequate protection.
6. Turn off electrical power.
5

MAINTENANCE SCHEDULE
Maintenance intervals and normal parts replacement vary widely depending on numerous factors such as frequency
of system use, quality of ushing water, etc. The following chart is intended strictly as a general guide in keeping the
sanitation system 100% ready for any conditions of use.
Maintenance Procedure
Recommended
Date of Service
ROUTINE MAINTENANCE
Toilet ush ball seal cleaning
Tighten toilet seat mounting
hardware
Monthly
Monthly (or as needed)
SeaLand Toilet Bowl Cleaner
N/A
MAJOR SYSTEM MAINTENANCE
Replace duckbill valves in vacuum pump or vacuum generator
Replace ush ball seal and ush
ball (if needed)
Every three years
Every three years
Duckbill Valve Kit
Flush Ball Seal Kit
Flush Ball
ON-BOARD SPARE PARTS
It is recommended that the following parts be kept on board at all times:
Description
Flush Ball Seal
Flush Ball
Water Valve
Vacuum Breaker Kit
Vacuum Switch Kit
1.5-inch Duckbill Valve Kit
(2 ea. per kit)
Part Number
see parts list
see parts list
see parts list
see parts list
see parts list
see parts list
Quantity Where Used
1
1
1
1
1
1
3600 Series Toilet
Vacuum Generating System
Parts Required
SANITATION SYSTEM COMPONENTS
*
*
*
*
* Optional SeaLand components
6
 Loading...