

SeaLand Traveler 500 Plus Series,Traveler Lite 100 Series,SEALAND 2000 Series,Traveler 2000 Series Owner's Manual

®
SEALAND
FINE CHINA TOILET
OWNER’S MANUAL
Traveler® 500
Traveler Lite
Plus
Series, 2000 Series,
®
100 Series Toilets
WARNING
!
This manual must be read and understood before installation, adjustment,
service, or maintenance is performed.
Modification of this product can
result in property damage.
Dometic Corporation
13128 State Rt. 226, P.O. Box 38
Big Prairie, OH 44611-0038 USA
SeaLand Product Hotline 1-800-321-9886
(8:00 a.m. - 5:00 p.m. ET)
1

2
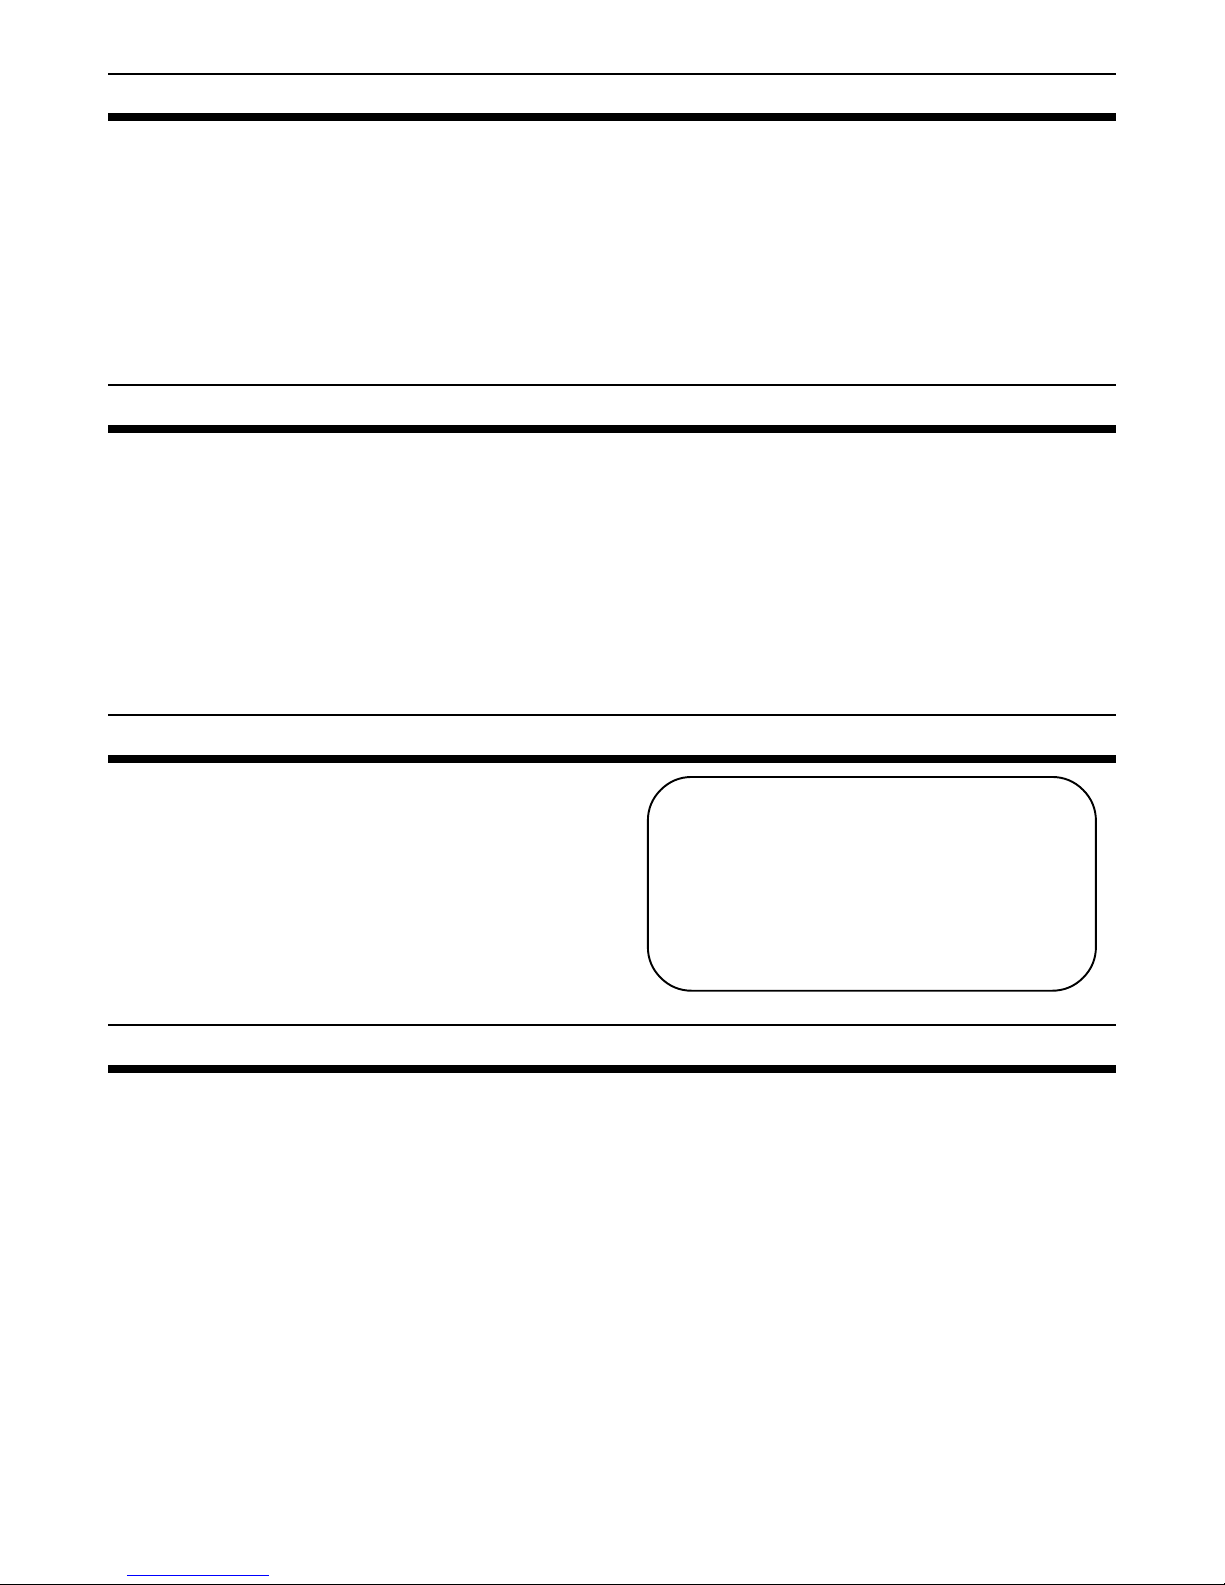
TABLE OF CONTENTS
Important Information .............................................. 3
Toilet Model Identification ....................................... 3
How to Use ............................................................ 3
Installation.............................................................. 4
Pedestal and Pedal Cover Installation..................... 4
Proper Cleaning and Maintenance .......................... 5
Winterizing ............................................................. 5
Deodorants and Special Tissue .............................. 6
Service Tip ............................................................. 6
Troubleshooting Guide ....................................... 7 - 9
100 Series Parts List ........................................... 10
500 Plus Series Parts List .................................... 11
2000 Series Parts List .......................................... 12
Dimensional Specifications................................... 13
Ordering Parts ...................................................... 14
Parts Distributors ................................................. 14
Manufacturer’s Limited Warranties ....................... 16
IMPORTANT INFORMATION
1. Do not use chlorine or caustic chemicals, such as laundry bleach or drain opening types, in the system. These
products damage the seals in toilets and dump valves.
2. Do not permit foreign objects (paper towels, paper cups, diapers, sanitary napkins, etc.) to be flushed through
the toilet.
3. Mechanical seal toilets, like SeaLand Traveler units, are designed to only discharge directly into a holding
tank. Horizontal pipe runs as found in conventional residential or commercial plumbing systems cannot be
accommodated.
4. Toilet bowl and flush seals must be regularly cleaned and winterized according to “Proper Cleaning and
Maintenance” and “Winterizing” procedures on page 5, or your warranty coverage may be voided.
TOILET MODEL IDENTIFICATION
The model identification label is located on the toilet base
and will show the model number and serial number. Follow
instructions for removing toilet pedestal cover in “Pedestal
and Pedal Cover Installation” on page 4. Traveler Lite Model
110 identification label is on the back of the base. If label is
not available, please refer to “Dimensional Specifications”
on page 13 for toilet model identification.
DOMETIC CORPORATION
P.O. BOX 38, 13128 STATE RT 226 (800) 321-9886
BIG PRAIRIE, OH 44611 USA
MODEL NO.
SERIAL NUMBER
000
000000
HOW TO USE
To prepare the Traveler toilet for use, check to be sure water supply to the toilet is connected. Turn on water supply and
check system for leaks. Flush toilet and check for leaks.
To properly use the Traveler toilet, follow these simple instructions:
1. To add water to the toilet, lift or raise the flush lever until desired water level is reached.
Generally, more water is required only when flushing solids.
2. To flush toilet, push lever all the way down until contents leave toilet bowl. Water flow pressures vary at
different locations, therefore holding the flush lever down for 4-8 seconds may be required. We require a
minimum flow to the toilet of two gpm (7.6 lpm) for proper rim and bowl wash.
3. Release flush lever by allowing it to snap back, which permits positive sealing around the flush ball.
4. A small amount of water should remain in bowl.
Note: Holding flush lever down longer than necessary results in excessive water usage.
3
INSTALLATION
1. To replace an older toilet, turn off water supply to toilet.
Disconnect water line at toilet water valve. Unscrew floor bolt
nuts and remove toilet. Discard old floor seal and mounting
bolts. The old floor flange may be used if it is in good
condition and has four (4) bolt locations. [Only two bolts are
All Traveler toilets
and Traveler Lite
Model 111
(4-bolt connection)
Traveler Lite
Model 110
(2-bolt connection)
required for Traveler Lite Model 110.]
NOTE: If old floor flange cannot be used and cannot be
removed, please use a SeaLand Universal Mounting Kit,
available from your SeaLand dealer.
Fig. A
2. When installing new floor flange, make certain that the toilet
mounting bolts align properly with Traveler toilet mounting
pattern.
3. Secure flange to floor using flat head screws through
countersunk holes in flange. Insert floor bolts into slotted holes
Fig. B
in flange (Figure A).
4. If toilet is being installed in a shower stall, apply a 1/4" thick
by 3/4" wide bead of glazing compound around the circumference of the floor flange (Figure B).
5. Install seat assembly with hinges and screws provided.
Traveler Models 510/511 will also accept handicap or household decorative seats. [Traveler Lite Models 110/111 seats
are already installed.]
6. Position floor seal by pressing the floor bolts up through holes
in the seal.
7. Set toilet in place with bolts protruding up through mounting
holes in base (Figure C).
8. Install washers and hex nuts provided with toilet. Snug nuts
Fig. C
Fig. D
Insert
two
wood
screws
in rear
of base.
down equally with standard 7/16" open end wrench. Remove
excess glazing compound from around base in shower stall
installation. For Traveler Lite Model 110, also install two wood
screws provided in two holes at rear of base. (See Figure C).
9. Connect water supply line to water valve (1/2" MPT) inlet
using appropriate fittings or an extension (Figure D). For
Traveler Lite Model 110, you must remove water valve cover
from flush pedal before connecting water supply line (see instructions below).
10. Turn on water supply and flush toilet to test for leaks.
11. For all models except Traveler Lite Model 110, attach pedestal and pedal covers to toilet base (see installation
instructions below).
PEDESTAL AND PEDAL COVER INSTALLATION
ALL TRAVELER TOILETS AND TRAVELER LITE MODEL 111:
1. Wrap pedestal cover
around base so that it
closes as shown.
TRAVELER LITE MODEL 110:
1. Press button on back of
pedal to release water
valve cover.
2. Tall model – screw
cover together. Short
model – snap together.
3. Slide pedal cover onto
foot pedal rod.
2. Pull on bottom of cover
to remove it. Cover
snaps back into place.
4
4. Secure side plate onto
pedal cover with screws.
PROPER CLEANING AND MAINTENANCE
The Traveler toilet should be cleaned regularly for maximum sanitation and operational efficiency. You can clean it just as you would a household toilet. Do not use
caustic chemicals, such as drain-opening types, as they will damage
the seals.
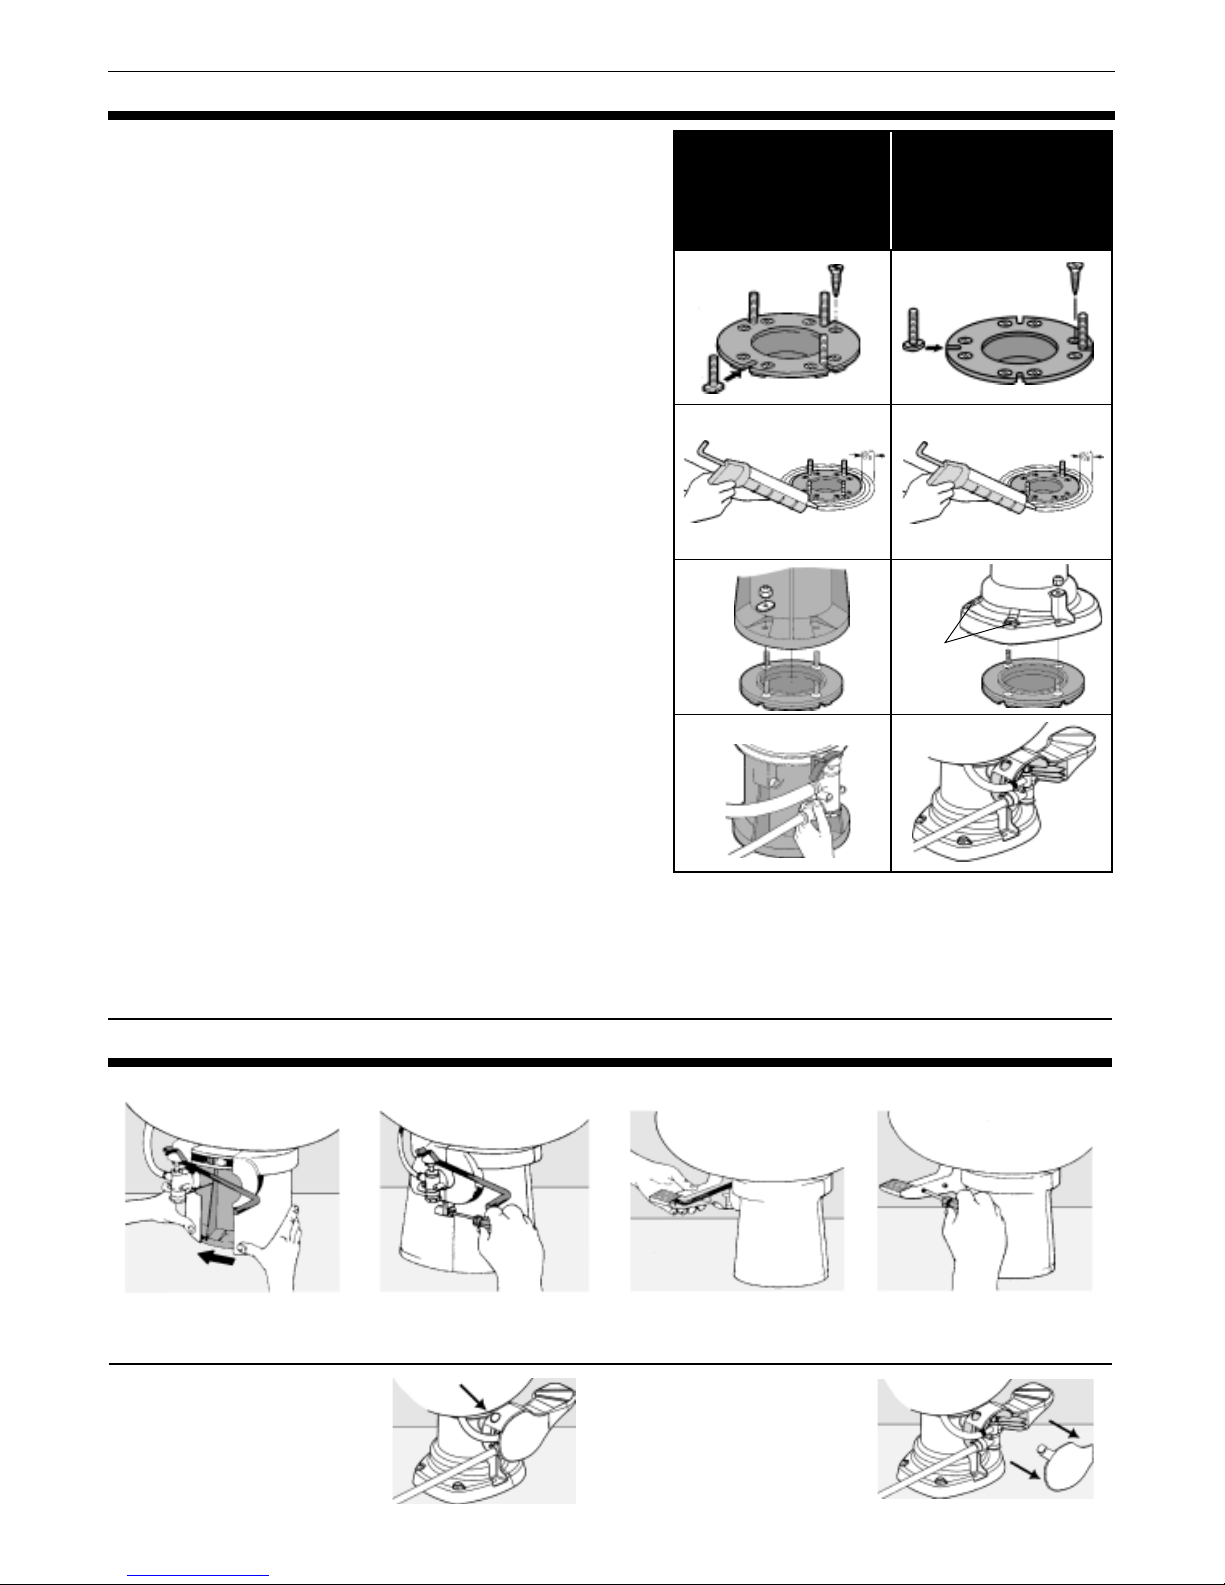
BOWL CLEANING: For stubborn stains, use SeaLand® Bowl and Seal Cleaner
(Fig. A). It’s manufactured especially for use with Traveler and Traveler Lite toilets.
In certain locations where water is hard, a build-up of lime may dull the toilet bowl
finish. Restore the shine with this SeaLand cleaner. If you cannot find it in your
area, contact SeaLand for your nearest dealer. If the cleaner is not available, you
can also use Bar Keepers Friend® cleanser. It is not necessary to vigorously scrub
with either product. Please follow label instructions.
SEAL CLEANING: After an extended time, mineral deposits from hard water can
build up under the edge of the rubber bowl seal, resulting in a slow leakdown of
water from the bowl. To prevent this mineral build-up, periodically clean under the
bowl seal with SeaLand Bowl and Seal Cleaner (Fig. B).
1. Shut off water supply.
2. Apply cleaner onto the seal cleaning tool (supplied with new toilet), open the
flush ball by pressing on flush lever, and scrub under the seal. Make sure to
push bristles between bottom of seal and top of flush ball surface to scrub all
parts of seal that come into contact with flush ball.
3. Close ball and wait 2-3 minutes.
4. Open flush ball. Use brush and water to rinse away cleanser and loosened deposits.
Fig. A
Fig. B
WINTERIZING
At the end of each season, the Traveler or Traveler Lite toilet should be winterized
for storage, by either draining or using potable water-safe antifreeze in the system.
To drain:
1. Thoroughly flush system with fresh water.
2. Empty holding tank.
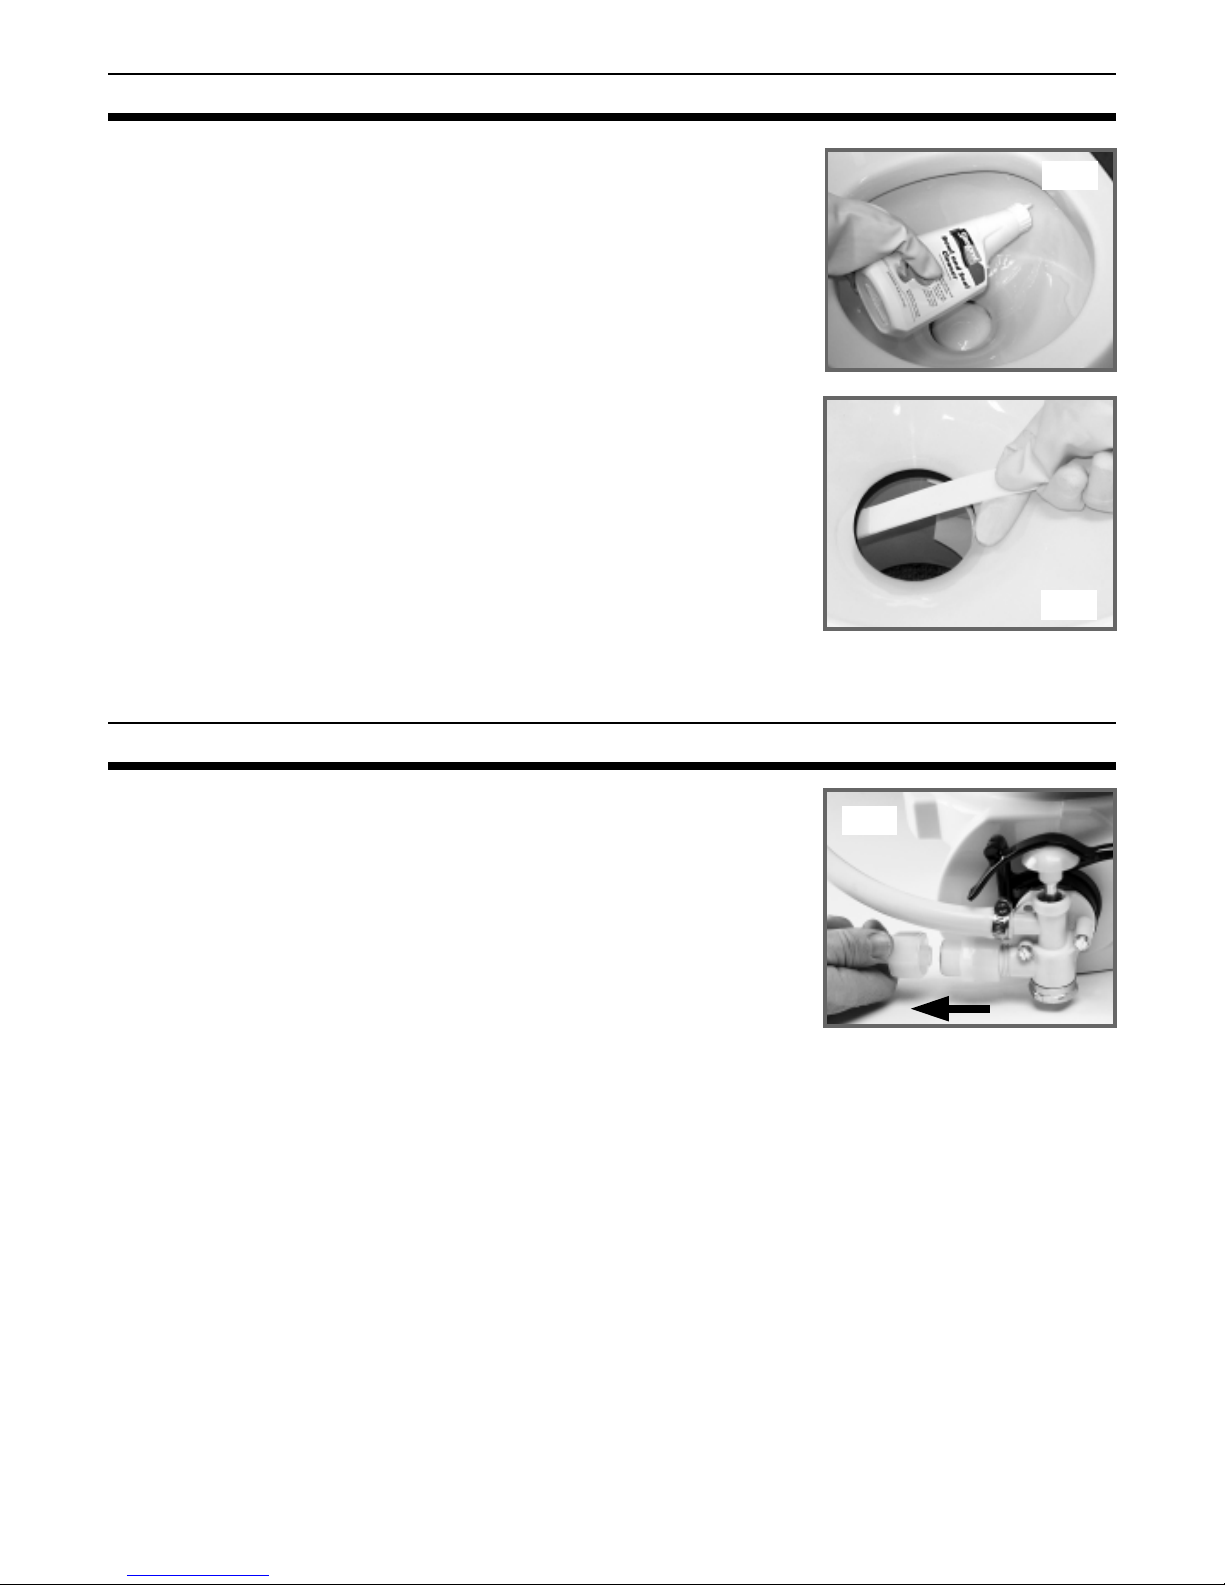
3. Shut off water supply to toilet(s), and remove inlet waterline (Fig. C).
Do not remove brass cap on bottom of valve.
4. Press flush lever until all water is drained from toilet(s).
To use antifreeze:
1. Drain potable water tank.
2. Add freshwater antifreeze to potable water tank.
3. Flush potable water antifreeze and water mixture through toilet(s) and into the waste holding tank. Each
installation is different, so amounts may vary. User discretion is required to assure adequate protection.
4. Empty holding tank.
NOTE: Use nontoxic antifreeze designated for potable water systems. (See vehicle owner’s manual.)
CAUTION: Never use automotive-type antifreeze in freshwater systems.
Fig. C
5
 Loading...