

Page 1
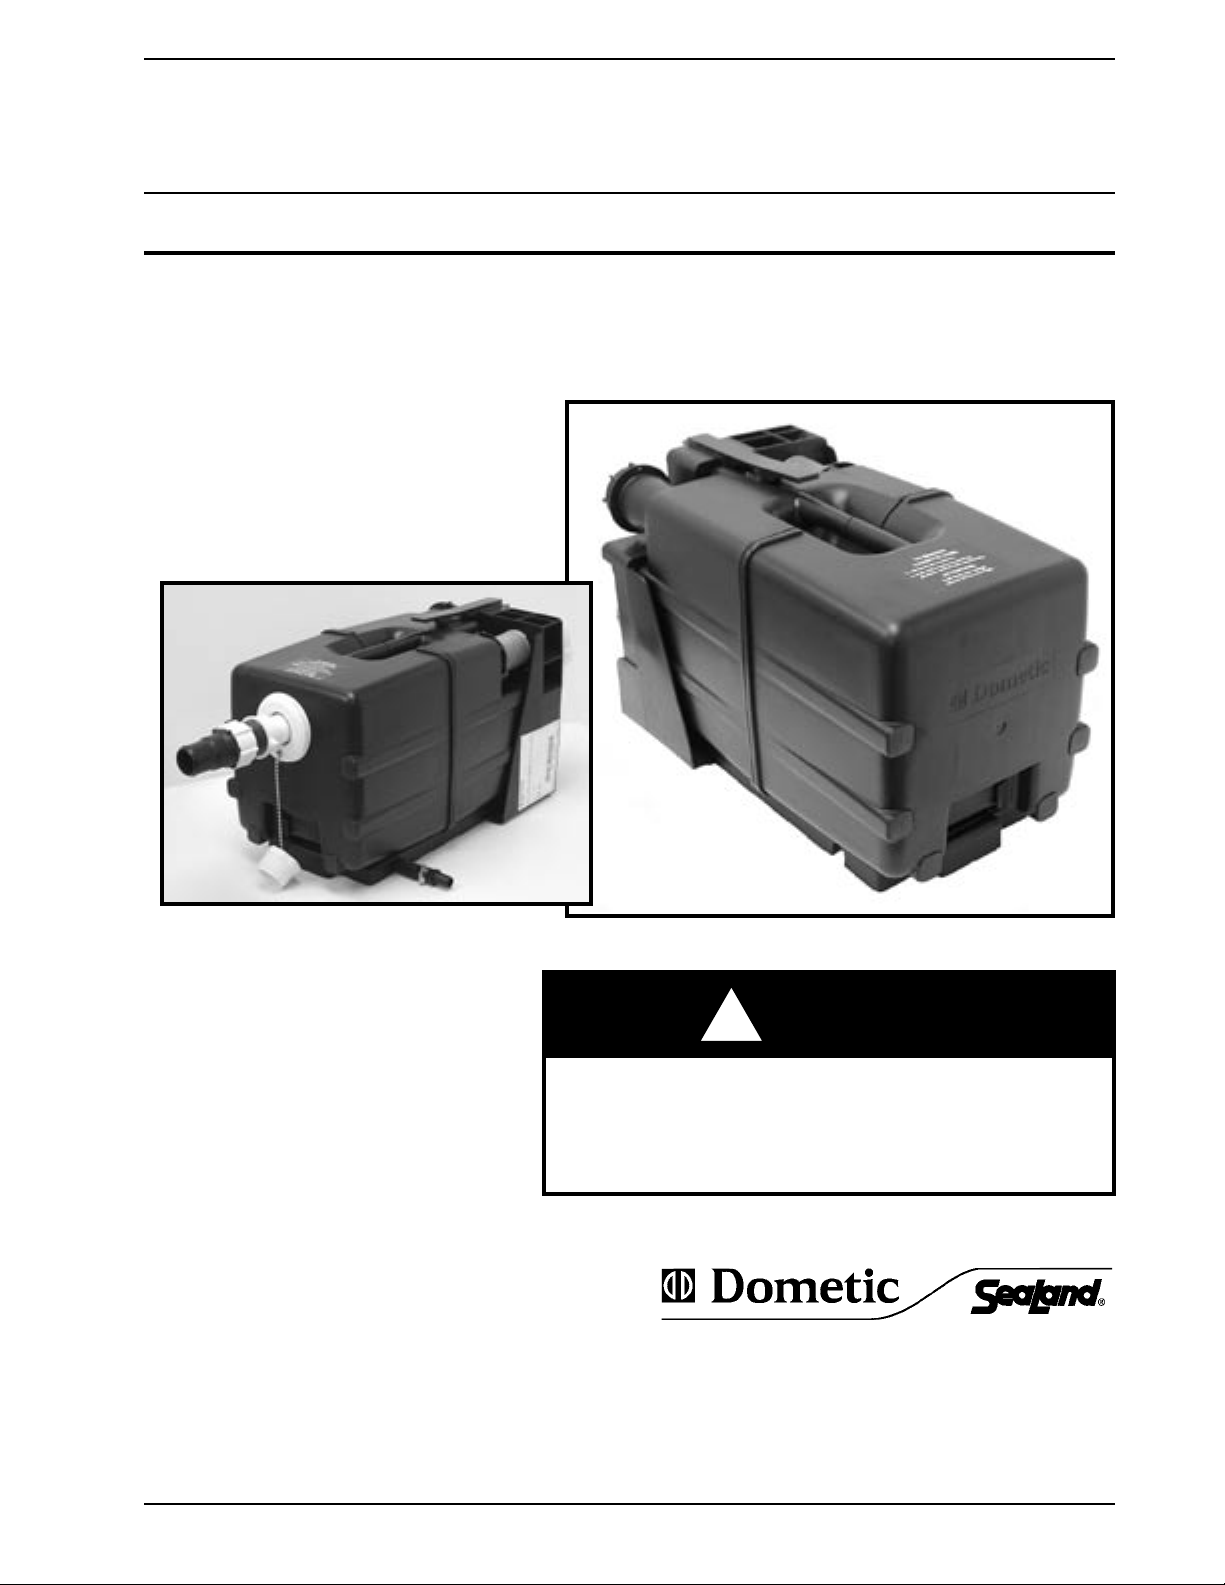
2500 Series
CASSETTE VACUUM TANK
OWNER’S MANUAL
Portable (2510) or Permanent (2520, 2521) Holding Tank System
for use with VacuFlush® Ceramic Toilet
NOTICE:
This product is
not recommended
for use on sailboats.
25102520
WARNING
!
This manual must be read and understood
before service or maintenance is performed.
Modification of this product can result in
property damage.
Dometic Corporation • Sanitation Systems
13128 State Rt. 226, P.O. Box 38
Big Prairie, OH 44611-0038 USA
SeaLand Product Hotline 1-800-321-9886
(8:00 a.m. - 5:00 p.m. ET)
www.DometicSanitation.com
1
Page 2
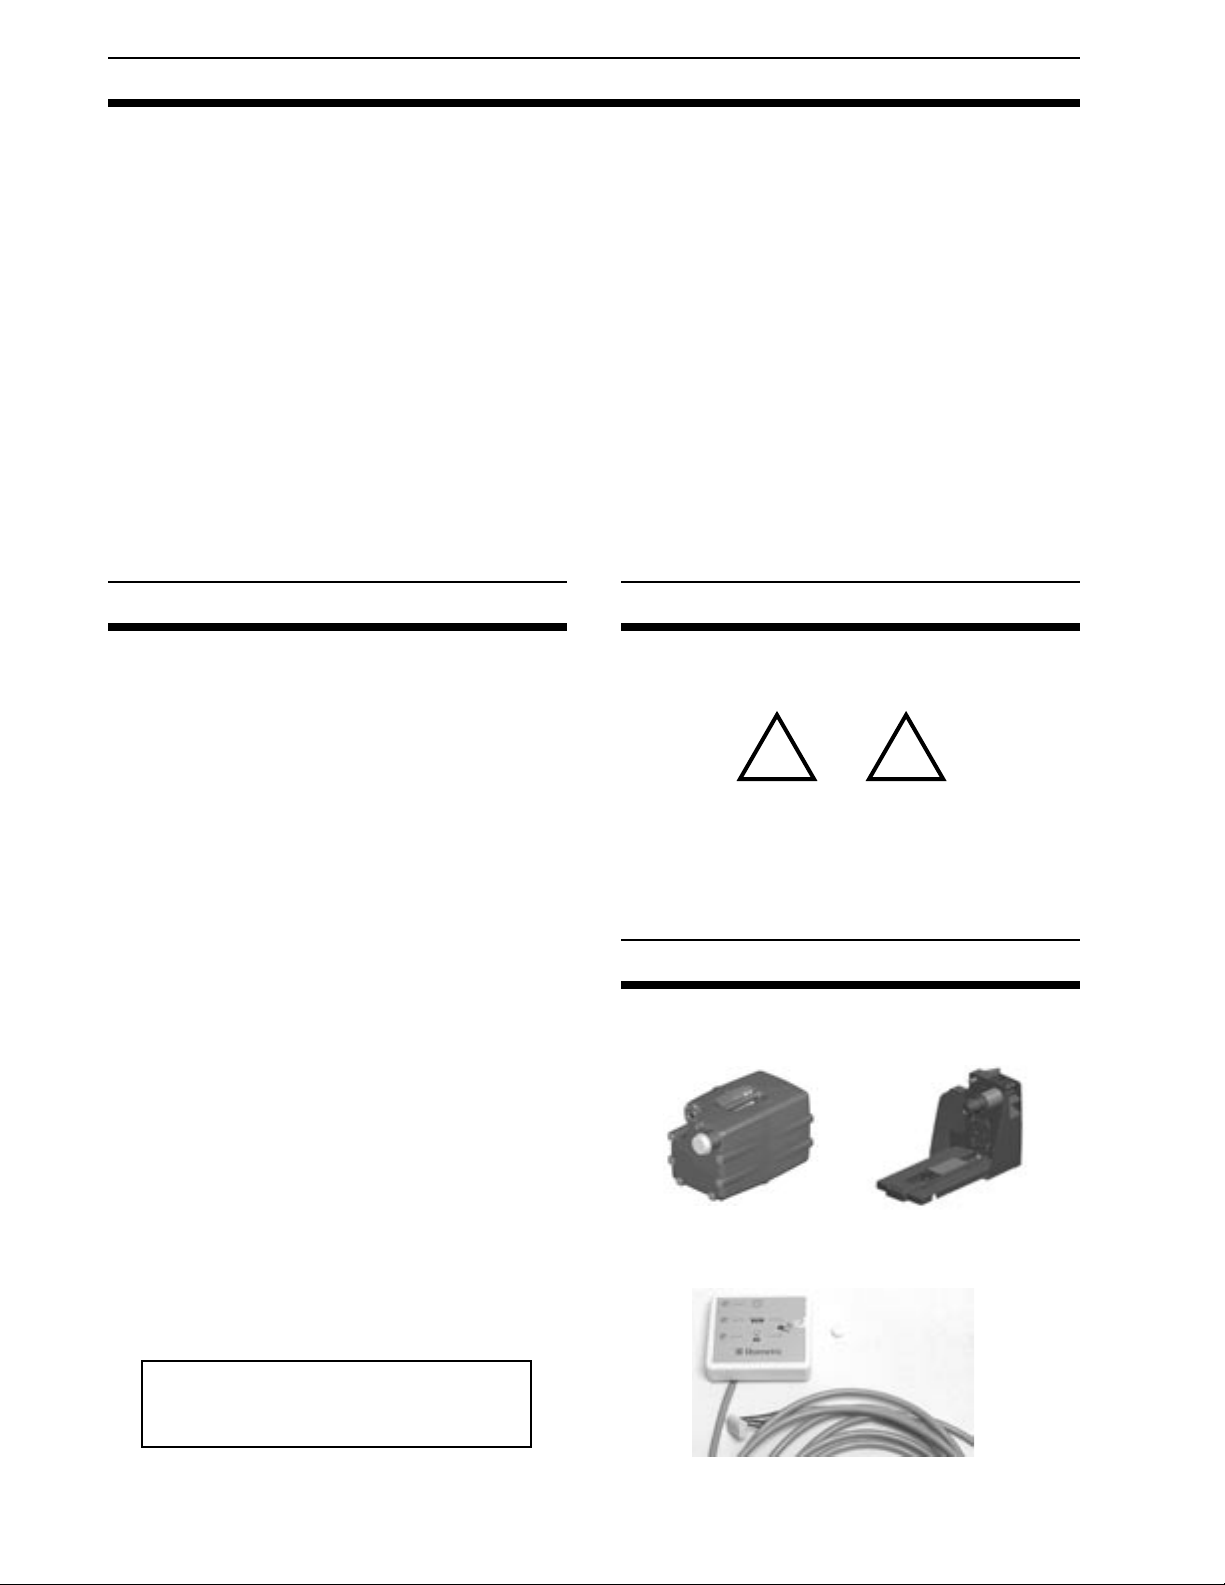
TABLE OF CONTENTS
Introduction . . . . . . . . . . . . . . . . . . . . . . . . . . . . . 2
For Your Safety. . . . . . . . . . . . . . . . . . . . . . . . . . . 2
System Components . . . . . . . . . . . . . . . . . . . . . . 2
Installation . . . . . . . . . . . . . . . . . . . . . . . . . . . .3 - 6
Docking Platform Riser. . . . . . . . . . . . . . . . . . . .3
Docking Platform Base . . . . . . . . . . . . . . . . . . . . 3
Inserting cassette tank . . . . . . . . . . . . . . . . . . . .4
Connecting sanitation hose . . . . . . . . . . . . . . . .4
How to make installation easier . . . . . . . . . . . . .5
Sanitation hose layouts . . . . . . . . . . . . . . . . . . .5
Electrical installation . . . . . . . . . . . . . . . . . . . . . . 6
Wiring Diagram . . . . . . . . . . . . . . . . . . . . . . . . . . 7
These operating instructions should be kept in a safe place.
If this device is passed on to another owner, please include
these operating instructions with it.
INTRODUCTION
Do metic br ings the comf ort and effi ciency of
VacuFlush sanitation systems in an easy-to-use and
easy-to-maintain package.
Operation . . . . . . . . . . . . . . . . . . . . . . . . . . . . . 8 - 9
Status panel . . . . . . . . . . . . . . . . . . . . . . . . . . . .8
Start-up checklist . . . . . . . . . . . . . . . . . . . . . . . .8
Flushing the toilet . . . . . . . . . . . . . . . . . . . . . . . .8
Removing cassette tank . . . . . . . . . . . . . . . . . . .8
Emptying cassette tank . . . . . . . . . . . . . . . . . . .9
Cleaning cassette tank, docking platform. . . . . .9
Changing vent filter. . . . . . . . . . . . . . . . . . . . . . . 9
Troubleshooting . . . . . . . . . . . . . . . . . . . . . . . . . 10
Specifications . . . . . . . . . . . . . . . . . . . . . . . . . . . .11
Customer Service. . . . . . . . . . . . . . . . . . . . . . . . .11
Manufacturer’s One-Year Limited Warranty . . . . 12
FOR YOUR SAFETY
WARNING AND SAFETY NOTICES
Highly Efficient Freshwater Flushing – Uses very
little water to make water supplies last longer.
Very Low Power Consumption – 1.5 amps max.
Status Panel – Indicates vacuum status, holding
tank full level, tank removal status.
Removable Cassette Holding Tank – “No drip”
disconnect and built-in carry handle make it easy to
empty holding tank at disposal facility.
Integral Vent Filter – Prevents odors from escaping
the holding tank.
Safety Shut-off – Turns off vacuum pump when
tank reaches full level or is removed.
Compact, Flexible Installation – Cassette holding
tank takes up less than 1.6 cu. ft. (.045 cu. m), and
can be placed 20 feet (6 meters) from toilet.
!
DANGER
• When flushing the toilet, always keep the seat
lid closed.
SYSTEM COMPONENTS
Each cassette vacuum tank includes:
• Portable cassette
vacuum tank
ATTENTION
• Cassette docking
platform
Dometic reserves the right
to change specifications
without notice.
• Status panel
2
Page 3
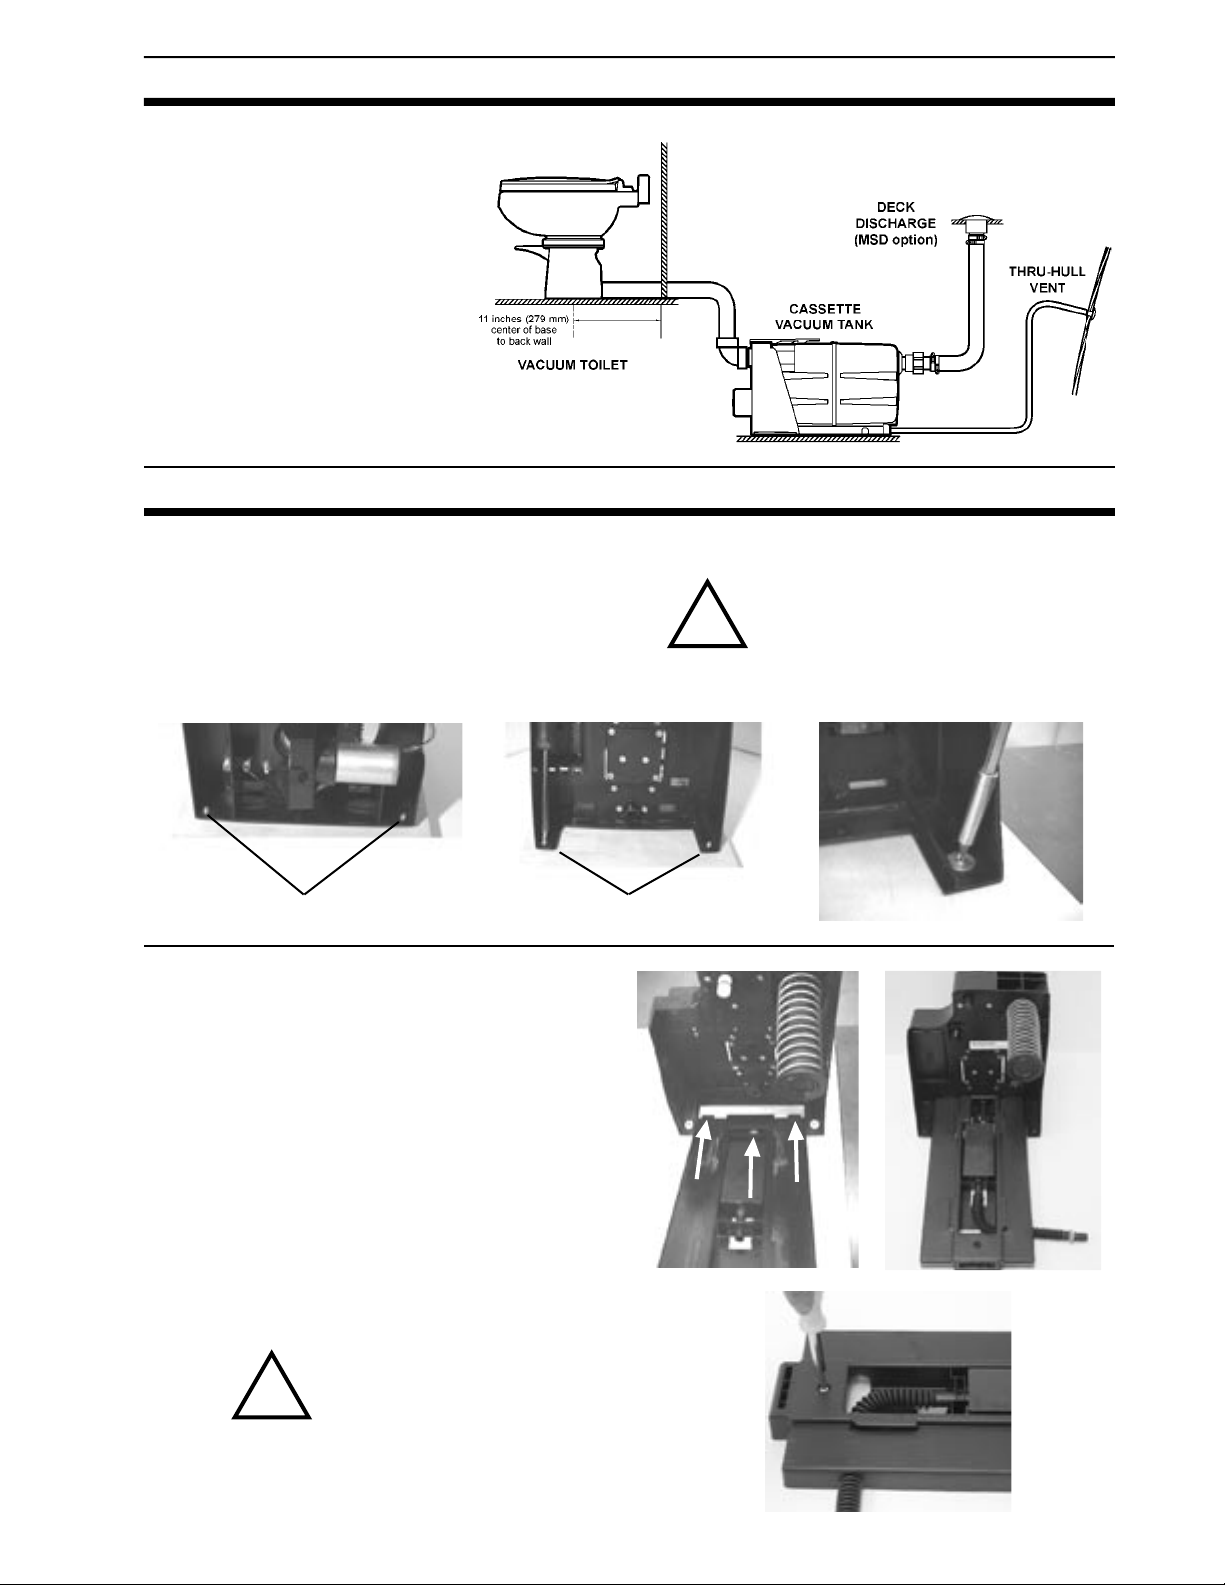
SANITATION SYSTEM LAYOUT
SYSTEM GUIDELINES
1. Cassette vacuum tank must be
used with VacuFlush toilet.
2. VacuFlush toilet must be
connected to pressurized
water supply (not shown).
3. Centerline of toilet base must
be 11 inches (279 mm) from
back wall.
4. 5/8-inch (16mm) ID vent hose
must be attached to vent fitting
(not included).
INSTALLATION
DOCKING PLATFORM RISER
1. The riser section of the docking platform is
mounted on a level floor using four screws (not
supplied). The floor must be strong enough
to support the weight of the cassette when full
(about 40 lbs. – 18 kg).
BACK FRONT
DOCKING PLATFORM BASE
1. The base section of the docking platform is attached to the riser. The base has two tabs (A)
that must be pushed into the respective slots
in the rear wall of the riser. Make sure that the
connection (B) for the carbon filter fits into the
space provided.
2. The ventilation hose (C) is routed out the side of
the base. Using barbed hose adapter provided,
route reinforced 5/8-inch (16mm) vent hose (not
supplied) to an outside vent fitting.
3. Fasten the base of the docking platform to the
surface (D).
ATTENTION
A
B
The riser and base sections
must be assembled on the
same level surface.
A
C
Make sure that the carbon
filter fits into the space
provided (B) and is
properly connected at
both ends
.
D
3
Page 4
INSTALLATION (cont’d)
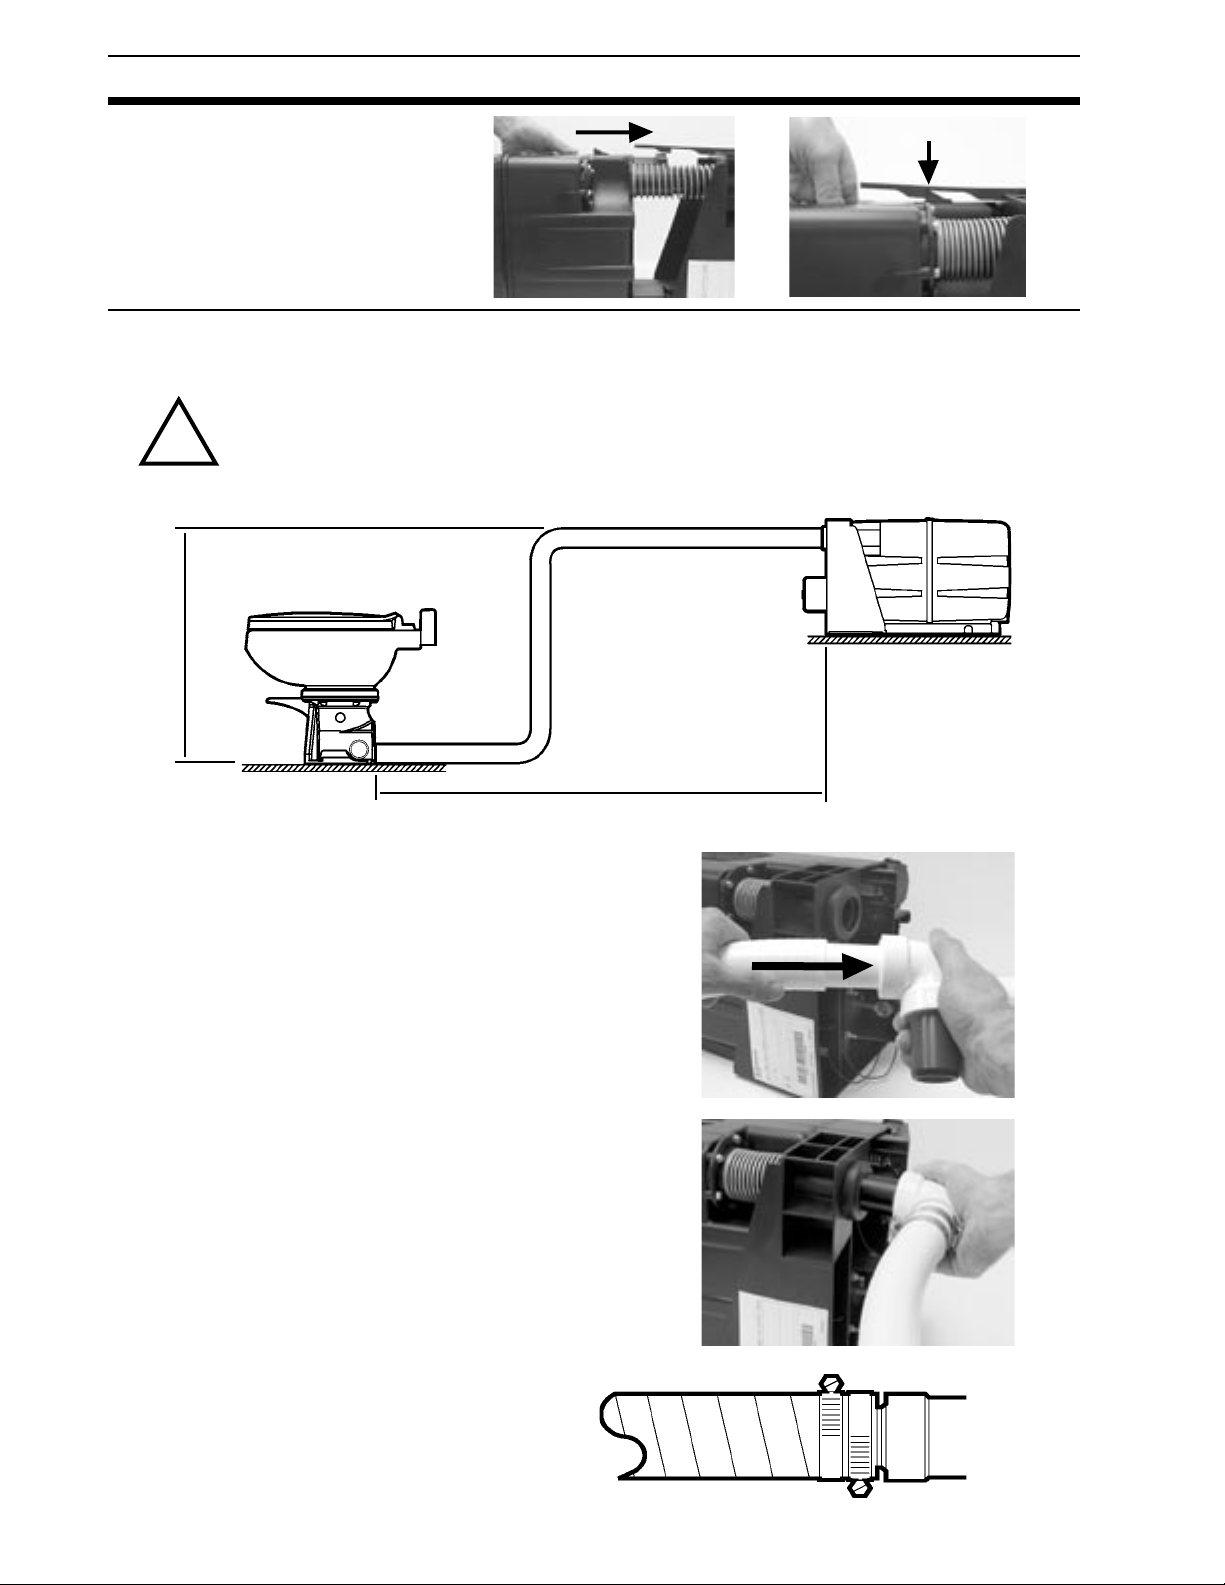
INSERTING CASSETTE TANK
Place the cassette tank on the dock-
ing platform, then push the cassette
tank toward the back of the docking
platform until the latch engages (A).
CONNECTING SANITATION HOSE
A.
Maximum difference in height
from toilet to cassette is 3 ft.
(1 m).
A
B.
Maximum length of hose
between toilet and cassette is
20 ft. (6 m).
A
1. Route the sanitation hose from the toilet outlet
to to the cassette tank inlet (see tips for routing
hose on next page).
2. Connect 1 1/2-in. (38 mm) ID sanitation hose to
the white adapter fitting of the elbow assembly
(see tips for connecting hose on next page).
After pushing hose and fitting together, use two
hose clamps to tighten the connection.
3. Push the black adapter fitting of the elbow
assembly into the cassette vacuum tank.
Turn adapter and hose to best angle.
Dometic recommends that each hose
connection be secured with two hose clamps
to prevent any leaks.
B
Position hose clamp screws 180°
apart from each other and tighten
clamps.
4
Page 5

INSTALLATION (cont’d)
HOW TO MAKE SYSTEM INSTALLATION (AND MAINTENANCE) EASIER
When connecting flexible hose to plastic fittings, use liquid dish soap on end of fitting and
inside hose end to make connection easier. A clockwise twist of the fitting while inserting it into
the hose makes connection easier.
Do not use any other lubricants, sealants or adhesives when connecting sanitation hoses and fittings.
Do not restrict the ability to pull the hose or pipe.
EXCELLENT
HOSE LAYOUTS
Trough sup-
port
YES
YES
Avoid binding corners and sharp bends.
Do not use wire ties to secure the hose or pipe.
Vertical hose runs should be installed as vertical as possible (no long runs at
an angle) for maximum vacuum efficiency.
YES
YES
YES
NO!
5
Page 6

INSTALLATION (cont’d)
ELECTRICAL INSTALLATION
Electrical installation
must be performed by
qualified personnel only!
The 12V DC connection to the toilet electronics
is shown in the photo.
Connect by correct polarity:
RED + WHITE –
The connection wire must be 14-gauge stranded
copper wire, and must be protected by a 5-amp
fuse (see wiring diagram).
POSITIVE +NEGATIVE
–
RED
WHITE
WARNING: Power wire s mus t be
WARNING : Power wires must be
connected as shown. Unit will not
connected as shown. Incorrect wiring
operate until power wires are properly
will damage circuit board.
connected.
Connecting Status Panel to
Docking Platform Circuit Board
The status panel’s 4-stranded cable connects to
the circuit board (shown below right).
.
Circuit board
location
6
Page 7

WIRING DIAGRAM
1 – “Tank Full” Float Switch
2 – Tank Interlock Switch
3 – Vacuum Switch
4 – Vacuum Pump Motor
7
Page 8

OPERATION
DISPLAY PANEL.
GREEN – Ready to flush.
RED – Cassette full, or cassette
LED
START-UP CHECKLIST
removed, or undervoltage.
Toilet cannot be flushed.
YELLOW – Vacuum pump is running.
Do not flush toilet.
Before first-time use of the 2500 series sanitation
system, check the following:
• The vacuum cassette tank is inserted correctly.
• The fresh water supply tank is full.
• The power supply is on.
FLUSHING THE TOILET
1. Make sure there is enough water in the bowl to
cover the flush ball and seal in bottom of bowl. Lift
pedal to add water to bowl (if needed for flushing
solids).
2. To flush, press pedal down to floor and hold down
for 2 or 3 seconds. Keep seat lid closed to reduce
noise.
3. The toilet will flush liquids effectively with only
1 pint (0.4 liters) of water per flush.
Never flush toilet while
sitting on open toilet seat,
or if the seat lid is up.
Do not flush any solid or
non-dissolving objects
such as paper towels,
plastic cans. They can
plug or damage system.
The yellow LED illuminates for about one minute.
Then the green LED illuminates.
THE SYSTEM IS READY FOR OPERATION.
4. Use only rapid-dissolving toilet paper designed
for low water flow toilets. Some residential bath
tissues may clog the system.
Flush toilet only when
green LED is illuminated.
5. If the cassette tank is full, the
tank is removed from the docking
platform, or the voltage is too low,
the red LED illuminates and the
system switches off. The system
cannot be used until the cassette
is emptied, inserted properly in the
docking platform, and the correct
voltage is restored.
REMOVING CASSETTE TANK
(model
1. Raise the latch (A). Holding the carrying
2. When reattaching cassette tank, make sure
2510)
handle (B), pull cassette straight back.
it is placed correctly on docking platform.
Make sure latch engages after pushing tank
into platform.
B
A
8
Page 9

OPERATION (cont’d)
EMPTYING CASSETTE TANK (model 2510)
1. Carry cassette tank to disposal facility.
2. With tank sitting level, open large cap (A), and
pour contents into disposal receptacle.
3. If possible, rinse the casse tte with fresh
water each time it is emptied.
A
EMPTYING CASSETTE TANK (
1. Turn off water to toilet and electrical power
to cassette vacuum tank.
2. Connect dockside discharge pump nozzle to
deck-mounted discharge fitting.
models
2520, 2521)
3. Flush valve in toilet should be held open (by press
ing down on flush pedal) when dockside pump is
used to empty holding tank.
4. Turn on dockside pump to discharge contents of
cassette tank.
CLEANING CASSETTE TANK AND DOCKING PLATFORM
Occasionally, clean the connection points
on the cassette tank and docking platform
where efflue nt may accumulate. See
photos for these locations.
-
CHANGING THE VENT FILTER
The filter in the docking platform should be changed about every year, depending on frequency of system use.
See parts list for part number to order.
1. Push filter toward platform riser.
2. Lift filter out of platform base. When inserting
new filter, make sure holes in filter line up
with vent line fittings.
9
Page 10

TROUBLESHOOTING
TROUBLESHOOTING
Problem Possible Cause Service Instructions
1. Vacuum pump will not run.
a. No electrical power.
b. Loose or broken electrical wiring.
c. Improper electrical connections.
d. Faulty vacuum switch.
e. Faulty motor.
f. Shut-down relay prevents pumping.
g. Replace motor.
h. Cassette tank not fully engaged in
docking platform.
a. Check input power, circuit breaker
and fuse.
b. Tighten or reconnect wires at docking
platform.
c. Be sure power wires and wires at
vacuum switch are connected to
proper terminals.
d. Replace vacuum switch.
e. Replace motor.
f. Empty the cassette tank. If cassette
is not seated in docking platform
properly, put cassette tank back into
docking platform until locking latch
engages.
g. Charge battery.
h. Engage cassette tank until latch
secures tank to platform.
2. Vacuum pump will not
shut off.
3. Vacuum pump is running too
slow, overheating, blowing
fuses or circuit breaker.
4. Toilet will not flush.
a. A vacuum leak exists in system.
b. Insufficient vacuum (pump creates less
than 10 inches Hg).
c. Faulty vacuum switch (pump creates
more than 10 inches Hg).
d. Diaphragm not pumping.
e. Blockage in inlet of vacuum pump.
a. Motor is worn or defective.
b. Plugged vent line or vent filter.
c. Improper wire size.
d. Improper voltage.
e. Vacuum pump clogged with tissue.
a. There is a blockage in the toilet.
b. Hose between toilet and cassette tank
is collapsed or kinked.
c. Foreign objects were flushed, causing
blockage in system.
d. Pump will not run.
a. Check for vacuum leaks in system
with vacuum gauge tester.
b. Isolate cassette tank (remove elbow
assembly) and use vacuum gauge to
check vacuum capability. Could be
worn valves.
c. Replace vacuum switch.
d. Tighten set screw in eccentric to mo-
tor shaft. Otherwise, check for damage to diaphragm and motor shaft.
Replace if necessary.
e. Clear blockage from pump inlet.
a. Check motor and replace if
necessary.
b. Disassemble and clean out vent line.
Replace vent filter if
necessary.
c. Wire size too small. Check
“Electrical Installation” section
for proper wire size.
d. Check input power for low voltage.
e. Remove and clean pump
assembly.
a. Open flush ball and check the
1-inch (25mm) orifice at the bottom of
the base for blockage and dislodge it.
Never use drain-opening or other
household plumbing chemicals.
b. Inspect hose and replace if collapsed
or kinked.
c. Clear foreign objects from system.
DO NOT flush any non-dissolving
items (i.e. sanitary napkins, facial
tissue, wet strength tissue, paper
towels, etc.) or excessive tissue.
Before flushing solids, be sure to add
water by lifting the flush lever.
d. See problem 1.
5. Tank will not discharge using dockside pump (model
2520/2521).
a. Tank is not adequately vented.
b. Blockage in check valve at tank outlet.
c. Blockage at bottom of discharge
diptube inside the tank.
10
a. Open flush valve in toilet by pressing
on pedal.
b. Disassemble the check valve and
remove blockage.
c. Remove diptube from tank and clear
blockage.
Page 11

SPECIFICATIONS
CASSETTE VACUUM TANK SPECIFICATIONS
Model Empty Weight Max. Weight Waste Capacity Power Pump Run Time
2510 13.3 lbs. (6 Kg) 42.1 lbs. (19.1 Kg) 3.6 gal. (14 L)
2520
2521
Specifications subject to change without notice.
14.3 lbs. (9.1 Kg) 43.1 lbs. (19.6 Kg) 3.0 gal. (11.5 L)
DIMENSIONS
MODEL 2510 MODEL 2520, 2521*
(MSD)
* Model 2521 (not shown) uses a 90° elbow discharge fitting.
Dimensions are same as Model 2520 with straight discharge fitting.
CUSTOMER SERVICE
There is a strong, worldwide network to assist in servicing
and maintaining your sanitation system. For the Authorized
Service Center near you, please call from 8:00 a.m. to 5:00
p.m. (ET) Monday through Friday. You may also write us at
Dometic Corp., P.O. Box 38, Big Prairie Ohio 44611.
Telephone: 1 800-321-9886 U.S.A. and Canada
330-496-3211 International
You may also contact or have your local dealer contact the
Parts Distributor nearest you for quick response to your
replacement parts needs. They carry a complete inventory
for the SeaLand product line.
Fax: 330-496-3097 U.S.A. and Canada
330-496-3220 International
12 VDC,
1.5 amp
approx. 60-70 sec.
U.S.A.
MASTER SANITATION
DISTRIBUTORS
U.S.A. – North Central
(IL, IN, KY, MI, OH)
Midwest Marine Supply
24300 Jefferson Ave.
St. Clair Shores, MI 48080
Tel: 586-778-8950
800-860-1540
Fax: 586-778-6108
E-mail: midwestmarine@yahoo.com
U.S.A. - Northeast
(CT, DE, DC, MA, MD, ME, NH, NJ,
NY, PA, RI, VA, VT, WV)
Northeast Marine Sanitation
69 Florida Street
Farmingdale, NY 11735
Tel: 631-752-7606
800-352-4323
Fax: 631-752-7615
888-283-7606
E-mail: northeast@northeastsanitation.
com
U.S.A. - Northwest
(AK, ID, MT, OR, WA, WY)
Marine Sanitation, Inc.
1900 N. Northlake Way, Suite 121
Seattle, WA 98103
Tel: 206-633-1110
800-624-9111
Fax: 206-633-0317
E-mail: marinesan@mindspring.com
U.S.A. - South Central
(AR, KS, LA, MO, MS, NM, OK, TX)
AER Supply
P.O. Box 349
2301 Nasa Road #1
Seabrook, TX 77586
Tel: 281-474-3276
800-767-7606
Fax: 281-474-2714
E-mail: sales@aersupply.com
U.S.A. - Southeast
(AL, FL, GA, NC, PR, SC, TN, VI)
Environmental Marine
111 S.W. 23rd Street, Suite A
Fort Lauderdale, FL 33315
Tel: 954-522-2626
800-522-2656
Fax: 954-522-5152
E-mail: info@environmentalmarine.
com
U.S.A. - Southwest
(AZ, CO, NV, UT, CA-south)
Ardemco Marine Specialties
778 West 17th Street
Costa Mesa, CA 92627
Tel: 949-722-7672
800-253-0115
Fax: 949-642-9582
E-mail: info@ardemco.com
U.S.A. – Upper Midwest
(IA, MN, NE, ND, SD, WI)
PowerHouse Marine
518 Logan
La Crosse, WI 54603
Tel: 608-784-9580
888-752-4539
Fax: 608-784-8422
E-mail: dave@powerhousemarine.com
U.S.A. – Northern California
Fox Marine
6545 Caballero
Buena Park, CA 95131
Tel: 800-826-2873
Fax: 562-983-6766
E-mail: foxmarco@pacbell.net
11
CANADA
MASTER SANITATION
DISTRIBUTORS
Canada - East
Eastern Marine Systems, Inc.
12-A Leslie Street
Toronto, Ontario M4M 3H7
Tel: 416-465-1668
888-764-1111
Fax: 416-465-2098
E-mail: info@eastmar.com
Canada - West
Western Marine Company
1494 Powell Street
Vancouver, BC V5L 5B5
Tel: 604-253-7721
800-663-0600
Fax: 604-253-2656
800-663-6790
E-mail: sales@westernmarine.com
INTERNATIONAL
SEALAND SANITATION SYSTEM
DISTRIBUTORS
Call 1-800-321-9886, email us at
sealand@dometicusa.com, or visit
www.DometicSanitation.com for the
distributor nearest you.
Page 12

MANUFACTURER’S ONE-YEAR LIMITED WARRANTY
Dometic Corporation warrants, to the original purchaser only, that this product, if used for personal, family
or household-like purposes, and if installed according to Dometic’s recommended procedures, is free from
defects in material and workmanship for a period of one year from the date of purchase.
If this Dometic product is placed in commercial or business use, it will be warranted, to the original purchaser only,
to be free of defects in material and workmanship for a period of ninety (90) days from the date of purchase.
Dometic reserves the right to replace or repair any part of this product that proves, upon inspection by Dometic,
to be defective in material or workmanship. All labor and transportation costs or charges incidental to warranty
service are to be borne by the purchaser-user.
EXCLUSIONS
IN NO EVENT SHALL DOMETIC BE LIABLE FOR INCIDENTAL OR CONSEQUENTIAL DAMAGES, FOR
DAMAGES RESULTING FROM IMPROPER INSTALLATION, OR FOR DAMAGES CAUSED BY NEGLECT,
ABUSE, ALTERATION OR USE OF UNAUTHORIZED COMPONENTS. ALL IMPLIED WARRANTIES,
INCLUDING ANY IMPLIED WARRANTY OF MERCHANTABILITY OR FITNESS FOR ANY PARTICULAR
PURPOSE, ARE LIMITED TO A PERIOD OF ONE YEAR FROM DATE OF PURCHASE.
IMPLIED WARRANTIES
No person is authorized to change, add to, or create any warranty or obligation other than that set forth
herein.
Implied warranties, including those of merchantability and fitness for a particular purpose, are limited to one (1)
year from the date of purchase for products used for personal, family or household purposes, and ninety (90)
days from the date of purchase for products placed in commercial or business use.
OTHER RIGHTS
Some states do not allow limitations on the duration of an implied warranty and some states do not allow
exclusions or limitations regarding incidental or consequential damages; so, the above limitations may not
apply to you. This warranty gives you specific legal rights, and you may have other rights which may vary from
state to state.
To obtain warranty service, first contact your local dealer from whom you purchased this product.
Dometic is a customer driven, world-leading provider of innovative leisure
products for the caravan, motorhome and marine markets. Dometic offers
a complete range of air conditioners, refrigerators, awnings, cookers,
sanitation systems, lighting, windows, doors and other equipment that
makes leisure life more comfortable away from home.
Dometic also provides refrigerators for specific use in hotel rooms,
offices and for storage of medical products and wine. Dometic’s products
are sold in almost 100 countries and are produced mainly in Dometic’s
own production facilities around the world. Dometic has more than
4,400 employees.
600344940 5/05
Dometic Corporation • Sanitation Systems
13128 State Rt. 226, P.O. Box 38
Big Prairie, OH 44611-0038 USA
330-496-3211
1-800-321-9886 • Fax: 330-496-3097
www.DometicSanitation.com
® Registered; ™ Trademark of Dometic Corporation.
© Dometic Corporation
12
 Loading...