

seagate BLACK ARMOR NAS420, BLACK ARMOR NAS440 QUICK START
BlackArmor® NAS 440/420 Quick Start Guide Kit Contents
WWW.SEAGATE.COM
Visit us at our Support pages for assistance with
• Installation:
• KnowledgeBase: FAQ’s, How to use this product
• Download Center: Installation software, utilities, and diagnostics
• Warranty Information
• And all of your other storage needs
A soft copy of your comprehensive User Guide is included with your product.
Click the Help Icon for assistance.
To contact Support, visit us at our Contact Us page.
© 2009 Seagate Technology LLC. All rights reserved. Seagate, Seagate Technology, the Wave logo, and BlackArmor are trademarks or registered trademarks of Seagate
Technology LLC or one of its affiliated companies in the United States and/or other countries. All other trademarks or registered trademarks are the property of their respective
owners. When referring to hard drive capacity, one gigabyte, or GB, equals one billion bytes and one terabyte, or TB, equals one thousand billion bytes. Your computer’s
operating system may use a different standard of measurement and report a lower capacity. In addition, some of the listed capacity is used for formatting and other functions
and will not be available for data storage. Seagate reserves the right to change, without notice, product offerings or specifications.
Seagate Technology LLC
920 Disc Drive
Scotts Valley
CA 95066 U.S.A.
PN: 100560500B 02/09
Additional instructions and troubleshooting assistance
?
?
100560500
Centralised Network Storage Server
Quick Start Guide
440 420
Welcome to your BlackArmor Network Attached Storage
(NAS) server Quick Start Guide. This guide will help you
complete a basic installation using a computer running
Windows or Mac.
If you need an introduction to the server first, or would
like help understanding the setup process before you
begin, read the BlackArmor User Guide.
1. Seagate BlackArmor NAS Server
2. Power Adapter
3. Ethernet cable
4. Installation CD
5. Quick Start Guide
6. Warranty card/flyer
1
2
3
5
4
6
A Quick Tour of BlackArmor® Server Features
1
LCD Screen
The LCD screen on the front of your BlackArmor server displays current server settings and status
information, including “event” messages that appear when a problem occurs on the server. Use the
buttons beside the screen to scroll up and down through the available information. Press and hold
either button to reveal more detail about currently displayed information.
For more information, see the BlackArmor User Guide.
2
LED Signals
The LEDs on the front of your BlackArmor server indicate server status and network activity, as
described in this table:
LED STATE INDICATION ACTION TO TAKE
Power Solid Blue Server is powered on and ready No action required.
for use.
Blinking Server is powering on. Wait until this LED stops blinking
Blue RAID system is rebuilding. before accessing the server.
System Status On (Blue) Server is ready for use. No action required.
On (Amber) Server has a system error. Check the LAN port and disk drive
LEDs to locate the source of the
problem. Refer to the BlackArmor
User Guide for help solving problems.
LAN Port 1 and 2 Solid Blue Network connection is detected. No action required.
Blinking Blue Network connection is busy. No action required.
Off No network connection Check Ethernet cables, switch/router
is detected. cables, and Internet connection for
disruption.
1
System status
LAN port 1 activity
LAN port 2 activity
USB port 1
Setting Up Your BlackArmor® ServerSetting Up Your BlackArmor® Server
1. Connect the server. 2. Install and open BlackArmor Discovery.
a. Insert the installation CD into your computer. The installation wizard opens automatically.
b. Follow the on-screen instructions to complete the installation.
Install both BlackArmor Discovery and BlackArmor Backup unless you are already using another
backup software program.
c. Open BlackArmor Discovery by double-clicking the icon on your desktop (Windows) or in your
Applications folder (Mac).
2
3. Link to your BlackArmor server and open BlackArmor Manager.
2
3
1
When BlackArmor Discovery opens, it automatically begins searching for all NAS servers on your network.
a. (Windows) From the list of discovered servers, select your BlackArmor server, click View Drive
Details to see pre set share (folders) ready for use. To mange or change the default settings
click Manage.
(Mac) From the list of discovered servers, select your BlackArmor server, then click Manage.
Note: You can open BlackArmor Discovery again at any time by double-clicking the icon on your
desktop (Windows) or in your Applications folder (Mac).
b. Follow the on-screen instructions to complete the initial setup. When prompted, log in using the
default settings. (The password is case-sensitive.)
user name: admin
password: admin
When the LEDs indicate a change in settings or status, information about this change appears on the
LCD screen.
For more information, including a description of all the LEDs on the server, see the BlackArmor User Guide.
3
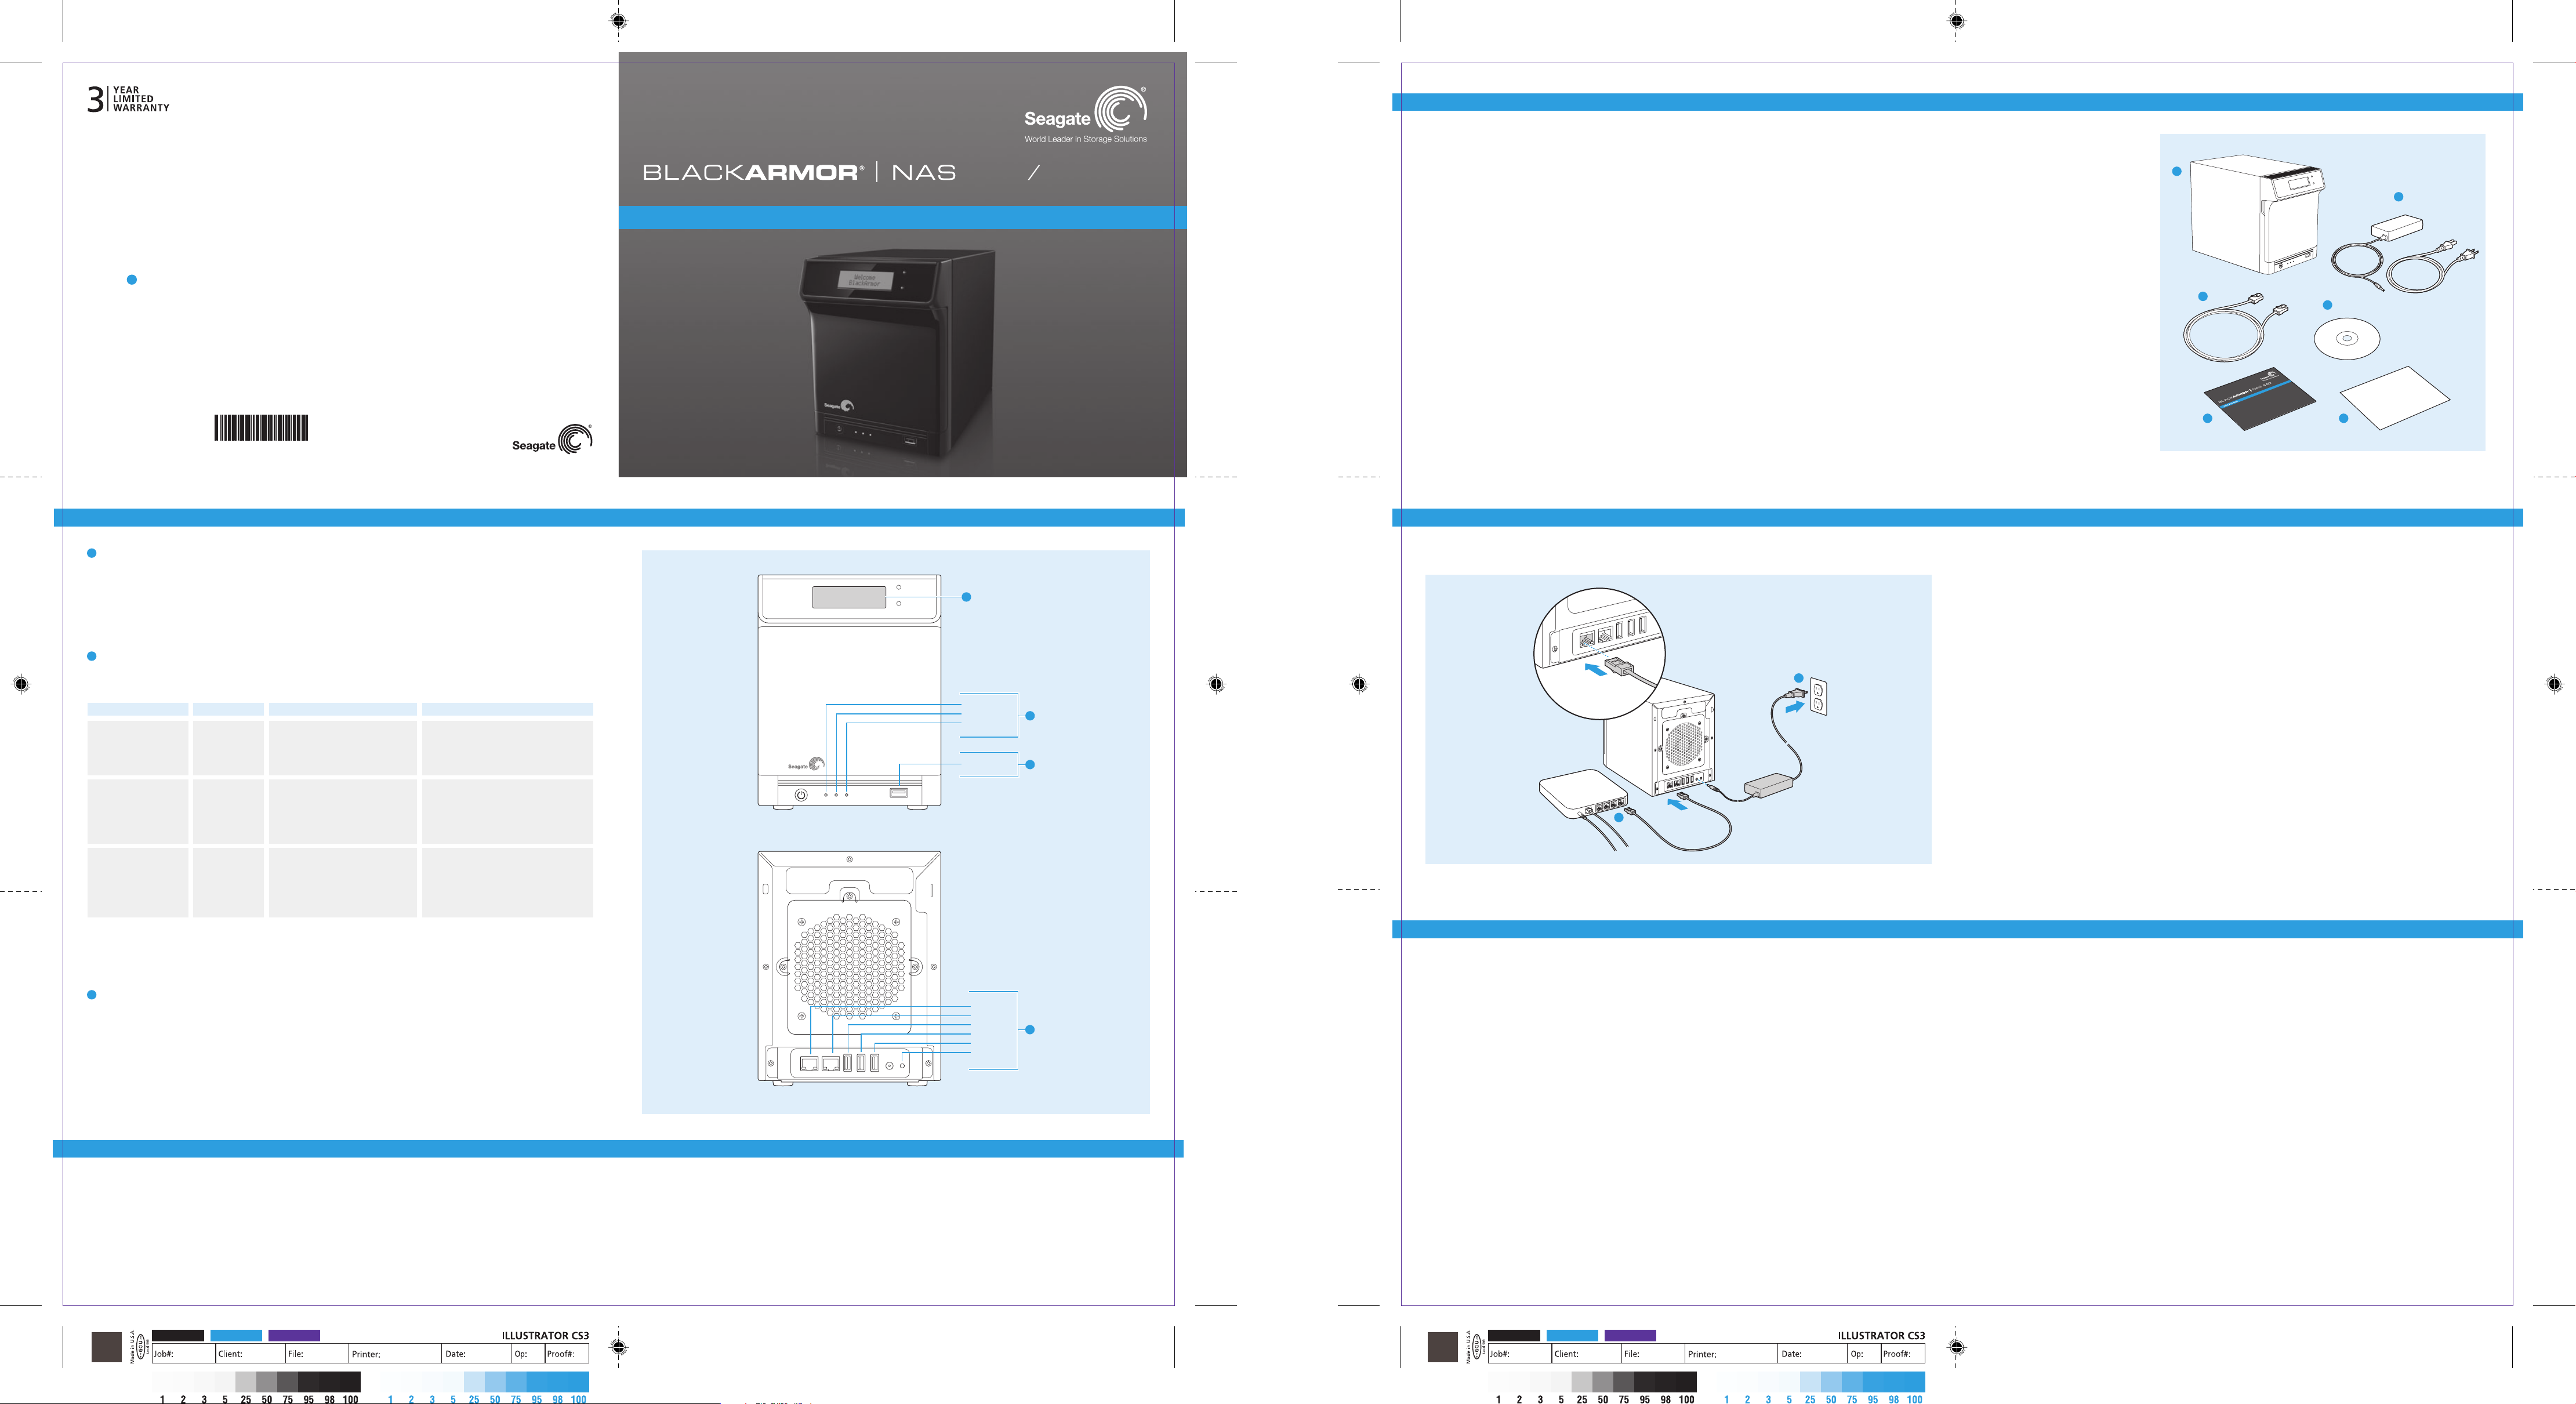
Ports
Your BlackArmor server has two Ethernet ports for local network connection, port failover and NAS to
NAS replication. Use LAN port 1 or LAN port 2 for connecting the BlackArmor server to your local network
and use LAN port 2 alone to set up replication, where an exact copy of the data on your BlackArmor server
is created and maintained on a second server.
For more information, see the BlackArmor User Guide.
BlackArmor® Server Backup Software Finding More Information
The CD includes BlackArmor Backup, software that you can use to set up and manage a file backup
program that suits your needs.
If you didn’t install BlackArmor Backup during setup, you can choose to install it from the CD at any time.
By default, your BlackArmor Backup license supports up to 10 users. You can increase the number of
people who can use BlackArmor Backup by purchasing an upgrade. See www.seagate.com for details.
For more information about BlackArmor Backup, see the User Guide.
For help using BlackArmor Discover and BlackArmor Manager, see:
• The BlackArmor User Guide
• The Discover and Manager online Help
For help using BlackArmor Backup, see:
• The BlackArmor Backup User Guide
• The BlackArmor Backup online Help
For more information, see the Seagate Knowledge Base.
LAN port 1
LAN port 2
USB port 2
USB port 3
USB port 4
Reset button
Setting Up Your BlackArmor® Server
Note: Your BlackArmor server comes with other default settings to help you get started storing,
sharing, and protecting your files right away:
• Preconfigured user accounts—Admin and Guest
• Preconfigured shared folders, or shares— Download, Media Library, and Public
3
• Preset data protection level—RAID 5 (BlackArmor NAS 440) and RAID 1 (BlackArmor NAS 420)
Next Steps
• Learn more about the features of your BlackArmor server and how you can customize your server’s
settings to meet your needs by reviewing the BlackArmor User Guide.
• Save your files to the server and share them with others.
For help getting started, see “Next Steps for Administrators” in the BlackArmor User Guide.
• Have other users on your network get started by installing BlackArmor Discovery and BlackArmor Backup.
For more information, see “Next Steps for Users” in the BlackArmor User Guide.
4. Customize the administrator user name and password.
a. Select the System tab, then click Admin Password.
• Back up your files using BlackArmor Backup. For more information, see the BlackArmor User Guide.
b. Enter the old password (admin).
c. Enter and re-enter a new password. Passwords can be up to 15 alphanumeric characters long
and are case-sensitive.
d. Click Submit.
Setup is complete.
BLACK PANTONE 299 DIE
182027
Seagate
A_US
N/A
02.24.09 bh
BLACK PANTONE 299 DIE
2
182027
Seagate
A_US
N/A
02.24.09 bh
2
 Loading...