

Page 1
THE SYSTEM
English
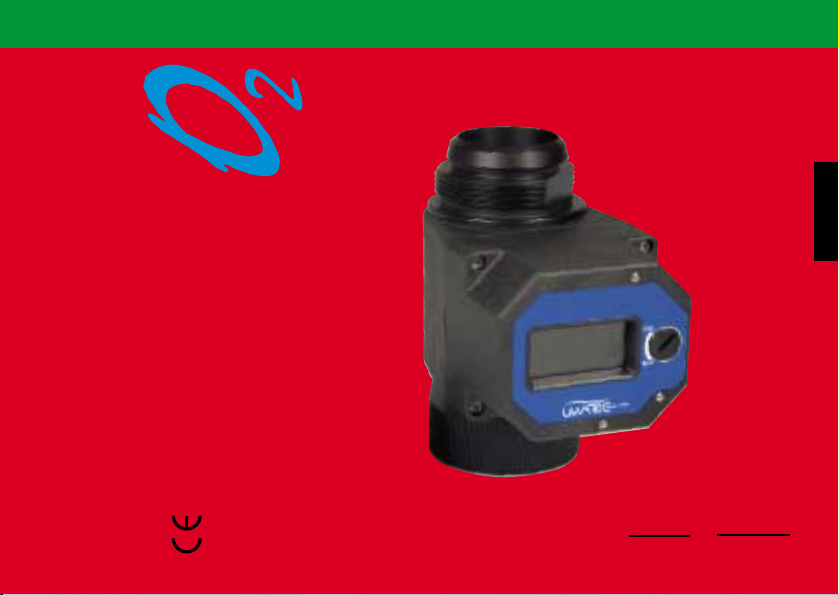
Oxy2
OPERATING MANUAL
English
SWISS MADE BY UWATEC AG
Page 2

Page 3

List of chapters
Introduction . . . . . . . . . . . . . . . . . . . . . . . . . . . . . . . . 4
How to operate the Oxy2 . . . . . . . . . . . . . . . . . . . . . . . . . 5
Switching the unit on and off . . . . . . . . . . . . . . . . . . . . . . . . 6
Checking the remaining battery and O
Checking the Oxy2 . . . . . . . . . . . . . . . . . . . . . . . . . . . . 7
Pairing of the Oxy2 with a dive computer . . . . . . . . . . . . . . . . . . 9
Mounting the Oxy2 on a rebreather . . . . . . . . . . . . . . . . . . . . 10
Warnings and service messages . . . . . . . . . . . . . . . . . . . . . . . 11
Sensors . . . . . . . . . . . . . . . . . . . . . . . . . . . . . . . . 13
O
2
Calibrating the O2sensors . . . . . . . . . . . . . . . . . . . . . . . 14
Replacing the O2sensors . . . . . . . . . . . . . . . . . . . . . . . 17
Battery . . . . . . . . . . . . . . . . . . . . . . . . . . . . . . . . . . 21
Replacing the Battery . . . . . . . . . . . . . . . . . . . . . . . . 21
Maintenance and Storing . . . . . . . . . . . . . . . . . . . . . . . . 24
Technical Information / Features . . . . . . . . . . . . . . . . . . . . . . 25
Diving in Mountain Lakes . . . . . . . . . . . . . . . . . . . . . . . . . 26
Pressure Chamber Tests . . . . . . . . . . . . . . . . . . . . . . . . . 26
Warranty . . . . . . . . . . . . . . . . . . . . . . . . . . . . . . . . . 26
Safety considerations . . . . . . . . . . . . . . . . . . . . . . . . . . . 28
-sensor lifetime . . . . . . . . . . . 6
2
3
English
Page 4

Introduction
The Oxy2 is fitted “in line“ to the inhalation hose
of the semi closed rebreather (SCR) and measures
the actual oxygen fraction of the inspired gas mixture. This information is displayed on the Oxy2 display and can be transmitted to a paired hoseless
dive computer (Aladin
®
Air X O2). This is the basis
for the calculation of both oxygen toxicity and
decompression, based on the real values of the
inhalation gas. Up to now the composition of the
gas had to be estimated.
®
The Aladin
Air X O2calculates the diver`s oxygen
metabolism using the measured oxygen fraction
of the inhalation gas mix, plus the automatically
determined oxygen fraction of the premixed gas
and a value for the highest oxygen consumption
you calculate with (programmed into the Aladin
Air X O2with DataTalk software). Using these 3
values the diver`s workload is calculated on line
and updated in real time. The significance of these
calculations should not be underestimated because both the oxygen toxicity – measured by the CNS
clock – and the speed of nitrogen diffusion in the
muscles is affected by workload. Due to the higher
workload the diver`s metabolism gets more activa-
4
ted and accelerates the nitrogen uptake. At the
same time the oxygen fraction goes down due to
the increased need for oxygen and the nitrogen
fraction is increased. This means that a higher
workload accelerates the uptake of the nitrogen
and additionally the nitrogen fraction increases.
This shows how important it is to know the composition of the inhalation gas, measured by the
Oxy2. Only with this information can the diver
have updated information (online) about decompression and oxygen toxicity. All this increases the
safety of diving.
®
Page 5
• Diving with a semi-closed rebreather (SCR) needs special education!
• Please read this manual carefully to the end!
• Before the first use, the O2sensors have to be fitted and calibrated. See Page 17
and 14.
How to operate the Oxy2
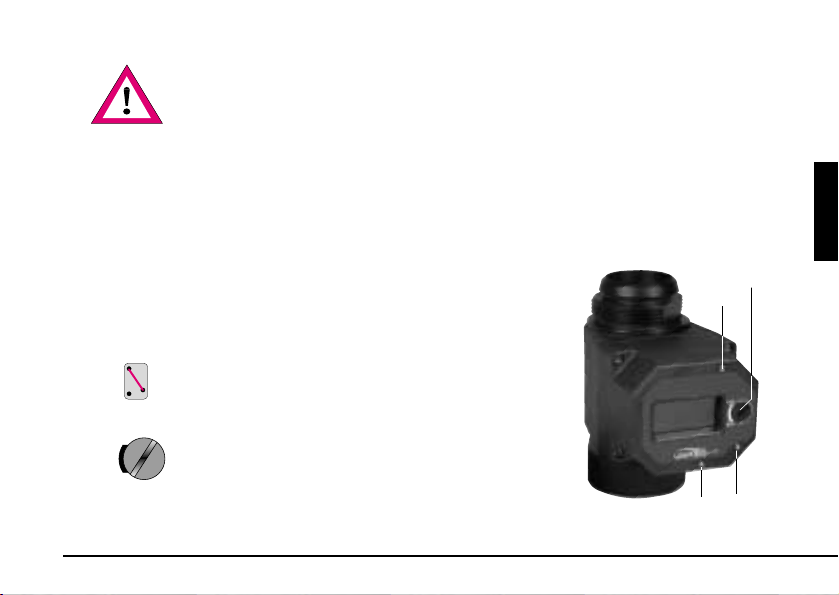
The user can operate the Oxy2 by using the 3 contacts and the turnable switch. The
user has – similar to the Aladin dive computers – to bridge two contacts with moistened fingertips.
B Base contact, must to be touched for all user
operations
E Enter contact, selects / confirms the current input
S Switch contact, changes the settings
Instruction for manual inputs.
For example: Bridging the contacts B and E.
English
turnable
switch
B
Cal.
Run
Instruction for the turnable switch
For example: The switch has to be in „RUN“ position
E
S
5
Page 6
Switching the unit on and off
Switching on
Manually: by bridging contacts B and E .
Automatically: by dip (dipping) into water.
• The Oxy2 has to be switched on manually before the dive in order that it is checked.
see page 7.
Cal.
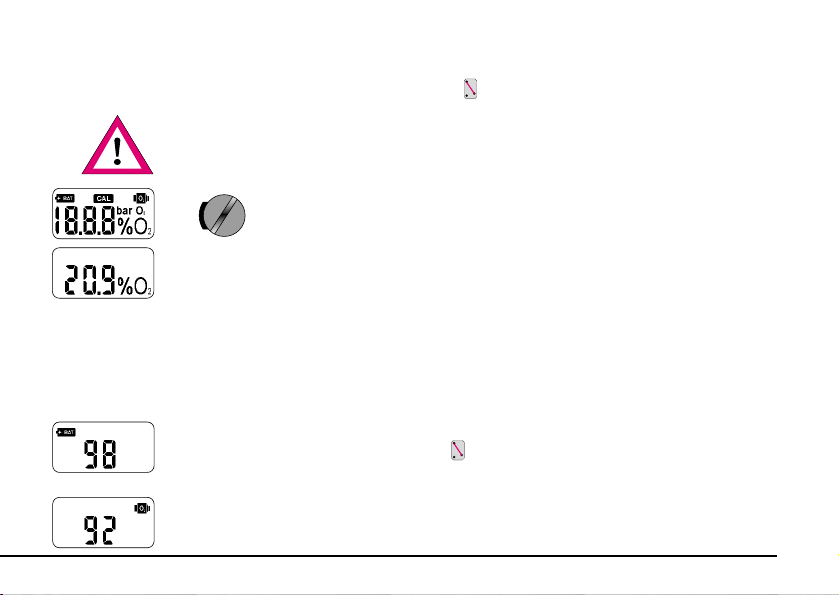
After being switched on the unit first runs a display check – for the first 4
seconds all the display segments are displayed. Then the screen shows the
Run
current oxygen percentage. The turnable switch has to be in position ”RUN“.
Switching off
The unit automatically switches off if a dive has not commenced within 30 minutes of
either switching on the Oxy2 or a calibration was done. 30 minutes gives the diver
enough time to thoroughly check his equipment and to start the dive.
After a dive the unit switches off automatically after 15 min..
Checking the remaining battery and O2sensor lifetime
The remaining battery lifetime can be checked – after the unit has been switched on
– by connecting the contacts B and E . The display shows for 4 seconds the battery
symbol and the remaining percentage of the battery lifetime and afterwards for another 4 seconds the O
sensors remaining percentage lifetime.
2
6
Page 7
Checking the Oxy2
Before each dive the Oxy2 has to be checked as follows:
Remove the Oxy2 from your equipment and move it very slowly through the air for a
few seconds. If the reading is within 20.9% ±0.2% O
the display is not visible, no further calibration is necessary.
A recalibration is necessary if:
• The reading shows less then 20.7% O
• The reading shows more then 21.1% O
• The „CAL“ segment on the display is visible
On page 14 is described how to calibrate the Oxy2.
The O
See page 17.
If there is no reliable measurement possible the unit shows the „CAL“ segment and
the sensor segment. First try a calibration. A sensor replacement may be necessary if
the calibration is not successful. See page 17 (Replacing the O
and if the „CAL“ segment on
2
2
2
sensors have to be replaced if the display shows the sensor segment.
2
Sensors).
2
English
7
Page 8

The battery has to be replaced if the display shows the battery segment. See page 21
(Replacing the battery).
Replace the battery if the remaining capacity would not be enough for the planned
dives.
Check that the Oxy2 is fitted to the inhalation hose of your rebreather!
Check the communication between the Oxy2 and the dive computer before each dive!
You will find more about the communication in the user`s manual of your dive computer.
8
Page 9
Pairing the Oxy2 with a dive computer
The Oxy2 sends every 5 seconds the actual oxygen values of the inhalation gas to an
Aladin®Air X O2or a compatible dive computer. The dive computer and the Oxy2 need
to be paired to make sure that the dive computer receives and uses the data from its
own Oxy2.
A pairing is necessary:
• Before the first dive of an Oxy2 with a dive computer
• If you change from a pressure transmitter (air/nitrox) to an Oxy2 or the reverse
• If you use a new Oxy2 or dive computer
• After a change of the dive computer battery
• Oxy2 and Aladin®Air X O2must be paired if you change from using a pressure trans-
mitter (air/nitrox) to an Oxy2!
English
The Oxy2 sends a pairing string during switching on the unit and at the beginning of the battery and O
Make sure that the Oxy2 and the dive computer touch each other during all the pairing process, until after the pairing has been confirmed. See page 6 (Checking the
remaining battery and O
• You find more detailed information about pairing in the Aladin®Air X O2manual.
sensor lifetime check.
2
sensor lifetime).
2
9
Page 10

Mounting the Oxy2 to a rebreather
The Oxy2 is fitted “in line“ to the inhalation hose of the semi closed rebreather (SCR). The Oxy2 has to
be mounted as shown below. This is the optimal position for transmission.
Position for left side inhalation
hose and lefthanders.
Position for left side inhalation
hose and righthanders.
• The Oxy2 may only be mounted into the inhalation hose of the semi-closed rebreather! Otherwise the calculation of decompression and the oxygen toxicity are based
on wrong data and this could result in death or serious injury.
10
Position for right side inhalation
hose and lefthanders.
Position for right side inhalation
hose and righthanders.
Page 11
Warnings and service messages
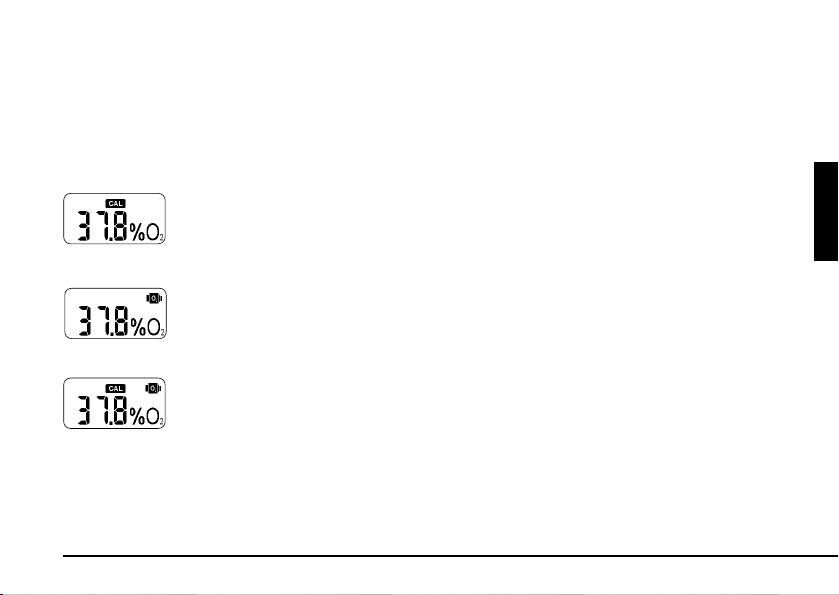
O2sensor connection problems
If there is no O2sensor or only one connected, the „no“ and the sensor symbol will
be displayed. You will find how the sensors are connected on page 17 (Replacing the
Sensors).
O
2
One O2sensor measures wrong
The Oxy2 continues to work but indicates the defect by displaying „CAL“. The message also appears on the Aladin
finished your dive (see page 14 „Calibrating the O2-sensors“). If this is not successful,
you have to replace the O2sensors. (see page 17 „Replacing the O2Sensors“)
You can continue your actual dive if the display shows „CAL“.
®
Air X O2display. Calibrate the Oxy2 after you have
English
Both O
When a reliable measurement is not possible the sensor symbol and ”CAL” appear on
sensors measure wrong
2
the displays of both the Oxy2 and the Aladin®Air X O2. When this happens the Oxy2
goes on measuring and indicating the oxygen fraction. At the same time the Aladin
Air X O2switches for its calculations to the premix value which was automatically measured by the Oxy2. The dive computer then has to be used as though there is no Oxy2.
It is recommended that an ascent is made.
Calibrate the Oxy2 after the dive (see page 14 „Calibrating the O
bration is not successful the O2sensors have to be replaced. (see page 17)
sensors“). If the cali-
2
It is possible that the sensor symbol and „CAL“ will disappear during the dive in which
case recalibration is not required.
11
®
Page 12

12
Battery warning
If the battery capacity reaches 0%, the battery symbol will be displayed. Replace the
battery after the dive (see page 21 „Replacing the battery“).
sensor warning
O
2
If the O
both sensors after the dive (see page 17 „Replacing the O2sensors“).
sensor capacity reaches 0%, the sensor symbol will be displayed. Replace
2
Page 13

O2Sensors
The O2sensors have – like batteries – a certain lifetime. From the first time that a sensor contacts oxygen it starts to discharge. Its` lifetime is approx. 1 year. The user can
replace the sensors by himself.
The actual remaining O
on) by bridging the contacts B and E .
• The remaining lifetime of an O2sensor cannot be increased by disconnecting the
sensor! On page 24 (maintenance and storing) you get information on how to
store the Oxy2.
sensors life can be checked (after the unit has been switched
2
Battery
O2sensors
English
13
Page 14

Calibrating the O2Sensors
A new calibration is needed when:
• The „CAL“ segment on the display is visible.
• New sensors have been installed.
• At least one of the O
• For other reasons see page 7 (Checking the Oxy2).
If the Oxy2 case has been opened you have to then wait 5 minutes after closing the
case before you start to recalibrate. This prevents the calibration being affected by the
influence of light.
sensors needs to be calibrated.
2
14
Cal.
Run
Procedure
1. Disconnect the Oxy2 from any equipment.
2. Switch it on and put the turnable switch to the position „CAL“ (calibration). The
display shows the flashing „CAL“ symbol. It will remain visible until the turnable
switch is turned back to „RUN“.
3. If you want to calibrate with pure oxygen, you have to confirm that by bridging BE .
• Using pure oxygen or oxygen enriched gas needs special safety measures!
• If a calibration is performed with pure oxygen, no air should enter the space between
the exit of the oxygen tank and the entrance of the Oxy2.
Page 15

If you want to calibrate with air (20.9% O2), switch with B-S to 20.9% and
confirm by bridging B-E .
4. After having confirmed your choice (100% or 20.9% O
test. If the program finds an important defect the Oxy2 displays ”Err” which
), the Oxy2 starts a self
2
means that the Oxy2 has gone into a special error mode which cannot be fixed by
the user. Only an authorised retailer or the manufacturer is able to repair it.
After the Oxy2 has passed the self test, the program starts with the automatic calibration procedure. The duration is between a few seconds up to approx. a minute.
If the calibration was not completely successful the old calibration settings will still
be valid and the display shows ”– – –”. In this case try to recalibrate again: turn
the switch to „RUN“ and back to „CAL“. If the calibration is still not successfully
completed the reason could be an unstable reference gas. Or if the display also
shows the sensor symbol the O
sensors could be exhausted and need replacing.
2
After a successful calibration the Oxy2 indicates the ambient air pressure. This
value has to be checked according to the following description: The absolute
ambient air pressure relates to the actual altitude and the weather. It can only be
measured by a barometer which is able to display the absolute air pressure.
Barometers which only display the air pressure reduced to the equivalent sea level
(normal) cannot be used. If you have no barometer on hand you can read out from
the altitude reference curve the theoretical ambient pressure. If the displayed air
pressure of the Oxy2 stays outside of a range of ±40 mbar (±0.58 psi) from the
measured or readout value, the unit has to be checked by an authorised retailer.
English
15
Page 16

16
Cal.
Run
Altitude over sea level (feet)
3280
1000
Altitude over sea level (m)
6560 9840 13120
The indicated pressure of
the Oxy2 has to be within
±40mbar (±0.58 psi)
of the curve
2000 3000 4000
15.95
14.50
13.05
11.60
10.15
8.70
7.25
5.80
Ambient pressure (psi)
1100
1000
900
800
700
600
Ambient pressure (mbar)
500
400
0
0
• Do not calibrate the Oxy2 above 4000 m (13120 feet).
5. Switch the turnable switch back to „RUN“.
• Make sure that you switch back to „RUN“ otherwise the unit does not turn off automatically and the battery will be quickly used up!
Page 17

Replacing the O2Sensors
In the following situations the O2sensors have to be replaced:
• The sensor symbol is visible on the Oxy2 display.
• If a reliable measurement is not possible anymore, the sensor symbol and „CAL“ will
be displayed. Try a calibration. If this is not successful, the O
replaced.
• If the sensor capacity reaches 0%.
• If a sensor replacement is required, always replace both sensors!
Procedure:
1. Disconnect the Oxy2 from any equipment.
2. Dry it with a soft towel.
3. Make sure that the turnable switch stays in position „RUN“.
4. Use a 2.5mm Allen key to unscrew (anticlockwise) the 4 case screws. Carefully
separate the 2 parts.
• Open the Oxy2 only in a dry and clean place! It prevents soiling and damage to the
electronics and O rings.
sensors have to be
2
English
17
Page 18
• Only open the unit if a battery or sensor replacement is necessary!
• Do not touch either by hand or with any other object the electronics on the PCB
board!
5. Remove carefully the large O ring and carefully dry the O ring recess.
6. Pull carefully the plugs out of the socket ( the tab, which stops the plug from fal-
ling out of the socket, has to be pulled back while pulling out the plug)
• Do not pull on the wires!
18
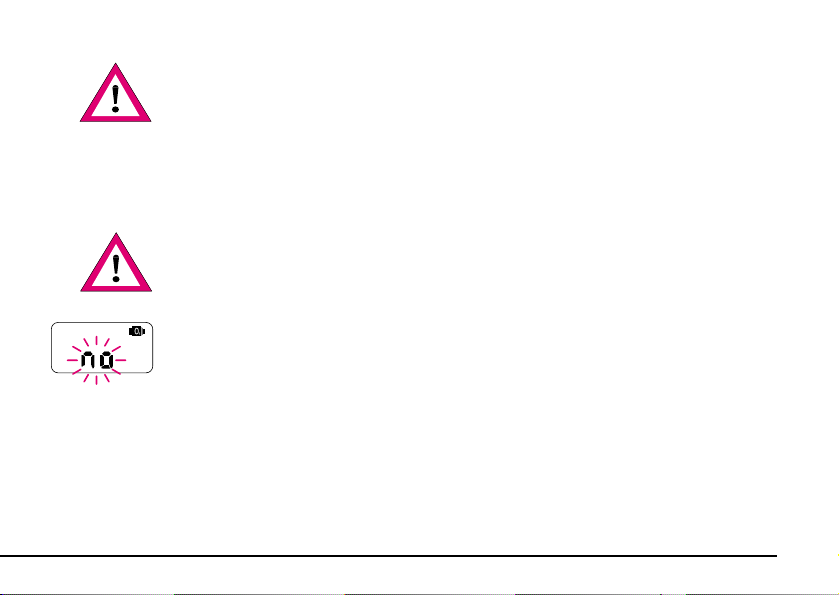
If the unit is running with an O
the display shows ”no”. The unit switches off automatically after 10 minutes.
7. Screw the O
8. Take the new O2 sensors out of their packaging and clean the sealing areas of the
O rings. If necessary clean the O rings too. Screw the sensors into the case. Tighten
the sensors so that they cannot loosen by themselves.
sensors out (anti clockwise)
2
sensor disconnected then, after a few seconds,
2
Page 19

• Do not open the sealed packaging before you need to use them for a replacement!
See remark page 13.
• After opening the sealed package the O2sensors need 10 minutes start-up time. This
means that calibration cannot be made until 10 minutes after opening the package.
9. Connect the plugs with the sockets of the O2sensors.
10. Check the O ring of the case (little cuts ...) and replace it if necessary.
11. Clean the O ring and the sealing area of the case.
12. Fit the O ring carefully into the case.
Carefully refit together the 2 parts of the case. Make sure that no wire gets trap-
13.
ped and damaged by the case. Carefully and evenly tighten the 4 screws (for example first the upper left, second the lower right, then the remaining two screws).
19
English
Page 20

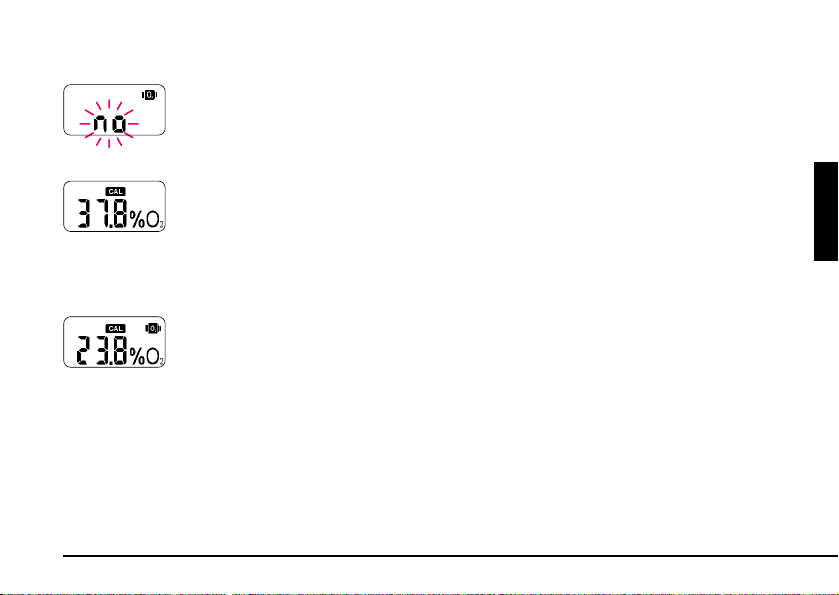
14. After connecting the sensors or after the next switching on, the Oxy2 asks you:
Are the fitted O
or have they been replaced (rep)?
sensors the same as you already used before disconnection (old)
2
20
„OLD“ means that after a confirmation (bridging B-E ) the lifetime calculation
of the O
selected if the sensors have not been replaced.
sensors continues where it was before disconnection. „OLD“ has to be
2
If you replaced the sensors, you have to switch by bridging B-S to „REP“.
„REP“ means, that – after a confirmation (B-E ) – the lifetime will be reset to
100% and the unit requires automatically a calibration. See page 14 „Calibrating
sensors“.
the O
2
• „REP“ may only be chosen after a replacement of the O2sensors by new ones!
15. Check the Oxy2. See page 7 „Checking the Oxy2“.
• Wait after you have opened the sealed packaging of the O2sensors for 10 minutes
before you start with a calibration! See page 19.
Page 21

Battery
Cal.
Run
The built-in battery has a lifetime of at least 4,5 years at 100 dives / year and can be
replaced by a authorised retailer or – if the user knows how to solder properly – by the
user.
The remaining battery lifetime can be checked – after switching on the unit – by bridging the contacts B and E .
Replacing the Battery
The following situations require a battery replacement:
• The battery symbol is visible
• If the remaining battery capacity seems to be too low for the dives you want to make
• After the battery has been disconnected (by soldering) the battery lifetime counter will
be reset to 100%. That means : If the battery has been disconnected, the battery has
to be replaced by a new one! Otherwise the Oxy2 calculates with a higher battery
capacity then the battery has. The Oxy2 can stop working in this case without any warning!
Procedure:
1. Disconnect the Oxy2 from any equipment.
2. Dry it with a soft towel.
3. Make sure that the turnable switch stays in position „RUN“.
4. Use a 2.5mm Allen key to unscrew (anticlockwise) the 4 case screws. Carefully
separate the 2 parts.
21
English
Page 22

22
• Open the Oxy2 only in a dry and clean place! It prevents soiling and damage to the
electronics and O rings.
• Do not touch either by hand or with any other object the electronics on the PCB
board!
• Only open the unit if a battery or sensor replacement is necessary!
5. Remove carefully the large O ring and carefully dry the O ring recess.
6. Replace the old battery with a new one.
• Make sure that the polarity is correct:
the red wire has to be connected to the + pole of the battery.
• Make sure that the battery does not get too hot from the soldering!
7. Check whether the unit can be switched on (B-E). If it does not start, the battery
has to be short-circuited ( bridging with a wire the + and the - of the battery) for
3 seconds. If it still does not want to start, the unit has to be sent to an authorised retailer.
• If the battery leaks: Do not bring the liquid in contact with your skin or eyes. Do not
inhale the vapour. Clean off immediately the battery leakage from the Oxy2!
Page 23

8. Check the O ring of the case (little cuts ...) and replace it if necessary.
9. Clean the O ring and the sealing area of the case and fit the O ring carefully into
the case.
Carefully refit together the 2 parts of the case. Make sure that no wire gets trap-
10.
ped and damaged by the case. Carefully and evenly tighten the 4 screws (for example first the upper left, second the lower right, then the remaining two screws).
11. Switch the unit on and check it. See page 7 (Checking the Oxy2).
• Take care to our environment, bring the used battery to a battery collection
point!
23
English
Page 24

Maintenance and Storing
• Protect the unit from impacts and intensive sun!
• After diving in salt water rinse the OXY2 with freshwater
• Dry the unit after use with a soft towel.
• Store the unit in a cool not too dry place. This helps to preserve the sensor lifetime.
• To maximise the O
phere except when it is necessary.
sensor lifetime do not leave them in an oxygen enriched atmos-
2
24
• Unplugging the O
• Replace the battery if the remaining capacity would not be enough for the planned
dives.
sensors does not increase their lifetime!
2
Page 25

Technical Information / Features
• Maximum depth: 50m (164ft)
• Maximum altitude: 4000m (13120ft)
• Operating temperature: -10 °C up to 60 °C (14 °F to 122 °F)
• Oxygen percentage: 0...100% O
• Oxygen partial pressure (measurement range): 0...2.5bar (0...36,26 psi)
• Resolution: 01% O
• Linearity: <3%
• Accuracy: < ±4% relative
• Selftest at startup
• Online oxygen sensor check
• Malfunction information
• Request for recalibration of oxygen sensors if necessary
• Oxygen sensor lifetime: approx. 1 year
• Battery lifetime: min. 4,5 years @ 100 dives/year
• Oxygen sensors remaining capacity
• Battery remaining capacity
• Battery: Uwatec
• Offline measurement possible (display)
• Wireless data transmission to Aladin
• 2 dual (redundant) oxygen sensors (checking each other) (A11.301)
• Adapter for oxygen calibration (optional)
• Exchangeable adapters for different SCR`s (optional)
2
2
English
®
Air X O
2
25
Page 26
Diving in Mountain Lakes
The Oxy2 adapts itself to the ambient pressure.
• Diving while at altitude can considerably increase the risks. Do not undertake high altitude diving without being specifically trained in special techniques for this diving.
Pressure Chamber Tests
• The Oxy2 must not be exposed to any pressure chamber test!
See Warranty page 27.
Warranty
Please pay attention to the following remarks on warranty claims:
Recognition of warranty:
The warranty only covers units which have been provably bought from an authorised
retailer or from the manufacturer.
26
Page 27

Scope of the warranty:
The manufacturer will repair all defects which are provably traceable to defects of
material or faults in production. The warranty covers the repair of the unit free of charge, the replacement of faulty parts or the entire Oxy2, respectively.
sensors are excluded from the warranty.
The O
2
UWATEC reserves the right to determine the merits of the warranty claim and to determine whether the unit will be repaired or replaced.
Excluded are faults or defects due to:
• excessive wear and tear
• exterior influences, e.g. transport damage, impact, damage due to bumping and
hitting, influences of weather or other phenomena
• repairs by anybody not authorised by the manufacturer
• pressure chamber tests
• diving accidents
Warranty period and claim
The warranty is given by a period of 12 months. Repairs or replacements during the
warranty period do not increase the warranty period.
In order to put forward a warranty claim, send the unit together with a dated receipt
of the purchase to your authorised retailer or an authorised servicing point.
The manufacturer does not have to accept extensions of the warranty granted by
national importers.
27
English
Page 28

Safety considerations
• Using pure oxygen or oxygen enriched gas needs special safety measures!
Please consider the general safety considerations of using pure oxygen or oxygen enriched gases!
Oxy2 with Aladin®Air X O2gives to the diver a high level of reassurance and safety.
However these units can never be a substitute for a thorough diving education.
Pay careful attention to warnings given by the Oxy2. Do not make risky dives. Pay special attention to the parts of this manual which are marked with and !
Follow all standard safe diving practices:
• Never dive without a buddy. The Oxy2 does not substitute – not even together with
an Aladin
• Only make dives that are appropriate to your level of dive training. Neither the Oxy2
nor the Oxy2 together with an Aladin
• Neither the Oxy2 nor the Aladin®Air X O2warn about nitrogen narcosis!
28
®
Air X O2– for a dive buddy!
®
Air X O2increase your knowledge of diving.
Page 29

• Do not dive deeper than the limit given by your SCR.
• Do not dive deeper than the Oxy2 maximum depth of 50m.
• The Oxy2 should only be used for semi closed rebreathers (SCR).
• The Oxy2 is not to be used with closed circuit rebreathers.
This manual is part of the Oxy2 safety concept. Please confirm that you have read and
understood the complete manual:
Place: ____________ Date: ___________ Signature: ___________________
29
English
 Loading...