

Page 1
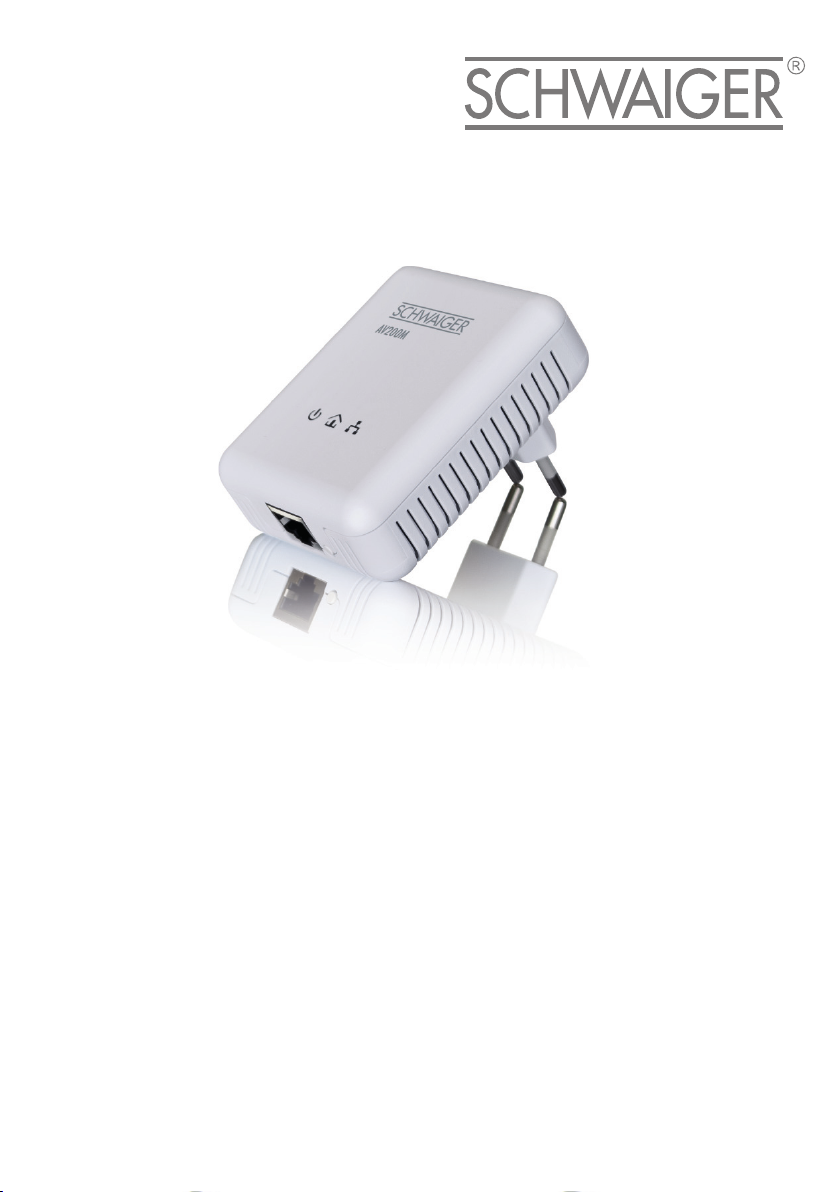
AV 200M
Inhouse-Powerline
Page 2

While the information in this manual has been compiled with great care, it may not be deemed an assurance of product
characteristics. The manufacturer shall be liable only to the degree specified in the terms of sale and delivery.
The reproduction and distribution of the documentation and software supplied with this product and the use of it s contents
is subject to written authorization from the manufacturer. We reserve the right to make any alterations that arise as the
result of technical development.
Trademarks
®
HomePlug
Linux
Mac
Windows
is a registered trademark of HomePlug Power Alliance.
®
is a registered trademark of Linus Torvalds.
®
and Mac OS X® are registered trademarks of Apple Computer, Inc.
®
and Microsoft® are registered trademarks of Microsoft, Corp.
Subject to change without notice. No liability for technical errors or omissions.
June 2012
Page 3

Contents
1 Introduction ................................................................................................................ 4
1.1 What does HomePlug stand for? .............................................................................4
1.1.1 AV200M ......................................................................................................5
1.2 Practical examples ...................................................................................................6
1.2.1 Internet solution for single users .................................................................6
1.2.2 Networking of two computers .....................................................................6
1.2.3 Internet solution for multi-users ..................................................................6
2 Installation ..................................................................................................................7
2.1 System requirements ...............................................................................................7
2.2 Connection and display elements ............................................................................7
2.3 Connecting the adapter ...........................................................................................8
3 Configuring the HomePlug network ........................................................................... 9
3.1 Encrypting the HomePlug network at the touch of a button ....................................9
4 Appendix ................................................................................................................... 12
4.1 Technical data .......................................................................................................12
4.2 Important safety instructions .................................................................................13
4.3 Disposal of old devices ..........................................................................................14
4.4 Warranty conditions ..............................................................................................14
AV200M
Page 4
4 Introduction
1 Introduction
This chapter gives an overview of the HomePlug technology and briefly introduces the adapter. Practical examples are listed at the end of the chapter.
1.1 What does HomePlug stand for?
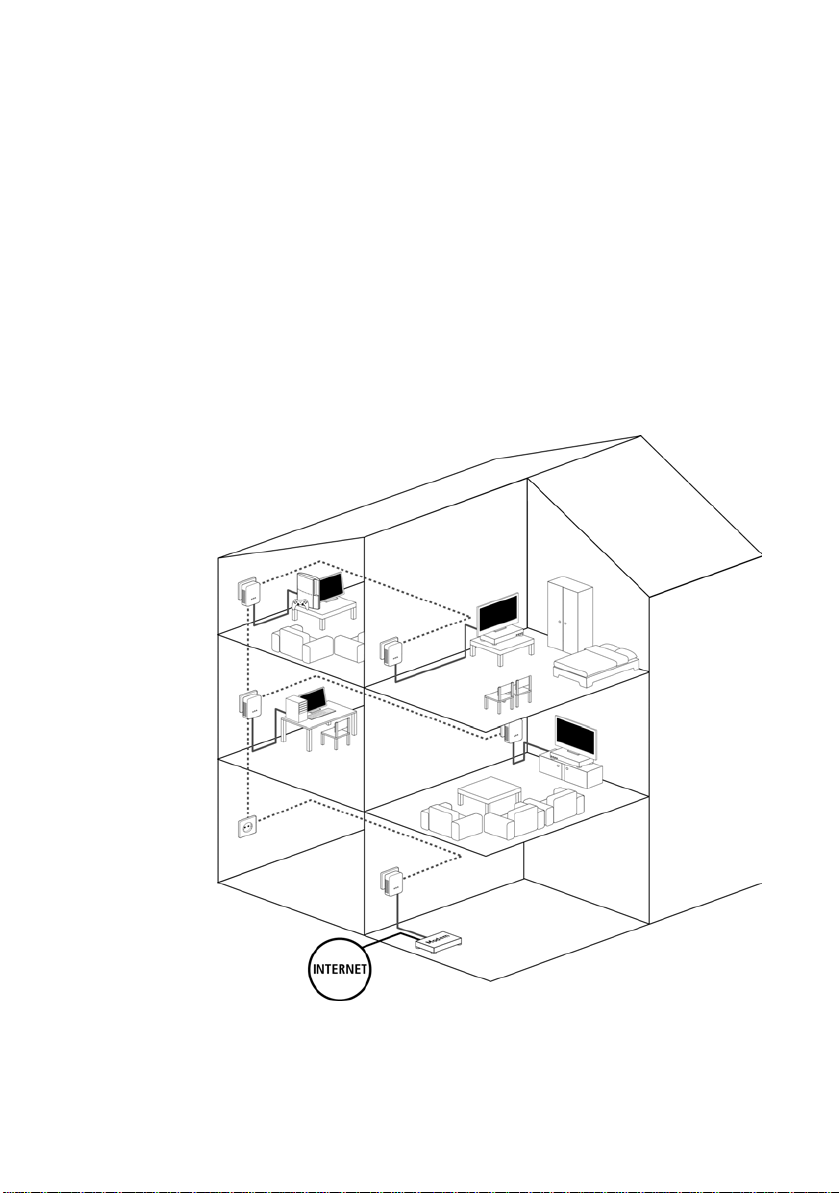
HomePlug (“Inhouse Powerline”) is an intelligent, secure technology that lets
you set up a home network easily, quickly and economically via your electrical wiring, without the need for complex and expensive
The available performance and effort required for the installation also compares favourably to traditional methods—HomePlug technology now
speeds you would expect from other LAN technologies.
dedicated cabling.
attains
AV200M
Page 5

1.1.1 AV200M
The adapter provides a transmission rate of up to 200 Mbps via the electrical
wiring in the building. It also facilitates larger data transfer between the computers in your network via
Simple Installation
• Connect
network device.
• Connect the adap
• As an option: for
button.
at's it!
• Th
Introduction 5
the electrical wiring.
the adapter via the network cable to the computer or the respective
ter to the electrical wiring
individual password allocation simply press the encryption
AV200M
Page 6
6 Introduction
1.2 Practical examples
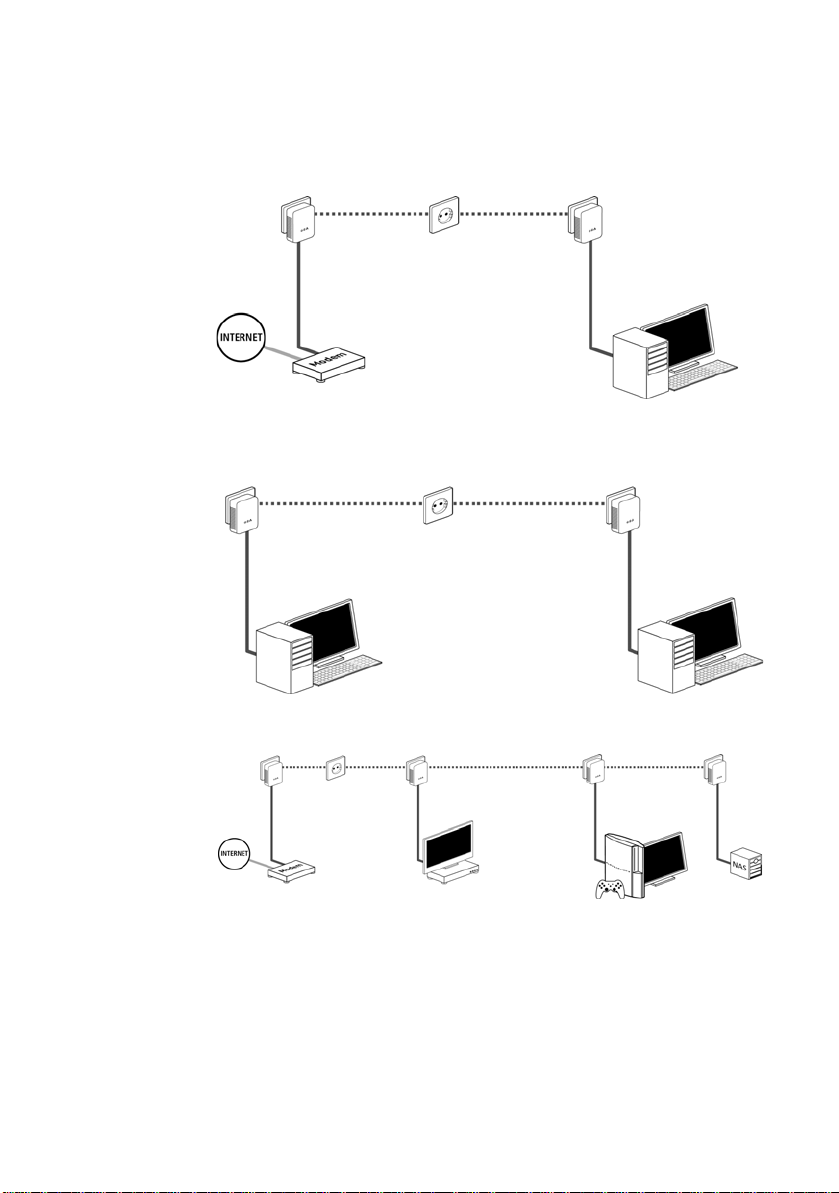
1.2.1 Internet solution for single users
1.2.2 Networking of two computers
1.2.3 Internet solution for multi-users
AV200M
Page 7
2Installation
This chapter describes the connection and display elements of the adapter
and how to connect it.
2.1 System requirements
• Operating systems: Windows XP (32 bit), Windows Vista (32 bit/64 bit),
Windows 7 (32 bit/64 bit), Linux, Mac OS X or any other operating system
network support
with
• Network connection
Please note that your computer or other device mu
adapter with an Ethernet port.
2.2 Connection and display elements
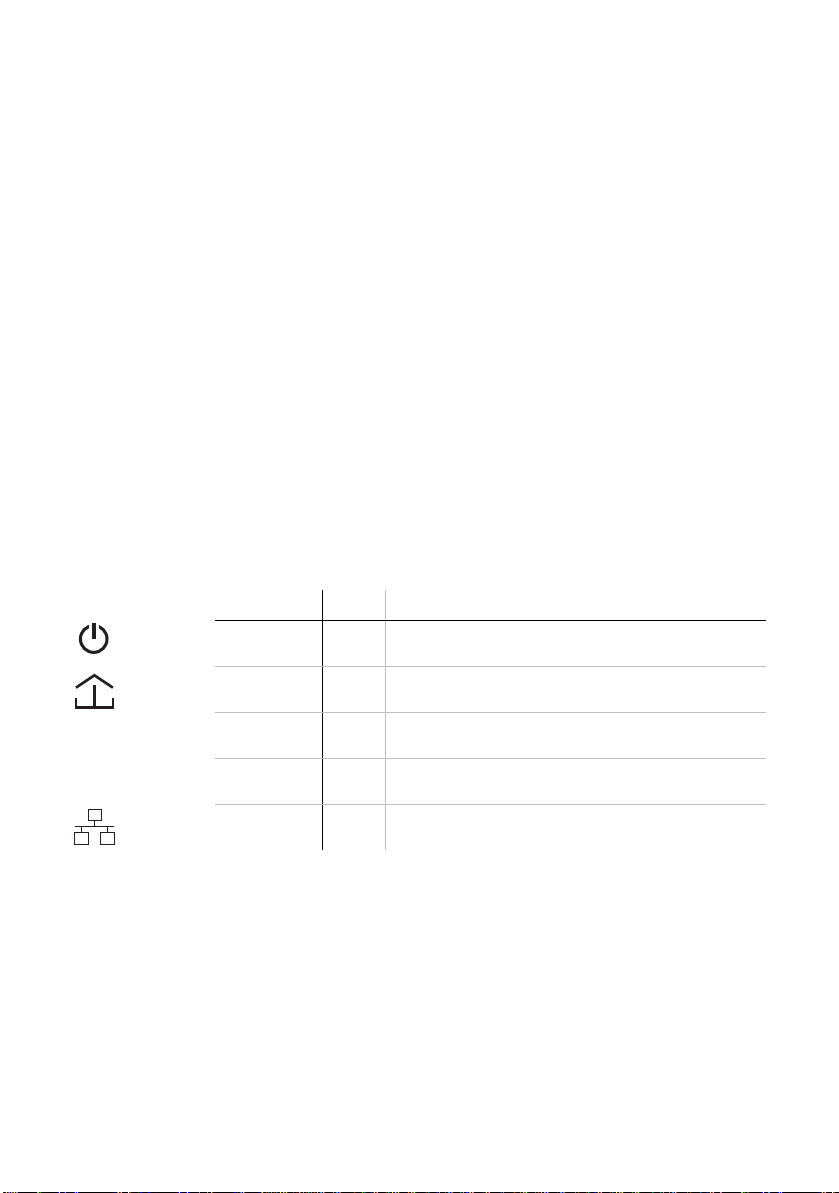
The adapter is fitted with 3 control lamps (LEDs) as well as a network connection and an encryption button.
LEDs AV200M
Power
HomePlug
Ethernet
green Lit steady when the adapter is ready for operation; flashes
green The network connection is suitable for HD video streaming;
orange The network connection is suitable for SD video streaming and
red The network connection is suitable for simple da ta transfer and
green A 100 Mbps or 10 Mbps connection to the Ethernet network
n the adapter is in standby mode.
whe
lashes when data is being transmitted.
f
line gaming; flashes when data is being transmitted.
on
nternet access; flashes when data is being transmitted.
I
ists; flashes when data is being transmitted.
ex
Installation 7
st feature a network
• Etherne
t connection
This is the connection point on the adapter for connecting it to a computer
or another network
device with the network cable (included).
• Encryption button
Data encryption at the touch of a button; For more information on the functions of the encryption button, please see
the chapter 'Configuring the
HomePlug network'.
AV200M
Page 8

8 Installation
Please note that all adapters which are connected to the electrical wiring,
switch to energy-saving mode after a short while, if no active network device
is connected to the Ethernet port. In energy-saving mode, the adapter cannot
be accessed via the electrical wiring.
2.3 Connecting the adapter
Use the included network cable to connect the adapter to the network
port of your running computer.
Plug the ad
In order to connect multiple HomePlug devices into a self-contained, secure
network, refer to the chapter 'Configuring the HomePlug network'.
apter into a free electrical outlet.
AV200M
Page 9
Configuring the HomePlug network 9
3 Configuring the HomePlug network
Use the encryption button to set up custom encryption for your network.
3.1 Encrypting the HomePlug network at the touch of a button
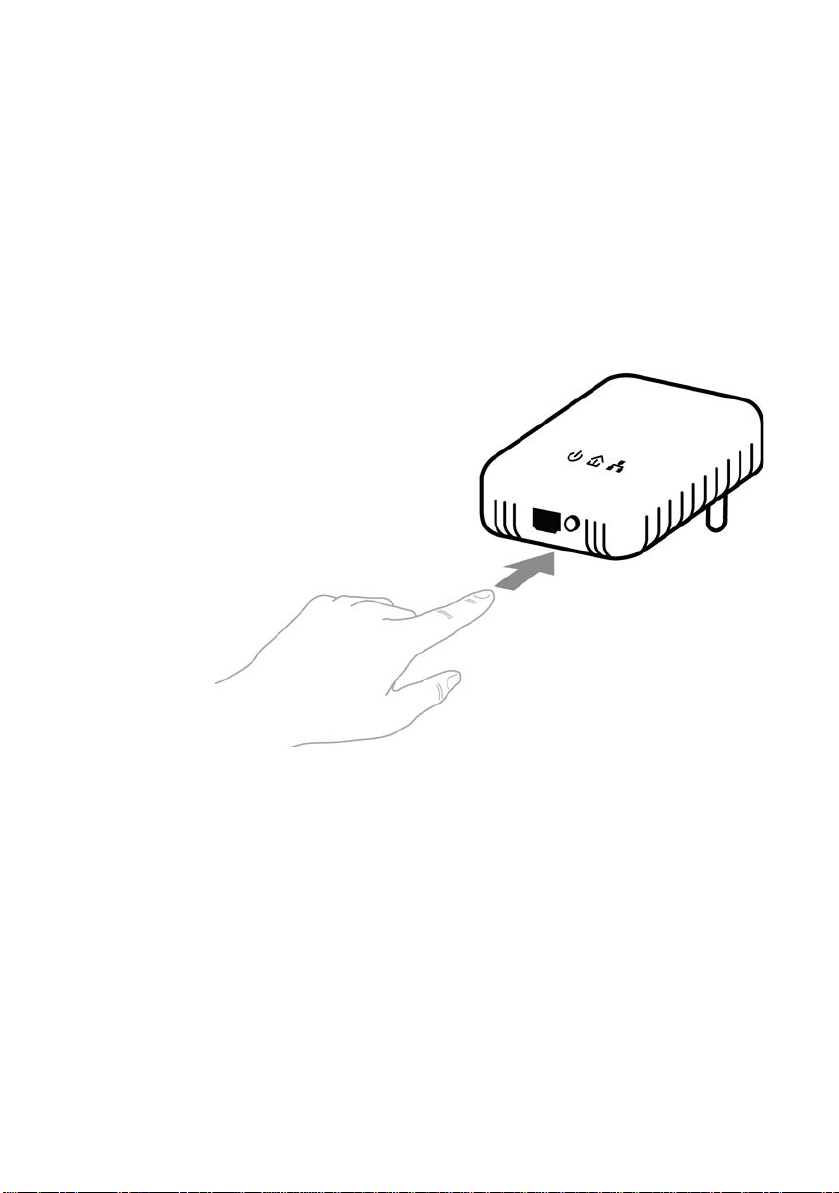
To encrypt a Homeplug network simply press the encryption button that is
located on the device. Pressing this button will encrypt your network with a
randomly generated password.
Adapters cannot be configured while in Standby mode.
The following section contains exact instructions o
work scenarios:
n the basis of possible net-
AV200M
Page 10
10 Configuring the HomePlug network
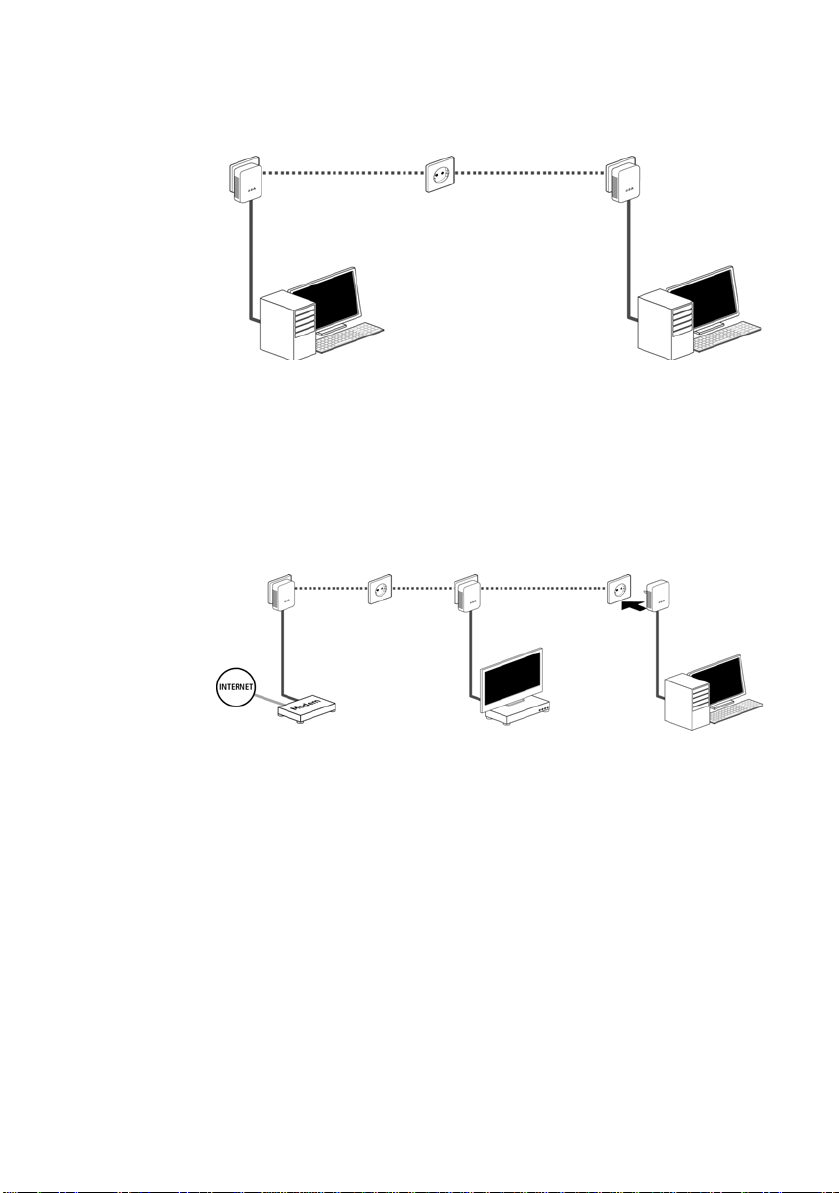
Encrypting a new AV200M network consisting of two adapters
If the adapters are still in their factory default states, press the encryption buttons on both adapters for a
out and starts to flash.
Once both adapters have been successfully connected, press each encryption button for one second within two minutes of one another. That's it!
Your HomePlug network
Expanding an existing AV200M network with a new AV200M
t least ten seconds, until the Power LED goes
is now protected against unauthorized access.
AV200M
If you have already secured your existing AV
200M network using the encryption button, use the same method to integrate other adapters. Once you have
successf
ully connected the new AV200M, first press the encryption button of
one of your network’s existing adapters (one second), then press the
encryption button of your new AV200M (one second) within two minutes.
That's it! The new AV200M is now integrated in your network.
To integrate additional adapters in your network, repeat the abo
ve steps.
Page 11
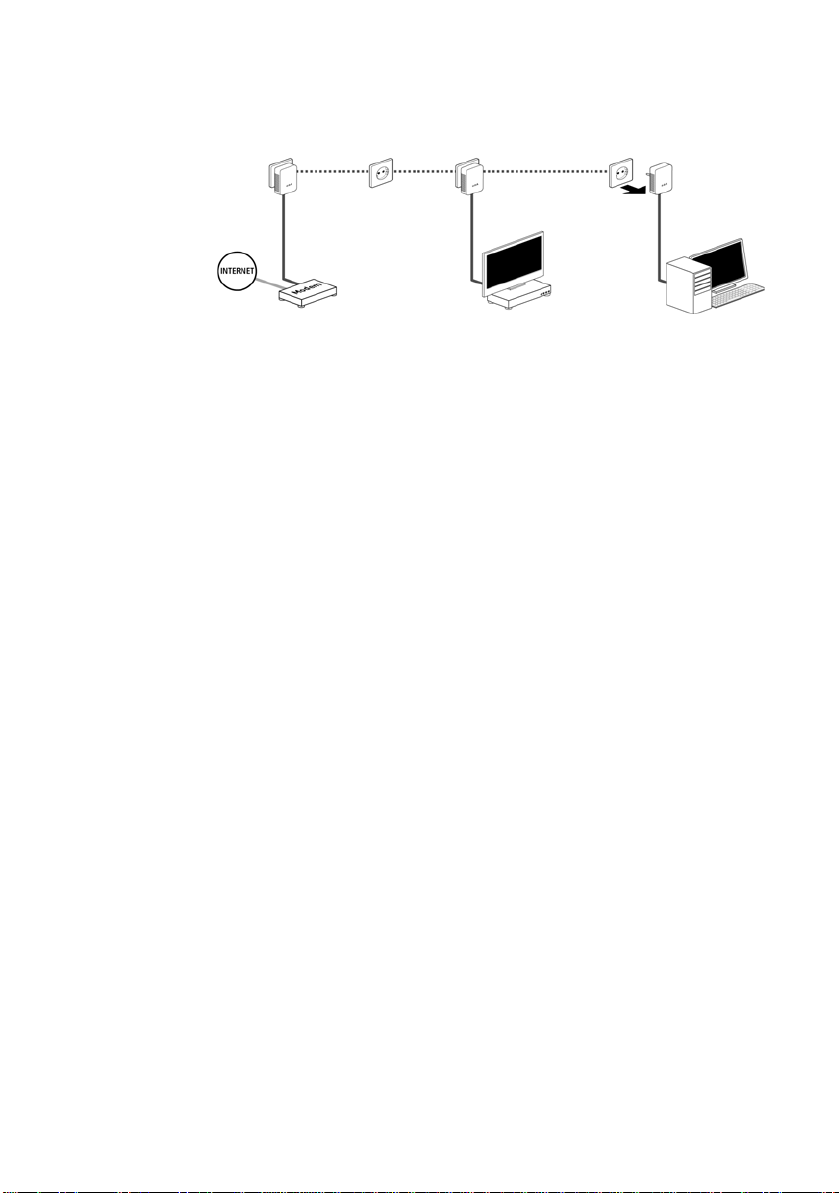
Excluding a AV200M from your network
Configuring the HomePlug network 11
To exclude a AV200M from an existing network,
press its encryption button
for at least ten seconds. The device will be assigned a new randomly generated password and will thus no longer be able to access the network. To
integrate
the adapter in a different AV200M network, follow the steps
described above, depending on whether you are setting up a new network or
adding the adapter to an existing one.
AV200M
Page 12

12 Appendix
4 Appendix
4.1 Technical data
AV200M
Standards Ethernet specification IEEE 8
Protocols CSMA/CD
Transfer rate 200 Mbps
Transfer procedure Asynchronous
Modulation OFDM—1155 Carrier, 1024/256/64-QAM, QPSK, BPSK
Range 300 m via power supply
Security 128-bit AES encryption via power supply
LEDs Power
HomePlug connection Standard power plug
Computer interface RJ45
Power consumption 4.3 VA (max.)
Power supply Integrated power supply via power socket
Environment Humidity (non-condensing): 10-90%
System requirements Ethernet interface
Warranty 2 years
802.3u
Auto MDI/X
HomePlug AV
HomePlug
Ethernet
0.3 VA (stand-by)
Rated voltage: 110 - 240 VAC
Rated frequency: 50/60 Hz
Storage: -25°C – 70°C
Operation: 0°C – 40°C
Windows XP (32 bit), Windows V
dows 7 (32 bit/64 bit), Linux, Mac OS X or any other operating system with network support
02.3, IEEE 802.3x, IEEE
ista (32 bit/64 bit), Win-
AV200M
Page 13

4.2 Important safety instructions
All safety and operating instructions should be read and understood before
using the device, and should be kept for future reference.
• Never open the device.
device.
Do not try to service this product yourself! Contact qualified technicians each
and every
shock!
time your device needs maintenance. There is a risk of electric
There are no user-serviceable parts inside the
Appendix 13
• Use the device in a dry
• Always use the included
• Do not
• To
• Do not
• S
• Never set up
• The device
• Disconnect the device
• Never use th
• In the
insert any objects into the openings of the device.
disconnect the device from the power supply grid, pull the power plug.
keep the device in direct sunlight.
lots and openings on the case serve as ventilation. Never block or cover
them.
the device near a heater or radiator.
should be located only where sufficient ventilation can be ensu-
red.
moist towel to clean the device. Never use water, paint thinner, benzene,
alcohol or other strong cleaning agents when cleaning the device, as these
could damage the case.
e device with a power supply that does not meet the specifications provided on the rating plate. If you do not
supply you have at home, contact your dealer or energy supplier.
event of damage, disconnect the device from the power supply grid
and contact customer service. This applies, for example, if
power cable or plug is damaged.
• the
• liquid
• the
• the
• the
has been spilled on the device or objects have fallen into the
device.
device has been exposed to rain or water.
device does not work, even though the operating instructions
have been followed properly.
device’s case is damaged.
location only.
network cable to connect the device.
from the power supply grid before cleaning. Use a
know what type of power
AV200M
Page 14

14 Appendix
4.3 Disposal of old devices
To be used in the countries of the European Union and other European countries with a separate collecting system:
The icon with crossed-out wastebasket on the device means that this adapter
is an
electrical or electronic device that falls within the scope of application of
the German Electrical and Electronic Equipment Act ("Elektrogesetz"). Since
24 March 2006, these types of devices may no longer be disposed of with
household waste. Rather, in Germany, they can be given to a municipal collection point free of charge. Contact your municipal government to
address and hours of the nearest collection point.
4.4 Warranty conditions
The warranty is given to purchasers of the manufacturer's products in addition to the warranty
conditions provided by law and in accordance with the following conditions:
1 Warranty coverage
a) The warranty covers the equipment delivered and
rer's sole discretion, be replaced or repair ed free of charge if, despite proven proper handling and adherence to the operating instructions, these parts became defective due to
fabrication and/or material defects. Alternatively, the manufacturer reserves the right to
replace the defective product with a comparable product with the same specifications and
features. Operating manuals and possibly supplied software are excluded from the warranty.
b) Material and service charges shall be covered by the manufacturer, but not shipping and
handling costs involved in transport from the buyer to the service station and/or to the
manufacturer.
c) Replaced parts become property of the manufacturer.
d) The manufacturer is authorized to carry out technical ch anges (e.g. f irmware updates) bey-
ond repair and replacement of defective parts in order to bring the equipment up to the c ur-
rent technical state. This does not result in any additional charge for the customer. A legal
claim to this service does not exist.
2 Warranty period
The warranty period for this product is two years. This period begins at the day of delivery from
the manufacturer's dealer. Warranty serv ices carried out by the man ufacture r do no t result in an
extension of the warranty period nor do they initiate a new warranty period. The warra nty period
for installed replacement parts ends with the warranty period of the device as a whole.
3 Warranty procedure
a) If defects appear during the warranty period, th
tely, at the latest within a period of 7 days.
b) In the case of any externally visible damage arising from transport (e.g. damage to the hou-
sing), the person carrying out the transportation and the sender should be informed imme-
diately. On discovery of damage which is not externally visible, t he transport company and
the sender are to be immediately informed in writing, at the latest within 3 da ys of delivery .
find out the
all its parts. Parts will, at the manufactu-
e warranty claims must be made immedia-
AV200M
Page 15

c) Transport to and from the location where the warranty claim is accepted and/or the repaired
device is exchanged, is at the purchaser's own risk and cost.
d) Warranty claims are only valid if a copy of the original purchas e receipt is re turned with the
device. The manufacturer reserves the right to require the submission of the original
purchase receipt.
4 Suspension of the warranty
All warranty claims will be deemed invalid
a) if the label with the serial number has been removed from the device,
b) if the device is damaged or destroyed as a result of acts of nature or by environment al influ-
ences (moisture, electric shock, dust, etc.),
c) if the device was stored or operated under conditions not in compliance with the technical
specifications,
d) if the damage occurred due to incorrect handling , especially to non-observance of the sys-
tem description and the operating instructions,
e) if the device was opened, repaired or modified by persons not contracted by the manufac-
turer,
f) if the device shows any kind of mechanical damage, or
g) if the warranty claim has not been reported in accordance with 3a) or 3b).
5 Operating mistakes
If it becomes apparent that the reported malfunction of the device has been caused by un suitable
hardware, software, installation or operation, the manufacturer reserves the right to charge the
purchaser for the resulting testing costs.
6 Additional regulations
a) The above conditions define the complete scope of the manufacturer's legal liability.
The warranty gives no entitlement to additional claims, such as any refund in full or in part.
b)
Compensation claims, regardless of the legal basis, are excluded. This does not apply if
e.g. injury to persons or damage to private property are specifically covered by the pro duct
liability law, or in cases of intentional act or culpable negligence.
c) Claims for compensation of lost profits, indirect or consequential detriments, are excluded.
d) The manufacturer is not liable for lost data or retrieval of lost data in cases of slight and ordi-
nary negligence.
e) In the case that the intentional or culpable negligence of the manufac turer's employees has
caused a loss of data, the manufacturer will be liable for those costs typical to the recovery
of data where periodic security data back-ups have been made.
f) The warranty is valid only for the first purchaser and is not transferable.
g) The court of jurisdiction is located in Aachen, Germany in the case that the purchaser is a
merchant. If the purchaser does not have a court of jurisdiction in the Federal Republic of
Germany or if he moves his domicile out of Germany after conclusion of the contract, the
manufacturer's court of jurisdiction applies. This is also applicable if the purchaser's domic-
ile is not known at the time of institution of proceedings.
h) The law of the Federal Republic of Germany is applicable. The UN commercial law does
not apply to dealings between the manufacturer and the purchaser.
Appendix 15
AV200M
Page 16

MANUFACTURER INFORMATION
Dear customer,
should you require technical assistance and your dealer or installer was
not able to help, please contact our technical support.
Schwaiger GmbH
Wuerzburger Straße 17
90579 Langenzenn
Hotline: +49 (0) 9101 702-299
www.schwaiger.de
[email protected]
Business hours:
Monday to Thursday: 08:00 am - 05:00 pm
Friday: 08:00 am - 02:30 pm
 Loading...