

SCHOLTES SPY1S Operating Instructions Manual


1
Operating Instructions
Scholtès Built-in Oven
Content
Installation Instruction, 2-3
Choice of Location
Electrical Connection
Technical Characteristics
Description of the appliance, 4-5
Overview
Control Panel
Display
Accessories
Start-up and Use, 6-12
Using your oven for the first time
Time Setting
Timer Setting
Child Safety Device
Start Cooking
Programming cooking cycle
Cooking Advices
Suggested Cooking Table
Precaution, 13
Safety Guidelines
Care For Environment
Cleaning and Maintenance, 14-17
Automatic PYROLYSIS Cleaning
Switch Off Power
Cleaning Outer Surface
Cleaning Oven Door
Assistance, 18
Important safety instruction.
Please carefully read this booklet, and keep it
for future reference.
Applicable to Hong Kong Region
EN
SPY1S

2
EN
Installation Instruction
Choice of Location
The dimension of the cabinet from the above diagram is able to hold the oven.
Appliance can be installed under a work top or in a column of cabinet with suitable dimension
(open or close). (see adjacent diagram)
The appliance has optimized air circulation system which allows it to perform excellent cooking
and cleaning result if the following guidelines are followed:
Place the oven in the middle of the cabinet, and guarantee the oven has a minimum
distance of 15mm between it and the neighboring cabinet.
The materials and the coating of the cabinet must be heat-resistance.
To improve the stability, use 2 screws to penetrate the screw holes on either side of front
inner panel. (Fig. 1)
Built-in installation
Suggested procedures:
1. Drill a hole on the cabinet panel to avoid splitting the wood.
2. Attach the oven with two screws.
Tips
To ensure the appliance install correctly, do not hesitate to call on a household appliance
specialist.
3
EN
Installation Instruction
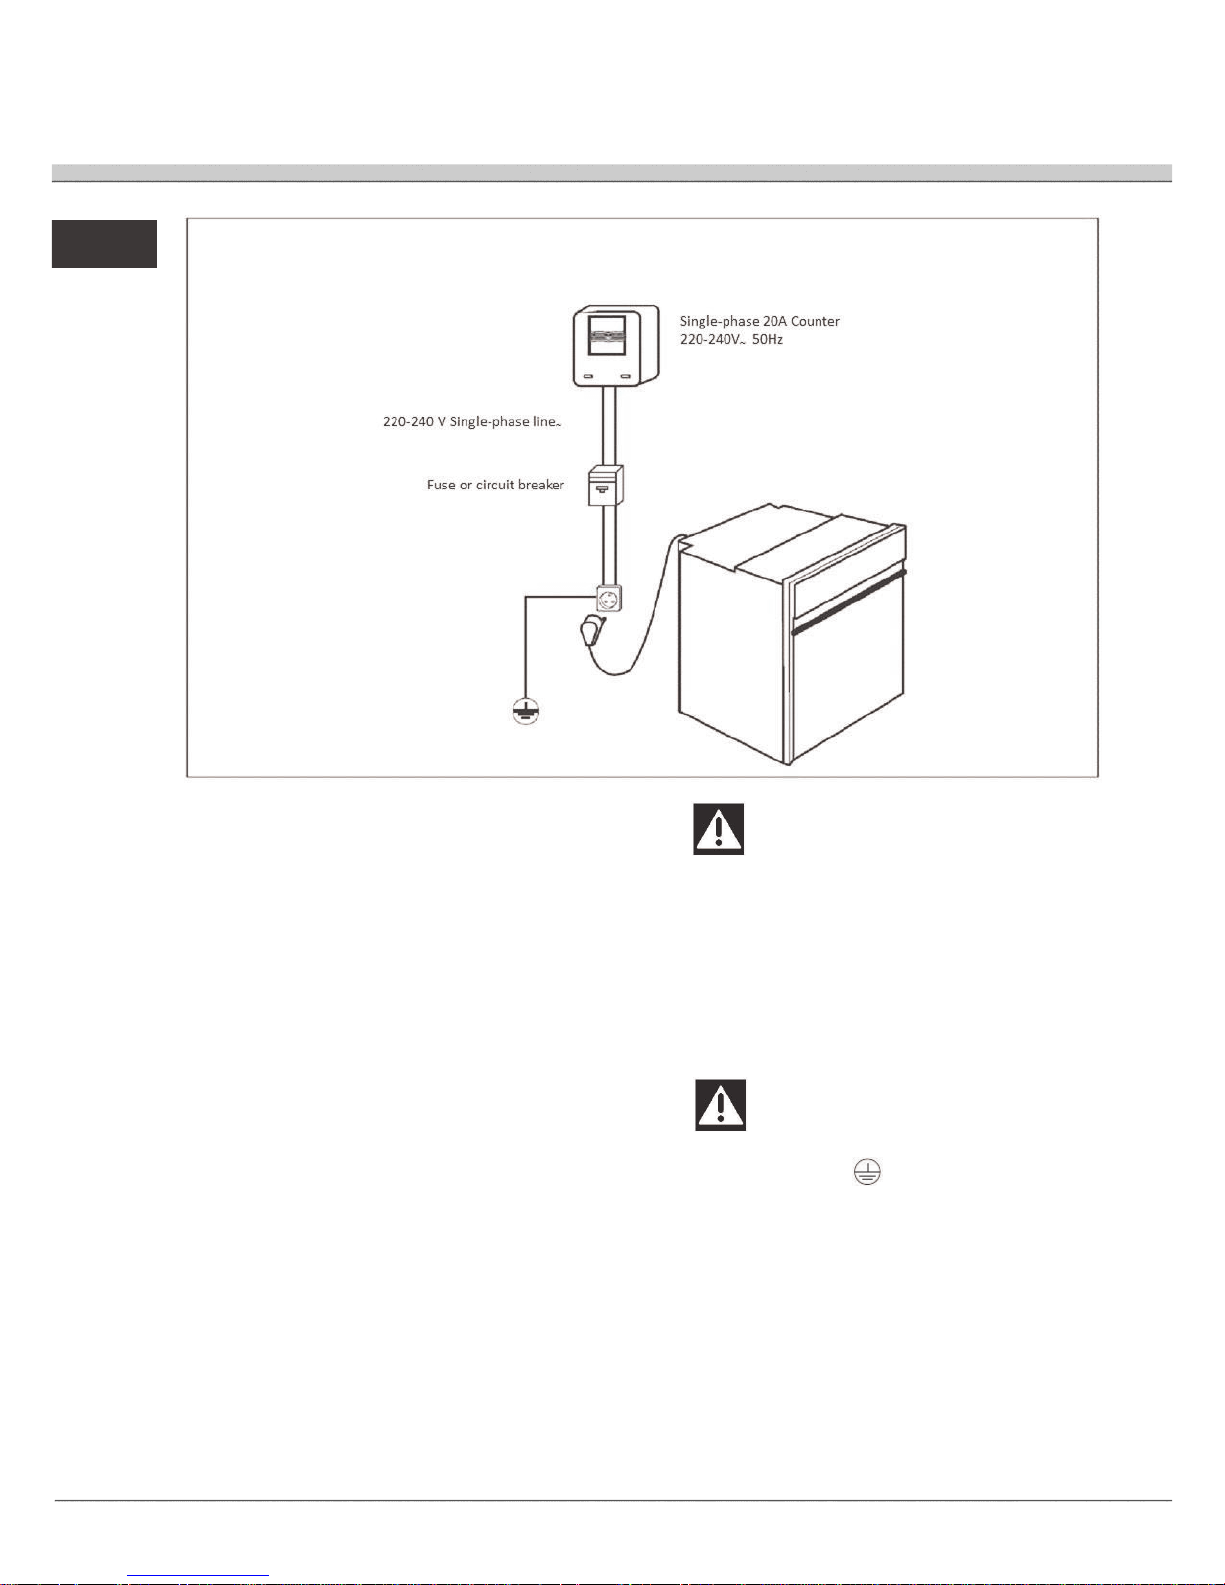
Electrical Installation
Appliance must be correctly installed to ensure electrical
safety. During fitting and maintenance operations, the
appliance must be unplugged from the electrical grid. Fuses
must also be switched off or remove. The electrical
connections are made before the appliance is installed in its
housing.
Please ensure:
the electrical installation has sufficient voltage,
the electrical wires are good in condition,
the diameter of the wires complies with the installation
requirements.
Appliance must connect with a power cable (standardized)
with three 1.5mm2 conductors (1 ph +1N + ground) that must
be connected to monophase 220-240V network via a
standardized receptacle 1 ph +1N + ground lead or an allpole cut-off device in accordance with installation rules.
Warning
We will not be held responsible for any accident
caused by non-existent, defective or incorrect
earthling.
If the electrical installation in your residence requires
any changes in order to hook up your appliance, call
upon a professional electrician.
If any malfunction occur, unplug the appliance or
remove the fuse corresponding to the sector where the
oven is hooked up.
Warning
The safety wire (green-yellow) is connected to the
appliance’s terminal and must be connected to
the earth terminal of the electrical set-up.
You must enable the appliance to be disconnected
from the supply network after installation.
Disconnection can be enabled by ensuring that there
is an accessible power plug or by incorporating a
switch into the fixed wiring in compliance with the
installation rules. If the power cable is damaged, it
should be replaced by the manufacturer, its after-sales
service department or a similarly qualified person to
avoid danger.
4
EN
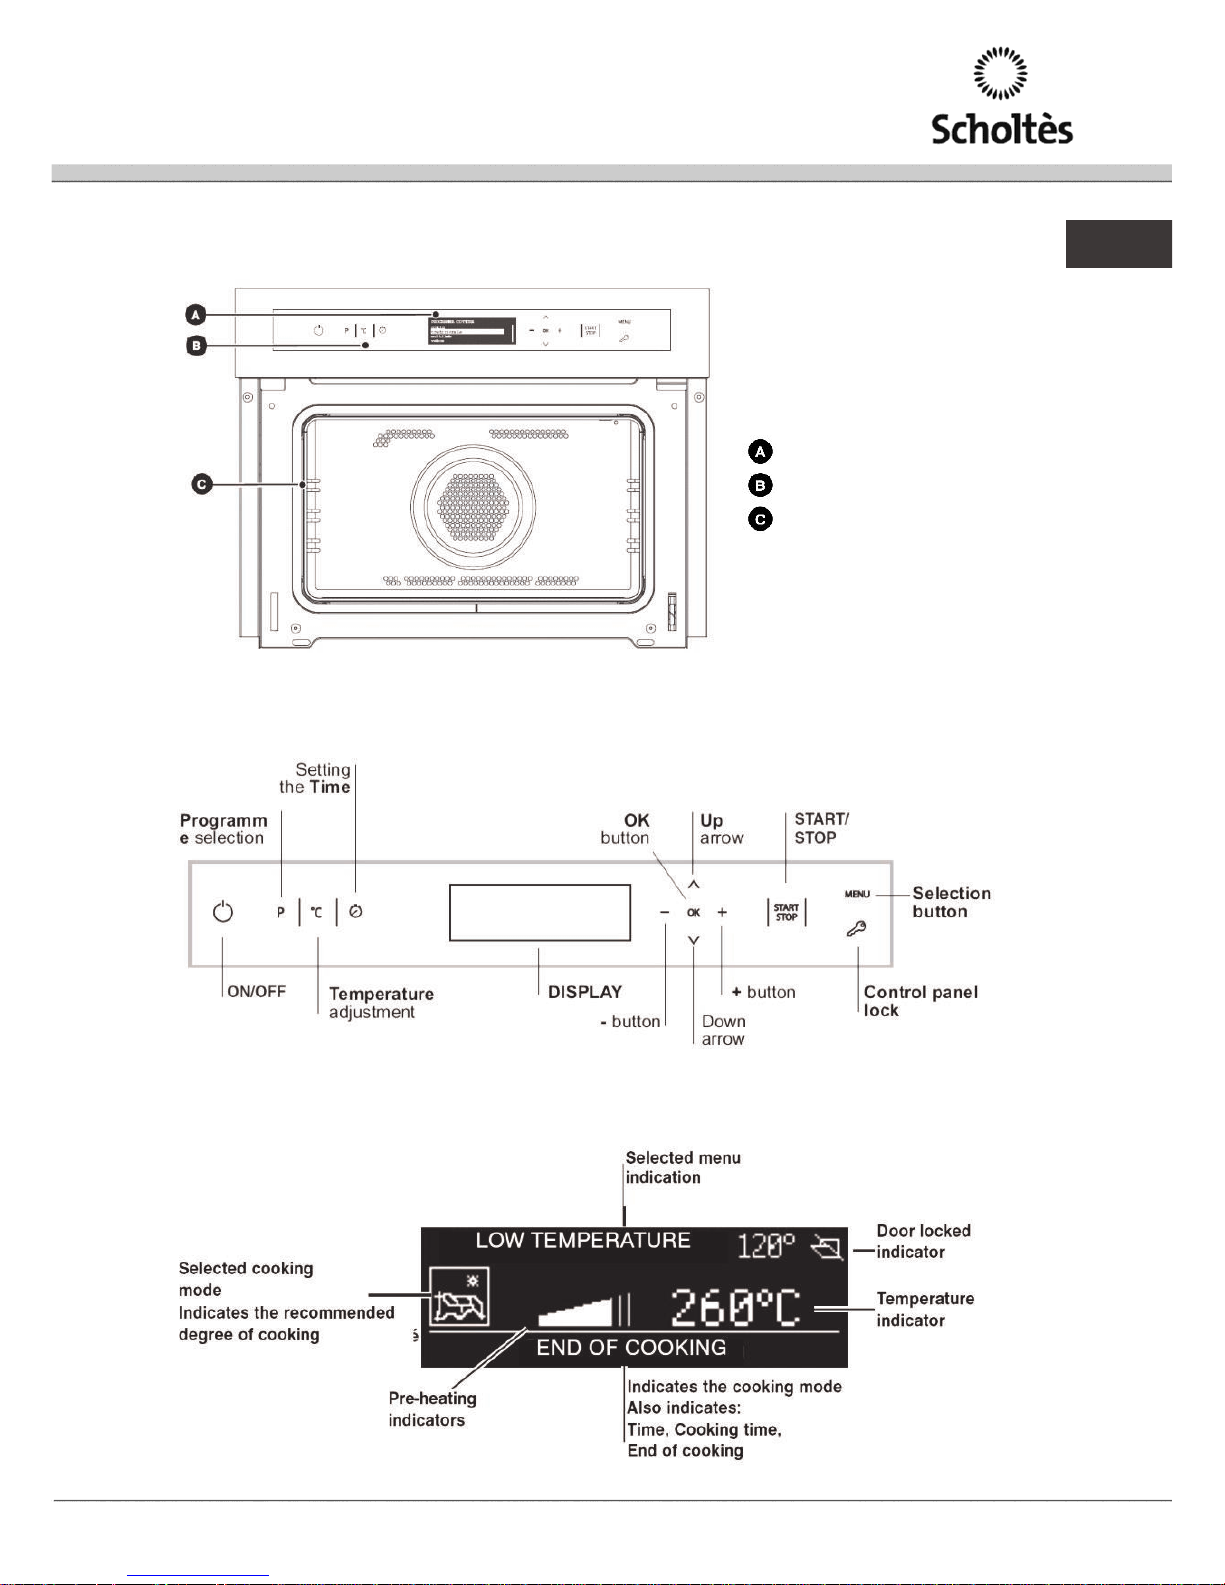
Description of the appliance
Program Setting
Control Panel
Shelf Support
Overview
Control Panel
Display
5
EN
Description of the Appliance
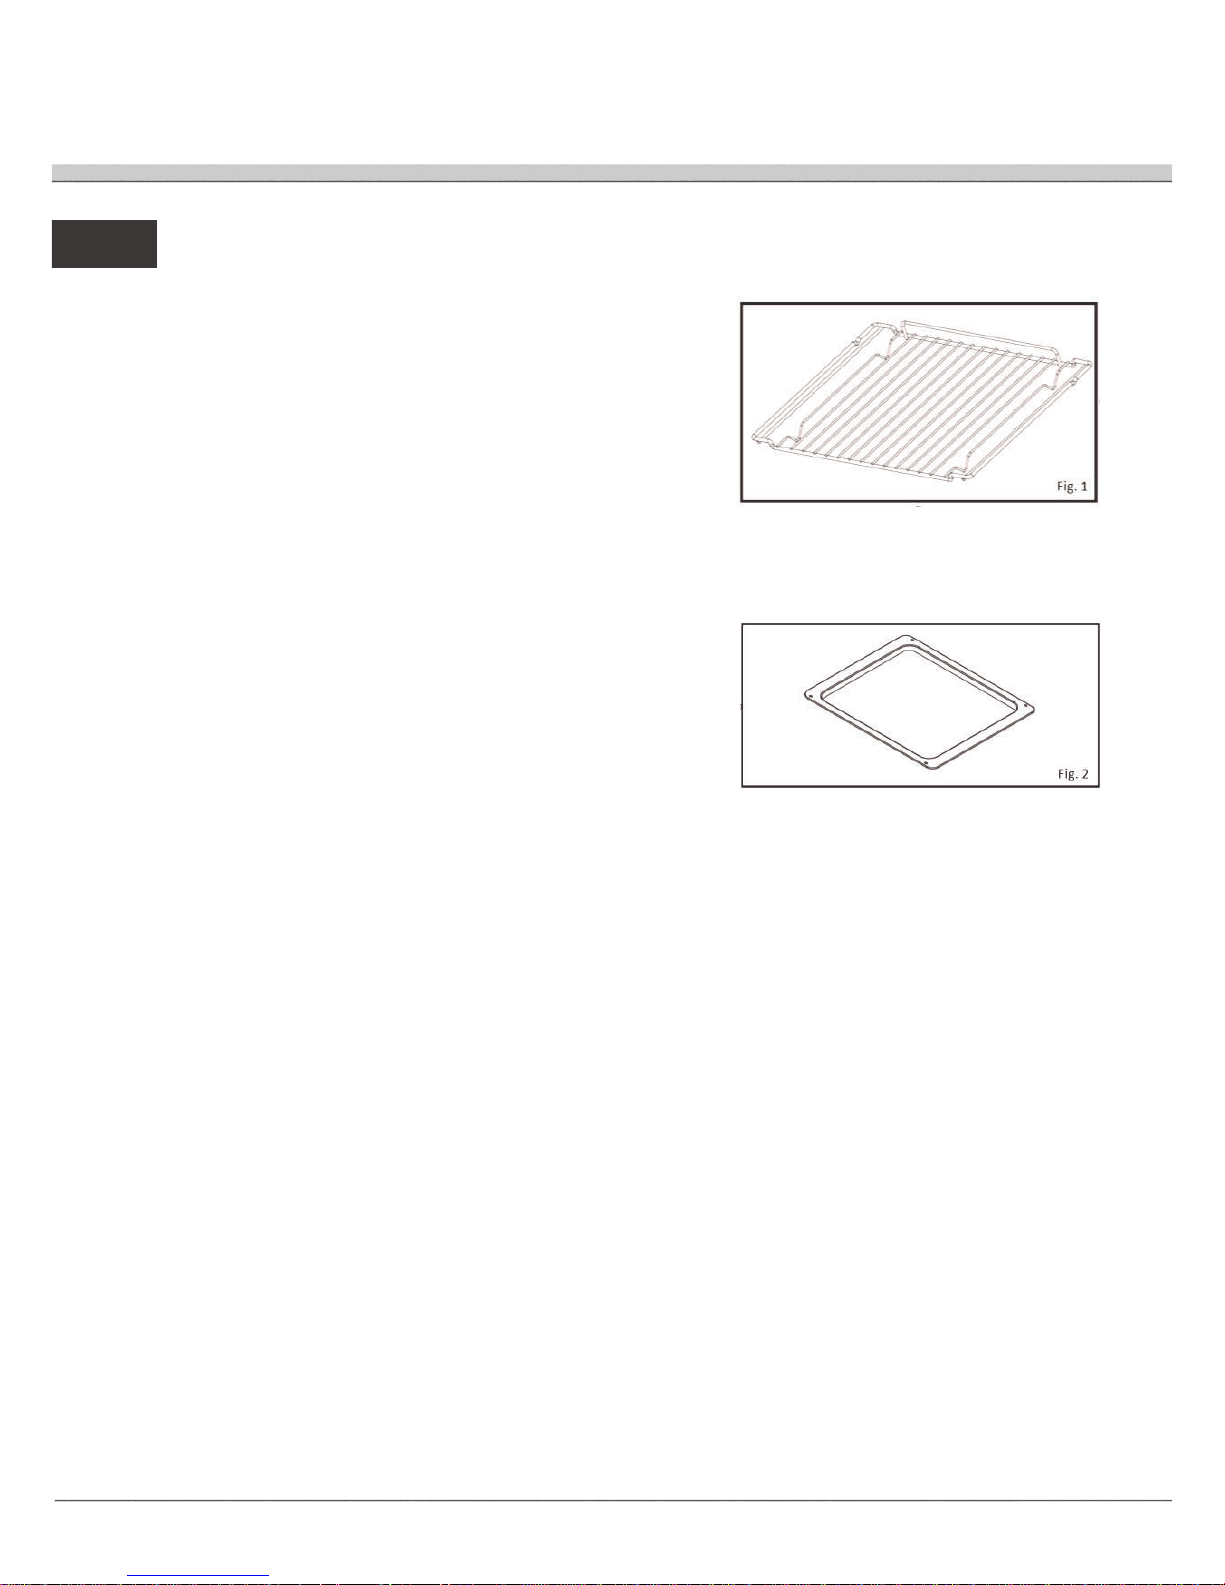
Accessories
Safety Grid (Fig. 1)
This grid can be used to hold all dishes and molds containing
foodstuffs to be cooked or browned.
It can be used for barbecues (place on the grid directly).
Please refer to the cooking table on page 12.
Multi-purpose 45mm Tray (Fig. 2)
When you insert the support under the grid, it collects the
juice and fat from grilling. If half-fill it with water, it can be
used as a double boiler or “bain-marie”.
Avoid putting roasted food or meat directly on the tray as it
will cause significant spills. Please refer to the cooking table
on page 12.
 Loading...