

Schlage LT Series Installation Instructions Manual
*P516-769*
P516-769
LT-Series
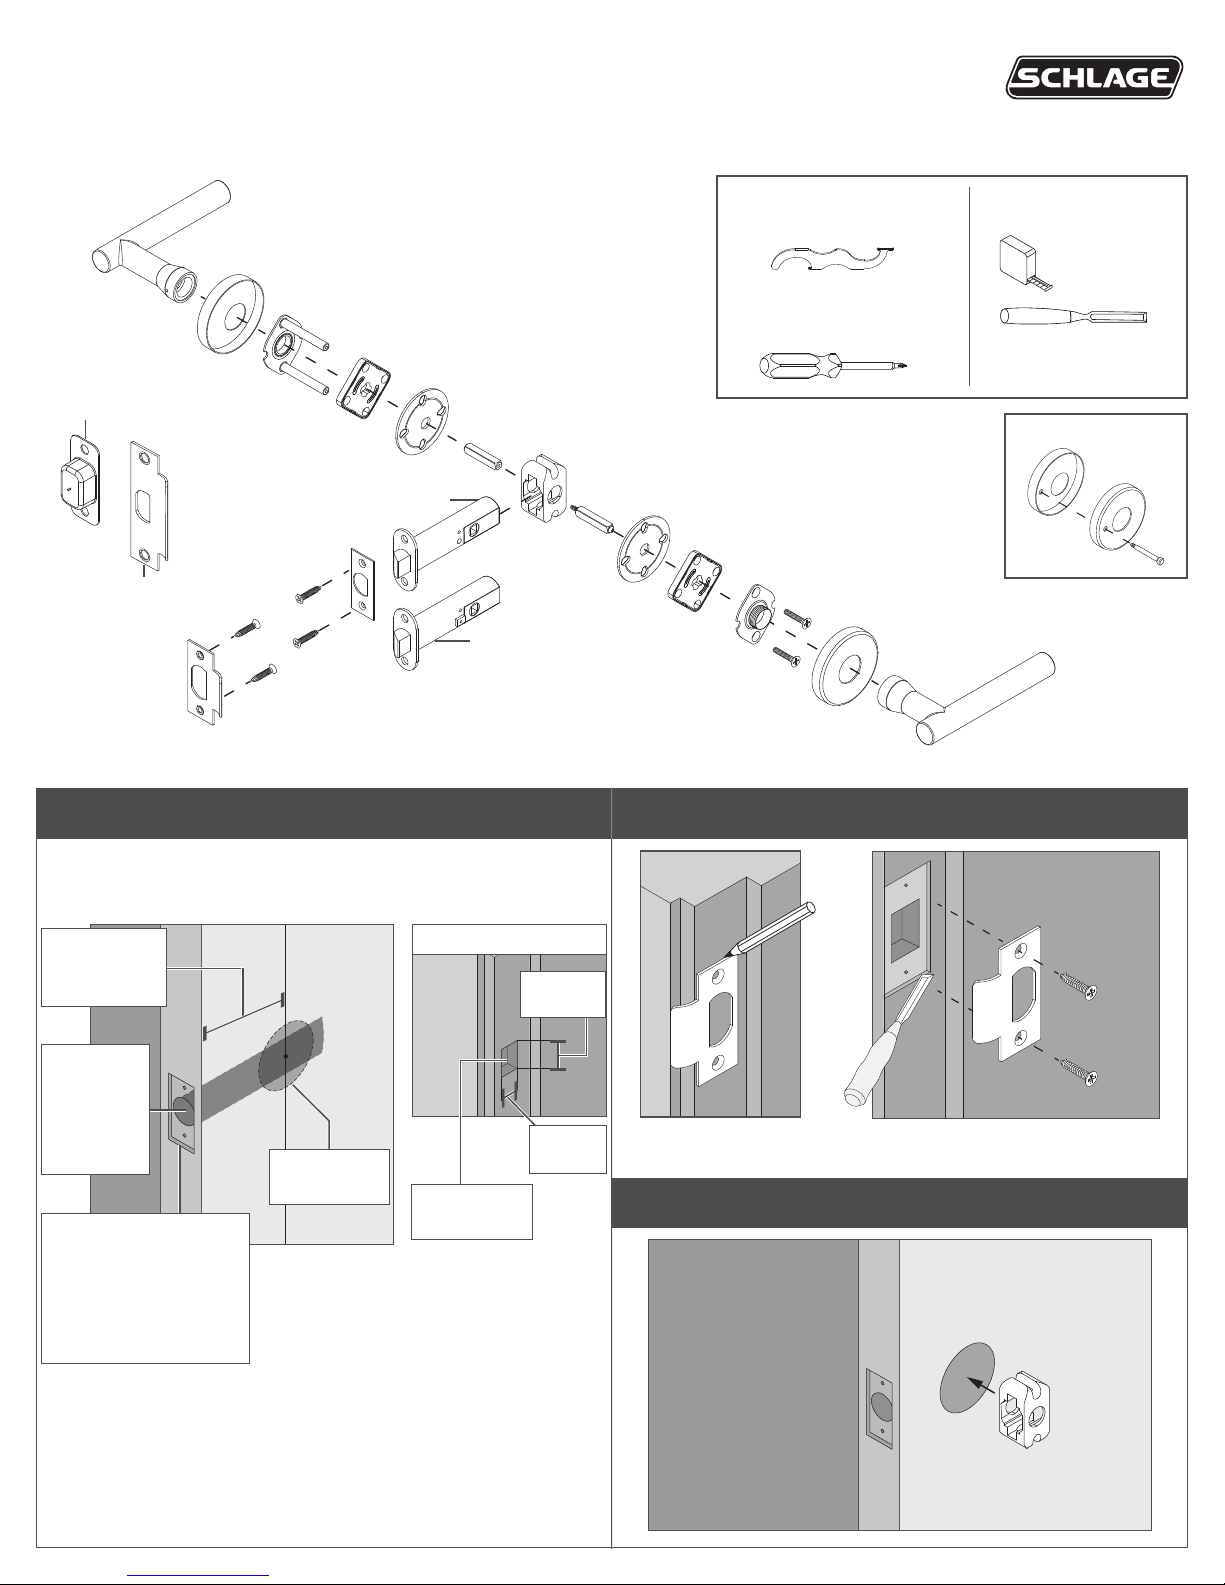
Installation InstructionsLT Passage and Privacy functions
Optional
strike box
Optional
ANSI strike
Passage latch
L A passage latch or a privacy latch is
included in the package, as ordered.
Privacy latch
Tools Needed
(included)
(not included)
Optional Tools
1 2 3 4 5
Privacy Lock Only
1 Check dimensions
If door and door jamb dimensions do not match, go to
www.schlage.com for drilling instructions or refer to the enclosed
template.
2C\,” (60 mm)
OR
2C\v” (70 mm)
1” (25 mm)
Hole
4Z\,”
(105 mm)
deep
2C\,” (60 mm) Backset:
2Z\v” x 1” (57 x 25 mm)
B\cx” (4 mm) deep
2C\v” (70 mm) Backset:
2Z\v” x 1Z\,” (57 x 28 mm)
B\cx” (4 mm) deep
2Z\,” (54 mm)
Hole
Door Jamb
(29 mm)
(22 mm)
B\,” (16 mm)
deep
2 Install strike
a b
1Z\,"
M\,”
3 Install alignment collar
4 Install latch
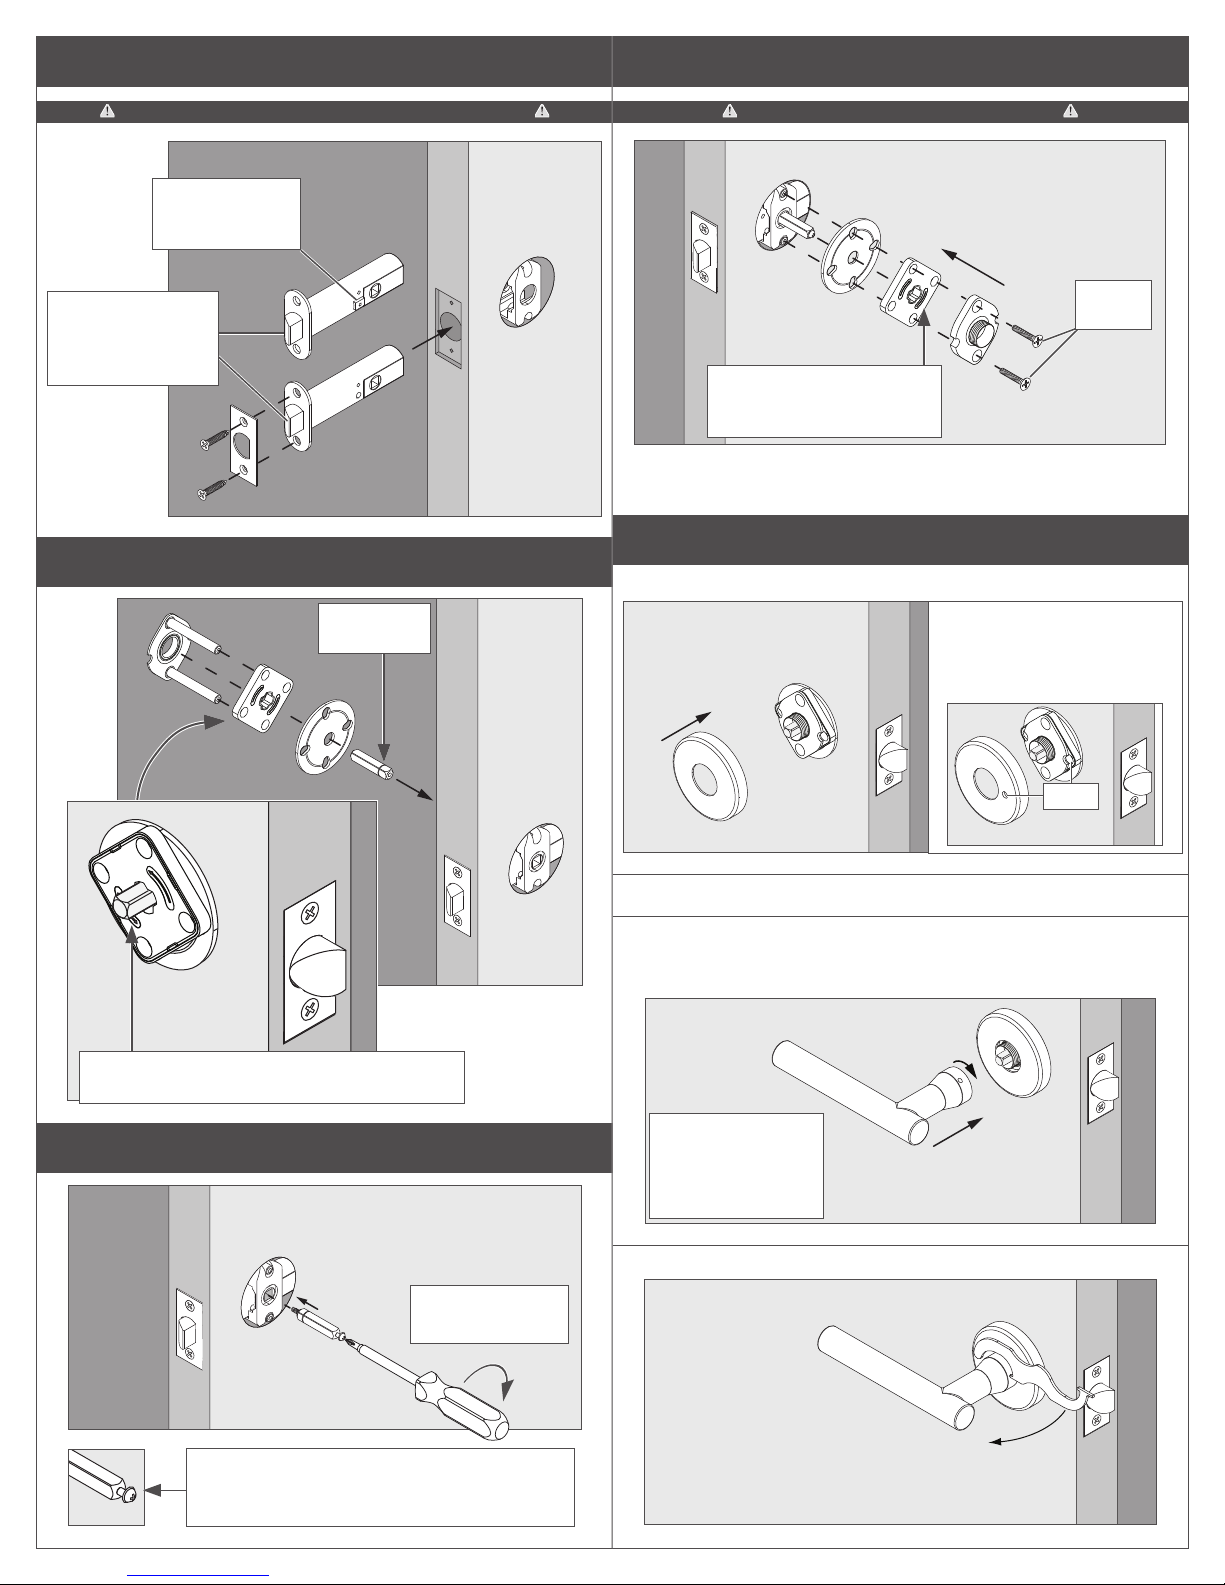
7 Install interior chassis
DO NOT FULLY tighten latch faceplate screws
PRIVACY ONLY:
Button toward
interior of door
PASSAGE and
PRIVACY: Latch
bevel must face the
door frame
5 Install exterior spindle and chassis assembly
Groove
toward door
INTERIOR
INTERIOR
Do not overtighten chassis screws
INTERIOR
Chassis
screws
IMPORTANT! Spring cage
arrow must point in direction
of lever down rotation.
L Privacy lock only: For door thickness exceeding 1C\v”, use
the thick door kit.
8 Install exterior rose and lever
8a Place the rose over the mounting plate and spindle.
EXTERIOR
a
PRIVACY ONLY: Align the
hole in the rose with the
groove in the mounting
plate.
IMPORTANT! Spring cage arrow must point in
direction of lever down rotation.
6 Install interior spindle
INTERIOR
Turn the spindle
screw clockwise.
Align
8b Place the lever over the rose and spindle.
8c By hand only, thread the lever bushing on the mounting
plate. If Privacy Lock, hold the rose rmly in place to
ensure proper alignment.
c
IF DIFFICULT TO
ASSEMBLE, check
that latch screws are
NOT fully tightened.
b
8d Tighten the lever bushing using the spanner wrench.
IMPORTANT: The spindle screw will not fully
tighten against the spindle.
DO NOT OVERTIGHTEN!
d
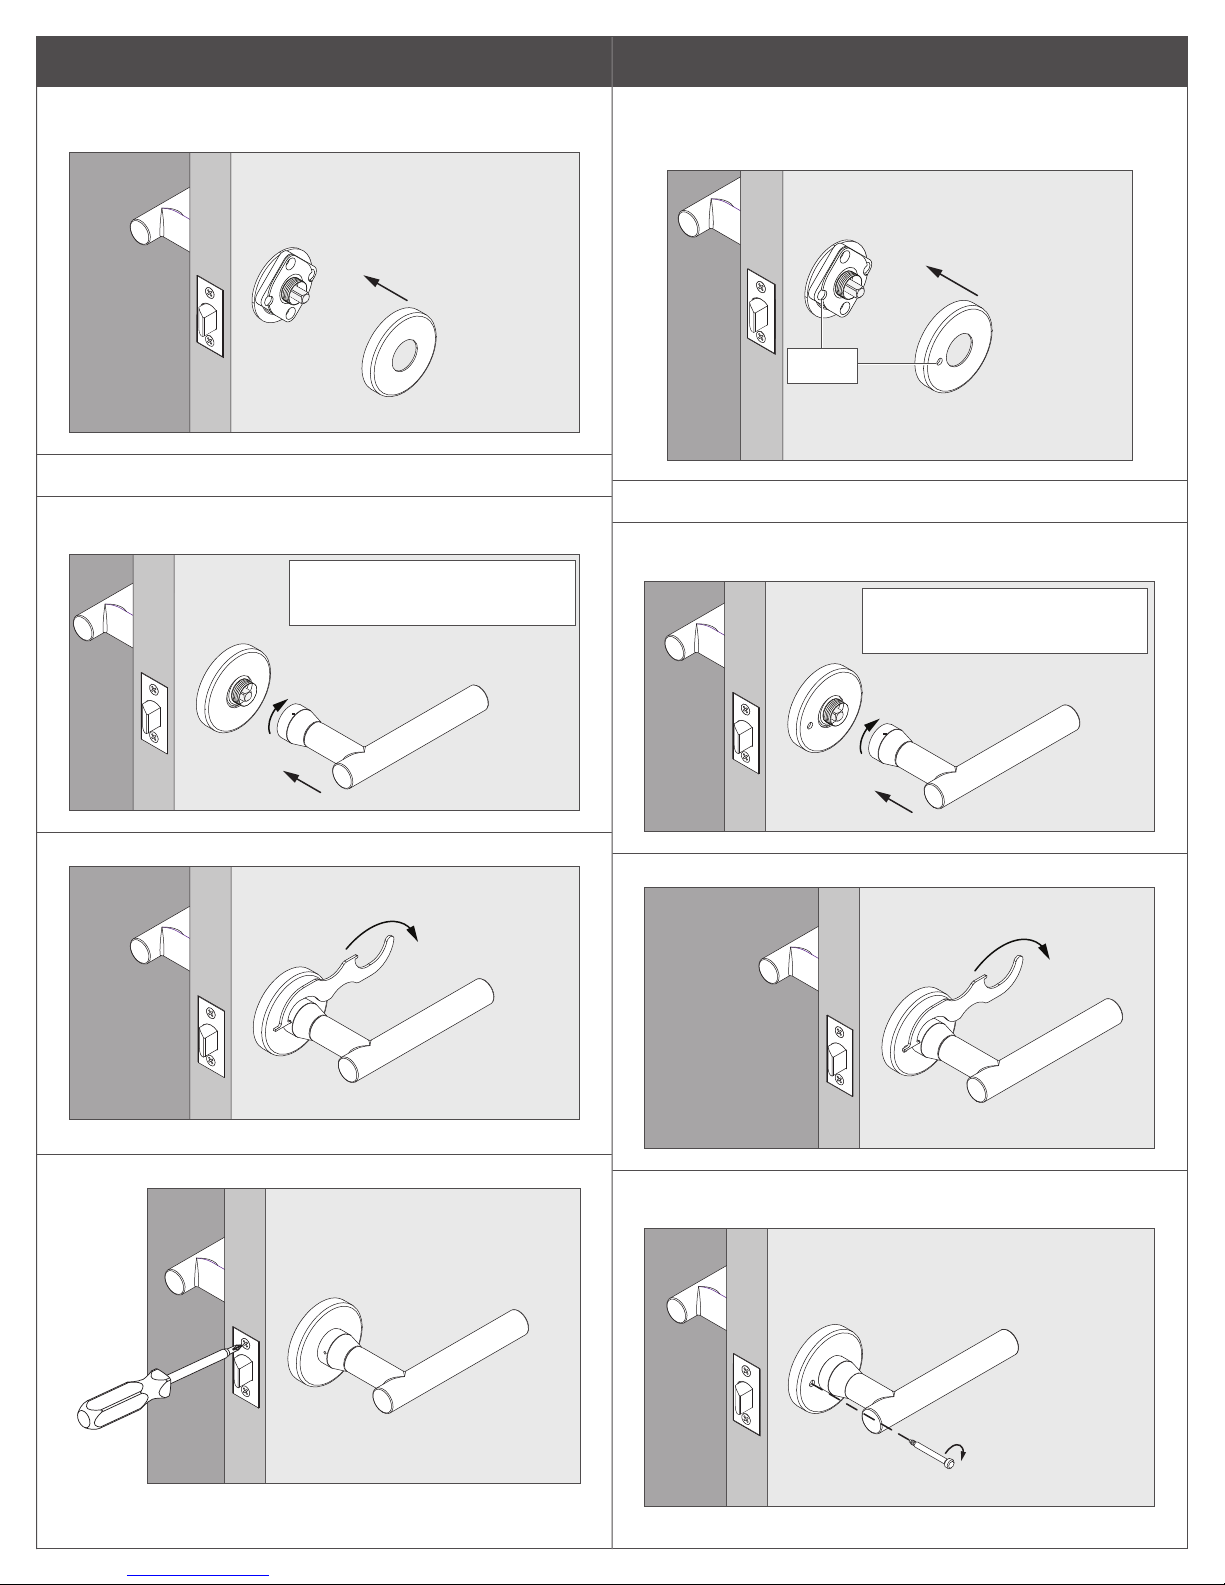
9 Install interior rose and lever
L For privacy lock, skip to Step 10.
9a Place the rose over the mounting plate and spindle.
INTERIOR
10 PRIVACY ONLY: Install interior rose, lever and pin
10a Place the interior privacy rose over the mounting plate
and spindle. Align the hole in the rose with the groove in
the mounting plate.
INTERIOR
a
9b Place the lever over the rose and spindle.
9c By hand only, thread the lever bushing on the
mounting plate.
IF DIFFICULT TO ASSEMBLE,
check that latch screws are NOT
fully tightened.
c
b
9d Tighten the lever bushing using the spanner wrench.
a
Align
10b Place the lever over the rose and spindle.
10c Hold the rose rmly in place and, by hand only, thread
the lever bushing on the mounting plate.
IF DIFFICULT TO ASSEMBLE,
check that latch screws are NOT
fully tightened.
c
b
10d Tighten the lever bushing using the spanner wrench.
d
9e Fully tighten the latch faceplate screws.
e
d
10e Insert the privacy pin into privacy rose. Turn the pin
clockwise to tighten.
e
 Loading...