

Page 1
Please read and keep these instructions
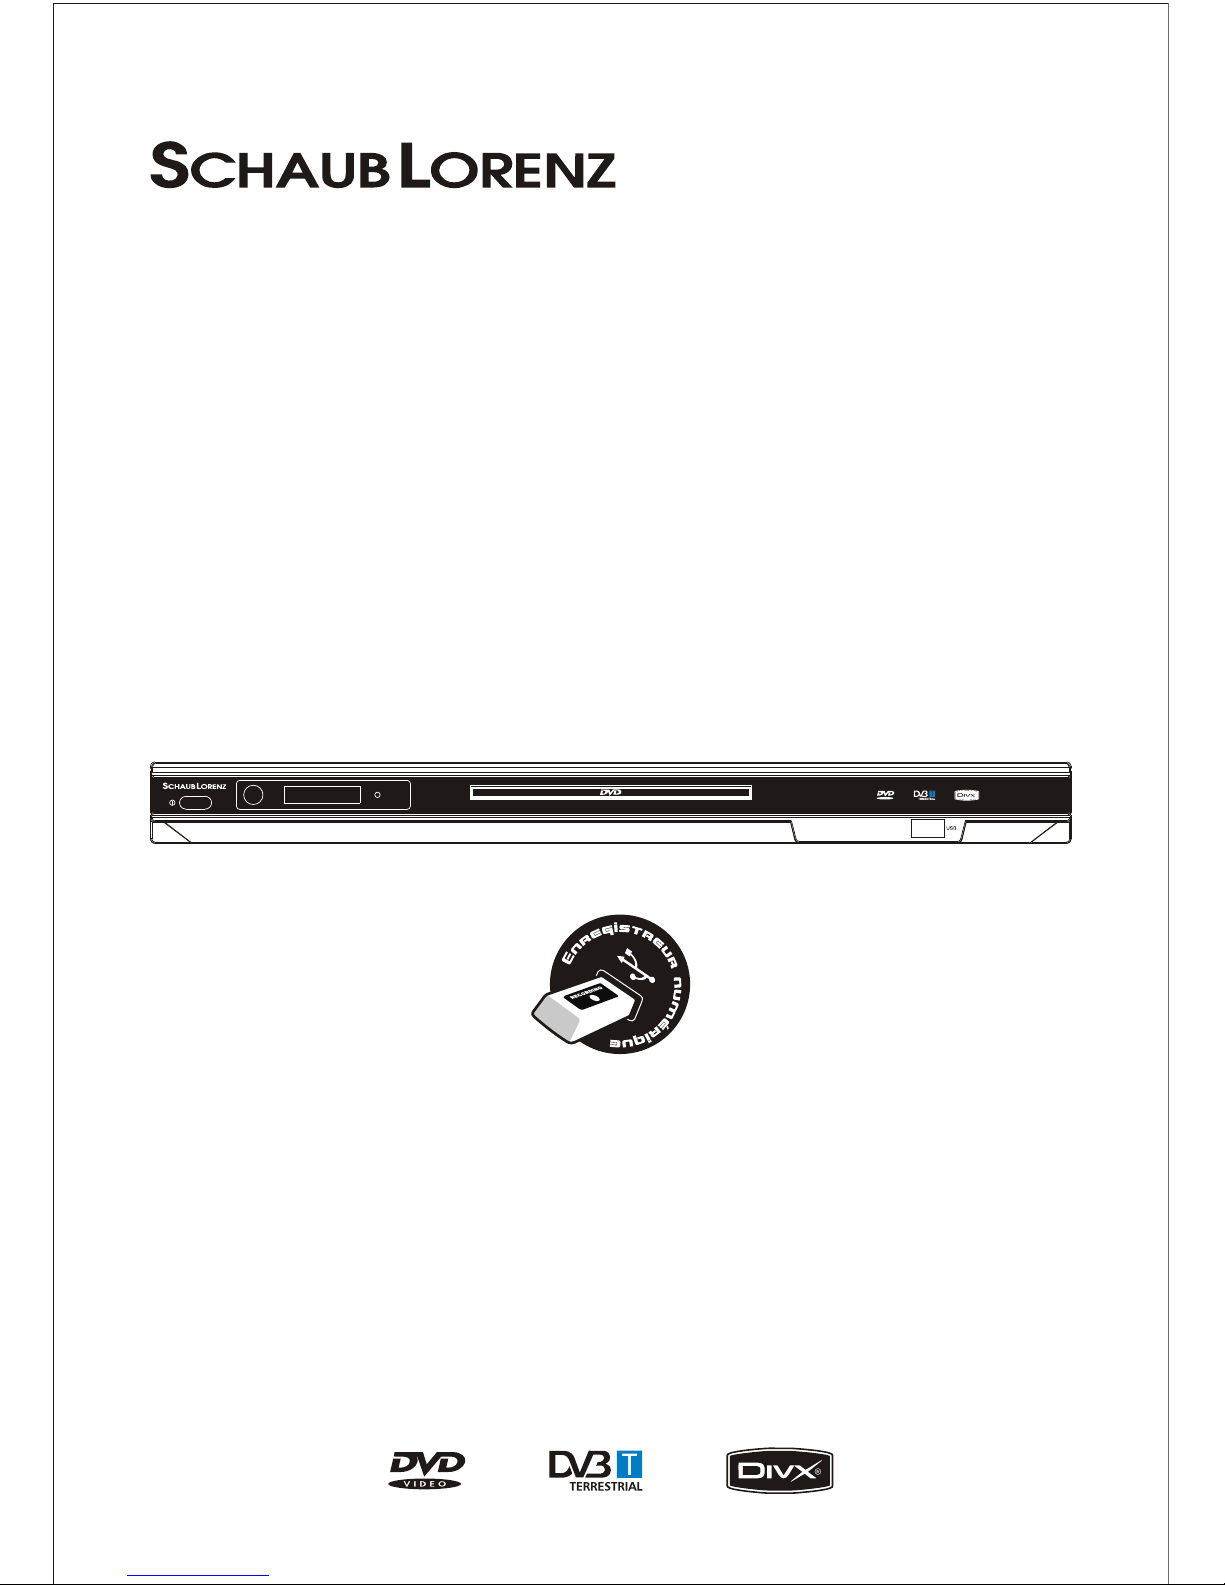
DVD-1066TNT
USER MANUAL
DVD PLAYER WITH BUILT- IN DVB-T
USB WITH RECORDING FUNCTION
Page 2
Important safety instructions-please read carefully
And keeps for future reference
To reduce the risk of fire or electric shock, do not expose this product to
water, rain or moisture. To prevent the risk of electric shock, do not remove
the cover or back or this product. In case of product failure, only qua lified
personnel can repair. There are no user-serviceable parts inside.
CAUTION !
Dangerous tension inside the product ! Do not open . Risk of electric shock ! No pa rts
can be repaired by the end-user. Only qualified personnel can repair and maintain
this product.
If the electric cord is damaged, it must be replaced by the manufacturer or qualified aftersales personnel in order to avoid any danger.
The product must be installed in accord ance with local laws.
Damaged batteries must be properly di sposed. In order to protect the environment, please
dispose the batteries properly, in accordance with l ocal laws (information is available at
your reseller).
This appliance is to be used on temperate c limate. Don’t use the apparatus in tropical
climates.
Where to install the product
- Place the product on a straight, rigid an d stable place. Do not place the product on a
carpet.
- Do not place the product on top or another th at may cause overheating (for example, a
receiver or amplifier).
- Do not place anything underneath the product (for example, CDs or magazines).
Proper ventilation
- Place the product in a sufficiently-aerated place t o avoid overheating. Allow at least
10cm spacing at the back and top of the produ ct, and 5cm spacing on both sides to
prevent overheating.
- Do not place items such as newspapers, ta blecloth, curtains, in front or the ventilating
openings.
Do not expose the product to high temperatures, moisture, water and dust.
- The apparatus shall not be exposed to dri pping or splashing and that no objects filled
with liquids, such as vases, shall be placed on the apparatus
- Do not place other items close to this prod uct that may damage it (for example, an object
containing water or lightened candles).
- No naked flame sources, such as lighted c andles, should be placed on the apparatus.
Use of controls, adjustments, or performance of procedures other than
those specified herein may result in dangerous radiation exposure. This
product is rated as LASER CLASS 1 PRODUCT.
CAUTION: Laser radiation when open - ne ver stare into the laser beam.
Page 3
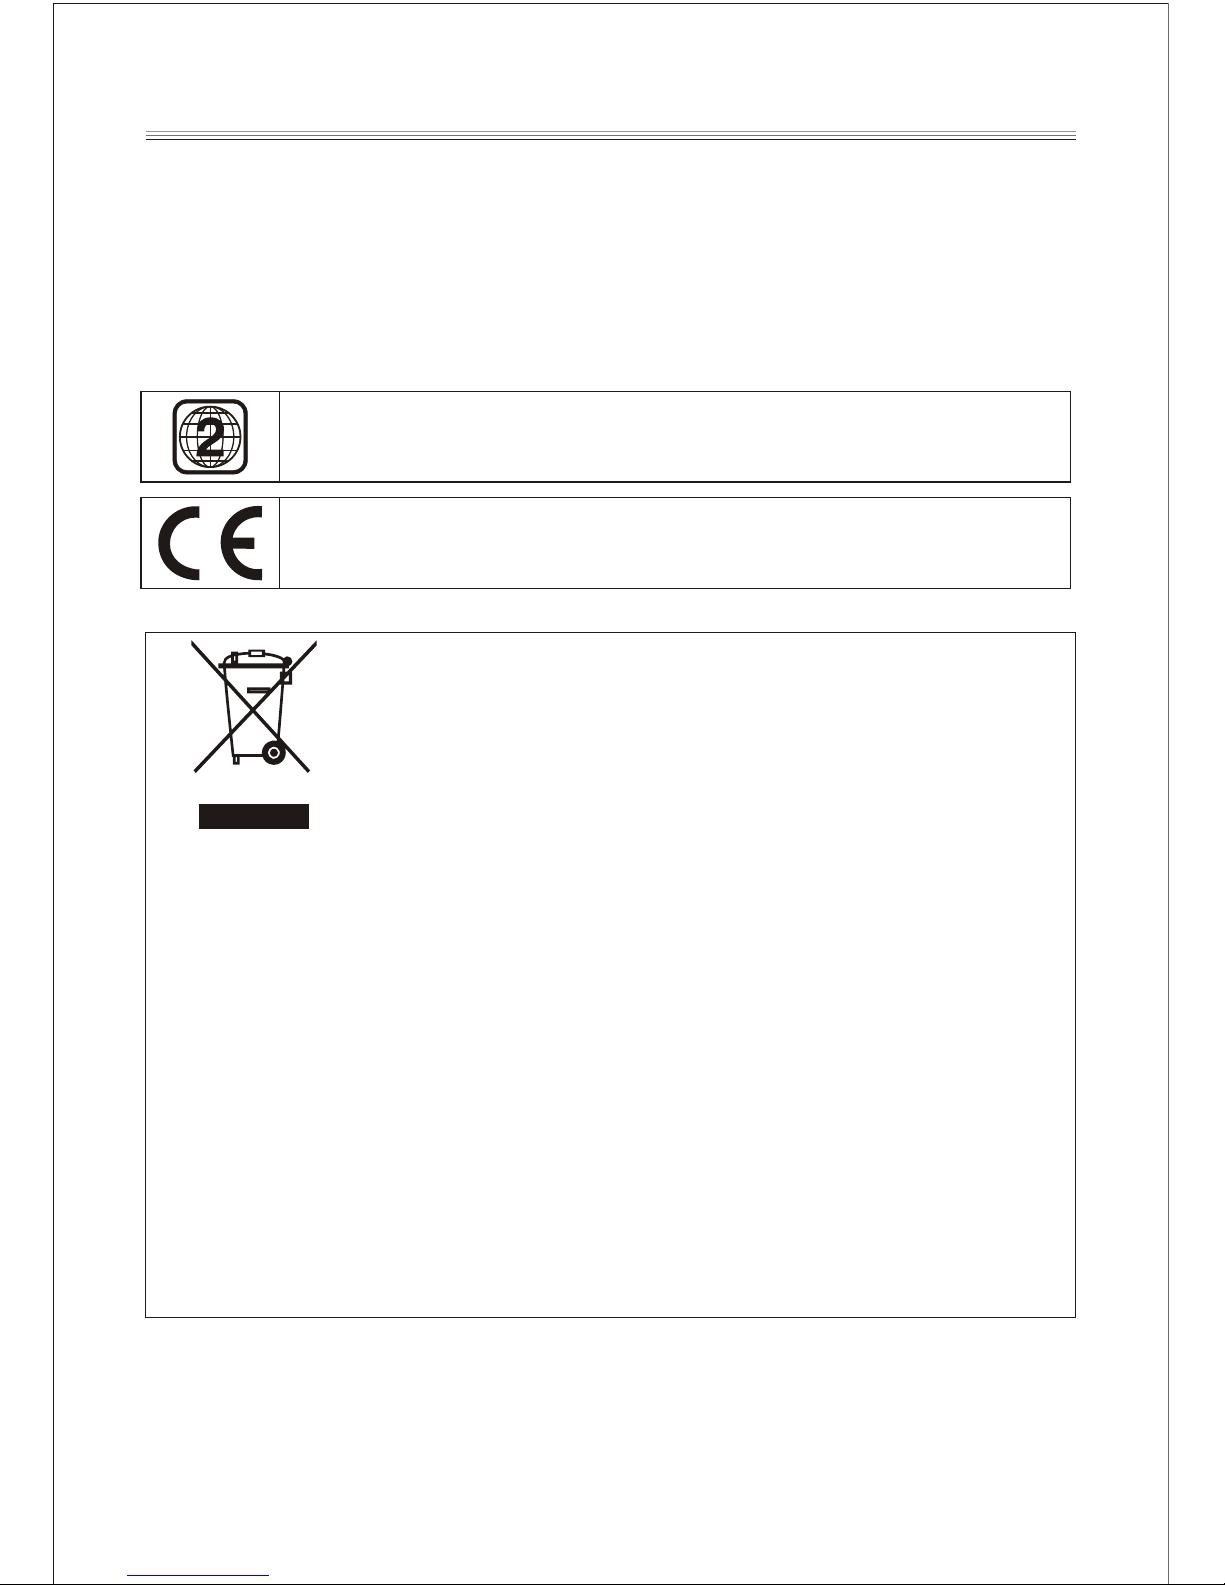
- This logo set on the product means that the recycling of this apparatus comes within the
framework of the directive 2002/96/EC of January 27, 2003 concerning the waste on
electrical and electronic equipment (WEEE).
- The presence of dangerous substances in the electrical and electronic equipments can
have potential consequences on the environment and human health in the cycle of
reprocessing this product.
- Therefore, at the end of its lifetime, this product shall not be disposed with othe r nonrecycled waste.
- As the end user, your role is of prime importan ce in the cycles of re-using, recycling, and
other forms of valorization of this electrical and electronic equipment. Local authorities
and resellers have set special procedures for the purpose of collecting and recycling this
product.
- You have the obli gation to use the selective waste collection systems put in place by
your local authorities.
DVD Compatibility
This product can only play ZONE 2 DVD.
This product is compliant with directives 2006/95/EC (abrogating the directive
73/23/EEC modified by the directive 93/68/EEC) and 2004/108/EC
(Abrogating the directive 89/336EEC).
Electric supply
- Please unplug the product in case of prolonged non-use.
- This product is intended to be used under temperate climate and should not be used
under tropical climate.
- If the supply cable is damaged, it must be replaced by the manufacturer or qualified
after-sales personnel to avoid any da nger.
- This product must be connected to an elec trical supply 230V ~ 50Hz.
- The plug must be accessible after insta llation.
Page 4

Table of Contents
1. Presentation
1
2. Front Panel and Rear Panel
2
3. Quick Installation Guide for First Use
3-5
4. Remote Controller
6
6. System Setup
8-9
5. Connections
7
7. DVD Setup
8. Initial Installation Instructions
9-10
11
9.DVB Menu
10. Program Search
14. Recording a DVB-T Program
11-12
12-13
16-19
11.Parental Control
15. Record List
12. System Setup
16. Troubleshooting
13
19
13-14
20-21
13. Main operations in DVB-T mode
17.Technical Specification
14-15
22
Page 5

1
1. Presentation
Thank you for having purchased this DVD player with built-in DVB-T tuner. This unit
allows you to receive all free DVB-T channels broadcast in MPEG-2 format. Simply
press the DVD button on the remote control in order to switch to DVD mode and
watch your favorite movies.
This unit can also serve as an authentic multimedia station thanks to its USB port:
- Plug a USB stick to the unit and you may start recording a DVB-T channel by
simply pressing the REC button on the remote control! You may also program a
recording in advance by using the TIMER function, just as you can do with a
recorder.
- With this unit, you can also watch your MPEG-4 and DIVX6 videos, play MP3 and
WMA music files, and visualize your JPEG photo albums.
Other features of this product:
- The installation of the unit is quick and easy. Simply connect it to your roof
antenna (via the RF IN antenna input) and then connect it to your television by
using an SCART cable. At first use, the installation of DVB-T channels will take
place automatically.
- Thanks to the coaxial output, you may enjoy better audio quality by connecting
this unit to your home cinema system!
- The EPG function allows you to easily consult, at all time, the coming programs of
the DVB-T channels (subject to the information broadcast by the channels).
Package Contents
Before installation, please check the items of the package.
The package should contain the following items:
~ DVD player with built- in DVB-T
~ Remote Controller x1
~ User's Manual x1
Auto Standby
In order to save energy, the electricity consumption of this product has been reduced
in both operation mode and standby mode. Furthermore, if no operation is carried
out for three consecutive hours, the unit will automatically enter standby mode.
Simply press the Standby button on the remote control to switch the unit back to
operation mode.
Page 6
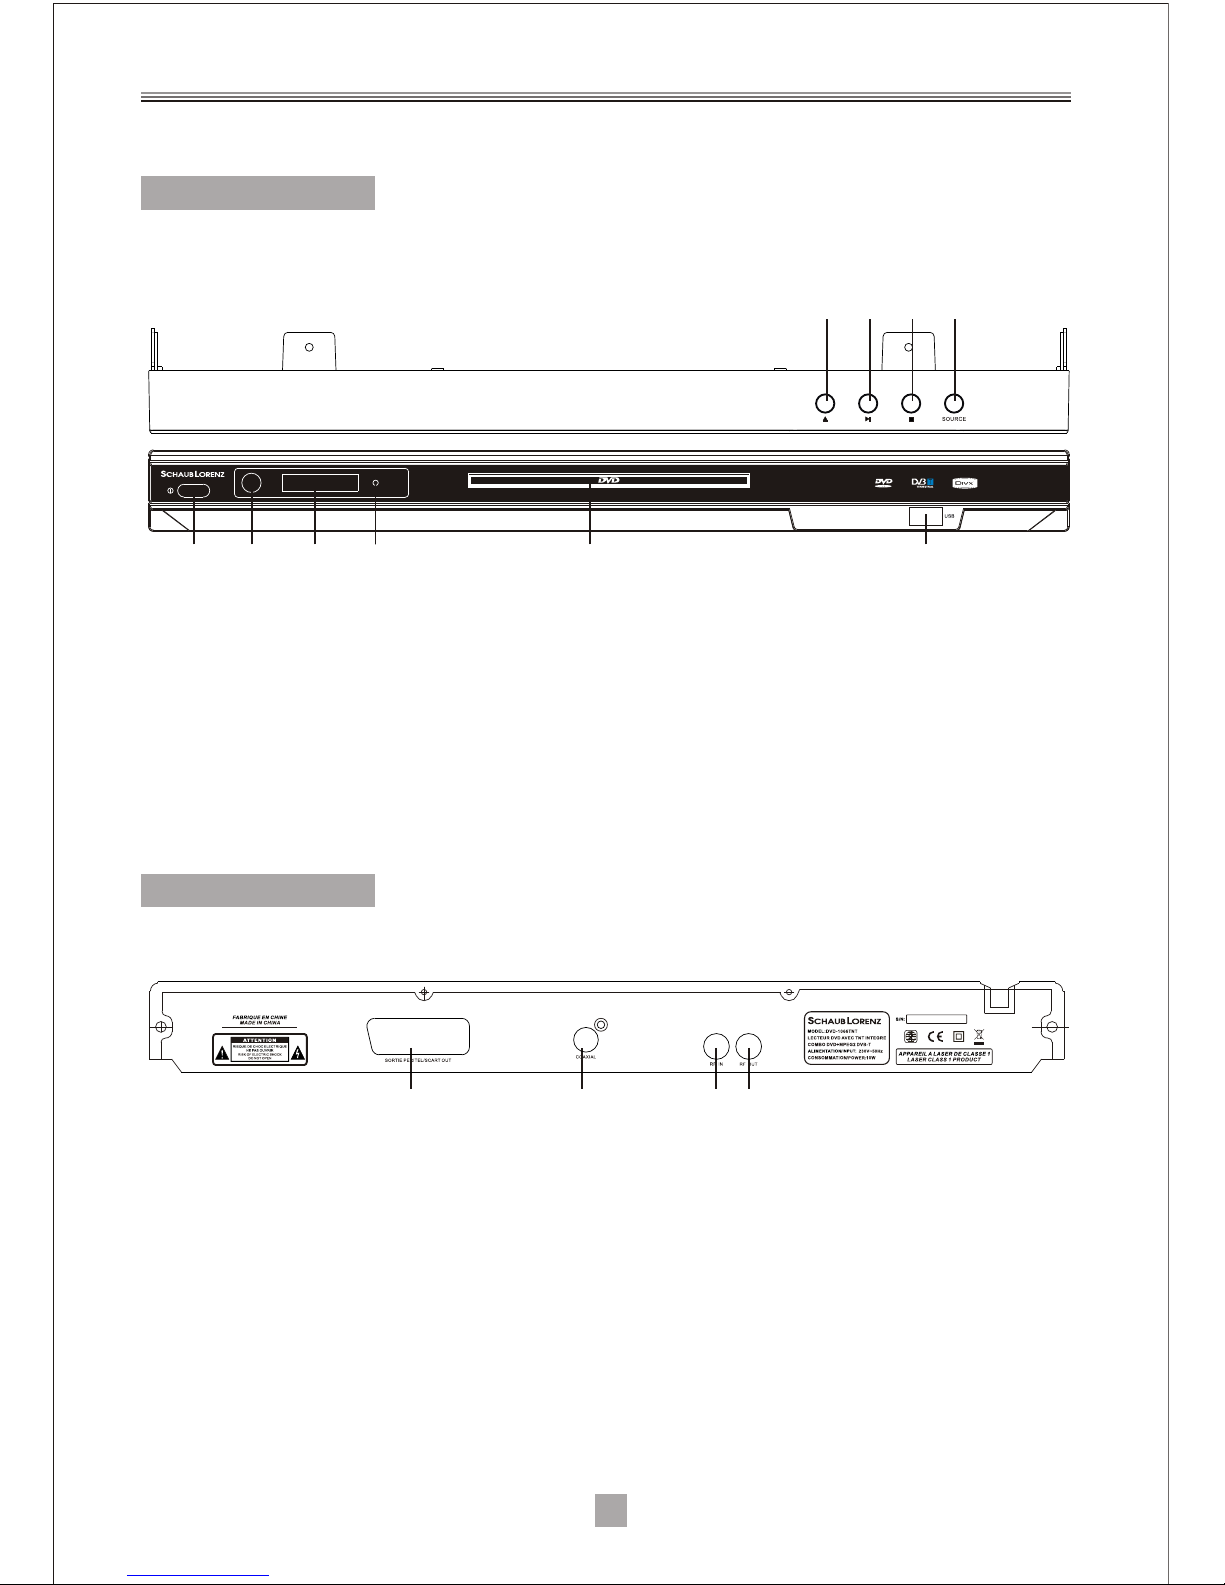
2. Front Panel and Rear Panel
2
Front Panel
Rear panel
1
1.OPEN/CLOSE
2.PLAY/PAUSE
3.STOP
4.SOURCE
5.USB
6.DISC TRAY
7.STATUS INDICATOR
8.LED DISPLAY
9.REMOTE CONTR OL SENSOR
10.POWER SWITC H
1. SCART OUT: Thi s socke t conne cts to your TV.
2. COAXIAL: This s ocket c onnects to a coaxia l socke t on your home t heate r.
3. RF IN : This socket c onnec ts to your external a erial .
4. RF LOOP THRO UGH: This s ocket will bypass t he RF sig nal to either your TV or an other v ideo
system.
1
2 3 4
5678910
2 3 4
Status indicat or of the u nit:
- The indicator li ghts in r ed when the un it is in st andby m ode or when re cordi ng is in progress.
- The indicator li ghts in g reen when th e unit is s witch ed on.
Page 7
3
3. Quick Installation Guide for First Use
Second step: Prepare the remote control
Insert two AAA batteries inside the remote control (batteries not included).
Third step: Initial Installation Instructions
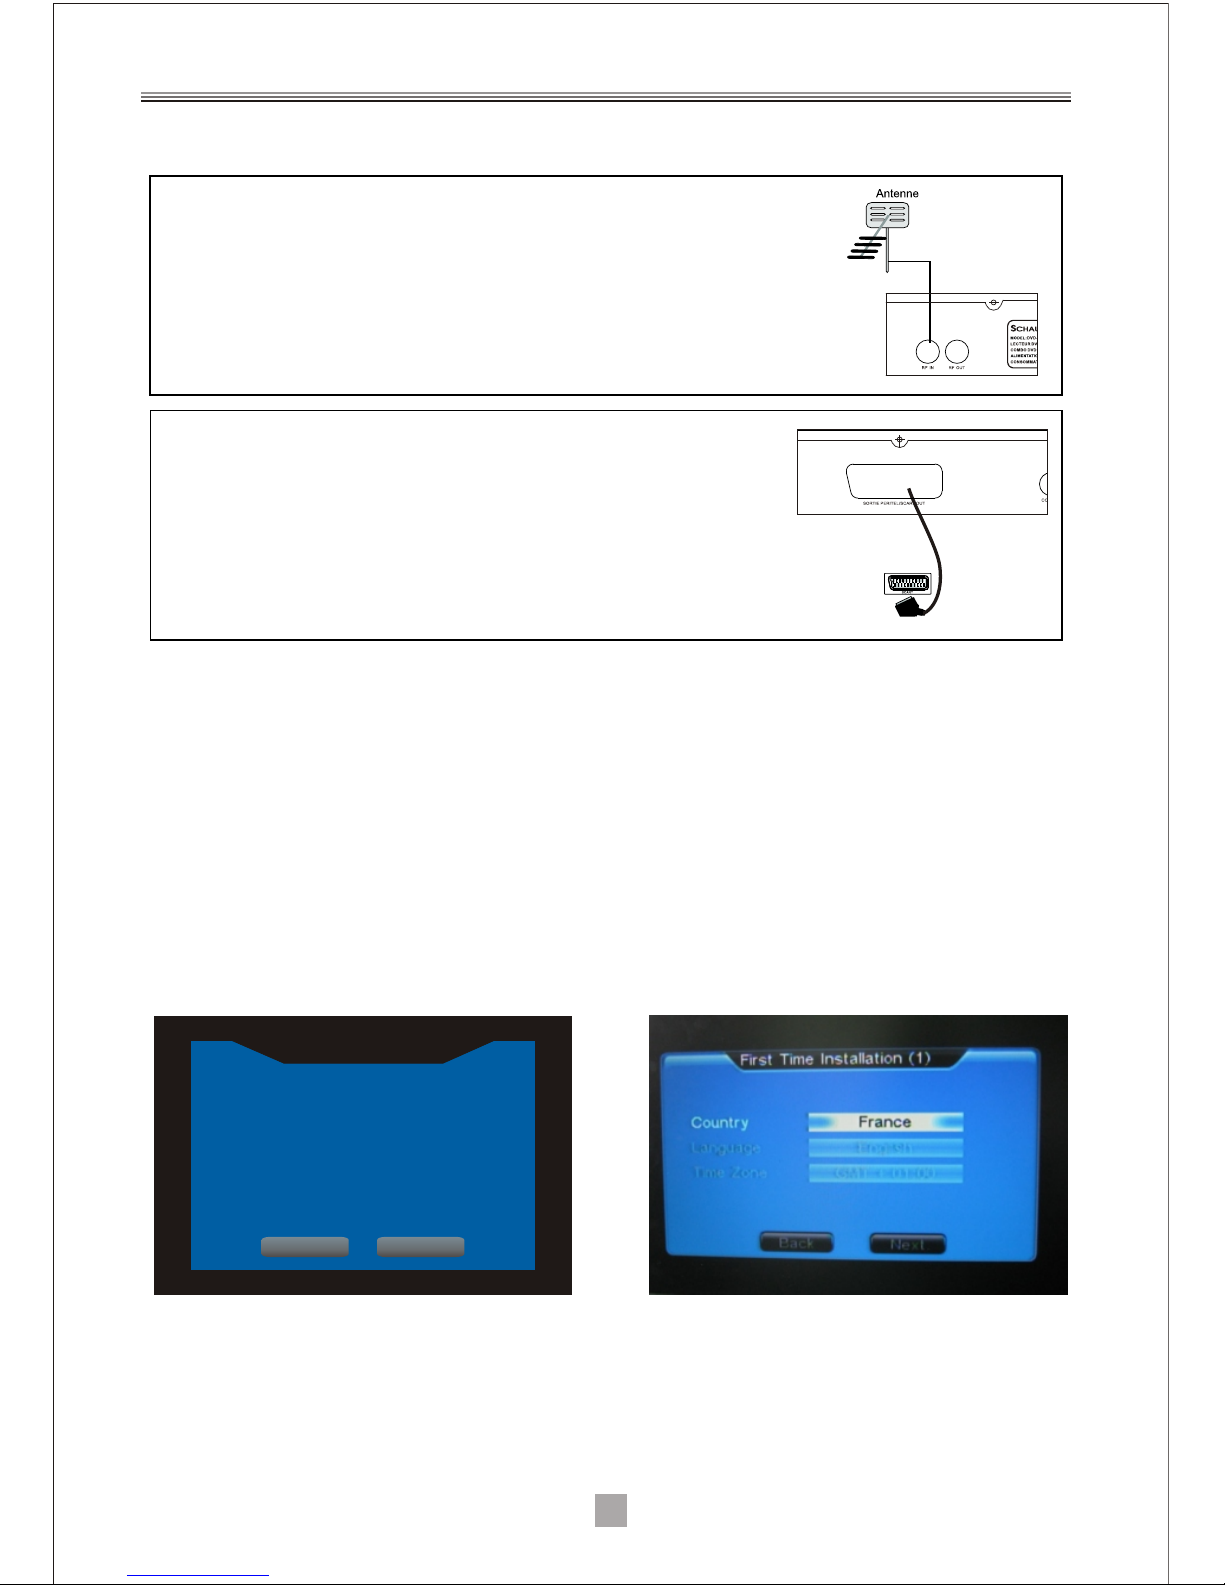
System first asks user whether to perform initial installation, select "YES" to
continue or "NO"to quit initial installation interface; user can use direction buttons to
select country/region and OSD language, and then select "NEXT" to access or
"BACK" to return , system asks user whether to start auto scanning, select" YES" to
access to activate system to start auto scanning and save scan information upon
completion and then play the first channel, select "NO" to quit scanning and exit
initial installation menu, or select "BACK" to return.
Firs t Tim e Inst allat ion
Do you w ant to start f irst tim e
Inst allat ion wiza rd?
NoYes
(1) First step: Connect the unit with your roof antenna
Connect your home antenna with the unit's input “ RF IN"
(2) Second step: Connect the unit with your
television
Use a scart cable to connect the unit's "SCART OUT"
output to the scart input of your television.
(The antenna cable is not provided)
(The s ca rt cable is n ot p rovided )
Page 8
4
- In case the first auto-installation message is not shown, or if you skip it, please
press SETUP from the remote control, then you can launch installation via
TV>Program Search>Automatic Search.
Important Remarks:
(1) Analog Reception and DVB-T Reception
When you wish to watch TV using your TV tuner (analog tuner) and that your DVBTunit has been turned off or unplugged, the image quality can be deteriorated
according to the TV you are using. This is normal, your DVB-T unit must be set in
standby mode to allow a good quality signal.
(2) Different volume levels between channels in AC3 format and those in stereo
format.
Certain DVB-T programs may be broadcasted in AC3 format, which provides a superior
audio quality via the coaxial output from the receiver. If you chose the AC3 format and
switch to a channel in stereo format afterwards, the audio volume may increase
depending on the DVB-T program format and your home theatre equipment. This is
normal; in this case, consider reducing the volume prior to changing channels to avoid
listening gene.
(3) If the reception problem still occurs.
Your unit has been tested for optimal performance over all the country. In most
cases, the DVB-T reception problems are due to a weakness in your home's
antenna installation. If your installation is old, or has never been tested for DVB-T,
the signal can be too weak or flawed for the unit to work properly. It is therefore
highly recommended that you ask for a qualified technician to test the compliance
of your home antenna. This unit has been designed and is guaranteed to work
with a signal of at least 60dB.
Firs t Tim e In stallation( 2)
Do you w an t to s tart
Auto s ea rc h ? Previous chan ne l li st
will b e re pl aced.
Back NoYes
Page 9

Good to know - Main Functions of your Remote Control
Menu Navigation
- Use the MENU button to change the unit's configuration. You can also define your
favorite channel lists, which will be directly accessible by using the FAV button on the
remote control.
- To exit a menu or a sub-menu, press the EXIT button on the remote control to return
to the previous screen.
Television Program Guide
- Press the EPG button to view the electronic TV guide of DVB-T channels. (such
information is provided by the channels and may not always be available). Press the
EXIT button to quit the EPG menu.
Sound Mode and Audio Language Selection
- Press the AUDIO button to:
o Change the sound mode (choose "Stereo" if you use the sound output from the
television, or "AC3" if you have connected your home theatre to the unit with a
coaxial cable);
o Change the audio track to another language if this option is available on the
current DVB-T channel.
Multimedia functions
- Press the REC button to begin recording of the currently viewed channel on the USB
support inserted in the unit. Press the STOP button to stop recording.
- To schedule a recording, press TIMER. You can choose the channel, the start time
and duration of the recording.
- To view your recordings, a single button: VIEW REC.
- Allows you to view all multimedia content of the USB key inserted (JPEG photos,
MP3 music and MPEG4 videos), press the USB button.
Switching between the DVD/DVB-T/Multimedia functions
- Press the TNT button on the remote control to switch to DVB-T mode.
- Press the DVD button in order to play DVDs.
- Press the USB button to display all the multimedia files on your USB stick and use
the VIEW REC button to display all the recorded files present on the USB stick.
Note:The recording function is only available in DVB-T mode. It is not possible to make
any recording in DVD mode.
5
Page 10

4. Remote Controller
6
1.STANDBY:Swi tch the r eceiver in and out of s tandb y mode.
2.NUMBER KEYS: U sed to se lect chann el numb ers or in put
numbers in menus .
3.GOTO:To sel ect you r desir ed time, cha pter of t he disc to
play.
4.MENU DVD:Dur ing DVD p layback , pr ess MEN U DVD to
display the disc m enu of th e current ti tle.
5.SETUP:Pres s the but ton to enter the syst em sett ing menu,
press the button a gain to e xit the menu .
6/25.CH+/CH- :Prog ram changi ng keys .
7.ENTER:To confi rm curr ent setting, or dis play al l programs i n
no-menu mode.
8/24.VOL-/ VOL +:To incr ease / decrease vol ume. Ch ange
date of EPG.
9.REV/ FWD: To fast forw ard/r ewind t he playbac k.
10.TIMER:Pre ss "TIM ER" button to enter t he setu p menu of
time recorder.
11.STOP:
(1).Stop playi ng USB Me dia.
(2).stop recor ding.
12. PLAY/PAUSE: To free ze the cu rrent imag e, and th en to
resume viewing .
13.TTX:Used to o pen tel etext OSD display i f telet ext availa ble
in the broadcast ed stre am.
14.FAVORITE :Used t o acces s your favor ite cha nnels.
15.COLOR KEYS( RED/G REEN/YELLOW/B LUE): These
buttons are used t o navig ate telete xt page s.
16.OPEN/CLOS E:To open t he disc tray, pre ss OPEN /CLOS E;
To close the disc tray, pre ss OPEN /CLOSE aga in.
17.TNT:Press the k ey to acc ess DVB-T mode d irect ly.
18.DVD:Press t he key to a ccess to DVD mode dor ectly.
19.USB:Allow s you to di splay all mu ltime dia content of the
USB key inserted i n the dev ice.
20. TITLE :Press the button t o enter t he appointed titl e.
21.VIEW REC:To acc ess the l ist of your recordi ngs and t o
view the chosen re cordi ng.
22.EXIT:Use this k ey to qui t current menu.
23.MUTE:Used t o turn th e sound on or off.
26.PREV/NEXT: To read th e previous or next fi le of the U SB
key.
27.EPG:Shows t he Elec tronic Program Gu ide.
28.REC:Press “ REC" bu tton to record to USB .
29.STEP:Pres s the key , you can play the disc s tep by st ep , in
this way, you ca n catch a ny pict ure on the dis c .Pres s play
button to play nor mally.
30.SUB-T:Used to s witch b etween diffe rent su btitles that are
broadcasted.
31.AUDIO:Use d to set th e sound output, the a vaila ble
settings are STE REO,L EFT,RIGHT.
32.INFO TNT: In DVB- T mo de only, the program nam e, the
signal quality a nd stre ngth.
1
2
5
4
7
6
9
10
11
12
14
30
29
28
27
26
23
22
19
18
17
16
15
13
32
31
3
21
20
8
24
25
Page 11

RF IN
RF IN
SCART
VCR
RF IN
SCART
TV
5. Connections
Connecting to TV and VCR
Antenna TV
Note: When connecting the receiver to other equipment, e.g., TV, VCR and
amplifier, make sure to refer to relevant user manual for instruction. Also, make sure
you disconnect all the equipments from the mains supply before the connection.
7
Page 12

8
6. System Setup
6.1 Language Setup
Select Language in the setup menu and display the Language submenu:
6.1.1 OSD Language
Use this item to select the language of the setup menu and screen display.
6.1.2 Encoding
MPEG4 Subtitle setting is used for choosing the subtitle language (only for
MPEG4).After selecting one language, the alphabet of this language will be
displayed on the screen.If you find the displaying subtitle not corresponding to the
one you have set when playing a MPEG4 with internal subtitle, please check whether
the MPEG4 internal subtitle language available in the Encoding setting, and then
select the correct language.
6.2Display Setup
6.2.1TV Standard
According to the Color System of the TV. You can choose the TV System.
AUTO: Choose this settings if your DVD player is connected to an Auto TV.
NTSC: Choose this settings if your DVD player is connected to a NTSC TV.
PAL: Choose this settings if your DVD player is connected to a PAL TV.
6.2.2 Display Type
4:3 LB (Letterbox): For conventional 4:3 TV. The full width of a windscreen content
is displayed on a normal TV with black bars above and below the picture.
4:3 PS( Pan & Scan): For conventional 4:3 TV. It crops the left and right edges of a
windscreen content to fit a normal TV.
16:9: If you are using a wide screen TV, select this option.
6.2.3 Video Output
If you want to select the video output, you can select the video output mode, it will
appear following 2 options:CVBS/RGB.
Language Setup
Langue Menu
Encoding
Ent er
Sel ect
OK
System
English
Westren Eu ro pe an
Eix t
System
TV S ta nd ar d
Display Type
Video Ou pu t
16:9
CVBS
Display Setup
PAL
Ent er
Sel ect
OK
Eix t
SYSTEM SETUP
Page 13

9
6.3Preference
6.3.1Change PIN
The password option is initialized locked, and you cannot set the ratings limit or
change the pass word without inputting the password. If you want to set the ratings
limit, you need to enter the default password, which is 0000, then press "Enter" to
confirm. To change the password, you will be prompted for the old password, then be
prompted for a new one. Enter four digit numbers (this is your password).
6.3.2Default Type
This option can enable you select the mode of unit, such as DVD or DVB mode.
6.3.3 Default
Choose this option to resume all the setup options to default settings.
6.3.4 Auto Power Down
Automatic switch to standby mode after 3 hours of active mode without action from
user ( in DVB-T mode only).
System
Preference
Change PIN
Default Type
Default
Auto Power Down
System Info
Input
DVD
Read
On
Show
Ent er
Sel ect
OK
Eix t
7. DVD Setup
Please press DVD from the remote control , in order to enter DVD mode. In order to
enter the DVD setup menu, please press SETUP from the remote control, choose
DISC, and then please press ENTER to confirm, DVD setup menu will then
immediately display.
Remark: If no DVD is inserted, you cannot enter the DVD Setup menu.
7.1 Language Setup
7.1.1 Menu
Highlight the MENU option, and press the Arrow buttons to choose the menu
language. Press "Enter" to confirm.
Note:
1.If your preferred language isn't available, the disc's default language will be
played.
2.The default language of your DVD player is French.
7.1.2 Audio
Highlight the AUDIO option, and press the Arrow buttons to choose the audio
language. Press "Enter" to confirm.
7.1.3 Subtitle
Highlight the SUBTITLE option, and press the Arrow buttons to choose the subtitle
language. Press "Enter" to confirm.
DVD OPERATIONS
Page 14

10
7.2 Audio Setup
Digital Out
Highlight the Digital Out option, and press the Arrow buttons to choose the audio
output mode . Press" Enter "to confirm; There are 3 optional audio output
modes:OFF, SPDIF / RAW, and SPDIF/ PCM.
OFF: From the Coaxial Output jack, no signal is output.
SPDIF/ RAW: Choose this setting if your DVD player is connected to a power
amplifier with a coaxial cable; When playing a disc with Dolby Digital,MPEG audio
format, the corresponding digital signal will be output from the Coaxial Output jack.
This player's digital output jacks are designed for a connection to a Dolby Digital,or
MPEG receiver or decoder.
SPDIF / PCM: Choose this setting if your DVD player is connected to a 2-channel
digital stereo amplifier. When playing a disc with Dolby Digital and MPEG audio
formats, audio signals will be modulated into a 2-channel PCM signal, and it will be
output from the Coaxial Output jack.
Languag e Setu p
Disc
French
French
French
Menu
Audio
Subtitl e
Ent er
Sel ect
OK
Eix t
Disc
Digital Ou t
SPDIF /RAW
Audio Se tup
Ent er
Sel ect
OK
Eix t
7.3 Custom Setup
Parental Control
Selecting a Rating allows the user to set the parental control feature of the player,
select parental control, and press ENTER to change the different mode.
Note: Unlock the password before setting parental control.
Disc
Custom S etup
Parenta l Ctrl
8
Ent er
Sel ect
OK
Eix t
Page 15

Fir st Time In st allat ion(2 )
Do yo u want to s tart
Aut o searc h ? Previ ous cha nnel li st
wil l be repl aced.
Back NoYes
11
8. Initial Installation Instructions
System first asks user whether to perform initial installation, select "YES" to
continue or "NO"to quit initial installation interface; user can use direction buttons to
select country/region and OSD language, and then select "NEXT" to access or
"BACK" to return , system asks user whether to start auto scanning, select" YES" to
access to activate system to start auto scanning and save scan information upon
completion and then play the first channel, select "NO" to quit scanning and exit
initial installation menu, or select "BACK" to return.
DVB OPERATIONS
First Ti me Install at io n
Do y ou want t o st ar t fi rs t ti me
Insta ll at ion wi za rd?
NoYes
- In case the first auto-installation message is not shown, or if you skip it, please
press SETUP from the remote control, then you can launch installation via
TV>Program Search>Automatic Search.
9.DVB Menu
Press TNT from the remote control to enter TNT mode, then access DVB-T menu via
SETUP>TV .
9.1Program List
9.1.1 TV ProgramIn
Select TV Channels to display channel list with TV channel numbers and channel
names at the left where you can use " UP/DOWN" button to browse TV programs; at
the right is the symbol illustration for editing. Press " LEFT/RIGHT" to display
Program Edit (favorite, move, delete…), press “ENTER” to confirm. (Note: if there is
no channel in TV channel list at this moment, "TV channel" menu cannot be
accessed.)
Page 16

12
9.1.2 Sort
To choose your favorite way to arrange the Channel Order, such as by channel no,
user ID etc.
10. Program Search
10.1 Automatic Search
Automatic Search is a kind of intelligent and convenient mode of programs
searching, which covers programs of all frequency points of target countries or
regions.
1. Enter the Auto search menu via TV >Setup > Program Search >Auto Search,
Press OK to start Auto Search.
1. Favorite:Select Favorite, then Press ENTER button.
2. Parental Lock:Select Parental Lock, then Press ENTER button.
3. Delete:Select Delete, then Press ENTER button.
4. Move:Select Move, then Press ENTER button.
10.2 Manual Search
If any channel is missing after auto search, or you want to add newly launched
channels, you can use Manual Search to scan the desired channels.
Page 17

TV
System Set ti ng
Country
Language
GMT Usage
Tim e Zo ne
Summer tim e
France
Show
On
GMT + 0 1: 00
ON
Ent er
Sel ect
OK
Eix t
13
11.Parental Control
Channel Lock
Choose the channel No.you want to lock by direction keys, press ENTER to confirm.
Parental PIN is needed each time you change the setting, please input 0000 by
default.
12. System Setup
Enter system setup interface via Setup > TV > System Setting.
1).Select an option by pressing the UP and DOWN keys of the remote control, and
press OK keys of the remote control to change the setting’s value.
2).Press the button EXIT of the remote control to go back to the previous menu.
When moving cursor to Channel,press ENTER to display channel number list. Use
up/down keys to choose the channel you need search by manual scaning,
besides, The Frequency below Channel will change according to your choosing.
After choosing, you can press ENTER to start channel scaning.
12.1 Country
Make sure to select the correct country to make the installation successful.
Page 18

14
12.2 Language
Use this item to select the language of the setup menu and screen display.
12.3 GMT Usage
When the setting is off,you can change the Date and Time.
12.4 Time Zone/Summer Time
Go here to select your country’s time zone, as well as Activate or desactivate
summer time.
13. Main operations in DVB-T mode
13.1 Change channel
Please press CH+/CH- Or numeric keys from the remote control to change channel.
13.2 Access to favourite channels
A list of favourite channels allows the user to go directly to the channel list of his
choice, without having to press CH+ or CH- several times or without pressing the
numeric channel keys.
13.2.1 Create a list of favourite channels
Please press SETUP from the remote control , then you can setup favourite
channels via TV>Program List>TV Program>Show. Press ENTER to confirm, and TV
program list will display immediately as shown in below figure. Press LEFT/RIGHT
keys to display Program Edit(favorite, move, delete etc.), then press UP/DOWN
keys to choose Favorite. Press ENTER to confirm. Your favorite channel will be
successfully created if symbol appears.
Within this menu, you also have the option to move a channel, so as to classify
channels in a different way. You can also set a parental password for the channels of
your choice.
13.2.2 View your favorite channels
Please press FAV from the remote control to view favorite channels directly, press
FAV again to cancel viewing favorite channels.
13.3. Displaying subtitle
Press the SUB-T button to enable or disable the subtitles on the screen. This
availability of this function depends on the viewed DVB-T channel.
13.4 Teletext function
Press the TTX button to enable or disable the teletext function. This availability of
this function depends on the viewed DVB-T channel.
Page 19

15
13.5. Choosing the audio language
Certain channels or programs, like movies, can be broadcast in multiple languages
or different audio formats. To view the audio options available on the viewing DVB-T
channel, press the AUDIO button on the remote control. Then, use the UP and
DOWN buttons on the remote control to change the audio language and the sound
mode.
About AC3 mode: some DVB-T programs may be broadcast in AC3 mode. You may
choose the audio track in AC3 format only if you have connected this unit to your
home theatre via a coaxial cable.
Notes:
- The possible choice of languages and whether the AC3 mode is available depend
on the viewed DVB-T program. Some programs may offer only one language and
no AC3 mode. The AC3 audio mode may also be available only during certain
hours of broadcast (e.g. for films).
- When you select the AC3 audio track, your television speakers are muted. This is
because the sound is transmitted directly to your home theatre system via the
coaxial output of the unit. Please make sure that your home theatre can decode
AC3 audio signal beforehand.
- If you have selected the AC3 sound mode and then switch to another channel
which broadcasts only in stereo mode, the volume may increase. This is normal
and depends on your home theatre equipment settings: to avoid any possible
listening discomfort, reduce the volume in advance.
13.6 DVB-T Program Guide (EPG)
Press the EPG button to access the program guide of DVB-T channels. You may also
consult the details of a program in the EPG menu.
Note: Such information is provided by channels and may not always be available.
Press the EXIT button to quit the EPG menu.
Page 20

16
14. Recording a DVB-T Program
This unit allows you to record your favorites DVB-T programs in a simple and userfriendly way. Simply plug a USB stick to the unit, the recording will be saved on it.
After the recording, you can view the recorded file on this unit, or by using any other
compatible multimedia equipment.
14.1 Making an immediate recording
When the unit is switched on in DVB-T mode, press the REC button to start recording
the viewed program on the USB device connected to the unit. During recording, the
"REC" symbol appears on the screen. To stop the recording, press the STOP button.
14.2 Viewing the list of scheduled recordings and canceling a programmed
recording
When the unit is switched on in DVB-T mode, press the TIMER button. Then, select
the option SCHEDULED RECORDINGS. The screen will list out all the recordings
programmed.
To delete a scheduled recording, move the cursor onto the item to be deleted and
press the OK button on the remote control. A red cross “X” will then appear in front of
the item to be deleted. In order to confirm your selection, move the cursor onto the
option CONFIRM by pressing the right navigation button on the remote control.
Press OK and a message will pop up on the screen to ask if you want to confirm
deleting the selected recording(s).
14.3 Making a scheduled recording
To program a scheduled recording, press the TIMER button and then select the
option NEW RECORDING.
1. Select the task 1 then set the recording mode to be Active in order to enable the
program #1.
2. You can then choose the channel to be recorded, the start time and the recording
duration. You also have to possibility to:
- Set weekly or Daily recordings;
- Program several scheduled recordings on different dates, by using different
program numbers.
3. After setting all the parameters, press OK and then EXIT to confirm the recording.
To cancel the programmed recording, return to the program #1 and change the
recording mode to Inactive.
4. To check that the programmed recording has been saved, press the TIMER button
and then select the option SCHEDULED RECORDINGS.
Note:It is not possible for you to access the TIMER menu if you have not inserted a
USB stick into the unit. This avoids you from forgetting to plug a USB stick for the
scheduled recording.
Page 21

17
Mode: there are 2 options: INACTIVE(close the timer setting task) and Record(timer
recording) .
Frequency: There are 2 options: ONCE,DAILY and WEEKLY.
Channel No : To select the channel you want to select.
Time Setting : To select the time you want to set .
Note: If you enter the timer recording menu (by pressing the TIMER button on the
remote control) and program a recording to start in less than 5 minutes, do not put
the unit to standby (by pressing the STANDBY button) immediately afterwards;
otherwise, the recoding may be canceled.
14.4 Formatting your USB device
This option allows you to format your USB device. This can be useful for:
- Freeing the entire disk space in order to make recordings;
- In case of problems, making your USB device compatible with the unit.
To access this function, press the TIMER button on the remote control and then
select the option USB INFORMATION.
Caution
- The formatting process will erase all the data on your USB device. It is
recommended that you save all the data of your USB device beforehand.
- You should never perform formatting on portable audio or video players. In fact,
these products have a file system necessary for start-up and file playback.
Formatting such devices might make them unusable.
- You can format external hard drives and USB sticks. Before doing so, please
refer to the manual of the corresponding device to ensure that formatting can be
done without altering its functionality.
Page 22

18
%
Ent er
Sel ect
OK
Eix t
14.5 Notes on the USB playback and recording functions
- Information on the recording format: The recording is carried out in MPEG-TS
(Transport Stream) format which allows making recording in MPEG-2 of quality
identical to the signal received. In order to play your recordings on another
multimedia device, it may be necessary to install a compatible video codec.
- If you want to record a film or a long program, use a memory stick of larger
capacity (e.g. 4GB). While if you want to record several films, opt for external
hard drives of large capacity.
- Recordings should be made in stereo audio mode (the default mode) and not in
AC3 mode. When you select an AC3 audio track (while the channel offers such
option), the AC3 signal is transmitted via the coaxial digital output and then
decoded directly by your home theatre equipment. Therefore, in case you have
selected the AC3 mode before the recording, you must first quit the AC3 mode
and return to the stereo audio track. Otherwise, your recording will have no
sound.
- When you plug a USB device to the unit, the file loading process can sometimes
take a minute or more. This depends on the size of your device, the number of
files on it and, above all, the complexity of its directories. You can reduce loading
time considerably by avoiding the use of multiple sub-directories on your USB
disk.
14.6 Troubleshooting of USB detection or recording problems
- In case the unit cannot detect or recognize you USB device, try formatting it via
the Formatting option of the unit. To do this, please refer to the section "14.4
Formatting your USB device”.
- After you have plugged your device to the unit, you may need to switch on the
USB device to make it readable by the receiver.
- This unit does not support direct USB connection with a computer. It is necessary
that you transfer your data on a USB device such as a USB stick or a MP3 player
beforehand. If you use an external hard drive connected to USB, you need to
connect your hard drive to a power source and to the unit simultaneously. If you
use a video player with hard drive, you must ensure that the internal battery of the
player is sufficiently charged.
Page 23

19
- Also, verify that the file system of your USB device is properly formatted in FAT
32. USB devices formatted in NTFS are not compatible with this unit. As a last
resort, if your USB device in FAT 32 format is not recognized by the unit, it is
recommended that you format the device on this unit. To do so, please follow the
instructions in Section 14.4 and refer to the manual for your USB device so as to
make sure that the formatting can be carried out without altering its functionality.
- Making recordings on a USB stick requires a high transfer rate and a full
compatibility with the USB 2.0 standard. This unit has been tested with most USB
2.0-compatible sticks available on the market. However, some USB sticks, even
some new ones, are not fully compatible with the standard. If any USB detection
problem or recording problem arises, try with another USB stick which is USB 2.0
compatible. Or, even better, connect an external hard drive equipped with USB
port (the device must be connected to a power source) to the unit.
- This unit is completely compatible with videos recorded in MPEG-4 SD format.
This unit will automatically be able to read the videos encoded with the future
updates of the MPEG-4 codecs. No updates on this unit will therefore be
necessary. In case of MPEG4 video playback problems, you should first check the
four following points:
o This player supports videos that are recorded with DivX codecs. In case of
video playback problem, it is probable that the codec used is not reliable (this
may be true for some videos downloaded from internet) and not fully
compatible. Demonstration videos are available for download at the Internet
address www.divx.com.
o This player does not support MPEG4 videos recorded in High Definition or MKV
files. The maximum resolution supported by the DivX codecs and this unit are:
720x480@30fps / 720x576@25fps
o In case your MPEG-4 file does not appear on the screen, verify that the file
extension ends with “.AVI”.
- Other formats supported by this unit: audio files in MP3 and WMA formats, and
JPEG photos (of resolution less than or equal to 6 MB).
15. Record List
Press the VIEW REC button after finish recording, it shows the lists all content
recorded.To select any item to playback.
Page 24

20
16. Troubleshooting
If you experience problems with this receiver or its intallation,in the first instance
please read carefully the relevant sections of this User Manual and this
Troubleshooting section.
The status indicator flashes
in red and green
alternatively.
A recording session is
schedule but no USB
support is inserted.
Insert a USB key into
the unit.
The remote control buttons
are not active, impossible to
change the DVB-T channel.
A recording is in progress During recording, you
cannot change the channel
since the unit's tuner must
remain on the recording
channel. You can also stop
recording by pressing STOP.
The channel is encrypted
Standby
The unit shuts down
automatically.
If no operation is
performed from the
remote control for three
hours, the unit will
automatically switch to
standby mode to reduce
power consumption.
Press the Standby button
to put th e unit back into
operation.
Page 25

Important Remarks:
(1) Analog Reception and DVB-T Reception
When you wish to watch TV using your TV tuner (analog tuner) and that your DVBT unit has been turned off or unplugged, the image quality can be deteriorated
according to the TV you are using. This is normal, your DVB-T unit must be set in
standby mode to allow a good quality signal.
(2) Different volume levels between channels in AC3 format and those in stereo
format.
Certain DVB-T programs may be broadcasted in AC3 format, which provides a superior
audio quality via the coaxial output from the receiver. If you chose the AC3 format and
switch to a channel in stereo format afterwards, the audio volume may increase
depending on the DVB-T program format and your home theatre equipment. This is
normal; in this case, consider reducing the volume prior to changing channels to avoid
listening gene.
(3) If the reception problem still occurs.
Your unit has been tested for optimal performance over all the country. In most
cases, the DVB-T reception problems are due to a weakness in your home's
antenna installation. If your installation is old, or has never been tested for DVB-T,
the signal can be too weak or flawed for the unit to work properly. It is therefore
highly recommended that you ask for a qualified technician to test the compliance
of your home antenna. This unit has been designed and is guaranteed to work
with a signal of at least 60dB.
21
Page 26

1122
17.Technical Specification
Demodulation
Input/Output
Terminals
Power
Display
Decoding
Other
Tuner
Frequency
Impedance
Input Signal Level
Bandwidth
Demodulator
OFDM Modulation
Packet Transmission
Guard Interval
RF Input
RF Output
TV SCART
Coaxial
USB Port
Entry
Consumption
Decoder
Resolution
Aspect Ratio
Video
Audio
Conformity
Sound modes
VHF: 178.7 to 218.7 MHz
UHF: 474 to 858 MHz
75 Ohms unbalanced
-78-25 dBm
8 MHz
COFDM
2K, 8K FFT, SFN and MFN
2K/8K
1/4, 1/8, 1/16, 1/32
IEC 169-2 female connector
IEC 165-2 male connector
Composite video (CVBS), RGB,
audio left and right
RCA for digital SPDIF audio output
USB 2.0
230 V ~ 50 Hz
10 W max
PAL, NTSC
720 x 576 (PAL); 720 x 480 (NTSC)
4:3 (Letterbox, PanScan), 16:9
MPEG2 Transport MP@ML
MPEG2 Audio Layer I @ II
ETSI EN 300 744 DVB-T Standard
Right, Left, Stereo
Signal System
Frequency Response
Signal - to Noisy
Ratio (Audio)
Audio Distortion +
Noise
Audio Output
( Analog audio)
Video Outp ut
PAL/NTSC
20Hz - 20KHz (at 1 KHz 0 dB)
≥90 dB (at 1 KHz 0 dB)
≤-60dB (at 1 KHz 0 dB)
Vrms
2.0
+0
-1.0
Composite: 1.0±0.2Vp-p
Load impedance: 75 , Imbalance,negative polarity
Page 27

SAV
ADMEA / LOGISAV
ZI du clos des charmes
26 rue du clos des charmes
77090 COLLEGIEN - FRANCE
 Loading...