

Page 1
Removing the servomaster and clutch
WARNING!
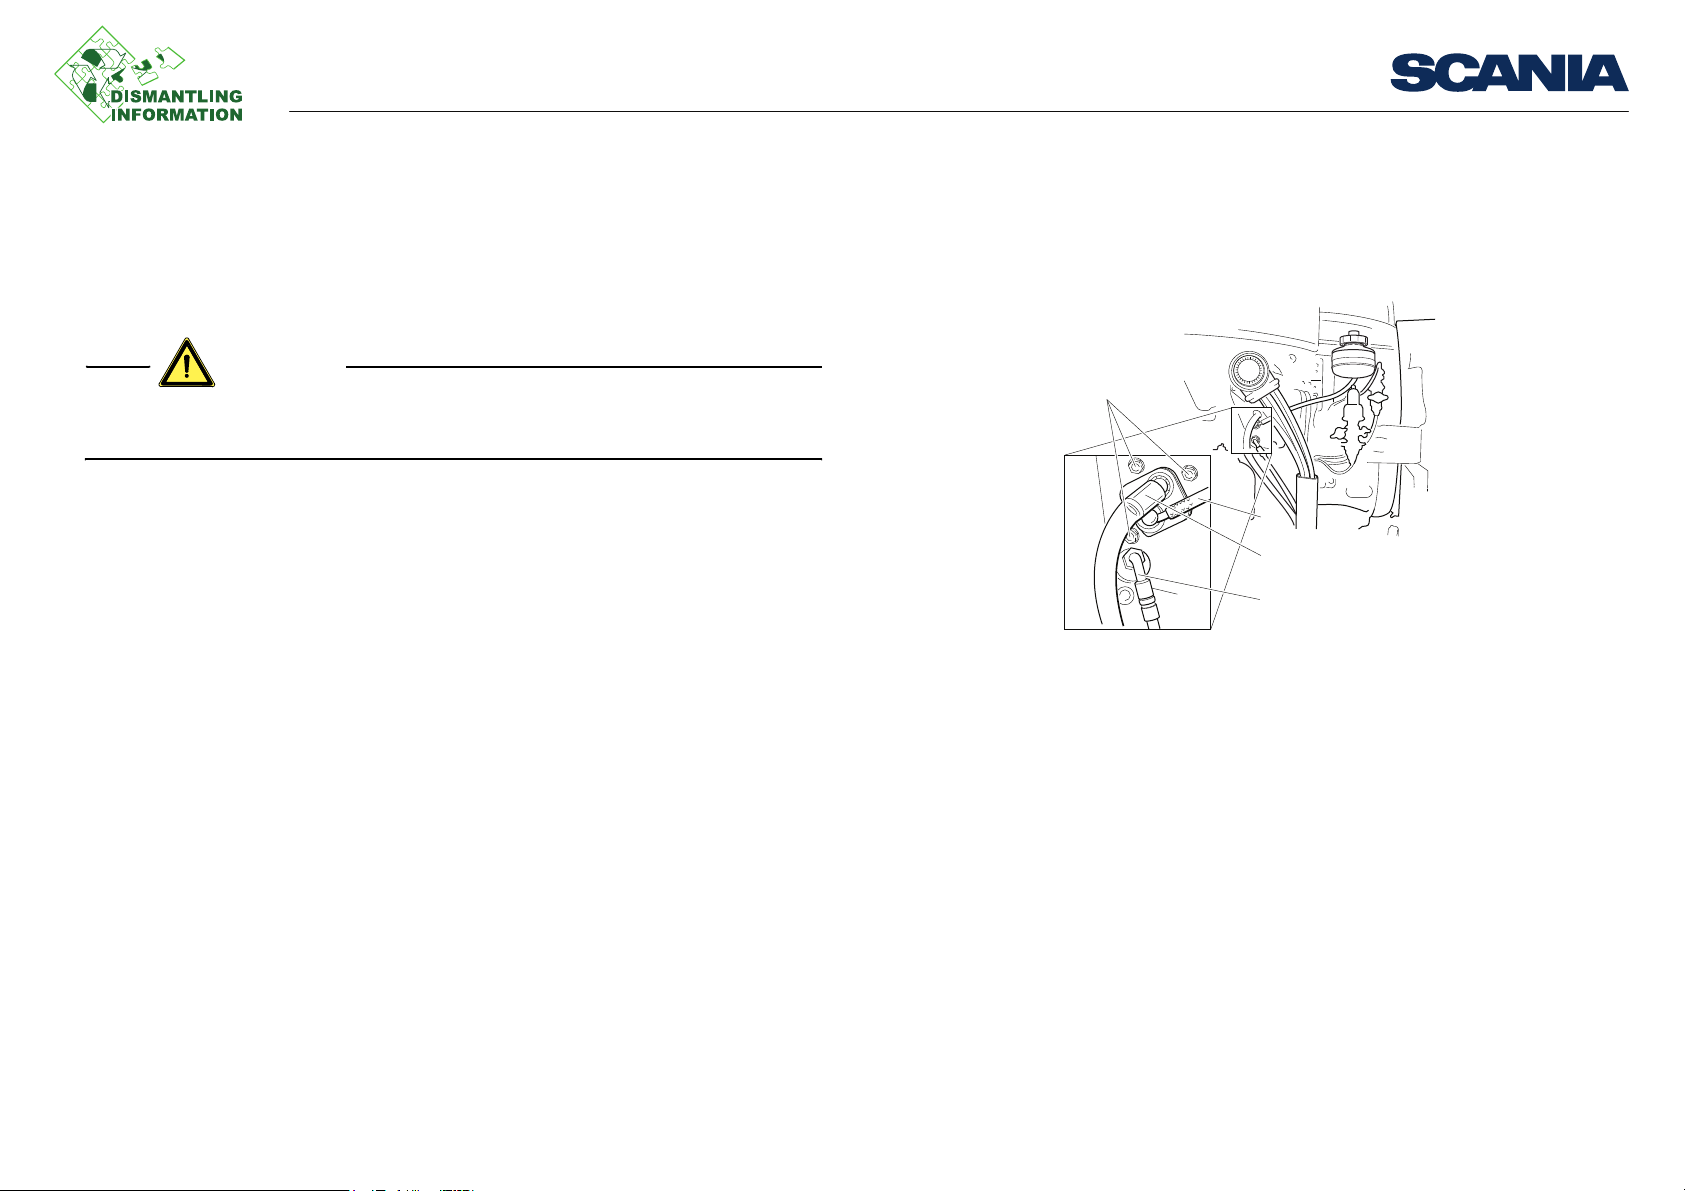
1. Nuts
2. Hose to fluid reservoir
3. Bleed hose
4. Hydraulic hose to slave cylinder
Work description
Servomaster
Depressurise the system.
Wear protective goggles. Hydraulic fluid is corrosive and can cause permanent eye
damage.
Work description
1
Remove the parts in the following order:
1. Hose (2) to the fluid reservoir. Fold the hose upwards so that the fluid does not
run out of the reservoir.
2. Bleed hose (3).
3. Hydraulic hose (4) to the slave cylinder.
4. Panel underneath the steering wheel.
03:11-00 Issue 1 en-GB 1 (4)
©
Scania CV AB 2012, Sweden
2
3
4
b115433
Page 2
Removing the servomaster and clutch
Note:
112 871
7
6
5
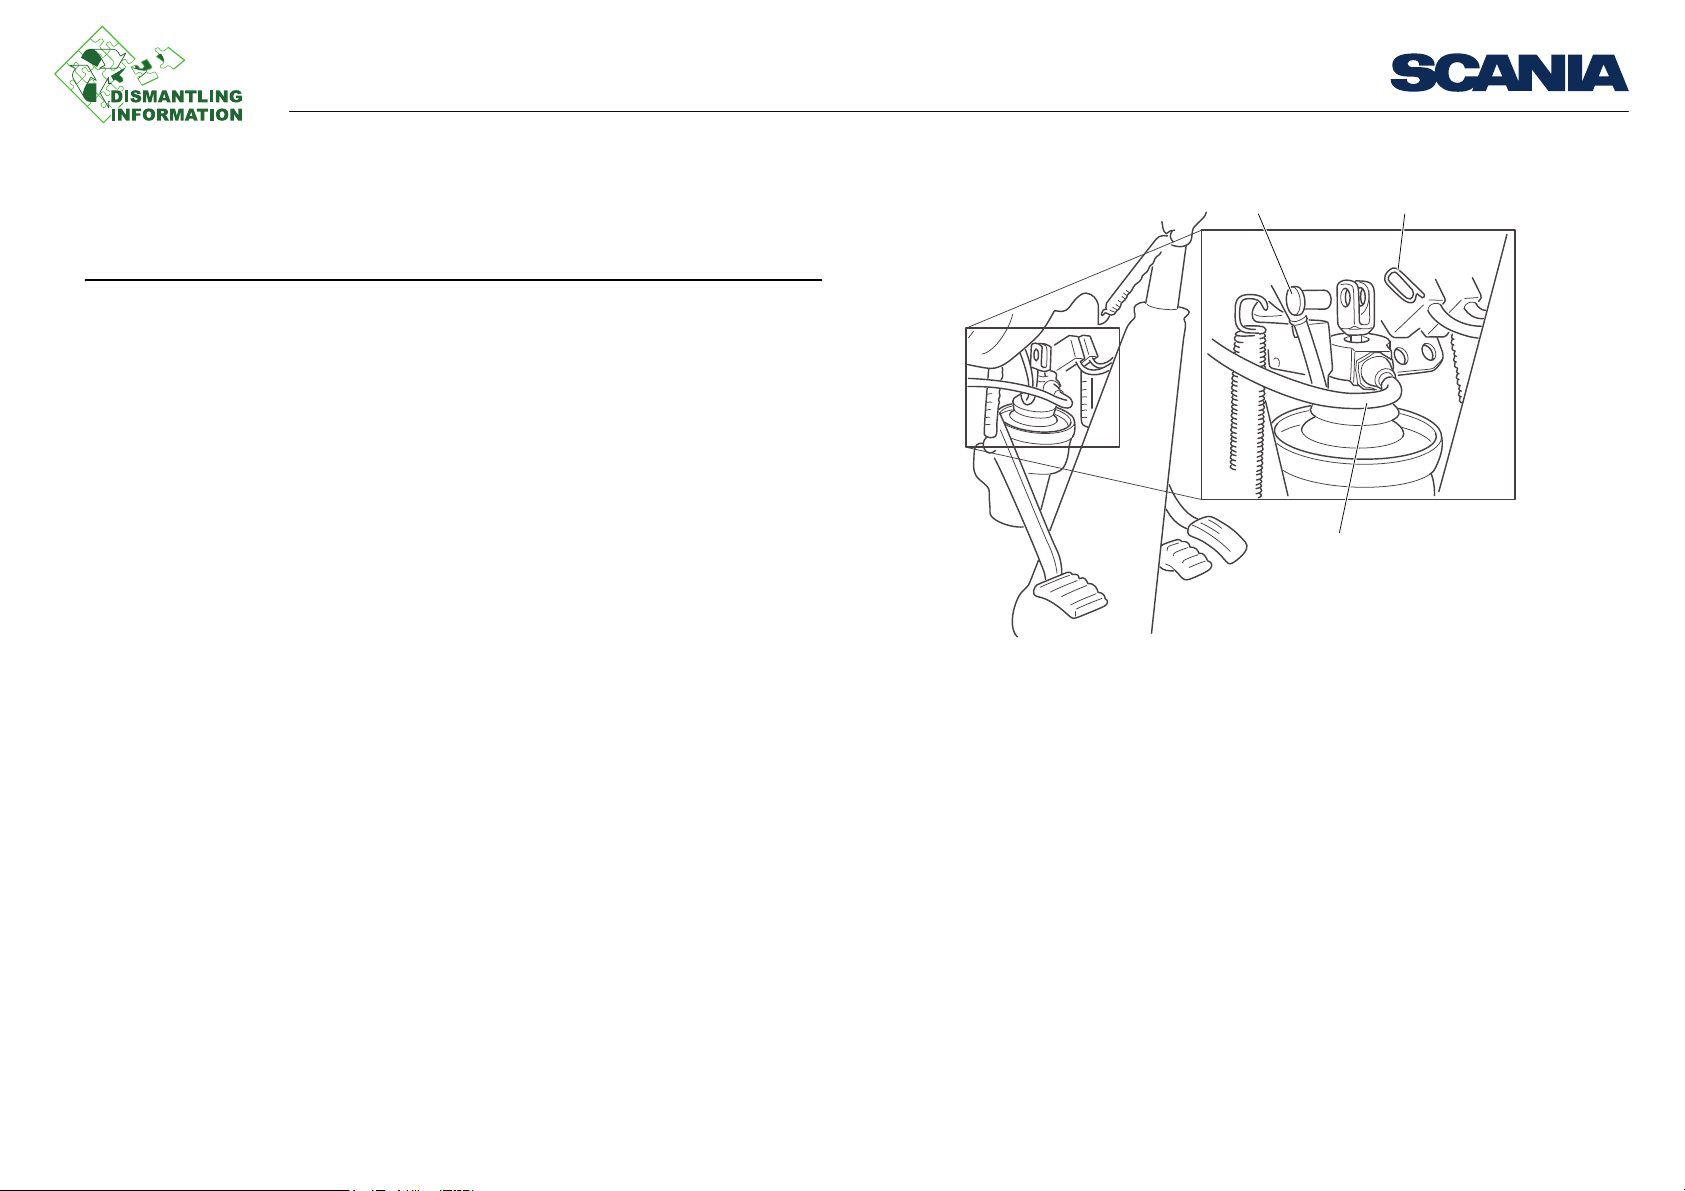
5. Parallel pin
6. Locking pin
7. Air supply hose
5. Union for air supply hose (7).
Use a counterhold when loosening the union.
6. The servomaster 3 nuts (1).
Work description
03:11-00 Issue 1 en-GB 2 (4)
©
Scania CV AB 2012, Sweden
Page 3

Removing the servomaster and clutch
7. Locking pin (6) and parallel pin (5).
Work description
b115462
03:11-00 Issue 1 en-GB 3 (4)
©
Scania CV AB 2012, Sweden
Page 4

Removing the servomaster and clutch
332 188
6
2
4
8
5
1
3
7
Clutch, tools
Examples of suitable tools from Scania:
Part number Designation
98 747 Guide pins
99 204 Mandrel
99 205 Socket
1. Remove the gearbox.
2. Remove the screws (7) and (8).
3. Fit the guide pins 98 747 in the screw holes.
4. Fit the mandrel 99 204 with the socket 99 205 in the centre of the disc.
5. Remove the clutch cover and the clutch disc by alternately loosening the remain-
ing screws.
Work description
03:11-00 Issue 1 en-GB 4 (4)
©
Scania CV AB 2012, Sweden
 Loading...