

Saturn Series for SATA Enclosure Install Guide
The new generation of Serial ATA interface comes in by now!
ViPowER has developed a full serial of external enclosures for SATA device.
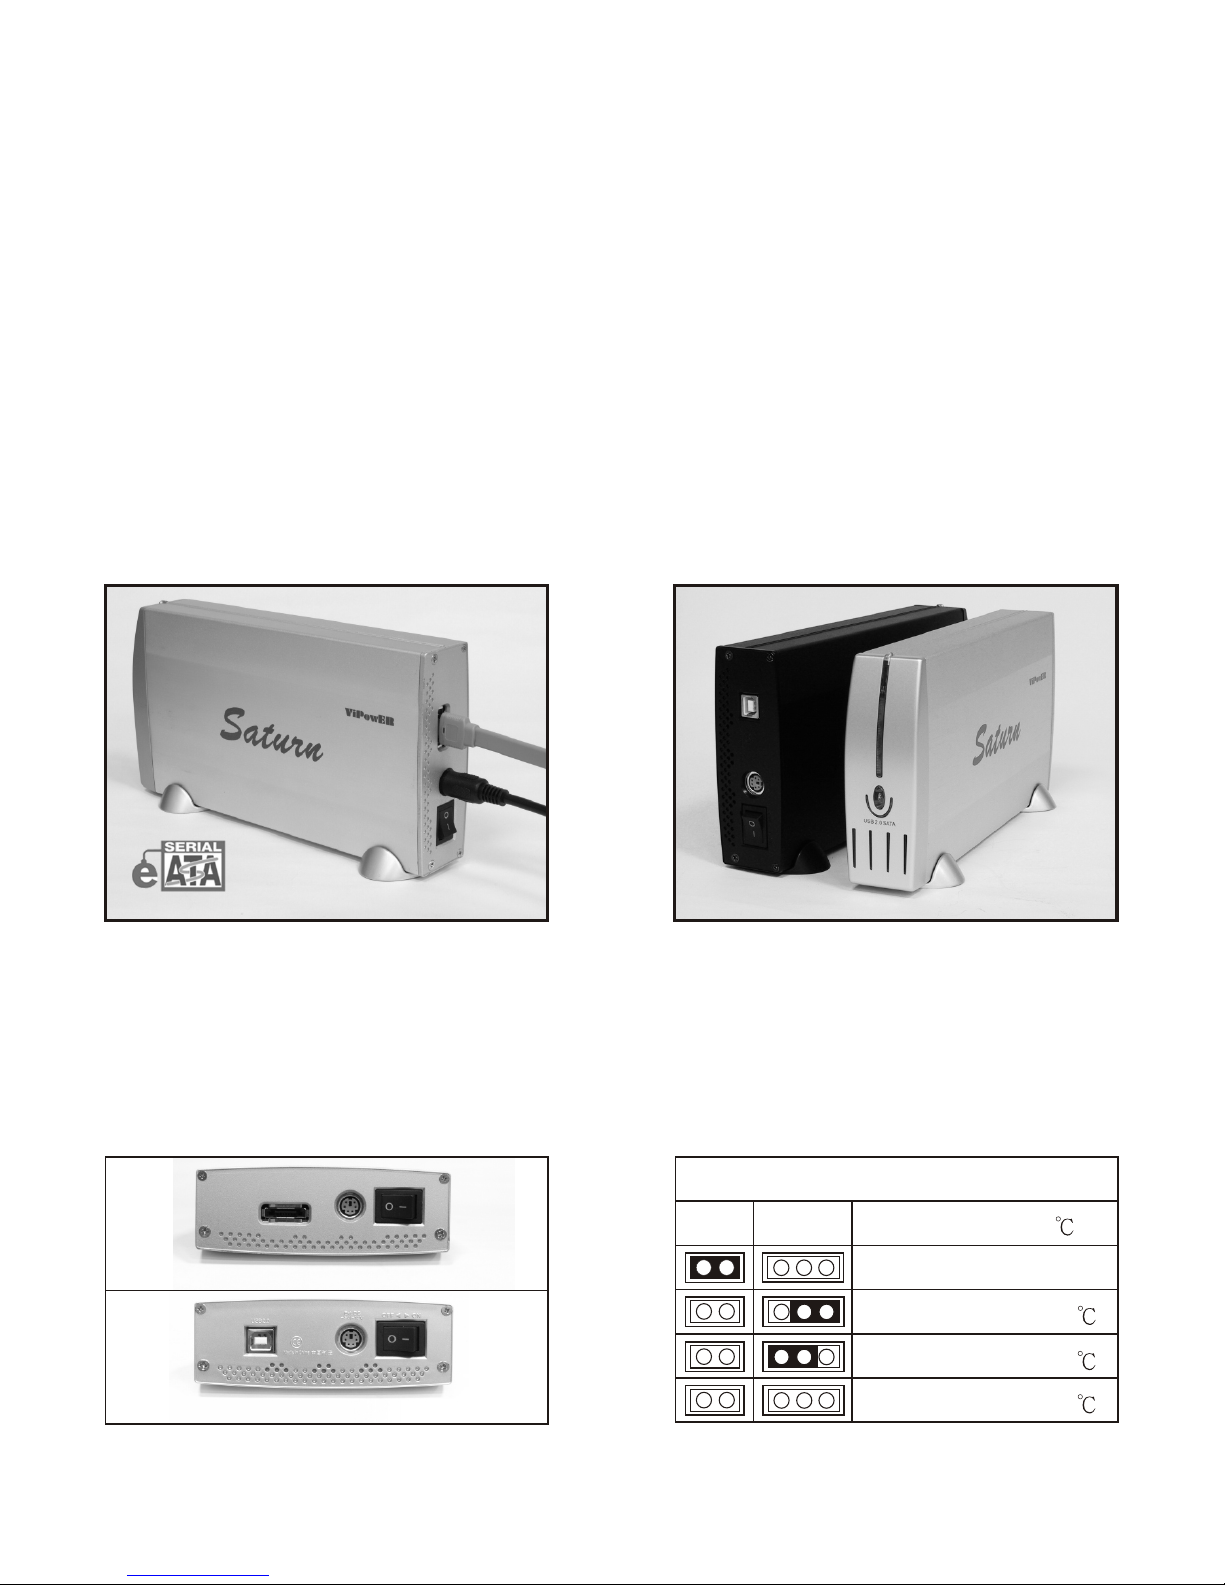
The VPA-35011 and VPA-35018 was designed the 3.5" SATA aluminum
external enclosure for your High-performance and DATA transfer needs.
It new solution that it has a cable-less connector that provides simplified installation
due to use our Direct-Link technology.
Product Features
1) Support for SATA to SATA and USB 2.0 to SATA as a hot swap removable hard drive.
2) Well temperate design for energy savings and low-noise working environment.
3) Aluminum enclosure cases plus cooling fan for better heat dissipation and efficient cooling.
TJP1
Temperature Control Jumper Setting
1
2 2
1
3
TJP2 Temperature ( )
FAN Always ON
Temperature 40
Temperature 50
Temperature 60
Mode No.:VPA-35011
Mode No.:VPA-35018
Mode No.:VPA-35011
1)SATA to 3.5" SATA HDD Enclosure.
2)Support e-SATA Interface.
3)ViPowER Temperature Control Design.
4)ViPowER Direct-Link Technology.
Mode No.:VPA-35018
1)Stand-alone USB 2.0 to SATA Enclosure.
2)Compliant with USB2.0 specifications.
3)Support USB Bootable function.
4)SATA HDD active LED.
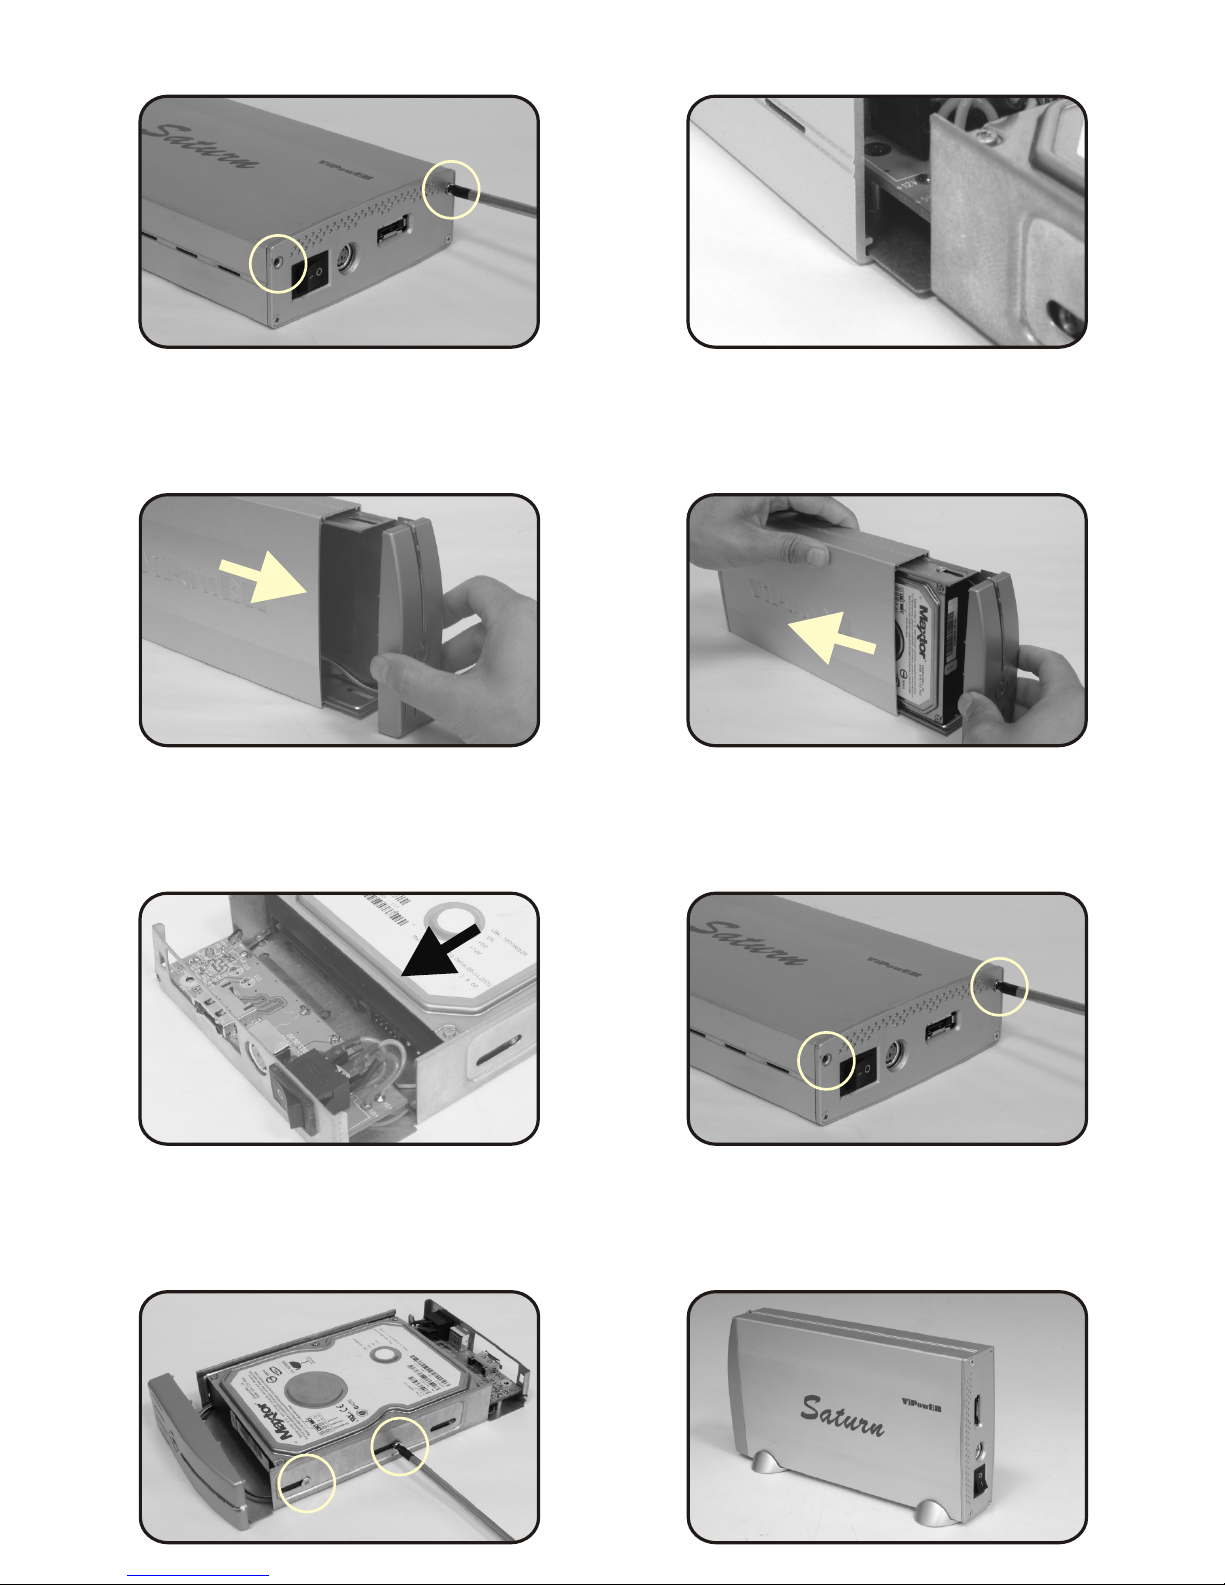
Step 1
Remove two retaining screw.
Step 4
Secure the HDD and the Inner cradlewith four
retaining screws. ( two on each side )
Step 2
Slide out the front panel.
Step 5
Slide back the inner cradle to its housing.
Step 3
Plug the HDD to PCB. ( Direct-Link )
Step 6
Slide in the front panel.
Step 7
Screw the back panel back..
Step 10
The hard drive installation is complete,
and the enclosure is ready to use.
 Loading...