

Sartorius arium bagtank 50,arium bagtank 20,arium bagtank 100 Installation Instructions Manual
1000025386
Installation Instructions | Installationsanleitung
arium® bagtank
bagtanks

2
Installation Instructions arium® bagtank
English – page 3
In cases involving questions of interpretation,
the German-language version shall prevail.
Deutsch – page 19
Im Auslegungsfall ist die deutsche Sprache maßgeblich.

3
Installation Instructions arium® bagtank
Contents
Contents
1 Product Description ............................................................... 4
1.1 Application Options ..........................................................4
1.2 Intended Use ..................................................................4
1.3 Connections on the arium® bagtank 20 ...................................... 5
1.4 Connections on the arium® bagtank 50 and 100 ............................. 5
2 Installation
......................................................................... 6
2.1 Scope of Delivery, arium® bagtank ........................................... 6
2.2 Setting Up the arium® bagtank 20 ...........................................6
2.3 Setting Up arium® bagtank 50 and 100 ...................................... 8
2.4 Installation of arium® bagtank ............................................... 9
2.5 Connecting the arium® bagtank to the arium® system .....................11
2.6 Replacing the Plastic Bag ....................................................11
2.7 Dispensing Water Directly from the arium® bagtank ........................13
3 Technical Specifications
..........................................................14

4
Installation Instructions arium® bagtank
Product Description
1 Product Description
1.1 Application Options
arium® bagtank can be used with the following Sartorius water purification systems:
– arium® comfort I, comfort II
– arium® advance
1.2 Intended Use
The pure water produced by the arium® comfort and advance systems is stored in the
arium® bagtank. The tank systems listed in the following are available.
arium® bagtank 20 arium® bagtank 50 arium® bagtank 100
Stores product
water in a 20 liter
plastic bag
Stores product water
in a 50 liter plastic bag
Stores product water in
two 50 liter plastic bags
Without pressure
booster pump
With built-in pressure
booster pump or without
pressure booster pump
With built-in pressure booster
pump or without pressure
booster pump
For additional data on the arium
®
bagtanks see page 14
arium
®
bagtanks must be installed and connected before starting up the arium®
system.
arium
®
bagtanks must be set up in a suitable location, i.e., a flat surface with enough
space that can accommodate the weight of the operational bagtank.
Make sure that the setup location also has nearby access to a 100 – 240 V electrical
outlet (arium
®
bagtank 50 and 100 with built-in pump) and an atmospherically
vented drain.
5
Installation Instructions arium® bagtank
Product Description
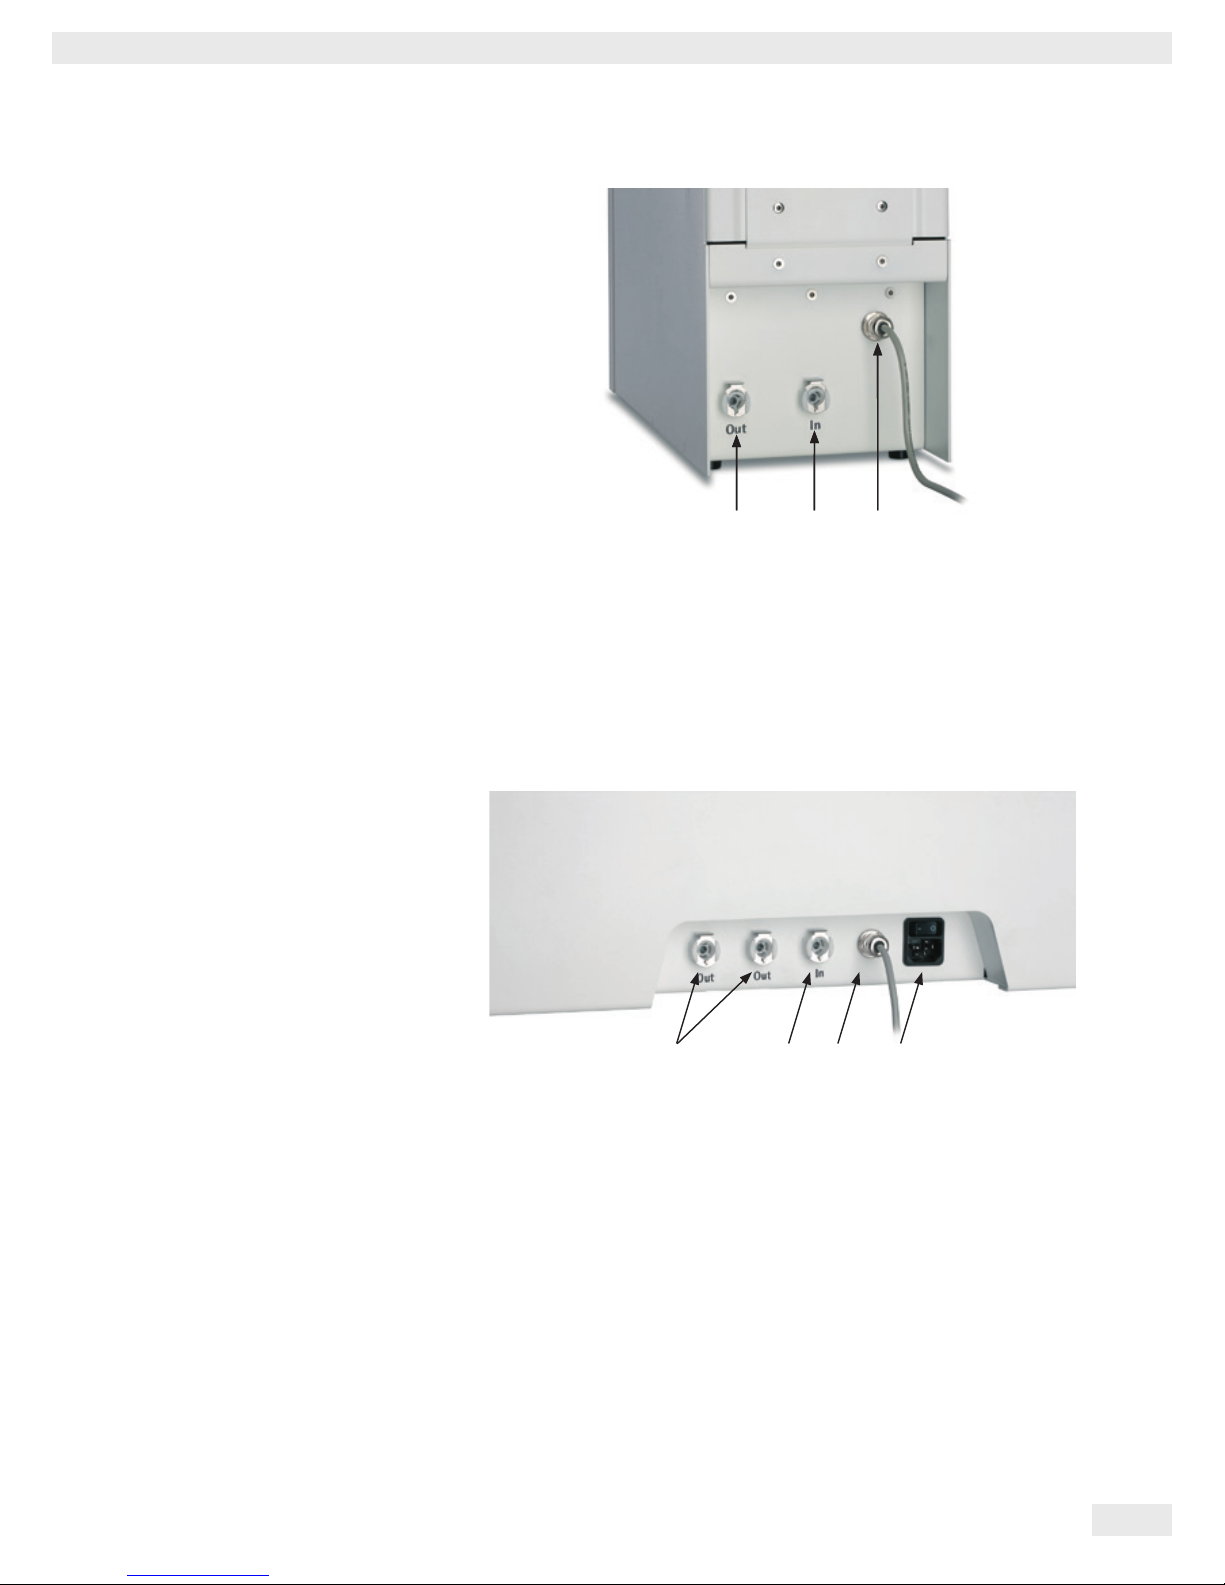
1.3 Connections on the arium® bagtank 20
1. Out (connection for product water dispensing from the bagtank or connection
for recirculating the pre-treated water to the arium® comfort)
2. In (connection for the pre-treated water from the arium® system)
3. Sensor cable for connection to the arium® system
1.4 Connections on the arium® bagtank 50 and 100
Connections on the arium® bagtank 50 and 100
1. Out (connection for product water dispensing from the bagtank and connection
for recirculating the pre-treated water to the arium® comfort)
2. In (connection for the pre-treated water from the arium® device)
3. Sensor cable for connection to the arium® device
4. Power switch with power connection (only for the version with the built-in
pump)
1 2
3
1 2 3 4
6
Installation Instructions arium® bagtank
Installation
2 Installation
We recommend that you have the set-up and initial startup of your arium® bagtank
system performed by a qualified Sartorius service technician.
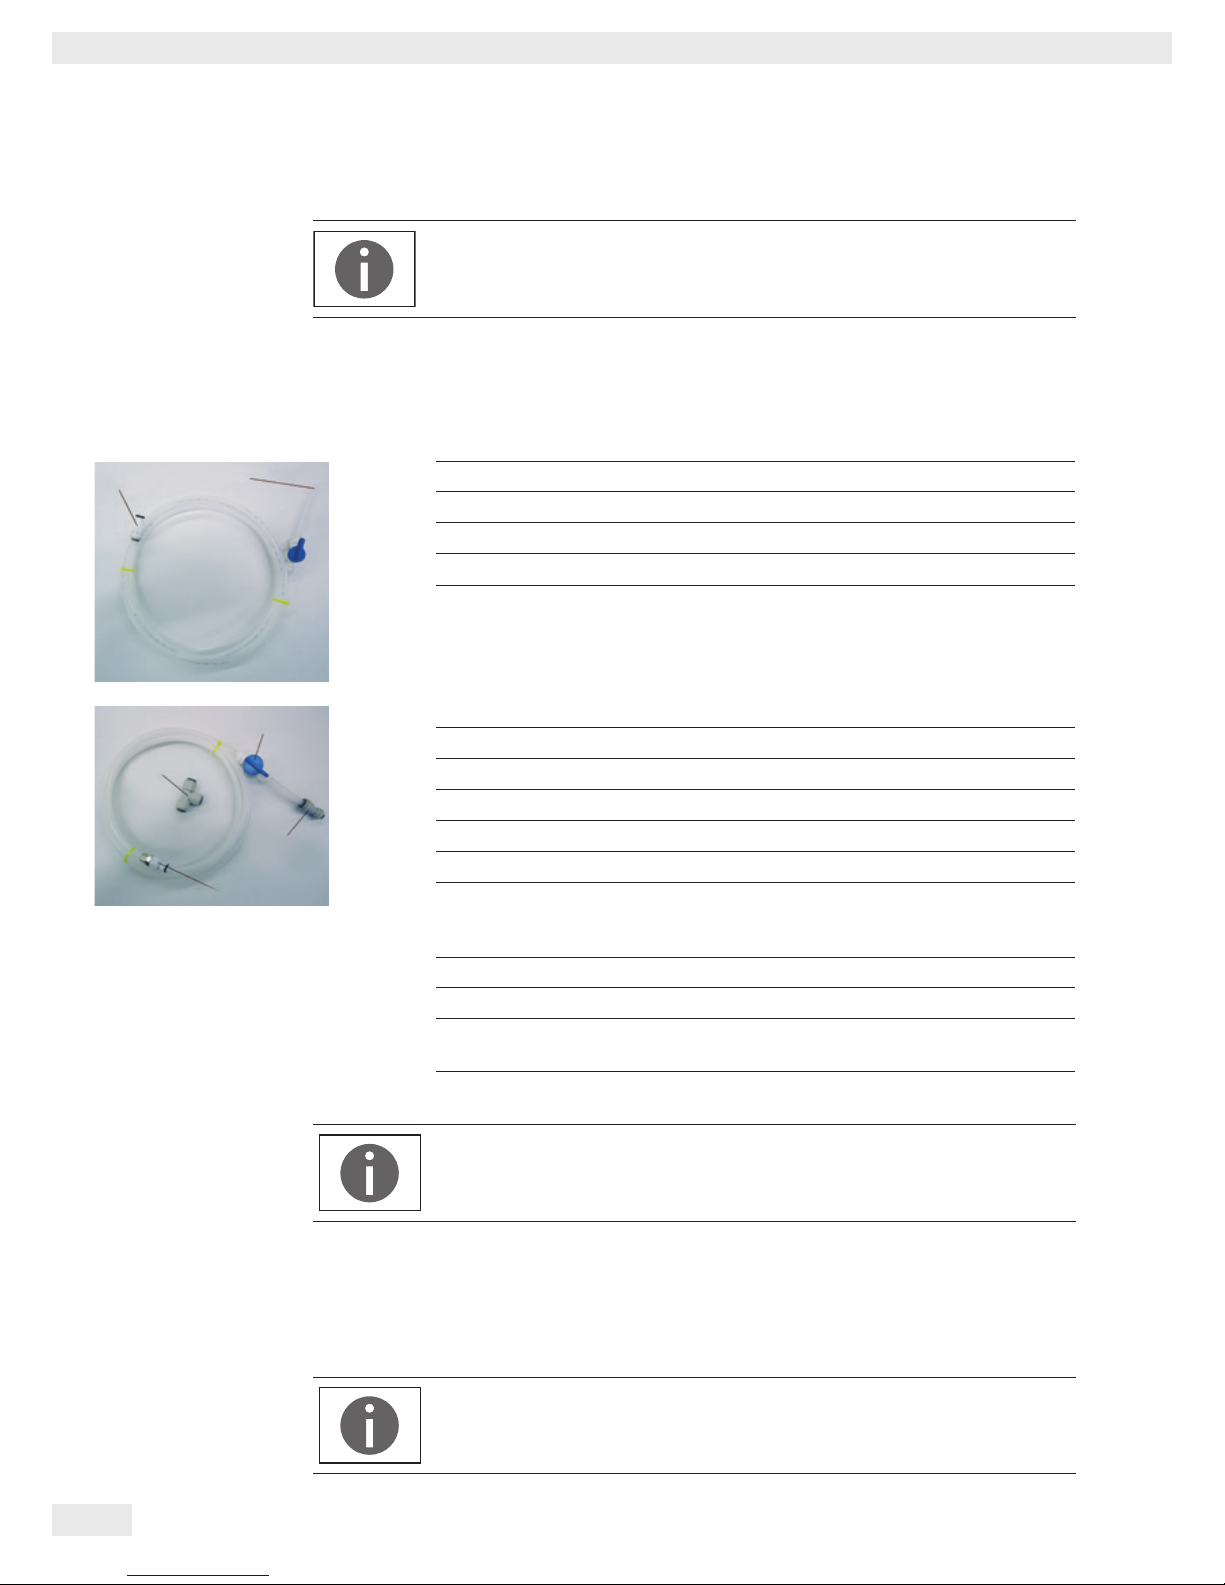
2.1 Scope of Delivery, arium® bagtank
The equipment supplied with arium® bagtanks includes connection hoses and
additional accessories as described in the following.
Part Description Quantity
Tank Kit 1 (IN)
Tubing, PE, 4” outer diameter, length 2.4 m (“Tank Outlet” tubing)
1
Tubing, PE, 4” outer diameter, length 0.1 m
1
Shut-off valve 4”
1
Tubing plug-in nipple 4”
1
Tank Kit 2 (OUT)
Tubing, PE, a” outer diameter, length 2.4 m
1
Tubing, PE, a” outer diameter, length 0.1 m
1
Tubing plug-in nipple a”
1
Shut-off valve a”
1
Connector, straight, a” - 4”
1
T-connector a”
1
Operating Instructions 1
Power cable (bagtank 50 and 100 with built-in pump only) 1
Rollers for bagtank 50 and 100 (optional) 4
Pressure booster pump for bagtank 20, 50, 100 without built-in pump
(optional)
1
Wall mounting bracket for bagtank 20 (optional) 1
Bags are not included in the arium
®
bagtank equipment supplied and must be
ordered separately.
2.2 Setting Up the arium® bagtank 20
If used without the optional pressure booster pump, the arium® bagtank 20 has to
be set up at the same level or higher than the feed device.
The arium® bagtank 20 can be purchased with an optional pressure booster pump
and an optional wall mounting bracket irrespective of the arium® system in use.
Please observe the specifications for the required input pressure on the downstream
devices. An arium
®
bagtank 50 or 100 with a built-in pump generates an outlet
pressure of 3 bar.
Connection to tank (IN)
Connection to arium
®
(tank outlet)
Connection to tank (OUT)
Ball cock for
water dispensing
T piece a”
to connect
an additional
supply
Connector a”
4” to connect the
sterile final filter
7
Installation Instructions arium® bagtank
Installation
When selecting the installation location, make sure that an atmospherically vented
drain is nearby.
Also take into account the door hinge for the arium
®
bagtank (direction it opens)
when selecting the installation location. If the door hinge needs to be retrofitted
because of the installation location, this can be performed by Sartorius Service.
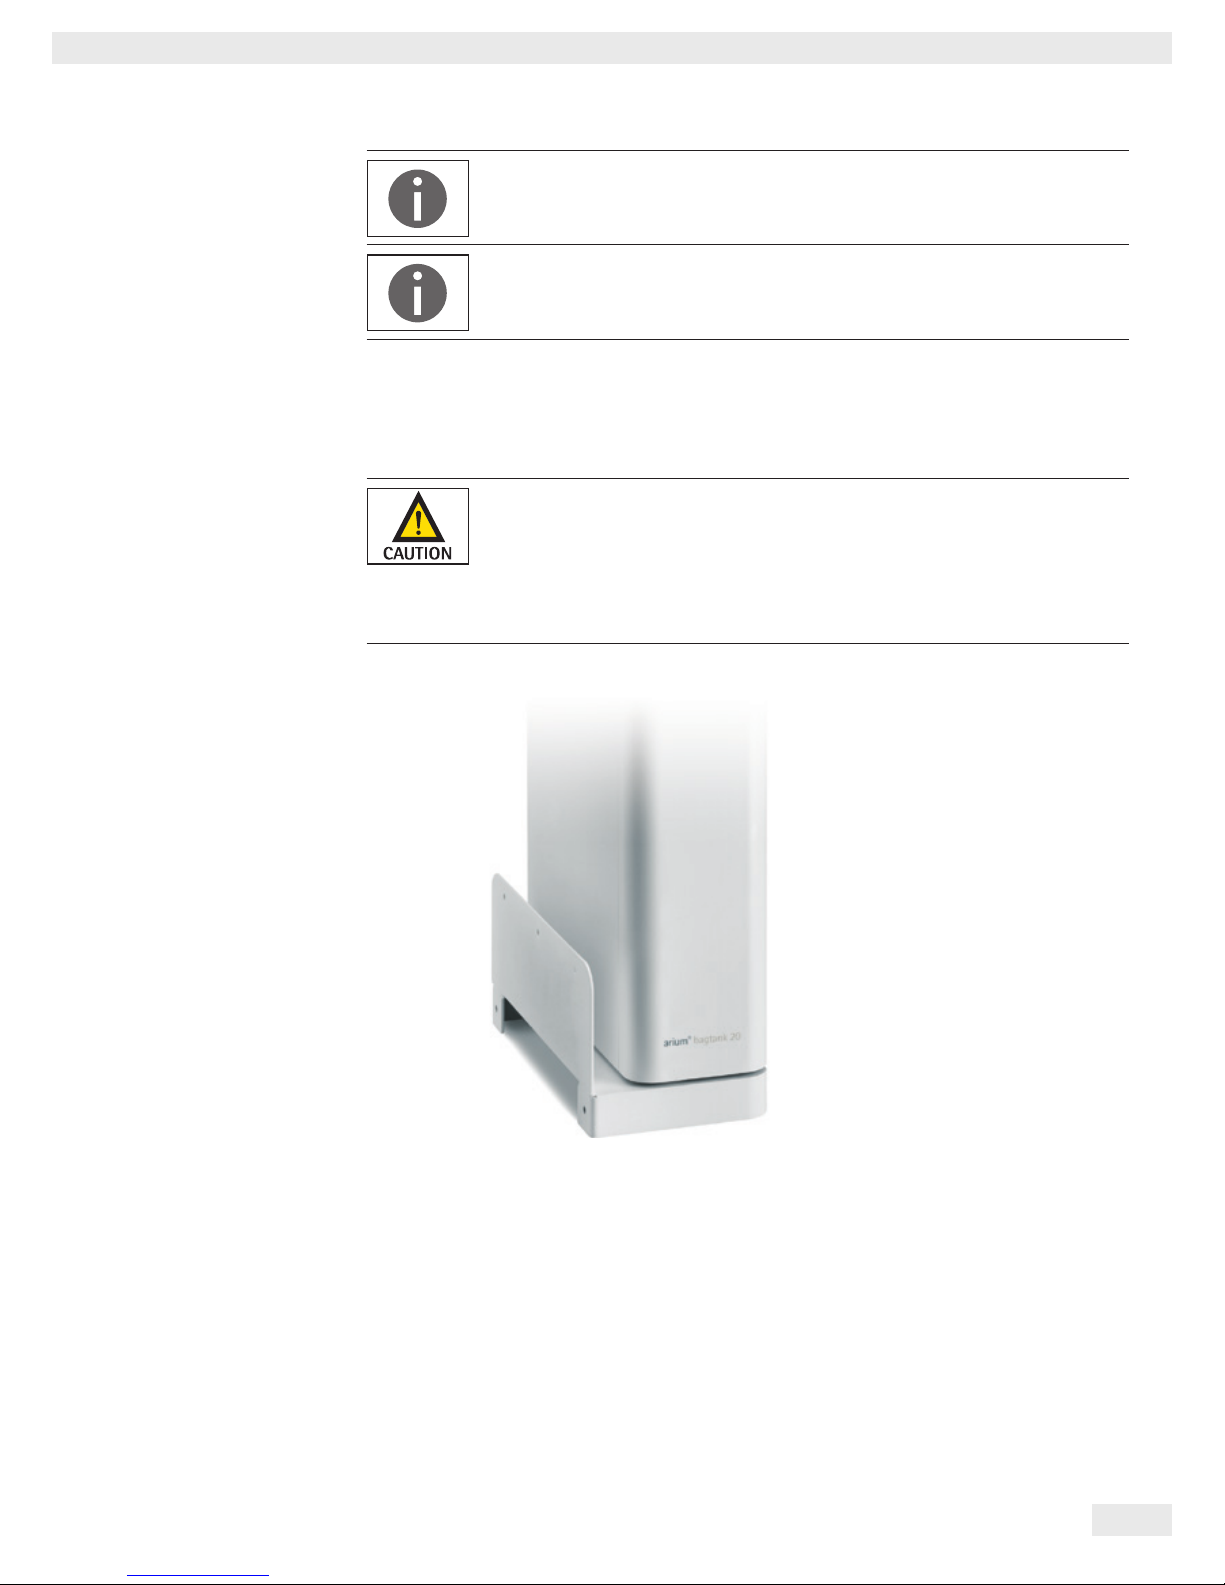
Wall Mounting Bracket for arium
®
bagtank 20
An optional wall mounting bracket (H2O-ATB) is available for arium® bagtank 20
system installation.
The wall mounting bracket for the bagtank 20 can only be used for mounting and
attaching the arium
®
bagtank 20. Do not add additional load to the bracket. When
mounting the unit on a wall, make sure that the mounting surface and fasteners
selected are capable of supporting a minimum of 100 kg (220 lbs). Inadequate
support and/or fasteners may result in injury to the operator and damage to the
equipment.
The figure shows the wall mounting bracket with an attached arium® bagtank 20
Wall installation:
− Use the pre-drilled slotted holes in the wall mounting bracket to mount the
bracket to the wall.
− Fasten the wall mounting bracket to the wall using suitable screws and dowels
(ensure that it is horizontally aligned).
− Position the arium
®
bagtank 20 on the wall mounting bracket attached to the
wall. The device feet on the bagtank can be used for proper alignment of the
bagtank on the wall mounting bracket. They must fit into the holes on the wall
mounting bracket without being jammed or wedged.
− Secure the arium
®
bagtank to the wall mounting bracket. Use the screws
provided for this.

8
Installation Instructions arium® bagtank
Installation
arium® bagtanks are heavy!
Two people should be used to lift and mount the arium® bagtank onto the wall
mounting bracket.
2.3 Setting Up arium® bagtank 50 and 100
arium® bagtank 50 and bagtank 100 are only designed for floor installations.
Integration into laboratory furniture may be possible if it has sufficient weightbearing capacity.
The arium
®
bagtank 50 and 100 without in-built pump are not compatible with
arium® pro and comfort systems.
If you wish to do so, you will need a distribution pump for this.
The setup location must also have access to a 100–240 V electrical outlet (arium
®
bagtank 50 and 100 with built-in pump) and an atmospherically
vented drain.
Rollers (optional for bagtank 50 and bagtank 100)
Optional rollers are available for arium® bagtank floor installations.
The rollers should be mounted before the initial startup of the arium
®
bagtank.
Mounting the rollers to the bottom:
Rollers
This figure shows the
arium® bagtank 50
with mounted rollers
This figure shows the arium®
bagtank100 with mounted rollers
arium
®
bagtanks are heavy!
Two people should be used to lift and carry the bagtank.
9
Installation Instructions arium® bagtank
Installation
2.4 Installation of arium® bagtank
Install the bag into the frame as described in the following and connect the arium®
bagtank to your arium® device.
t Remove the proper bag for your arium
®
bagtank out of the packaging.
Only use the bag that is suitable for your arium
®
bagtank.
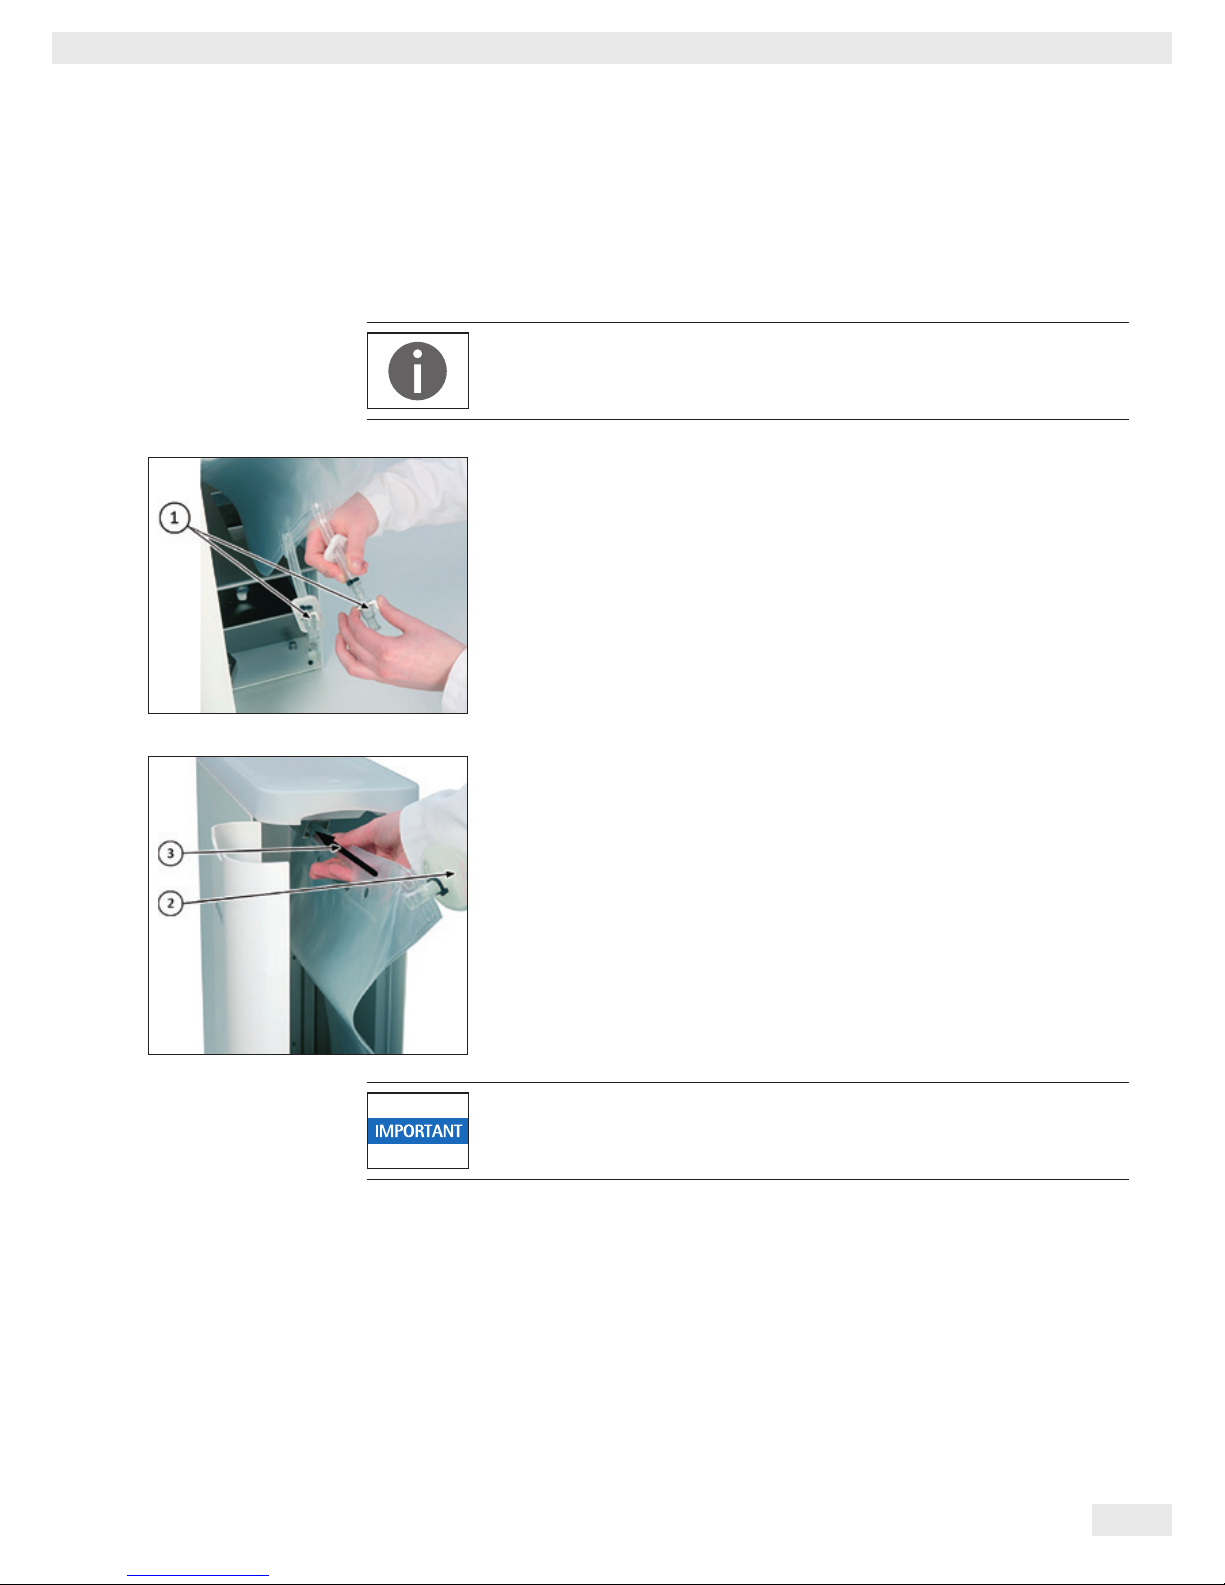
t Remove the plugs from the bag.
t Slide the bag - with the carrying handle facing upwards and the vent filter (2)
pointing forward - into the arium
®
bagtank via the top guide rail (3).
Do not force the bag on to the guide rail as this could damage it.
10
Installation Instructions arium® bagtank
Installation
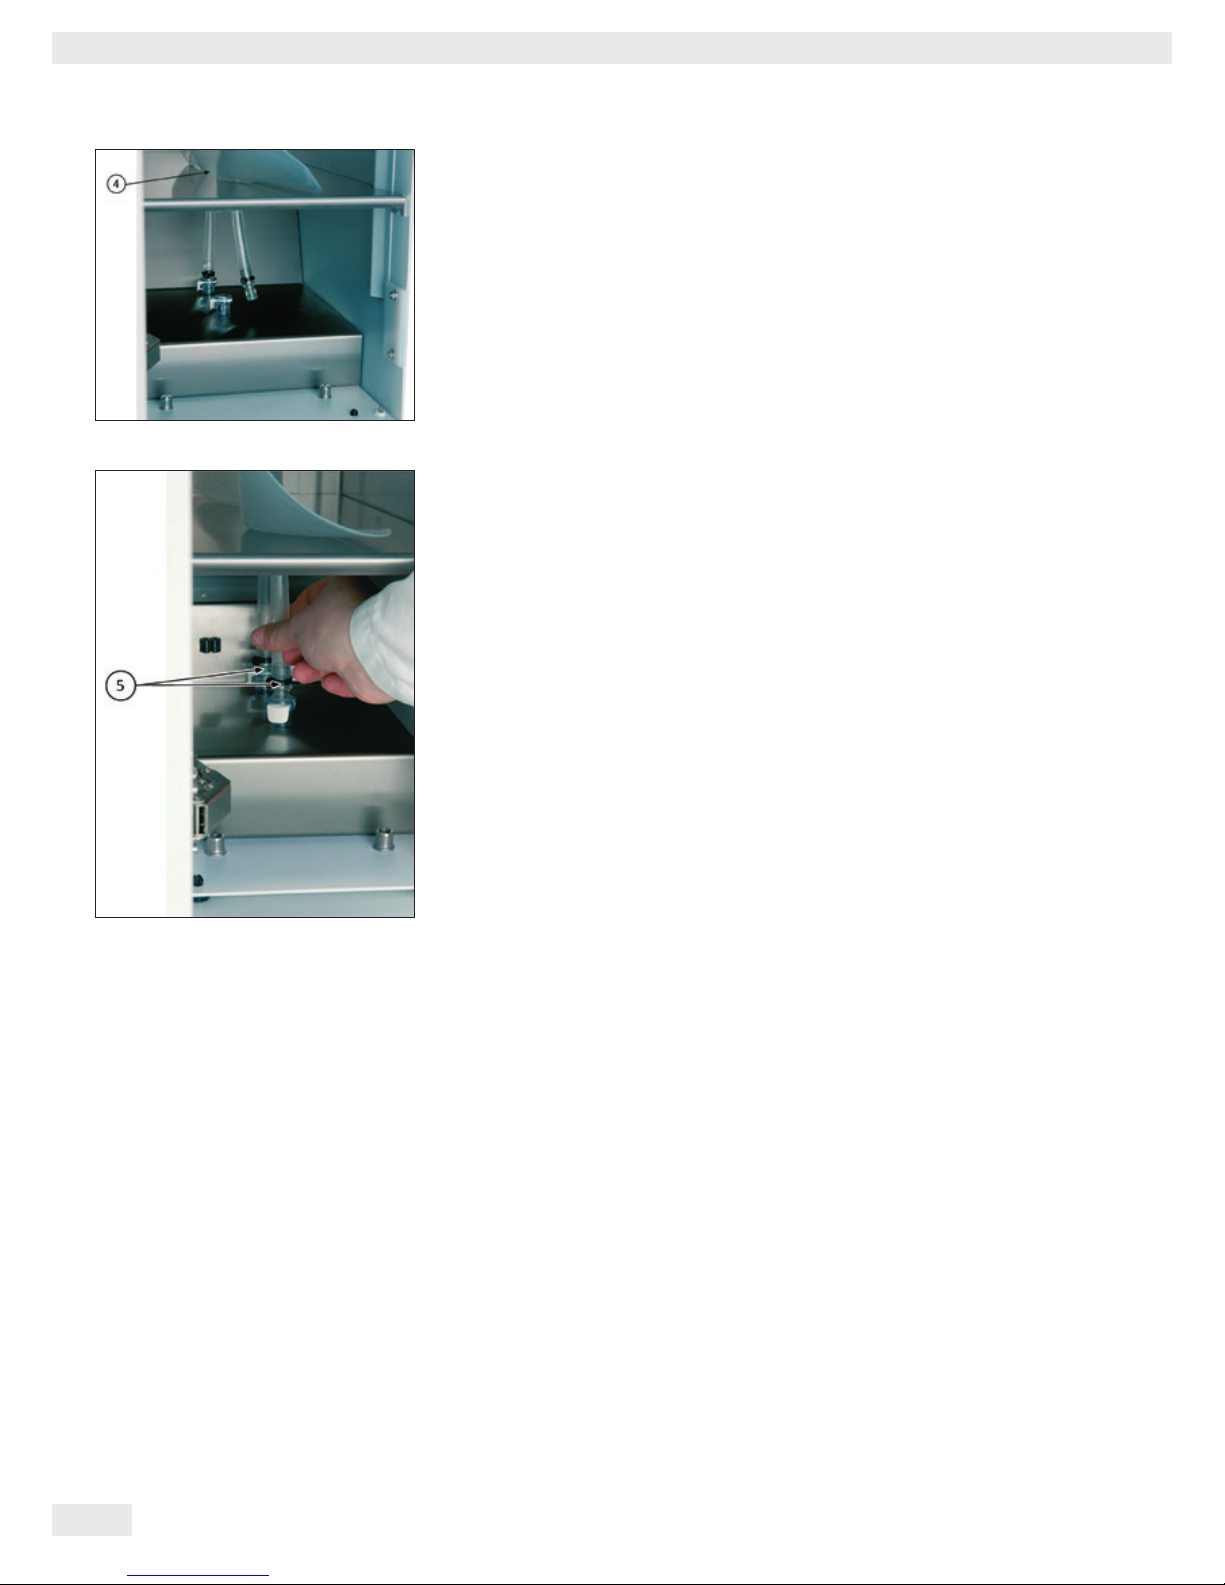
t Guide both bag connection tubes through the lower opening in the arium®
bagtank. (4).
t Connect the front and back connection tubing of the bag to the connectors at
the base of the arium
®
bagtank (5).
 Loading...