

Operating Instructions | Betriebsanleitung
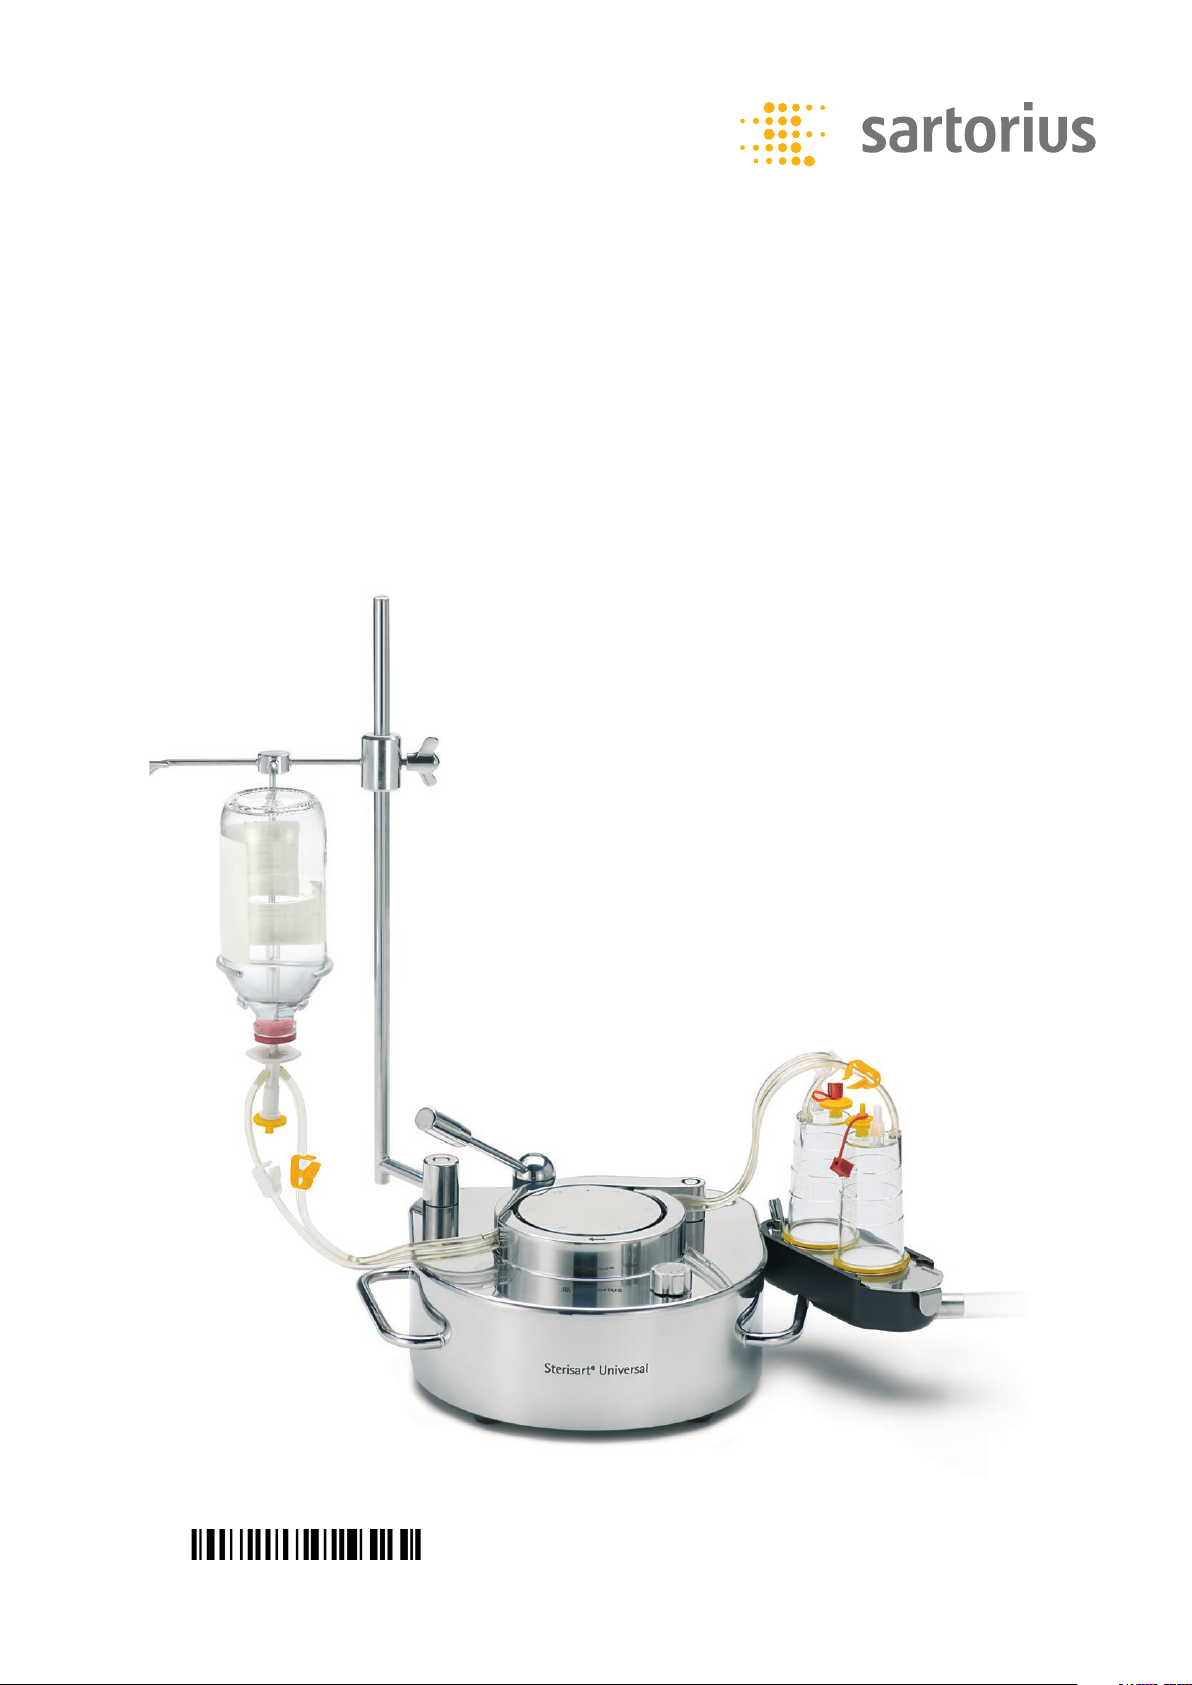
Sterisart® Universal Pump 16419
Sterisart
®
Universal-Pumpe 16419
1000072189

English .............................................Page 3
Deutsch ............................................Seite 21

Contents
1 General Safety Information ......................................4
®
2 Intended Use of the Sterisart
3 Important Notes on the Safe and Proper Usage of the Sterisart
Universal Pump ...............................................5
4 Unpacking the Pump and Checking the Equipment Supplied.............6
5 Description of the Sterisart
6 Startup......................................................9
7 Application..................................................10
8 Operating the Sterisart
9 Cleaning and Sanitization ......................................12
10 Installation in an Isolator.......................................13
11 Important Notes Concerning the Warranty .........................13
Universal Pump .......................5
®
®
Universal Pump.........................7
®
Universal Pump 16419 .....................11
12 Troubleshooting ..............................................14
13 Technical Specifications........................................15
®
14 Ordering Information for the Sterisart
Universal Pump ...............16
15 Ordering Information for Consumables ...........................17
16 Literature...................................................18
17 Storage and Shipping..........................................18
17.1 Storage .........................................................18
17.2 Returning Devices and Parts........................................18
18 Disposal ....................................................19
18.1 Information on Decontamination ...................................19
18.2 Disposing of Device and Parts ......................................19
18.2.1 Information on Disposal ....................................19
18.2.2 Disposal ..................................................19
19 Conformity..................................................20
20 Legal information about licenses and trademarks ...................20
20.1 Millipore™.......................................................20
Contents 3
1 General Safety Information
Explanation of Safety Symbols Used
These operating instructions contain important information which is visibly marked.
This information must be observed in order to avoid hazards to users as well as to
avoid damage and|or malfunctions to the device.
Symbols in the operating instructions:
Important Note! Important information
Danger! General danger with risk of injury
Laser warning
General information and|or help
Symbols on the manufacturer‘s ID label
AC voltage
Return and disposal
Observe instructions for use
Manufacturer
4 General Safety Information
2 Intended Use of the
®
Sterisart
The new Sterisart® Universal pump is a peristaltic pump equipped with appropriate
devices for attaching a closed sterility test system and a sample container.
The pump draws liquid from the sample container into the specially designed double
tubing, distributing the liquid equally to both sample containers of the sterility test
system. The sample is rinsed in a similar way. After the nutrient media is added, the
sample containers are incubated for a prescribed time and evaluated.
Universal Pump
3 Important Notes on the Safe
®
and Proper Usage of the Sterisart
Universal Pump
– The Sterisart® Universal pump must be switched off before any electrical
connections are made or broken (e.g. when plugging in or unplugging the power
cable or foot switch).
– The Sterisart® Universal pump must only be used with the original current-carrying
parts supplied with it (power cable with ferrite core, D-Sub connecting cable and
foot switch). The D-Sub protective cap supplied must cover the port when the
D-Sub connecting cable is not connected.
– The Sterisart® Universal pump is designed for use with Sterisart® NF filtration
systems. The suitability of any other tubing must be approved by Sartorius.
– Only plastic and glass bottles with a filling volume of 500 ml or less are permitted
to be placed in the delivered bottle holder.
– Only authorized Sartorius service technicians are allowed to open the pump
housing.
– Do not expose the Sterisart® Universal pump to extreme temperatures.
– Improper use or handling will invalidate the manufacturer‘s guarantee.
– Sterisart® Universal pump may only be used with a grounded, readily accessible and
fuse-protected electrical outlet that complies with national standards.
Intended Use of the Sterisart® Universal Pump 5

4 Unpacking the Pump and Checking
the Equipment Supplied
When unpacking the Sterisart® Universal pump 16419 make sure not to leave
any parts in the packaging. The equipment supplied includes the following accessories
(one of each):
– Sterisart® Universal pump 16419
– Power cable (depends on country rating)
– Container for draining
– Pump cover for container for draining (Sterisart® units)
– Drain tubing
– Fastening arm
– Bottle holder
– Support rod
– Bow
– Clamping lever with sleeve
– Operating instructions German | English
6 Unpacking the Pump and Checking the Equipment Supplied

5 Description of the Sterisart®
Universal Pump
Fig. 1
The Sterisart® Universal pump 16419 (see Fig. 1) consists of pump housing (1) with pump
head (2), lever (3), bow (4) and handles (5). On the right handle, there is also a bolt with
a tilting lock for the container for draining (11). The selecting knob (6) is at the front on
the right. The stand (7) with the holding ring for bottles (8) and fastening arm (9) and the
optional ampoule breaker (10) is located on the left side of the pump.
The container for draining (Fig. 1; 11) for the sterility test containers is located on the
right side of the pump. The drain tubing can be attached to the appropriate connector
(barb) on the container for draining (Fig. 1; 12).
Laser warning
The internal barcode scanner emits a laser beam.
Do not look directly into the beam.
Description of the Sterisart® Universal Pump 7

1 2 3 4 5 6
Fig. 2
Located on the rear panel (see Figure 2): a laser warning label (1), On|Off switch (2),
AC power socket (3), socket for the foot switch (4), an RS-232 interface port for
connecting a PC/MMC card reader (5) and the manufacturer’s ID label (6).
8 Description of the Sterisart® Universal Pump
6 Startup
Set up the Sterisart® universal pump ergonomically in a suitable area (cleanroom,
laminar flow work bench, isolator).
Before initial start-up, the accessories supplied must be assembled on the Sterisart®
Universal pump. Please proceed in the following order:
– At the back left, push the support rod (Fig.1, 7) onto the pin of the upper part of the
pump until it is firmly in place. The holes in the foot of the support rod allow the
positioning of the support rod to be altered.
– Fasten the bottle holder (Fig. 1, 8) and the fastening arm (Fig. 1, 9) to the support
rod. If necessary, attach the ampoule breaker (Fig. 1, 10) beforehand.
– Insert the bow (Fig. 1, 4) and the clamping lever (Fig. 1, 3) on the corresponding
bolts on the top of the pump. The lever is jacketed in a plastic sleeve, which can be
removed for cleaning. If signs of wear appear on this sleeve after it has been in use
for some time, it can be re-ordered as a spare part (see chapter “Ordering informa-
tion for the Sterisart® Universal Pump”).
– After connecting the drain tubing to the barb (Fig. 1, 12) of the container for drain-
ing (Fig. 1, 11); attach the container for draining to the appropriate bolts on the
right handle (Fig. 1, 5). The container for draining and the cover plate are attached
by moving the tilting lock.
– Fasten the end of the drain tubing to the appropriate drain.
Very Important Note!
Always make sure that there is a sufficient liquid level differential (> 5 cm) between the container for draining and the drain. This makes safe drainage possible
and prevents backflow into the container for draining. Make sure that the drain
tubing is kept lower than the pump to prevent the drain pan from overflowing.
Treat the waste as a biohazard. Only dispose of it in accordance with current
regulations.
– Plug the foot switch into the designated socket located on the rear panel (see Fig. 2,
4). Fasten the plug to the socket by turning it clockwise.
– Plug the power cable into the male power socket on the back of the Sterisart®
Universal pump and into a grounded electrical outlet (Fig. 2, 3).
– Use the On|Off switch (Fig. 2, 2) at the rear side of the Sterisart® Universal pump to
turn it on.
Startup 9
7 Application
Caution!
General danger with risk of injury
Do not operate the Sterisart® Universal pump until the tubing has been properly
installed. The pump may only be operated with the tubing inserted and only by
one person at a time. Never pump any flammable, corrosive or explosive fluids.
Users should always wear tight-fitting clothing (no ties, etc.).
To be able to operate the pump, Sterisart® sterility test systems must be installed
beforehand. To do this, follow the steps given below:
Remove the sterility test systems from their respective packaging and place the sterility test sample containers in the container for draining on the right side of the pump.
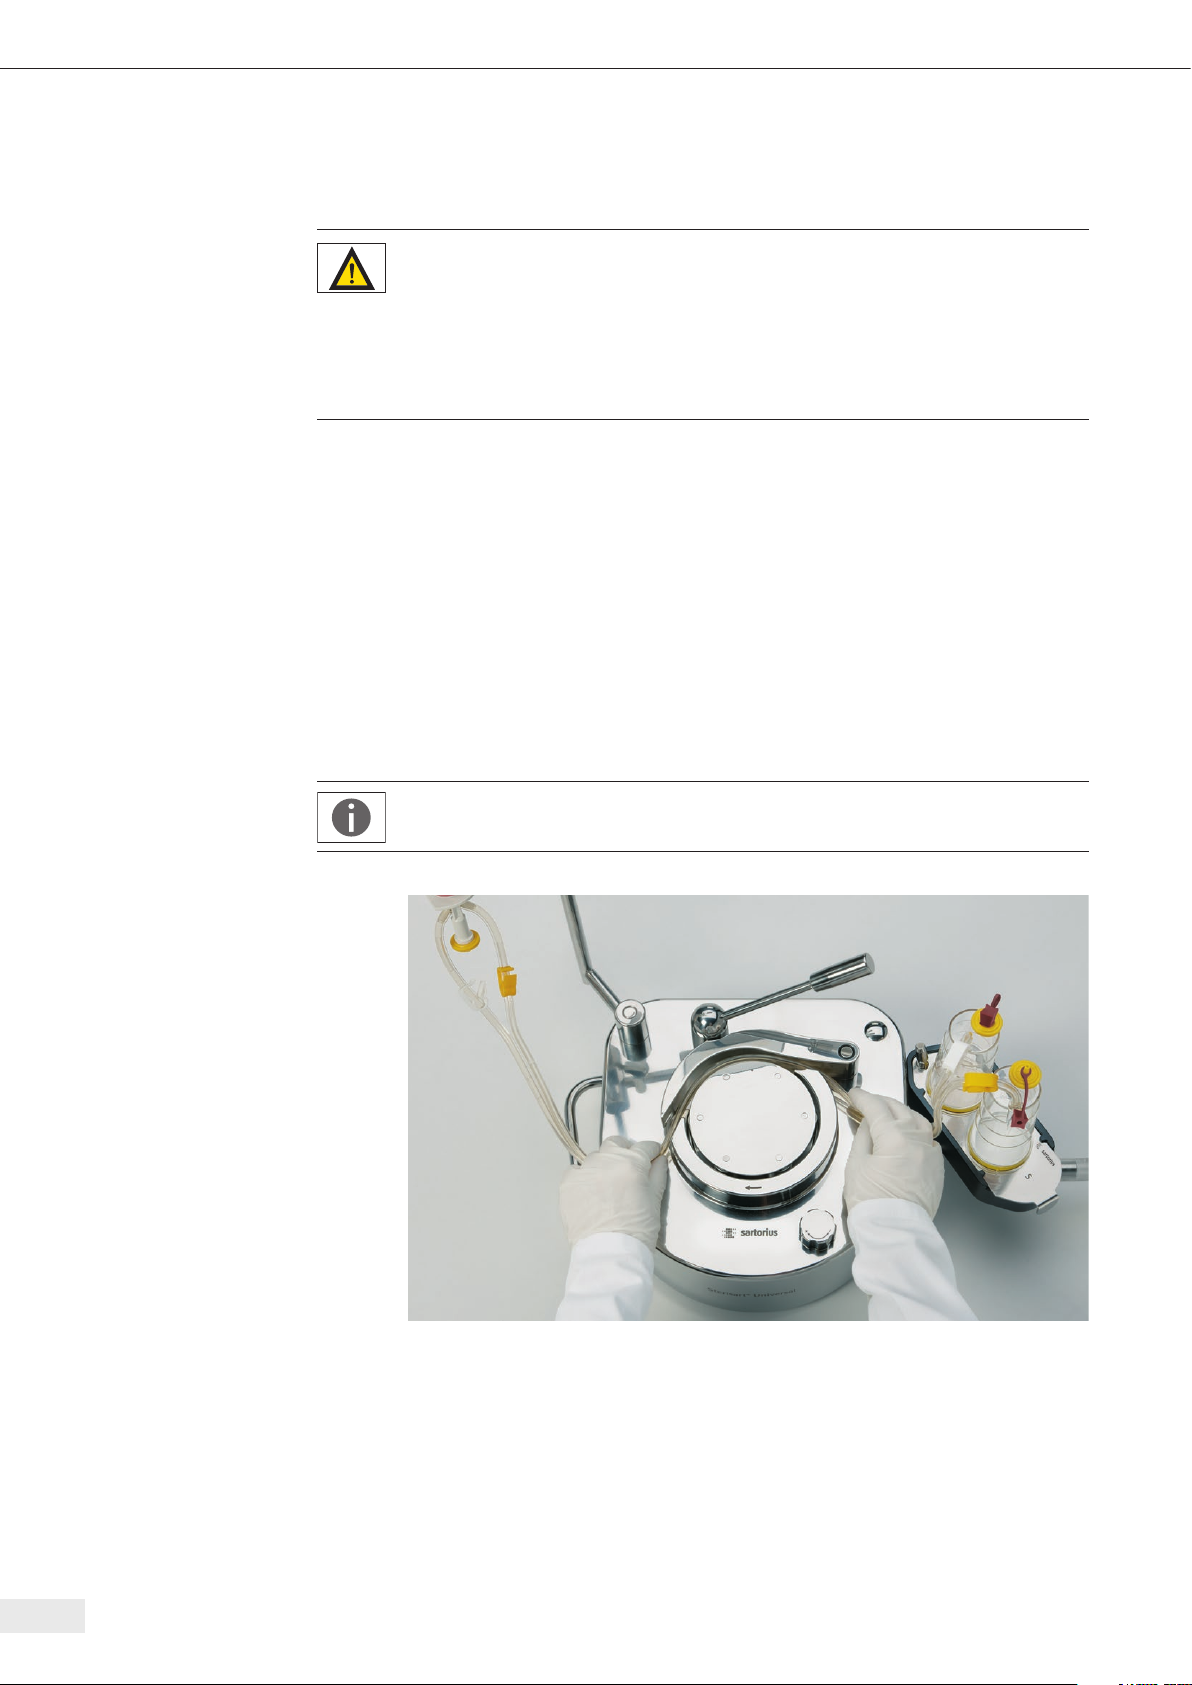
– Now open the lever and the bow.
– Keep the tubing around the rotor of the pump (the arrow on the fixed part sur-
rounding the pump head indicates the subsequent direction of rotation), so that no
kinks occur and the tubing is not under tension (Fig. 3). The tubing is attached by
simply inserting it (with it lying on the ground) and fastening the lever (Fig. 4). In
this way, the tubing is automatically correctly positioned.
Important Note!
When threading the tubing, make sure that it is not kinked or twisted.
Fig. 3
10 Application
– To start the pumping process, the tubing must be fully inserted and the lever
must be engaged. A safety function ensures that the pump does not start if the
lever or the bow are open.

– After threading the tubing and closing the lever, insert the removal spike/needle of
the Sterisart® NF system as described in the instructions for the Sterisart® NF steril-
ity test system. Then attach the test liquid container (e.g., bag or bottle) by hanging
it on the support rod (bag) or by placing it in the holding ring on the support rod
(bottle). The holding ring accepts bottles of various sizes. The holder must be turned
so that the sterility test system tubing is not under tension after the spike | needle
has been inserted and so that the spike | needle cannot slip out of the container.
For testing ampoules, an ampoule breaker is also attached to the support rod.
Use the integrated knife to scratch the neck of the ampoule, then snap off the top.
The broken-off top of the ampoule falls into the collection container (which can be
emptied later).
– For the following pumping process, make sure that the Sterisart® NF sample
containers are correctly positioned in the intended holders, and that the tubing
has been inserted without tension or kinking.
Important Note!
When the lever is opened, the Sterisart® Universal pump is turned off
immediately by a safety function. In this event, the Sterisart® Universal pump
can be restarted after adequately closing all components.
8 Operating the Sterisart® Universal
Pump 16419
The Sterisart® Universal Pump 16419 can be started up either by pressing the selec-
ting knob or by activating the optional foot switch. The speed can be smoothly adjusted using the selecting knob. The pump is switched off by again pressing the selecting knob or by releasing the foot switch.
Fig. 4
Operating the Sterisart® Universal Pump 16419 11
9 Cleaning and Sanitization
Caution!
Ports on the back panel are not tight.
The Sterisart® Universal pump is not suited for sanitization (gaseous or atomized)
with peracetic acid, hydrogen peroxide, or other decontamination procedures
commonly used in isolators, unless it is built into an isolator countertop. These
types of disinfectant can be used when the pump has been professionally
installed in the isolator.
– Before cleaning the pump rotor, turn off the main power switch and unplug the
power cable.
The following parts of the pump have to be removed for cleaning:
– Bow, lever, support rod and container for draining
– Disconnect the pump head:
– The rotor must be turned by hand until the marking on the upper side (black dot)
is pointing backwards.
– The marking indicates the position of the fastening screw that is located in the
rotor mid-section.
– Loosen this screw with a 4-mm Allen wrench. Do not turn the screw out
completely.
– Pull the rotor upwards.
– Pull the speed-selecting knob upwards.
Comply with the IP protection rating! No liquid may enter the Sterisart®
Universal pump. Disconnect the pump from line voltage before any cleaning,
maintenance, or repair work.
Cleaning stainless steel surfaces:
The stainless steel housing can be cleaned at regular intervals. Clean stainless steel
parts with a wet cloth. Customary cleaning agents suitable for stainless steel can be
used without risk. For surface sanitization, use commercially available disinfectants
that are suitable for stainless steel.
Do not use any cleaning agents on the stainless steel housing that contain sodium
hydroxide or acetic, sulfuric or citric acid. The use of steel wool cleaning sponges is
prohibited.
All stainless steel surfaces can be cleaned by wiping with a moist cloth and with the
following products:
– Peracetic acid, H2O2 and acetic acid (2.5%)
– Quaternary ammonium
– Formaldehyde and glutaraldehyde
– Isopropyl alcohol
– Ethanol 70%
Autoclavable at 121°C for 20 min. are bow, lever, speed selecting knob, support rod,
bottle holder, counter-bottle holder and container for draining (complete).
12 Cleaning and Sanitization
Never autoclave the pump rotor and never submerge it into any liquid.
Only use a slightly moistened cloth | tissue for cleaning | desinfecting.
After cleaning, all parts should be secured as described in Chapter “6 Startup,”
page 9. The rotor is assembled as follows:
– The rotor shaft has a groove on the side turned towards the back.
– Push the rotor upwards onto the shaft.
– Turn the marking on the rotor towards the back, so that the groove on the rotor
shaft aligns with the marking on the rotor
– Tighten the screw in the rotor to guarantee that the rotor is firmly seated.
10 Installation in an Isolator
The installation must be carried out by the isolator manufacturer.
To install the Sterisart® Universal pump in an isolator, it must be opened up first.
Make sure to unplug it from AC current (mains supply) before opening it!
During assembly, please follow the installation instructions precisely (part of the
installation kit for isolators, order number 1ZE---0050). The instructions are available
separately from the manufacturer.
11 Important Notes Concerning the
Warranty
The correct functioning and safe use of the Sterisart® Universal pump is only guaranteed when it is operated according to the information given in these instructions.
The equipment manufacturer is responsible only for effects on safety, dependability
and performance of the instrument if assembly, extensions, new settings, changes or
repairs are carried out by persons authorized by him to do so, if the electrical installation in the room is in conformance with IEC requirements and if the equipment is
used in accordance with these operating instructions.
Any changes made to the Sterisart® Universal pump will invalidate the manufacturer‘s
warranty unless they are previously agreed to by authorized Sartorius Service staff, or
carried out by them.
Installation in an Isolator 13

12 Troubleshooting
This section lists a few problems that could arise in connection with the Sterisart®
pump. Several solutions are given for each problem. The first solution given is usually
the most likely one. If this does not solve the problem, go down the list of suggestions
until the problem has been solved.
Important Note!
The pump must be switched off before electrical connections are unplugged
or plugged in!
Should it not be possible to locate and solve the problem in this way, contact the
appropriate service center (see the back cover of this manual).
Problem Solution
No function; no display The pump is not switched on, or is not correctly connected to the electric supply.
Plug the power cable into the electric outlet correctly and to the Sterisart
pump. Switch on the on-off switch.
Check the electric supply; switch on multiple outlet sockets; check the wiring.
If these possibilities are not feasible, the primary fuse in the main line filter may be
defective.
Changing this, with the power cable unplugged, must only be performed by
authorized personnel!
The pump rotor does not rotate. The locking lever is open or the foot switch is not properly connected.
The bow has been removed from the pump.
Check the connection of the foot switch to the pump.
®
Universal
14 Troubleshooting

13 Technical Specifications
Dimensions pump in mm (W × D × H) approx. 336 × 260 × 210 (with lever)
Dimensions pump with holding
ring for bottles, container for
draining in mm
Weight: Basic model 16419 Approx. 13.5 kg
Maximum operating temperature 40°C
Further data IP41 in accordance to IEC 60529/EN 60529
Electrical connection
Voltage 100 – 240 VAC ± 10%
Frequency 50 – 60 Hz
Power consumption 100 VA
Pump
Pump flow rate 70 – 650 ml/min (depending on the tubing)
Tubing
Correct functioning of the Sterisart
with tubing that has been approved by Sartorius.
Materials
Base plate, lever, bow, rotor Stainless steel 316L (1.4435)
Housing, connection port,
support rod, bottle holder
Connecting cable PVC
Container for draining, plastic
sleeve for lever, hydrodynamic
bearing for bow
Hydrodynamic bearing for lever Iglidur X
Seals, gaskets, drain tubing Silicone
(W × D × H) 440 × 365 × 485
®
Universal pump is only guaranteed when used
Stainless steel 316 (1.4401)
PET
Technical Specifications 15

14 Ordering Information for the
®
Sterisart
Order No. Description
16419 Sterisart
16973 Ampoule tongs
1ZG---0009 Bottle holder
1ZF---0004 Fastening arm
1ZA---0002 Drain tubing
1ZW---0002 Ampoule breaker
1ZE---0033 Foot switch
1ZF---0013 Stand
1ZG---0028 Container for draining
1ZB---0001 Plastic sleeve for lever
1ZF---0007 Wing nut
1ZS---0005 Bow
1ZS---0002 Lever
Universal Pump
®
Universal pump, basic model
1ZL---0003 Rotor
®
1ZG---0023 Cover for container for draining (Sterisart
1ZG---0024 Cover for container for draining (Millipore™ sterility test units)
®
1ZG---0014 Adaptor for Sterisart
a Millipore™ Equinox pump
1ZG---0039 Transport trolley
1ZE---0041 Installation kit isolators
Additional accessories are available on request.
container for draining for use with
sterility test units)
16 Ordering Information for the Sterisart® Universal Pump

15 Ordering Information for
Consumables
Recommended disposable sterility test units for use with pump.
Order No. Description
®
16466-ACD Sterisart
(box of 10, individually sterilized with ETO; single-packed).
16467-ACD Sterisart
(box of 10, individually sterilized with ETO; single-packed)
16468-ACD Sterisart
connectors (box of 10, individually sterilized with ETO; singlepacked)
16466-GBD Sterisart
(box of 10, individually gamma sterilized, double-packed).
Optimal for use in isolators.
16467-GBD Sterisart
(box of 10, individually gamma sterilized, double-packed).
Optimal for use in isolators.
16468-GBD Sterisart
lock connectors (box of 10, individually gamma sterilized, doublepacked). Optimal for use in isolators.
16469-GBD Sterisart
(box of 10, individually gamma sterilized, double-packed).
Optimal for use in isolators.
16470-GBD Sterisart
unvented vials (box of 10, individually gamma sterilized, doublepacked). Optimal for use in isolators.
16475-GBD Sterisart
powders in unvented vials (box of 10, individually gamma sterilized, double-packed). Optimal for use in isolators.
16476-GBD Sterisart
closed containers (box of 10, individually gamma sterilized,
double-packed). Optimal for use in isolators.
16477-GBD Sterisart
(box of 10, individually gamma sterilized, double-packed). Optimal
for use in isolators.
16478-GBD Sterisart
male connectors (box of 10, individually gamma sterilized, doublepacked). Optimal for use in isolators.
Additional Sterisart
NF alpha, dual-needle metal spike for closed containers
®
NF alpha, 6-cm metal needle for open containers
®
NF alpha, system for medical devices with Luer lock
®
NF gamma, dual-needle metal spike for closed containers
®
NF gamma, 6-cm metal needle for open containers
®
NF gamma, system for medical devices with Luer or Luer
®
NF gamma, system with adapter for prefilled syringes
®
NF gamma, system for slightly soluble powders in
®
NF gamma, system for lyophilized or freely soluble
®
NF gamma, system with short dual-needle metal spike for
®
NF gamma, system for liquids in plastic containers
®
NF gamma, system for medical containers with Luer lock
®
units are available on request.
Ordering Information for Consumables 17

16 Literature
Data sheet Sterisart® Universal Pump English
Publ. No.: SLD2010-e Order No.: 85030-531-17
®
Brochure Sterisart
Publ. No.: SLD1003-e Order No.: 85030-531-14
Universal Pump English
17 Storage and Shipping
17.1 Storage
Procedure
t If the device is in operation:
t Decommission the device.
t Clean the device.
t Store the device according to the ambient conditions (see Chapter “13 Technical
Specifications,” page 15).
17.2 Returning Devices and Parts
Defective devices or parts can be sent back to Sartorius. Returned devices must be
clean, decontaminated, and properly packed.
Transport damage as well as measures for subsequent cleaning and disinfection of
the device or parts by Sartorius shall be charged to sender.
WARNING
Risk of injury due to contaminated devices!
Devices contaminated with hazardous materials [nuclear, biological or chemical
(NBC)] will not be accepted for repair or disposal.
t Observe the information on decontamination (see Chapter “13 Technical Specifi-
cations,” page 15).
Procedure
t Decommission the device.
t Contact Sartorius Service for instructions on how to return equipment or parts
(please refer to our website at www.sartorius.com for return instructions).
t Pack the device and the parts in an un-used original packaging.
The original packaging can be ordered (contact Sartorius Service).
18 Literature

18 Disposal
18.1 Information on Decontamination
The device does not contain any hazardous materials that would necessitate special
disposal actions. The media (e.g. acids, bases) used during the process are potentially
hazardous materials that could cause biological or chemical hazards.
According to the EU Directive on Hazardous Substances, the owners of devices that
come into contact with hazardous substances are responsible for properly disposing
of these devices and for declaring such devices when transporting them.
WARNING
Risk of injury due to contaminated devices!
Devices contaminated with hazardous materials [nuclear, biological or chemical
(NBC)] will not be accepted for repair or disposal.
18.2 Disposing of Device and Parts
18.2.1 Information on Disposal
The device and the device accessories must be disposed of properly by disposal
facilities.
A lithium cell battery is installed inside the device. Batteries must be disposed of
properly by disposal facilities.
The packaging is made of environmentally friendly materials that can be used as
secondary raw materials.
18.2.2 Disposal
Requirements
The device has been decontaminated.
Procedure
t Dispose of the device. Follow the disposal instructions on our website
(www.sartorius.com). Inform the disposal facility that there is a lithium cell
battery installed inside the device.
t Dispose of the packaging in accordance with local government regulations.
t Dispose of the consumables in accordance with local government regulations.
Disposal 19

19 Conformity
The attached documents confirm compliance of the device with the directives or
standards cited.
20 Legal information about licenses
and trademarks
20.1 Millipore™
Millipore™ is a registered trademark of Merck KGaA, Darmstadt, Germany or its
affiliates.

Inhalt
1 Allgemeine Sicherheitshinweise ..................................22
®
2 Verwendung der Sterisart
Universal-Pumpe ........................23
3 Wichtige Hinweise für den sicheren und korrekten Gebrauch
der Sterisart
®
Universal-Pumpe ..................................23
4 Auspacken des Gerätes und Überprüfung des Lieferumfanges...........24
®
5 Beschreibung der Sterisart
Universal-Pumpe .......................25
6 Inbetriebnahme . . . . . . . . . . . . . . . . . . . . . . . . . . . . . . . . . . . . . . . . . . . . . . 27
7 Anwendung .................................................28
®
8 Betrieb der Sterisart
Universal-Pumpe 16419 ......................29
9 Reinigung, Desinfektion........................................30
10 Montage in einem Isolator......................................31
11 Wichtige Hinweise zur Gewährleistung ............................31
12 Hilfe bei Problemen ...........................................32
13 Technische Daten.............................................33
®
14 Bestellinformationen für die Sterisart
Universal-Pumpe 16419.........34
15 Bestellinformationen Verbrauchsartikel ...........................35
16 Dokumentation ..............................................36
17 Lagerung und Versand .........................................36
17.1 Lagern ..........................................................36
17.2 Geräte und Teile zurücksenden .....................................36
18 Entsorgung..................................................37
18.1 Hinweise zur Dekontamination .....................................37
18.2 Gerät und Teile entsorgen..........................................37
18.2.1 Hinweise zur Entsorgung....................................37
18.2.2 Entsorgen ................................................37
19 Konformität.................................................38
20 Lizenzrechtliche oder markenrechtliche Informationen ................38
20.1 Millipore™.......................................................38
21

1 Allgemeine Sicherheitshinweise
Erklärung der verwendeten Sicherheitssymbole
In dieser Bedienungsanleitung sind wichtige Hinweise visuell gekennzeichnet.
Diese Hinweise sind Voraussetzung für den Ausschluss von Gefährdungen
für den Anwender, sowie für die Vermeidung von Beschädigungen bzw. Funktionsstörungen am Gerät.
Symbole in der Bedienungsanleitung:
Achtung! Wichtiger Hinweis
Gefahr! Allgemeine Gefahr mit Verletzungsrisiko
Laserwarnhinweis
Allgemeiner Hinweis bzw. Hilfe
Symbole auf dem Typenschild:
Wechselspannung
Rücknahme und Entsorgung
Gebrauchsanweisung beachten
Hersteller
22 Allgemeine Sicherheitshinweise

2 Verwendung der Sterisart®
Universal-Pumpe
Bei der neuen Sterisart® Universal-Pumpe handelt es sich um eine peristaltische
Schlauchpumpe aus Edelstahl für den Sterilitätstest, die mit den entsprechenden Vorrichtungen zur Befestigung des Sartorius Sterilitätstestsystems und des zu testenden
Probegefäßes ausgerüstet ist.
Die Pumpe zieht die zu testende Flüssigkeit aus dem Probenbehälter durch das dafür
speziell konzipierte Doppelschlauchsystem und pumpt sie in die beiden Testbehälter
des Sterilitätstestsystems. Das Spülen der Probe erfolgt in analoger Weise. Nach Zugabe der Nährmedien werden die Sterilitätstestbehälter für einen vorgeschriebenen
Zeit raum inkubiert und ausgewertet.
3 Wichtige Hinweise für den sicheren
und korrekten Gebrauch der
®
Sterisart
Universal-Pumpe
– Die Steckverbindungen an der Sterisart® Universal-Pumpe (Netzschalter, Fuß-
schalter) dürfen nur bei ausgeschaltetem Gerät gezogen bzw. eingesteckt werden.
– Es dürfen nur die mitgelieferten spannungsführenden Originalteile (Netzkabel mit
Ferritkern, Verbindungskabel sowie Fußschalter) eingesetzt werden. Bei nicht
angeschlossenem D-Sub Kabel ist die mitgelieferte montierte D-Sub Schutzkappe
zu tragen.
– Die Sterisart® Universal-Pumpe ist für den Einsatz mit Sterisart® NF Filtrationssystemen
konzipiert worden. Die Eignung anderer Schlauchsysteme muss durch Sartorius
überprüft werden.
– In den mitgelieferten Flaschenhalter dürfen ausschließlich Kunststoff- oder Glas-
flaschen mit einem maximalen Füllvolumen von 500 ml eingestellt werden.
– Nur von Sartorius autorisierten Technikern ist es erlaubt das Pumpengehäuse zu
öffnen.
– Das Gerät keinen extremen Temperaturen aussetzen.
– Unsachgemäße Nutzung kann zum Erlöschen der Gewährleistung führen.
– Das Gerät darf nur an geerdeter, gut zugänglicher und dem Nationalen Standard
entsprechender, abgesicherter Steckdose verwendet werden.
Verwendung der Sterisart® Universal-Pumpe 23

4 Auspacken des Gerätes und
Überprüfung des Lieferumfanges
Beim Auspacken der Sterisart® Universal-Pumpe 16419 achten Sie bitte darauf, dass
keine Teile in der Verpackung verbleiben. Zum Lieferumfang gehören die folgenden
Zubehörteile (je 1 Stück):
– Sterisart® Universal-Pumpe 16419
– Netzkabel (länderspezifisch)
– Ablaufbehälter
– Abdeckung Ablaufbehälter (Sterisart® Einheiten)
– Ablaufschlauch
– Haltearm
– Flaschenhalter
– Stativ
– Bügel
– Klemmhebel mit Hülse
– Bedienungsanleitung Deutsch | Englisch
24 Auspacken des Gerätes und Überprüfung des Lieferumfanges

5 Beschreibung der Sterisart®
Universal-Pumpe
Abb. 1
Die Sterisart® Universalpumpe 16419 (siehe Abb. 1) besteht aus Pumpengehäuse (1)
mit Pumpenkopf (2), Hebel (3), Bügel (4) und Griffen (5). Auf dem rechten Griff sitzt
weiterhin ein Bolzen mit Kippfixierung für den Abblaufbehälter (11). Vorne rechts
sitzt der Wählknopf (6). Auf der linken Seite der Pumpe befindet sich das Stativ (7)
mit Flaschenhalter (8) und Haltearm (9) sowie der optionale Ampullenbrecher (10).
An der rechten Seite der Pumpe ist der Ablaufbehälter (Abb. 1; 11) für die Sterilitätstestbehälter angebracht. An ihm kann ein Ablaufschlauch an dem dafür vorgesehenem Anschlussstutzen (Abb. 1; 12) angeschlossen werden.
Laserwarnhinweis!
Der interne Barcodescanner emittiert Laserstrahlung.
Nicht in den Strahl blicken.
Beschreibung der Sterisart® Universal-Pumpe 25

1 2 3 4 5 6
Abb. 2
An der Rückseite (siehe Abb. 3) befinden sich ein Laser-Warnhinweisschild (1),
der Ein|Ausschalter (2), Netzanschluss (3), Anschluss für den Fußschalter (4), RS-232
PC-Anbindung/MMC Kartenlesegerät (5) sowie das Typenschild (6).
26 Beschreibung der Sterisart® Universal-Pumpe

6 Inbetriebnahme
Die Sterisart® Universal-Pumpe sollte in einem geeigneten Raum (Reinraum |
LAF-Werkbank, Isolator) ergonomisch aufgestellt werden.
Bei der erstmaligen Inbetriebnahme müssen Sie das mitgelieferte Zubehör an die
Sterisart® Universal-Pumpe montieren. Gehen Sie dazu bitte in der angegebenen
Reihenfolge vor:
– Stecken Sie das Stativ (Abb.1, 7) hinten links auf die Stifte des Pumpenoberteiles
bis es fest sitzt. Die Bohrungen im Fuß des Statives erlauben unterschiedliche
Positionierungen des Statives.
– An dem Stativ befestigen Sie zuerst den Flaschenhalter (Abb. 1, 8), danach den
Haltearm (Abb. 1, 9). Bei Bedarf bringen Sie vorher den Ampullenbrecher (Abb.1, 10)
an.
– Stecken Sie den Bügel (Abb. 1, 4) und den Klemmhebel (Abb. 1, 3) auf die ent-
sprechenden Bolzen auf der Oberseite der Pumpe. Der Hebel ist mit einer Kunst-
stoffhülse ummantelt, die zu Reinigungs zwecken entfernt werden kann. Sollte im
Laufe der Benutzung diese Hülse Verschleißerscheinungen aufweisen, kann diese als
Ersatzteil nachbestellt werden (siehe Kapitel Bestellinformationen).
– Nach Anbringung des Ablaufschlauches an den Anschlussstutzen (Abb. 1, 12) des
Ablaufbehälters (Abb. 1, 11) bringen Sie diesen an dem dafür vorgesehenen Bolzen
auf dem rechten Griff (Abb. 1, 5) an. Der Ablaufbehälter sowie die Abdeckplatte
werden durch Umlegen der Kippfixierung befestigt.
– Das Ende des Ablaufschlauches bitte an einen vorhanden Abfluss montieren.
Hinweis!
Achten Sie darauf, dass ein ausreichender Höhenunterschied (> 5 cm) zwischen
Ablaufbehälter und Abfluss vorhanden ist, der ein gesichertes Abfließen
ermöglicht, sowie einen Rückfluss in den Ablaufbehälter verhindert. Hierbei ist
darauf zu achten, dass der Schlauch immer tiefer liegt als die Pumpe, da sonst
ein Überlaufen der Ablaufwanne eintritt.
Achtung! Wichtiger Hinweis!
Behandeln Sie den Abfall als Biohazard. Beseitigen Sie diesen nur gemäß der
geltenden Vorschriften.
– Schließen sie den Fußschalter an der Rückseite an die vorgesehene Buchse an
(Abb. 2; 4). Verschrauben Sie den Stecker mit der Buchse im Uhrzeigersinn.
– Stecken Sie das Netzkabel auf der Rückseite der Sterisart® Universal-Pumpe in
die Netzanschlussbuchse (Abb. 2; 3) und in eine Steckdose mit angeschlossenem
Schutzleiter.
– Schalten Sie die Sterisart® Universal-Pumpe über den Netzschalter (Abb. 2; 2) auf
der Geräterückseite ein.
Inbetriebnahme 27

7 Anwendung
Gefahr!
Allgemeine Gefahr mit Verletzungsrisiko
Pumpe darf nur mit eingelegtem Schlauch und von einer Person gleichzeitig
betrieben werden. Es dürfen keine entflammbaren, ätzenden und explosiven
Flüssigkeiten gefördert werden. Es ist darauf zu achten enganliegende Kleidung
zu tragen (keine Krawatte o.ä.).
Zum Betrieb der Pumpe muss diese zuerst mit Sterisart® Sterilitätstest systemen
bestückt werden. Hierfür sind folgende Schritte notwendig:
Nehmen Sie die Sterilitätstest systeme aus der Verpackung und stellen Sie die Sterilitätstestbehälter in den Ablaufbehälter auf der rechten Geräteseite der Pumpe.
– Öffnen Sie nun den Hebel und den Bügel der Pumpe.
– Halten Sie den Schlauch so um den Rotor der Pumpe (der Pfeil auf dem unbeweg-
lichen Teil, welcher den Pumpenkopf umgibt, gibt die spätere Drehrichtung an), dass
keine Knicke entstehen und der Schlauch nicht gespannt ist (Abb. 3). Die Fixierung
des Schlauches erfolgt durch einfaches Einlegen des Schlauches (auf dem Boden
auf liegend) und Befestigen des Hebels (Abb. 4). Hierdurch wird der Schlauch automatisch richtig positioniert.
Hinweis! Beim Einlegen des Schlauches ist auf jeden Fall darauf zu achten, dass
der Schlauch sauber geführt wird.
Abb. 3
28 Anwendung
– Zum Starten des Pumpvorganges muss der Schlauch komplett eingelegt und der
Hebel eingerastet sein. Eine Sicherheitsfunktion sorgt dafür, dass bei geöffnetem
Hebel oder Bügel die Pumpe nicht startet.

– Nach dem vollständigen Einlegen des Schlauches wird der Entnahmespike | die
Nadel des Sterisart® NF Systems, wie in der Bedienungsanleitung für das Sterisart®
NF Sterilitätstestsystem beschrieben, in die Entnahmestelle des Probengefäßes
eingestochen. Anschließend wird das Probengefäß (z.B. Beutel oder Flasche), durch
Aufhängen (Beutel) oder Hineinstellen (Flasche) in den Flaschenhalter an dem Stativ
angebracht. Der Flaschenhalter dient zur Aufnahme verschiedener Flaschengrößen.
Der Flaschenhalter muss so ausgerichtet sein, dass nach Einstechen des Entnahme-
spikes | der Nadel, der Schlauch des Sterilitätstestsystemes nicht gespannt ist und
ein Herausrutschen des Entnahmespikes | der Nadel aus dem Probengefäß ausge-
schlossen ist.
Für die Prüfung von Ampullen befindet sich ein Ampullenbrecher ebenfalls an dem
Stativ. Die Ampullen können an dem integrierten Messer angeritzt und anschließend
gebrochen werden. Die abgebrochenen Ampullenspitzen werden in dem Auffangbehälter aufgefangen (dieser Behälter kann dann zu einem späteren Zeitpunkt geleert
werden).
– Für den folgenden Pumpvorgang achten Sie darauf, dass die Sterisart® NF Testbe-
hälter in den vorgesehenen Aufnahmen stehen, und der Schlauch ohne Spannung
und Knicke eingelegt ist.
Achtung! Wichtiger Hinweis!
Beim Öffnen des Hebels wird die Sterisart® Universal-Pumpe durch eine Sicherheitsfunktion sofort abgeschaltet. In diesem Falle ist die Sterisart® UniversalPumpe nach ordnungsgemäßem Schließen aller Bauteile neu zu starten.
8 Betrieb der Sterisart® Universal-
Pumpe 16419
Die Sterisart® Universal-Pumpe 16419 kann entweder durch Drücken des Wähl-
knopfes in Gang gesetzt werden oder durch Betätigen des optionalen Fußschalters.
Hierbei kann die Geschwindigkeit stufenlos am Wählknopf eingestellt werden. Das
Ausschalten erfolgt durch erneutes Drücken des Wählknopfes oder Loslassen des Fußschalters.
.
Abb. 4
Betrieb der Sterisart® Universal-Pumpe 16419 29

9 Reinigung, Desinfektion
Achtung!
Anschlüsse hinten sind nicht dicht.
Die Sterisart® Universal-Pumpe ist, sofern sie nicht in eine Isolator arbeitsplatte
dicht eingebaut ist, nicht für die Desinfektion (gasförmig oder vernebelt) mit
Peressigsäure, H2O2 oder andere im Isolator gebräuchliche Dekontaminationverfahren geeignet. Im fachgerecht eingebauten Zustand im Isolator können
diese Desinfektionsmittel eingesetzt werden.
– Vor der Reinigung des Pumpen rotors schalten Sie die Pumpe am Netzschalter aus
und entfernen Sie das Netzkabel.
Zur Reinigung müssen folgende Teile von der Pumpe abgenommen werden:
– Bügel, Exzenterhebel, Stativ und Ablaufbehälter
– Entfernen des Pumpenkopfs:
– Der Rotor muss per Hand so gedreht werden, dass die Markierung auf der Ober-
seite (schwarzer Punkt) nach hinten weist.
– Die Markierung kennzeichnet die Position der Befestigungsschraube, die sich im
Rotormittelteil befindet.
– Lösen Sie diese Schraube mit einem 4 mm Inbusschlüssel. Drehen Sie die Schrau-
be nicht ganz heraus.
– Ziehen Sie den Rotor nach oben ab.
– Ziehen Sie den Geschwindigkeitswählknopf nach oben ab.
IP-Schutz einhalten! Es darf keine Flüssigkeit in die Sterisart® Universal-Pumpe
gelangen. Vor der Reinigung, Wartung oder Reparatur das Gerät von der
Betriebsspannung trennen.
Reinigung der Edelstahloberflächen:
Das Edelstahlgehäuse kann in regelmäßigen Abständen gereinigt werden. Edelstahlteile mit einem angefeuchteten Tuch reinigen. Handelsübliche Reiniger, die für Edelstahl geeignet sind, können gefahrlos eingesetzt werden. Zur Oberflächendesinfektion
handelsübliche Desinfektionsmittel, die für Edelstahl geeignet sind, einsetzen.
Keine Reinigungsmittel für das Edelstahlgehäuse verwenden, die Natronlauge, Essig-,
Schwefel- oder Zitronensäure enthalten. Die Verwendung von Putzschwämmen aus
Stahlwolle ist verboten.
Alle Edelstahloberflächen können mit folgenden Produkten wischend feucht gereinigt
werden:
– Peressigsäure, H2O2 und Essigsäure (2,5%)
– Quartäres Ammonium
– Formaldehyd und Glutaraldehyd
– Isopropylalkohol
– Ethanol 70%
30 Reinigung, Desinfektion
Autoklavierbar bei 121°C und 20 Minuten sind: Bügel, Exzenterhebel, Wählknopf,
Stativ, Flaschenhalter, Flaschengegenhalter und Ablaufbehälter (komplett).

Niemals den Pumpenrotor autoklavieren oder in Flüssigkeit tauchen.
Zur Reinigung | Desinfektion nur ein leicht angefeuchtetes Tuch verwenden.
Nach Reinigung werden alle Teile wie im Kapitel „Inbetriebnahme“ auf Seite 27
beschrieben befestigt. Der Rotor wird folgendermaßen montiert:
– Die Rotorwelle besitzt auf der nach hinten gewandten Seite eine Einkerbung.
– Schieben sie den Rotor von oben auf die Welle.
– Drehen sie die Markierung auf dem Rotor nach hinten, so dass die Einkerbung auf
der Rotorwelle und die Markierung auf dem Rotor fluchten.
– Drehen Sie die Schraube im Rotormittelteil fest, sodass ein fester Sitz des Rotors
gewährleistet ist.
10 Montage in einem Isolator
Die Montage der Pumpe in einem Isolator darf nur durch den
Isolatorhersteller erfolgen.
Zur Montage der Sterisart® Universal-Pumpe in einem Isolator muss das Gerät auf
jeden Fall geöffnet werden. Hierzu muss auf jeden Fall der Netzstecker gezogen sein.
Für die Montage beachten Sie bitte genau die Einbauvorschrift (Bestandteil des
Einbaukits für Isolatoren, Bestellnummer 1ZE---0050) die separat vom Hersteller
erhältlich ist.
11 Wichtige Hinweise zur
Gewährleistung
Die Funktion und die Sicherheit der Sterisart® Universal Pumpe wird nur nach den
Informationen in dieser Anleitung gewährleistet.
Der Hersteller des Gerätes betrachtet sich nur dann für die Auswirkungen auf
die Sicherheit, Zuverlässigkeit und Leistung des Geräts als verantwortlich,
wenn Montage, Erweiterungen, Neueinstellung, Änderung oder Reparaturen durch
von ihm ermächtigte Personen ausgeführt werden, die elektrische Installation
des Raumes den Anforderungen von IEC-Festlegungen entspricht und das Gerät in
Übereinstimmung mit der Bedienungsanleitung verwendet wird.
Veränderungen an der Sterisart® Universal-Pumpe, die nicht nach Absprache oder
durch autorisiertes Sartorius Servicepersonal vorgenommen wurden, befreien den
Hersteller von jeglicher Gewährleistung.
Montage in einem Isolator 31

12 Hilfe bei Problemen
In diesem Kapitel werden einige Probleme aufgezeigt, die in Zusammenhang mit
der Sterisart®pumpe auftreten können. Für jedes Problem sind mehrere Lösungsmöglichkeiten aufgeführt. Der erste Vorschlag ist in der Regel der naheliegendste.
Wird das Problem dadurch nicht gelöst, sollten Sie die Vorschläge in der aufgeführten
Reihenfolge durchführen, bis der Fehler behoben ist.
Bei dem Lösen oder Verbinden von Steckverbindungen muss das Gerät ausgeschaltet sein!
Sollte sich der Fehler auf diese Weise nicht beheben lassen, wenden Sie sich bitte an
Ihre zuständige Service-Stelle.
Problem Lösung
Keine Funktion, Display geht nicht an Die Pumpe ist nicht eingeschaltet oder nicht richtig an die Stromversorgung
angeschlossen.
Netzkabel richtig in die Steckdose und in die Sterisart
Netzschalter einschalten.
Die Stromzuführung überprüfen, Mehrfachsteckdosen evtl. einschalten, Zuleitungen
überprüfen.
Sollten diese Möglichkeiten ausgeschlossen sein, könnte auch die Primärsicherung im
Netzfilter defekt sein.
Ein Auswechseln bei gezogenem Netzstecker darf nur durch Fachpersonal erfolgen!
Die Pumpe dreht sich nicht. Der Verschlusshebel ist geöffnet oder der Fußschalter ist nicht richtig angeschlossen.
Der Bügel ist von der Pumpe entnommen.
Den Anschluss des Fußschalters an der Pumpe überprüfen.
®
Universal-Pumpe einstecken,
32 Hilfe bei Problemen

13 Technische Daten
Abmessungen Pumpe in mm
(B × T × H)
Abmessungen Pumpe mit
Flaschenhalter und Ablaufbehälter in
mm (B × T × H)
Gewicht ca 13.5 kg
Maximale Betriebstemperatur 40°C
Weitere Daten IP41 gemäß IEC 60529/EN 60529
Elektrischer Anschluss
Spannung 100 – 240 V ± 10%
Frequenz 50 – 60 Hz
Leistung 100 VA
Pumpe
Förderleistung 70 – 650 ml/min (systemabhängig)
Schlauchsysteme
Die einwandfreie Funktion der Sterisart
von Sartorius freigegebenen Schlauchsystemen gewährleistet.
Materialien
Basisplatte, Hebel, Bügel, Rotor Edelstahl 1.4435 (316L)
Gehäuse, Steckereinschub,
Stativ, Flaschenhalterung
Ablaufbehälter, Hebelum-
mantelung, Bügelgleitlager
Gleitlager Hebel Iglidur X
Dichtungen, Kleber, Ablaufschlauch Silikon
336 × 260 × 210 (mit Hebel)
440 × 365 × 485
®
Universal-Pumpe wird nur bei Verwendung
Edelstahl 1.4401 (316)
PET
Technische Daten 33

14 Bestellinformationen für die
®
Sterisart
Bestellnummern Beschreibung
16419 Sterisart
16973 Ampullenzange
1ZG---0009 Flaschenhalter
1ZF---0004 Haltearm
1ZA---0002 Ablaufschlauch
1ZW---0002 Ampullenbrecher
1ZE---0033 Fußschalter
1ZF---0013 Stativ
1ZG---0028 Ablaufbehälter
1ZB---0001 Kunststoffhülse Klemmhebel
1ZF---0007 Flügelschraube
1ZS---0005 Klemmbügel
1ZS---0002 Hebel
Universal-Pumpe 16419
®
Universal-Pumpe, Grundversion
1ZL---0003 Rotor
®
1ZG---0023 Abdeckung Ablaufbehälter für Sterisart
1ZG---0024 Abdeckung Ablaufbehälter für Millipore™ Sterilitätstesteinheiten
®
1ZG---0014 Adapter für Sterisart
Equinox Pumpe
1ZE---0039 Transport Trolley
1ZE---0041 Einbaukit Isolatoren
Weiteres Zubehör auf Anfrage!
Ablaufbehälter zum Gebrauch an Millipore™
Sterilitätstesteinheiten
34 Bestellinformationen für die Sterisart® Universal-Pumpe 16419

15 Bestellinformationen
Verbrauchsartikel
Empfohlene Einweg-Sterilitätstesteinheiten zum Einsatz mit der Pumpe:
Bestellnummern Beschreibung
®
16466-ACD Sterisart
Behälter (10 Stück, einzeln steril verpackt, ETO-sterilisiert)
16467-ACD Sterisart
(10 Stück, einzeln steril verpackt, ETO-sterilisiert)
16468-ACD Sterisart
Luer|Luer-Lock-Anschluss (10 Stück, einzeln steril verpackt,
ETO-sterilisiert)
16466-GBD Sterisart
Behälter (steril, doppelt verpackt, Verpackungsgröße 10 Einheiten).
Optimal für den Einsatz in Isolatoren
16467-GBD Sterisart
(steril, doppelt verpackt, Verpackungsgröße 10 Einheiten).
Optimal für den Einsatz in Isolatoren
16468-GBD Sterisart
Luer oder Luer Lock Anschluss (steril, doppelt verpackt, Verpackungsgröße 10 Einheiten). Optimal für den Einsatz in Isolatoren
16469-GBD Sterisart
verpackt, Verpackungsgröße 10 Einheiten).
Optimal für den Einsatz in Isolatoren
16470-GBD Sterisart
geschlossenen Behältern (steril, doppelt verpackt, Verpackungsgröße 10 Einheiten). Optimal für den Einsatz in Isolatoren
16475-GBD Sterisart
doppelt verpackt, Verpackungsgröße 10 Einheiten).
Optimal für den Einsatz in Isolatoren
16476-GBD Sterisart
geschlossene Behälter (10 Stück, steril, doppelt verpackt).
Optimal für den Einsatz in Isolatoren)
16477-GBD Sterisart
hältern (10 Stück, steril, doppelt verpackt).
Optimal für den Einsatz in Isolatoren
16478-GBD Sterisart
mit Luer Lock männlich Anschluss (steril, doppelt verpackt,
Verpackungsgröße 10 Einheiten).
Optimal für den Einsatz in Isolatoren
Weitere Sterisart
®
Einheiten erhalten Sie auf Anfrage.
NF alpha, Metall-Doppelnadel für geschlossene
®
NF alpha, 6 cm Metallnadel für offene Behälter
®
NF alpha, Adapter für medizinische Behältnisse mit
®
NF gamma, Metall-Doppelnadel für geschlossene
®
NF gamma, 6 cm Metallnadel für offene Behälter
®
NF gamma, Adapter für medizinische Behältnisse mit
®
NF gamma, System für Fertigspritzen (steril, doppelt
®
NF gamma, System für schwerlösliche Pulver in
®
NF gamma, System für leichtlösliche Pulver (steril,
®
NF gamma, System mit kurzer Metall-Doppelnadel für
®
NF gamma, System für Flüssigkeiten in Kunststoffbe-
®
NF gamma, Adapter für medizinische Behältnisse
Bestellinformationen Verbrauchsartikel 35

16 Dokumentation
Datenblatt Sterisart® Universal-Pumpe Deutsch
Publ. Nr.: SLD2010-d Bestellnummer: 85030-531-18
®
Datenblatt Sterisart
Publ. Nr.: SLD2010-e Bestellnummer: 85030-531-17
Broschüre Sterisart
Publ. Nr.: SLD1003-d Bestellnummer: 85030-531-15
Broschüre Sterisart
Publ. Nr.: SLD1003-e Bestellnummer: 85030-531-14
Universal-Pumpe Englisch
®
Universal-Pumpe Deutsch
®
Universal-Pumpe Englisch
17 Lagerung und Versand
17.1 Lagern
Vorgehen
t Wenn das Gerät in Betrieb ist:
t Das Gerät außer Betrieb nehmen.
t Das Gerät reinigen.
t Das Gerät gemäß den Umgebungsbedingungen lagern (siehe Kapitel „13 Techni-
sche Daten“ auf Seite 33).
17.2 Geräte und Teile zurücksenden
Defekte Geräte oder Teile können an Sartorius zurückgesendet werden. Zurückgesandte Geräte müssen sauber, dekontaminiert und sachgerecht verpackt sein.
Transportschäden sowie Maßnahmen zur nachträglichen Reinigung und Desinfektion
des Geräts oder der Teile durch Sartorius gehen zu Lasten des Absenders.
WARNUNG
Verletzungsgefahr durch kontaminierte Geräte!
Mit gefährlichen Stoffen kontaminierte Geräte (ABC-Kontamination) werden nicht
zur Reparatur und Entsorgung zurückgenommen.
t Die Hinweise zur Dekontamination beachten (siehe Kapitel „13 Technische Daten“
auf Seite 33).
Vorgehen
t Das Gerät außer Betrieb nehmen.
t Den Sartorius Service kontaktieren, um Hinweise zur Rücksendung von Geräten
oder Teilen zu erhalten (Hinweise zur Rücksendung siehe auf unserer Internetseite www.sartorius.com).
t Das Gerät und die Teile in einer ungenutzten Original-Verpackung oder in einem
Transportkoffer für den Versand verpacken. Die Original-Verpackung kann
bestellt werden (den Sartorius Service kontaktieren).
36 Dokumentation

18 Entsorgung
18.1 Hinweise zur Dekontamination
Das Gerät enthält keine gefährlichen Betriebsstoffe, deren Beseitigung besondere
Maßnahmen erfordert. Potentielle Gefahrstoffe, von denen biologische oder chemische Gefahren ausgehen können, sind die im Prozess verwendeten Medien (z. B.
Säuren, Laugen).
Gemäß EU-Richtlinien zur Europäischen Gefahrstoffverordnung ist der Eigentümer
von Geräten, die mit Gefahrstoffen in Berührung gekommen sind, für die sachgerechte Entsorgung und Deklaration bei deren Transport verantwortlich.
WARNUNG
Verletzungsgefahr durch kontaminierte Geräte!
Mit gefährlichen Stoffen kontaminierte Geräte (ABC-Kontamination) werden nicht
zur Reparatur und Entsorgung zurückgenommen.
18.2 Gerät und Teile entsorgen
18.2.1 Hinweise zur Entsorgung
Das Gerät und das Zubehör zum Gerät müssen fachgerecht durch Entsorgungseinrichtungen entsorgt werden.
Im Inneren des Geräts ist eine Lithium-Knopfzelle verbaut. Batterien müssen fachgerecht durch Entsorgungseinrichtungen entsorgt werden.
Die Verpackung besteht aus umweltfreundlichen Materialien, die als Sekundärrohstoffe dienen können.
18.2.2 Entsorgen
Voraussetzungen
Das Gerät ist dekontaminiert.
Vorgehen
t Das Gerät entsorgen. Dazu die Entsorgungshinweise auf unserer Internetseite
(www.sartorius.com) beachten. Die Entsorgungseinrichtung darüber informieren,
dass im Inneren des Geräts eine Lithium-Knopfzelle verbaut ist.
t Die Verpackung gemäß den landesrechtlichen Bestimmungen entsorgen.
t Das Verbrauchsmaterial gemäß den landesrechtlichen Bestimmungen entsorgen.
Entsorgung 37

19 Konformität
Mit den beigefügten Dokumenten wird die Übereinstimmung des Geräts mit den
benannten Richtlinien oder Normen erklärt.
20 Lizenzrechtliche oder
markenrechtliche Informationen
20.1 Millipore™
Millipore™ ist eine eingetragene Marke der Merck KGaA, Darmstadt, Deutschland,
oder ihrer Tochtergesellschaften.
38 Konformität


Certificate:
80003373
Master Contract:
167555
Project:
80003373
Date Issued:
2019-07-24
Issued To:
Sartorius Lab Instruments GmbH & Co. KG
Otto-Brenner-Strasse 20
Goettingen, Niedersachsen, 37079
Germany
The products listed below are eligible to bear the CSA Mark shown with
indicator 'US' for US only or without either indicator for Canada only.
CLASS - C872106 - ELECTRICAL LABORATORY EQUIPMENT
CLASS - C872186 - ELECTRICAL LABORATORY EQUIPMENT Certified to US Standards
Certificate of Compliance
adjacent indicators 'C' and 'US' for Canada and US or with adjacent
PRODUCTS
Peristaltic pumps, table top, portable, AC powered, Class I (grounded), models and rating as follow;
16419 and 16420, each rated: 100-240 V~, 50-60 Hz, 100 VA
Notes:
1. The above model is cord connected, Equipment Class I, Pollution Degree 2 and Overvoltage category II.
2. Mode of operation: Continuous
3. Environmental Conditions: +10 to +40 °C, 2000 m. max, 80% rH max.
Issued by:
Eric Fortier
Eric Fortier
DQD 507 Rev. 2019-04-30 © 2018 CSA Group. All rights reserved. Page 1

Certificate: 80003373
Master Contract: 167555
Project: 80003373
Date Issued: 2019-07-24
CONDITIONS OF ACCEPTABILITY
(1) If at any time there is a conflict between the system safety provisions and any relevant local (national or
regional) requirements, the local requirements always take precedence.
(2) For use in dry locations and indoor only.
(3) No user replaceable battery. Internal non rechargeable lithium cell can only be replaced by Service
personnel.
(4) Appliance coupler on power cord is considered as a disconnect device, it must remain accessible.
(5) Professional laboratory equipment; only trained personal is allowed to operate the unit.
(6) Pump is only allowed to be operated once the tubing has been properly installed into the unit.
APPLICABLE REQUIREMENTS
CAN/CSA-C22.2 No. 61010-1-12 - Safety Requirements for Electrical Equipment for Measurement,
+ UPD1:15 + UPD2:16 + AMD1:2018 Control, and Laboratory Use, Part 1: General Requirements
ANSI/UL 61010-1-2012 +AMD1:2018 - Safety Requirements for Electrical Equipment for Measurement,
Control, and Laboratory Use - Part 1: General Requirements
DQD 507 Rev. 2019-04-30 © 2018 CSA Group. All rights reserved. Page 2

Certificate: 80003373
Master Contract: 167555
Project
Date
Description
80003373
2019-07-24
CSA c/us certification of a sterelization pump, model Sterisart based on CB
Supplement to Certificate of Compliance
The products listed, including the latest revision described below,
are eligible to be marked in accordance with the referenced Certificate.
Product Certification History
report from SIQ
DQD 507 Rev. 2019-04-30 © 2018 CSA Group. All rights reserved. Page 1

Last updated:
The information and figures contained in these
instructions correspond to the version date
specified below.
Sartorius reserves the right to make changes
to the technology, features, specifications and
design of the equipment without notice.
Masculine or feminine forms are used to
facilitate legibility in these instructions and
always simultaneously denote the other
gender as well.
Copyright notice:
This instruction manual, including all of its
components, is protected by copyright.
Any use beyond the limits of the copyright law
is not permitted without our approval.
This applies in particular to reprinting,
translation and editing irrespective of the type
of media used.
© Sartorius Germany
Sartorius Lab Instruments GmbH & Co. KG
Otto-Brenner-Strasse 20
37079 Goettingen, Germany
Phone: +49.551.308.0
www.sartorius.com
06 | 2019
Printed in the EU on paper bleached
without chlorine. | HB
Publication No.: SLD6028-a190608
 Loading...