

Page 1
SPECIFICATIONSSPECIFICATIONS
Dimensions
Water level (HIGH)
Power Source
Power Consumption
Required Water Pressure
560(W) x 535(D) x 950(H) mm
50 litres
AC Local voltage
330 W
0.03 MPa ~ 1.0MPa
(0.3 kgf/cm ~ 10 kgf/cm )
2 2
WARNING - This appliance must be earthed.
( )
FOR WASHER PLUG TOP 3 PIN
IMPORTANT
The wires in this mains lead are coloured in accordance with the following code:
Green/yellow: Earth Blue: Neutral Brown: Live
As the colours of the wires in the mains lead of this appliance may not correspond
with the coloured markings identifying the terminals in your plug, proceed as follows:
●
The wire which is coloured green and yellow must be connected to the terminal
in the plug which is marked with the letter E or by the earth symbol
or coloured green or green and yellow.
●
The wire which is coloured light blue must be connected to the terminal which is
marked with the letter N or coloured white.
The wire which is coloured brown must be connected to the terminal which is marked
●
with the letter L or coloured black.
Light
FOLLOWING CAUTIONS ARE FOR WASHER USING DOUBLECORE
CORD ONLY.
For BS Standard Plug With A 13 Amp Fuse
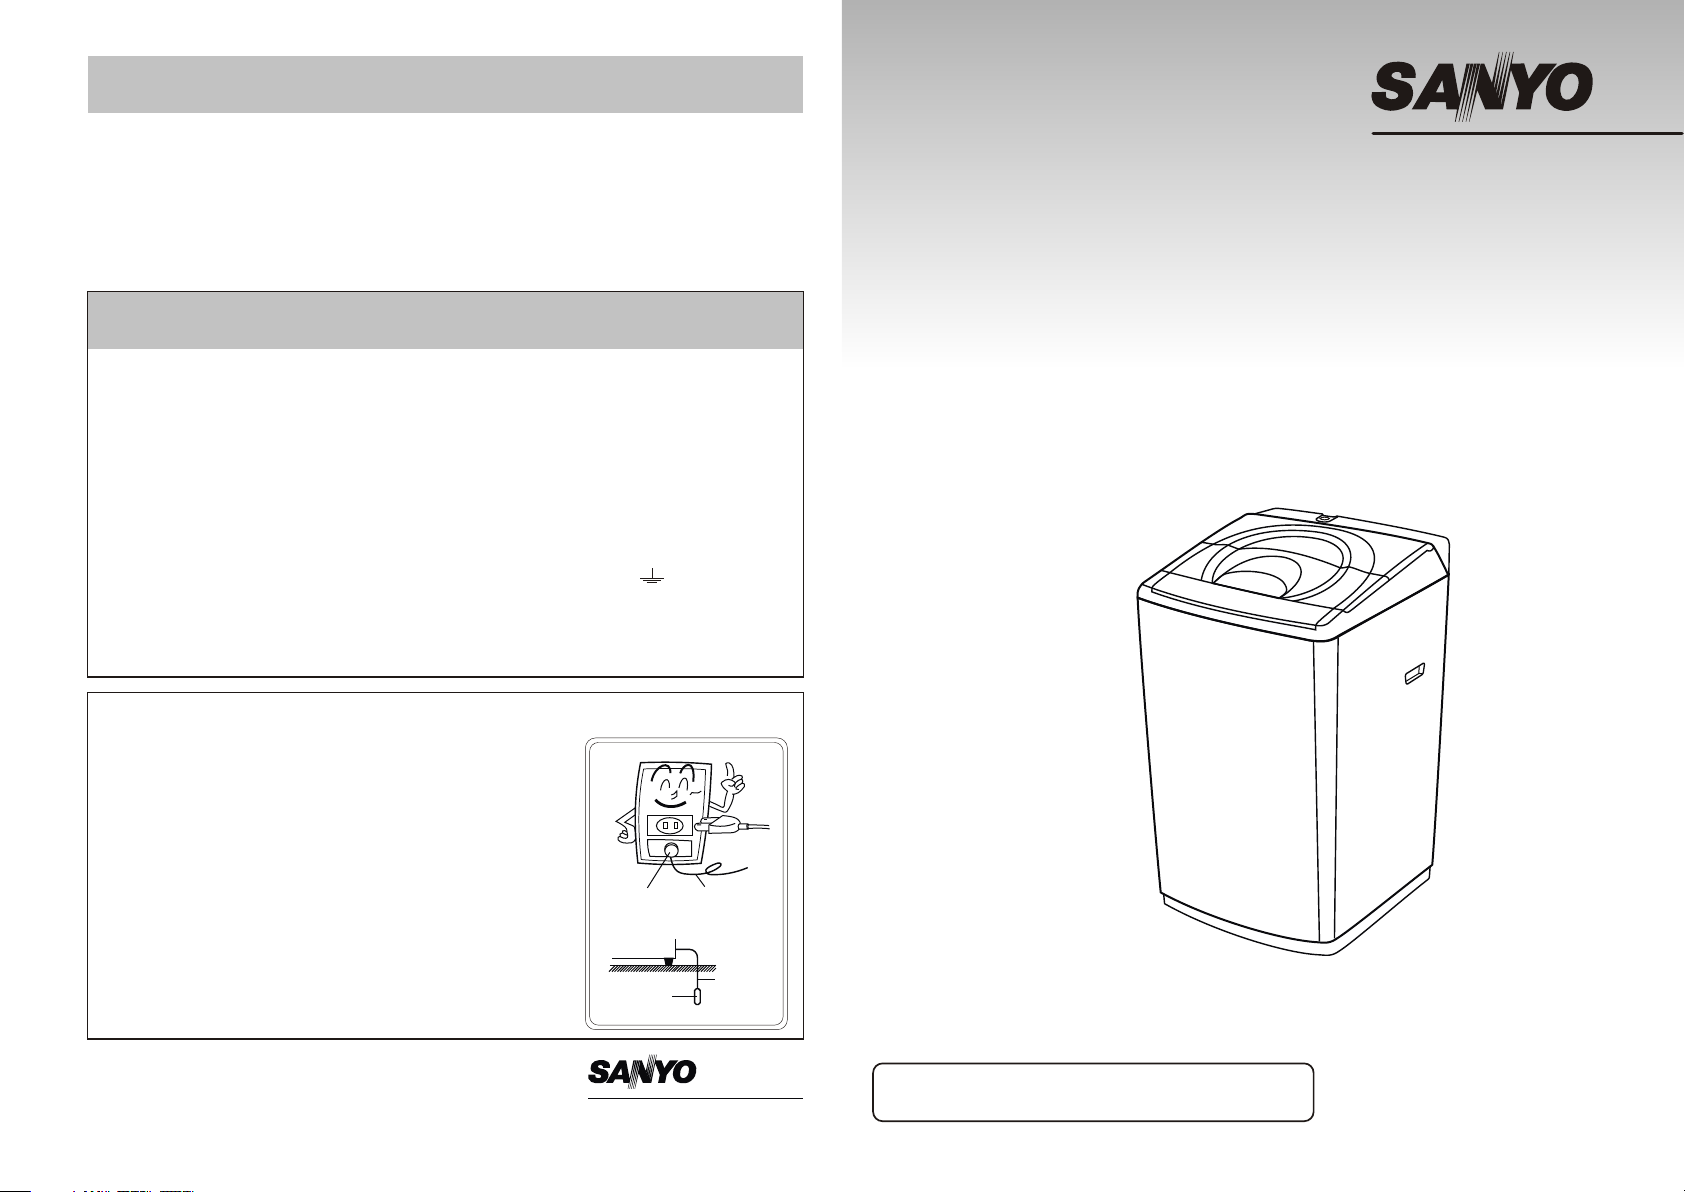
INSTRUCTION MANUAL
MICROCOMPUTER CONTROL
MICROCOMPUTER CONTROL
FULLY AUTOMATIC WASHING MACHINE
FULLY AUTOMATIC WASHING MACHINE
ASW-A85HT
● If the 2-pin type of socket-outlet has a grounding terminal,
securely attach the end of the Grounding Wire to the
terminal.
● When grounding the washer, connect the grounding wire
before plugging in the Power Cord.
● If the 2-pin type of the socket-outlet has no grounding
terminal, consult your nearest dealer or securely attach
the end of Grounding Wire to a suitable grounding point,
such as a metal cold water pipe.
Never connect the Grounding Wire to a gas pipe.
● Unplug the Power Cord before disconnecting the
Grounding Wire.
CODE NO.301-6-421S-032-40BCODE NO.301-6-421S-032-40B
Grounding
Terminal
Grounding
Rod
SANYO Electric Co.,Ltd.SANYO Electric Co.,Ltd.
Grounding
Wire Of
Washer
Grounding
Wire
Before operating this washing machine, please read
Before operating this washing machine, please read
these instructions carefully and completely.
these instructions carefully and completely.
Page 2
CONTENTSCONTENTS
IMPORTANT SAFEGUARDSIMPORTANT SAFEGUARDS
IMPORTANT SAFEGUARDS
ACCESSORIES
NAME OF PARTS
.................................................
...............................................
INSTALLATION INSTRUCTIONS
NAMES AND FUNCTIONS OF CONTROL PANEL
NORMAL USAGE
. ............................................. .
. .................................... .
...............................
.................
THE PREPARATION OF LAUNDRY BEFORE WASHING
HOW TO USE COURSE AND PROCESS
VARIOUS FUNCTIONS
PRESET
.......... ..........................................
WATER LEVEL SETTING
BLANKET
......... ..........................................
.......................................
......... ............................
TWO CLEAN STEPS FUNCTION
CHILD LOCK FUNCTION
REMEMBER FUNCTION
SHOWER RINSE
OTHERS
. . ................................. ..... ...........
. . .......................... ..... ...........
NO TROUBLE CONDITIONS
CARE AND MAINTENANCE
TROUBLE SHOOTING GUIDE
SPECIFICATIONS
. .....................................
..................... ................
. ................................ ....
.....................................
.....................................
...................................
. .................. ....
..............................
4-6
7-8
....... .. ...
10-11
11-13
Back Cover
11
11
12
12
12
12
12
13
13
13
14
2
!!
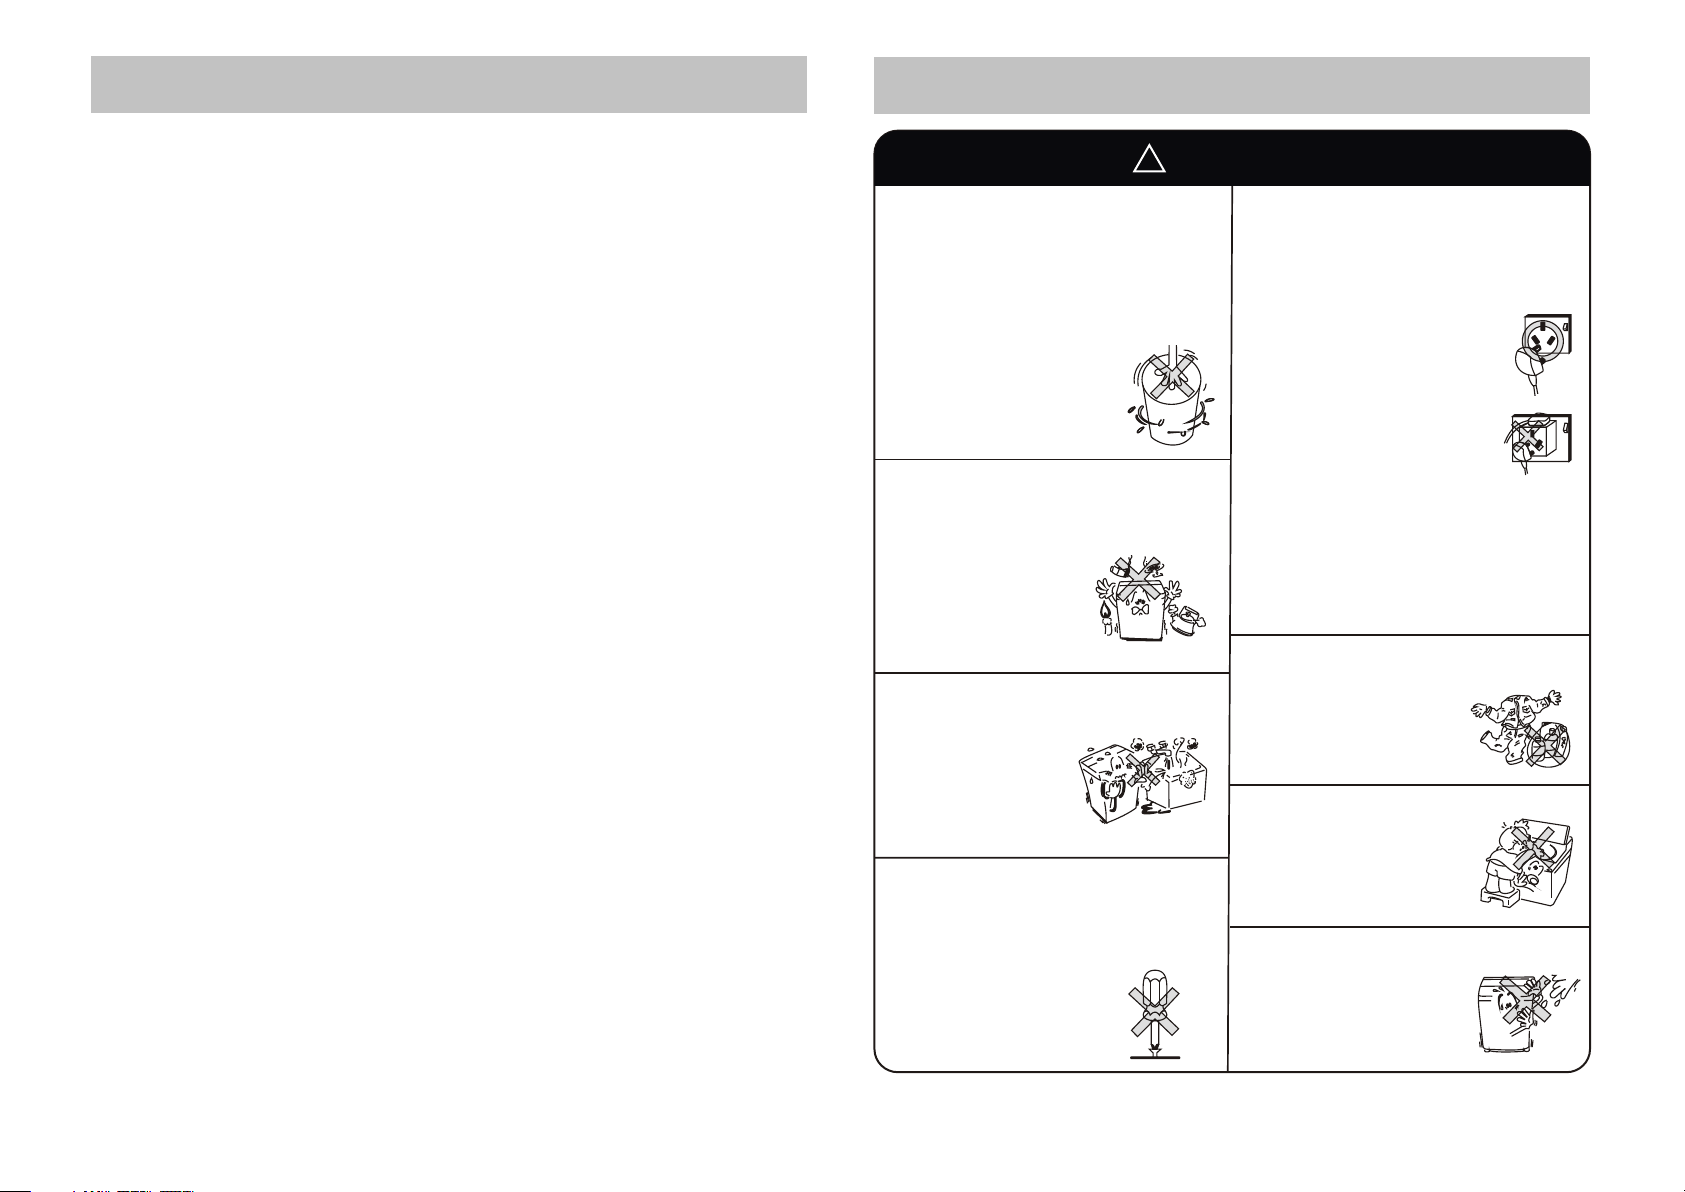
WARNINGSWARNINGS
3
Never put your hand(s) into the Wash/Spin
3
9
9
Tub while the washer is operating.
● If you reach into the Wash/Spin Tub,
it can cause injury.
● If the Wash/Spin Tub dose not stop
within 15 seconds after the
Washer Lid is opened,
turn the washer off
immediately and call
a service person.
Be sure not to bring any type of flame near
the washer or put lit cigarettes or volatile
materials on the top of the washer.
● It may deform the
washer or catch fire,
because this washer
has a large number
of plastic parts.
Do not install the washer in the bathroom
or very humid place.
● It may cause a
malfunction or an
electric shock.
Do not allow your washer to be repaired
by an unqualified service person.
● It may cause a risk of accidental fire.
● If the washer operates
abnormally, it may cause
injury.
Be sure to connect Power Plug and Power
Cord properly.
● Be sure to plug the Power Cord into a
proper socket-outlet for the washer.
● An improperly attached plug may
catch fire.
● Never disconnect by pulling
the cord. Hold the plug as
you pull it out.
● Never use a damaged Power
Cord.
● Never connect and/or
disconnect the Power Plug
with wet hands, it may cause
an electric shock.
● Wipe the Power Plug with a soft cloth
and remove any dust to prevent a risk of
the accidental fire before plugging into
the socket-outlet.
● Do not plug two Power Cords in one
socket-outlet.
Never wash items stained with benzine,
kerosene, thinner or gasoline.
● It may cause a risk
of fire or explosion.
Do not allow children to play on
or in the washer.
● If a child accidentally falls
in to the Wash/Spin Tub,
serious injury could occur.
Be sure not to splash or pour water
on the Control Panel.
● It may cause a
malfunction or an
electric shock.
11
22
Page 3
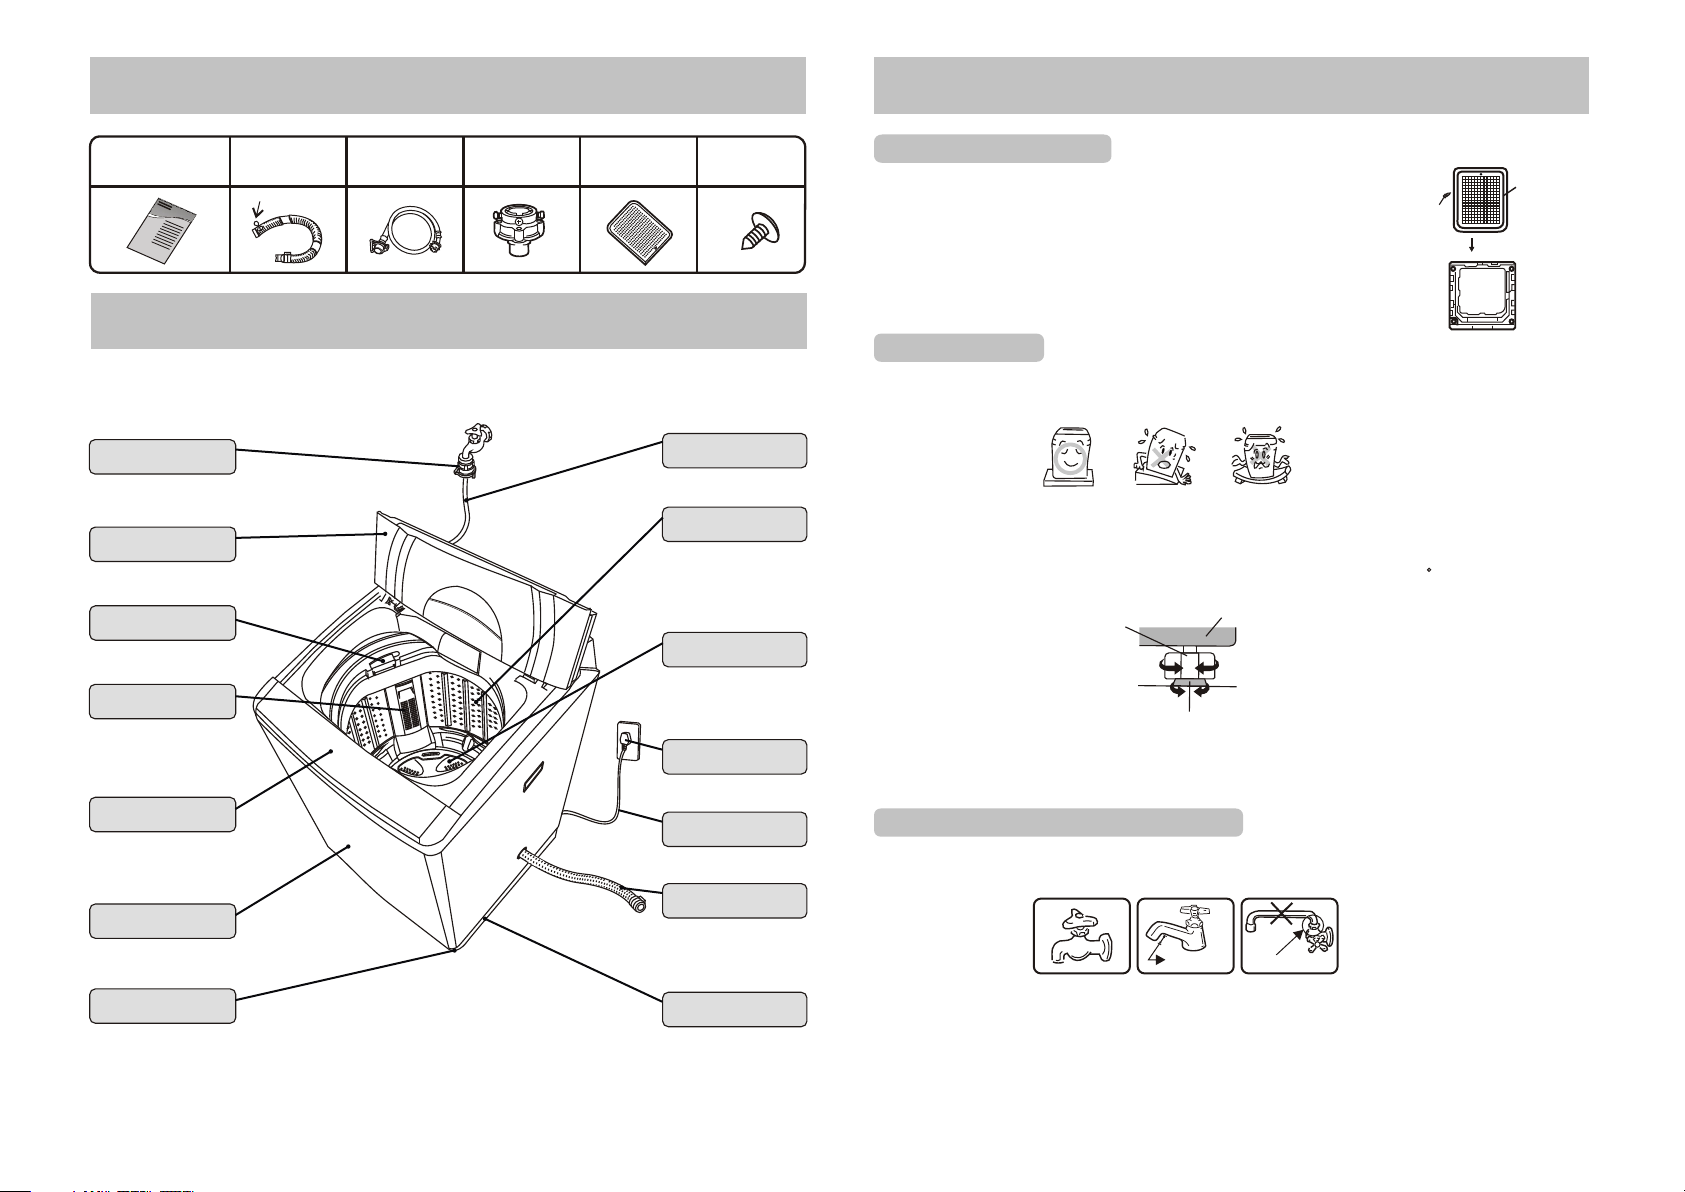
ACCESSORIESACCESSORIES
INSTALLATION INSTRUCTIONSINSTALLATION INSTRUCTIONS
Instruction manual
“ Magic”Hose
“ Magic”Hose
Joint
Joint
Was her LidWas her Lid
Softener DispenserSoftener Dispenser
Lint F ilterLint F ilter
Cont rol PanelCont rol Panel
Fram eFram e
Drain Hose
Hose Band
Water
Supply Hose
“Magic"
Hose Joint
NAME OF PARTSNAME OF PARTS
Bottom Cover
Wat er S up pl y Ho seWat er S up pl y Ho se
Was h/Spin TubWas h/Spin Tub
Screw
Puls atorPuls ator
Powe r PlugPowe r Plug
Powe r CordPowe r Cord
Drai n HoseDra in Hose
Installing the Bottom CoverInstalling the Bottom Cover
1.Unplug the Power Cord of the washer.
2.Gently lay down the front side of washer on a soft mat or
cushion.(Becareful not to dent the Frame.)
3.Insert the attached Bottom Cover into the hooks of Leg
by straightly pushing until it reaches into the front hooks.
4.Fasten the Bottom Cover with a screw.
5.Gently set the washer upright.
Location of WasherLocation of Washer
Screw
Leg
Front
Back
Botto m
Cover
1.Ch oose a dry lo cation out of s unlight f or the washer.
2.In stall the washer on a stab le and leve l surface.
Incli ned f loor
Unsta ble f loor
3.Adjust the Adjustable Leg of washer if necessary to make the washer level as shown
in the figure.
The maximum permissible inclination of the supporting surface is 2 . ●
Lock Nut
③Tighten
②Down
Adjustable Leg
Fundus
Loosen①
Up
CAUT ION:
● Do not block the ventilation openings on the bottom of washer by carpeting when the
washer is installed on a carpeted floor.
Attaching the "Magic" Hose Joint to a FaucetAttaching the "Magic" Hose Joint to a Faucet
Fauc et:
Type A :is the most suitable
Type A
Type B
Type C
Adju stable Le gAdjustabl e Leg
33
LegLeg
Wat er le ak
Type B :
At le as t 16m m
The le ngth of the mouth of the fau cet needs to be at least 16m m.
If it is l ess than16m m, the"Ma gic"Hos e Joint can not b e install ed.
Type C :It may cause water leaking.
CAUTIONS:
●
Do not use water which is hotter than 50 .
● please
If your faucet is not suitable, consult your dealer.
℃℃
44
Page 4

INSTALLATION INSTRUCTIONSINSTALLATION INSTRUCTIONS
INSTALLATION INSTRUCTIONSINSTALLATION INSTRUCTIONS
How to Attach the “ Magic ” Hose Joint How to Attach the “ Magic ” Hose Joint
1.Loosen the four screws and slide the top of the "Magic"Hose Joint(section A in the
figure)onto the faucet. Then, securely tighten the four screws provided with the
“Magic" Hose Joint by using a screwdriver to secure the top of the joint to the faucet.
2.Remove the CAUTION label from the "Magic" Hose Joint.
3.Turn the male coupler on the joint (section B in the figure) clockwise to attach it securely
to the top of the joint (section A in the figure).
●
The appliance is to be connected to the
water mains using new Water Supply
Hose and “Magic" Hose Joint and old
hose-sets should not be reused.
CAUTION:
Scr ew
CAUTION
label
A
About 4 mm
B
Aft er t igh ten ed
(Ab out 2mm o r less)
If outer diameter of faucet is larger than
calibre of the Joint Ring, loosen the four
screws and remove the Joint Ring from
Joint Rin g
the "Magic" Hose Joint.
Installing Water Supply Hose to the WasherInstalling Water Supply Hose to the Washer
1.Turn the nut clockwise while holding the hose.
●
Turn the nut counterclockwise after turning the
faucet off when you want to detach the Water
Nut
Hose
Supply Hose.
Connecting the Water Supply Hose to the “ Magic ” Hose JointConnecting the Water Supply Hose to the “ Magic ” Hose Joint
1.While pushing the sleeve on the female coupler
(section D in the figure) of the joint down with
your fingers, connect the female coupler to the
male coupler (section C in the figure).
2.Release the sleeve, then push the Water Supply
Lock Lever
C
Sleeve
D
Hose up into the “ Magic ” Hose Joint until it
clicks into place.
3.Pull the Water Supply Hose down to make sure
that it is securely attached.
How to Detach the Water Supply HoseHow to Detach the Water Supply Hose
Please read the following procedure in order to avoid spilling water when detaching the
Water Supply Hose.
1.Turn the faucet off.
2.Press the POWER ON/OFF button to turn the power on ,the
NORMAL button and the START/PAUSE button.
3.Press the POWER ON/OFF button to turn the power off
15 seconds later.
Lock
Lever
C
Sleeve
4.While pushing the lock lever and the sleeve on the female
(section D in the figure)of the joint down with your fingers,
detach the female coupler from the male coupler
D
(section C in the figure).
Inst alling The Drai n HoseInst alling The Drai n Hose
Set the clip part of Hose Band sideways to prevent touching the may cause
a vibration noise.
Hose Band
Drain Out le t
Drain Hos e
Hose Protector
Inside Hose
Drain Outlet
(A Sectional Plan)
frame which
Frame
Hose Band
Drain Hose
Changing the Drain Hose DirectionChanging the Drain Hose Direction
You can change the direction from right side to left side.
NOTE:
NOTE:
Put gloves on to prevent injury of your hands when changing the Drain Hose direction.
1.Unplug the Power Cord of the washer.
2.Detach the Back Cover by loosening
screws at the back side of the washer.
Detach outer Drain Hose and gently lay
down the front side of washer on a soft
mat or cushion.
Hose Clip
Drain hole cover
Drain Va lve
Drain Hose
Drain hole
● Be careful not to open the Washer Lid and
dent the frame.
3.Detach the Cap from the left side of .frame
4.Loosen the Hose Band and pull the inner
Drain Hose
Drai n Valve
Hose Clip
Drain hole
Drain Hose out of the Drain Valve. Pull the
Hose Band out of the inner Drain Hose.
5.Remove right and left Tabs of Drain Outlet one side by another side pushing the Tabs
both in side and outside and pull the Drain Hose out toward outside of .frame
6.Let the inner Drain Hose through outside of left hole and set the protrusive guard of
inner Drain Hose to the square cutting part of , then attach the Drain Out let of
the hose until fitting the Tabs certainly to the .
frame
frame
7.Connect the inner Drain Hose to the Drain Valve in place and fix the Hose Band as
shown below.
f you do not attach correct position marked with ,it can damage the inner Drain Hose
● I
and cause a water leaking through the torn position.
8.Attach the Cap to the right hole.
9.Reattach Back Cover and gently set the washer upright.
Extension of the Drain HoseExtension of the Drain Hose
When extending the external Drain Hose, please follow the below figure for the length
and height.
Exte nsion Hos e
No str aight
Stra ight
Heig ht
Max. 15cm
Leng th
Max. 1m
Max. 3m
Max.1m
Max.15 cm
55
66
Page 5

NAMES AND FUNCTIONS OF CONTROL PANELNAMES AND FUNCTIONS OF CONTROL PANEL
DETERGENT IndicatorsDETERGENT Indicators
These are the spoon
indications of the
DETERGENT volume.
Detailed operation
please refer to
page9.
99
TIMER And PRESET IndicatorsTIMER And PRESET Indicators
● This indicator shows remained
time during washing.
(E.g.) Remaining time is 20 minutes
REMAINING
TIME
● When setting PROCESS, the digital
display indicates time or times.
(E.g.) Twice Over flow Rinse
RINSE
This point lighting on during Overflow Rinse
●
This indicator shows when the
washing is finished during
presetting.
(E.g.) Finish washing 2 hours later
●
When abnormal conditions occur,
the indicator will indicate warning.
(E.g.) Water does not flow
SOFT SPINSOFT SPIN
Press the button SOFT SPIN ,
the light above flashes. The last 2
minutes spinning will be soft spin,
this avoid clothes creasing.
START/PAUSE ButtonSTART/PAUSE Button
This button can be used for starting the
washer operation.
This button can also be used to temporarily
stop the washer operation.
To restart the washer operation, press the
START/PAUSE button again.
NOTES:
This is not a cancel button. If you want to
delete the End Buzzer, press the
START/PAUSE button and hold down for
about 4 seconds until beeping stops.
See page 13.
1313
WATER LEVEL Button
WATER LEVEL Button
CHILD LOCK Function
CHILD LOCK Function
●
You can choose the appropriate
water level that matches the load
size.
●
You can set CHILD LOCK function.
Refer to CHILD LOCK FUNCTION
at page12.
●
Different water levels for washing
1212
rinsing optional.
Detailed operation please refer
to Page 11.
1111
77
PROCESS And SET ButtonPROCESS And SET Button
●The PROCESS and SET button can be
used to set PRESET, SOAK, WASH time,
RINSE type and SPIN time.
For example to set Rinse type:
Press PROCESS button till RINSE light
flashes. Then press SET button to
choose you wanted rinse times and rinse
type.
Detailed operation please refer to
Page 10.
1010
COURSE ButtonCOURSE Button
To choose the washing course,
press COURSE button.
NOTE:
If you choose the NORMAL,
HEAVY DUTY, CUSTOM
course, the washer will
automatically begin the
NEURO & FUZZY operation.
POWER ON/OFF ButtonPOWER ON/OFF Button
To turn the power on, press the POWER ON/OFF.
When you want to turn off the power, press the
POWER ON/OFF button again.
When washing has finished, the power will be turned
off in 5 seconds automatically.
( except Setting Remained water Draining function).
NOTES:
● If you want to change the wash program, press the
POWER ON/OFF button and then on it again.
● If you leave the washer turning on without starting
the operation, the power will be turned off in 10
minutes by itself.
88
Page 6

NORMAL USAGENORMAL USAGE
HOW TO USE COURSE AND PROCESSHOW TO USE COURSE AND PROCESS
1. Preparation
1) Make sure to fit the Drain hose.
2) Connect the water supply hose to the faucet and turn the faucet on.
Make sure that some screws of Magic Hose is tighten. Otherwise it may cause water
●
leak.
3) Plug the Power Cord into a socket
4) Put clothes inside
2. Press POWER ON/OFF button
3. Press START / PAUSE button
Sensor tests the clothes weight automatically.( For NORMAL/HEAVY DUTY/CUSTOM)
●
Auto choose the proper water level, wash/spin time, rinse type.
(It is not available for the 2 lowest water levels. Need manually set if needed)
4. Use recommended amount of detergent as shown in chart.
5. Close the asher lid
The washer will alarm and stop working before spinning if the washer lid is not closed.
●
Water Level
Water Volume
(Approx. L)
Detergent
Indicators
Powdered
detergent
volume (g)
Other detergent
volume
w
1 2 3 4 5 6 7 8
15 20 24 27 31 36 43 5 0
12~20 20~28
You may adjust the detergent volume according to the type of
detergent-follow recommendations on package.
28~36 36~50
1. Preparation: Fit the Drain hose, turn the water supply faucet on, plug the Power Cord
into a socket, put clothes inside
2. Press POWER ON/OFF button
3. Press COURSE button choose your needed course according to the clothes.
Please refer to below chart for course choosing.
COUR SE CHOOSING GUIDE
COURSE
NORMAL
HEAVY DUTY
DELICATE
BLANKET
CUSTOM
4. Press PROCESS button choose your like cycle. The light moves right one by one when
press.
SOAK → WASH → RINSE → SPIN → PRESET
5. Press SET button to choose SOAK, WASH, SPIN time, RINSE type
and RINSE times.
● SOAK t ime indicating
0 5 1 0 … … 3 5 4 00 5 1 0 … … 3 5 4 0
● WAS H time indi cating
0 1 2 … … 1 9 2 00 1 2 … … 1 9 2 0
Water Power
Stan dard
Stro ng
Soft
Blan ket
Stan dard
Suitable Clothes
Norm al clothe s
Dirt y Clothes l ike working c oat
wome n underwe ar, articles w ith embro ider
Blan ket or Bulk y
Kind s of clothe s
( This function is not available for DELICATE/
BLANKET course).
● Too much detergent causes poor rinsing and too little detergent causes poor washing.
THE PREPARATION OF LAUNDRY BEFORE WASHINGTHE PREPARATION OF LAUNDRY BEFORE WASHING
●
Make sure that nothing remained in pocket. (Pin, coin or something like possibly
damage clothes or washing machine, and the extra noise occurred may cause
trouble to washing machine).
●
Overturn the clothes to get rid of scraps.
●
Wool items like women underwear, articles with embroider, nylon etc, should be
placed in a laundry net for extra protection.
●
Close the fastener and tie loose laces.
●
Brush the dirty parts like dust, sand.
●
Put light clothes down. Please pause operation and push it into water when it floats up.
●
Please separate washing white clothes from coloured clothes, coats from underwear.
99
● RINS E times indicating
0 1 1 2 2 3 30 1 1 2 2 3 3
● SPIN t ime indic ating
0 1 2 … … 8 90 1 2 … … 8 9
0 1 2 30 1 2 3
6. Press WATER LEVEL button, choose proper water level and then put detergent.
7. Press START/PAUSE button.
8. Close the washer lid
If you want to change COURSE or PROCESS during operation, please switch off power,
●
restart power and choose the course you needed.
(The number means times,“ ”Means Overflow Rinse ).
( Except the DELICATE course).
( For DELICATE course).
1 01 0
Page 7

HOW TO USE COURSE AND PROCESSHOW TO USE COURSE AND PROCESS
VARIOUS FUNCTIONSVARIOUS FUNCTIONS
OPERATION STATUS FOR THE COURSE
COURSE
NORMAL
HEAVY DUTY
DELICATE
BLANKET
CUSTOM
●
Possible the total time is not same due to different water pressure.
●
Shower rinse could be changed as . Please see Page 12 instructions
SHOWER RINSE.
Wash Time
(minutes)
5~12
7~14
6
12
10
1212
Rinse Type and Rinse Times
Water Saver Rinse 2 times
Overflow Rinse 2 times
Overflow Rinse 2 times
Overflow Rinse 2 times
Shower Rinse 1 times
Water Saver Rinse 1 times
Water Saver Rinse
Spin Time
(minutes)
4-5
7-8
2
8
5
VARIOUS FUNCTIONSVARIOUS FUNCTIONS
PRESETPRESET
1. Press POWER ON/OFF button
2. Turn the faucet on and load the laundry into the washer.
3. Select your needed OURSE, PROCESS and WATER LEVEL.
C
4. Press PROCESS button till light of PRESET flashes, press SET button select your
needed preset time ( the time washing finished).
PRESET Indicate
6 7 8 24 0 1 5(hours)
… … ……
5. Press START/PAUSE button.
6. Put the detergent into the washer and close washer lid.
●
All the lights except PRESET will be lighted off in about one minute later.
●
Directly put the detergent into the tub. ( Do not make detergent touching
clothes)
●
PRESET confirming: Press SET button to indicate PROCESS about 5 seconds.
●
PRESET cancel, change: PRESET is canceled automatically when power
off; Switch power on and set PRESET again to change it.
●
This function is not available for DELICATE course.
WATER LEVEL SETTINGWATER LEVEL SETTING
This button allows you to choose the appropriate water level during WASH / RINSE
process.
Method: Press PROCESS till WASH light flashes, press WATER LEVEL button to choose
the appropriate water level, press SET button to set wash time. Then press PROCESS
button till RINSE light flashes, press WATER LEVEL button to choose the appropriate
water level, press SET button to set RINSE times and RINSE type. Then press PROCESS
button till SPIN light flashes, press SET button to set SPIN time. Finally press
START/PAUSE, the washer will start operating according to the wash water level and
rinse water level as set.
1 11 1
and make sure to fit the Drain Hose.
BLANKETBLANKET
1.Press POWER ON/OFF button and make sure to fit the Drain Hose.
2.Press COURSE button continuously and choose the BLANKET course (The
BLANKET Light flashes).
3.After the detergent is dissolved with proper amount of warm water (approx. 30℃), pour it
into the tub of the washing machine.
4.Fold up the blanket as the method showed in the figures below and put it into the
washing tub.
5.Press the START/PAUSE button.
6.Close the washer lid.
1 1 2 2 3 3 44
Fold in two by the
long side
Fold 4 times in the
same direction
Roll up the blanket.
Put it into the wash tub with
the edge downwards
TWO CLEAN STEPS FUNCTIONTWO CLEAN STEPS FUNCTION
The washer will start washing when water to the level below 2 levels as set. By this, the
washer starts working with more density of detergent.
●
This function won't be effected when select level 1 or level 2 water, and DELICATE
or BLANKET program.
●
When SOAK is selected, this function will not be effected after soaking.
CHILD LOCK FUNCTIONCHILD LOCK FUNCTION
The Washer will stop working automatically and alarm if wash lid opened 5
er seconds
during operation.
Method of Child Lock Set: Press POWER ON/OFF button to switch on the power, press
WATER LEVEL button for 4 seconds till Buzzer sounds. To restore it, repeat above or pull
out the plug.
REMEMBER FUNCTIONREMEMBER FUNCTION
When select NORMAL, CUSTOM or HEAVY DUTY, 30 seconds after starting, the
washer will remember this program and starts same next time working.
●This function is not available for DELICATE and BLANKET course.
● ,
PRESET SOAK and WATER LEVEL will not be remembered.
●
The Wash, Rinse and Spin for CUSTOM program could be remembered.
●The memory will be lost if pull out the plug.
SHOWER RINSESHOWER RINSE
Under CUSTOM, if set 2 times rinses, the first rinse will be shower rinse. If you don't want
shower rinse, you can cancel it and it will change to Water Saver Rinse or Overflow Rinse.
Method of use:
Press POWER ON/OFF button to switch on the power, and press SET button for 4
seconds till a sound from buzzer. To restore it, repeat above or pull out the plug.
1 21 2
Page 8

VARIOUS FUNCTIONSVARIOUS FUNCTIONS
TROUBLE SHOOTING GUIDETROUBLE SHOOTING GUIDE
OTHERSOTHERS
1.Delete the end buzzer: Press POWER ON/OFF button to switch on the power, and press
START/PAUSE button for 4 seconds till a sound from buzzer. To restore it, repeat above
or pull out the plug.
2.How to drain remaining water
When select this function, in 9 minutes after the working finished, the drainage valve will
open to drain out the remained water inside. This will avoid water freezing inside in winter
when temperature below 0℃.
● Method of Use
Press POWER ON/OFF button to switch on the power, and press PROCESS button for
4 seconds till a sound from buzzer. To restore it, repeat above or pull out the plug.
℃
NO TROUBLE CONDITIONSNO TROUBLE CONDITIONS
1.During Washing or Rinsing, still there is Water inletting. This is possibly automatic water
adding due to water level decrease.
2.Spin tub turns or stops timely at the beginning of spinning. This is intermittent spinning
for better spin effect.
3.No drainage during overflow rinse. This is caused by lower water level set or lower water
pressure.
4.Water inletting and rinsing sometimes during spinning. This is automatic lean-correction
due to clothe is not equally inside.
5.There is sound like water flow after spinning. This is the sound of balance liquid in
Balance ring. It is for reducing vibration of spinning.
6.Control panel keeps warm after Power Off, this is caused by Remember circuitry
working.
7.Power off during working and the washer could not continue working. Should set the
program again.
CARE AND MAINTENANCECARE AND MAINTENANCE
Clean washing machine
Use soft clothing to wipe off the water or
dirt on the surface of the washer.
● Do not spray water directly
to the washer body.
● Detergent, propellant and
other chemicals are not
allowed to use to avoid the
damages on the surface.
Clean “ magic ” hose joint filter
(Suggest clean it every 6 months)
1. Pull the water inlet hose out.
2. Turn off the revolver according to
below figure.
3. Load off the “ Magic ” Hose Joint
filter and clean the crud with a
toothbrush.
4. Install the clean “ Magic ” Hose Joint
filter to revolver and water inlet hose.
1 31 3
Clean the water inlet valve
(Suggest clean it every 6 months)
After long time use, The water inlet mesh
bag may be blocked with crud,
please load off the water inlet hose,
take out the water inlet mesh bag
from the water inlet valve, clean
the mesh bag, then assemble
the mesh bag in the valve and
load the water inlet hose.
Clean lint filter
(Suggest clean it every week)
1. Take out the lint filter
2. Pull out the scraps and wash
the lint filter in the water.
3. Install the Filter.
aim the frame claw to the
groove below.
( Lint Filer is easily destroyed parts).
Filter
Water Inlet
When the following problems occur, the microcomputer will detect the abnormal condition
and an electronic buzzer sounds for approximately 10 seconds and digital display
indicates flash as shown below.
Kind of Trouble
The washer
does not work
at all
Water does
not flow into
tub or water
flow is slim
Water does
not drain out
The washer
does not spin
Does not wash
Other troubles
NOTE: The Trouble indicators can be released by pressing the START/PAUSE button
once if you want to release the emergency stop. Then press the START/PAUSE button
again to restart the operation.
Troub le
Indi cation
Where to Check
●
Check the POWER ON/OFF button.
●
Check the START/PAUSE button.
Check whether under PRESET condition.
●
Check the power cord whether is securely plugged in.
●
Check whether power failure occurs.
●
Check whether the fuse or circuit breaker has been
●
activated.
●
Turn on the water supply faucet.
●
Check whether water supply has been cut off.
Check whether the metal filter in water inlet is clogged.
●
Check whether washer has been freezing.
●
Check whether water pressure is too low.
●
●
Check whether the Drain Hose has been put down.
●
Check whether the drain hose rises too high.
●
Check whether the drain hose is clogged.
●
Check whether the laundry is clumped on one side of tub.
●
Check whether the washer is on the level surface.
● Close the washer lid.
●● Check whether the washer is under Child Lock.
Close the washer lid.
Pres s the POWER ON/ OFF butto n, call the loc al
serv ice-per son or dealer.
1 41 4
 Loading...