

Page 1
FFMF2A
OPT
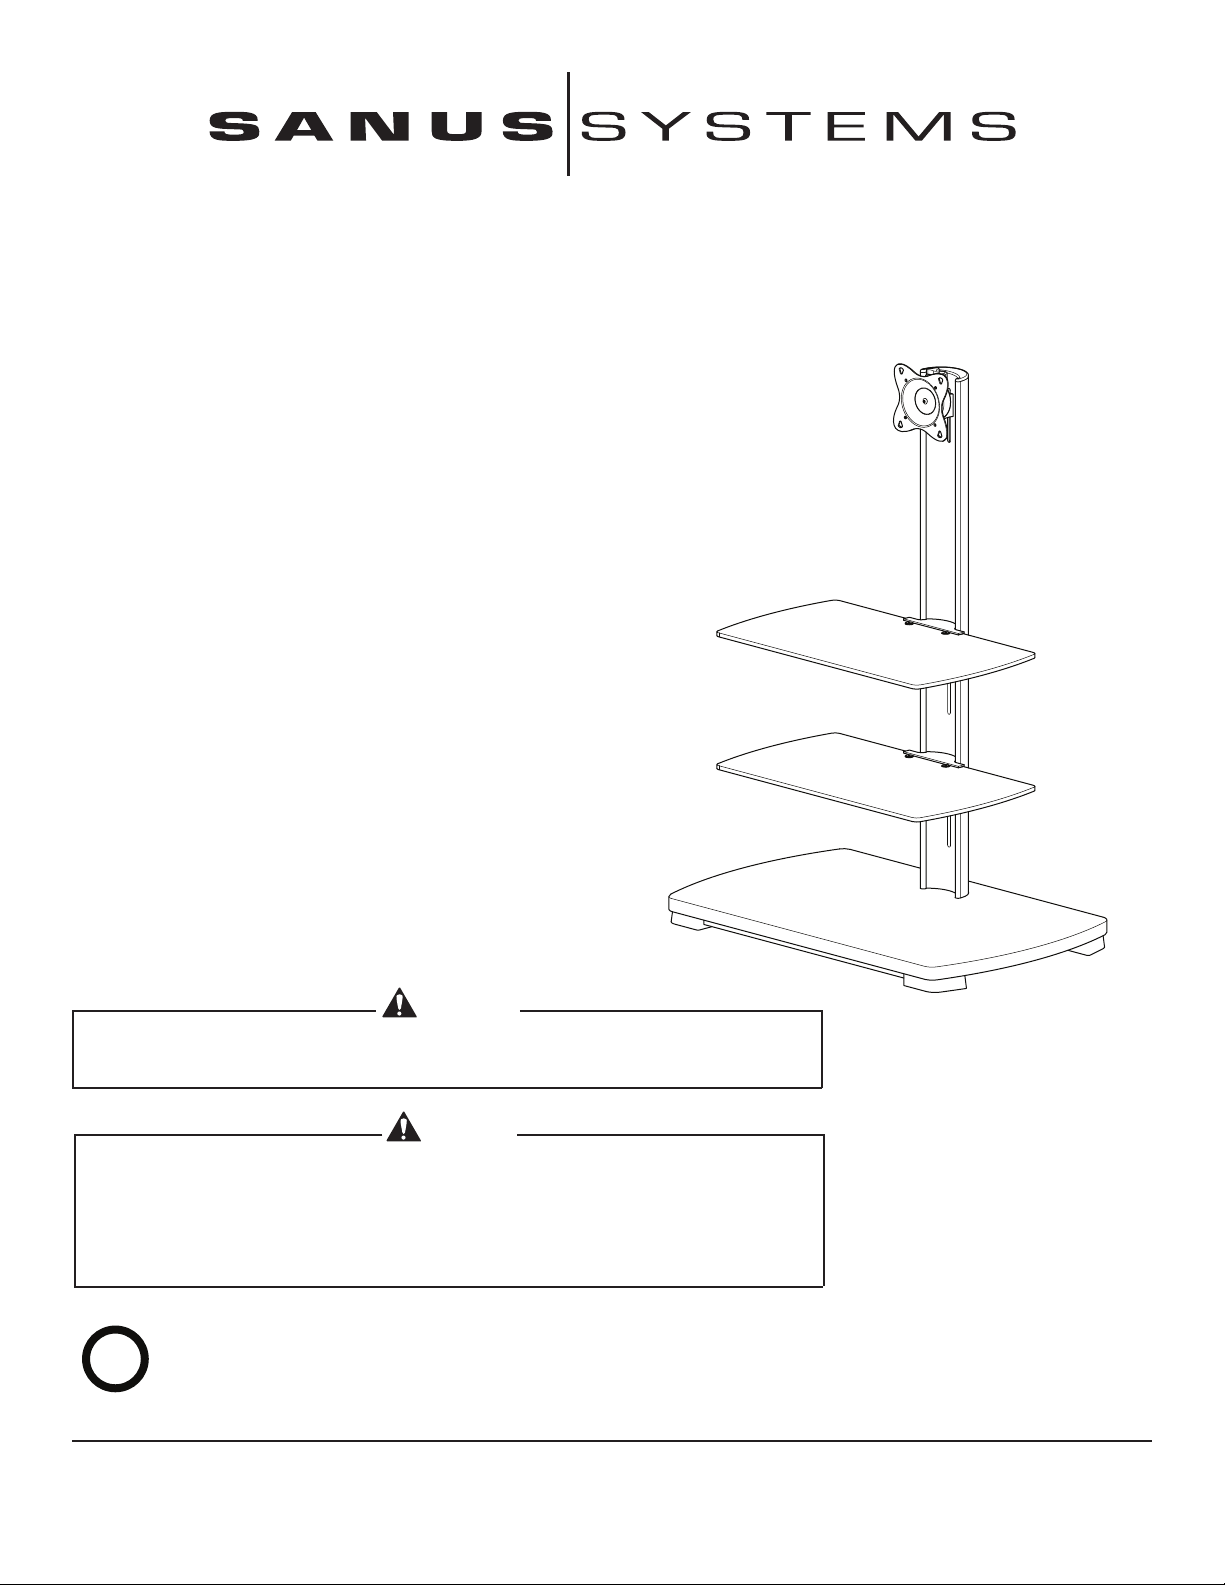
Thank you for choosing the Sanus Systems FFMF2A flat panel
foundation mount. The Sanus Systems FFMF2A flat panel foundation
mount is designed to support a flat panel monitor weighing up to
31 kg (70 lbs). The lower shelves each support additional equipment
weighing up to 11 kg (25 lbs). Hardware for multiple mounting
configurations is included.
WARNING
This product contains small items that could be a choking hazard if swallowed.
Keep these items away from young children!
CAUTION
Do not use this product for any purpose not explicitly specied by Sanus Systems.
Improper installation or use may cause personal injury and/or property damage. If
you do not understand these instructions, or if you have doubts about the safety of
the installation, contact Sanus Systems Customer Service. Sanus Systems is not liable
for injury or damage caused by incorrect installation or use.
Hardware and procedures for multiple mounting congurations are
included. When you see this symbol, choose the correct conguration to
suit your needs. Not all hardware included will be used.
Sanus Systems 2221 Hwy 36 West, St Paul, MN 55113 USA • (6901-100126 <07>)
USA Customer Service 1-800-359-5520 • www.sanus.com
Page 2
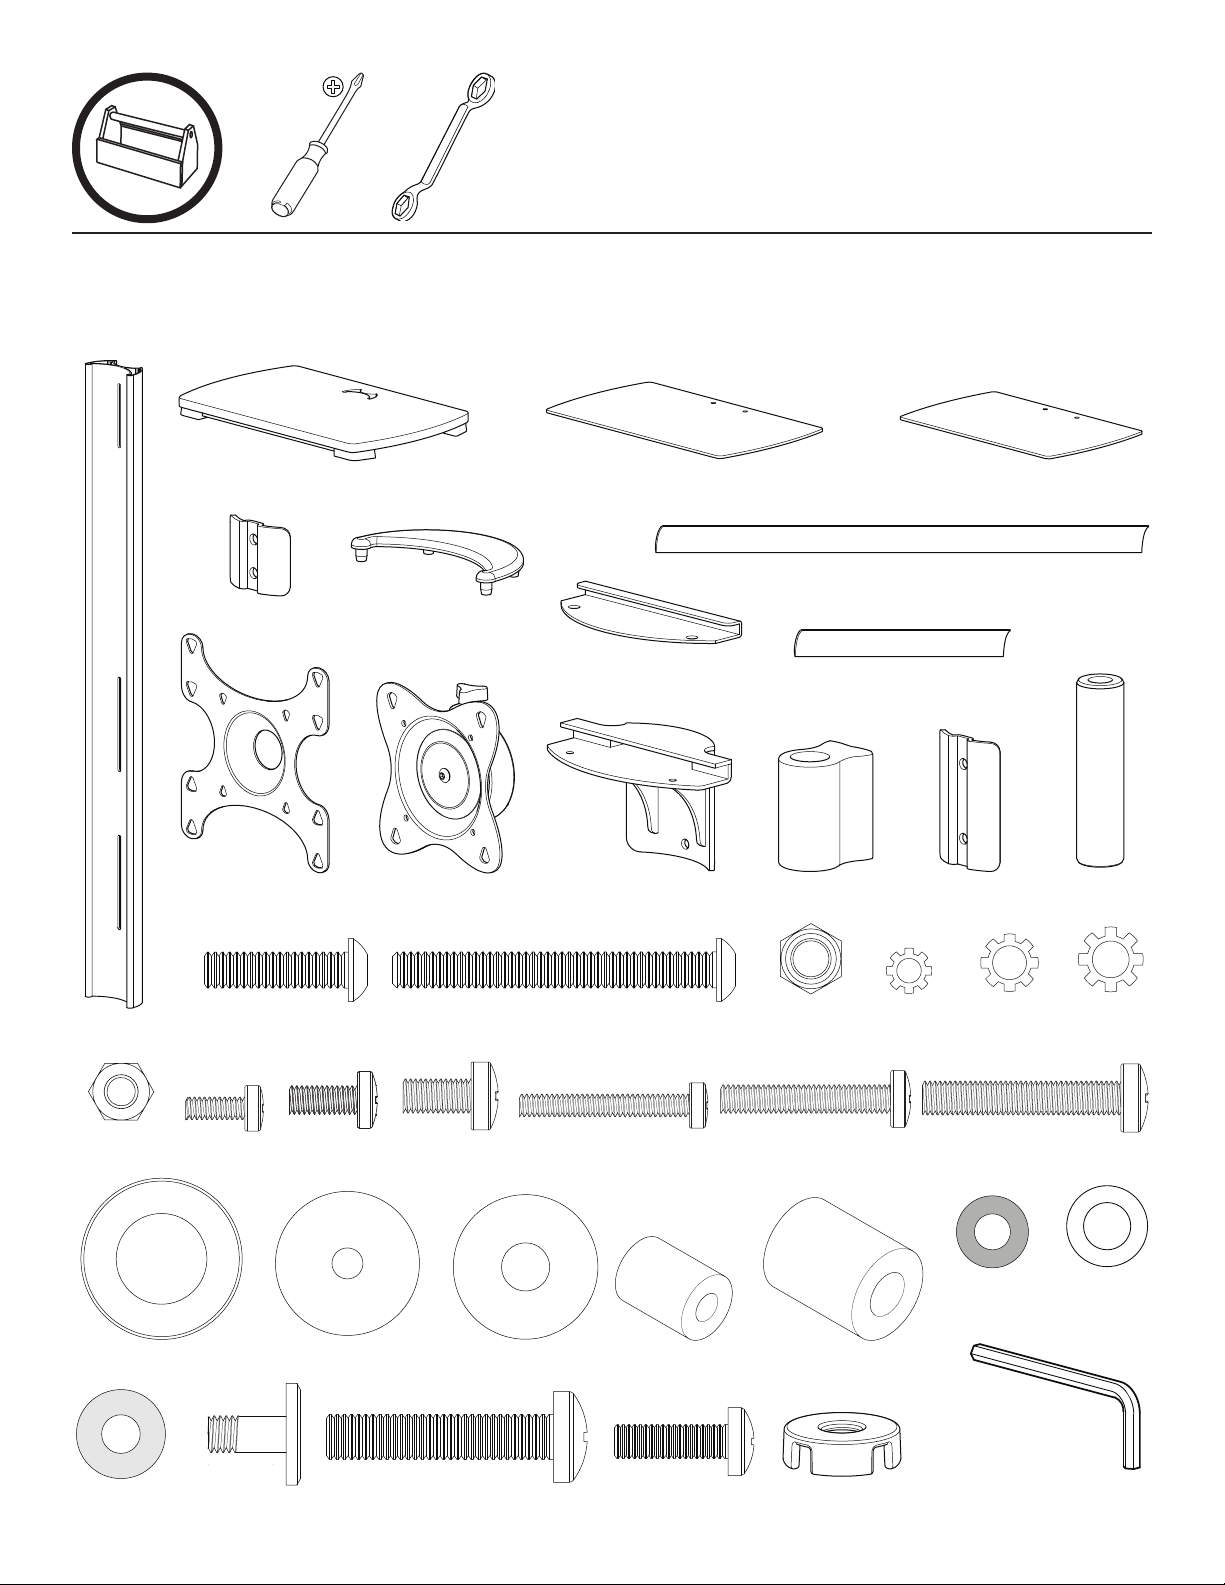
Supplied Parts and Hardware
M4 x 10mm
M6 x 20mm
1/4-20 x 0.625 in.
M4 x 30mm
M5 x 30mm
M6 x 35mm
M5 x 12mm
M6 x 12mm
M6
M4 / M5
M6 / M8
M4 / M5
M6 / M8
1/4-20 x 3.125 in.
0.5 in.
0.5 in.
M6 x 20mm
M8 x 40mm
M8
M6 1/4-20
Before starting assembly, verify all parts are included and undamaged. If any parts are missing or damaged, do not return the item
to your dealer; contact Sanus Systems Customer Service. Never use damaged parts!
[01] x 1
[05] x 1
[10] x 1
[16] x 4
[02] x 1
[06] x 1
[11] x 1
[17] x 1
[03] x 1
[07] x 2
[12] x 2
[13] x 2
1/4-20
[18] x 1
[04] x 1
[08] x 1
[09] x 2
[14] x 2
[15] x 1
[19] x 4M4[20] x 4M5[21] x 4
[22] x 4
[36] x 4
[23] x 4
[29] x 1
1/4-20 x 0.5 in.
[37] x 4
[24] x 4
[30] x 4
[25] x 4
[38] x 4
[31] x 4
[26] x 4
[32] x 4
[39] x 2
[27] x 4
[33] x 4
[40] x 2
[28] x 4
[34] x 1
[35] x 2
5/32 in.
[41] x 1
6901-100126 <07>
Page 3
[01]
[38]
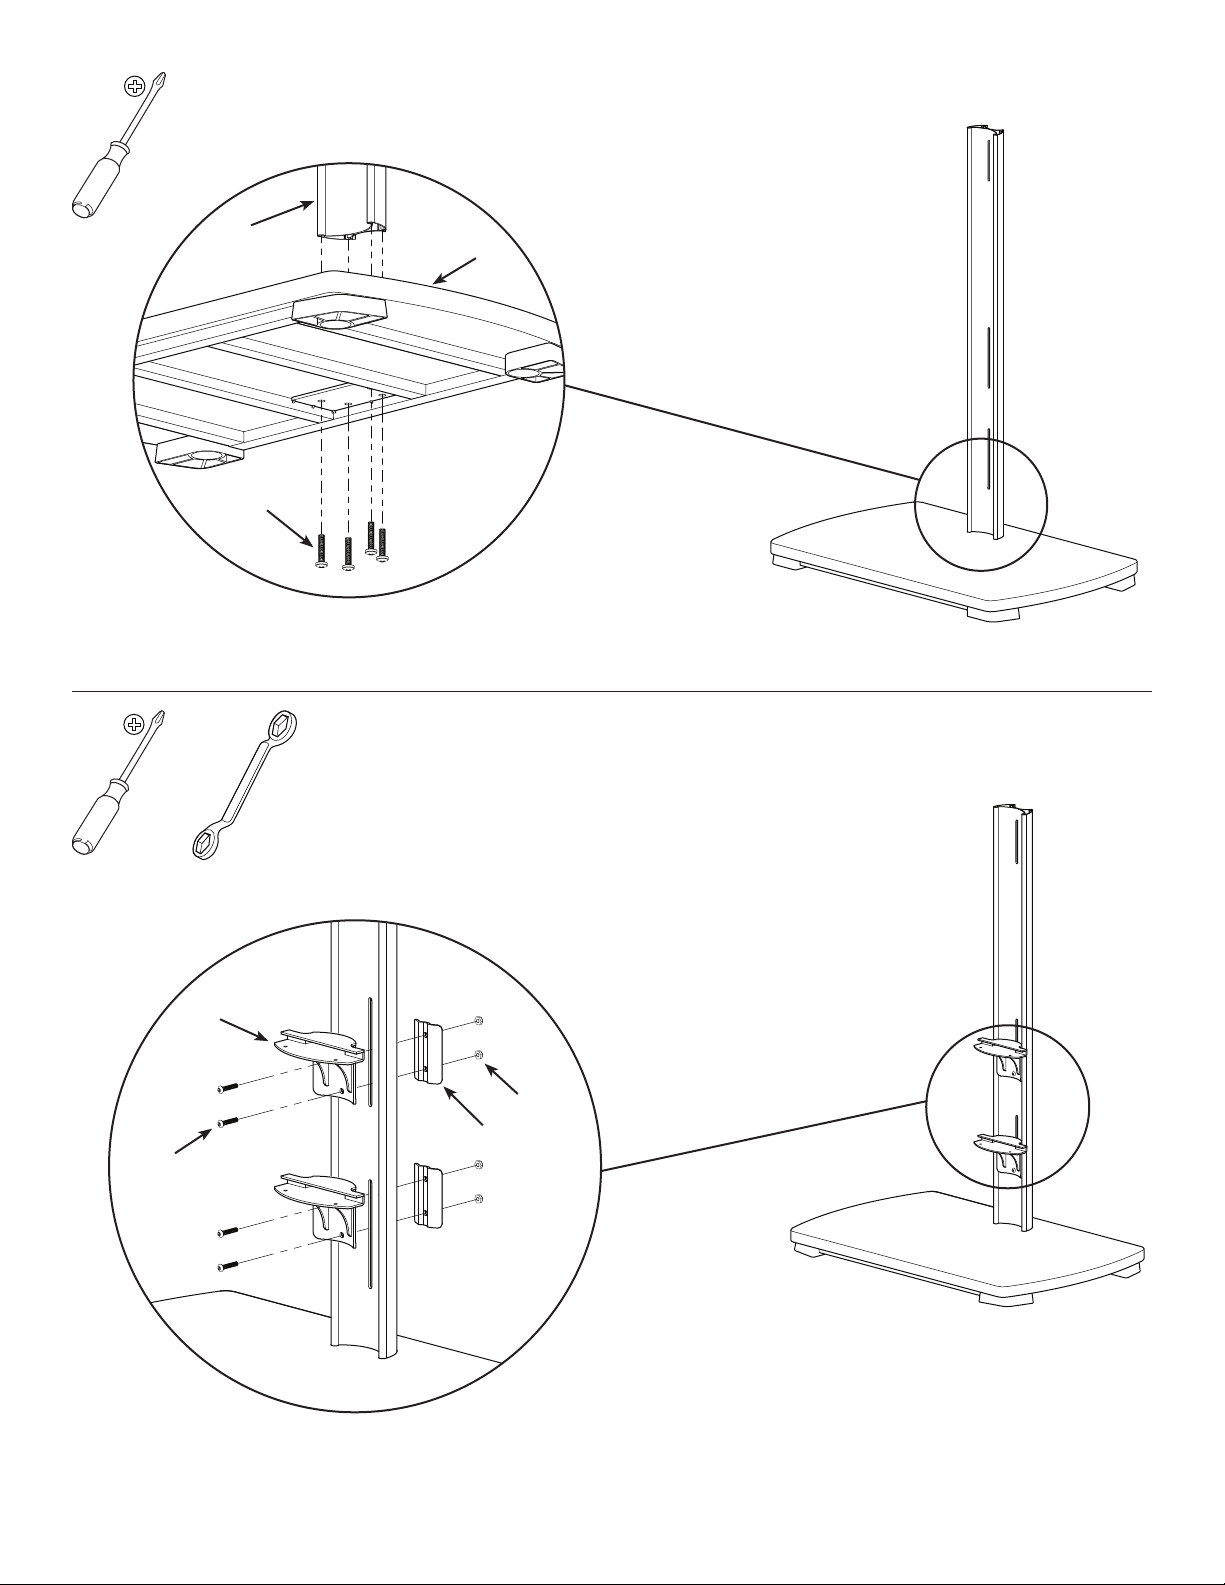
1: Install Pillar on Base
[02]
[16]
2: Install Brackets on Pillar
[12]
[18]
[14]
6901-100126 <07>
Page 4

3: Choose Correct Mounting Plate
001517.eps
001420.eps
Arrows
001420.eps
Arrows
75mm x 75mm or 100mm x 100mm
[41]
75mm
[11]
75mm
200mm x 200mm
[11]
[11]
100mm
100mm
NOTE
For monitors with 200mm x 200mm hole
spacing, you must remove the existing plate
from the head assembly [11] and replace it
with the larger plate [10].
[10]
200mm
200mm
6901-100126 <07>
Page 5

4: Install Head Assembly on Monitor
001503.eps
001503.eps
For Monitors with Flat Back
[30], [31]
[19], [20], [21]
[23], [24], [25]
[11]
For Monitors with a Curved Back or an Obstruction
[32], [33]
[30], [31]
[11]
[19], [20], [21]
[26], [27], [28]
6901-100126 <07>
Page 6

001510.eps
[15]
5: Install Pivot Pin
[29]
[13]
[05]
[01]
[39]
6: Install Monitor on Pillar
[13]
[40]
[17]
[35]
[34]
[35]
[22]
[40]
6901-100126 <07>
Page 7

[41]
7: Install Shelves
[37]
[36]
[03], [04]
[07]
8: Install Wire Channel Covers
[06]
[08]
[09]
[09]
CSAV, Inc. and its afliated corporations and subsidiaries (collectively, “CSAV”), intend to make this manual accurate and complete. However, CSAV makes no claim that the information contained herein
covers all details, conditions, or variations. Nor does it provide for every possible contingency in connection with the installation or use of this product. The information contained in this document is subject to
change without notice or obligation of any kind. CSAV makes no representation of warranty, expressed or implied, regarding the information contained herein. CSAV assumes no responsibility for accuracy,
completeness or sufciency of the information contained in this document.
6901-100126 <07>
 Loading...