

Sangean DT-500W User Manual

DT-500W
GB
Version 1
1
2
GB
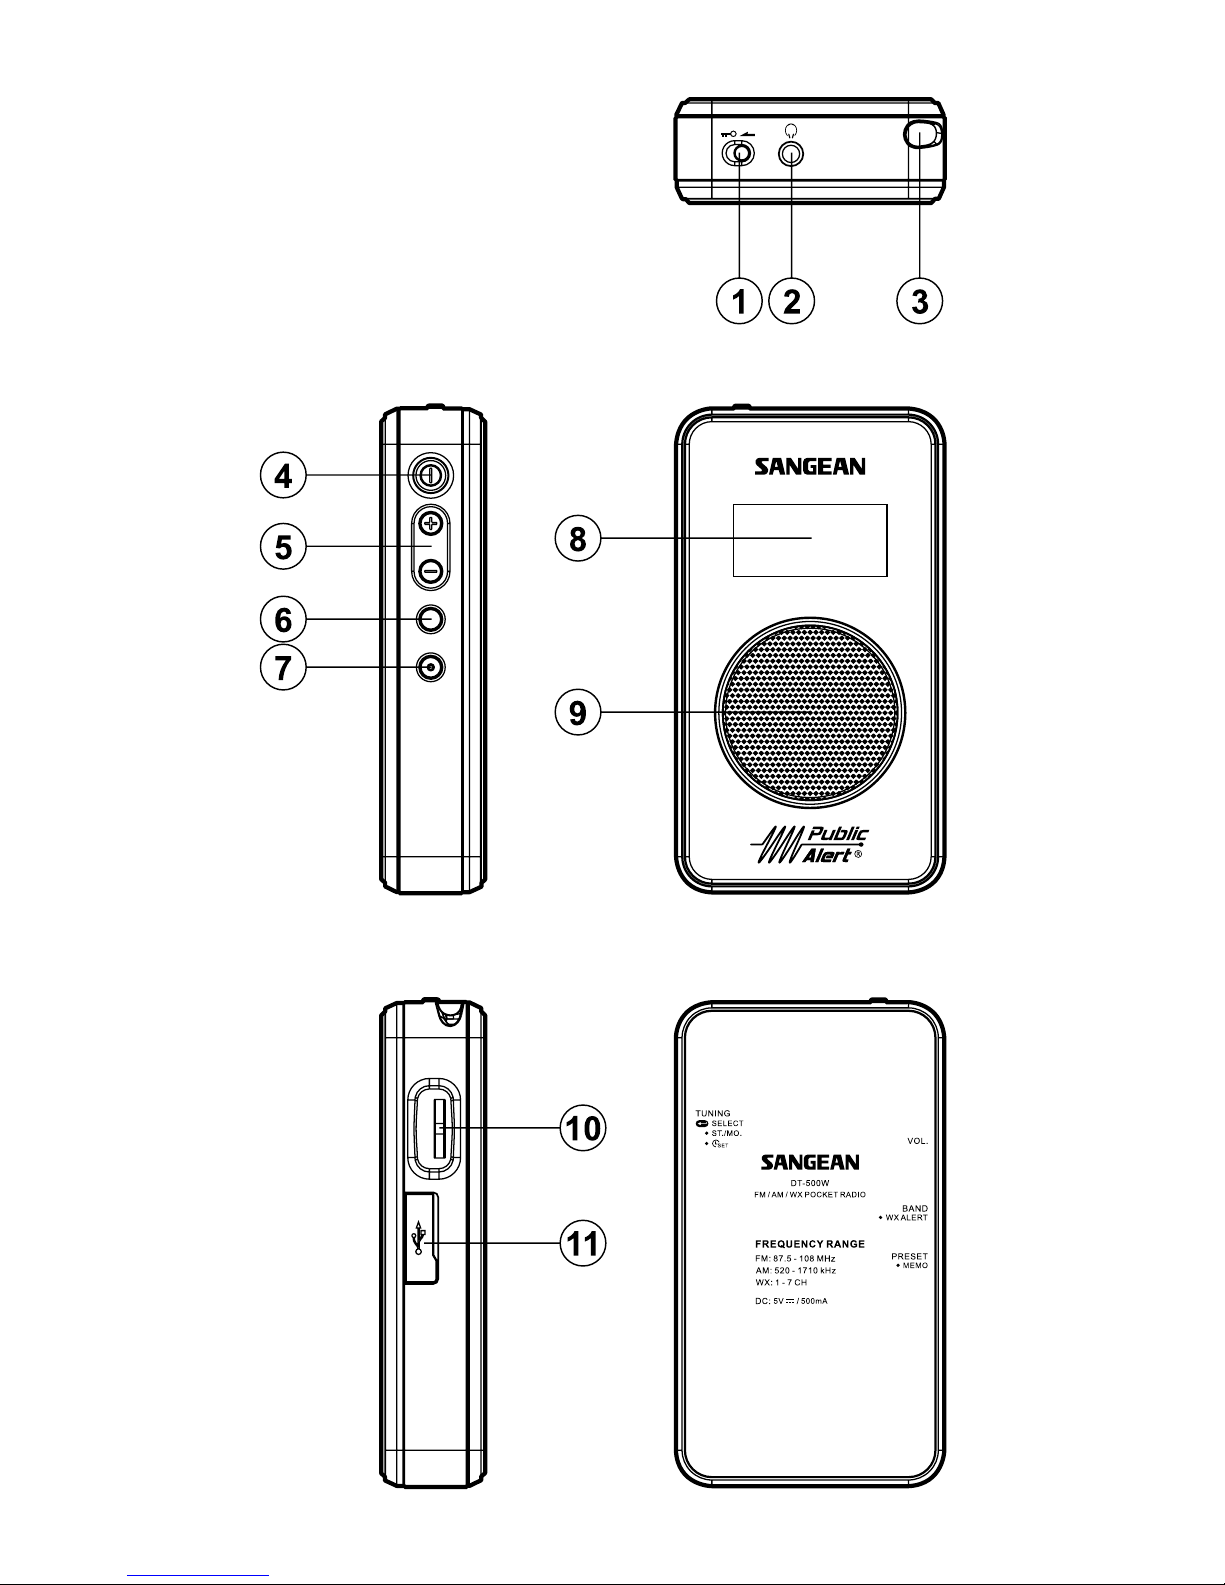
Control
Key lock: The key lock function is used
to prevent unintentional operation of the
radio. Slide the lock switch to the lock
position (left), the symbol will appear
on the display. The power and all other
buttons will be disabled.
Headphones
The 3.5 mm stereo headphone socket
located on the top of your radio is provided for
use with stereo headphones or an earpiece.
Important:
Excessive volume levels from earphones
and headphones may cause damage to
your hearing.
Telescopic antenna
Power button
Volume button
Band/Weather Alert button
Preset/Memory button
LCD display
Speaker
Tuning/Select jog wheel
DC socket
9
2
1
4
3
6
5
8
7
11
10
3
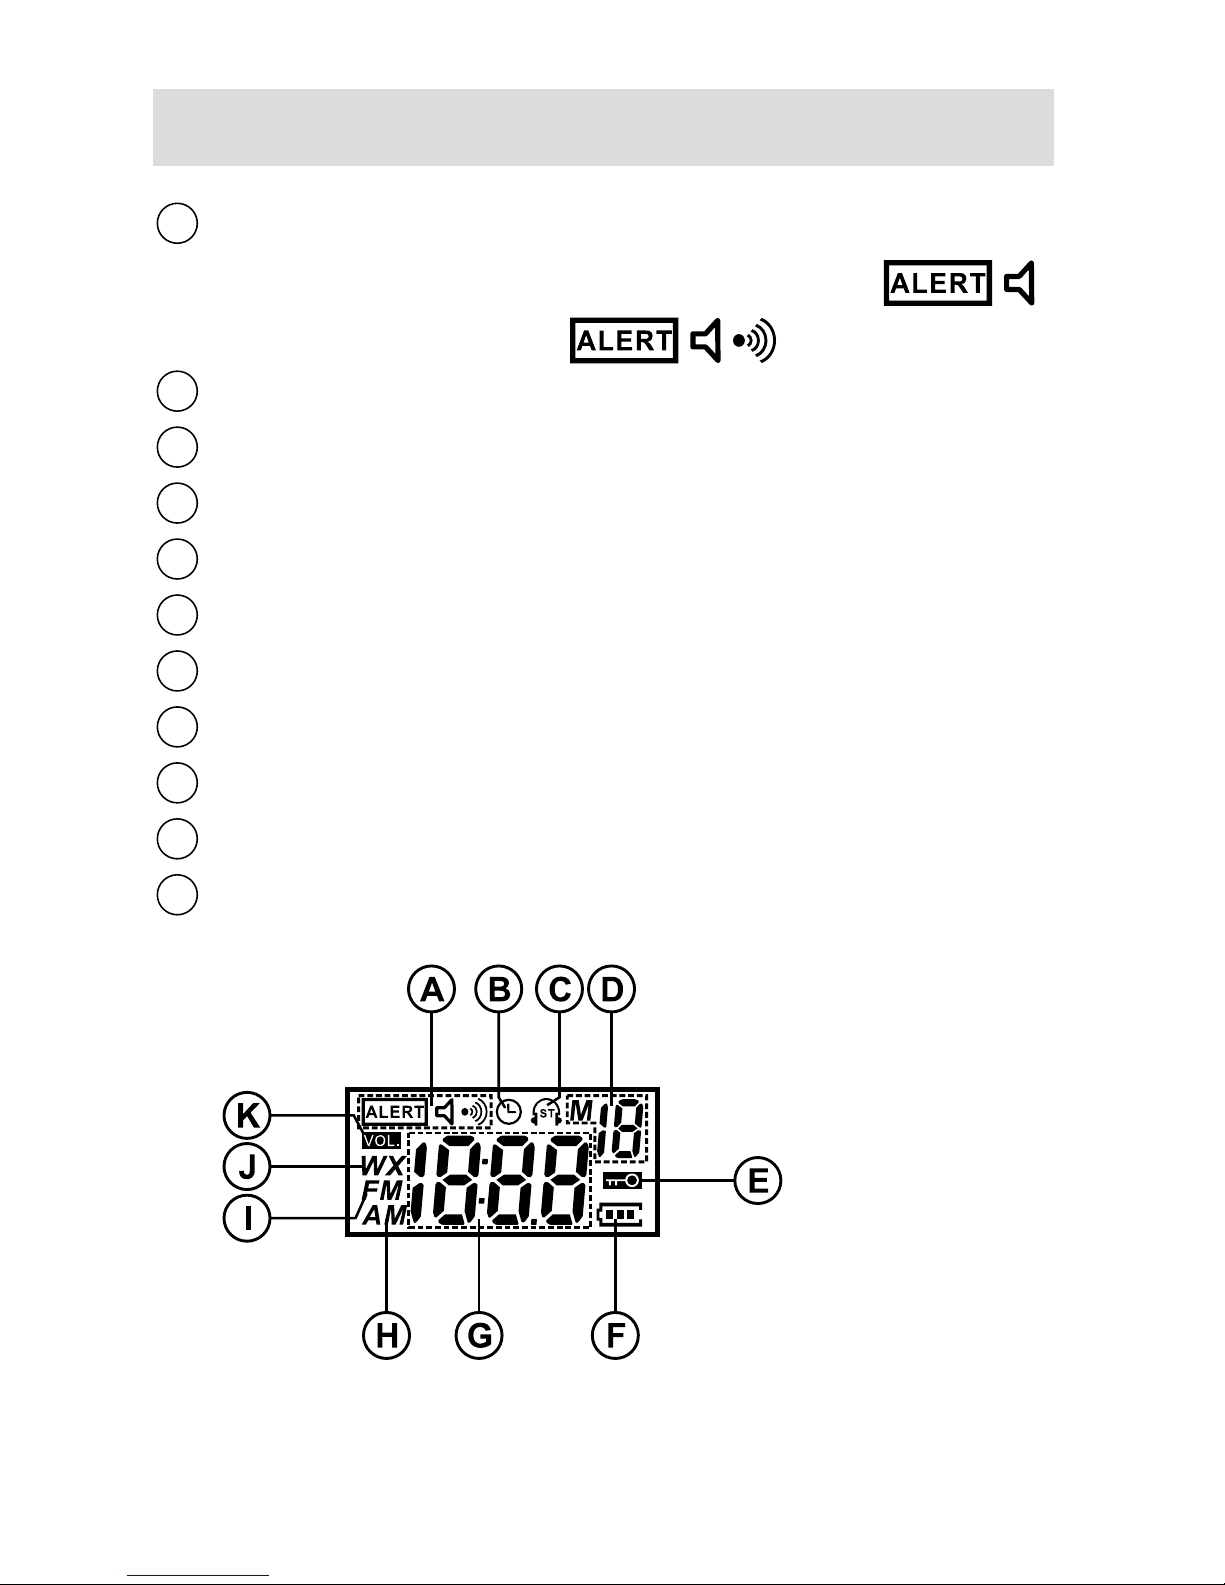
Display
Weather alert mode:
Alert light+weather broadcasting ( )
Alert light+Siren ( )
Sleep Timer icon
FM Stereo icon
Memory Preset icon
Key Lock icon
Battery Power icon
Frequency/Clock Display
AM/FM icon
FM Band icon
Weather Band icon
Volume indictor
A
B
C
D
E
F
G
H
I
J
K

4
GB
Charging the radio
This unit operates on a built-in Lithium-ion
battery that can be recharged either using
the USB charging port or from a AC power
adaptor (not included) with a rated output of
DC 5V, 500mA.
The first time using your radio, connect it
to your power supply (USB or AC) and fully
charge the battery. Charging time is approx. 4
hours with radio off. The battery power icon on
the LCD display will ash while charging and
stop ashing when the radio is fully charged.
The battery running time is approx. 16 hours
listening through the speaker and approx 32
hours with headphones. Reduced power,
distortion, ‘stuttering’ sounds or battery power
indicator in low position are all signs that the
battery needs to be recharged.
Note:
The radio can only be charged when it is
powered off. If the radio is connected to AC
Power adapter (not included) or USB when
it is powered on, the power icon does not
display on the LCD.

5
Setting the clock manually
Make sure the radio is turned off.
Press in jog wheel for 2 seconds and
release to enter the time setting mode and
the hour digit ashes.
Turn the jog wheel up or down to select the
required hours, then press in the jog wheel
to conrm the setting. Now the minute digit
ashes.
Press the jog wheel up/down to set the
required minutes, then press in the jog
wheel to complete the time setting.
1.
2.
3.
4.
 Loading...