

Page 1
381RKS1-A
Operating instruction
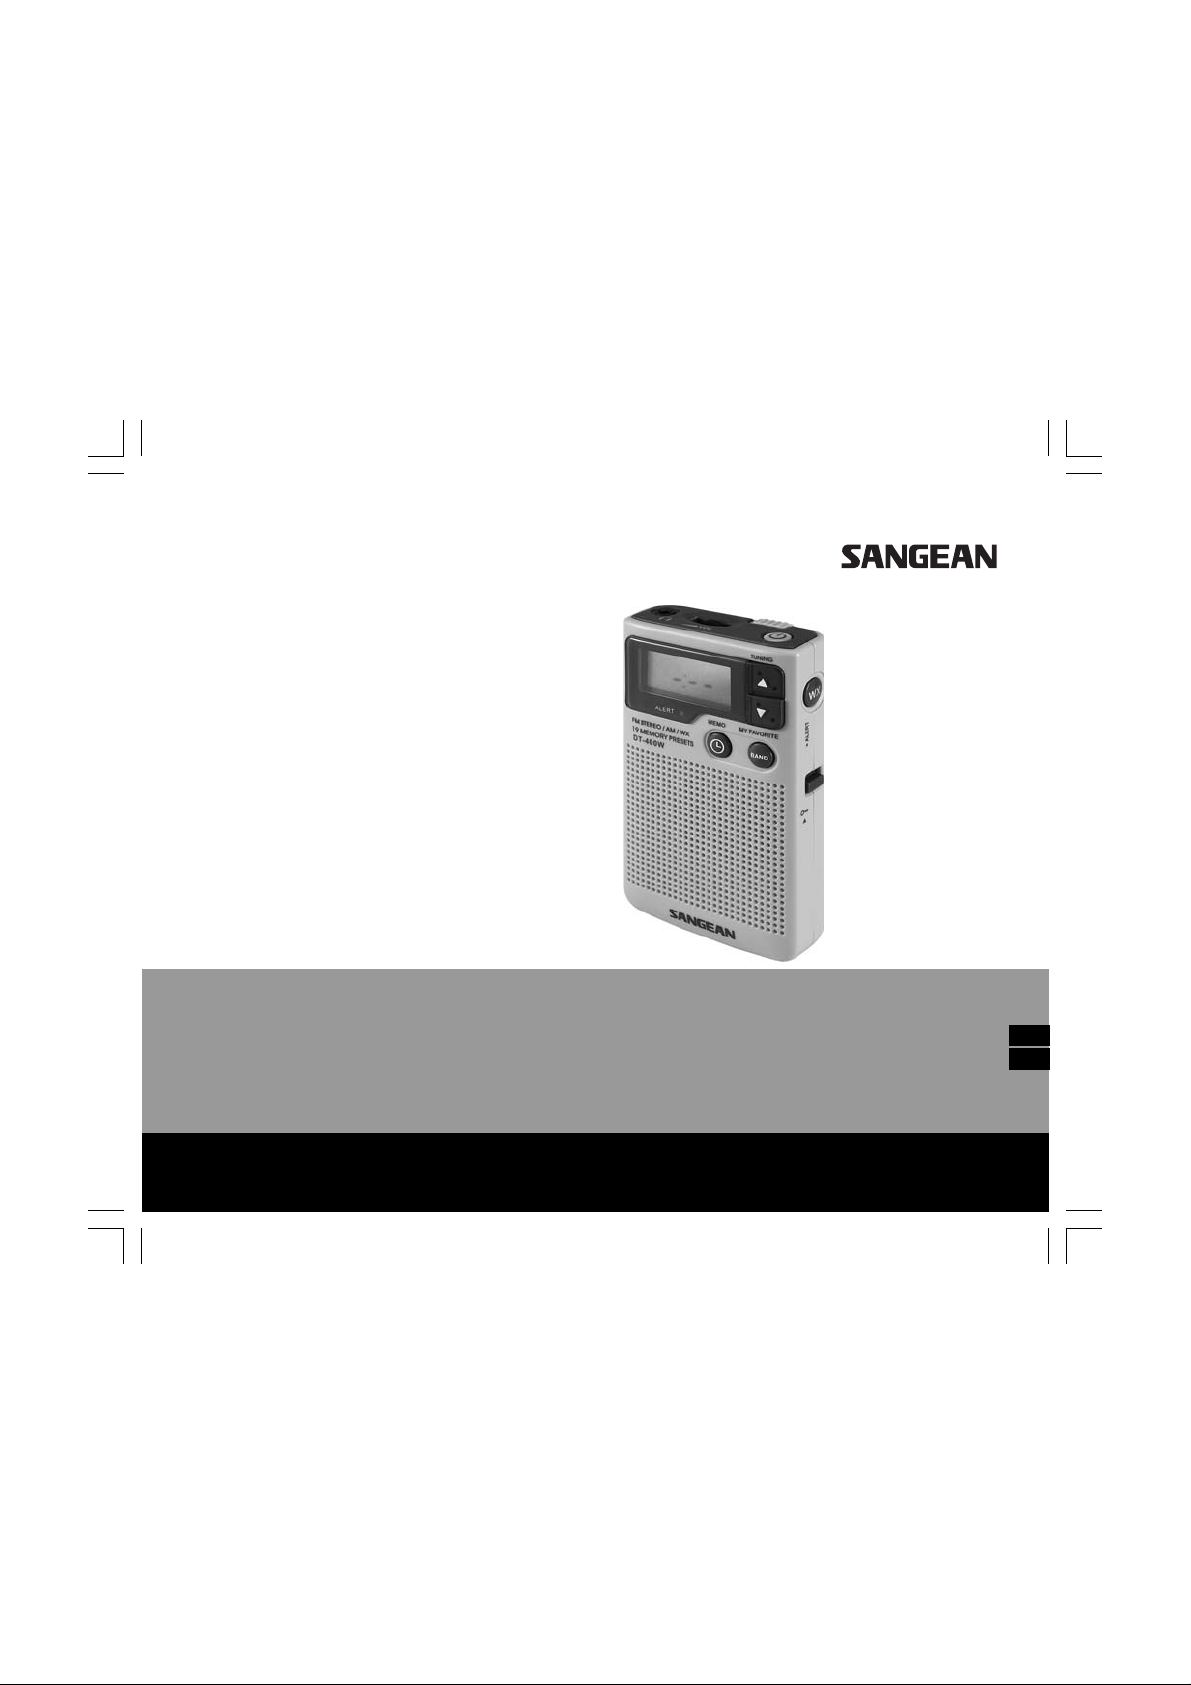
FM STEREO / AM / WX
19 MEMORY PRESETS
PLL SYNTHESIZED RECEIVER
DT-400W
Page 2

Limited Warranty
Sangea n America, Inc. warrants this product to be free
from defects in material and workm a nshi p under normal
use and conditions for a period of 90 (Ninety) days from
the date of original purchase on parts and labor .
Should service be necessary for a ny reason due to
manufacturing defe ct or malfunction during the warra nty
period Sangean America, Inc. will repair or repla ce at its
description, the defective merchandise at no charge
(except for small charge for ha ndling, packing, return
postage and insura nce), upon delivery of this product to
Sangea n America, Inc. service center with a copy of
proof of purchase date.
Warranty is only valid in the United States of America,
Canada, a nd Mexico and is not trans fera ble to owners
subsequent to the original owner. This warra nty doe s
not cover intentional or accidentally damaged product,
or items used in ways other than the item was intended
to be, units repaired or altered by persons other than
Sangea n America, Inc., or damage caused by parts,
accessories, or batteries not supplied or approved for
use by Sangean America, Inc.
1
Page 3

Any applicable implied warranties, including the
warranty of mercha ntability, are li mited in duration to a
period of 90 (Ninety) days from the date of original
purchase. No other warranties, whether expressed or
implied shall a pply to this product thereafter. Sa nge an
America, Inc. is not liable for any loss or damage,
direct or consequential arising out of the use of,
or inability to use this product. (Some states do not
allow limitation or implied warra nties or exclusion of
consequential da mage, therefore, these restrictions
may not apply to you.)
This warranty gives you specif ic legal rights and these
and additional rights may vary from state to state.
T o return product f or warra nty re pair:
1. Remove the batteries (if a pplicable) and carefully pack
the unit along with all it’s accessories in a suitable
well padded corrugated box.
2. Enclose copy of proof of purchase with date and a
letter describing your specific problem.
3. Enclose your check or money order payable to
Sangean America, Inc. for the sum of $6.00 for return
processing and shipping.
4. Insure and ship the unit vi a UPS, FedEx,
or Parcel Post to:
Sangean America, Inc.
Service Department
2651 Troy Avenue
South El Monte, CA 91733
2
Page 4
3
Page 5

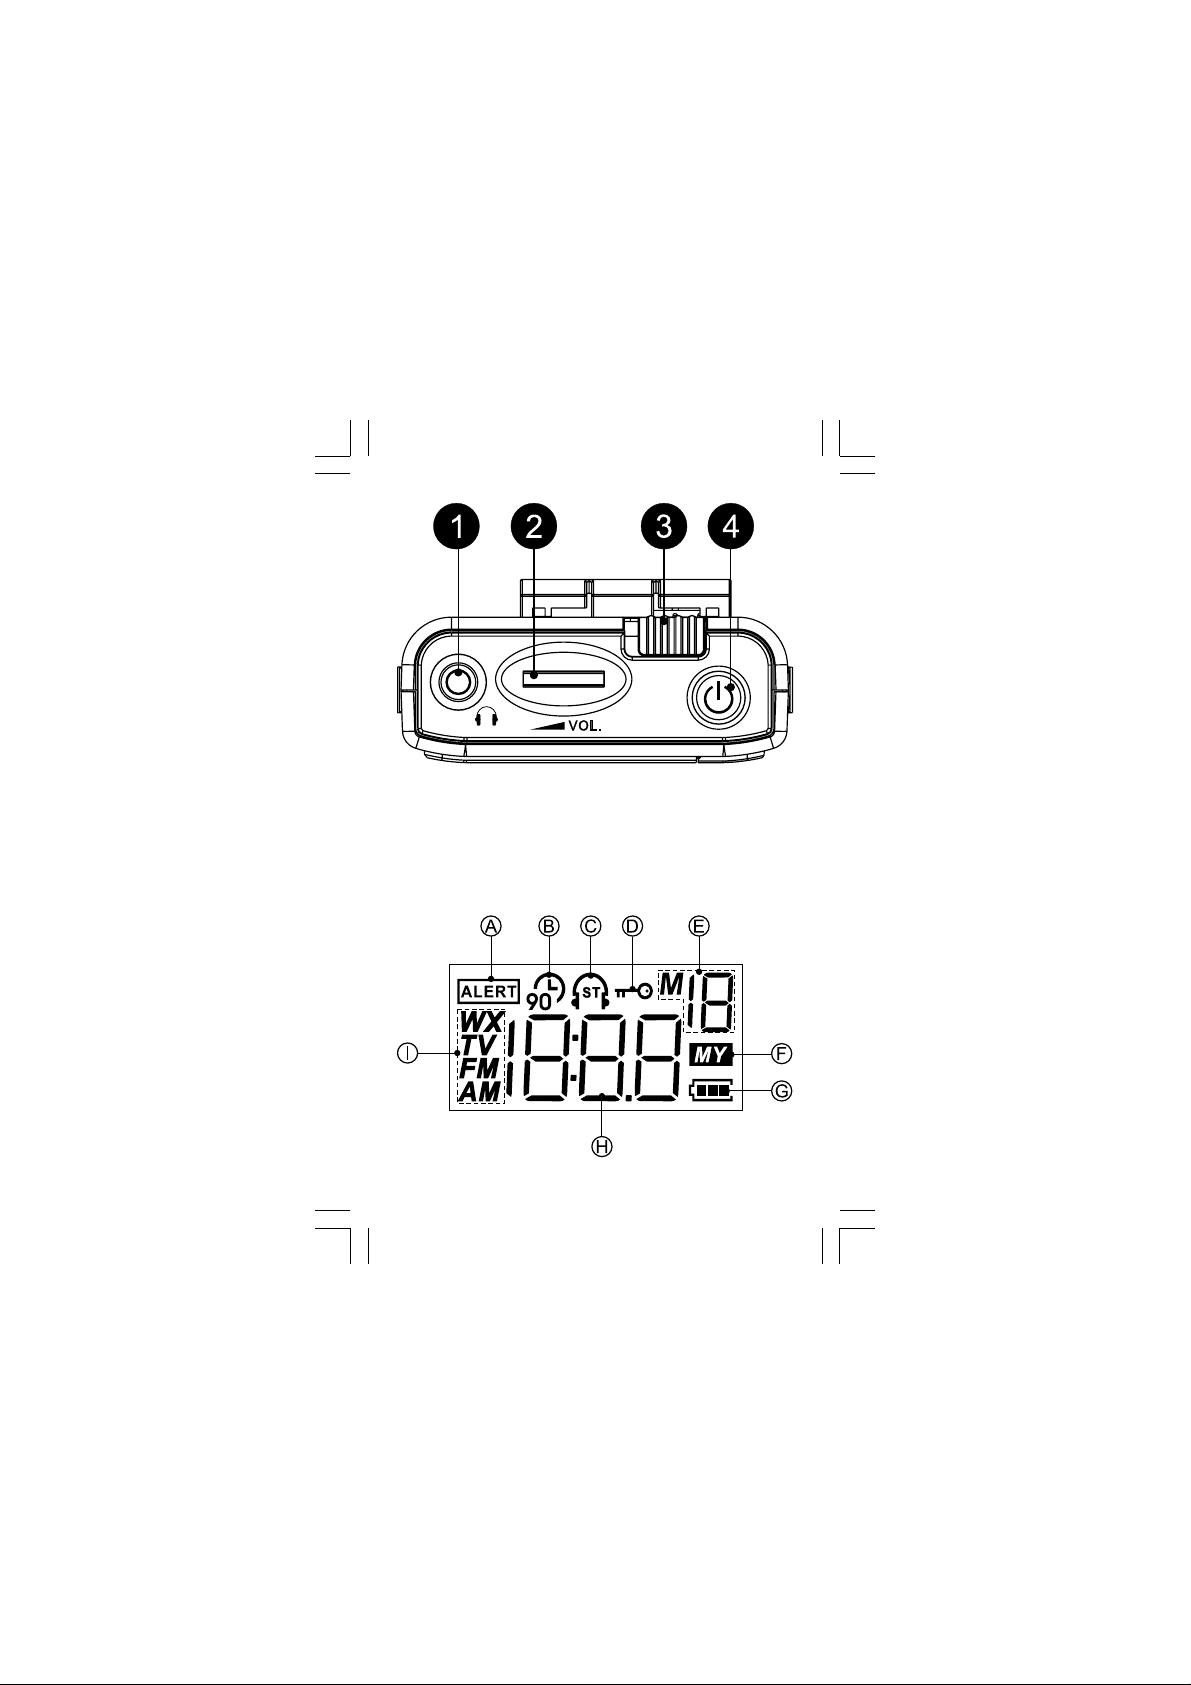
1
Headphone/Antenna Jack
The earphone also acts as the FM antenna when
plugged into the earphone jack. While listening via
speaker , you may plug the supplied wire antenna into
the earphone jack, and set the ST/MO/SP.
2
Volume Control
3
DBB-Deep Ba ss Boost
Switch on the DBB switch on the back top of the
radio to activate the Deep Ba ss Boost to have
stronger bass sound.
Another press will cancel the DBB.
Note:
Suggest to activate the DBB only using e arphone s.
4
Power switch
Power is switched on ( symbol will appear on the
display). If you don’t need this feature, press Power
button for more than 2 seconds until symbol removed
from the display.
Display
A
Alert Indicator
B
90 Minute Auto Timer Indicator
C
Stereo Tuned Indicator
D
Lock Button Activated
E
Memory Preset Position
F
MY Favorites Feature Activated
G
Battery Life Indicator
H
Time Display
I
Band Indicator
4
Page 6

5
Page 7

5
ST/MO/SP (Stereo/Mono/Speaker)
Switch the switch to SP (speaker) position,
while you listen to the radio program via speaker.
Make sure to plug the supplied wire antenn a or the
earphones to get best FM reception.
This radio is ca pable of receiving FM stereo radio
program by plug the supplied earphone s into the
earphones jack and set the ST/MO/SP switch to
ST (stereo) position, display will show stereo
symbol. If the station being received is weak,
some hiss may be audible, to reduce the hiss,
switch the ST/MO/SP to MO/(mono) position.
The stereo indicator will be removed from
the display.
6
LCD Display
7
ALERT indicator
8
Memory Button/Clock Set
9
Band Selection
10
Weather Band
6
Page 8

7
Page 9

11
My Favorites
12
Lock Switch
The lock switch prevents accidental cha nging of any
of the radio settings.
Slide the lock switch to the up ‘locked’ position,
the symbol will appear in the display.
The power and all other buttons will be disabled.
13
Belt Clip
A removable belt cli p is provided on the back of
the unit.
Removal:
It can be removed by gently pushing on the center tab
of the clip where indicated, and sliding the cli p
downward towards the bottom of the radio.
Replacement:
You can easily connect the belt clip by inserting the
top of the clip into the designated receiver slots and
gently pushing the clip in an upwards motion towards
the top of the radio.
14
Battery Compartment
8
Page 10

Battery Installation
Turn radio off.
Prepare replacement batteries to en sure a quick and
easy cha nge. Failure to change batteries within
1 minute will reset presets and clock settings.
The battery cover is located on the back of the unit.
Apply a gentle downward pressure and slide the door
to the right side of the unit.
Place 2 ‘AA’ batteries inside the unit oriented
to the illustration located just below the
battery compartment.
NOTE:
A flashing “E” a ppe aring on the LCD display indicates a
weak battery and that replace ment of batteries is
required. And the Weather Alert will be deactivated.
Tuning the Radio
Seek Tuning
Turn radio on using the On/Off button located on the
top of the radio.
Select desired band by pressing the “Band” selector
on the front of the unit.
Press and hold the proper tuning button (Up/Down) for
approxi mately ½ se cond. Radio will seek for next
active signal station.
Repeat as many times as desired.
9
Page 11

Manual Step Tuning
Turn radio on using the On/Off button located on the
top of the radio.
Select desired band by pressing the “Band” selector
on the front of the unit.
Press the desired tuning button (Up/Down) repeatedly
until desired frequency is found.
Memory Tuning
To tune in stations already programmed into memory.
See Setting Memory Section for instructions on how to
program station s into ra dio memory.
1. Turn radio on using the On/Off button located on the
top of the radio.
2. Press “My Favorites” button located on the right side
of the radio. “MY” should appe ar on the right hand of
the display indicating function is on.
3. Use tuning controls (Up/Down) to navigate through
memory programmed stations.
4. Press “My Favorites” button to turn off
memory tuning.
10
Page 12

Setting Memory
Turn radio on using the On/Off button located on the
top of the radio.
Select desired band by pressing the “Band” selector
on the front of the unit.
Tune to desired station using either M anual Step
Tuning or Scan Tuning option s.
Press Memory Button located on the front of radio unit
and use the tuning controls (Up/Down) to rea c h
memory position as indicated in the top-right of
the display.
Press Memory Button located on the front of the unit
to lock station into memory.
* There are 19 memory sets.
Weather Band and weather
alert operation
1. When that radio is on, press the WX button to switch
between AM/FM a nd Weather Band.
Then press TUNING UP or DOWN select the
Weather Band cha nnel.
2. When the radio is in the Weather Ba nd, pre ss and
hold the WX button for more than 3 seconds to enter
the Weather Alert mode.
3. Press the TUNING UP or DOWN to select the
Weather Alert time (OFF , 4H, 8H, 16H or OFF).
11
Page 13

4. Press the WX button to confirm the setting.
5. Press the POWER button to turn off the radio.
And the ALERT indicator flashes every 3 seconds and
the word “ALERT” is shown on the display. You can
press the WX button and the display shows the
Weather Alert channel and remained ti me.
6. When the Weather Alert sounds, press any button to
enter the W eather Band.
7. When the set Alert time is elapsed, the Alert
is deactivated.
* There is no memory preset for Weather ba nd.
About Weather Band standby mode:
1. Reception: The reception related to the distance to
the ratio station, broadcast signal strength,
earphone allocation and so. Try to stretch out the
earphone to get better reception.
2. W eather broadca sts usually transmit signal every
Wednesday noon time. You can test your alarm
at this time.
3. Alarm standby mode consumes power.
4. When the battery is low, and changing battery
eliminate the alarm set.
12
Page 14

Setting the Clock
This unit features a clock that will display the current
time while off. To set the clock:
Turn unit off by depressing the power button located
on the top of the radio.
Press and hold MEMO or CLOCK button until the
hour setting begins blinking and the colon is no
longer blinking.
Select hour by using the Tuning Control Buttons
located just to the right of the display. Adjust UP or
DOWN accordingly until desired hour is displayed.
Press MEMO or CLOCK button once to set
the minutes.
The minute indicator should now be blinking. Using the
Tuning Control Buttons located just to the right of the
display. Adjust UP or DOW N accordingly until desired
minutes is displayed.
Once time displayed matches desired setting press
MEMO or CLOCK button once more.
Time should display solidly, with the colon
blinking periodically.
13
Page 15

Change AM (MW) band tuning step
In Europe and other parts of the world, AM (MW) tuning
step are 9 kHz, in America the AM tuning step is
10 kHz.
To change the AM tuning step from 10 kHz to 9 kHz,
proceed as f ollows:
1. Press Tuning Down button and hold mea nwhile
press the Power button and hold.
2. Until the display shows SEP 9 then shows 522.
3. The AM frequency step is 9kHz now.
To change the AM tuning step from 9 kHz to 10 kHz,
proceed as f ollows,
1. Press Tuning UP button then Power button and
hold meanwhile press the Power button and hold.
2. Until the display shows SEP 10 then shows 520.
3. The AM frequency ste p is 10kHz now.
Specification
FM: 87.5 - 108.0 MHz,step 100k
AM: 522 - 1629 kHz,step 9k
520 - 1710 kHz,step 10k
WX: USA 1-7ch with alert
14
 Loading...