


YP-T9J
For Your Safety
Read this manual carefully to ensure proper use of the product and
to avoid any danger or physical damage.
2
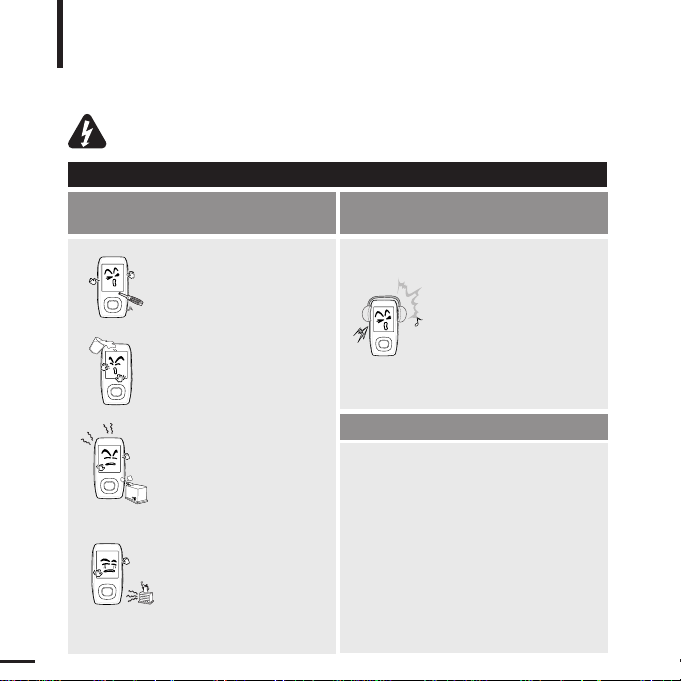
WARNING
Product Use
Improper use can result in explosion,
fire or electric shock.
To avoid your hearing damage
Do not disassemble, repair
or modify this product on
your own.
Do not get the product wet
or drop it in water.
If the product gets wet,
do not switch it on.
Contact a Service Center.
Do not place the product in
damp, dusty or sooty areas,
as it could result in fire or
electric shock.
Avoid using your player at
high volume levels, as it may
result in permanent
hearing damage.
If you experience ringing in
your ears while using the
earphones, remove the
earphones immediately and
lower the volume.
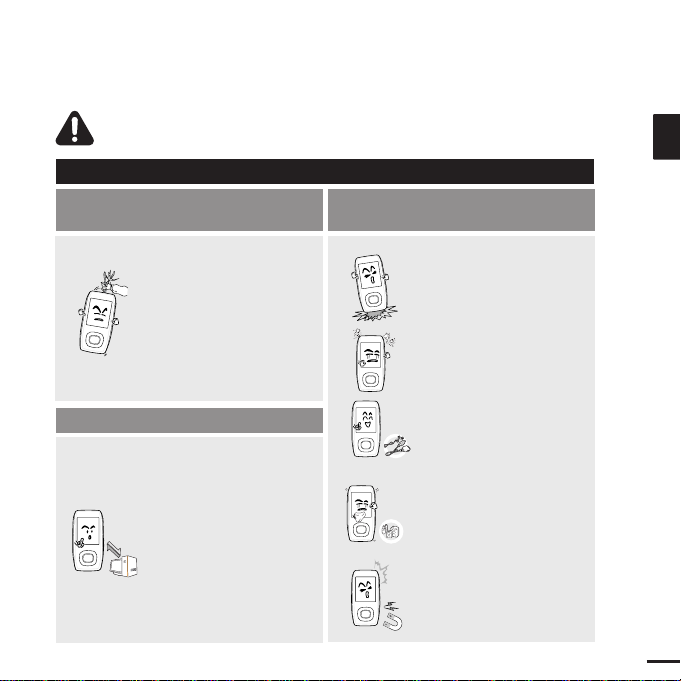
To avoid a risk of traffic accident
Do not use the earphones while you are
driving a bicycle, automobile or motorcycle.
It can cause a serious accident and furthermore,
is prohibited by law in some areas.
Using the earphones while walking, in particular,
on a crosswalk, can lead to a serious accident.
Take care not to tangle the earphone cable
around your arms or neighboring objects
while driving, working out or walking, as it
could result in a car accident or other
injuries.
Do not leave the player in
areas above 35°C(95°F)
(such as a sauna or inside
a parked car).
During hot weather, the
temperature inside a car may
rise up to 80°C(176°F).
Failing to heed the product instructions may cause serious injury.
3
ENG
CAUTION
Product Use
Take care to avoid product
malfunction and physical damage.
Management of Important Data
Avoid malfunction
When wearing the product
around your neck, take
care not to exert excessive
force on the neck string.
Be sure to backup
important data.
Please be aware that we
claim no responsibility for
damage from data loss due
to breakdown, repair or other
causes.
Failure to follow all instructions lead to physical injuries or damage to the product.
Do not cause excessive
impact on the product by
dropping it. Do not place
heavy objects on top of the
product.
Prevent any foreign
particles or dust from
entering into the product.
Always use the accessories
provided by or approved by
Samsung.
Do not spray water on the
product. Never clean the
product with chemical
substances such as
benzene or thinner, as it may
cause fire, electric shock or
deteriorate the surface.
Do not place the product
near magnetic objects, as it
may cause a malfunction.
Basic Information .......................................6
Components...............................................6
Screen Display Information........................9
Button Functions......................................10
Charging the battery ................................11
Basic Use ...................................................12
Contents
4
Chapter 1. Preparation
Chapter 2.
Loading Your Desired File
Loading Your Desired File ......................16
Installing Samsung Media Studio ............16
Connecting to your PC.............................17
Adding Folders/Files in Samsung
Media Studio............................................18
Transferring Files to the Player
with Samsung Media Studio....................20
Chapter 3. Multimedia function
Listening to Music ....................................22
Listening to Music....................................22
Section Repetition....................................25
Creating Playlist Using
Samsung Media Studio............................26
To Play a Playlist......................................28
Using Music menu ...................................31
Video............................................................34
Video........................................................34
Using Video menu....................................37
Photo Viewing ...........................................38
Photo Viewing..........................................38
Using Photo menu ...................................40
Text Viewing ...............................................43
Text Viewing.............................................43
Using Text menu ......................................44
Listening to FM Radio .............................47
Listening to FM Radio..............................47
Setting a Frequency.................................49
To Delete Presets.....................................51
Using FM Radio menu.............................52
Recording...................................................54
Recording.................................................54
Voice/FM Radio Recording ......................56
Bluetooth....................................................57
Using Bluetooth........................................57
Using Bluetooth menu..............................63
Game ...........................................................64
Game .......................................................64
For Your Safety ..........................................2
Contents .......................................................4
5
ENG
Chapter 4. Setting
Settings......................................................66
Setting Music ...........................................66
Setting Record.........................................68
Setting Time ............................................69
Setting Display ........................................71
Setting Language.....................................72
Setting System ........................................73
Chapter 5. Troubleshooting
Troubleshooting........................................75
Chapter 6. Appendix
Menu Tree...................................................77
Product Specifications............................78
6
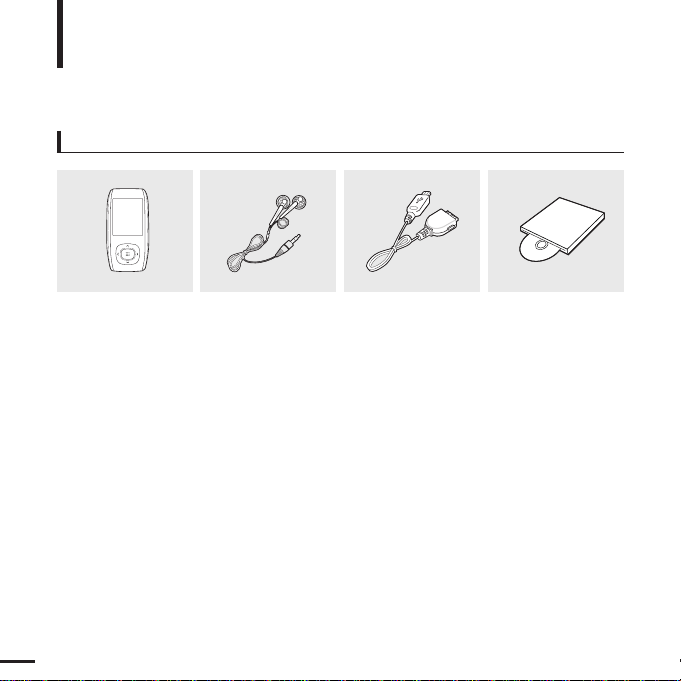
Components
Basic Information
Checking the Accessories
■ Design of accessories is subject to change for the purpose of improvement, without notice.
Player Earphones USB Cable
Installation CD

7
ENG
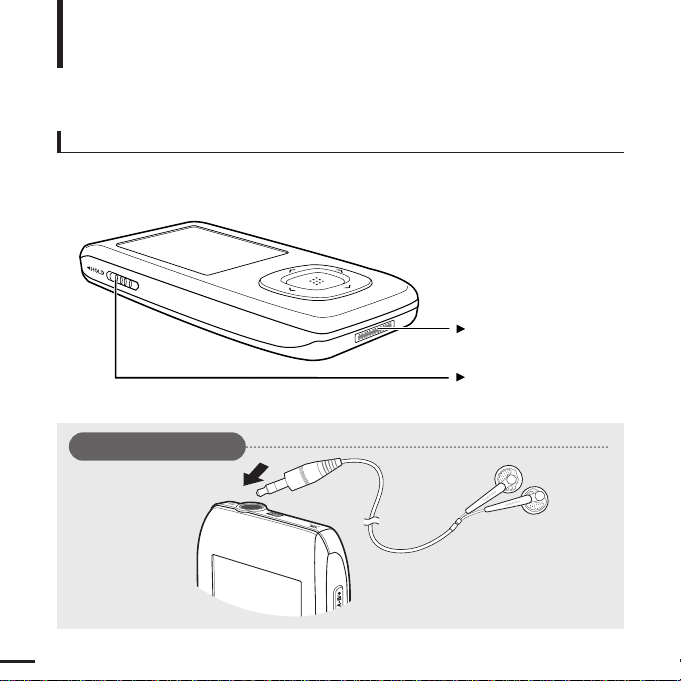
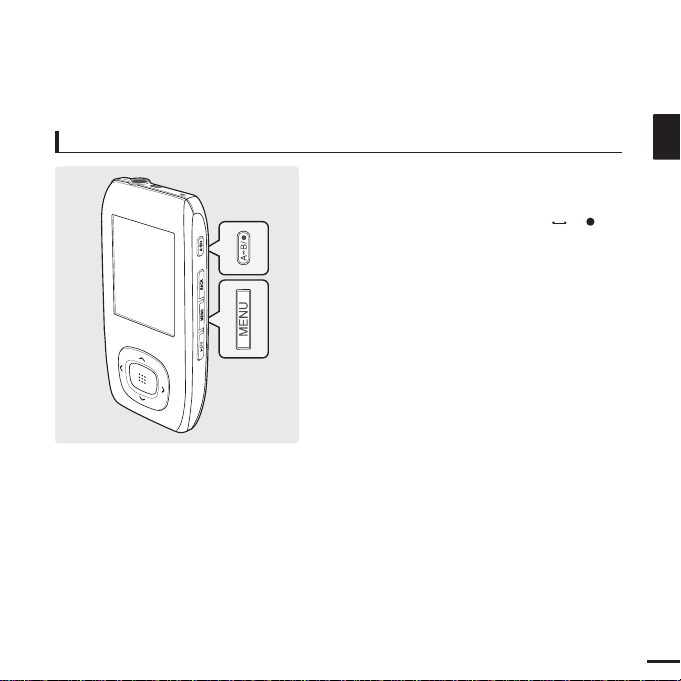
Front, Right Side and Top
Earphone Connection Jack
Neck String Hole
Microphone
Screen Display
Section Repeat(A B)/
Recording Button
Back Button
Move/File Browser Button
Move/Volume Control Button
Select Button
MENU Button
Power & Play/Pause Button
8
Bottom and Left Side
USB Connection Port
Hold Switch
Components (Continued)
Basic Information
Earphone Connection
√ Top
Earphones
9
ENG
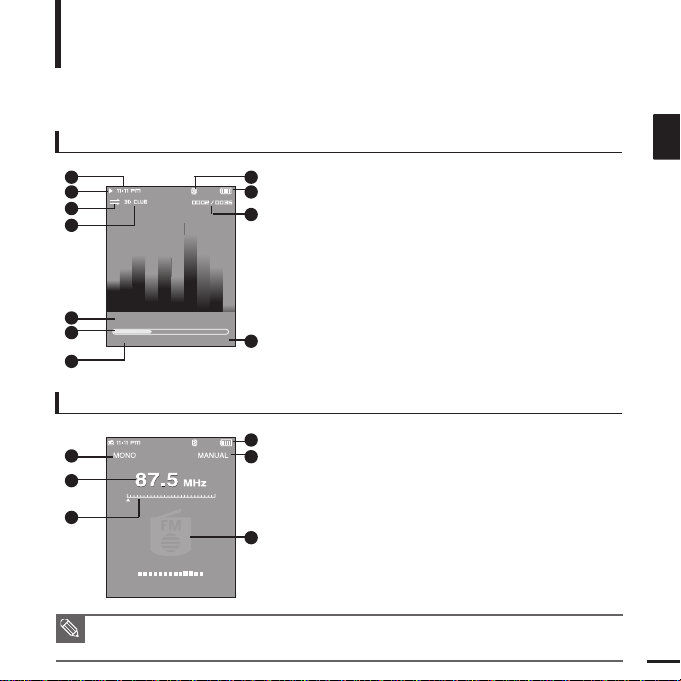
Screen Display Information
Basic Information
NOTE
■ The screen pictures are for illustration purposes only. The actual screen may differ.
1
Current Time Display
3
Play Mode Display
2
Playback Display
4
Sound Mode Display
5
Music Title Display
6
Play Status Bar
7
Play Time Display
8
Bluetooth Display
*
The Bluetooth feature can
be applied only for the
appropriate model
(YP-T9B, T9JB).
10
Current Music Number/
Total Music Number Display
9
Battery Status Display
11
Total Play Time Display
1
Mono/Stereo Display
3
Frequency Location Display
2
Frequency Display
4
Battery Display
5
6
Preset/Manual/Add
Preset/Remove Preset Display
RDS Display
Music
FM Radio
Audio Track 1
00:01:42 00:05:06
1
2
3
4
5
6
7
8
9
10
11
1
2
3
BBC R2
4
5
6
10
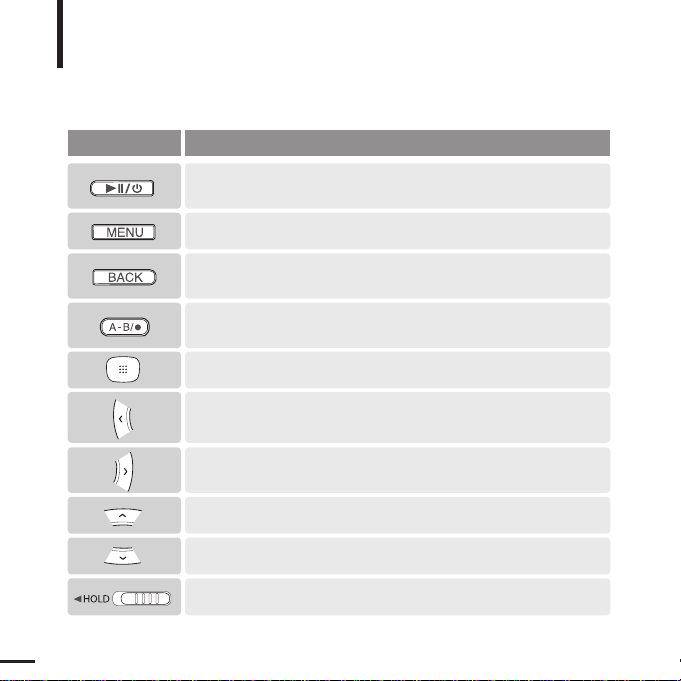
Button Functions
Basic Information
■ Press and hold for power on/off.
■ Press for play/pause.
■ Press and hold to move to the main menu.
■ Press to return to the previous stage.
■
Press and hold to start recording.
■
Press to set section repetition, stop recording and add to/delete from the playlist.
■ Press to move to the selected menu/confirm and save your selection.
■ Press and hold to quickly scan tracks.
■ Press to move to next track.
■ Press to increase the volume or move to an upper item/menu.
■ Press to reduce the volume or move to a lower item/menu.
■ Press to display the menu screen.
Buttons Functions and Use
■ Push in the direction of the arrow to lock the button functions.
■ Press and hold to quickly scan tracks.
■ Press to move to the previous track or play the current track from the begin-
ning.
11
ENG
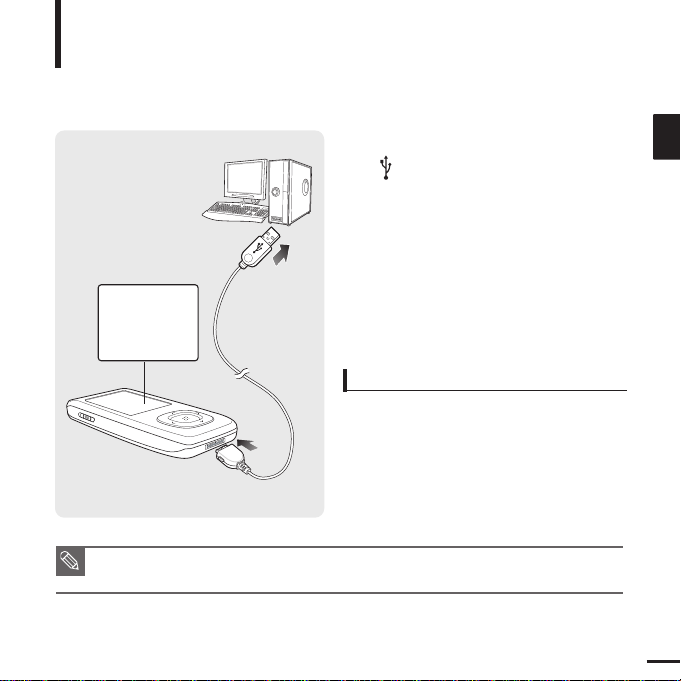
Charging the battery
Fully charge the rechargeable battery before using the
player for the first time or when it has not been used for a
while.
1
Connect the USB cable to the USB port
( ) on your PC.
2
Connect the other end of the USB
cable to the USB Connection Port on
the bottom of the player.
■ When connected with the USB cable, it takes
about 4 hours for the player to fully charge
although this may vary depending on your PC
environment.
Battery Use
■
Recharge and store within the temperature range
of 5
°C
~35
°C(40°F
~95°F).
■
Do not overcharge (longer than 12 hours).
Excessive charging or discharging may shorten
the battery’s life.
■
Battery life naturally shortens slowly over time as
it is a consumable item.
NOTE
■ If you are charging the player while it is connected to your Notebook, make sure the Notebook's
battery is also fully charged.
Screen Display
■
Charging...
■
Fully Charged
1
2
12
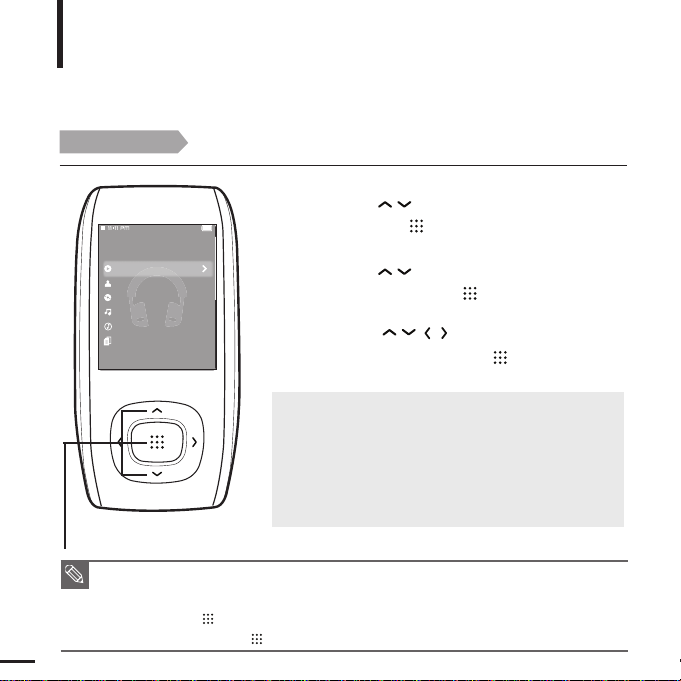
■ Press the [ ] button to move to the sub level.
■ Press the [BACK] button to move to the previous screen.
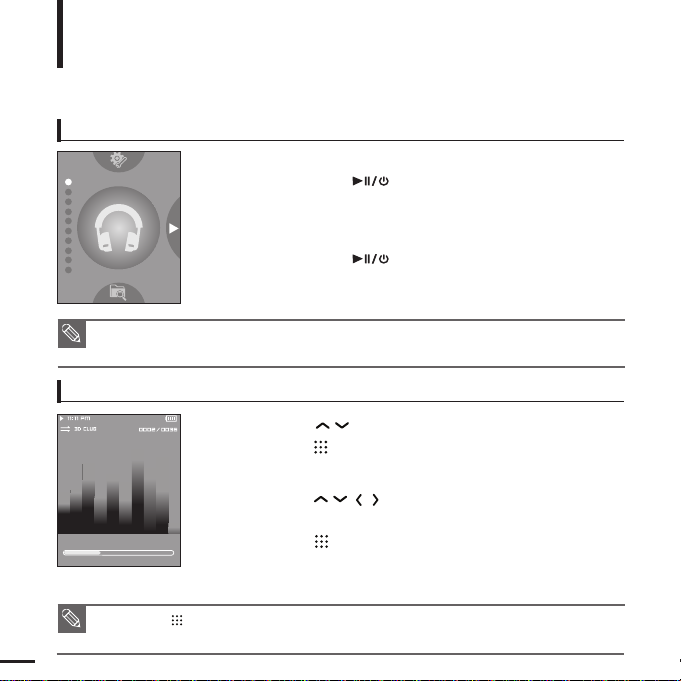
Basic Use
Turning the Power On & Off
Playing Music
Turning the Power On
Press and hold the
[]
button
■
Power is turned on.
Turning the Power Off
Press and hold the
[]
button
■
Power is turned off.
1
Press the [ ] button to select <Music> and then
press the [ ] button.
2
Press the [ ] button to select the desired music file.
3
Press the [ ] button.
■ The music file will begin playing.
NOTE
■ Power is automatically turned off when none of the buttons have been pressed for a preset
period of time (Default: 1 minute) in the pause mode.
√ Page 69
NOTE
Audio Track 1
00:01:42 00:05:06
13
ENG
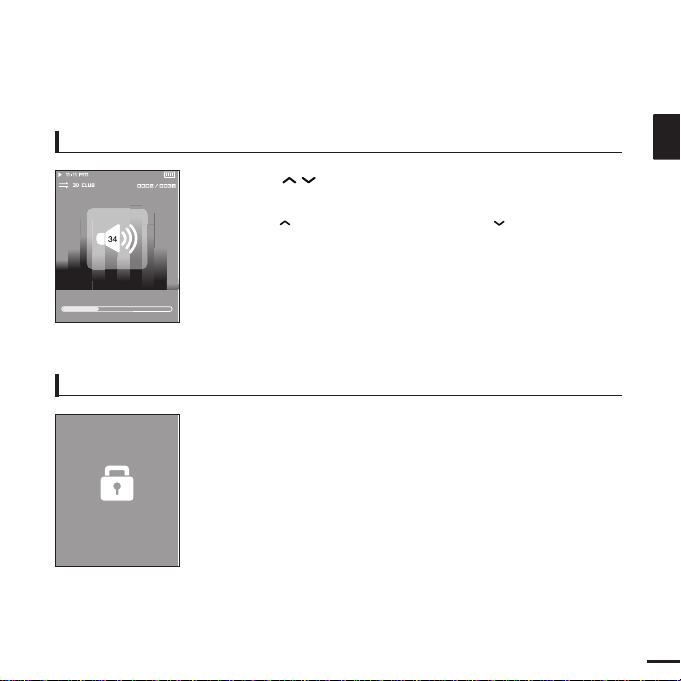
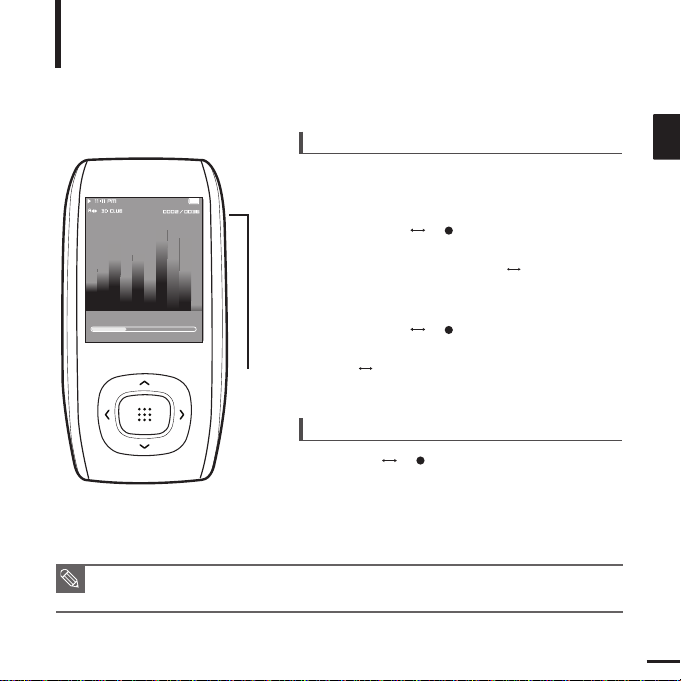
Volume Control
Lock Function
Press the [ ] button.
■ You will see a volume control icon.
■ Press the button to increase the volume or the button to decrease it.
In Hold mode, all buttons are disabled. This function is useful
when you are walking or jogging.
1
Push the [HOLD] switch in the direction of the arrow.
2
Push the [HOLD] switch in the opposite direction of the
arrow to release the Lock function.
Audio Track 1
Hold!
00:01:42 00:05:06
14
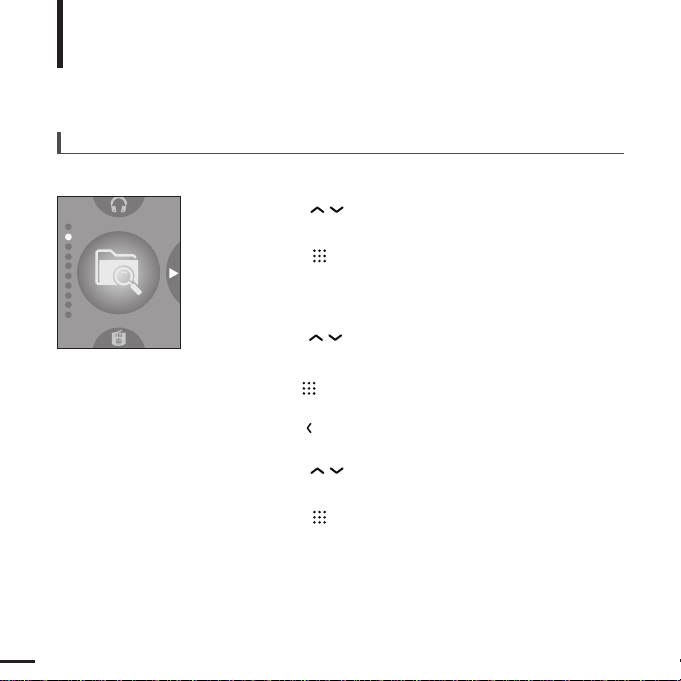
Basic Use (Continued)
Searching for Files with <File Browser>
Search easily for files using the <File Browser> function.
4
Use the
[]
button to move to the file list in the
selected folder.
■
Use the [ ] button to move to the upper step.
3
Press the
[]
button to select a folder of your choice.
6
Press the [ ] button.
■
The selected file will start playing.
Press the [ ] button.
■
The <File Browser> folder list containing Music, Text, Pictures and
Video appears.
2
Press the [ ] button to select a file of your choice.
5
1
Press the [ ] button to select <File Browser>.
15
ENG
If a product malfunction occurs, you can
re-initialize the system.
Press and hold the [MENU] and [A B/ ]
buttons at the same time.
■
The system will be initialized.
■
Your settings and files will not be affected.
Reset Function
16
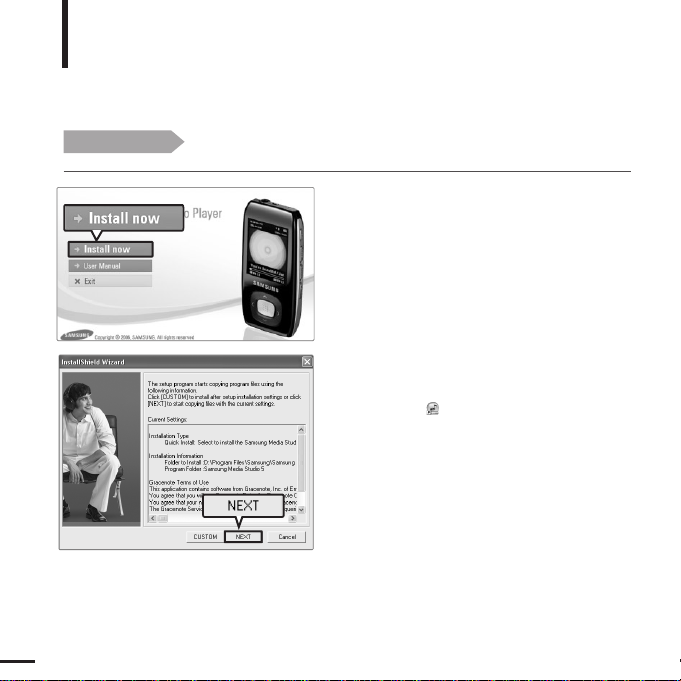
Installing Samsung Media Studio
Use Media Studio to transfer music
files from your PC to the player.
Loading Your Desired File
Before you start!
Insert the installation CD provided with the player into the CD-ROM drive.
2
Click <NEXT>.
■
Media Studio installation starts.
■
An icon is created on the desktop after
installation is complete and Media Studio
starts.
1
Click <Install now>.
17
ENG
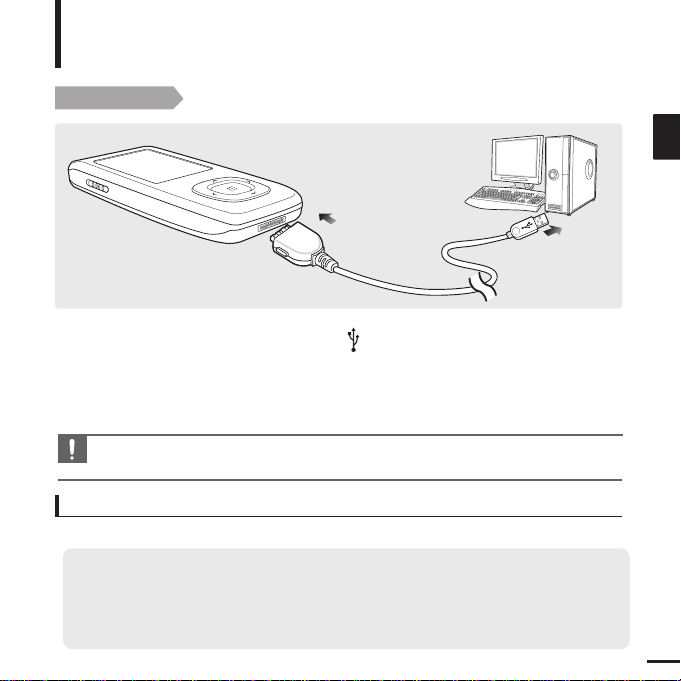
Before you start!
Use the USB Cable provided when connecting the player to your PC.
1
2
Connect the USB cable to the USB port ( ) on your PC.
2
1
Connect the other end of the USB cable to the
USB Connection Port
on bottom
of the player.
■
<USB Connected> appears on the screen display of the player.
CAUTION
■
If you connect the player through a USB hub, the connection may be unstable. Please connect the
player to the computer directly.
The PC system must meet the following minimum specifications:
■ Pentium 300MHz or higher
■ USB Port 2.0
■ Windows XP Service Pack 2 or higher
■ DirectX 9.0 or higher
■ 100MB of free hard disc space
■ CD Rom Drive (2X or higher)
■
Windows Media Player 10.0 or higher
■
Resolution 1024 X 768 or higher
PC Requirements
Connecting to your PC
Loading Your Desired File
18
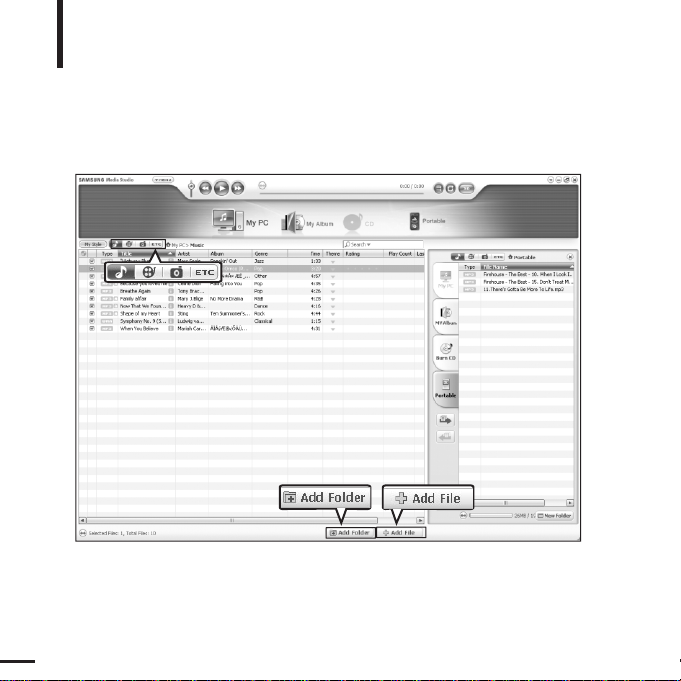
Adding Folders/Files in Samsung Media Studio
Loading Your Desired File
Please refer to Help for more information on how to use Media Studio.
■ Click <MENU> ➝ <Help> ➝ <Help> from the menu on the top of the Media Studio program.
3
3
2
[YP-T9
[YP-T9[MTP]]
Media Studio enables you to select and organize files and folders in preparation
for transfer to your player.
19
ENG
1
Media Studio will automatically start when the player is connected to your PC.
■ If the program does not start automatically, double Click the Media Studio icon on the desktop.
2
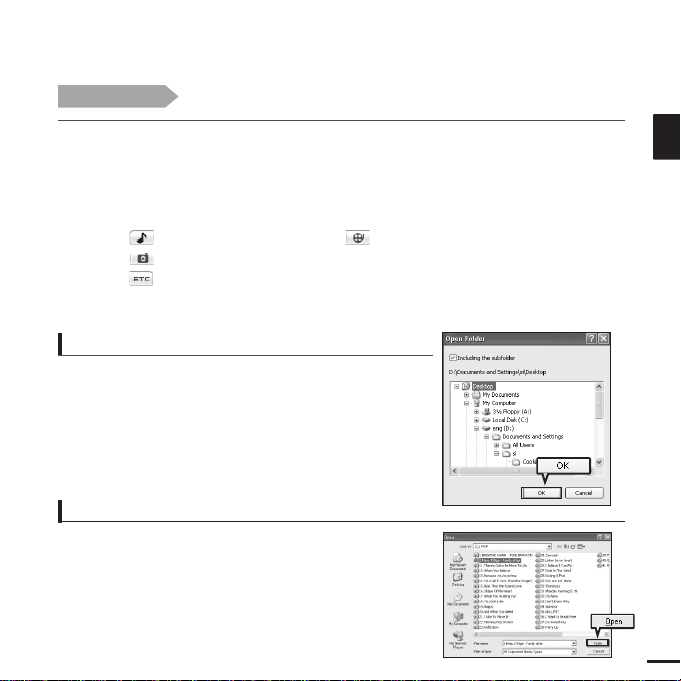
Click the desired file icon.
■
Choose the file type you want to transfer by clicking on one of these icons.
■ Click icon to display music list. ■ Click icon to display video list.
■ Click icon to display photo list
■ Click icon to display etc list. The ETC list includes file types (ex: TXT, XOV, etc) other than
music, photo, and video files.
3
Click <Add Folder> on the bottom of Media Studio.
■ The Open Folder window will appear.
Before you start!
■ Connect the player to your PC.
■ Media Studio must be installed on your PC.
To add folders
3
Click <Add File> on the bottom of Media Studio.
■ The Open window will appear.
4
Select the files to add and click <Open>.
■ The selected files are added to the list.
To add files
4
4
4
Select the folder to add and click <OK>.
■ The selected folder is added to the list on the left side the
Media Studio Screen.
20
Transferring Files to the Player with Samsung Media Studio
Loading Your Desired File
NOTE
■
Music recognition technology and related data are provided by Gracenote and
Gracenote CDDB®Music Recognition ServiceSM.
■
CDDB is a registered trademark of Gracenote. The Gracenote logo and logotype, the Gracenote
CDDB logo and logotype, and the "Powered by Gracenote CDDB" logo are
trademarks of Gracenote. Music Recognition Service and MRS are service marks of Gracenote.
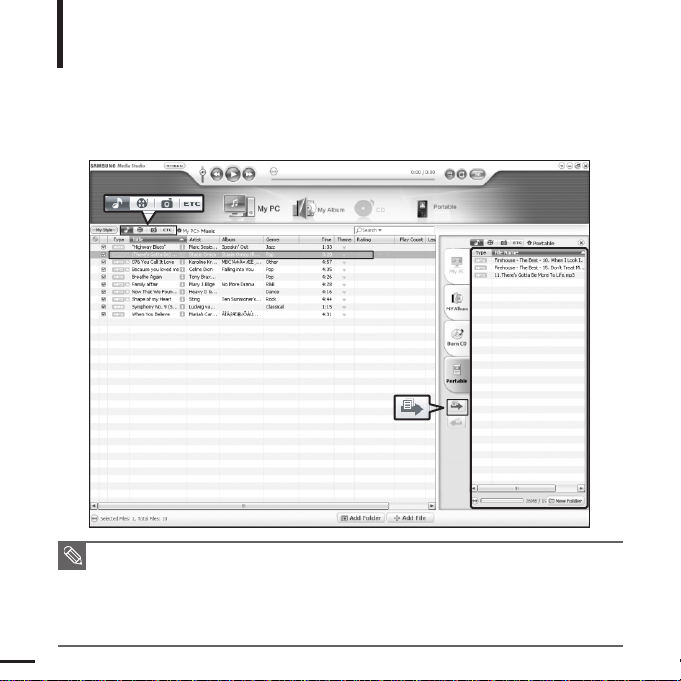
Perform the following steps to transfer files from your PC to the player.
4
3
2
Portable
window
[YP-T9[MTP]]
[YP-T9]

21
ENG
1
Media Studio will automatically start when the player is connected to your PC.
■ If the program does not start automatically, double click the Media Studio icon on the desktop.
2
Click the desired file icon.
■
Choose the file type you want to transfer by clicking on one of these icons.
■ Click icon to display music list. ■ Click icon to display video list.
■ Click icon to display photo list
■ Click icon to display etc list. The ETC list includes file types (ex: TXT, XOV, etc) other than
music, photo, and video files.
3
Select the file to transfer in the left file list.
■
Do not disconnect the USB cable during file transfer. This may cause damage to the
player or your PC.
CAUTION
■ When transferring a photo or video file to the player using <Media Studio>, it is automatically converted
into JPG(photo) or SVI(video) format before transfer. The file size is automatically adjusted, too.
NOTE
4
Click icon.
■ The selected file is transferred to the player.
Before you start!
■ Connect the player to your PC.
■ Media Studio must be installed on your PC.
Listening to Music
Listening to Music
Before you start!
Connect the earphones, then turn on the player, and check the battery.
1
Press the [ ] button to select <Music> and
then press the [ ] button.
2
Press the [ ] button to select the desired
list
and then press the [ ] button.
■ <Now Playing> : You can listen to the last played music or
recording file.
■ <Artists> : To play by artist
■ <Albums> : To play by album
■ <Tracks> : To play in numeric or alphabetical order
■ <Genres> : To play by genre
■ <Playlists> : To play by Playlist
NOTE
■ The music files compatible with the player are MP3, WMA.
■ MP1 or MP2 files which only have a changed extension to MP3, may not play on the player.
■ A file without an ID3 Tag (Unknown) is displayed as [Unknown].
■ If you press the [ ] button in Music mode, the “S” mark appears on the screen and the Street mode
is set to On. Pressing the [ ] again to disappear “S” and set off the Street mode.
√
Page 67
22
1,2,3
3
Press the [ ] button to select the
file
to play and then press the [ ] button.
■ The music file starts to play.
Now Playing
Artists
Albums
Tracks
Genres
Playlists
Music
23
ENG
To Pause
1
Press the [ ] button while the music is playing.
■
The music playback will be paused.
2
Press the [ ] button again.
■
The music will play from the point where it stopped.
To search within a track
1
Press and hold the [ ] button while the selected track is playing.
■
It searches to the beginning or the end of the track.
2
Release the button at the point you wish to start.
■
It starts playing from the point you release the button.
24
To Play from the beginning of the current track
Press the [ ] button after 5 seconds of play.
■
The current track starts playing from the beginning.
To play the previous/next track
Press the [ ] button within 5 seconds of play.
■
The previous track will start playing.
Press the [ ] button.
■
The next track will start playing.
CAUTION
■ When playing VBR files, the previous track may not play even if you press the
[]
button within
5 seconds of the play.
Listening to Music (Continued)
Listening to Music
25
ENG
To set a section for repetition
To cancel the section repetition
2,3
Audio Track 1
00:01:42 00:05:06
Section Repetition
This function enables you to listen to specific parts of a track repeatedly. Recommended for language learning.
Listening to Music
1
Play a file of your choice.
Press the [A B/ ] button again during Section
Repeat.
■ Section Repeat will be canceled.
2
Press the [A B/ ] button at the
beginning of the section you want to repeat.
■ The starting point is set and <A > will appear in
the screen display window.
3
Press the [A B/ ] button again to set the
ending of the section you want to repeat.
■ <A B> will appear on the screen and the specified
section starts to play repeatedly.
■ You can set the start and end points of the section repetition only within a single file.
NOTE
 Loading...