

Page 1
MP3 Player
user manual
imagine the possibilities
Thank you for purchasing this Samsung product.
To receive more complete service, please
register your product at
www.samsung.com/global/register
YP-S5
Page 2
features of your new MP3 Player
Good looking. Smart. Reliable. And lots of fun. Your new MP3 player
is all this and more. Its state-of-the-art technology delivers rich sound,
vibrant pictures, and action-packed games. You’ll love your new MP3
player, whether you’re exercising, downloading your favorite tunes,
watching videos, playing games, or even listening to FM Radio.
Use it once, and you’ll wonder how you ever lived without it.
HIGH-QUALITY STEREO SPEAKERS!
The player comes with stereo speakers that
slide out from the player.
PUTTING THE “MULTI” IN MULTIMEDIA
We call it an MP3 player, but it’s much more
than that. It allows you to view pictures, text,
and videos and listen to FM radio.
The built-in Bluetooth wireless technology
turns your MP3 player into your own
personal network.
TOUCH NAVIGATION!
You can tap on the touch pad to navigate
through the menus.
WHERE FORM MEETS FUNCTION
Sure, it’s sleek and good-looking. But it’s
easy to hold and use, too.
LONGER PLAY TIME AND SHORTER
DOWNLOADING!
A fully charged battery can play up to 24
hours of music or 4 hours of video(when
using the earphones).
Download times are shorter. Because of its
USB 2.0 capability, the player is much faster
than models with USB 1.1.
ACOUSTIC WONDER
Your new MP3 player has built-in DNSe™
(Digital Natural Sound engine), Samsung’s
unique sound technology created to deliver
richer, deeper sound for an unbelievable
listening experience.
Page 3
safety information
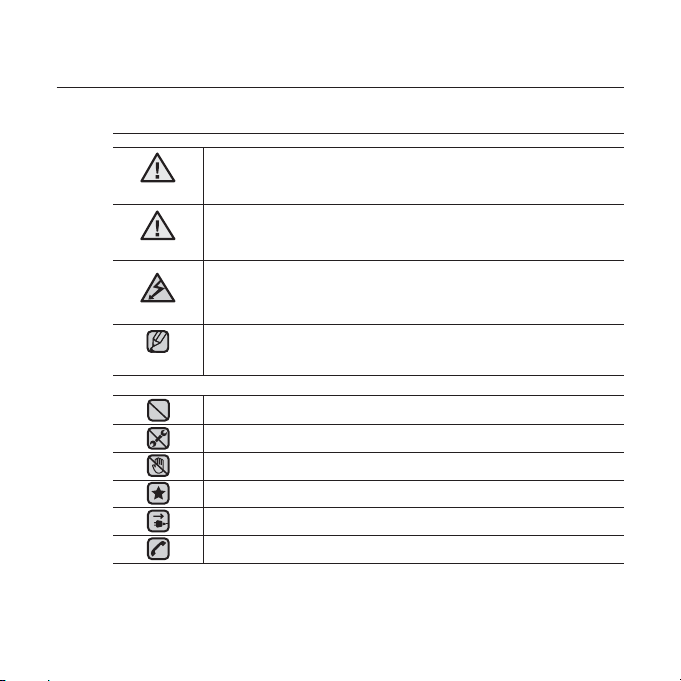
What the icons and signs in this user manual mean :
WARNING
CAUTION
CAUTION
NOTE
These warning signs are here to prevent injury to you and others.
Please follow them explicitly.
After reading this section, keep it in a safe place for future reference.
Means that death or serious personal injury is a risk.
Means that there is a potential risk for personal injury or
material damage.
To reduce the risk of fi re, explosion, electric shock, or
personal injury when using your MP3 Player, follow
these basic safety precautions:
Means hints or referential pages that may be helpful to
operate the player.
Do NOT attempt.
Do NOT disassemble.
Do NOT touch.
Follow directions explicitly.
Unplug the power plug from the wall socket.
Call the service center for help.
Page 4
safety information
This manual describes how to properly use your new mp3 player.
Read it carefully to avoid damaging the player and injuring yourself.
Pay particular attention to the following serious warnings:
PROTECT YOURSELF
Do not disassemble, repair, or modify this product on your own.
Do not get the product wet or drop it in water. If the product gets wet, do
not switch it on because you could get an electric shock. Instead, contact
CAUTION
a Samsung Customer Service Center at 1-800 SAMSUNG.
Do not use the earphones while you are driving a bicycle, automobile or
CAUTION
motorcycle.
It can cause a serious accident, and furthermore, is prohibited by law in some
areas.
Using the earphones while walking or jogging on a road, in particular, on a
crosswalk can lead to a serious accident.
For your safety, make sure the earphone cable does not get in the way of
your arm or other surrounding objects while you are taking exercise or a
walk.
Do not place the product in damp, dusty, or sooty areas because these
WARNING
environments could lead to fi re or electric shock.
Page 5
PROTECT YOURSELF
Using earphones or headphones for an extended time may cause serious
WARNING
damage to your hearing.
If you are exposed to sound louder than 85db for an extended time, you may
adversely affect your hearing. The louder the sound is, the more seriously damaged
your hearing may be (an ordinary conversation is between 50 to 60db and road
noise is approximately 80db). You are strongly advised to set the volume level to
medium (the medium level is usually less than 2/3 of the maximum).
If you feel a ringing in the ear(s), lower the volume or stop using the
earphones or headphones.
PROTECT YOUR MP3 PLAYER
Do not leave the player in temperatures above 95°F (35°C), such as a
sauna or a parked car.
Do not cause excessive impact on the player by dropping it.
Do not place heavy objects on top of the player.
Prevent any foreign particles or dust from entering into the product.
Do not place the product near magnetic objects.
Be sure to backup important data. Samsung is not responsible for data loss.
Use only accessories provided by or approved by Samsung.
Do not spray water on the product. Never clean the product with chemical
substances such as benzene or thinner, as it may cause fi re, electric
CAUTION
shock or deteriorate the surface.
Failure to follow these instructions may lead to physical injuries or damage to
CAUTION
the player.
When printing this user manual, we recommend that you print in color and
NOTE
check “Fit to Page” in the print option for better viewing.
Page 6

SAFETY INFORMATION
FCC
This device complies with part 15 of the FCC Rules.
Operation is subject to the following two conditions:
(1) This device may not cause harmful interference, and
(2) This device must accept any interference received, including interference
that may cause undesired operation.
Caution: Any changes or modifi cations in construction of this device which are
not expressly approved by the party responsible for compliance could void the
user’s authority to operate the equipment.
Note: This equipment has been tested and found to comply with the limits for
a Class B digital device, pursuant to part 15 of the FCC Rules. These limits
are designed to provide reasonable protection against harmful interference
in a residential installation. This equipment generates, uses and can radiate
radio frequency energy and, if not installed and used in accordance with the
instructions, may cause harmful interference to radio communications, However,
there is no guarantee that interference will not occur in a particular installation.
If this equipment does cause harmful interference to radio or television
reception, which can be determined by turning the equipment off and on, the
user is encouraged to try to correct the interference by one or more of the
following measures:
- Reorient or relocate the receiving antenna.
- Increase the separation between the equipment and receiver.
- Connect the equipment to an outlet on a circuit different from that to which
the receiver is connected.
- Consult the dealer or an experienced radio/TV technician for help.
Page 7

SAFETY INFORMATION (Continued)
Declaration of Conformity
We, Samsung Electronics Co.,Ltd., declares under its sole responsibility that
the product, Trade name Samsung & Model name YP-S5, has been tested
according to the part 15 of the FCC Rules.
Party responsible for Product Compliance
Samsung Electronics America QA Lab.
18600 Broadwick Street, Rancho Dominguez, CA 90220
Page 8

contents
THE BASICS
12
12 What’s included
13 Your MP3 Player
16 Screen displays
19 Using the touch button
19 Using the speakers
20 Charging the battery
21 Caring for the battery
21 Turning the Power on & off
22 Playing music
22 Controlling the volume
23 Disabling the buttons
23 Browsing for fi les using
“File Browser”
24 Deleting fi les with “File Browser”
25 Changing the settings and
preferences
25 Menu Style Settings
26 Sound Settings
27 Display Settings
28 Language Settings
29 Time Settings
30 System Settings
32 Resetting the system
SAMSUNG MEDIA STUDIO
33
33 PC requirements
34 Installing Samsung Media Studio
35 Transferring fi les to the player with
Samsung Media Studio
Page 9

contents
LISTENING TO MUSIC
40
38 Listening by category
40 Pausing
40 Searching within a track
40 Playing from the beginning of the
current track
40 Playing the previous track
40 Playing the next track
41 Creating a playlist using Samsung
Media Studio
41 Creating a playlist
42 Adding music fi les to a playlist you’ve
created
43 Transferring a playlist to your player
using Media Studio
44
Creating a playlist on your mp3 player
45 Playing a playlist
46 Deleting a fi le from the playlist
46 Deleting all fi les from the playlist
47 Using the music menu
WATCHING A VIDEO
56
56 Pausing
57 To move to a specifi c frame
57 To play the previous video fi le
57 To play the next video fi le
58 Using the video menu
Page 10

contents
VIEWING PICTURES
60
60 Viewing pictures
61 Using the picture menu
LISTENING TO
FM RADIO
65
USING THE DATACAST
75
ENJOYING
THE PRIME PACK
78
65 To use the mute function
66 To search for FM stations
67 Using the FM radio menu
75 Registering a channel
76 Creating a new channel group
76 Transferring a datacast from
<Media Studio>
77 Viewing Datacasts
78 Reading text
79 Using the text menu
82 Voice recording
83 Using the voice recording menu
84 Playing video games
86 Setting the alarm
89 Viewing the world clock
90 Using the speakers to listen to music
from an external device
Page 11

contents
USING BLUETOOTH
91
91 What is Bluetooth?
93 Using a Bluetooth stereo headset
96 Using a Bluetooth mobile phone
102 Transferring fi les to/from a Bluetooth
device
107 Using the Bluetooth menu
108 Bluetooth settings
UPGRADING FIRMWARE
110
TROUBLESHOOTING
112
APPENDIX
116
110 Upgrading fi rmware
112 Troubleshooting
116 Menu Tree
117 Product Specifi cations
119 License
120 Warranty
Page 12
the basics
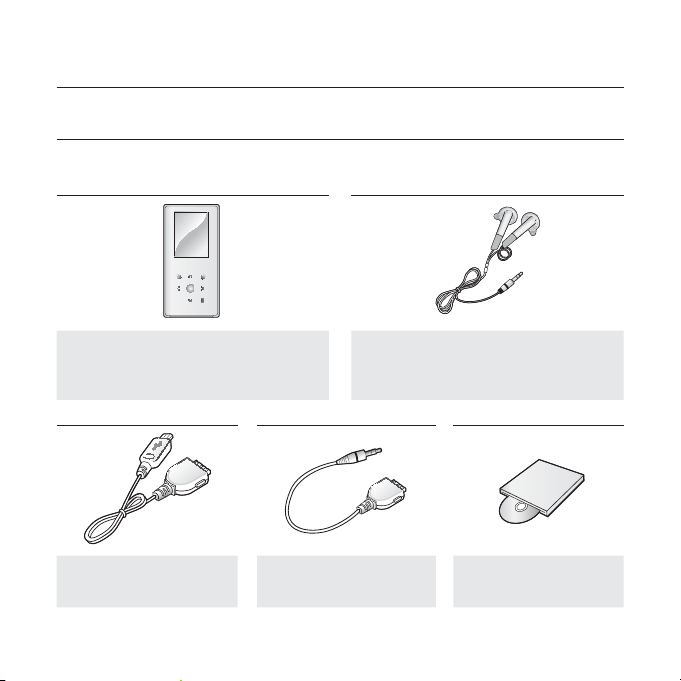
WHAT’S INCLUDED
Your new mp3 player comes with these accessories. If you’re missing any of these
items, contact Samsung Customer Service at 1-800-SAMSUNG (1-800-726-7864).
Earphones
Player
Black : AH59-01883A
White : AH59-01885A
USB Cable
AH39-00899A
The accessories in your box may look slightly different than these.
12 _ the basics
Audio in Cable
AH39-00900A
Installation CD
AH46-00048B
Page 13
YOUR MP3 PLAYER
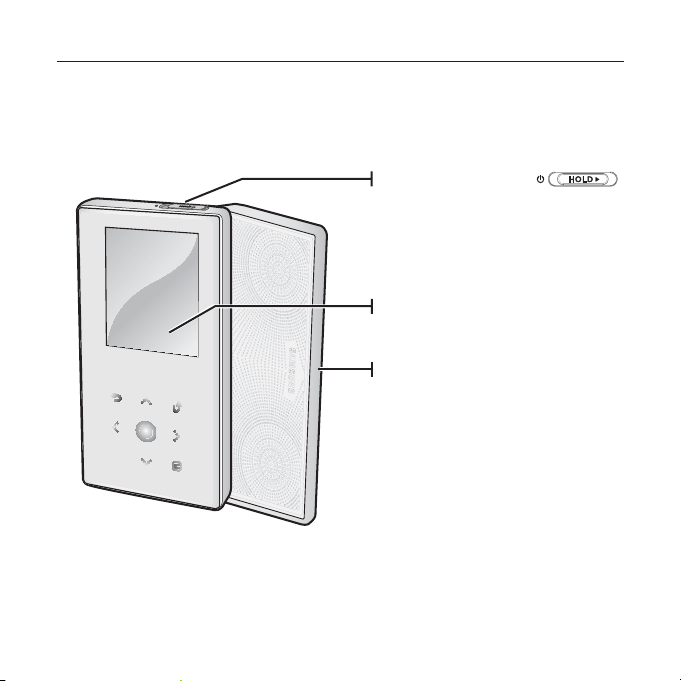
Power & Hold switch
Slide and hold in the opposite
direction of the arrow for power
on/off.
Slide in the direction of the arrow
to lock the button functions.
Screen display
Speakers
the basics _ 13
Page 14
YOUR MP3 PLAYER (Continued)
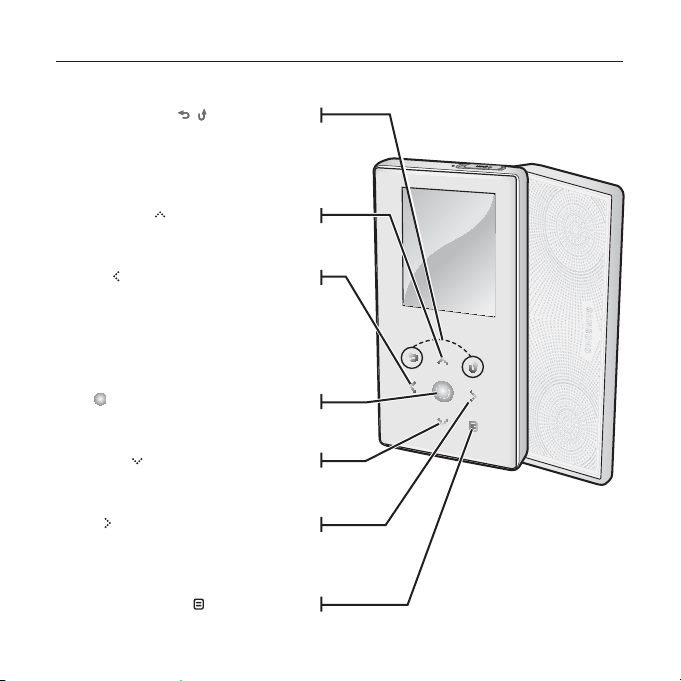
These buttons are ‘Touch’ buttons.
Tap to move to the previous
Press and briefl y hold to move to
the main menu screen.
Tap to increase the volume or
move to an upper item/menu.
Left fi le browser button
Tap to move to the previous track/
menu or play the current track
Press and briefl y hold to quickly
Play/Pause, Select button
Tap to select the play/pause and
function, move to the next screen.
Down volume button
Tap to reduce the volume or move
to a lower item/menu.
Right fi le browser button
Tap to move to next track/menu.
Press and briefl y hold to quickly
Tap to display the menu.
14 _ the basics
Back button
screen.
Up volume button
from the beginning.
scan tracks.
scan tracks.
Menu button
Page 15
YOUR MP3 PLAYER (Continued)
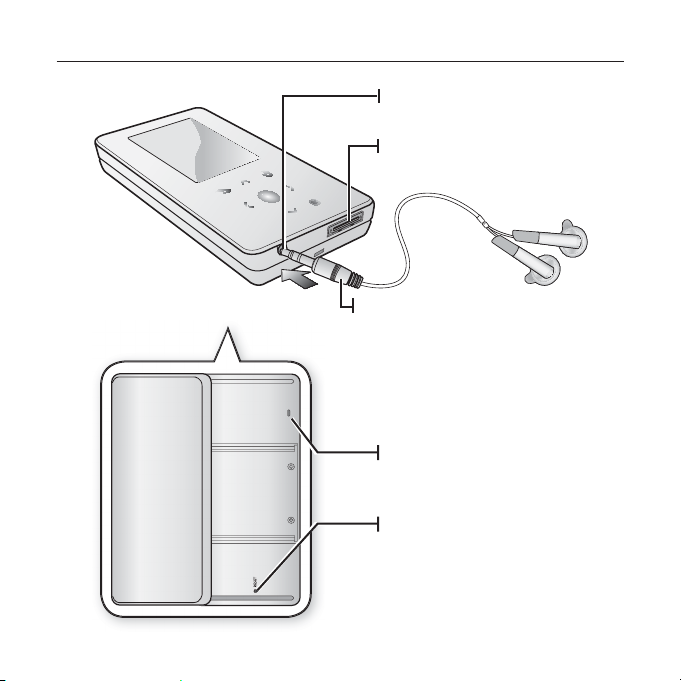
Earphones
Labeled “L” for the left earpiece
and “R” for the right earpiece.
Also serves as an antenna for FM
Radio in the MP3 player.
Earphone connection jack
USB connection port
Microphone
Reset Hole
If a player malfunction occurs,
press the reset hole with a pointed
object to re-initialize the system.
the basics _ 15
Page 16
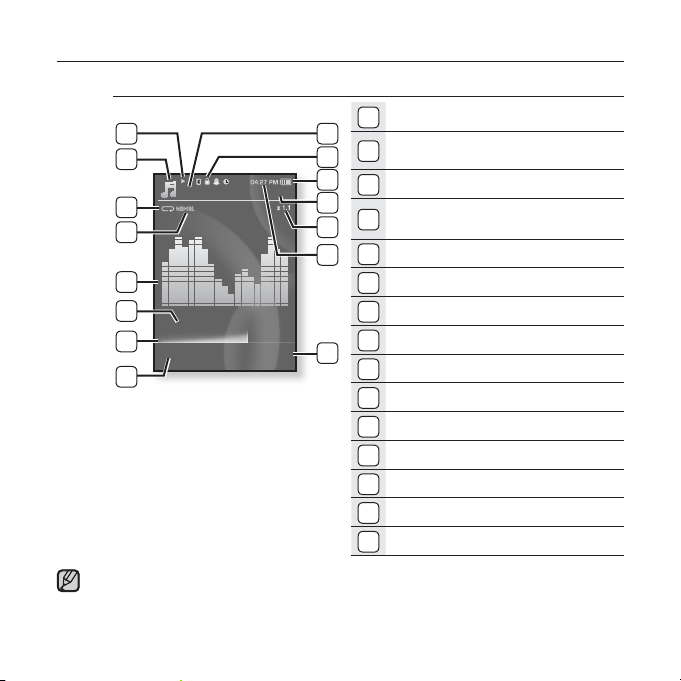
SCREEN DISPLAYS
Music
8
9
Music
10
11
12
13
1.Life is cool
14
02:13 04:28
15
The screen pictures are for illustration purposes only. The actual screen may differ.
NOTE
15/20
1
1
2
3
4
5
6
7
Parent Menu Indicator
Bluetooth/Lock/Alarm/
2
Sleep Timer Indicator
3
Battery Status
Current track playing / Total
4
number of tracks Indicator
5
Play Speed Indicator
6
Current Time
7
Total Play Time
8
Play/Pause, Search Indicator
9
Music Mode Indicator
Play Mode Indicator
10
DNSe Mode Indicator
11
Music Play Screen
12
Music Title
13
Play Status Bar
14
Current Play Time
15
16 _ the basics
Page 17
SCREEN DISPLAYS (Continued)
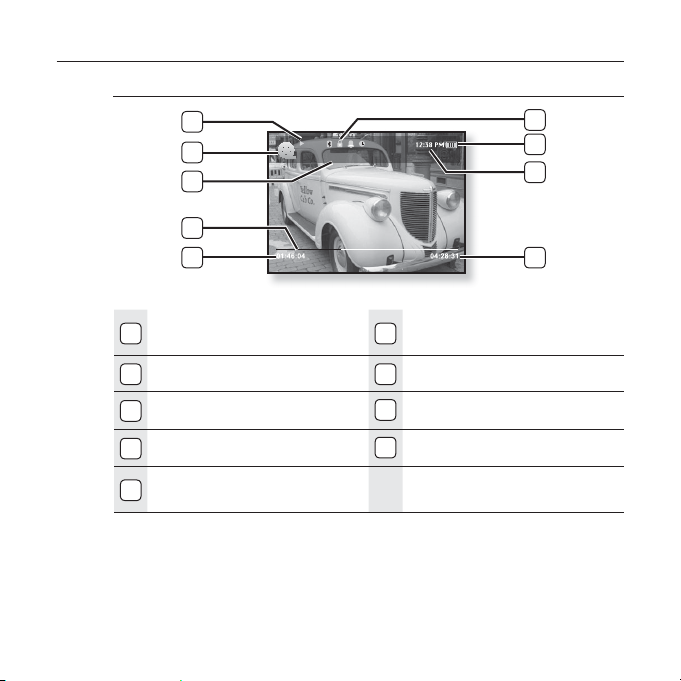
Video
5
6
7
8
9
Bluetooth/Lock/Alarm/
1
Sleep Timer Indicator
2
Battery Status
Video Track 1
6
Video Mode Indicator
7
File Name
1
2
3
4
3
Current Time
4
Total Play Time
Play/Pause, Search
5
Indicator
8
Play Status Bar
9
Current Play Time
the basics _ 17
Page 18
SCREEN DISPLAYS (Continued)
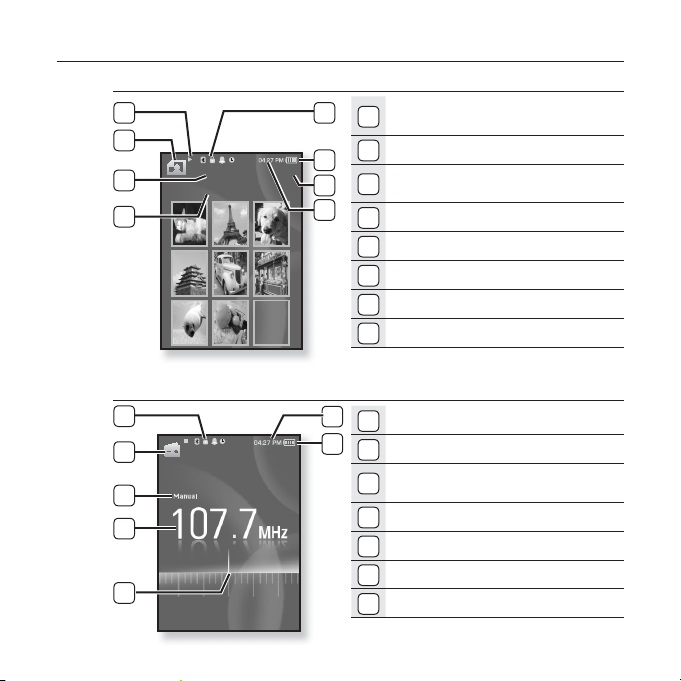
Picture
5
6
7
Picture Image 1.jpg
8
[Preview Screen]
FM Radio
3
4
5
6
7
Pictures
1
1
2
2
1/8
3
3
4
4
5
6
7
8
1
1
2
2
3
4
5
6
7
Bluetooth/Lock/Alarm/
Sleep Timer Indicator
Battery Status
Current fi le /
Total number of fi les Indicator
Current Time
Music Play Status
Picture Mode Indicator
Parent Menu Indicator
File Name
Current Time
Battery Status
Bluetooth/Lock/Alarm/
Sleep Timer Indicator
Radio Mode Indicator
Manual/Preset Indicator
Current Frequency(MHz) Indicator
Frequency Location Indicator
18 _ the basics
Page 19
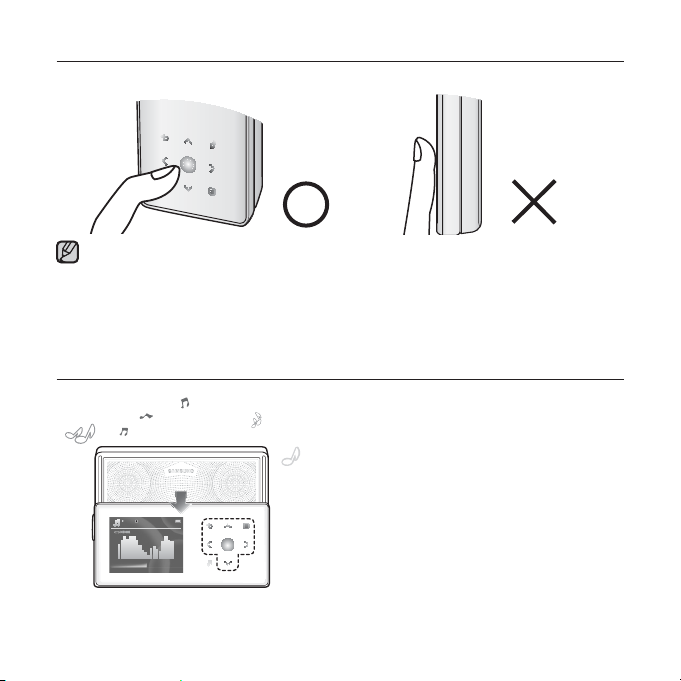
USING THE TOUCH BUTTON
Tap on touch screen with your fi ngertip.
To avoid damage to the touch screen, do not use any object other than your fi ngers
to operate it.
NOTE
Do not tap on the touch screen if your fi ngers are not clean.
Do not tap on the touch screen with gloves on.
The touch screen may not function if you use a fi ngernail or other instruments such
as a ballpoint pen.
USING THE SPEAKERS
Slide the middle of the player in the arrow
direction while listening to music or the radio.
You can listen to music through the speakers.
As the earphone wires functions as FM
antennas, make sure that the earphones are
connected to the player if you want to listen to
03:28 PM
Music
1.Life is cool
02:13 04:28
15/20
the radio through the speakers.
If you want to use the earphones to listen to
music, close the speakers panel by sliding it
back to the original position.
If you close the slide panel, the speakers will
shut off.
Please position the player horizontally when
using the speakers.
the basics _ 19
Page 20
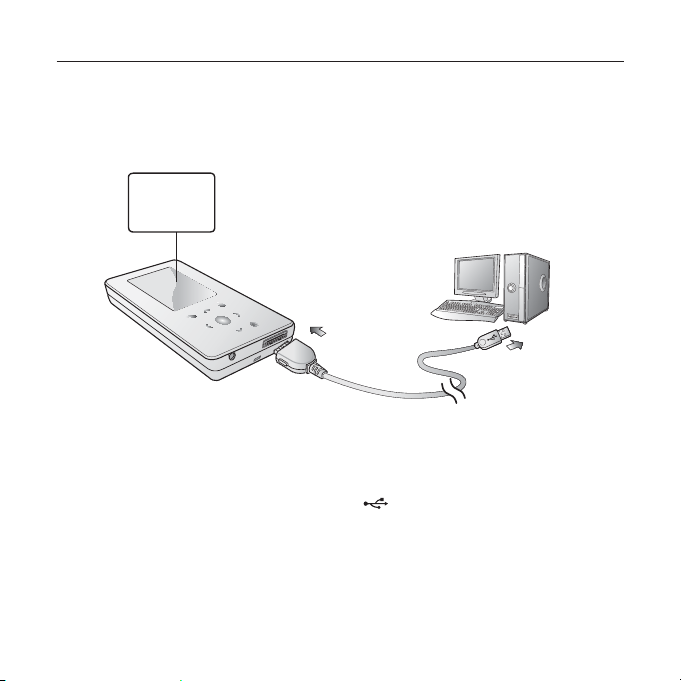
CHARGING THE BATTERY
Charge it before using the player for the fi rst time and when you haven’t used it
for a long time.
The battery for your mp3 player will fully charge in about 3 hours, although total
charging time varies depending on your PC environment.
Screen Display
USB Connected
Charging...
Fully Charged
1
2
1. Connect the other (larger) end of the USB cable to the USB Connection Port
on the bottom of the player.
2. Connect the USB cable to the USB port (
20 _ the basics
) on your PC.
Page 21
CARING FOR THE BATTERY
Your battery will last longer if you follow these simple guidelines for caring and
storing it.
• Recharge and store the battery within the temperature range of 40°F~95°F
(5°C~35°C ).
• Do not overcharge (longer than 12 hours).
Excessive charging or discharging may shorten the battery’s life.
• Battery life naturally shortens slowly over time.
If you are charging the player while it is connected to a laptop computer, make sure
the laptop’s battery is also fully charged or that the laptop is plugged into its power
NOTE
source.
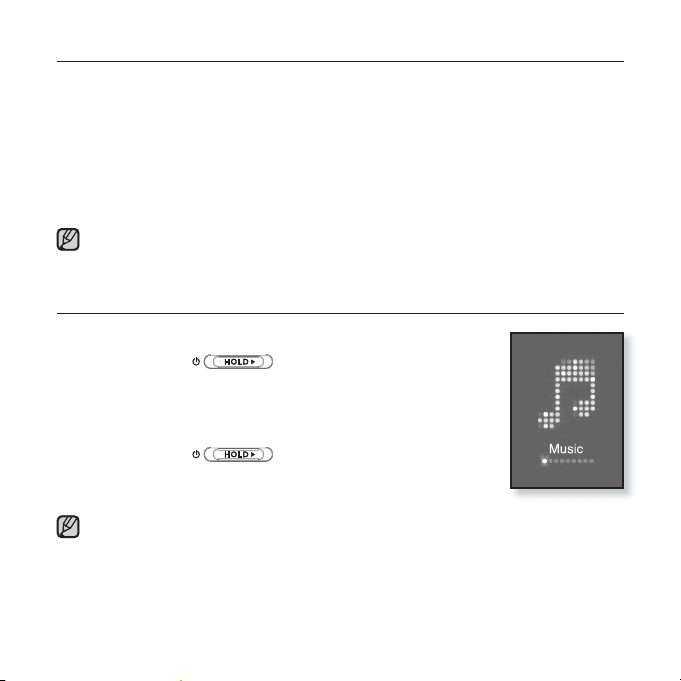
TURNING THE POWER ON & OFF
Turning the Power on
Slide and hold the
direction of the arrow.
Power is turned on.
Turning the Power off
Slide and hold the
direction of the arrow again.
Power is turned off.
Your mp3 player will be automatically turned off when none of the buttons have
NOTE
been pressed for a specifi c length of time in the pause mode. The factory setting for
<Auto Power Off> is 1 minute, but you can change this length of time. See page 31
for more information.
switch in the opposite
switch in the opposite
the basics _ 21
Page 22
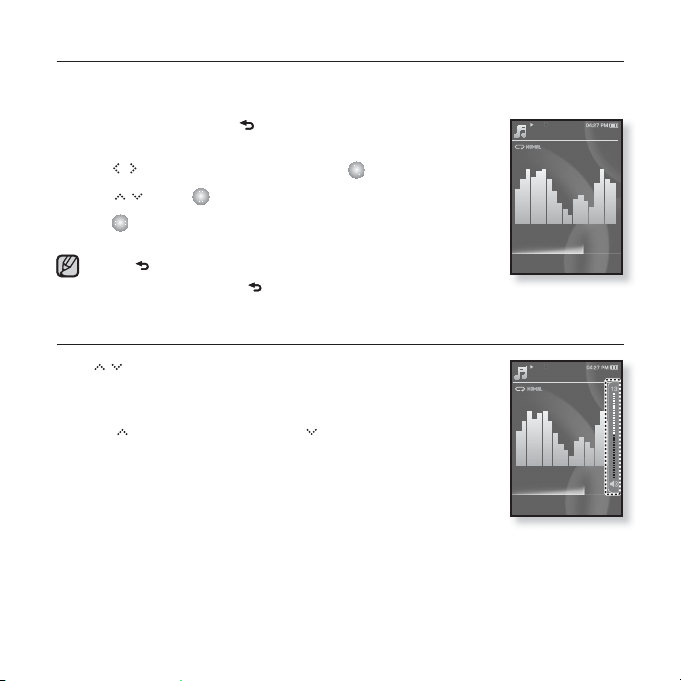
PLAYING MUSIC
Load music fi les onto your new mp3 player using Samsung Media Studio.
Learn more about Media Studio on pages 35~37.
1. Press and briefl y hold [ ] to move to the main menu
screen.
Music
2. Tap [ ] to select <Music> and tap [ ].
3. Use [ ] and [ ] to select a music fi le of your choice.
4. Tap [ ].
The music fi le will begin playing.
Ta p [
NOTE
] to move to the previous screen.
Press and briefl y hold [
] to move to the main menu screen.
1.Life is cool
02:13 04:28
CONTROLLING THE VOLUME
Tap [ ].
You will see a volume control icon.
The range of volume is set between 0 to 30.
] to increase the volume or [ ] to decrease it.
Tap [
Music
1.Life is cool
02:13 04:28
15/20
15/20
22 _ the basics
Page 23
DISABLING THE BUTTONS
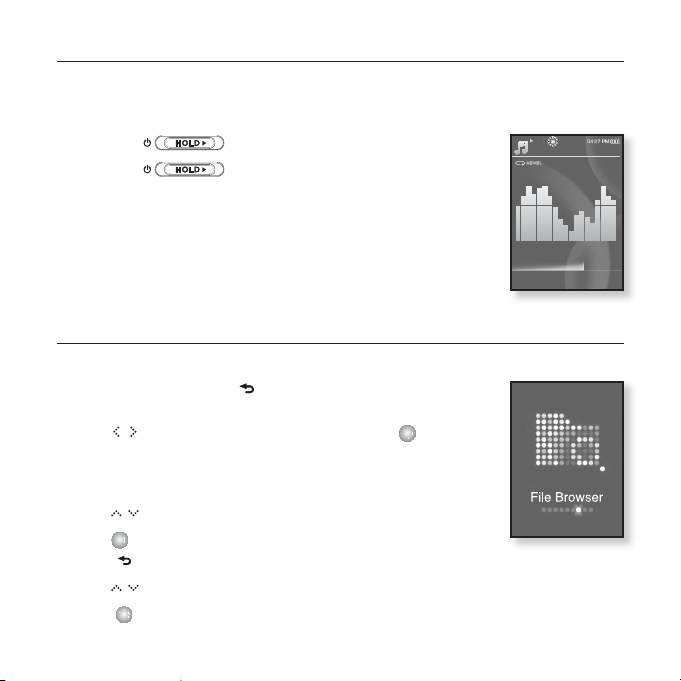
The hold function disables all the other buttons on the mp3 player, so that if
you accidentally bump one-while working out, for example-your music won’t be
interrupted.
1. Slide the in the direction of the arrow.
Music
2. Slide the in the opposite direction of the arrow
to release the Lock function.
1.Life is cool
02:13 04:28
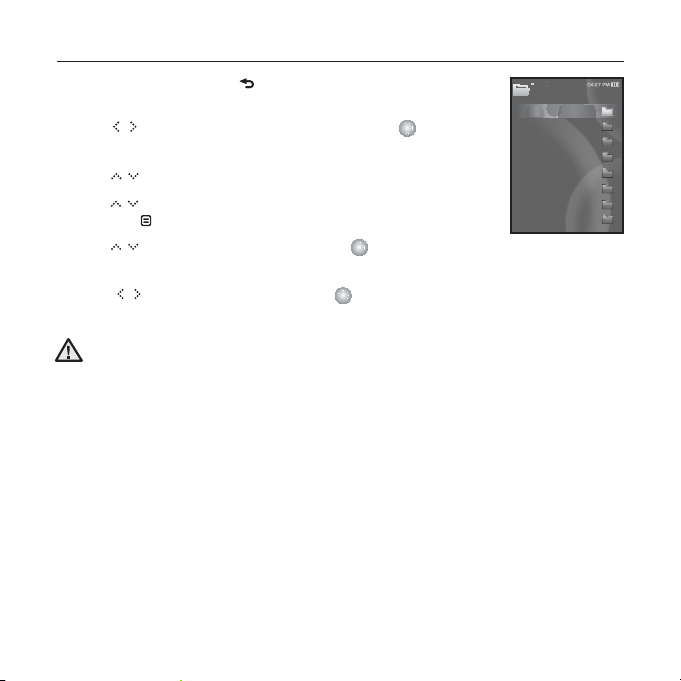
BROWSING FOR FILES USING “File Browser”
Search easily for fi les using the “File Browser” function.
1. Press and briefl y hold [ ] to move to the main menu
screen.
2. Tap [ ] to select <File Browser> and tap [ ].
The <File Browser> folder list containing “Music, Playlists, Video,
Pictures, Datacasts, Texts, Recorded Files and Received Files ”
appears.
3. Tap [ ] to select a desired folder.
4. Tap [ ] to bring up the fi le list in the selected folder.
Tap [ ] to move to the previous screen.
5. Tap [ ] to select a desired fi le.
6. Tap [ ].
The fi le will start playing.
the basics _ 23
15/20
Page 24
DELETING FILES WITH “File Browser”
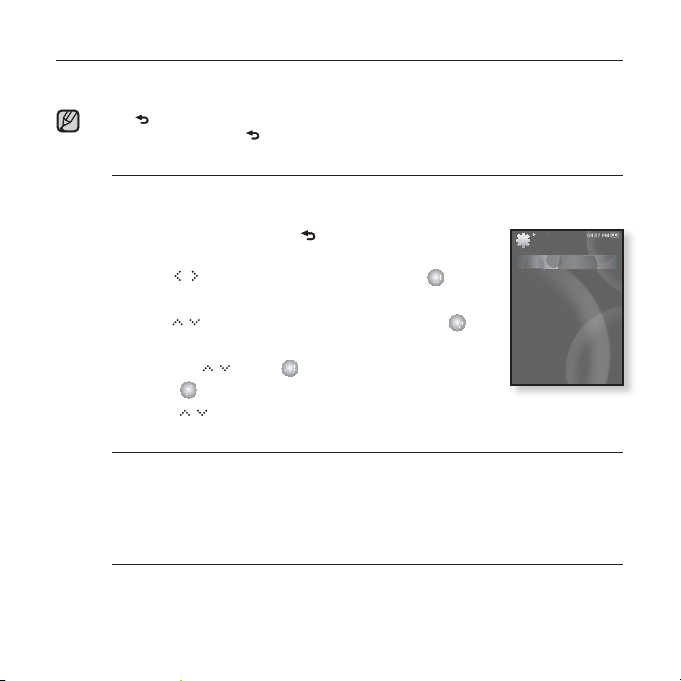
1. Press and briefl y hold [ ] to move to the main menu
screen.
2. Tap [ ] to select <File Browser> and tap [ ].
The <File Browser> folder list containing appears.
3. Tap [ ] to select a desired folder.
4. Tap [ ] to select the fi le that you want to delete
and tap [ ].
5. Tap [ ] to select <Delete> and tap [ ].
The confi rmation window will appear.
6. Tap [ ] to select <Yes> and tap [ ].
The fi le will be deleted
Once fi les are deleted, they cannot be recovered.
CAUTION
File Browser
Music
Playlists
Video
Pictures
Datacasts
Tex t s
Recorded Files
Received Files
24 _ the basics
Page 25
CHANGING THE SETTINGS AND PREFERENCES
Your mp3 player comes with settings and preferences that were set up at the
factory, but you can change these pre-set values to truly customize your player.
Tap [ ] to move to the previous screen.
Press and briefl y hold [
NOTE
Menu Style Settings
You can change the menu design and font and delete the background
image of the main menu.
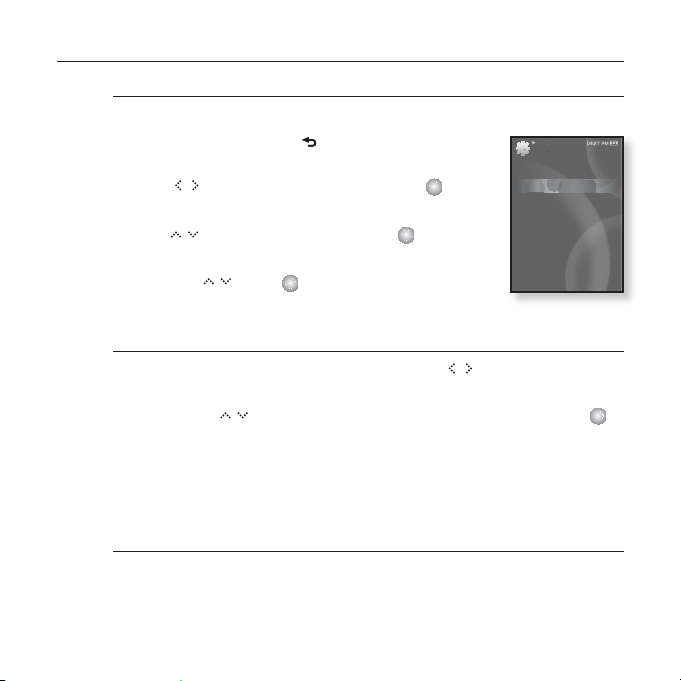
1. Press and briefl y hold [
menu screen.
2. Tap [
3. Tap [ ] to select <Menu Style> and tap [ ].
4. Use the [ ] and [ ] to set functions.
Menu Style Setting Options
Menu Design : You can change the style of the main menu screen. Select from
<Crystal>, <My Skin>, <Stella>.
Font : You can change the font type of the menu language. Select one from 3
font types. In some menu languages, <Font> will be disabled.
Reset My Skin : Initializes the background image of the screen display to its
default image.
] to select <Settings> and tap [ ].
The <Settings> menu appears.
The <Menu Style> menu appears.
Tap [ ] to move to the next item/select the menu.
Tap [
] to move to the main menu screen.
] to move to the main
] to move up or down through the current menu.
Settings
Menu Style
Sound
Display
Language
Time
System
the basics _ 25
Page 26
CHANGING THE SETTINGS AND PREFERENCES (Continued)
Sound Settings
You can set the master EQ, beep sound, volume limit.
1. Press and briefl y hold [ ] to move to the main
menu screen.
2.
Tap [ ] to select <Settings> and tap [ ].
The <Settings> menu appears.
3.
Tap [ ] to select <Sound> and tap [ ].
The <Sound> menu appears.
4. Use the [ ] and [ ] to set functions.
Sound Setting Options
Master EQ : You can optimize sound settings. Tap [ ] to select the
frequency you want to adjust. The frequencies that can be adjusted are <60Hz>,
<125Hz>, <250Hz>, <500Hz>, <1KHz>, <2KHz>,<4KHz>, <8KHz>, and
<16KHz>.Tap [
Beep Sound : Sets the beep sound for button operations to on or off. Select
from <Off> and <On>.
Volume Limit : You can avoid hearing damage by setting the limit of the volume
when using the earphone. <On> will limit the maximum volume level to 15.
The maximum volume level when volume limit is set to <Off> is 30. Even if you
have selected <Off>, the volume will be set back to 15 to avoid hearing damage
when you turn the player back on.
] to adjust the selected frequency’s level and then tap [ ].
Settings
Menu Style
Sound
Display
Language
Time
System
26 _ the basics
Page 27
CHANGING THE SETTINGS AND PREFERENCES (Continued)
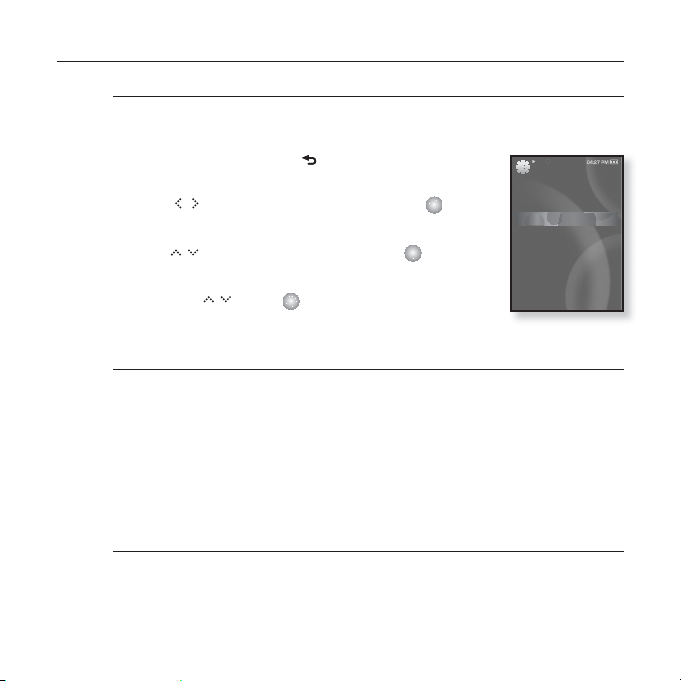
Display Settings
Change the display off time, the screen saver and brightness of your
screen.
1. Press and briefl y hold [ ] to move to the main
menu screen.
2.
Tap [ ] to select <Settings> and tap [ ].
The <Settings> menu appears.
3.
Tap [ ] to select <Display> and tap [ ].
The <Display> menu appears.
4. Use the [ ] and [ ] to set functions.
Display Setting Options
Display Off : If no button is tapped within the time set shown below, the screen
display will automatically be turned off. Select either <15 sec>, <30 sec>,
<1 min>, <3 min>, <5 min>, or <Always On>. Press any button to turn it back on.
Screen Saver : You can set an image to use as a screen saver. Select either
<Analog Clock>, <Digital Clock>, <Animation 1>, <Animation 2>,< Animation 3>
and set the wait time. You can select from <Off>, <15sec>, <30sec>, <1min>,
<3min> and <5min>. If no button is tapped within the time set shown above, the
player will display the screen saver image.
Brightness : You can adjust the brightness of the display screen. Select a level
from <0-10>, where 10 is the brightest.
Settings
Menu Style
Sound
Display
Language
Time
System
the basics _ 27
Page 28
CHANGING THE SETTINGS AND PREFERENCES (Continued)
Language Settings
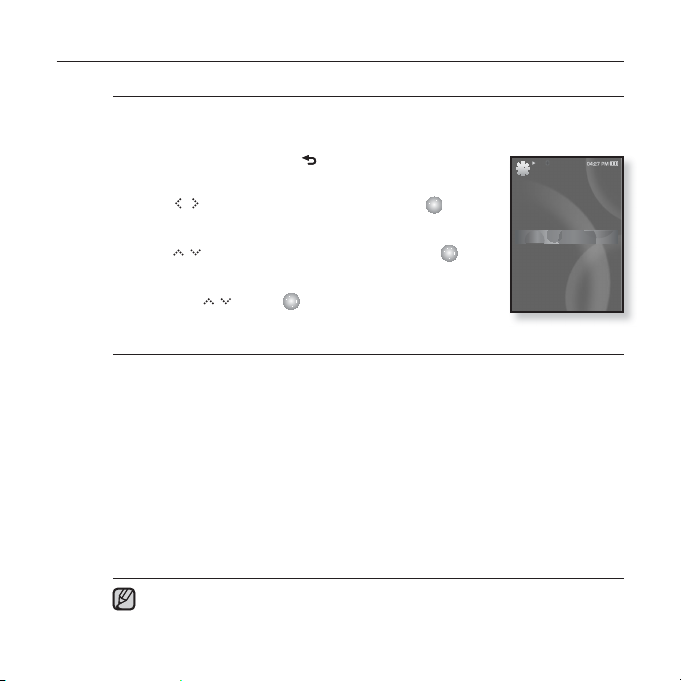
The menus on your new mp3 player can be set to appear in any one of
multiple languages. You can change your preference language easily.
1. Press and briefl y hold [ ] to move to the main
menu screen.
2.
Tap [ ] to select <Settings> and tap [ ].
The <Settings> menu appears.
3. Tap [ ] to select <Language> and tap [ ].
The <Language> menu appears.
4. Use the [ ] and [ ] to set functions.
Language Setting Options
Menu : Set the menu language. Select from <English>, <한국어>, <Français>,
<Deutsch>, <Italiano>, <日本語>, <ㅔԧЁ᭛>, <㐕储Ё᭛>, <Español>,
<Ɋɭɫɫɤɢɣ>, <Magyar>, <Nederlands>, <Polski>, <Português>, <Svenska>,
<ѳъѕ>, <ýeština>, <ƧnjnjLjǎNJNjƽ>, <Türkçe>, <Norsk>, <Dansk>, <Suomi>,
<Español (Sudamérica)>, <Português (Brasil)>, <Indonesia>, <TiӃng ViӋt>,
<Bulgarian>, <Română>, <ɍɤɪɚʀɧɫɶɤɚ>, <Slovenšþina> or <Slovenský>.
Contents : Set the language in which the track information and Text will
appear. Select from <English>, <Korean>, <French>, <German>, <Italian>,
<Japanese>, <Simplifi ed Chinese>, <Tranditional Chinese>, <Spanish>,
<Russian>, <Hungarian>, <Dutch>, <Polish>, <Portuguese>, <Swedish>,
<Thai>, <Finnish>, <Danish>, <Norwegian>, <Farsi>, <Afrikaans>, <Basque>,
<Catalan>, <Czech>, <Estonian>, <Greek>, <Hrvatski>, <Icelandic>,
<Rumanian>, <Slovak>, <Slovene>, <Turkish> or <Vietnamese>.
The supported languages can be changed or added.
NOTE
28 _ the basics
Settings
Menu Style
Sound
Display
Language
Time
System
Page 29
CHANGING THE SETTINGS AND PREFERENCES (Continued)
Time Settings
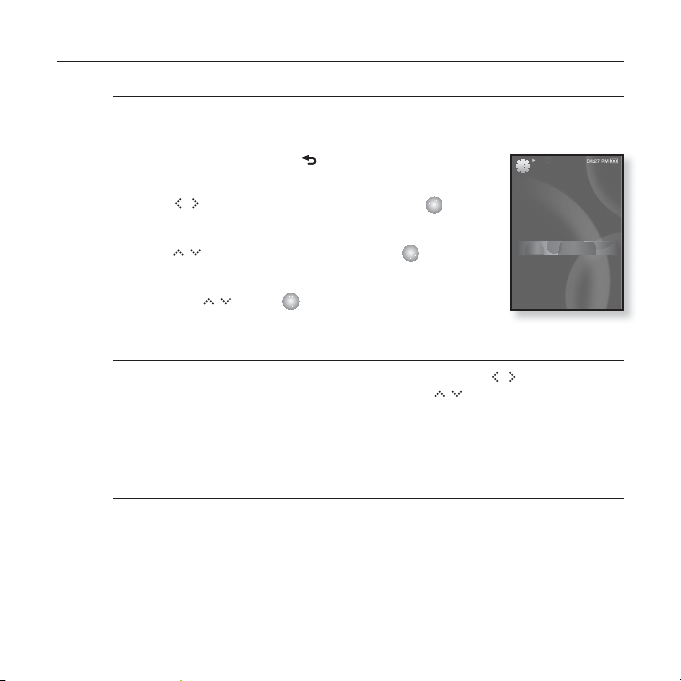
Setting the time allows you to use the date/time set, date type and even
time zone.
1. Press and briefl y hold [ ] to move to the main
menu screen.
2.
Tap [ ] to select <Settings> and tap [ ].
The <Settings> menu appears.
3. Tap [ ] to select <Time> and tap [ ].
The <Time> menu appears.
4. Use the [ ] and [ ] to set functions.
Time Setting Options
Date & Time : You can set the current time and date. Tap [ ] to move to
<Year, Month, Date, Hour, Min, AM/PM> and tap [
Date Type : You can set the time display type for the World Clock. Select from
<YY-MM-DD>, <MM-DD-YY> and <DD-MM-YY>.
Time Zone : You can change the current time by selecting an international city-
specifi c time zone. You must set the time zone before you can display the world
time information. See page 89.
] to set each item.
Settings
Menu Style
Sound
Display
Language
Time
System
the basics _ 29
Page 30
CHANGING THE SETTINGS AND PREFERENCES (Continued)
System Settings
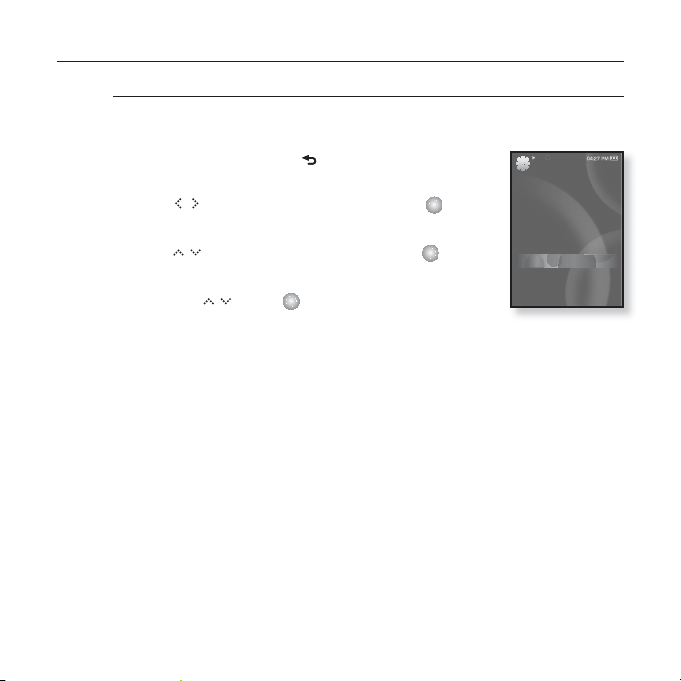
Choose the sleep timer, start mode, auto power off, default setting that’s
right for you.
1. Press and briefl y hold [ ] to move to the main
menu screen.
2.
Tap [ ] to select <Settings> and tap [ ].
The <Settings> menu appears.
3. Tap [ ] to select <System> and tap [ ].
The <System> menu appears.
4. Use the [ ] and [ ] to set functions.
Settings
Menu Style
Sound
Display
Language
Time
System
30 _ the basics
Page 31
CHANGING THE SETTINGS AND PREFERENCES (Continued)
System Setting Options
Sleep : Turns off power automatically after the preset time. Select either <Off>,
<15 min>, <30 min>, <60 min>, <90 min>, or <120 min>.
Start Mode : You can set the start screen displayed when you turn on the
player. Select from <Home> and <Last State>. Select <Home> to start the
system with the main menu screen while <Last State> will use the last used
menu screen.
Auto Power Off : Automatically turns power off when there is no button
operation after the preset time in the pause mode. Select either <15sec>,
<30sec>, <1min>, <3min>, <5min> or <Always On>.
Default Set : Returns all settings to the default value. Select either <Yes> or
<No>. <Yes> initializes all settings to default. <No> cancels default settings.
Format : Formats the internal memory. Select either <Yes> or <No>.
Selecting <Yes> will format the internal memory and delete all fi les on the
player. Selecting <No> does not format the internal memory.
Check before formatting it.
About : Checks the fi rmware version and memory capacity.
<Firmware Version> displays the current fi rmware version.
<Used> indicates the usage, <Available> indicates the remaining capacity and
<Total> indicates the total memory capacity.
Regarding the Built-In Memory
NOTE
1GB=1,000,000,000 bytes : actual formatted capacity may be less as the
internal fi rmware uses a portion of the memory.
the basics _ 31
Page 32
RESETTING THE SYSTEM
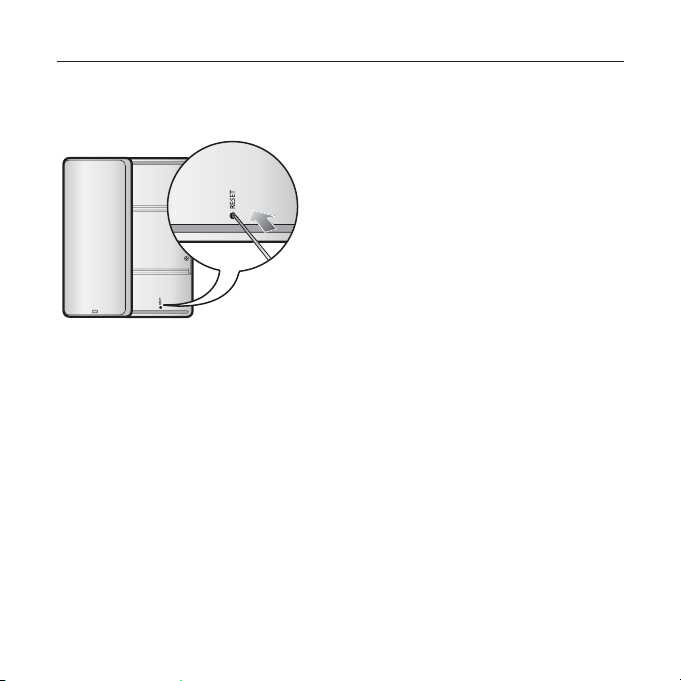
If your mp3 player won’t turn on, won’t play music, or isn’t recognized by your
computer when you connect it, you may have to reset the system.
Press the Reset hole at the rear of the
player with a pointed object such as a
safety clip.
The system will be initialized.
Your settings and fi les will not be affected.
32 _ the basics
Page 33
samsung media studio
Samsung Media Studio is the easy-to-use software application that
helps you organize your fi les on your PC. With your fi les already sorted
and organized in Media Studio, you can quickly transfer them to your
mp3 without searching your entire hard drive for the right fi le.
PC REQUIREMENTS
Your PC system must meet the following minimum specifi cations in order to
install and run Media Studio:
• Pentium 500MHz or higher
• USB Port 2.0
• Windows XP Service Pack 2 or higher
• DirectX 9.0 or higher
• 100MB of free hard disc space
• CD Rom Drive (2X or higher)
• Windows Media Player 10.0 or higher
• Resolution 1024 X 768 or higher
• Internet Explorer 6.0 or higher
• 512 MB RAM or higher
samsung media studio _ 33
Page 34
INSTALLING SAMSUNG MEDIA STUDIO
Ensure that you run the <Media Studio> installer in your PC’s administrator account.
Otherwise, <Media Studio> will not be installed. To fi nd the administrator account,
CAUTION
please refer to your PC’s user manual.
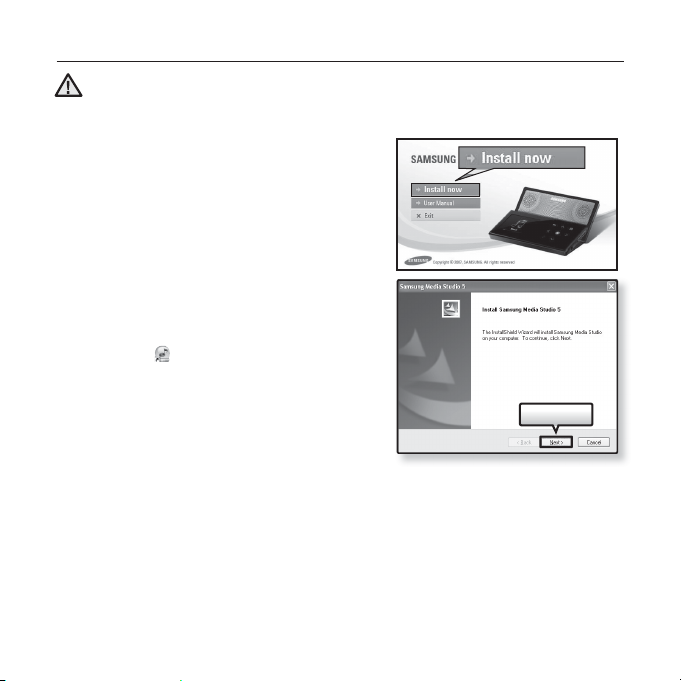
1. Insert the Installation CD provided
with the player into the CD-ROM drive.
2. Click <Install Now>.
3. Click <Next>.
<Media Studio> installation starts and then
creates an
installation is complete.
icon on your desktop when
Next >
34 _ samsung media studio
Page 35
TRANSFERRING FILES TO THE PLAYER WITH SAMSUNG MEDIA STUDIO
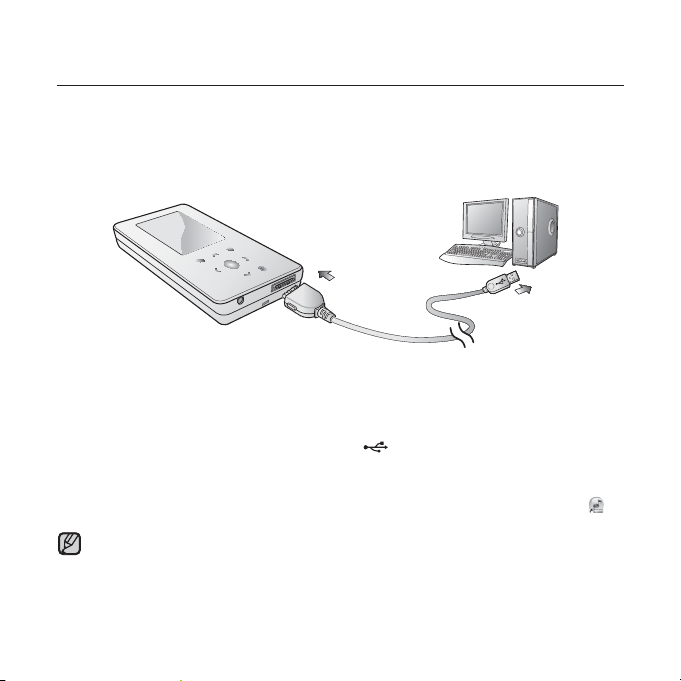
<Media Studio> enables you to select and organize fi les and folders before
transferring them to your player. This will make scanning fi les on your mp3
player easier and faster. <Media Studio> fi le transfer is the easiest way to get
fi les from your PC to your mp3 player.
1
2
1. Connect the other (larger) end of the USB cable to the USB Connection Port
on the bottom of the player.
2. Connect the USB cable to the USB port (
<USB Connected> appears on the screen display of the player.
<Media Studio> will automatically start when the player is connected to your PC.
If the program does not start automatically, double click the <Media Studio> icon
on the desktop.
Music recognition technology and related data are provided by Gracenote and
Gracenote CDDB
NOTE
CDDB is a registered trademark of Gracenote. The Gracenote logo and logotype,
the Gracenote CDDB logo and logotype, and the “Powered by Gracenote CDDB”
logo are trademarks of Gracenote. Music Recognition Service and MRS are service
marks of Gracenote.
®
Music Recognition ServiceSM.
) on your PC.
samsung media studio _ 35
Page 36
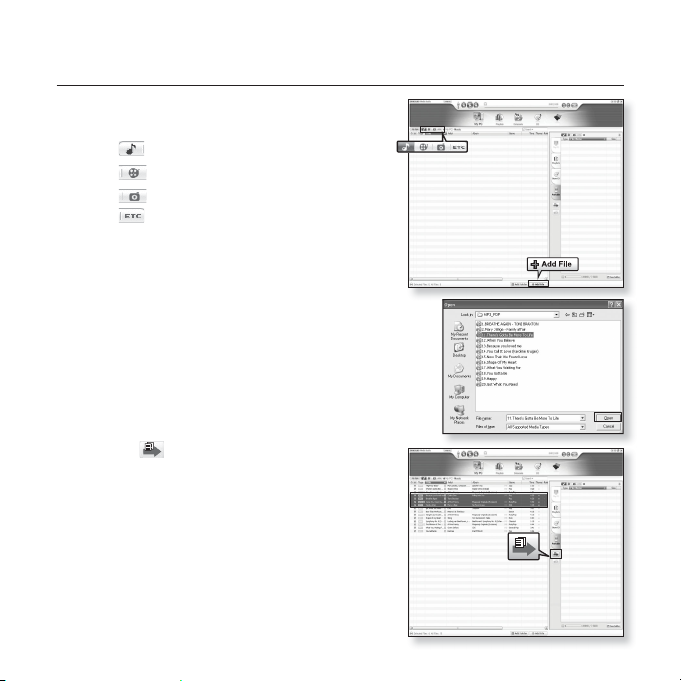
TRANSFERRING FILES TO THE PLAYER WITH
SAMSUNG MEDIA STUDIO (Continued)
3. Click the icon for the type of fi le you want to
transfer.
Click to display music list.
Click
Click
Click
fi le types (ex: TXT, etc) other than music, picture,
and video fi les.
to display video list.
to display picture list
to display etc list. The ETC list includes
4. Click <Add File> on the bottom of
<Media Studio>.
The <Open> window will appear.
5. Select the fi les to add and click <Open>.
The fi les are added to the list on the left side the
<Media Studio> Screen.
6. Select the fi le to transfer from the list on the left
side.
7. Click the icon.
The fi le you selected is transferred to the player.
3
4
6
[YP-S5 [MTP]]
Portable [YP-S5[MTP]]
5
[YP-S5 [MTP]]
Portable [YP-S5[MTP]]
7
36 _ samsung media studio
Page 37
TRANSFERRING FILES TO THE PLAYER WITH
SAMSUNG MEDIA STUDIO (Continued)
Do not disconnect the USB cable during fi le transfer. Disconnecting during transfer
CAUTION
may damage the player or your PC.
Connect the player to the computer directly rather than through a USB hub to avoid
an unstable connection.
When transferring a video fi le to the player using Media Studio, it is automatically
NOTE
converted into .svi format before transfer. The fi le size is automatically adjusted, too.
A video fi le that is not converted into .svi format cannot be played on your player.
Samsung Media Studio supported video fi les
- Mpeg Files (.mpg, .mpeg), AVI Files (.avi), WMV Files (.wmv), ASF Files (.asf),
SVI Files (.svi), MP4 Files (.mp4), Real Media Files (.rm, .rmvb), MOV Files
(.mov), SMF Files (.smf).
- Files that Media Studio supports may change in the future.
When transferring a picture fi le to the player using Media Studio, it is automatically
converted into JPG format before transfer. The fi le size is automatically adjusted,
too.
GA picture that is transferred to the player without using <Media Studio> can look
different on the screen from the original picture.
All functions are disabled during connection.
If you connect the USB cable to the PC in the Low Battery condition, the player will
be charged for several minutes before connecting to the PC.
Samsung Media Studio has a thorough Help function. If you can’t fi nd the answer to
your question about Media Studio, click <MENU> ĺ <Help> ĺ <Help> on the top
of the <Media Studio> program.
An audio book with DRM (Digital Rights Management) is not supported.
What is SVI?
Samsung Audio Video interleaving(SVI) is a new video format developed and
controlled by Samsung.
samsung media studio _ 37
Page 38
listening to music
Before you start - Connect the earphones, then turn on the player, and check the battery.
Tap [ ] to move to the previous screen.
Press and briefl y hold [
NOTE
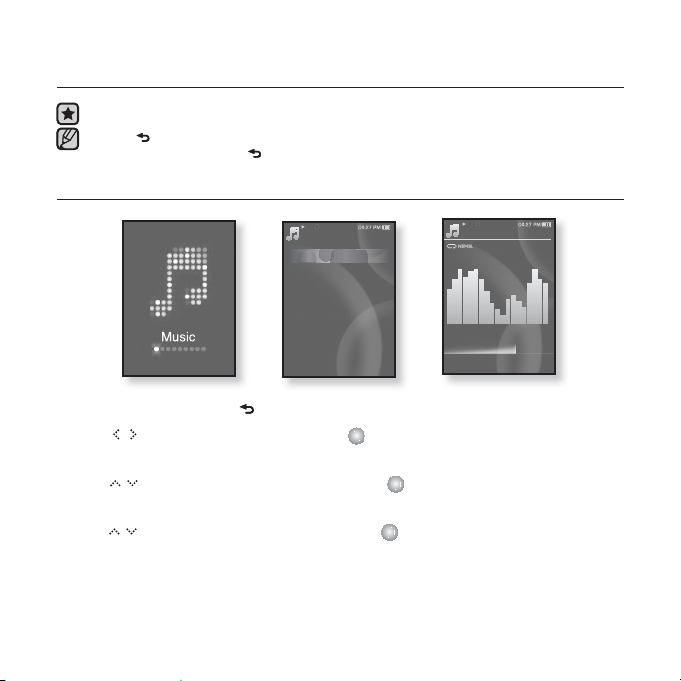
LISTENING BY CATEGORY
] to move to the main menu screen.
Music
Now Playing
Artists
Albums
Songs
Genres
Playlists
Recorded Files
Music Browser
Music
1.Life is cool
02:13 04:28
1. Press and briefl y hold [ ] to move to the main menu screen.
2. Tap [ ] to select <Music> and tap [ ].
The <Music> list appears.
3. Tap [ ] to select the desired list and tap [ ].
The music fi les appears.
4. Tap [ ] to select the fi le to play and tap [ ].
The music will start playing.
38 _ listening to music
15/20
Page 39
LISTENING BY CATEGORY (Continued)
Music List
File information including the artist name, album name, music title and genre will be
displayed according to the ID3 Tag information on the appropriate music fi le. A fi le without
an ID3 Tag is displayed as [Unknown].
Now Playing :
Artists : To play by artist Albums : To play by album
Songs : To play in numeric or alphabetical order Genres : To play by genre
Playlists : To play by Playlist.
Recorded Files : Shows all recorded fi les.
Music Browser : Shows all the music fi les stored in the Music Folder.
NOTE
Plays a recently played fi le or moves to the playback screen of the current fi le.
MP3 and WMA music fi les are compatible with the player.
MP1 or MP2 fi les which only have a changed extension to MP3 may not play on the
player.
Disconnecting the earphones during music playback will pause the playback.
What is an ID3 Tag?
This is what is attached to an MP3 to carry information relevant to the fi le such as
the title, artist, album, year, genre and a comment fi eld.
listening to music _ 39
Page 40
PAUSING
1. Tap [ ] while the music is playing.
The music playback will be paused.
2. Tap [ ] again.
The music will play from the point where it stopped.
SEARCHING WITHIN A TRACK
1. Press and briefl y hold [ ] while the selected track is playing.
It searches to the beginning or the end of the track.
2. Release the button at the point you wish to start.
It starts playing from the point you release the button.
PLAYING FROM THE BEGINNING OF THE CURRENT TRACK
1. Tap [ ] after 3 seconds of play.
The current track starts playing from the beginning.
PLAYING THE PREVIOUS TRACK
Tap [ ] within 3 seconds of play.
Tap [ ] twice after 3 seconds of play.
The previous track will start playing.
PLAYING THE NEXT TRACK
Tap [ ].
The next track will start playing.
When playing VBR fi les, the previous track may not play even if you tap [
3 seconds.
CAUTION
40 _ listening to music
] within
Page 41
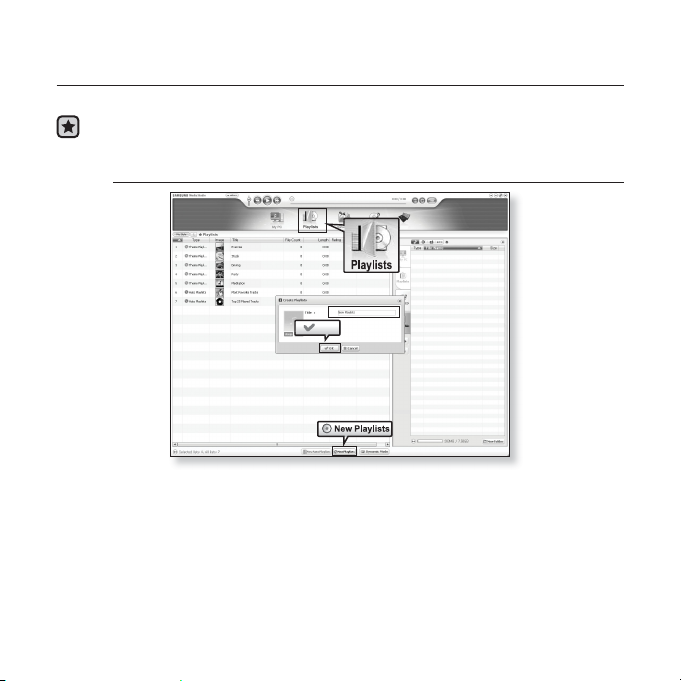
CREATING A PLAYLIST USING SAMSUNG MEDIA STUDIO
With <Media Studio>, you can create your own collection, or playlist, of audio fi les.
Before you start - Connect the player to your PC.
Media Studio must be installed on your PC.
Creating a Playlist
[YP-S5 [MTP]]
1
OK
3
Portable [YP-S5[MTP]]
2
1. Click <Playlists> on the top of <Media Studio>.
The <Playlists> window appears.
2. Click <New Playlists> on the bottom.
The <Create Playlists> window appears.
3. Type in the playlist title and click [OK].
A new playlist will be named and stored in the <Playlists> section
of <Media Studio>.
listening to music _ 41
Page 42
CREATING A PLAYLIST USING
SAMSUNG MEDIA STUDIO (Continued)
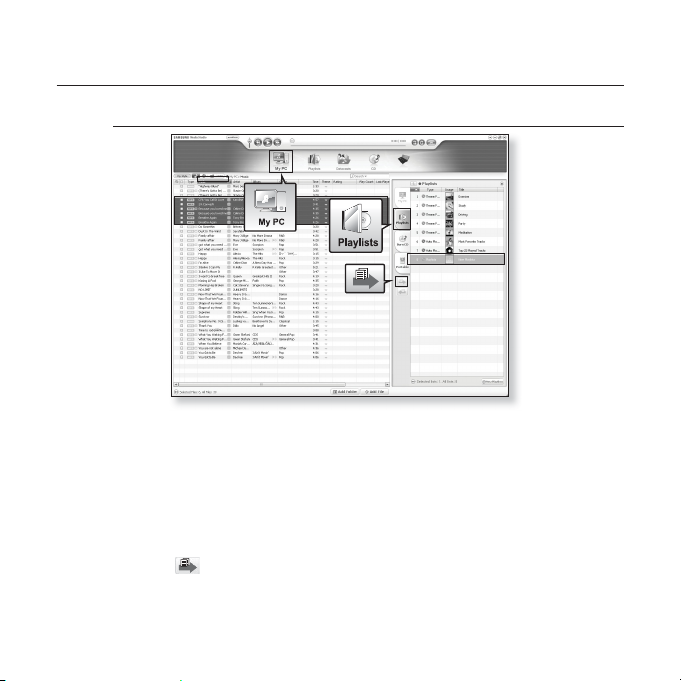
Adding music fi les to a Playlist you’ve created
1
[YP-S5 [MTP]]
2
4
5
1. Click <My PC> on the top of <Media Studio>.
The <My PC> window appears.
2. Click <Playlists> in the right corner of the window.
The <Playlists> window appears.
3. Double click on a playlist in the right window.
4. Select fi les that you want to transfer in the <My PC> window.
5. Click .
The selected fi les will be added to the playlist.
42 _ listening to music
3
Page 43
CREATING A PLAYLIST USING
SAMSUNG MEDIA STUDIO (Continued)
Transferring a Playlist to your player using Media Studio
[YP-S5 [MTP]]
Portable [YP-S5[MTP]]
1
2
3
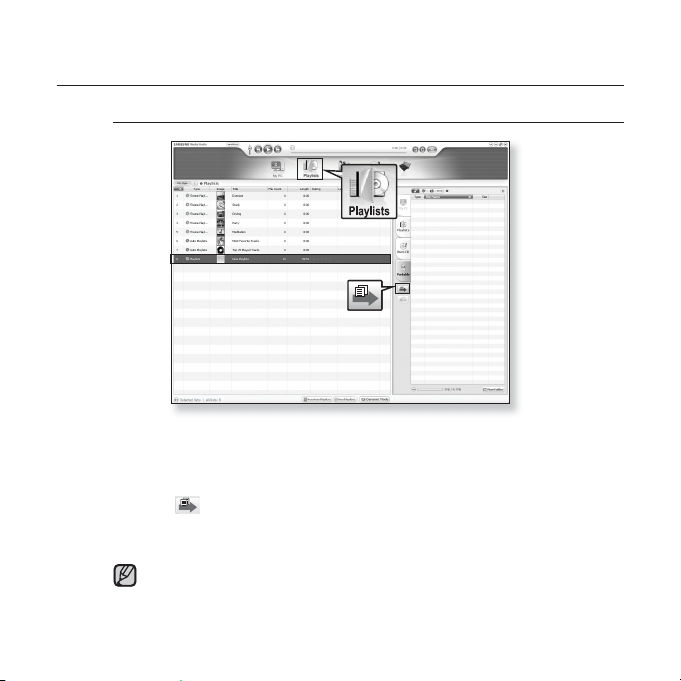
1. Click <Playlists> on the top of <Media Studio>.
The <Playlists> window appears.
2. Select a playlist in the <Playlists> section.
3. Click .
The selected playlist will be transferred to the player folder by folder in
<File Browser> ĺ <Playlists>.
GThe player can play up to 999 music fi les for each playlist.
NOTE
listening to music _ 43
Page 44
CREATING A PLAYLIST ON YOUR MP3 PLAYER
If you’ve already downloaded fi les to your mp3 player, you can create a
“Favorites” playlist without Media Studio or your PC.
1. Press and briefl y hold [ ] to move to the main menu
screen.
2. Tap [ ] to select <File Browser> and tap [ ].
3. Tap [ ] to select <Music> and tap [ ].
The music fi le appears.
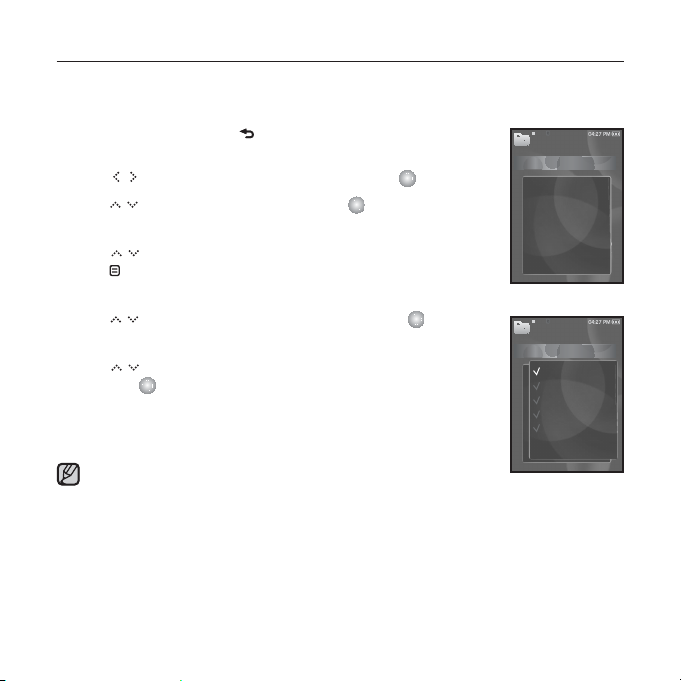
4. Tap [ ] to select a fi le to add to the playlist list and
tap [ ].
The Playlist menu appears.
5.
Tap [ ] to select <Add to Playlist> and tap [ ].
<Playlist 1> to <Playlist 5> appears.
6. Tap [ ] to select a playlist number to add the selected fi le
and tap [ ].
The selected fi le will be added to the playlist.
You can check the playlist in <Music> ĺ <Playlists> ĺ
<Playlist 1> to <Playlist 5> in the main menu.
You can add up to 100 music fi les to each playlist (<Playlist 1>
to <Playlist 5>).
NOTE
44 _ listening to music
Music
Life is cool
My love
Add to Playlist
Delete from Pla..
Delete
Music
Life is cool
My love
Playlist 1
Playlist 2
Playlist 3
Playlist 4
Playlist 5
Page 45
PLAYING A PLAYLIST
1. Press and briefl y hold [ ] to move to the main menu
screen.
2. Tap [ ] to select <Music> and tap [ ].
The music list appears.
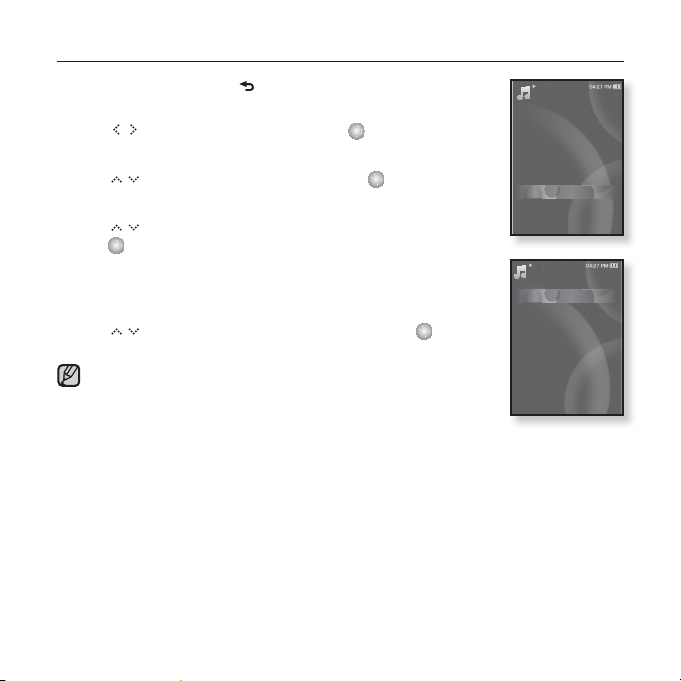
3. Tap [ ] to select <Playlists> and tap [ ].
The playlist(s) appear.
4. Tap [ ] to select the playlist of your choice and
tap [ ].
Music fi les stored in the selected playlist appear.
If there is no playlist found, you will see a <No fi le> message on
the screen.
5. Tap [ ] to select a music fi le to play and tap [ ].
The music fi le will start playing.
See pages 41 and 43 to see how to transfer the playlist using
<Media Studio>.
NOTE
Music
Now Playing
Artists
Albums
Songs
Genres
Playlists
Recorded Files
Music Browser
Playlists
Playlist 1
Playlist 2
Playlist 3
Playlist 4
Playlist 5
listening to music _ 45
Page 46
DELETING A FILE FROM THE PLAYLIST
1. Press and briefl y hold [ ] to move to the main menu
screen.
2. Tap [
] to select <Music> and tap [ ].
The music list appears.
3. Tap [ ] to select <Playlists> and tap [ ].
The playlist(s) appear.
4.
Tap [ ] to select the playlist of your choice and tap [ ].
Music fi les stored in the selected playlist appear.
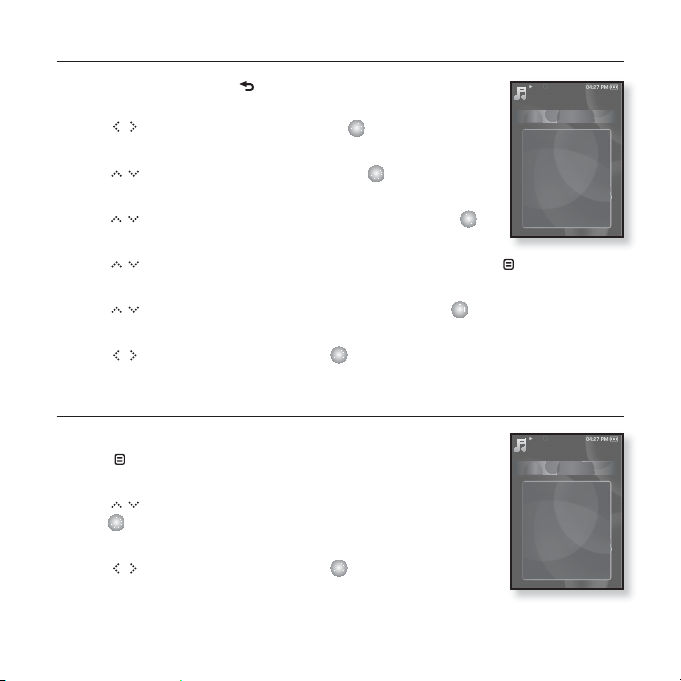
5. Tap [ ] to select a fi le to delete from the playlist and tap [ ].
The Playlist menu appears.
6. Tap [ ] to select <Delete from Playlist> and tap [ ].
The delete confi rmation window appears.
7. Tap [ ] to select <Yes> and tap [ ].
The selected fi le is deleted from the playlist.
DELETING ALL FILES FROM THE PLAYLIST
Follow the steps 1-4 above.
5. Tap [
6. Tap [ ] to select <Delete All from Playlist> and
7. Tap [ ] to select <Yes> and tap [ ].
46 _ listening to music
].
The playlist menu appears.
tap [ ].
The delete confi rmation window appears.
All fi les are deleted from the playlist.
Playlist 1
Life is cool
My love
Delete from Playlist
Delete All from ..
Playlist 1
Life is cool
My love
Delete from Playlist
Delete All from ..
Page 47
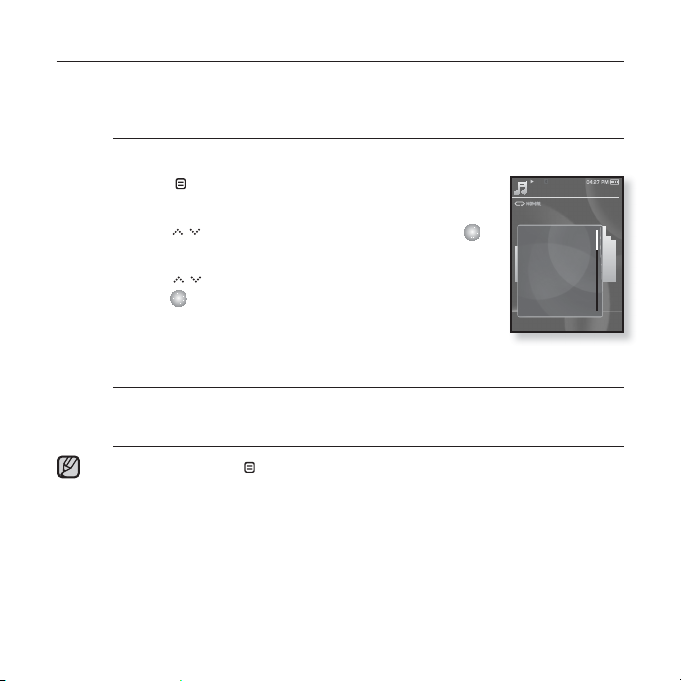
USING THE MUSIC MENU
The Music menu allows you manage all facets of listening - from repeating
tracks and albums to choosing the background on the screen as you listen.
To set the sound effect
You can enjoy clearer sound.
1. Tap [
2. Tap [ ] to select <Sound Effect> and tap [ ].
3. Tap [ ] to select the desired sound effect and
Sound Effect Options
Street Mode : Allows you to hear the music outdoors clearly by fi ltering out
some of the street noise. Select either <Off> or <On>.
Clarity: You can enjoy clearer sound with improved quality. Select from <0 - 2>.
To exit the menu, tap [
NOTE
] while listening to music.
The music menu appears.
The <Sound Effect> menu appears.
tap [ ].
].
Music
Sound Effect
DNSe
Play Mode
Music Play Scre..
Add to Alarm
Play Speed
1.Life is cool
Skip Interval
02:13 04:28
15/20
listening to music _ 47
Page 48
USING THE MUSIC MENU (Continued)
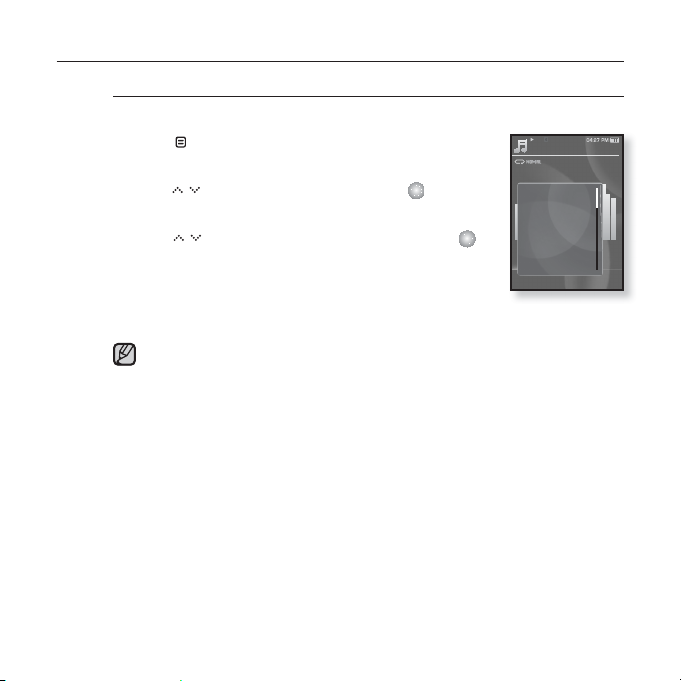
To set the Digital Natural Sound engine (DNSe)
Select the right sound for each music genre.
1. Tap [ ] while listening to music.
The music menu appears.
2. Tap [ ] to select <DNSe> and tap [ ].
The <DNSe> menu appears.
3. Tap [ ] to select a desired DNSe and tap [ ].
Select from <Normal>, <Rock>, <Vocal>, <Bass Boost>,
<Classical>, <Studio>, <Concert Hall>, and <User>.
You can set <EQ> and <3D&BASS> when you have
selected <User>. See page 49.
What is DNSe?
NOTE
Digital Natural Sound Engine (DNSe) is a sound effect function for MP3
players developed by Samsung. It provides various sound settings to
enhance the type of music you’re listening to.
Music
Sound Effect
DNSe
Play Mode
Music Play Scre..
Add to Alarm
Play Speed
1.Life is cool
Skip Interval
02:13 04:28
15/20
48 _ listening to music
Page 49
USING THE MUSIC MENU (Continued)
To set the Digital Natural Sound engine (DNSe)
(Continued)
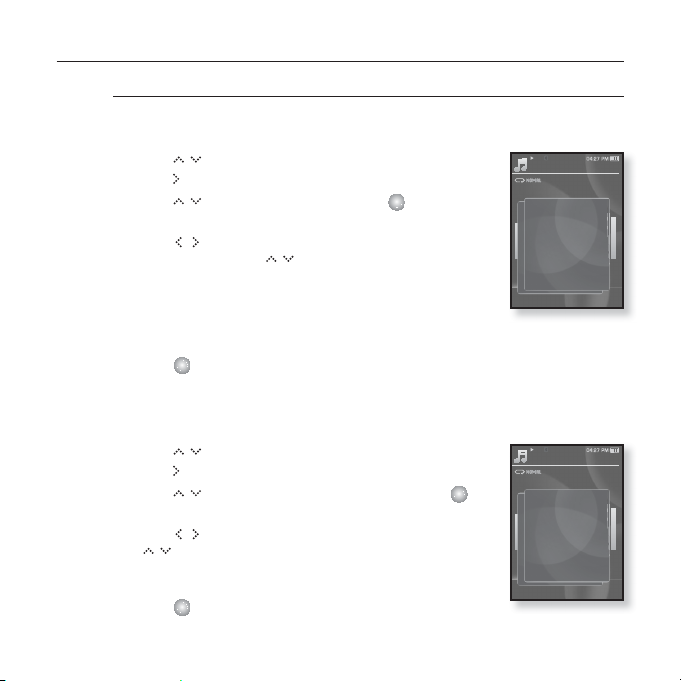
<EQ>
You can adjust individual frequencies to adjust the sound to your preference.
1 Tap [ ] in the DNSe menu to select <User> and
tap [ ].
2. Ta p [
] to select <EQ> and tap [ ].
The <EQ> setting screen appears.
Music
EQ
3D & BASS
15/20
3. Tap [ ] to select the frequency you want
to adjust and tap [ ] to adjust the selected
frequency’s level.
The frequencies that can be adjusted are <60Hz>,
<125Hz>,<250Hz>, <500Hz>, <1KHz>, <2KHz>,
<4KHz>, <8KHz>, <16KHz>.
You can select from –10 to +10 for the selected frequency’s level.
4. Tap [ ].
The setting is completed.
1.Life is cool
02:13 04:28
<3D&BASS>
You can set the 3D surround sound and bass boost level.
1. Tap [
tap [ ].
2. Ta p [
] in the DNSe menu to select <User> and
] to select <3D & BASS> and tap [ ].
The <3D & Bass> setting screen appears.
Music
EQ
3D & BASS
15/20
3. Tap [ ] to select <3D> or <Bass> and tap
[ ].
You can select a <3D> level from 0 to 4, and <Bass>
from 0 to 4.
1.Life is cool
02:13 04:28
4. Tap [ ].
The setting is completed.
listening to music _ 49
Page 50
USING THE MUSIC MENU (Continued)
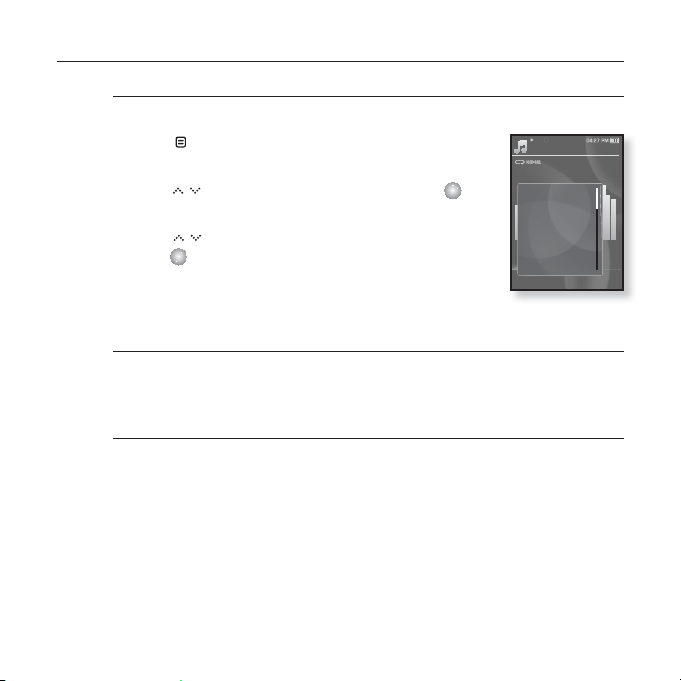
To set the play mode
Select playback mode such as repeat settings.
1. Tap [ ] while listening to music.
The music menu appears.
2. Tap [ ] to select <Play Mode> and tap [ ].
The <Play Mode> menu appears.
3. Tap [ ] to select the desired mode and
tap [ ].
Play Mode Options
Normal : To play all the tracks in order one time.
Repeat : To repeat all fi les in the current folder.
Repeat One : To repeat one fi le.
Shuffl e : To play fi les at random.
Music
Sound Effect
DNSe
Play Mode
Music Play Scre..
Add to Alarm
Play Speed
1.Life is cool
Skip Interval
02:13 04:28
15/20
50 _ listening to music
Page 51
USING THE MUSIC MENU (Continued)
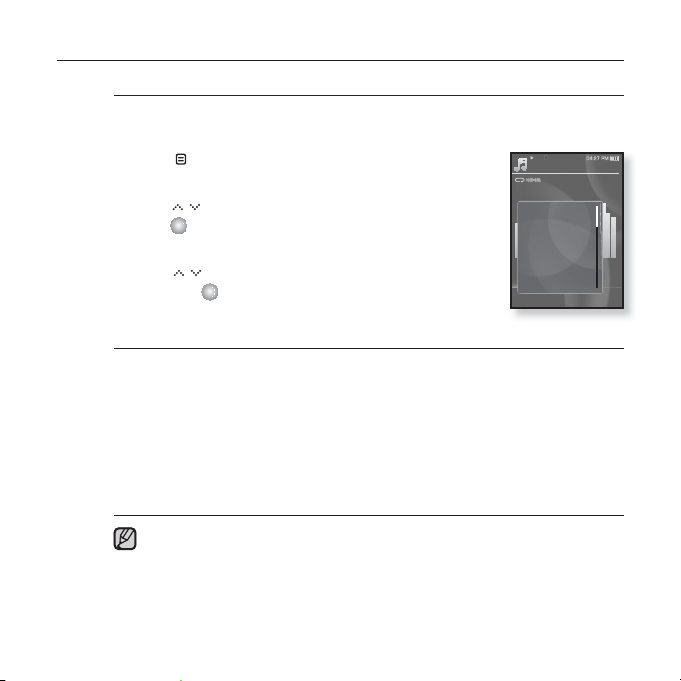
To select the music play screen
Choose a background image from those provided, or choose an image
of your own to be displayed as you listen to music.
1. Tap [ ] while listening to music.
The music menu appears.
2. Tap [ ] to select <Music Play Screen> and
tap [ ].
The <Music Play Screen> menu appears.
3. Tap [ ] to select a desired music play screen
and tap [ ].
Music Play Screen Options
Type 1 ~ Type 3 : You can select a desired music play screen.
Album Info. : Information on the artist name, album and genre displays if ID3
Album Art : The album cover image displays if an album cover image is
Auto : Automatically switches <Type 1> through <Type 3> each time a different
NOTE
Tag information is stored on the music fi le.
included in the ID3 Tag information of the music fi le.
Album cover images less than 200 pixel (horizontal) x 200
pixel(vertical) in size are supported.
music fi le is played.
What is an ID3 Tag?
This is what is attached to an MP3 to carry information relevant to the fi le
such as the title, artist, album, year, genre and a comment fi eld.
Music
Sound Effect
DNSe
Play Mode
Music Play Screen
Add to Alarm
Play Speed
1.Life is cool
Skip Interval
02:13 04:28
15/20
listening to music _ 51
Page 52
USING THE MUSIC MENU (Continued)
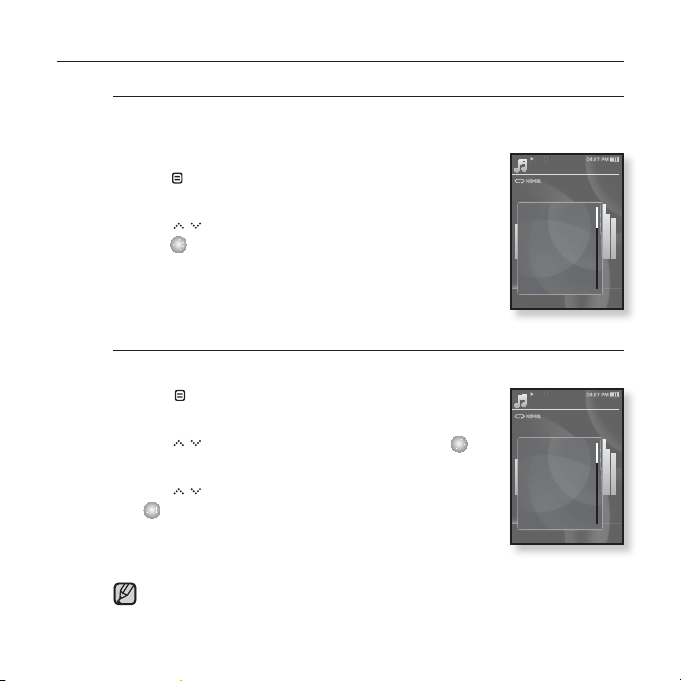
To add to alarm sound
You can add your favorite music fi le to the alarm sound list, so it can
be heard the next time the alarm goes off. See page 86 to set the alarm.
1. Select a musc fi le to add to the alarm sound and
tap [ ].
The music menu appears.
2. Tap [ ] to select <Add to Alarm> and
tap [ ].
The selected music will be added to the alarm sound list.
One music fi le can be added to the alarm sound.
To set the play speed
Speed up or slow down your favorite music by adjusting the play speed.
1. Tap [ ] while listening to music.
The music menu appears.
2. Tap [ ] to select <Play Speed> and tap [ ].
The <Play Speed> menu appears.
3. Tap [ ] to select a desired play speed and tap
[ ].
Select from <X 0.7>, <X 0.8>, <X 0.9>,
<X 1.0 (Normal)>, <X 1.1>, <X 1.2>, <X 1.3>.
The higher the number is, the faster the speed is.
The adjusted play speed may differ from the actual speed, depending on
NOTE
the fi le.
52 _ listening to music
Music
Sound Effect
DNSe
Play Mode
Music Play Scre..
Add to Alarm
Play Speed
1.Life is cool
Skip Interval
02:13 04:28
Music
Sound Effect
DNSe
Play Mode
Music Play Scre..
Add to Alarm
Play Speed
1.Life is cool
Skip Interval
02:13 04:28
15/20
15/20
Page 53
USING THE MUSIC MENU (Continued)
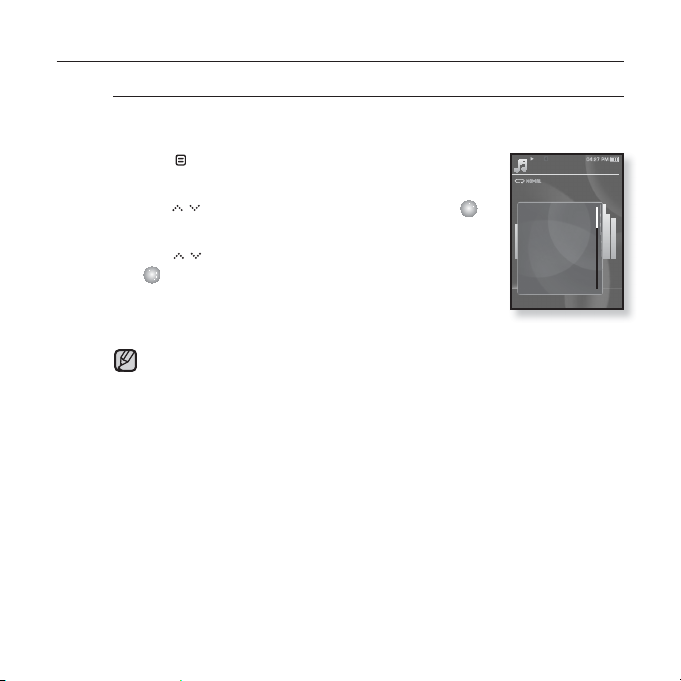
To set the skip interval
You can fast forward through a fi le at various intervals. Skip a whole
track or skip several seconds at a time.
1. Tap [ ] while listening to music.
The music menu appears.
2. Tap [ ] to select <Skip Interval> and tap [ ].
The <Skip Interval> menu appears.
3. Tap [ ] to select a desired skip interval and tap
[ ].
Select from <1 Song>, <5 sec>, <10 sec>, <30 sec>
and <1 min>.
If the fi le was developed with a variable bit rate, the actual length of the
NOTE
skip interval may not be exactly what you select.
Music
Sound Effect
DNSe
Play Mode
Music Play Scre..
Add to Alarm
Play Speed
1.Life is cool
Skip Interval
02:13 04:28
15/20
listening to music _ 53
Page 54
USING THE MUSIC MENU (Continued)
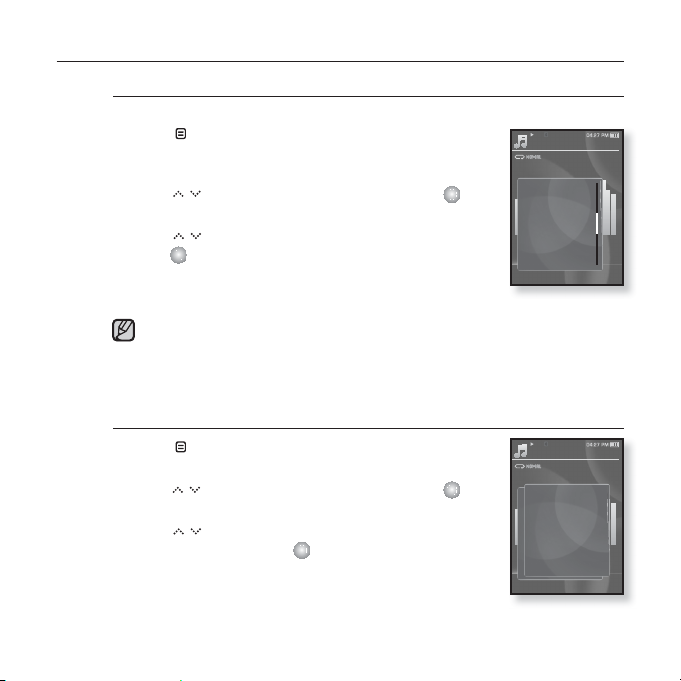
To set a bookmark
Once you set a bookmark, you can easily fi nd that position later.
1. Tap [
2. Tap [ ] to select <Bookmark> and tap [ ].
3. Tap [ ] to select <Add Bookmark> and
NOTE
To move to (play) / remove the bookmark
1. Tap [ ] while listening to music.
2. Tap [ ] to select <Bookmark> and tap [ ].
3. Tap [ ] to select <Go to Bookmark> or <Delete
54 _ listening to music
] at the point you want while listening to
music.
The music menu appears.
The <Bookmark> menu appears.
tap [ ].
The current play / stop point will be added to the
bookmark.
You will see the [ Ň ] symbol on the play status bar.
The Overwrite window appears if there is a bookmark previously set. If you
select <Yes>, the previously set bookmark is deleted and a new bookmark
is added.
The bookmark can be set one for each music fi le, and a maximum number
of 50 bookmarks can be set.
The music menu appears.
The <Bookmark> menu appears.
Bookmark> and tap [ ].
When you selected <Go to Bookamrk> then the player
will move to the selected bookmark and start playback.
<Delete Bookmark> will remove the selected bookmark
from the music fi le.
Music
DNSe
Play Mode
Music Play Scre..
Add to Alarm
Play Speed
Skip Interval
1.Life is cool
Bookmark
02:13 04:28
Music
Add Bookmark
Go to Bookmark
Delete Bookmark
1.Life is cool
02:13 04:28
15/20
15/20
Page 55
USING THE MUSIC MENU (Continued)
Before you start - Use only the Bluetooth-certifi ed stereo headset.
Check if your Bluetooth stereo headset has been registered. <Connect to
Stereo Headset> appears when there is a registered headset.
For more information, refer to <Using a Bluetooth Stereo Headset.>.
See page 93.
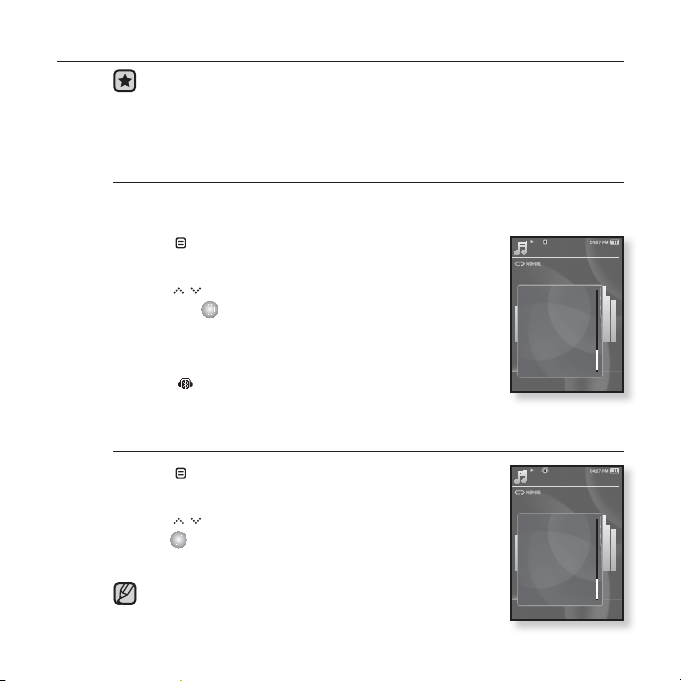
To connect a Bluetooth stereo headset
You can connect directly to the registered Bluetooth stereo headset
during music playback.
1. Tap [ ] while listening to music.
The music menu appears.
2. Tap [ ] to select <Connect to Stereo Headset>
and tap [ ].
If <Bluetooth Mode> is set to <Off>, it will be changed
to <On>.
When the connection is successfully done, you will see
] icon on the screen.
the [
You can listen to music through the stereo headset.
To disconnect the Bluetooth stereo headset
1. Tap [ ] while listening to music.
The music menu appears.
2. Tap [ ] to select <Disconnect Headset> and
tap [ ].
The headset is disconnected.
Some menu will not be selected while the player is
NOTE
connecting to the Bluetooth stereo headset.
Music
Play Mode
Music Play Scre..
Add to Alarm
Play Speed
Skip Interval
Bookmark
1.Life is cool
Connect to Ster..
02:13 04:28
Music
Play Mode
Music Play Scre..
Add to Alarm
Play Speed
Skip Interval
Bookmark
1.Life is cool
Disconnect Heads...
02:13 04:28
15/20
15/20
listening to music _ 55
Page 56
watching a video
Before you start - Connect the earphones, then turn on the player, and check the
battery.
Transfer a video fi le to the player. See pages 35~37.
NOTE
1. Press and briefl y hold [ ] to move to the main menu
screen.
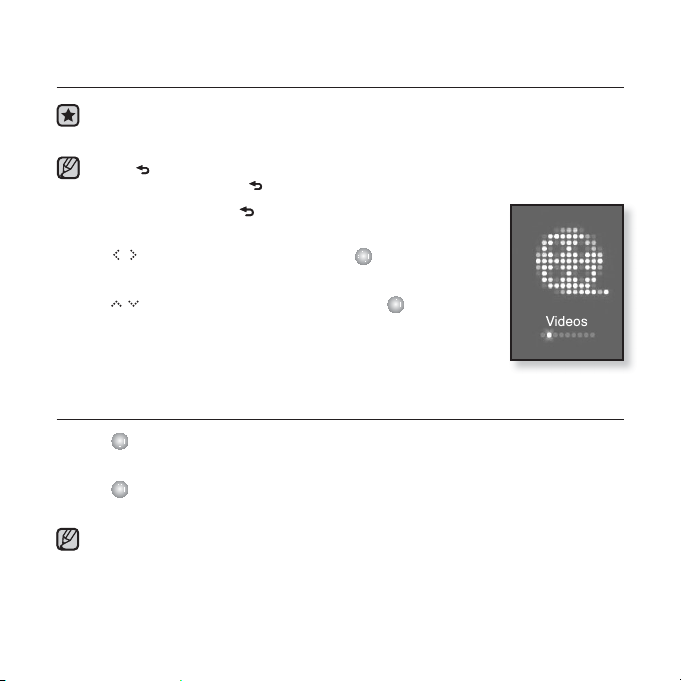
2. Tap [ ] to select <Videos> and tap [ ].
The video list appears.
3. Tap [ ] to select a video to play and tap [ ].
The selected video fi le starts to play horizontally.
PAUSING
1. Tap [ ] during a video playback.
The player pauses playing.
2. Tap [ ] again.
The player resumes playing from the last played point.
NOTE
56 _ watching a video
] to move to the previous screen.
Tap [
Press and briefl y hold [
When transferring a video fi le to the player using <Media Studio>, it is automatically
converted into SVI format before transfer. The fi le size is automatically adjusted, too.
] to move to the main menu screen.
Page 57
TO MOVE TO A SPECIFIC FRAME
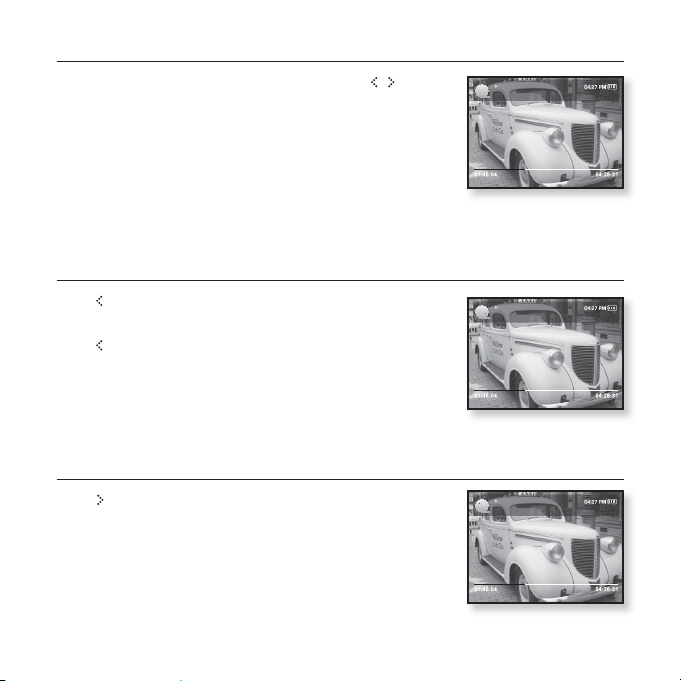
1. In horizontal view, press and briefl y hold [ ].
This enables you to move backwards or forwards in current
video fi le.
2. Release the button when you have moved to the
position you want.
The video starts playing from the position.
TO PLAY THE PREVIOUS VIDEO FILE
Tap [ ] within 3 seconds after the current fi le started
playing.
Tap [ ] twice 3 seconds after the current fi le started
playing.
This will return to the previous video.
TO PLAY THE NEXT VIDEO FILE
Tap [ ].
This will move to the next video.
Video Track 1
Video Track 1
Video Track 2
watching a video _ 57
Page 58
USING THE VIDEO MENU
To set a bookmark
Once you set a bookmark, you can easily fi nd that position later.
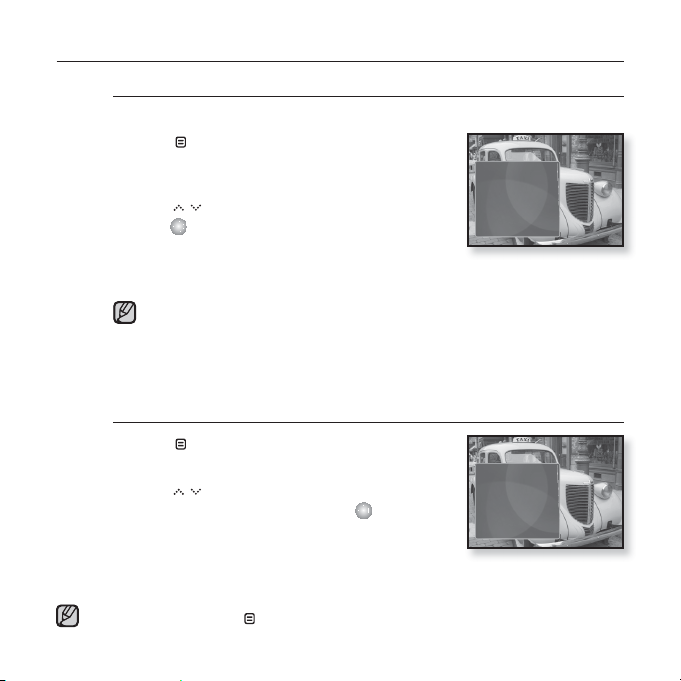
1. Tap [ ] at the desired scene you want
during video playback.
The video menu appears.
2. Tap [ ] to select <Add Bookmark> and
tap [ ].
The current play / stop point will be added to the
bookmark.
You will see the [ Ň ] symbol on the play status bar.
The Overwrite window appears if there is a bookmark previously set. If you
NOTE
select <Yes>, the previously set bookmark is deleted and a new bookmark
is added.
A bookmark can be set one for each video fi le, and a maximum number of
50 bookmarks can be set.
To move to (play) / remove the bookmark
1. Tap [ ] during video playback.
The video menu appears.
2. Tap [ ] to select <Go to Bookmark> or
<Delete Bookmark> and tap [ ].
When you selected <Go to Bookmark> then the
player will move to the selected bookmark and
start playback.
<Delete Bookmark> will remove the selected bookmark from the video fi le.
To exit the menu, tap [
NOTE
58 _ watching a video
].
Add Bookmark
Go to Bookmark
Delete Bookmark
DNSe
Brightness
Add Bookmark
Go to Bookmark
Delete Bookmark
DNSe
Brightness
Page 59
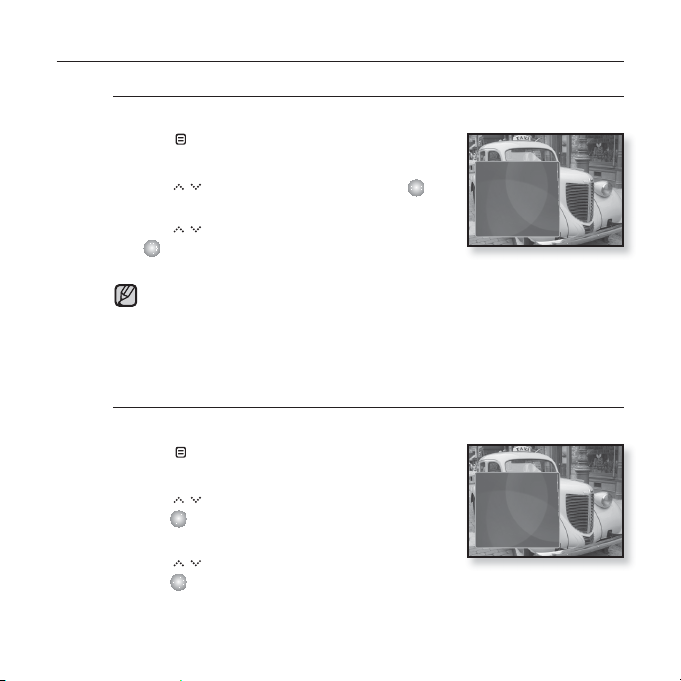
USING THE VIDEO MENU (Continued)
To set the Digital Natural Sound engine (DNSe)
Select the right sound for each video genre.
1. Tap [ ] during video playback.
The video menu appears.
2. Tap [ ] to select <DNSe> and tap [ ].
The <DNSe> menu appears.
3. Tap [ ] to select a desired DNSe and tap
[ ].
Select from <Normal>, <Drama> and <Action>.
What is DNSe?
NOTE
Digital Natural Sound Engine (DNSe) is a sound effect function for MP3
players developed by Samsung. It provides various sound settings to
enhance the type of music you’re listening to.
To adjust the brightness
You can adjust the screen brightness.
1. Tap [ ] during video playback.
The video menu appears.
2. Tap [ ] to select <Brightness> and
tap [ ].
The <Brightness> menu appears.
3. Tap [ ] to adjust the brightness and
tap [ ].
Select from <0~10>.
Add Bookmark
Go to Bookmark
Delete Bookmark
DNSe
Brightness
Add Bookmark
Go to Bookmark
Delete Bookmark
DNSe
Brightness
watching a video _ 59
Page 60
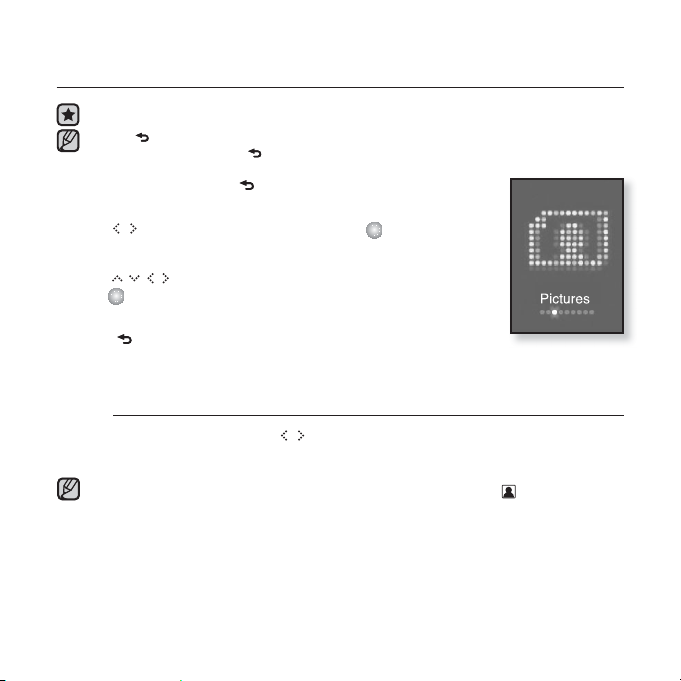
viewing pictures
Before you start - Connect the earphones, then turn on the player, and check the battery.
Tap [ ] to move to the previous screen.
Press and briefl y hold [
NOTE
1. Press and briefl y hold [ ] to move to the main menu
screen.
2. Tap [ ] to select <Pictures> and tap [ ].
The picture preview window appears.
3. Tap [ ] to select the picture you want to look at and
tap [ ].
The selected picture will be displayed.
] to move to the preview window.
Tap [
To move to the previous/next picture
In horizontal view, tap [ ].
The previous/next picture will be displayed.
A JPG fi le including incorrect thumbnail data will be displayed in .
NOTE
Some pictures can be displayed slowly.
When transferring a picture to the player using <Media Studio>, it is automatically
converted into JPG format before transfer. The fi le size is automatically adjusted,
too.
You can also use the <File Browser> to search for a picture. See page 23.
60 _ viewing pictures
] to move to the main menu screen.
Page 61
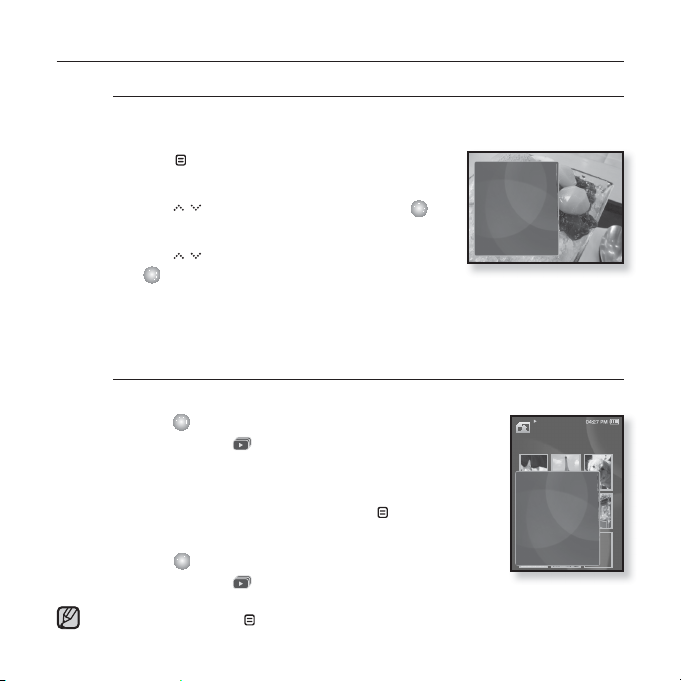
USING THE PICTURE MENU
To listen to music while viewing your picture
You can listen to the music that you last played while viewing your
picture.
1. Tap [ ] while viewing a picture.
The picture menu appears.
2. Tap [ ] to select <Music> and tap [ ].
The <Music> menu appears.
3. Tap [ ] to select a desired mode and tap
[ ].
<Off> : No background music is played while viewing a picture.
<On> : You can listen to the music that you last played while viewing your
picture.
To watch a slideshow
How To 1
1. Tap [
How To 2
1. In the picture preview mode, tap [
2. Tap [ ].
To exit the menu, tap [
NOTE
] while viewing a picture.
You will see [ ] on the screen and then the player will
start the slideshow.
].
The Start Slideshow window appears.
You will see [ ] on the screen and then the player will
start the slideshow.
].
Music
Start Sildeshow
Slideshow Speed
Zoom
Rotate
Select as My Skin
Pictures
Picture Image 1
Start Slideshow
viewing pictures _ 61
1/8
Page 62
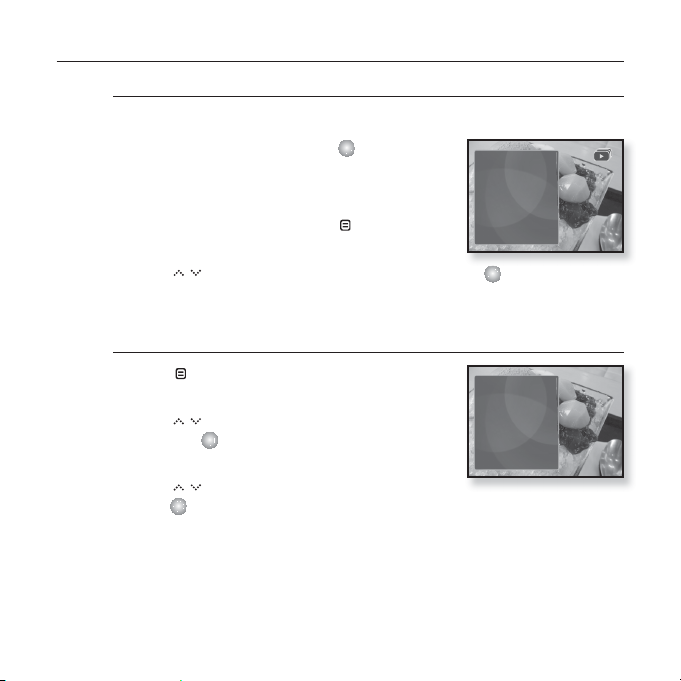
USING THE PICTURE MENU (Continued)
To stop the slideshow
How To 1
1. In the slideshow mode, tap [ ].
The slideshow stops.
How To 2
1. In the slideshow mode, tap [ ].
The picture menu appears.
2. Tap [ ] to select <Stop Sildeshow> and tap [ ].
The slideshow stops.
To set the slideshow speed
1. Tap [ ] while viewing a picture.
The picture menu appears.
2. Tap [ ] to select <Slideshow Speed>
and tap [ ].
The <Slideshow Speed> menu appears.
3. Tap [ ] to select a desired speed and
tap [ ].
Select from <Fast>, <Normal>, and <Slow>.
Music
Stop Sildeshow
Slideshow Speed
Zoom
Rotate
Select as My Skin
Music
Start Sildeshow
Slideshow Speed
Zoom
Rotate
Select as My Skin
62 _ viewing pictures
Page 63
USING THE PICTURE MENU (Continued)
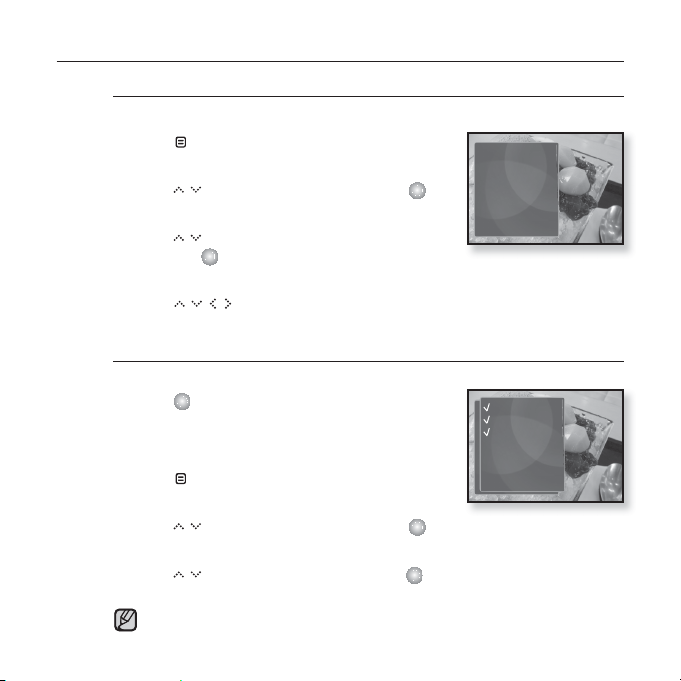
To enlarge a picture
You can zoom in a picture.
1. Tap [ ] while viewing a picture.
The picture menu appears.
2. Tap [ ] to select <Zoom> and tap [ ].
The <Zoom> menu appears.
3. Tap [ ] to select a desired zoom factor
and tap [ ].
Select from <100%>, <200%> and <400%>.
4. Tap [ ] to move to the portion of the picture to magnify.
To cancel the zooming
How To 1
1. Tap [ ] in an enlarged picture view.
This returns to the original size.
How To 2
1. Tap [ ] in an enlarged picture view.
The picture menu appears.
2. Tap [ ] to select <Zoom> and tap [ ].
The <Zoom> menu appears.
3. Tap [ ] to select <100%> and tap [ ].
This returns to the original size.
A big picture fi le may take awhile to zoom.
NOTE
Music
Start Sildeshow
Slideshow Speed
Zoom
Rotate
Select as My Skin
100%
200%
400%
viewing pictures _ 63
Page 64
USING THE PICTURE MENU (Continued)
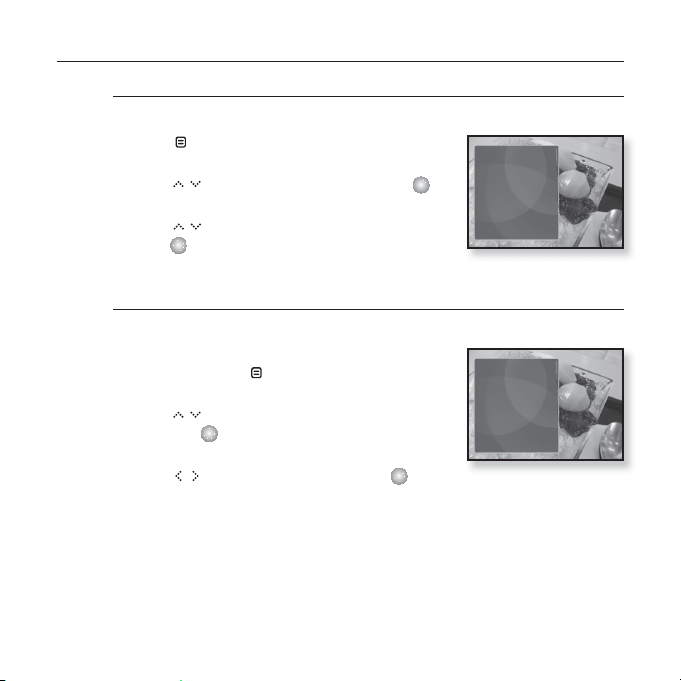
To rotate a picture
You can rotate a picture for your convenience.
1. Tap [ ] while viewing a picture.
The picture menu appears.
2.
Tap [ ] to select <Rotate> and tap [ ].
The <Rotate> menu appears.
3. Tap [ ] to select a desired angle and
tap [ ].
Select from <Left 90°>, <Right 90°>, and <180°>.
To set a picture as a background image
You can set a desired picture as a background image for the display window.
1. Select a picture fi le to set as a background
image and tap [ ].
The picture menu appears.
2.
Tap [ ] to select <Select as My Skin>
and tap [ ].
The save confi rmation window appears.
3.
Tap [ ] to select <Yes> and tap [ ].
The selected picture will be set to the background image.
If <My Skin> is selected from <Settings> ĺ <Menu Style> ĺ
<Menu Design>, the set image will be displayed.
Music
Start Sildeshow
Slideshow Speed
Zoom
Rotate
Select as My Skin
Music
Start Sildeshow
Slideshow Speed
Zoom
Rotate
Select as My Skin
64 _ viewing pictures
Page 65
listening to FM radio
Before you start - Connect the earphones, then turn on the player, and check the battery.
Tap [ ] to move to the previous screen.
Press and briefl y hold [
NOTE
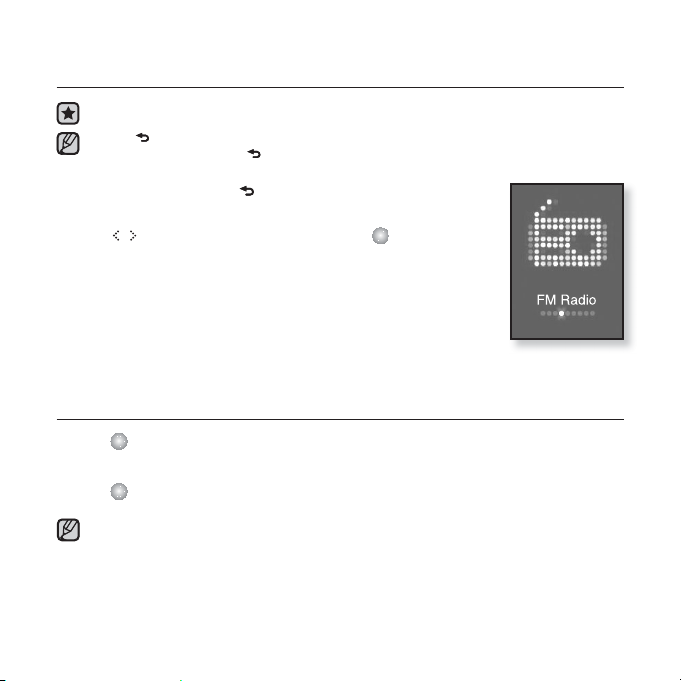
1. Press and briefl y hold [ ] to move to the main menu
screen.
2.
Tap [ ] to select <FM Radio> and tap [ ].
FM radio reception will start.
TO USE THE MUTE FUNCTION
1. Tap [ ] while listening to FM Radio.
Sound is muted.
2. Tap [ ] once again to resume listening.
Always connect your earphones to the player when searching or setting frequencies
and listening to FM Radio using the speakers or Bluetooth stereo headset.
NOTE
The earphones serve as antennas to receive FM radio reception.
In poor reception areas, the player may not fi nd an available FM frequency.
] to move to the main menu screen.
listening to FM radio _ 65
Page 66
TO SEARCH FOR FM STATIONS
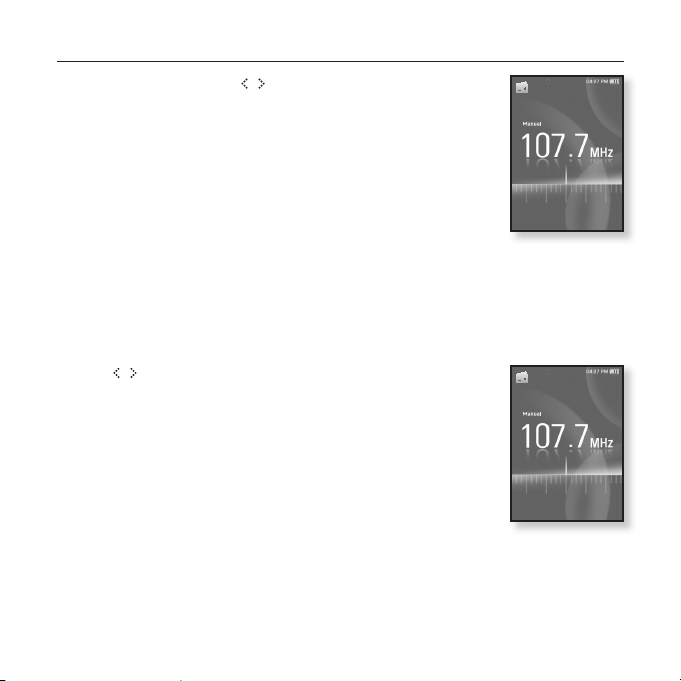
1. Press and briefl y hold [ ] and then release in Manual
mode.
<Searching> apprears.
The search will stop at the frequency nearest from the point the
button is released.
OR,
1. Tap [ ] to progress through the frequencies one by one
in Manual mode.
Moves to frequencies whenever the button is pressed.
Searching
66 _ listening to FM radio
Page 67
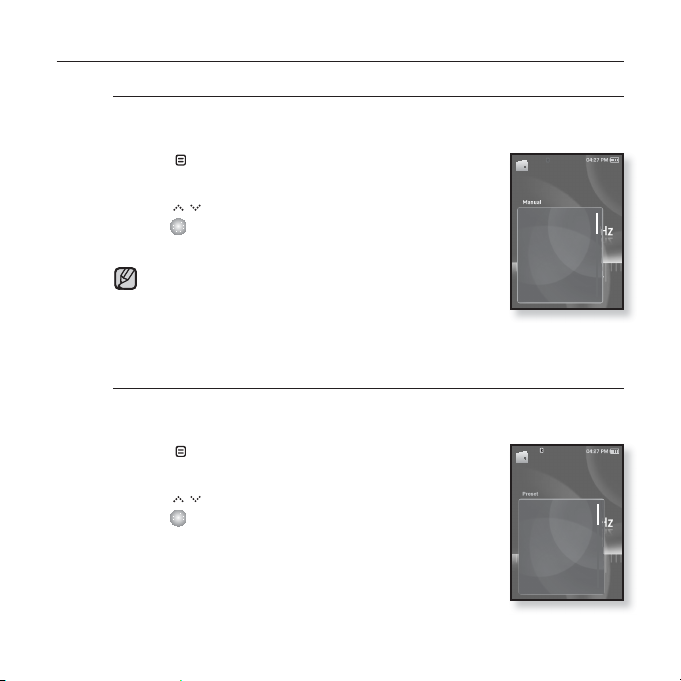
USING THE FM RADIO MENU
To switch to Preset Mode
Select this mode if you want to search through your saved FM presets
one preset at a time.
1. Tap [ ] in Manual mode.
The <FM Radio> menu appears.
2.
Tap [ ] to select <Go to Preset Mode> and
tap [ ].
You will see <Preset> on the screen.
If no preset frequencies are set, you will see <No
NOTE
preset> and the player will not switch to Preset mode.
If <Default Set>is selected from<Settings>ĺ <System>,
any preset list will be lost.
To switch to Manual Mode
Select this mode if you want to manually search through the FM band
one frequency at a time.
1. Tap [ ] in Preset mode.
The <FM Radio> menu appears.
2.
Tap [ ] to select <Go to Manual Mode> and
tap [ ].
You will see <Manual> on the screen.
Go to Preset Mo..
Add to Preset
Auto Preset
Start Recording
FM REC Quality
FM Sensitivity
FM Region
Go to Manual M..
Delete from Pre..
Auto Preset
Start Recording
FM REC Quality
FM Sensitivity
FM Region
listening to FM radio _ 67
Page 68
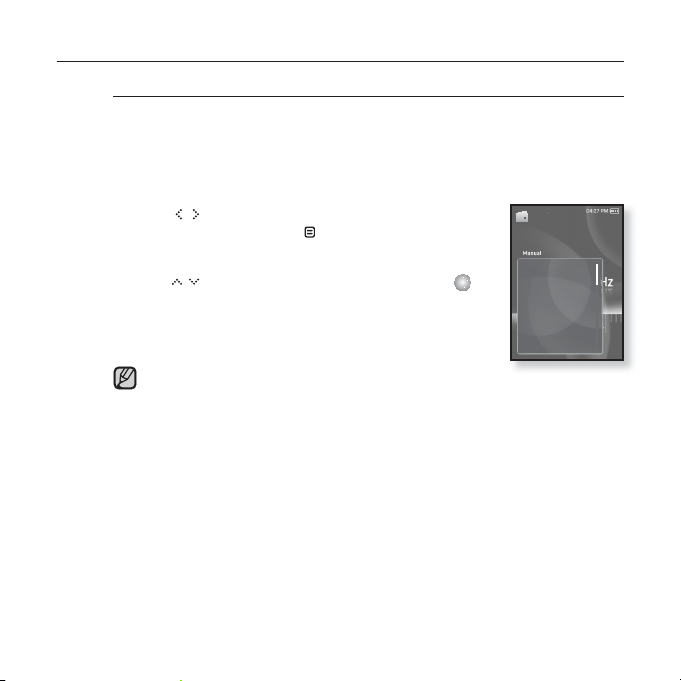
USING THE FM RADIO MENU (Continued)
To store stations in the preset memory
You can store up to 30 stations in your MP3 player’s memory and return
to them with the press of just one number. Have the MP3 player choose
only the stations you want using the manual process, or fi nd and store
the local stations automatically.
Manual - choose only the stations you want to store
1. Tap [ ] to select a frequency to preset in
Manual mode and tap [ ].
The <FM Radio> menu appears.
2.
Tap [ ] to select <Add to Preset> and tap [ ].
The selected frequency will be added to the preset list.
3.
To set a preset for other frequencies, follow 1-2 steps
above.
If the same frequency is already set, the <This preset
NOTE
already exists> message appears and the setting is disabled.
Go to Preset Mo..
Add to Preset
Auto Preset
Start Recording
FM REC Quality
FM Sensitivity
FM Region
68 _ listening to FM radio
Page 69
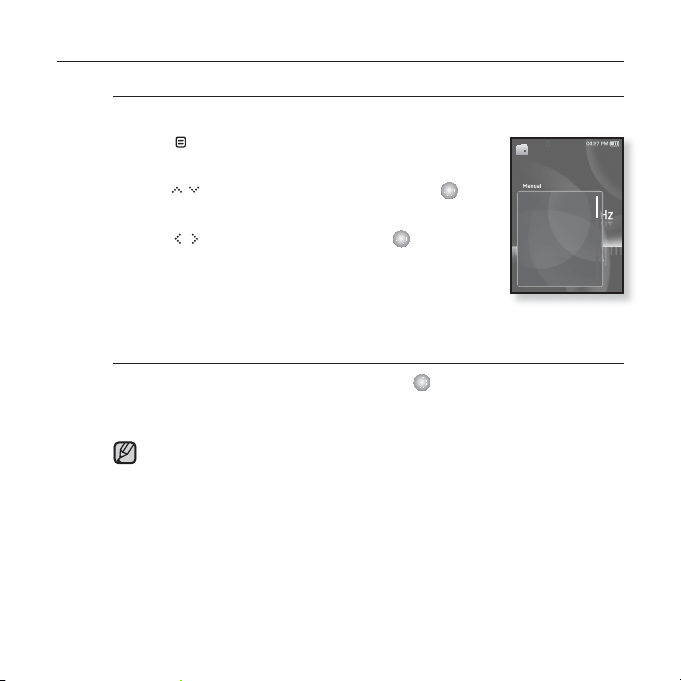
USING THE FM RADIO MENU (Continued)
To store stations in the preset memory (Continued)
Automatic – automatically store all the stations the player receives
1. Tap [ ] in FM Radio mode.
The <FM Radio> menu appears.
2.
Tap [ ] to select <Auto Preset> and tap [ ].
The confi rmation window appears.
3. Tap [ ] to select <Yes> and tap [ ]
<Auto Preset> will appear and up to 30 frequencies are
automatically set.
To cancel Auto Preset
If you want to cancel the auto preset, tap [ ] in the process.
The auto preset setting is canceled, and only frequencies set up to that point are
stored.
You may want to re-set the stored stations if you’re going to listen to your
MP3 player in a different city. To delete the preset stations and store new
NOTE
ones, simply repeat the process.
.
Go to Preset Mo..
Add to Preset
Auto Preset
Start Recording
FM REC Quality
FM Sensitivity
FM Region
listening to FM radio _ 69
Page 70
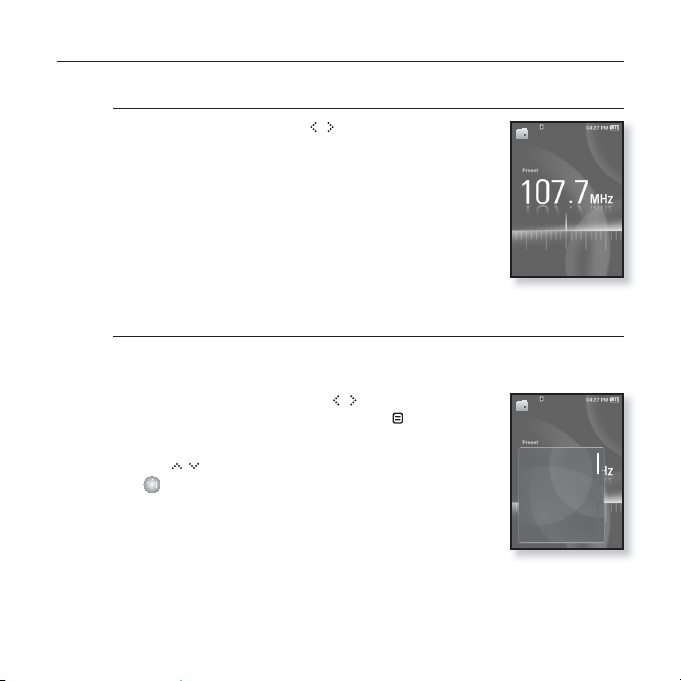
USING THE FM RADIO MENU (Continued)
To listen to preset stations
While in Preset mode, tap [ ] to scroll through
preset stations.
You can listen to the stored radio frequency.
To delete a preset
Follow the steps below to delete frequencies while listening to FM
Radio.
1. While in Preset mode, tap [ ] to search for a
preset frequency to delete and tap [ ].
The <FM Radio> menu appears.
2. Tap [ ] to select <Delete from Preset> and tap
[ ].
The selected frequency will be deleted.
3. To delete other preset frequencies, follow 1-2 steps
above.
Go to Manual M..
Delete from Pre..
Auto Preset
Start Recording
FM REC Quality
FM Sensitivity
FM Region
70 _ listening to FM radio
Page 71
USING THE FM RADIO MENU (Continued)
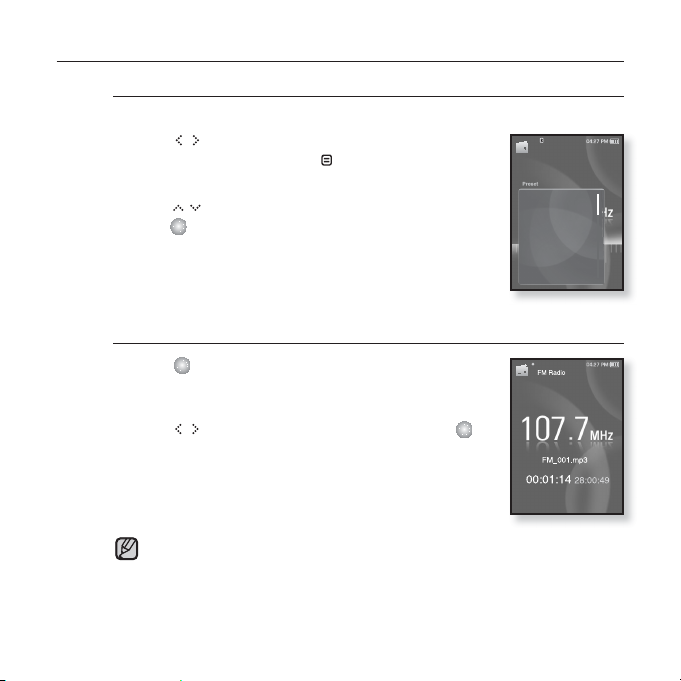
To record FM Radio broadcasting
You can record a FM radio program at any time while listening to the radio.
1. Tap [ ] to select a frequency to record in
FM Radio mode and tap [ ].
The <FM Radio> menu appears.
2. Tap [ ] to select <Start Recording> and
tap [ ].
An automatically created fi le name appears and the
recording starts.
To stop recording
1. Tap [ ] during the recording.
A message appears asking you if you want to listen to
the fi le you just recorded.
2. Tap [ ] to select <Yes> or <No> and tap [ ].
Selecting <Yes> will play the just recorded fi le.
Selecting <No> will not play the recorded fi le.
The recorded fi le is stored in <File Browser> ĺ
<Recorded Files> ĺ <FM Radio>.
You can store a maximum of 999 fi les for FM radio recording.
NOTE
You can make a recording for up to approximately 30 hours (based on
128Kbps, 2GB)
The recording fi le name will be automatically specifi ed, for example, as such as
“FM_000.mp3”. “FM” indicates FM radio recording and “000” is the recording
fi le number.
listening to FM radio _ 71
Go to Manual M..
Delete from Pre..
Auto Preset
Start Recording
FM REC Quality
FM Sensitivity
FM Region
Page 72
USING THE FM RADIO MENU (Continued)
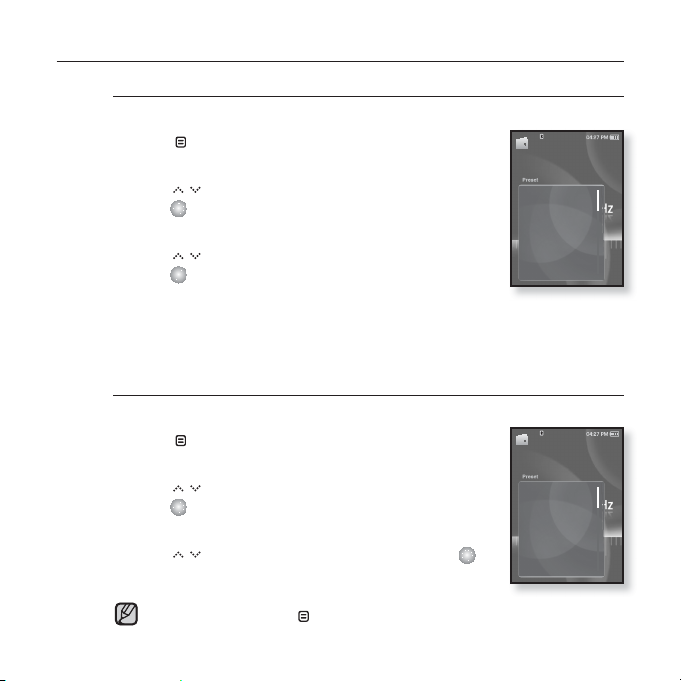
To set the FM recording quality
You can choose the recording quality for FM radio.
1. Tap [ ] in FM Radio mode.
The <FM Radio> menu appears.
2. Tap [ ] to select <FM REC Quality> and
tap [ ].
The FM recording quality menu appears.
3. Tap [ ] to select a desired quality level and
tap [ ].
Select from <Super High(192kbps)>, <High(160kbps)>
and <Normal(128kbps)>.
The higher the number is, the better the audio quality and the larger the fi le
size becomes.
To set the FM sensitivity
To receive more or fewer FM radio frequencies, adjust the FM sensitivity.
1. Tap [ ] in FM Radio mode.
The <FM Radio> menu appears.
2. Tap [ ] to select <FM Sensitivity> and
tap [ ].
The< FM Sensitivity> menu appears.
3. Tap [ ] to select the search level and tap [ ].
Select from <High>, <Middle> and <Low>.
If you select <High>, more frequencies will be received.
To exit the menu, tap [
NOTE
72 _ listening to FM radio
].
Go to Manual Mo
Delete from Pre..
Auto Preset
Start Recording
FM REC Quality
FM Sensitivity
FM Region
Go to Manual Mo
Delete from Pre..
Auto Preset
Start Recording
FM REC Quality
FM Sensitivity
FM Region
Page 73
USING THE FM RADIO MENU (Continued)
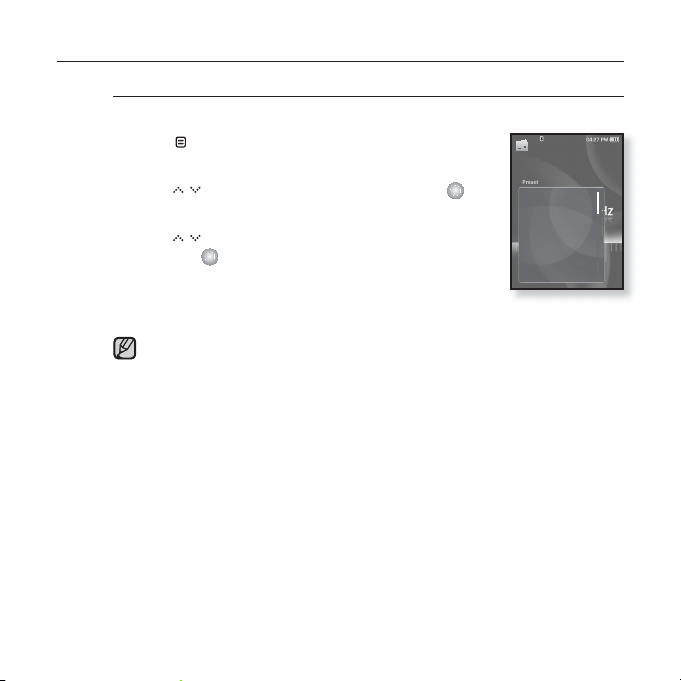
To set the FM region
You can change an FM region setting in preparation for overseas travel.
1. Tap [ ] in FM Radio mode.
The <FM Radio> menu appears.
2. Tap [ ] to select <FM Region> and tap [ ].
The <FM Region> menu appears.
3. Tap [ ] to select your regional area for FM radio
and tap [ ].
Select from <Korea/US>, <Japan> and <Other
Countries>.
Your previously stored radio frequencies will be deleted when you change
the <FM Region> on your player.
NOTE
Frequency range by region
- Korea/US: Search for FM frequencies in 100 kHz increments between
87.5 MHz~108.0 MHz.
- Japan: Search for FM frequencies in 100 kHz increments between 76.0
MHz~108.0 MHz.
- Other Countries: Search for FM frequencies in 50 kHz increments
between 87.50 MHz~108.00 MHz.
Go to Manual Mo
Delete from Pre..
Auto Preset
Start Recording
FM REC Quality
FM Sensitivity
FM Region
listening to FM radio _ 73
Page 74
USING THE FM RADIO MENU (Continued)
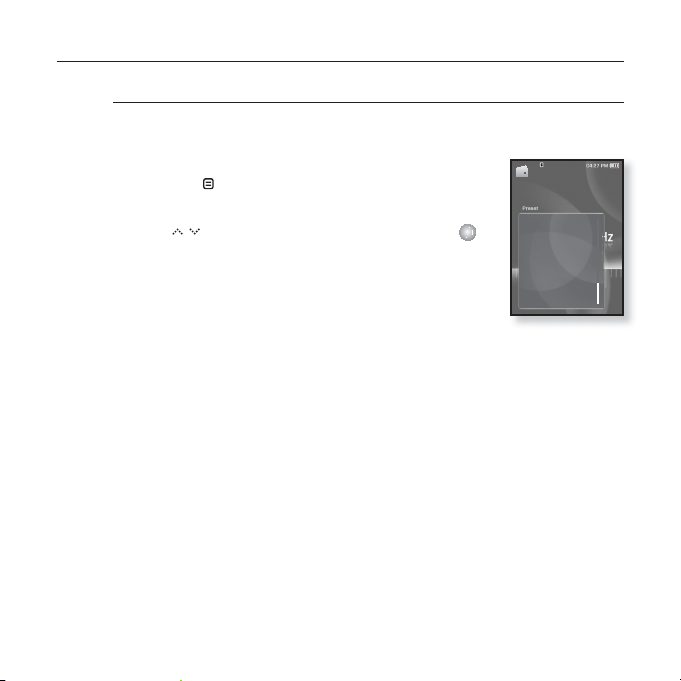
To add to the alarm sound
You can add your FM radio to the alarm sound list, so it can be heard
the next time the alarm goes off. See page 86 to set the alarm.
1. Select a radio frequency to add to the alarm sound
and tap [ ].
The <FM Radio> menu appears.
2.
Tap [ ] to select <Add to Alarm> and tap [ ].
If you set the alarm sound to <FM Radio> in the alarm
setting, you can listen to FM radio.
Delete from Pre..
Auto Preset
Start Recording
FM REC Quality
FM Sensitivity
FM Region
Add to Alarm
74 _ listening to FM radio
Page 75
using the datacast
Using <Media Studio>, you can transfer blog information and fi les registered on
RSS to the player for your entertainment.
What is RSS?
RSS stands for Rich Site Summary or Really Simple Syndication. It is a xml-based data
NOTE
transmission system used to deliver information on frequently updated web sites such as
news and blogs to users in a more convenient and easier way.
What are Datacasts?
You can automatically receive updated information without having to visit your frequently
visited news, blog and UCC sites every time.
Before you start - Media Studio must be installed on your PC. See page 34.
REGISTERING A CHANNEL
You can create a new channel by registering RSS-supported web sites or web pages.
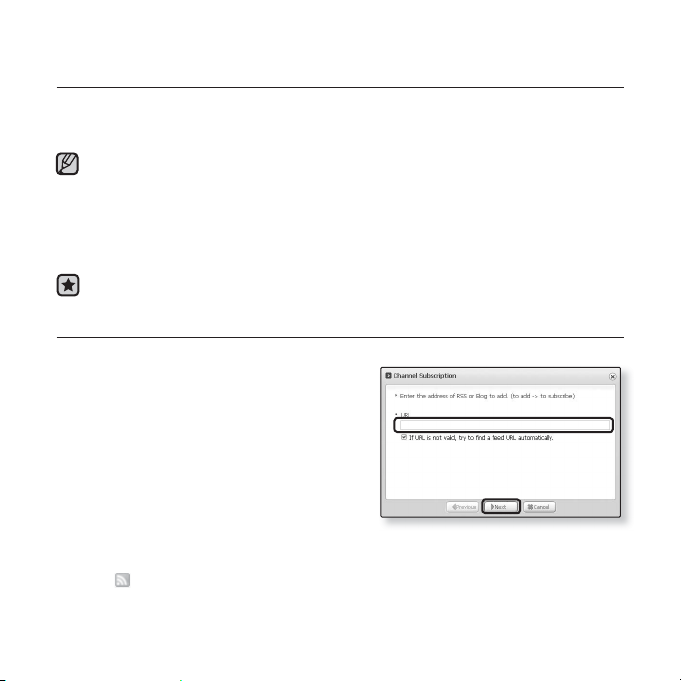
1. Click the <Subscribe> on the bottom of
the <Datacasts> of <Media Studio>.
2. Enter an address in the <URL> and Click
<ŹNext>.
When you copy a web address and click
<Subscribe>, the copied address is displayed
automatically in the <URL>.
The setting confi rmation window appears if the
Web address supports RSS.
3. Click <OK>.
The channel you want is registered.
icon appears in Datacasts for the registered channel.
The
2
using the datacast _ 75
2
Page 76
CREATING A NEW CHANNEL GROUP
You can create a new group to manage channels by the category.
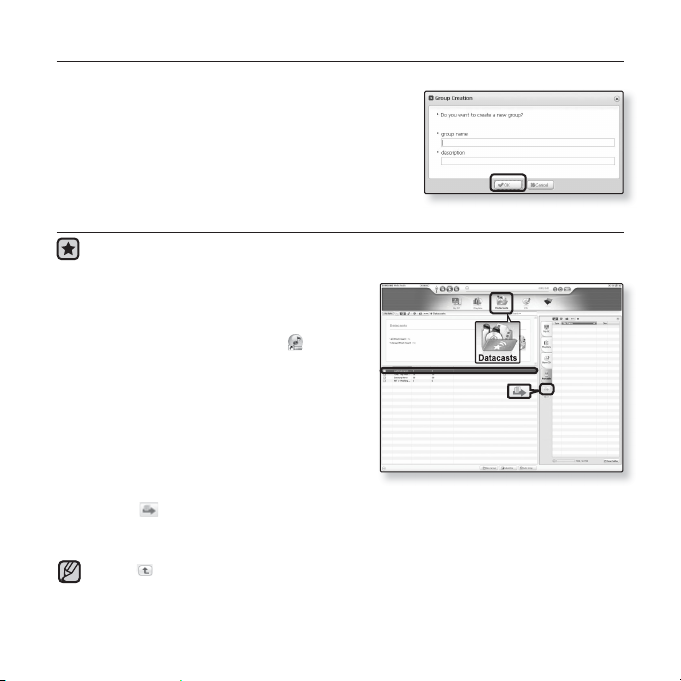
1. Click <New Group> on the bottom of
<Datacasts> of <Media Studio>.
2. Type in a group name and description and
click <OK>.
2
TRANSFERRING A DATACAST FROM <MEDIA STUDIO>
Before you start - Connect the player to your PC.
1. <Media Studio> will automatically start
when the player is connected to your PC.
If the program does not start automatically,
double click the <Media Studio>
the desktop.
2. Click <Datacasts> on the top of <Media
Studio>.
Datacasts group channel list appears.
3. Click a desired group channel.
4. Click a desired channel.
5. Select the post you want to transfer.
6. Click the icon.
The Post of the selected channel will be transferred to the player in <File Browser> ĺ
<Datacasts>.
on the top of <Media Studio> to move to the previous screen.
Click
NOTE
In <Datacasts> of <Media Studio>, if the post has the attachment, you can
download the attachment to the player. However, the attachment may not be
downloaded, depending on the policy of the applicable website.
76 _ using the datacast
Media Studio must be installed on your PC. See page 34.
2
icon on
[YP-S5[MTP]]
5
6
Portable [YP-S5[MTP]]
Page 77
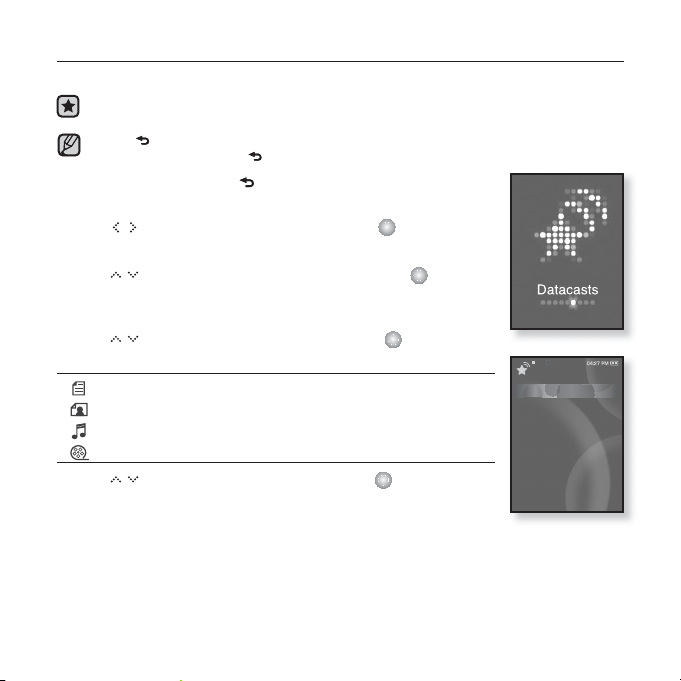
VIEWING DATACASTS
You can view channel posts added to <Datacasts>.
Before you start - Transfer a desired channel post to to the player using <Media
Studio>. See page 76.
NOTE
1. Press and briefl y hold [ ] to move to the main menu
screen.
2. Tap [ ] to select <Datacasts> and tap [ ].
The Datacasts list appears.
3. Tap [ ] to select a desired channel and tap [ ].
The title is the same as that of the channel added to <
in <Media Studio>.
4. Tap [ ] to select a desired post and tap [ ].
The fi le list appears.
icon : main text for the transferred post
icon : music fi le
5. Tap [ ] to select a desired fi le and tap [ ].
The selected fi le will start playing.
] to move to the previous screen.
Tap [
Press and briefl y hold [
icon : picture fi le
icon : video fi le
] to move to the main menu screen.
Datacasts
>
Datacasts
Datacast 1
Datacast 2
Datacast3
Datacast 4
1/4
using the datacast _ 77
Page 78
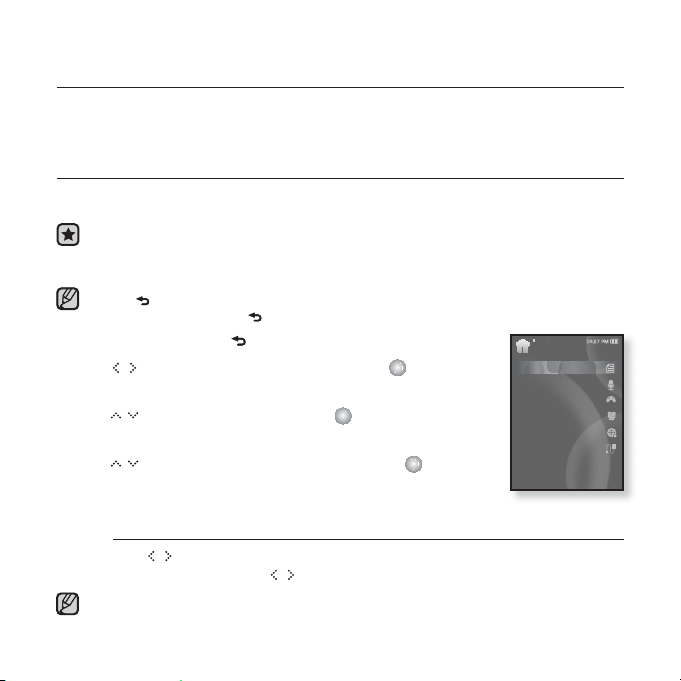
enjoying the prime pack
Prime Pack enables you to enjoy various functions such as reading text,
a voice recording, playing games and the alarm setting, etc.
READING TEXT
Whether it’s a novel, the manuscript of a new story, or your research paper, your
mp3 player allows you to read it… all while listening to music!
Before you start - Turn on the player and check the battery.
Transfer text fi les to the player using <Media Studio>. See page 35.
Set a preferred text language for text in <Settings> ˧ <Language> ˧
<Contents>. See page 28.
NOTE
1.
Press and briefl y hold [ ] to move to the main menu screen.
2. Tap [ ] to select <Prime Pack> and tap [ ].
The <Prime Pack> list appears.
3. Tap [ ] to select <Text> and tap [ ].
The text fi le list appears.
4. Tap [ ] to select a desired text fi le and tap [ ].
You will see the text on the screen.
NOTE
78 _ enjoying the prime pack
] to move to the previous screen.
Tap [
Press and briefl y hold [
] to move to the main menu screen.
Prime Pack
Tex t
Voice REC
Games
Alarm
World Clock
Audio In
To move to previous/next page
Tap [ ].
Press and briefl y hold [
You can also use the <File Browser>>to search for a text fi le. See page 23.
Your mp3 player supports the TXT fi le format in Text mode.
] to move continuously to the previous / next page.
Page 79
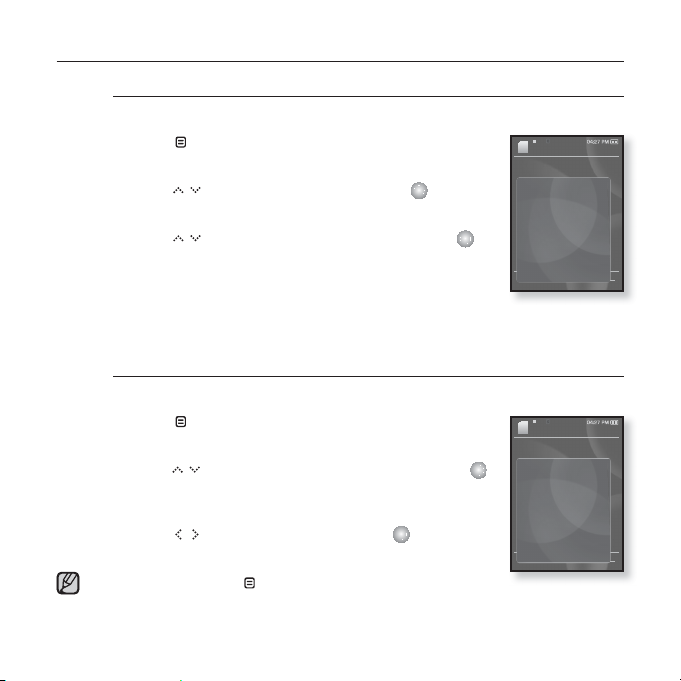
USING THE TEXT MENU
To listen to music while viewing your text
You can listen to the music that you last played while viewing your text.
1. Tap [ ] while viewing a text.
The <Text> menu appears.
2. Tap [ ] to select <Music> and tap [ ].
The <Music> menu appears.
3. Tap [ ] to select a desired mode and tap [ ].
<Off> : No background music is played while viewing
your text.
<On> : You can listen to the music that you last played
while viewing your text.
To move to the fi rst page
Use this if you want to view the text from the fi rst page.
1. Tap [ ] while viewing a text.
The <Text> menu appears.
2.
Tap [ ] to select <Go to 1st page> and tap [ ].
You will see the confi rmation window to move to the fi rst
page.
3. Tap [ ] to select <Yes> and tap [ ].
Moves to the fi rst page.
To exit the menu, tap [
NOTE
].
Book1
It's a common fantasy:
rewind your life, erase all the
mistakes and cringe-worthy
Music
moments and start over
Go to 1st Page
with a clean slate. But for
Samantha Newly, the fantasy
Add Bookmark
is far too real.
Go to Bookmark
Delete Bookmark
Font Size
Text Viewer Col..
Book1
It's a common fantasy:
rewind your life, erase all the
mistakes and cringe-worthy
Music
moments and start over
Go to 1st Page
with a clean slate. But for
Samantha Newly, the fantasy
Add Bookmark
is far too real.
Go to Bookmark
Delete Bookmark
Font Size
Text Viewer Col..
45.40%
45.40%
enjoying the prime pack_ 79
Page 80
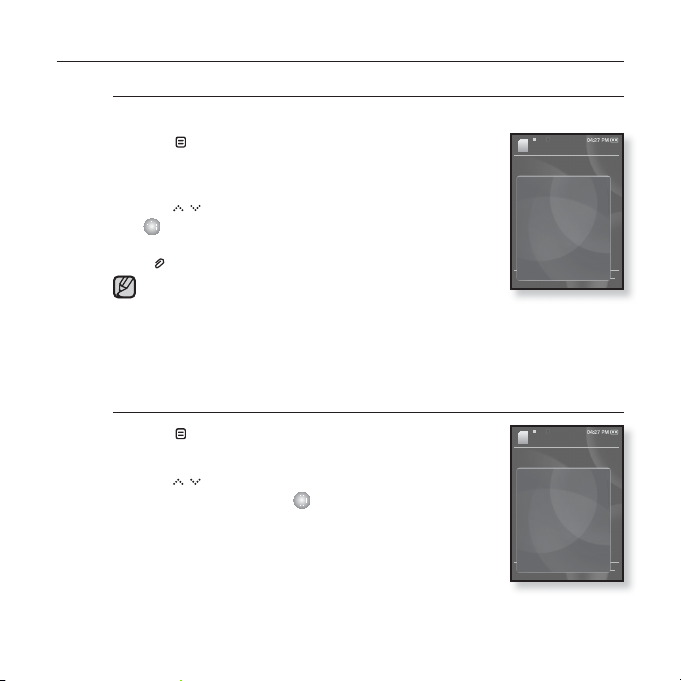
USING THE TEXT MENU (Continued)
To set a bookmark
Set a bookmark to return to that point in the text at any time.
1. Tap [ ] at the desired page you want while
viewing a text.
The <Text> menu appears.
2. Tap [ ] to select <Add Bookmark> and tap
[ ].
The current text screen is set to a bookmark with the
] symbol displayed on the top left corner.
[
The Overwrite window appears if there is a bookmark
previously set. If you select <Yes>, the previously set
NOTE
bookmark is deleted and a new bookmark is added.
The bookmark can be set one for each text fi le, and you can set a
maximum of 50 bookmarks.
To move to/ remove the bookmark
1. Tap [ ] while viewing a text.
The <Text> menu appears.
2. Tap [ ] to select <Go to Bookmark> or <Delete
Bookmark> and tap [ ].
When you selected <Go to Bookmark> then it will move
to the selected bookmark and <Delete Bookmark> will
remove the selected bookmark from the text fi le.
Book1
It's a common fantasy:
rewind your life, erase all the
mistakes and cringe-worthy
Music
moments and start over
Go to 1st Page
with a clean slate. But for
Samantha Newly, the fantasy
Add Bookmark
is far too real.
Go to Bookmark
Delete Bookmark
Font Size
Text Viewer Col..
Book1
It's a common fantasy:
rewind your life, erase all the
mistakes and cringe-worthy
Music
moments and start over
Go to 1st Page
with a clean slate. But for
Samantha Newly, the fantasy
Add Bookmark
is far too real.
Go to Bookmark
Delete Bookmark
Font Size
Text Viewer Col..
45.40%
45.40%
80 _ enjoying the prime pack
Page 81
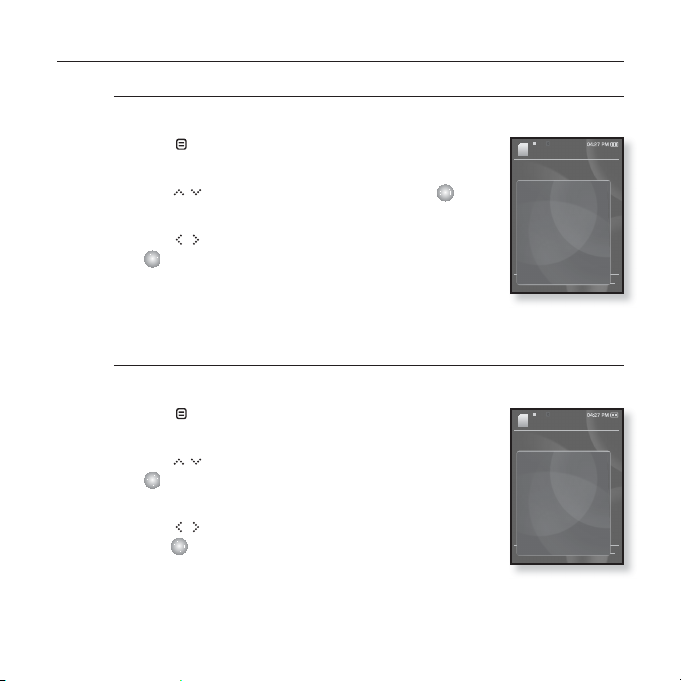
USING THE TEXT MENU (Continued)
To change the font size
You can change the font size of the text.
1. Tap [ ] while viewing a text.
The <Text> menu appears.
2. Tap [ ] to select <Font Size> and tap [ ].
The <Font Size> menu appears.
3. Tap [ ] to select a desired font size and tap
[ ].
Select from <Small>, <Medium> and <Large>.
To set the text viewer color
Choose what color you’d like the text to appear.
1. Tap [ ] while viewing a text.
The <Text> menu appears.
2. Tap [ ] to select <Text Viewer Color> and tap
[ ].
The <Text Viewer Color> menu appears.
3. Tap [ ] to select a desired text viewer color and
tap [ ].
Select from <Type 1> ~ <Type 6>.
Book1
It's a common fantasy:
rewind your life, erase all the
mistakes and cringe-worthy
Music
moments and start over
Go to 1st Page
with a clean slate. But for
Samantha Newly, the fantasy
Add Bookmark
is far too real.
Go to Bookmark
Delete Bookmark
Font Size
Text Viewer Col..
Book1
It's a common fantasy:
rewind your life, erase all the
mistakes and cringe-worthy
Music
moments and start over
Go to 1st Page
with a clean slate. But for
Samantha Newly, the fantasy
Add Bookmark
is far too real.
Go to Bookmark
Delete Bookmark
Font Size
Text Viewer Color
45.40%
45.40%
enjoying the prime pack_ 81
Page 82
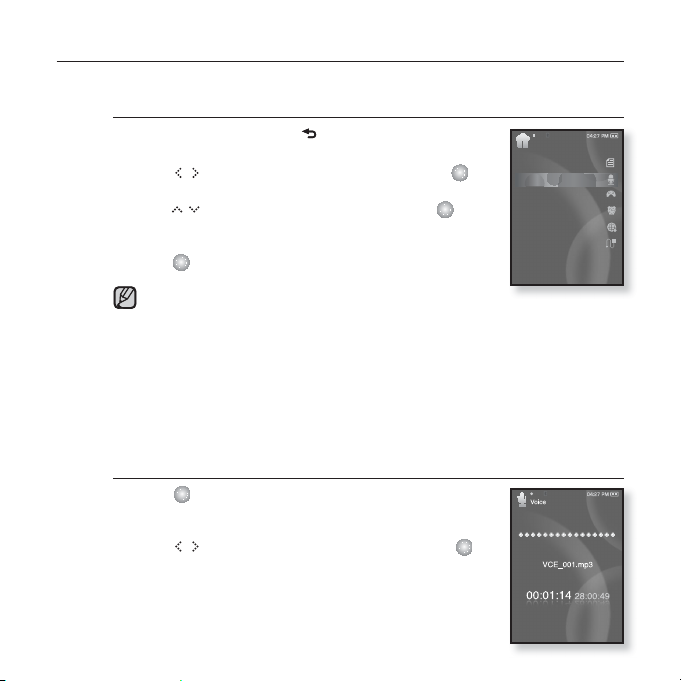
VOICE RECORDING
You can make a voice recording.
To make a voice recording
1. Press and briefl y hold [ ] to move to the main
menu screen.
2. Tap [
3.
Tap [ ] to select <Voice REC> and tap [ ].
4.
Tap [ ].
NOTE
To stop voice recording
1. Tap [ ] during the recording.
2. Tap [ ] to select <Yes> or <No> and tap [ ].
] to select <Prime Pack> and tap [ ].
The <Prime Pack> list appears.
The fi le name is displayed and the recording window
appears.
Recording is started with displaying the fi le name to save.
You can make a recording for up to approximately 30
hours (based on 128Kbps, 2GB)
You can store a maximum of 999 fi les for voice recording.
The recording fi le name will be automatically specifi ed, for example, as
such as “VCE_000.mp3”. “VCE” indicates the fi le is a voice recording and
“000” is the recording fi le number.
Voice recording does not perform properly when the battery is low.
Do not put the microphone too close to or far away from your mouth as it
may cause a poor recording.
You can listen to the sound only via the earphones while you are recording.
A message appears asking you if you want to listen to
the fi le you just recorded.
<Yes> will play the just recorded fi le.
<No> will not play the just recorded fi le.
The recorded fi le is stored in <File Browser> ĺ
<Recorded Files> ĺ <Voice>.
Prime Pack
Tex t
Voice REC
Games
Alarm
World Clock
Audio In
82 _ enjoying the prime pack
Page 83
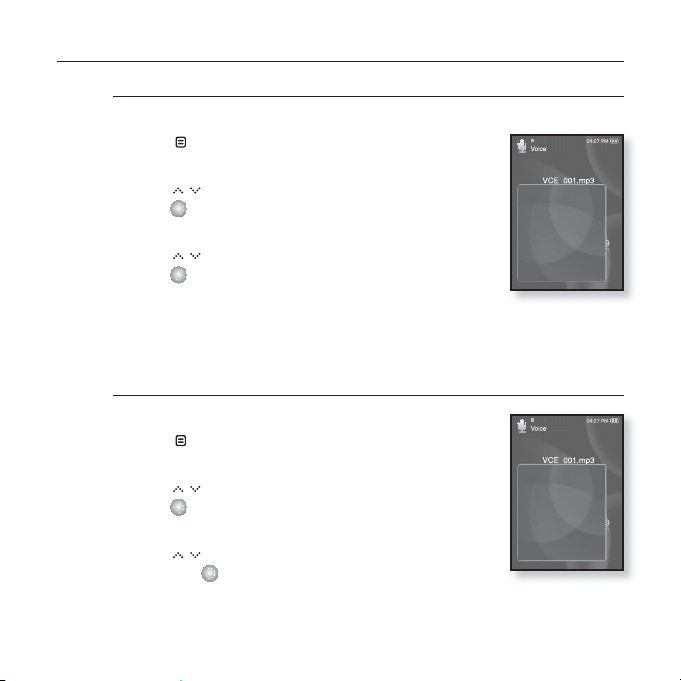
USING THE VOICE RECORDING MENU
To set the voice recording quality
You can select the voice recording quality.
1. Tap [ ] in the recording window.
The <Recording voice> menu appears.
2. Tap [ ] to select <Voice REC Quality> and
tap [ ].
The voice recording quality menu appears.
3. Tap [ ] to select a desired quality level and
tap [ ].
Select from <Super High(128kbps)>, <High(96kbps)>
and <Normal(64kbps)>.
The higher the number is, the better the audio quality and the larger the fi le
size becomes.
To listen to the recorded fi les
You can listen to a previously recorded fi le.
1. Tap [ ] in the recording window.
The <Recording voice> menu appears.
2. Tap [ ] to select <Recorded Files> and
tap [ ].
The <Recorded fi les> list appears.
3. Tap [ ] to select a recorded fi le of your choice
and tap [ ].
The recorded fi le will start playing.
Voice REC Quality
Recorded Files
Voice REC Quality
Recorded Files
enjoying the prime pack_ 83
Page 84
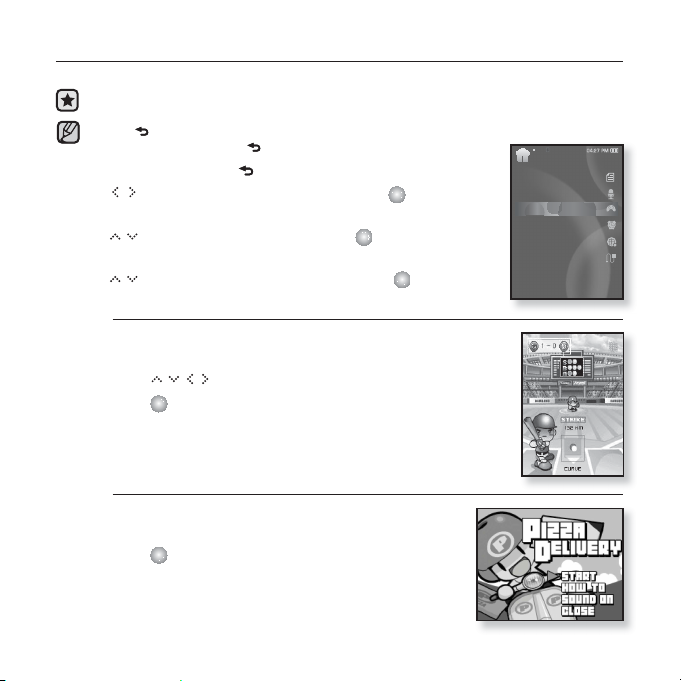
PLAYING VIDEO GAMES
Your mp3 player comes with the exciting games already loaded on!
Before you start - Connect the earphones, then turn on the player, and check the
battery.
NOTE
1. Press and briefl y hold [ ] to move to the main menu.
2. Tap [
The <Prime Pack> list appears.
3. Tap [ ] to select <Games> and tap [ ].
Tha game list appears.
4. Tap [ ] to select a desired game and tap [ ].
] to move to the previous screen.
Tap [
Press and briefl y hold [
] to move to the main menu screen.
] to select <Prime Pack> and tap [ ].
Baseball
Try to score against one of the league’s best pitchers in
this version of America’s favorite pastime.
Tap [
Tap [
] to select a menu or function.
] to pitch or hit the ball.
Pizza Delivery
See if you can get the pizza delivered on time and
avoid the many obstacles along the way.
] to jump up.
Tap [
Prime Pack
Tex t
Voice REC
Games
Alarm
World Clock
Audio In
84 _ enjoying the prime pack
Page 85
PLAYING VIDEO GAMES (Continued)
Honeybee
This is a puzzle game where you match 3 or more
colored objects to gain scores.
Use [
direction.
Tap [
Jungmumun
This is a martial arts type game requiring
instantaneous reactionary ability, in which you have to
kick and punch to remove the stones according to the
arrow direction marked on them.
Use [ ] to remove the stone.
Food King
This is a game that requires you to arrange food
by changing the order of three colored objects
(representing burger, tomato and bun) up and down,
diagonally, or in a row. The object is to prevent the food
from reaching the top of the screen.
Use [
Use [
Tap [
Games may be added or changed without notice.
For more information about Game navigation, see the Help section.
NOTE
] to select a menu or move the object’s
] to select or cancel.
] to move the object.
] to change the position of the object.
] to drop the object.
enjoying the prime pack_ 85
Page 86
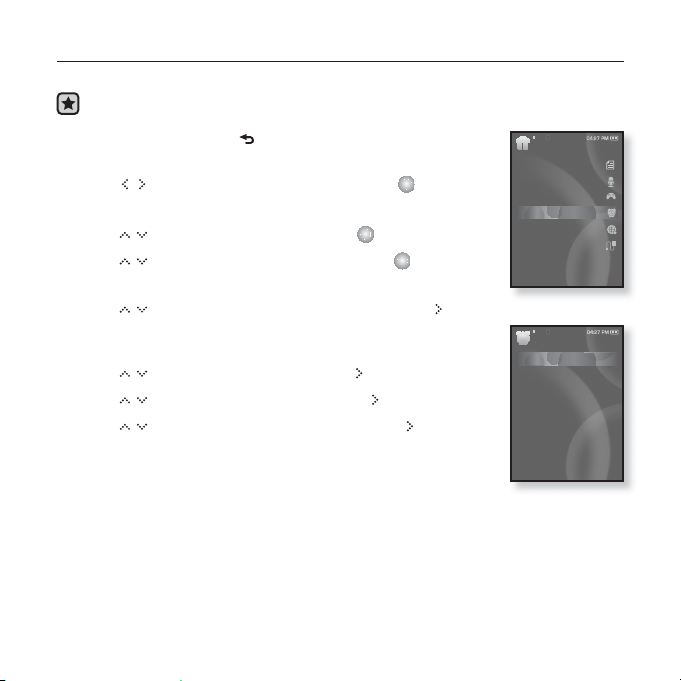
SETTING THE ALARM
This player has an alarm which can be set to go off at a scheduled time.
Before you start - Set the current date and time . See page 29.
1. Press and briefl y hold [ ] to move to the main menu
screen.
2. Tap [ ] to select <Prime Pack> and tap [ ].
The <Prime Pack> list appears.
3. Tap [ ] to select <Alarm> and tap [ ].
4. Tap [ ] to select <New Alarm> and tap [ ].
The new alarm settings window appears
5. Tap [ ] to select an alarm frequency and tap [ ].
Select from <Once>, <Everyday>, <Mon~Fri>, <Mon~Sat>,
<Sat~Sun> and <Off>.
6. Tap [ ] to select the hour and tap [ ].
7. Tap [ ] to select the minute and tap [ ].
8. Tap [ ] to select <AM> or <PM> and tap [ ].
86 _ enjoying the prime pack
Prime Pack
Tex t
Voice REC
Games
Alarm
World Clock
Audio In
Alarm
New Alarm
Page 87
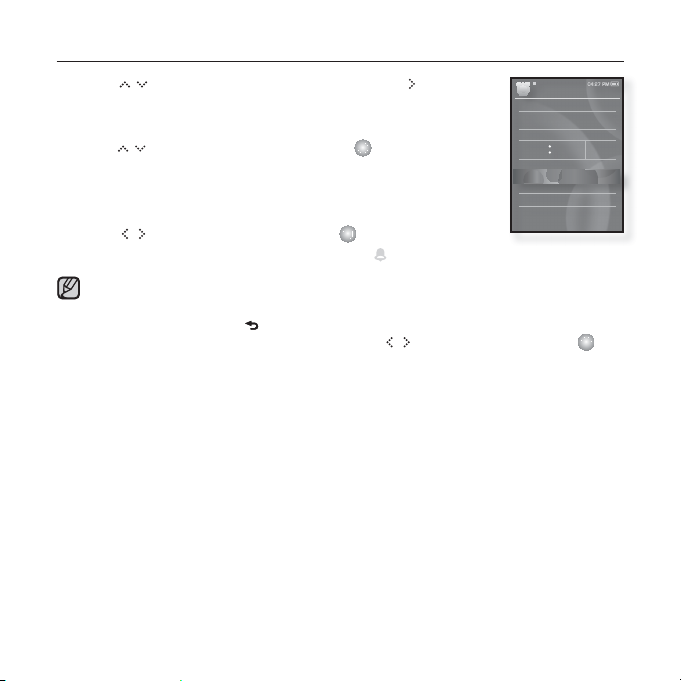
SETTING THE ALARM (Continued)
9. Tap [ ] to select an alarm sound and tap [ ].
Select one from <Alarm Sound 1> through <Alarm Sound 3>,
music fi le added to the alarm sound and FM Radio.
10.
Tap [ ] to select an interval and tap [ ].
Select one from <Interval : Off>, <Interval : 3min>,
<Interval : 5min> and <Interval : 10min>.
The save confi rmation window will appear.
11. Tap [ ] to select <Yes> and tap [ ].
When the alarm setting is done, the symbol ( ) will appear on the top.
You can store up to 7 alarms.
NOTE
The player will sound the alarm when it reaches the scheduled time.
To end the alarm, tap [
When the confi rmation window appears, tap [
You will return to the main menu.
].
] to select <Yes> and tap [ ].
New Alarm Settings
Once
08 00 AM
Ÿ
Alarm Sound 1
ź
Interval : Off
enjoying the prime pack_ 87
Page 88
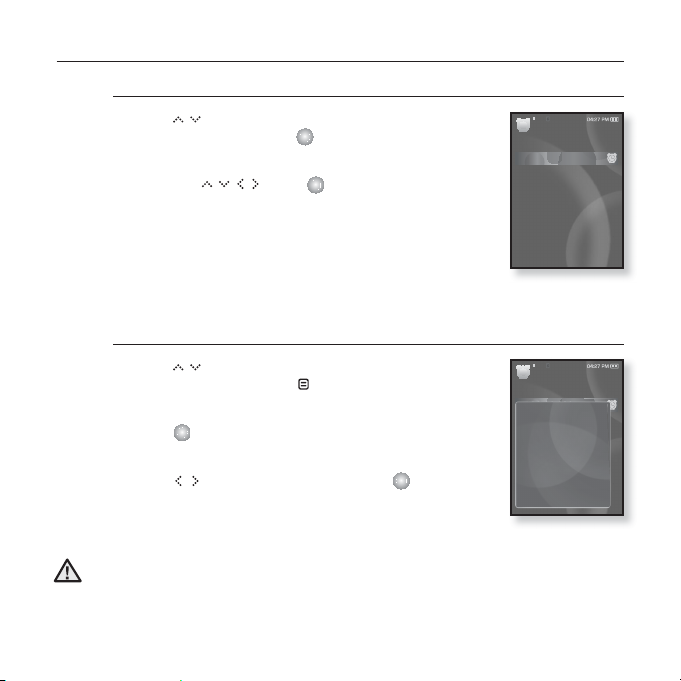
SETTING THE ALARM (Continued)
To edit the alarm setting
1. Tap [ ] to select the alarm setting to change in
the alarm list and tap [ ].
The Alarm Settings window appears.
2. Use the [ ] and [ ] to edit the settings you
prefer.
To delete an alarm setting
1. Tap [ ] to select the alarm setting to delete in
the alarm list and tap [ ].
The delete menu appears.
2. Tap [ ].
The Delete window appears.
3. Tap [ ] to select <Yes> and tap [ ].
The selected alarm will be deleted.
If the USB cable is connected to the player, the alarm function does not work.
CAUTION
Alarm
New Alarm
08:00 AM
Alarm
New Alarm
08:00 AM
Delete
88 _ enjoying the prime pack
Page 89
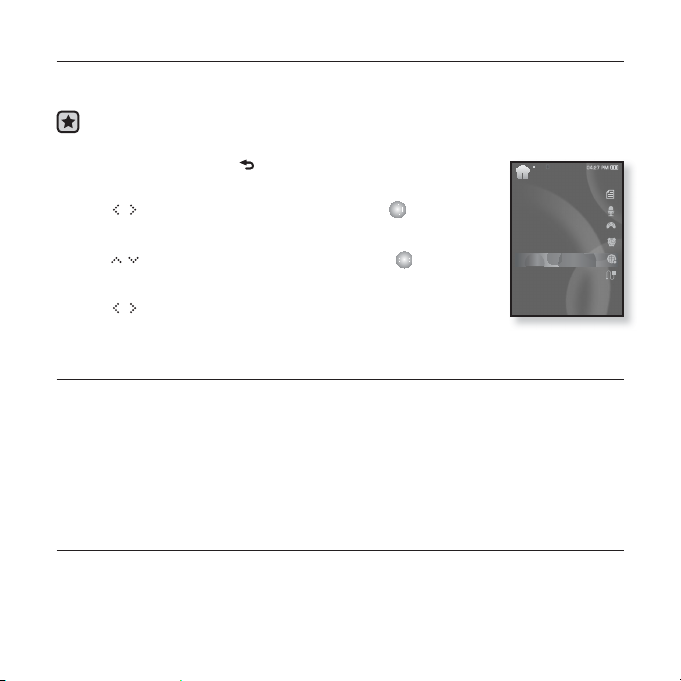
VIEWING THE WORLD CLOCK
You can check the location and date/time of major world cities based on their
respective time zone.
Before you start - Set the current date and time. See page 29.
Set the time zone you want in the <Settings> ˧ <Time> ˧ <Time Zone>.
1. Press and briefl y hold [ ] to move to the main menu
screen.
2. Tap [ ] to select <Prime Pack> and tap [ ].
The <Prime Pack> list appears.
3. Tap [ ] to select <World Clock> and tap [ ].
The world clock screen appears.
4. Tap [ ] to select a time zone.
You can check local time of the following time zone.
(‘/’ indicates the standard time zone in the region)
Cape Verde / London, Lisbon / Rome, Paris, Berlin, Stockholm, Madrid, Frankfurt/
Athens, Helsinki, Cairo, Ankara / Moscow, Riyadh / Abu Dhabi, Muscat / Tashkent, Ashgabat /
Alma Ata, Kathmandu / Bangkok, Jakarta, Rangoon / Hongkong, Beijing, Manila, Singapore /
Seoul, Tokyo, Pyongyang / Guam, Sydney, Brisbane / Okhotsk /
Wellingtons, Oakland, Fiji / Samoa, Midway / Honolulu, Hawaii, Tahiti / Alyeska /
Los Angeles, San Francisco, Vancouver, Seattle / Denver, Phoenix, Salt Lake City /
Chicago, Dallas, Houston, Mexico City / New York, Miami, Washington DC, Montreal, Atlanta /
Caracas, LA Paz, Santiago / Buenos Aires, Brasilia, Sao Paulo / The middle Atlantic
Prime Pack
Tex t
Voice REC
Games
Alarm
World Clock
Audio In
enjoying the prime pack_ 89
Page 90
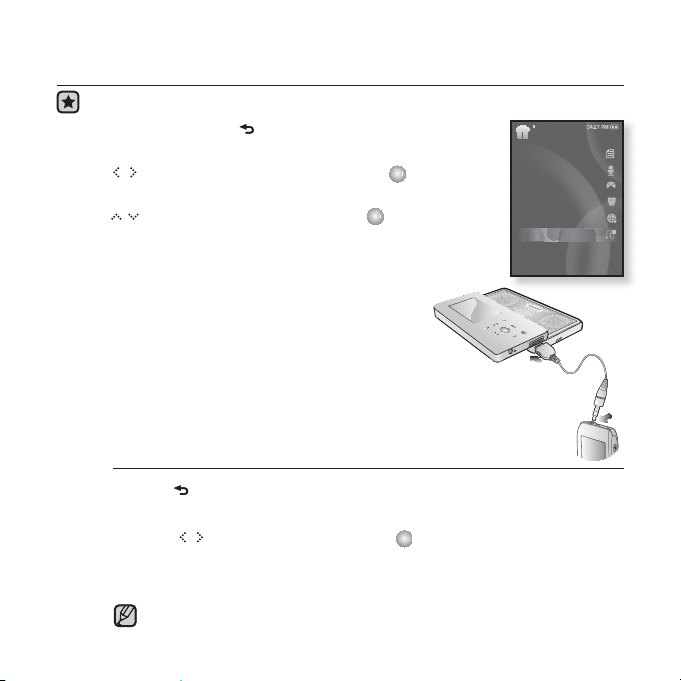
USING THE SPEAKERS TO LISTEN TO MUSIC FROM AN EXTERNAL DEVICE
Before you start - Open the speakers panel by sliding.
1. Press and briefl y hold [ ] to move to the main menu
screen.
2. Tap [ ] to select <Prime Pack> and tap [ ].
The <Prime Pack> list appears.
3. Tap [ ] to select <Audio In> and tap [ ].
4. Connect the 3.5ĭ earphone jack on the external device to
the USB connection port on the player with the Audio in
cable.
You will see connection completion message on the
screen.
5. Press the Play button on the external device to
play music over the YP-S5’s speakers.
To disconnect the External Device
1. Tap [ ].
You will see the audio input exit message.
2. Tap [ ] to select <Yes> and tap [ ].
The audio input mode will be terminated.
3. Disconnect the player from the external device.
The sound volume may vary, depending on the connected external device.
NOTE
90 _ enjoying the prime pack
Prime Pack
Tex t
Voice REC
Games
Alarm
World Clock
Audio In
Page 91
using bluetooth
Using Bluetooth wireless, you can connect your player wirelessly to other
Bluetooth devices and exchange data with them, talk hands-free or enjoy music
using a Bluetooth stereo headset.
Ta p [ ] to move to the previous screen.
Press and briefl y hold [
NOTE
WHAT IS BLUETOOTH?
Bluetooth is an industry specifi cation that describes how Bluetooth-compliant
stereo headsets, mobile phones, and external devices can easily interconnect
with each other using a short wireless connection.
The Bluetooth device can cause a noise or malfunction, depending on the use
conditions.
Physical signal interference, for instance, if you hold the player in the hand and wear a
stereo headset in your ears, or if you hold the player in the one hand and take a mobile
phone in the other hand.
When a part of the body is in contact with the receiving/transmitting system of the
player or the stereo headset.
Electrical variation from electrical jamming by the wall, corner or offi ce partitioning.
Electrical interference from the same frequency-band devices including medical
equipment, microwave oven and wireless LAN.
When pairing the Bluetooth device with the player, make it within as short distance
as possible.
The farther the distance between player and stereo headset is, the worse the
quality is. If the distance exceeds the limit, the communications are disconnected.
] to move to the main menu screen.
using bluetooth_ 91
Page 92
WHAT IS BLUETOOTH? (Continued)
We do not recommend you use text and picture view modes while listening to
the music with the stereo headset or hands-free (mobile phone), or transferring
fi les as it can cause deterioration of both player performance and Bluetooth
communications.
Depending on the model of the stereo headset, fi les less than 32 KHz can not be
played.
In poor reception-sensitivity areas such as inside an elevator or underground,
the Bluetooth connection may not work properly.
The maximum distance that enables wireless connection between the player and
the Bluetooth device is 32.8 feet. The connection will be automatically cut off if
the distance is out of this range. Even within this range, the sound quality may be
deteriorated by obstacles such as walls or doors.
When not in use, set the <Bluetooth Mode> to <Off>. If you stay in <On> for
NOTE
<Bluetooth Mode>, the battery usable time is reduced.
The Bluetooth features of the player are optimized with Samsung products. If used with
third party products, the Bluetooth features may not work properly.
92 _ using bluetooth
Page 93
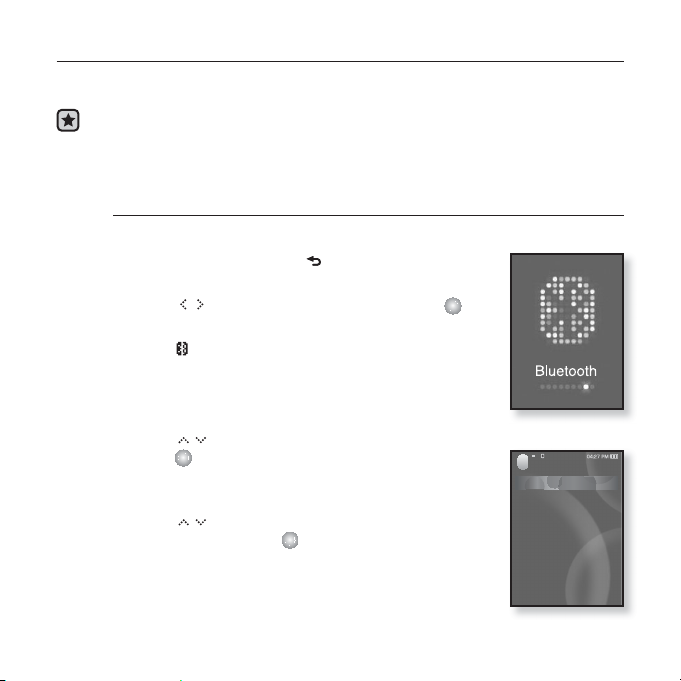
USING A BLUETOOTH STEREO HEADSET
You can use a Bluetooth stereo headset to let you enjoy music with high quality
stereo sound, all without wires!
Before you start - If the player has connected to a Bluetooth mobile phone or
To register the Bluetooth Stereo Headset
(you only need to register it once)
1. Press and briefl y hold [ ] to move to the main
menu screen.
2. Tap [ ] to select <Bluetooth> and tap [ ].
The <Bluetooth Mode> is set to <On>.
The
3. Set the stereo headset ready for pairing.
To set the headset ready for the pairing mode, refer to
the headset’s user manual.
4. Tap [ ] to select <Stereo Headset> and
tap [ ].
This player automatically starts to search for any
Bluetooth stereo headset.
5. Tap [ ] to select the name of headset you want
to register and tap [ ].
The password input window appears if the password for
the headset is other than 0000. Refer to the headset’s
manual for the password.
The registration of the headset is completed.
external device, set off the connection fi rst.
Ensure that the Bluetooth device to connect is ready for pairing.
(refer to the device’s user manual)
icon will light.
Bluetooth
Stereo Headset
Mobile Phone
File Transfer
Bluetooth Mode
Bluetooth Settings
using bluetooth_ 93
Page 94
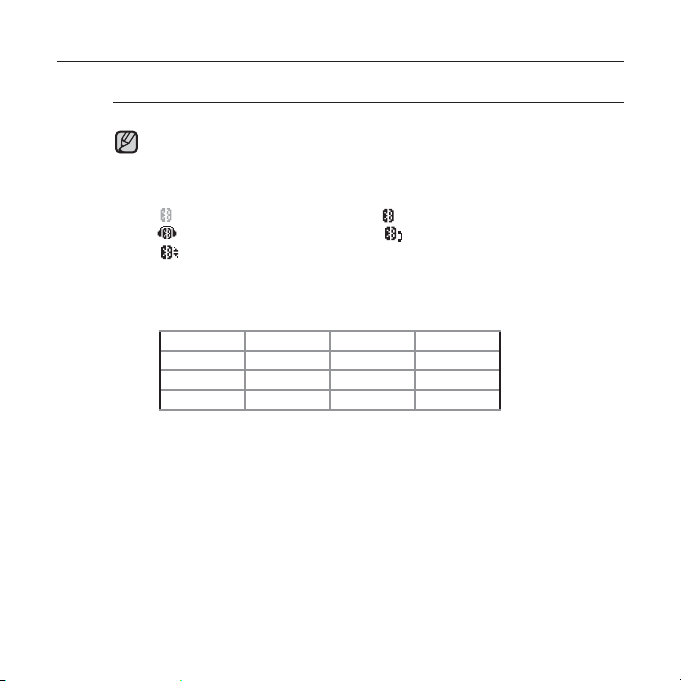
USING A BLUETOOTH STEREO HEADSET (Continued)
To register the Bluetooth Stereo Headset (continued)
You can use the Bluetooth function only when playing music and listening
to FM Radio. It is not supported while you are enjoying a video or playing
NOTE
a game.
Description of the Bluetooth icon
: Bluetooth mode off : Bluetooth mode on
:Connected to a stereo headset :Connected to a mobile phone
: File transfer mode
If you want to turn off the Bluetooth function, set the Bluetooth Mode to
<Bluetooth> ĺ <Bluetooth Mode> ĺ <Off>..
Bluetooth-compliant Headsets
Company Model Company Model
i.TECH Blueband SAMSUNG SBH100
Plantronics PULSAR 590A Jabra BT620s
MOTOROLA
Use only a Bluetooth-certifi ed stereo headset. Mono hands-free headsets
are not supported.
HT820
94 _ using bluetooth
Page 95
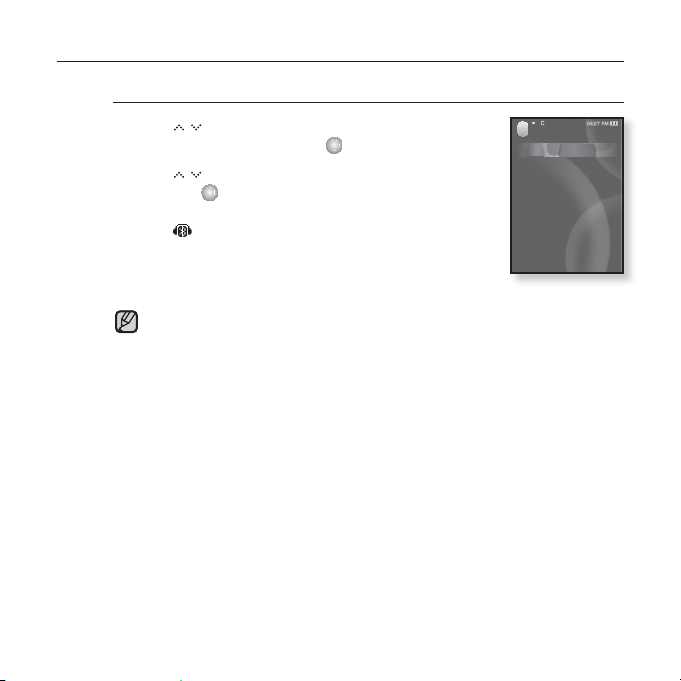
USING A BLUETOOTH STEREO HEADSET (Continued)
To connect the registered Bluetooth stereo headset
1. Tap [ ] to select <Stereo Headset> in the
Bluetooth screen and tap [ ].
2. Tap [
] to select a stereo headset to connect
and tap [ ].
When the connection is successfully done, you will see
icon.
the
3. Play a fi le of your choice.
You can listen to the music using a stereo headset.
If you can’t fi nd the desired headset to connect, register it fi rst.
NOTE
If you turn off the player or the headset, and then turn it on, the bluetooth
communication may be disconnected. If you want to listen to the music
again using the stereo headset, repeat the instructions above.
using bluetooth_ 95
Bluetooth
Stereo Headset
Mobile Phone
File Transfer
Bluetooth Mode
Bluetooth Settings
Page 96
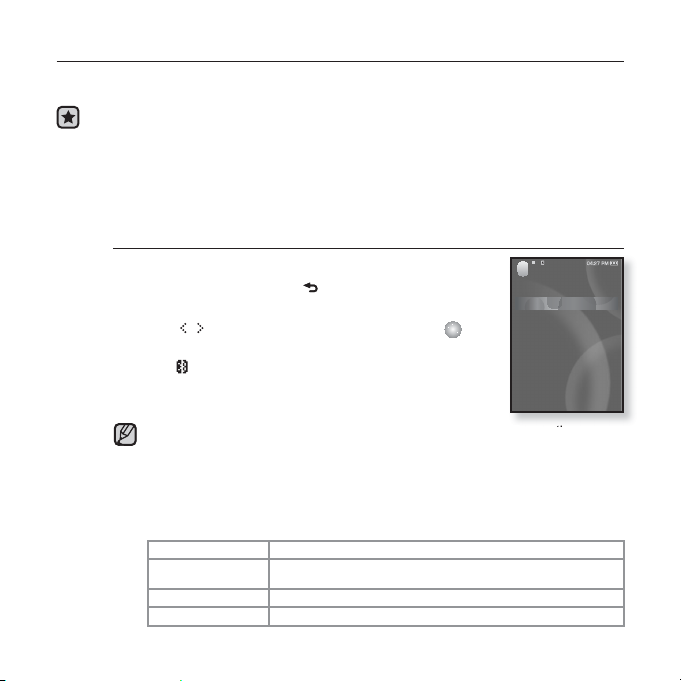
USING A
BLUETOOTH
MOBILE PHONE
You can make and receive phone calls on your player once you connect a
Bluetooth mobile phone. The player will function as a hands-free device.
Before you start - If the player is connected to a Bluetooth stereo headset or
external device, set the connection to off fi rst.
Ensure that the Bluetooth mobile phone you are going to
connect is ready for pairing. (refer to the mobile phone’s user
manual)
Set to <Discoverable> from <Bluetooth Settings> ĺ <Discover
option>. See page 108.
To register the Bluetooth mobile phone
(you only need to register it once)
1.
Press and briefl y hold [ ] to move to the main
menu screen.
2. Tap [ ] to select <Bluetooth> and tap [ ].
The <Bluetooth Mode> is set to <On>.
The
icon will light.
3.
Search for YP-S5 in your mobile phone’s menu.
If you renamed the YP-S5 player, search the new name.
With some mobile phones, the search device and mobile conversation
(placing/receiving calls) functions may not work properly.
NOTE
If you press a button on the mobile phone or make or end a call when there
is a Bluetooth connection between the player and the mobile phone, you may
hear a noise from the player.
We recommended using English for the device name of the mobile phone.
Bluetooth-compliant Mobile Phones
Company Model
SAMSUNG
NOKIA N73
MOTOROLA
96 _ using bluetooth
SGH-D500, SGH-D600, SGH-D820, SGH-D900,
SPH-V6900, SPH-V7400, SPH-V8900, SPH-V9000
MOTORIZR Z3
Bluetooth
Stereo Headset
Mobile Phone
File Transfer
Bluetooth Mode
Bluetooth Settings
Page 97
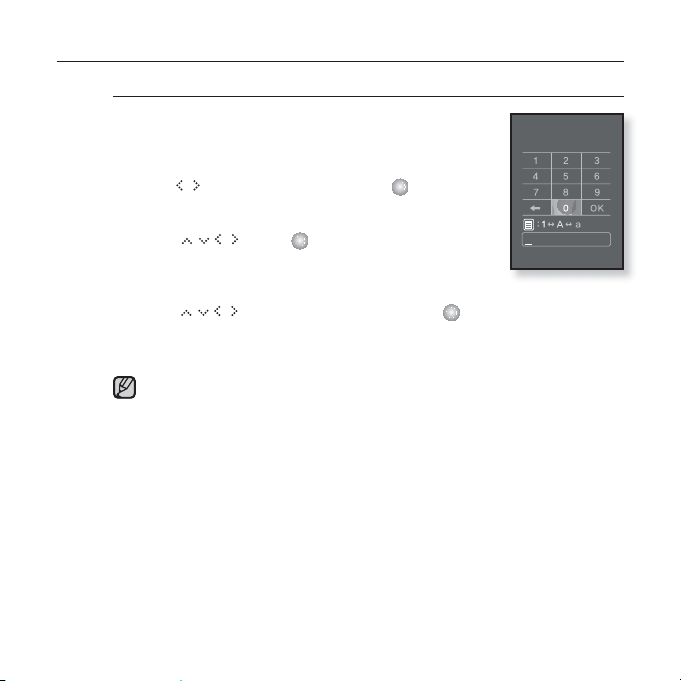
USING A BLUETOOTH MOBILE PHONE (Continued)
To register the
4.
Enter the password when the password input
Bluetooth
mobile phone (Continued)
window appears on the mobile phone.
5.
When you see <Pair?>,
tap [ ] to select <Yes> and tap [ ].
The PIN code (password) input window appears.
6.
Use
[ ]
and [ ] to enter the password
for the mobile phone to add to the player.
Make sure to enter the same password as in step 4 above.
7. Use [ ] to move to <OK> and tap [ ].
The mobile phone registration is complete.
The password digits may differ, depending on the mobile phone. (refer to
NOTE
the mobile phone’s user manual)
using bluetooth_ 97
Enter PIN code
Page 98
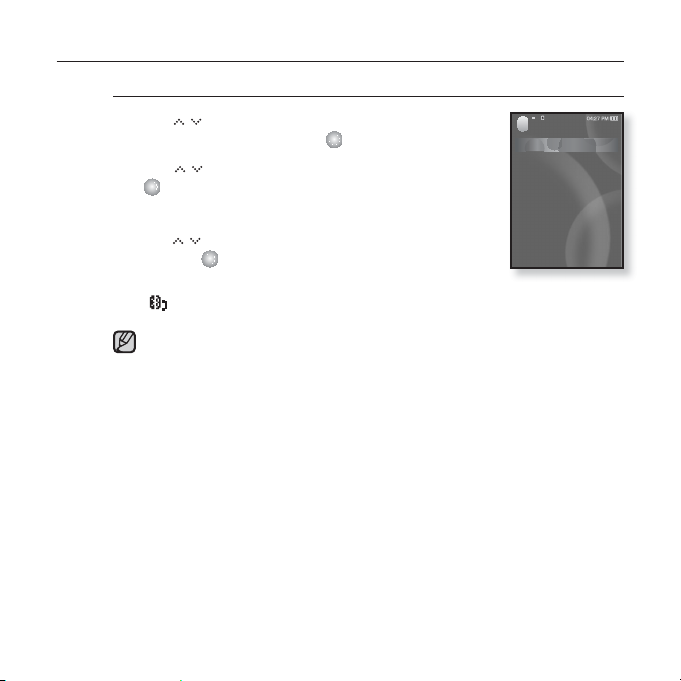
USING A BLUETOOTH MOBILE PHONE (Continued)
To connect to the registered Bluetooth mobile phone
1. Tap [ ] to select <Mobile Phone> in the
Bluetooth screen and tap [ ].
Tap [ ] to select <Connect to Phone> and tap
2.
[ ].
The phone number input window appears.
3. Tap [ ] to select the mobile phone to connect to
and tap
[ ].
When the connection is successfully done, you will see the
icon.
If you can’t fi nd a phone to connect to, register the phone with the player
fi rst.
NOTE
The mobile phone connection can be set off if you turn off and restart the
player. If the connection is set off, refer to the steps above to connect
again.
98 _ using bluetooth
Mobile Phone
Connect to Phone
Call by Number
Call History
Page 99
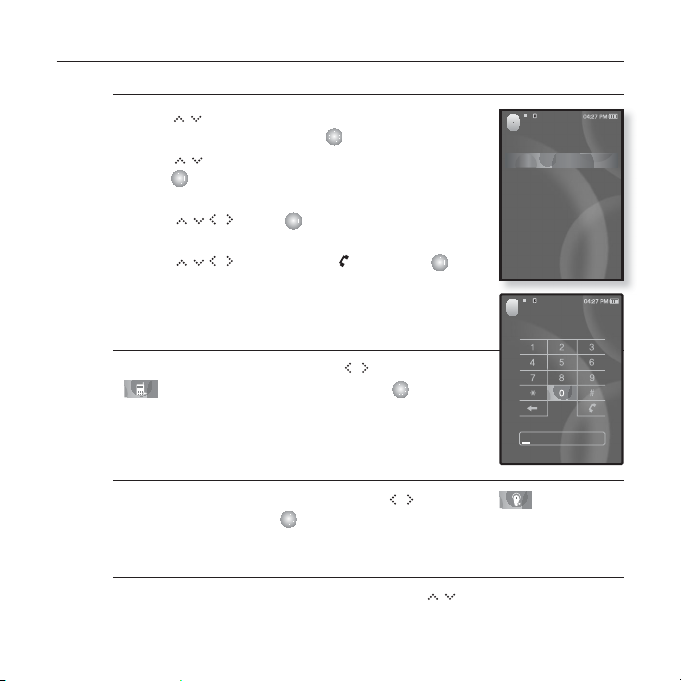
USING A BLUETOOTH MOBILE PHONE (Continued)
To make a call using the player
1. Tap [ ] to select <Mobile Phone> in the
Bluetooth screen and tap [ ].
Tap [ ] to select <Call by Number> and
2.
tap [ ].
The phone number input window appears.
3. Use [
]
and [ ] to enter the phone
Mobile Phone
Connect to Phone
Call by Number
Call History
number for the other person.
4. Use [
You are now placing a call to the other person.
To switch to the mobile phone while
] to move to < > and tap [ ].
Mobile Phone
talking on the player (YP-S5)
While talking on the player, tap [ ] to select
< > on the screen display and tap [ ].
You can now make conversations on the mobile phone.
To switch to the player (YP-S5) while
talking on the mobile phone
While talking on the mobile phone, tap [ ] to select < > on the
screen display and tap [ ].
You can now make conversations on the hands-free device.
To adjust the volume
While talking on the hands-free device, tap [ ] to adjust the volume.
You can select the volume from 0 to 30.
using bluetooth_ 99
Page 100
USING A BLUETOOTH MOBILE PHONE (Continued)
To make a call using the phone number list
1. Tap [ ] to select <Mobile Phone> in the
Bluetooth screen and tap [ ].
2. Tap [
] to select <Call History> and tap [ ].
The phone number list appears.
3. Tap [ ] to select a desired number and tap
[ ].
You are now placing a call to the other person.
To delete a phone number in the phone number list
1. In <Call History> list, tap [ ] to select the phone number to
delete and tap [ ].
2. Tap [
3. Tap [ ] to select <Yes> and tap [ ].
100 _ using bluetooth
] to select <Delete> and tap [ ].
If you want to delete all numbers in the phone number list, select
<Delete All>.
The confi rmation window appears
The selected number will be deleted.
Mobile Phone
Connect to Phone
Call by Number
Call History
 Loading...