

Page 1
4. Disassembly and Reassembly
4-1 Main Body
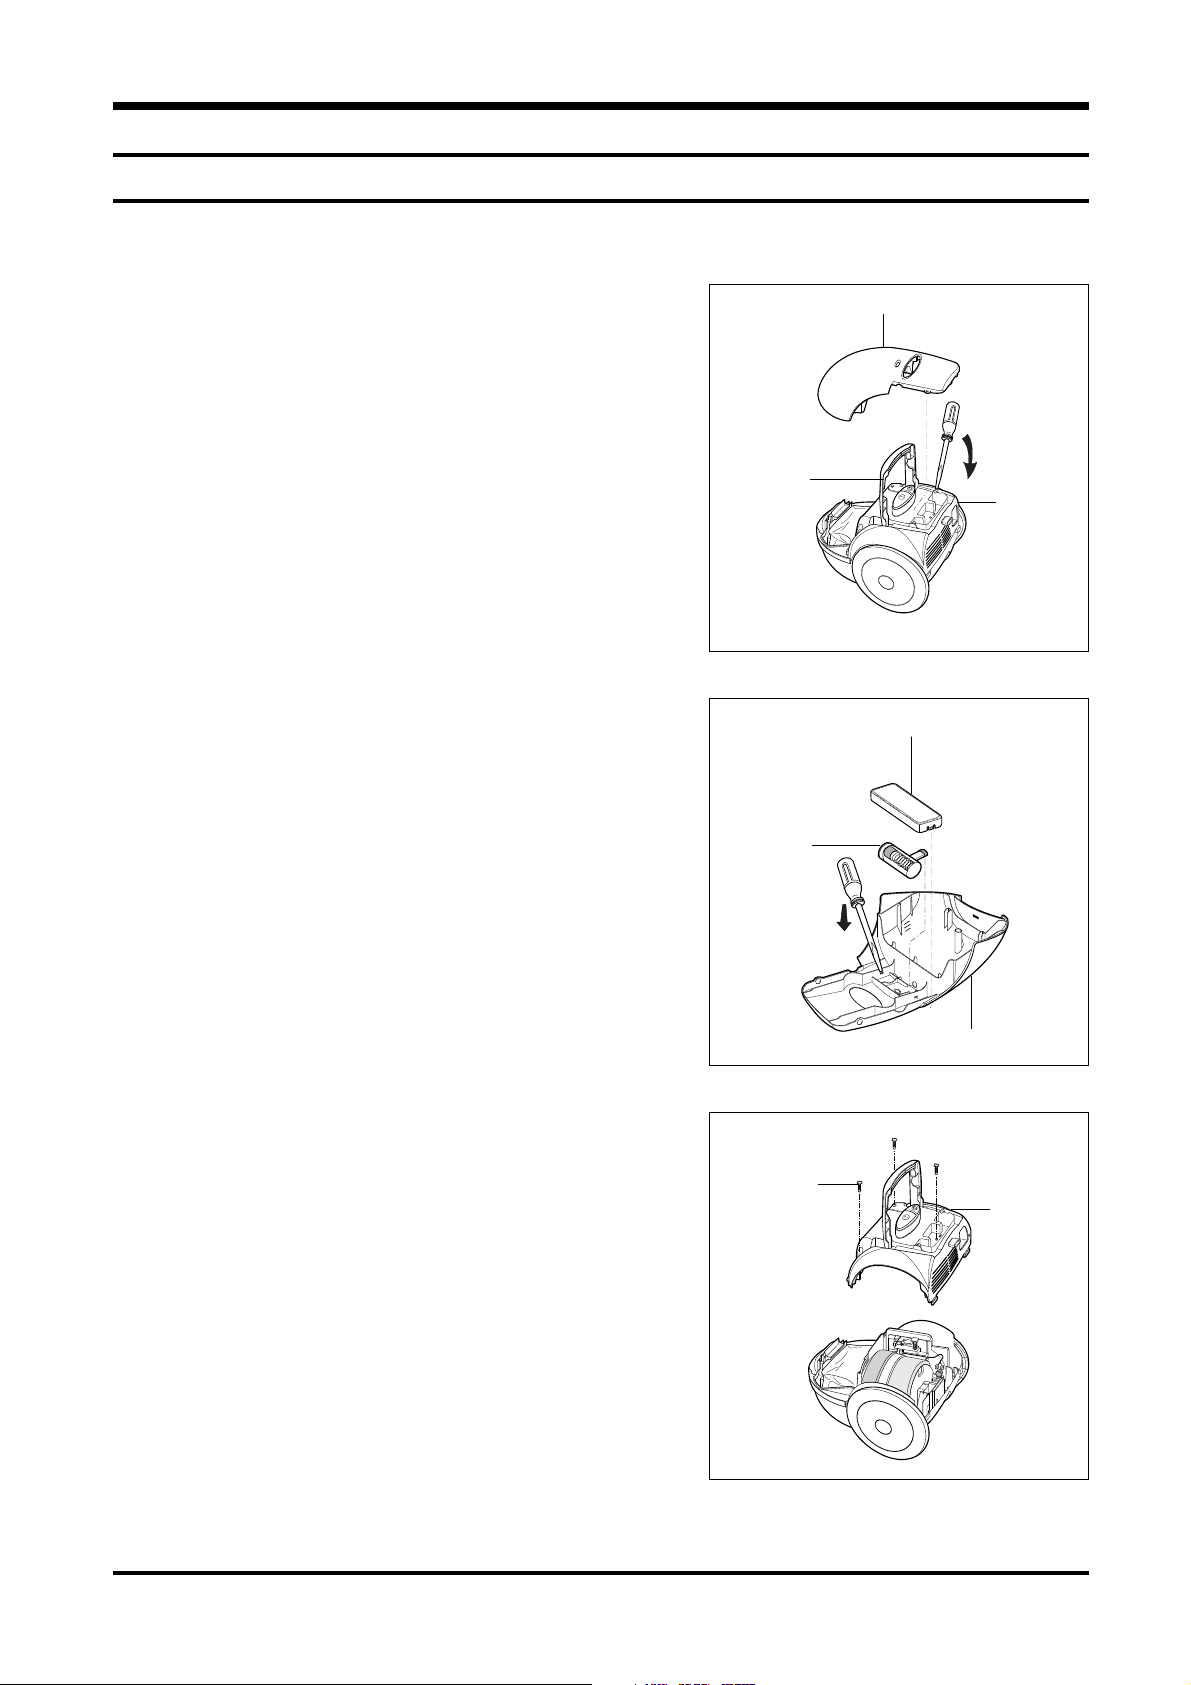
1. While keeping the door handle open, separate
the Dust-Cover and Body-Control Assemblies
from the main body (use a screwdriver).
2. Separate the Indicator Assembly from the Dust Cover assembly. (Pull it from the left and right
hooks. Use a screwdriver.)
ASSY-COVER DUST
HANDLE
ASSY-BODY
CONTROL
COVER-INDICATOR
ASSY-
INDICATOR
3. Loosen the three screws (4 x 16). Separate the
Body-Control Assembly from the Main Body.
SAMSUNG ELECTRONICS CO., LTD.
ASSY-COVER DUST
SCREW(4X16)
ASSY-BODY
CONTROL
4-1
Page 2
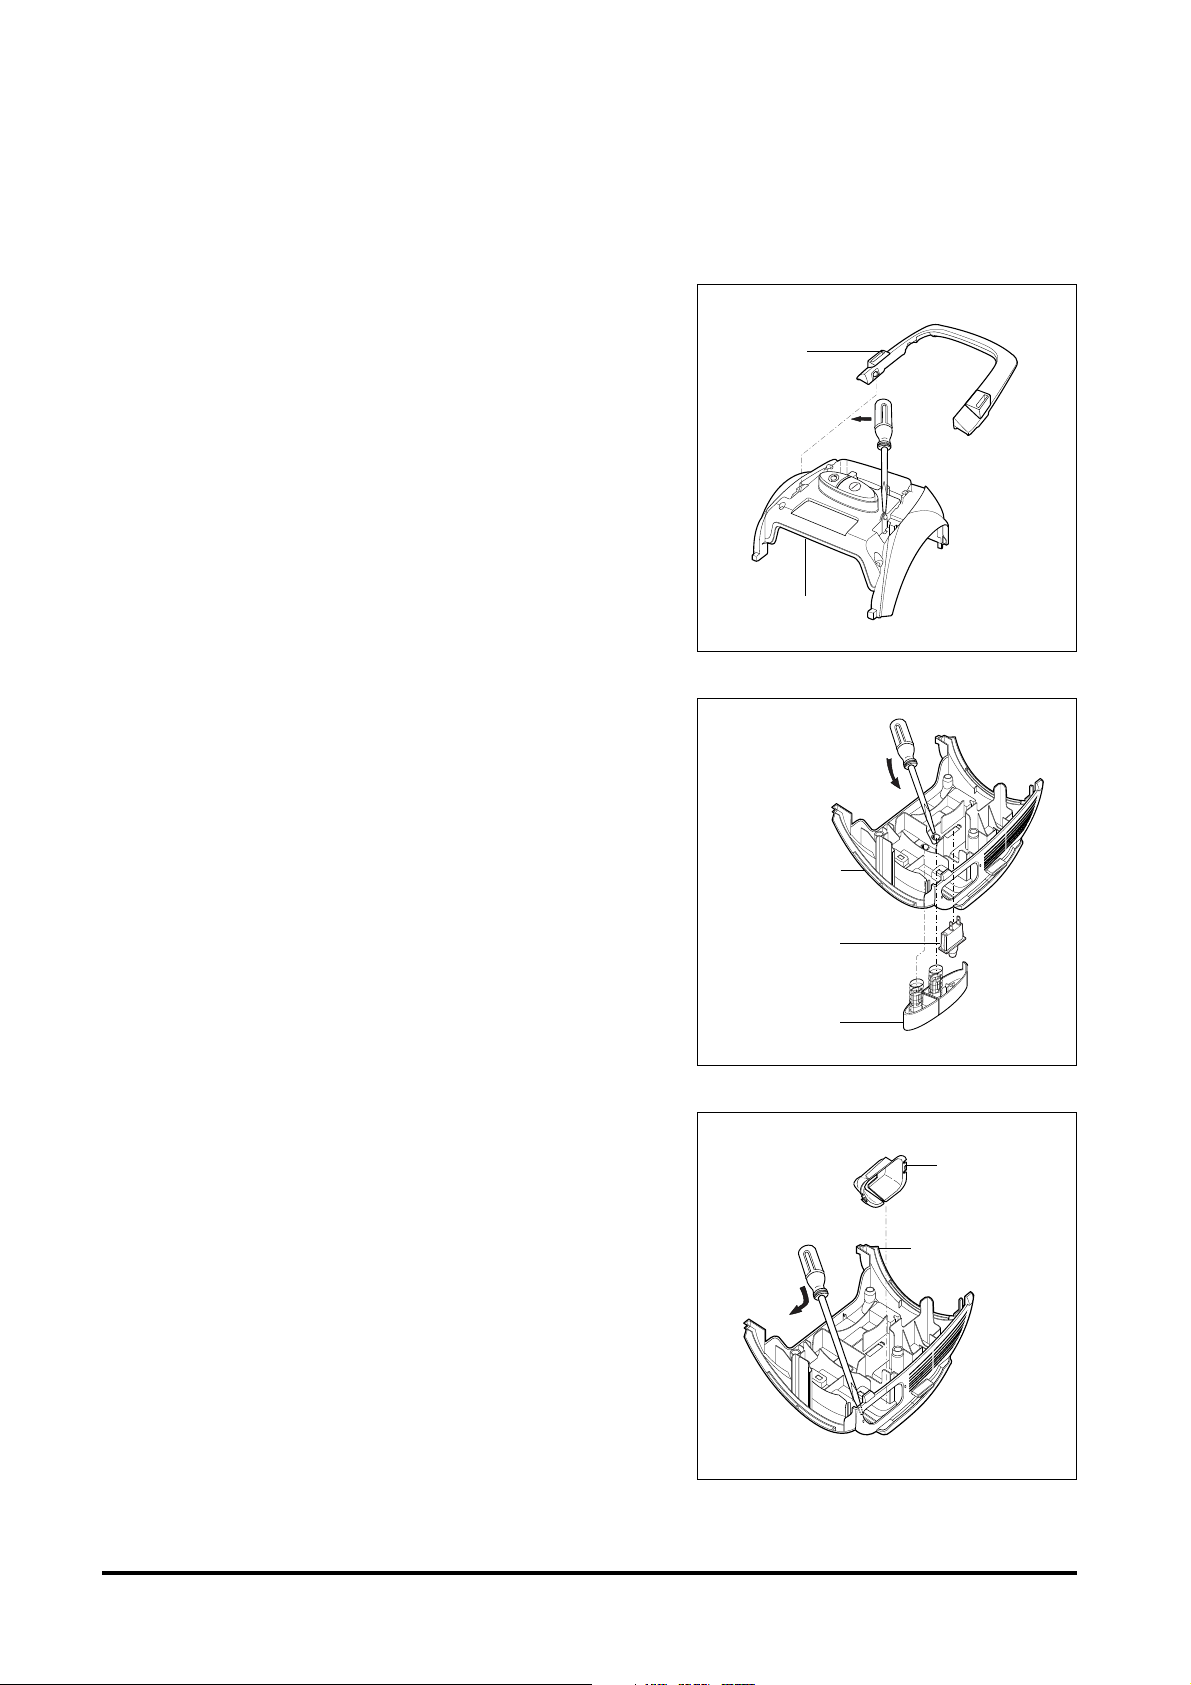
4. Disassemble the handle. (push the left and
right hooks when disassembling.)
5. Disassemble the Cord-Reel Button and ON/OFF Button
and Main switch from the Body-Control Assembly as
shown in the diagram.
HANDLE
ASSY-COVER DUST
ASSY-COVER DUST
6. Disassemble the Cord Guard as shown in the
diagram.
MAIN SWITCH
BUTTON-CORD REEL
GUARD-CORD
ASSY-BODY CONTROL
4-2
SAMSUNG ELECTRONICS CO., LTD.
Page 3

7. Separate the Cord-Reel, Main PCB and Motor
Assemblies from the body.
4-2 Exchanging the Motor
Separate the CUSHION-MOTOR.F and CUSHION-MOTOR.B
ASSY-MOTOR PART’S
CUSION-MOTOR.F
ASSY-CORD REEL
SPONGE-MOTOR
4-3 Replacing The Cord Reel
1. Separate the Cord Reel from the Main Body.
2. Hold the reel cover and wind the power cord to
the left 5 times, and quickly assemble the reel
onto the body,holding the reel not to reverse.
Warning:
Be careful not to wind the cord in reverse (this
might cut off the spiral spring or force it to pop
out).
Before assembling, the winding speed setting
should not exceed 5 (higher settings might be
dangerous).
MOTOR-V/C
CUSHION-MOTOR.B
SAMSUNG ELECTRONICS CO., LTD.
4-3
 Loading...