

Samsung VC-6013 User Manual [da]

VACUUM CLEANER
❈ Before operating this unit, please read the instructions carefully.
Operating Instructions
Bruksanvisning
Bruksanvisning
Brugsanvisning
Käyttöohje
EN
SV
NO
DA
FI
DJ68-00097X(EN) 6/7/02 2:27 PM Page 1
1-1
EN
This appliance must be connected to the same main voltage as
shown on the rating plate.
This vacuum cleaner is not suitable for removing any kind of liquid.
Carpets treated with a liquid cleaner must be allowed to dry before
being cleaned with the unit.
Never operate the vacuum cleaner without a dust bag.
The cover cannot be closed if a dust bag is inserted. Please do not
close forcibly.
Keep children away from this vacuum cleaner. It must not be used
on people or animals.
Never use your appliance to vacuum matches, glowing embers, or
cigarette-ends. Avoid vacuuming hard, pointed objects, since they
may damage the appliance or dust bag.
If your vacuum cleaner has a fault, please contact your electrical
retailer or an auth-orized service agent.
If the main cable is defective, the complete cable winder must be
replaced by a service agent.
Once you have unpacked the unit, do not simply throw the packing
into the household waste.
Take them to the appropriate collecting points for recycling.
IMPORTANT SAFEGUARDS
PROTECTING THE ENVIRONMENT
▲
▲
▲
▲
▲
▲
▲
▲▲
▲
▲
DJ68-00097X(EN) 6/7/02 2:27 PM Page 2
1-2
EN
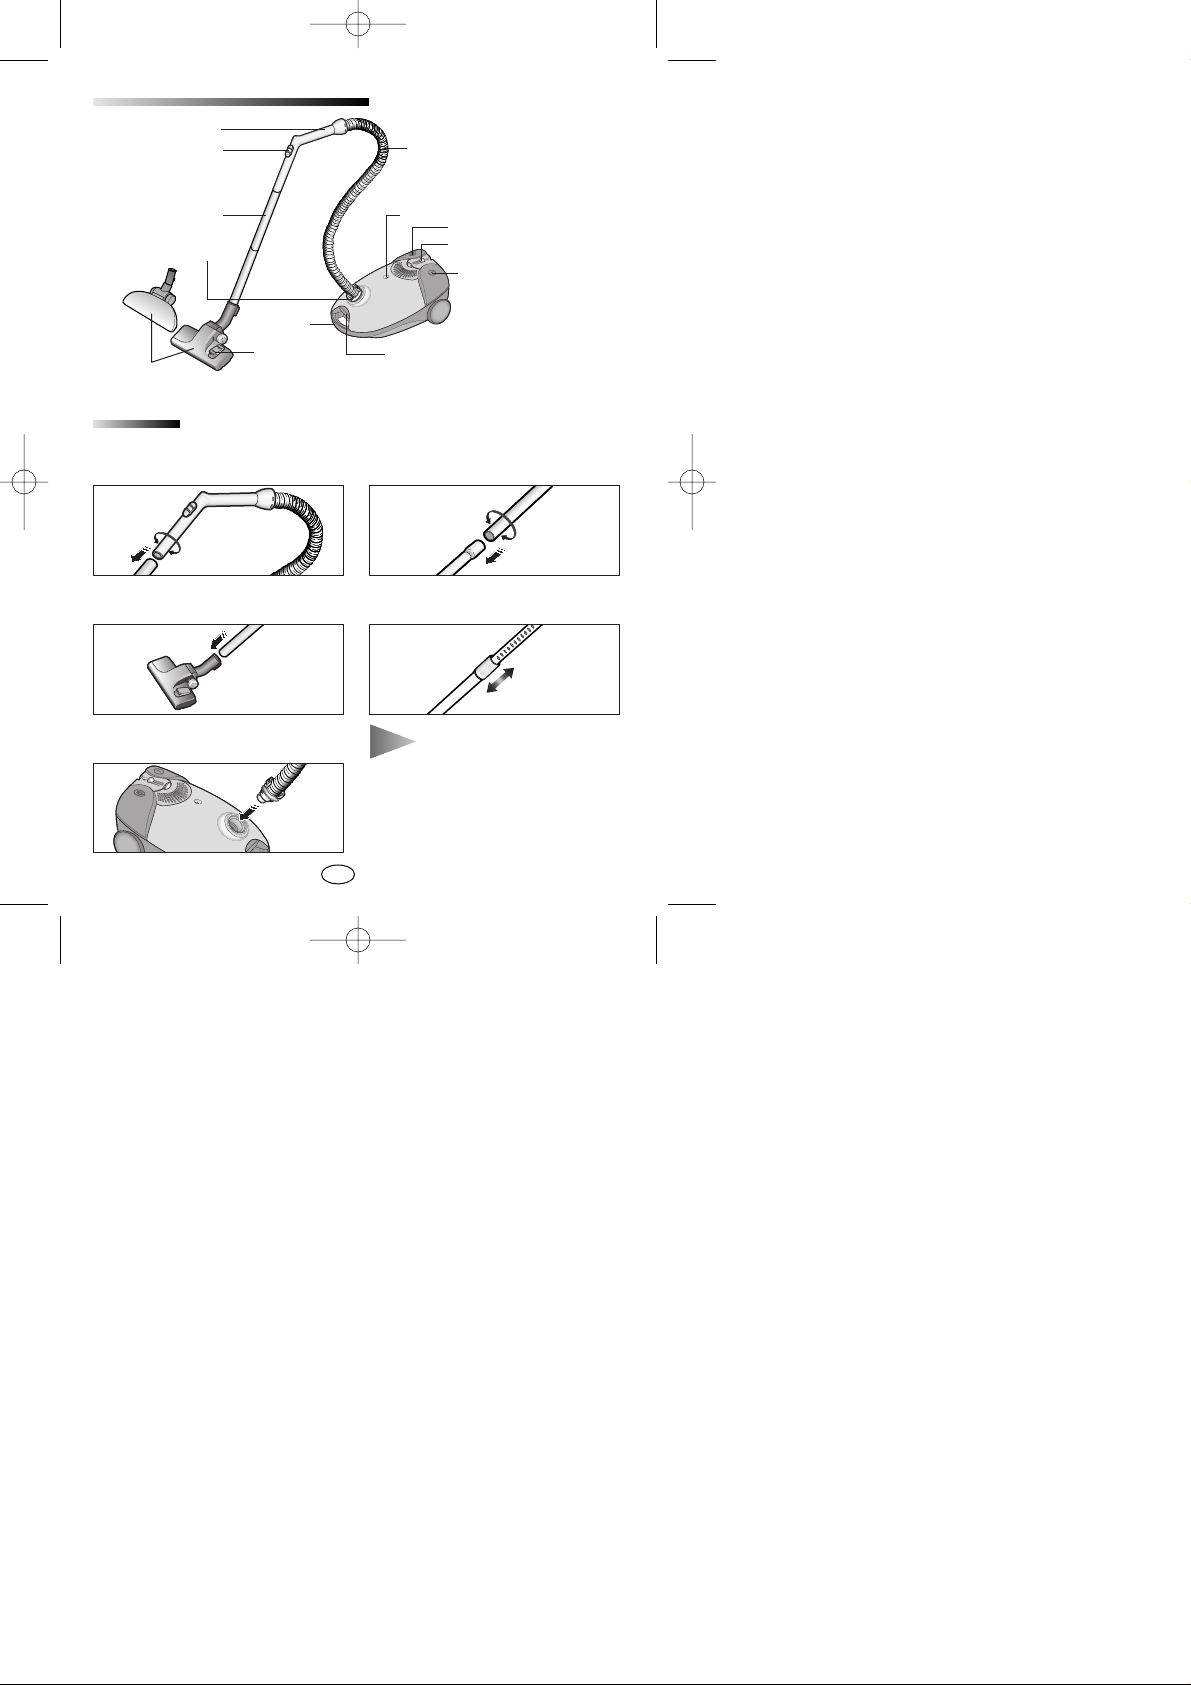
IDENTIFICATIONS OF PARTS
ASSEMBLING THE VACUUM - CLEANER READY FOR USE
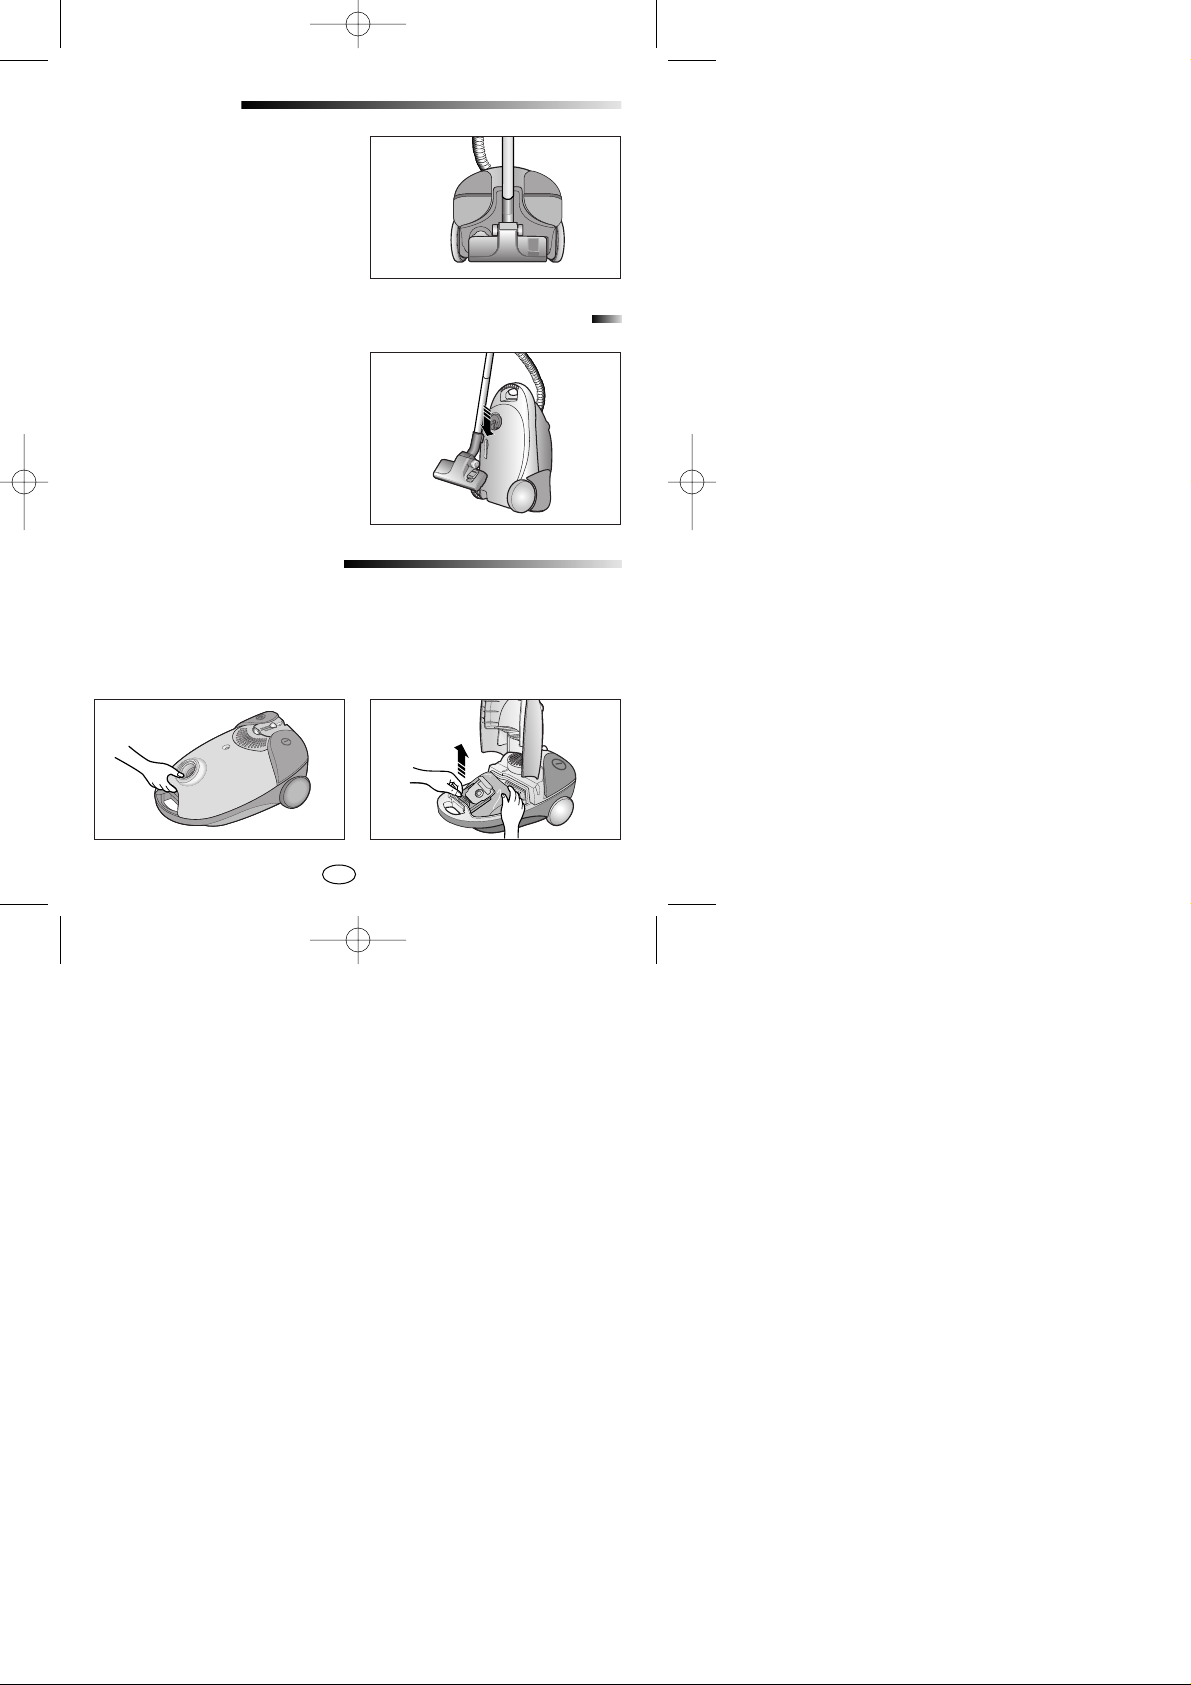
1) Connect the suction hose to the
suction tube.
2) Connect the suction tubes together
(depending on model).
3) Connect the nozzle to the suction
tube.
4) Connect the body connector to the body
of the cleaner.
OPTION : Adjusting the telescopic
tube(depending on model).
▲
Features marked with *may vary according to model.
HANDLE
AIR REGULATOR
TUBE*
FLOOR NOZZLE*
RUG/FLOOR
SELECTOR
BUTTON FOR SUCTION
HOSE REMOVAL
CLAMPER FOR DUST BAG
COMPARTMENT
POWER CONTROL SWITCH*
ON/OFF BUTTON
CORD REWIND BUTTON
DUST-FULLINDICAT OR
SUCTION HOSE
CARRYING
HANDLE
DJ68-00097X(EN) 6/7/02 2:27 PM Page 3
1-3
EN
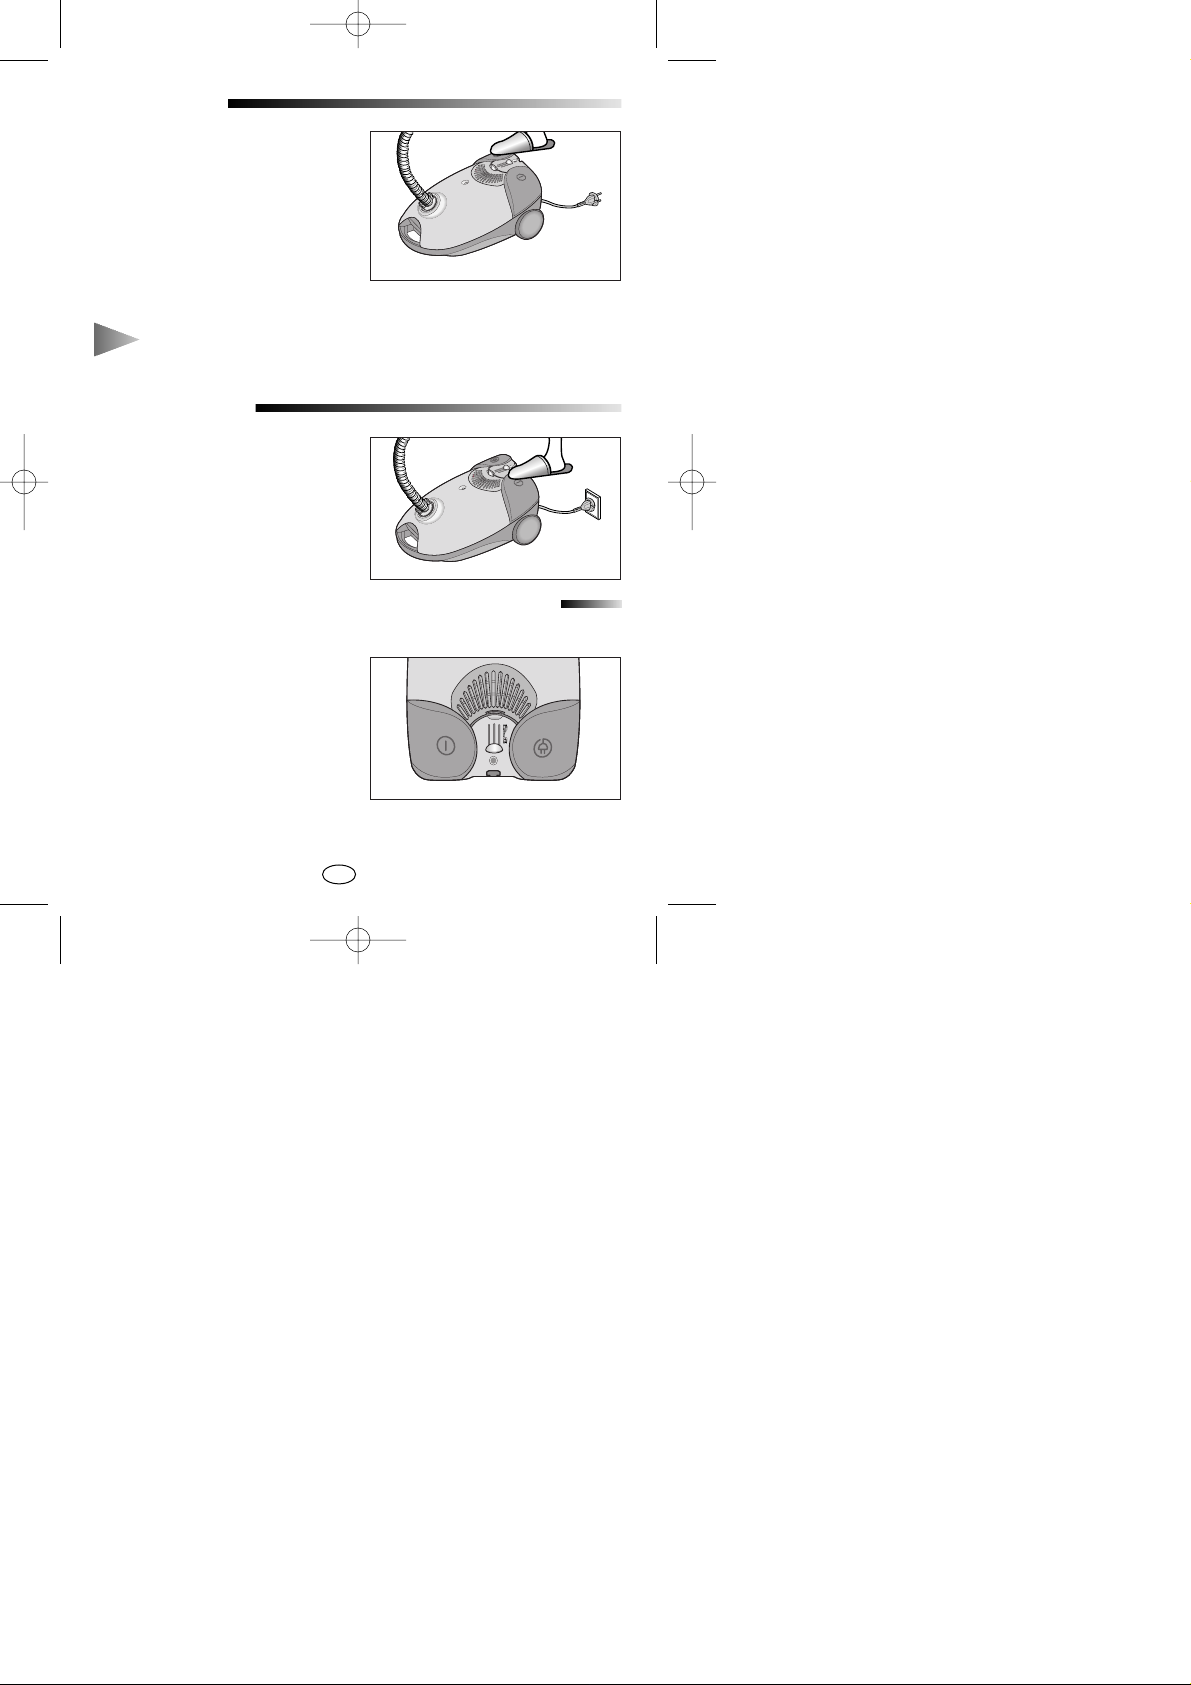
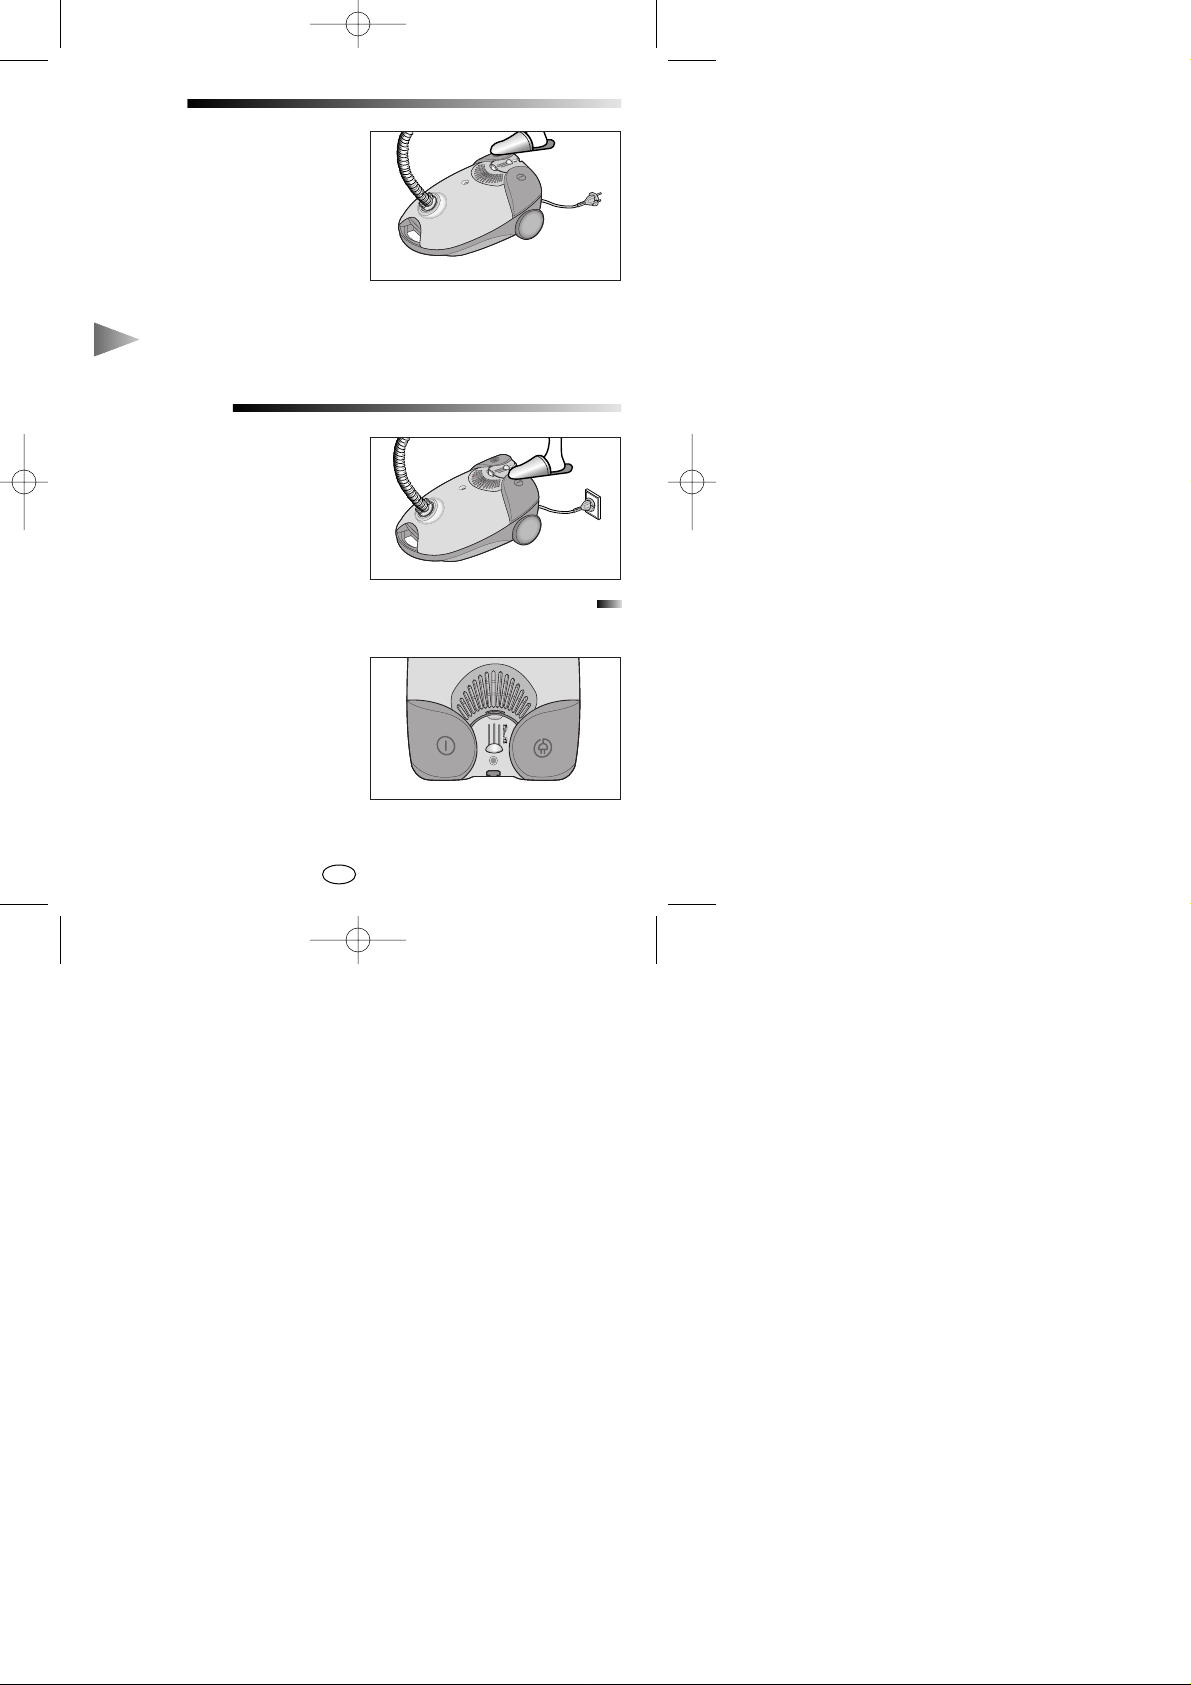
POWER CORD
ON / OFF SWITCH
POWER CONTROL(VARIABLE CONTROL TYPE ONLY )
1) PULLING OUT
The power cord is long enough to
be drawn out for convenience.
2) REWINDING
When you have finished cleaning,
disconnect the plug from the
electrical outlet and simply press
the cord rewind button lightly with
your toe.
With the cord plugged into an
electrical outlet, start or stop the
vacuum cleaner by pushing lightly
downward on the switch with your
toe.
The vacuuming power can be
adjusted to suit any situation with the
electrical power control.
MIN = For delicate fabrics, e.g.net
curtains.
MAX = For hard floors and heavily
soiled carpets.
NOTE :
When removing the power cord from the electrical outlet, grasp
the plug, not the cord.
DJ68-00097X(EN) 6/7/02 2:27 PM Page 4
1-4
EN
NOTE :
If the “Dust-Full” indicator continues to display “RED” even after
changing the dust bag, turn the cleaner off and check whether the
hose, tube or nozzle is clogged.
DUST-FULL INDICAT OR
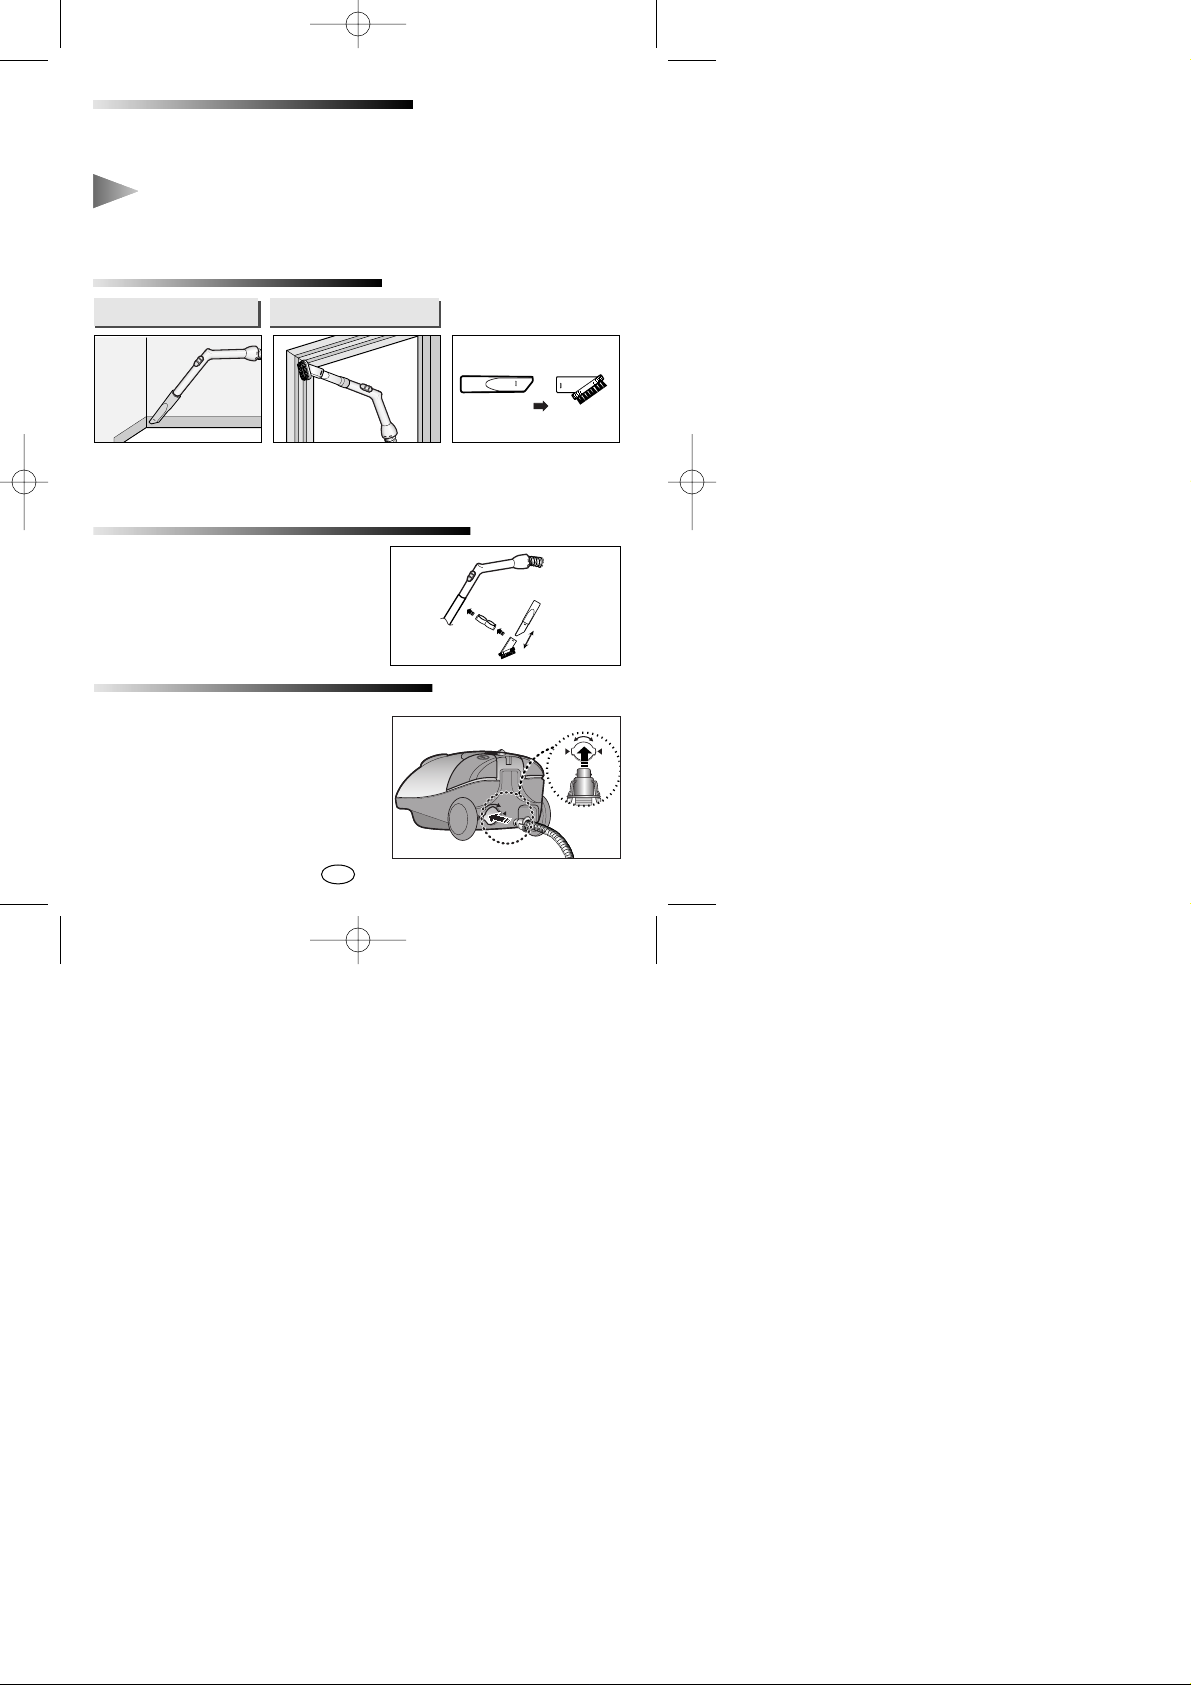
USING THE ACCESSORIES
USING THE BLOWER
If the “Dust-Full” indicator changes to “RED” while you are cleaning, the
dust bag requires replacement.
•
Crevice tool for
radiators, crevice,
corners, between
cushions.
Located on the left rear side of the
cleaner.
1) Disconnect the hose from the body
of the cleaner.
2) Connect the hose clamper to the
blow hole.
CREVICE DUSTING
•
Before use, assemble
the dusting brush to
the crevice tool.
•
Dusting brush for
furniture, shelves,
books, etc.
TOOL STORAGE
Your cleaner features a tool storage
device.
Assemble the accessory hanger on to the
extension tube. It can be used to store the
cleaning tools while they are not in use.
This tool can be separated into two parts.
DJ68-00097X(EN) 6/7/02 2:27 PM Page 5
1-5
EN
PARK POSITION
Located in the top rear side of the
vacuum-cleaner, there is a nozzle
support that can be used to park
the nozzle during pauses in
cleaning.
TRANSPORTING AND STORING THE VACUUM CLEANER
For easy storage and
transportation, this vacuum cleaner
has a clip system built onto the
body, which will keep the tube,
hose and nozzle in a vertical
position.
REPLACING THE DUST BAG
1) To open the dust cover of the
dust bagcompartment, press
the clamper upward.
(The clamper is located at the
front of the dust cover)
2) Remove the carrying bag from
the cleaner.
DJ68-00097X(EN) 6/7/02 2:27 PM Page 6
1-6
EN
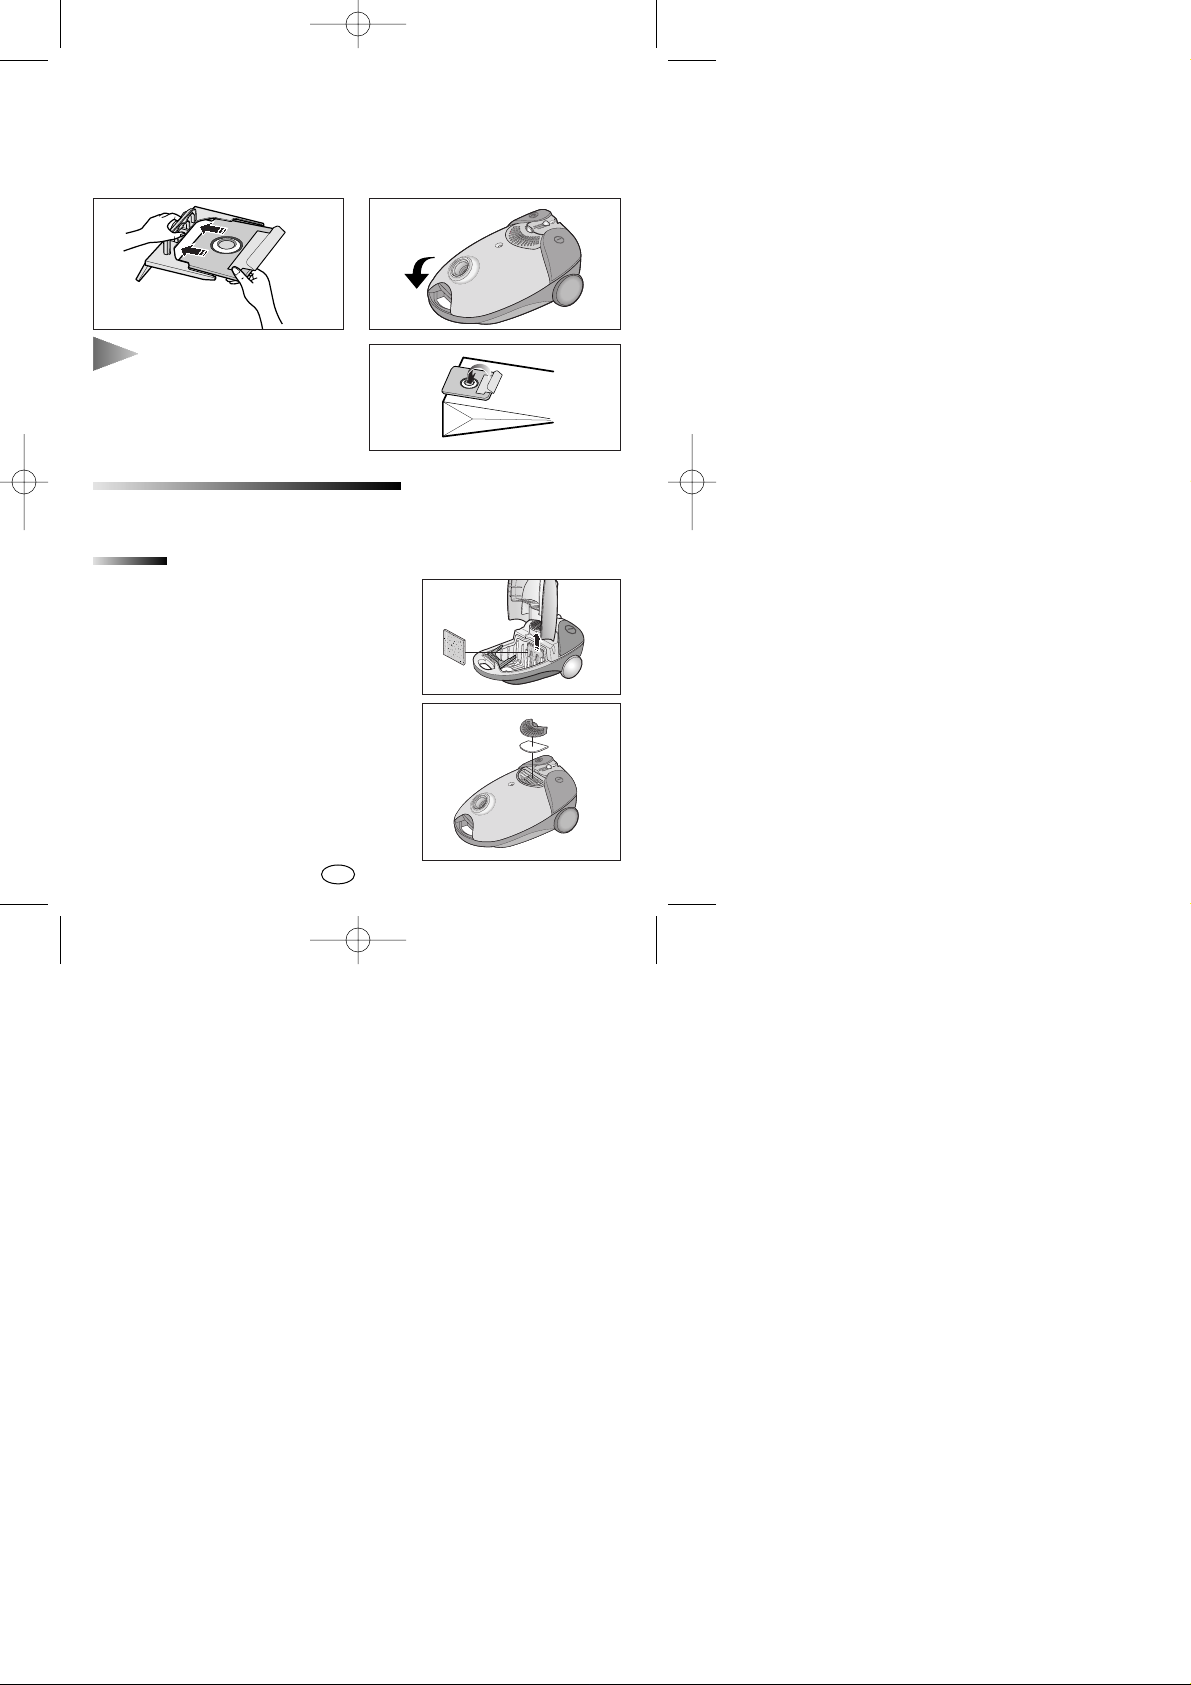
FOR CLOTH FILTER BAG
MAINTENANCE OR REPLACEMENT OF THE FILTERS
NOTE :
Used dust bag can be
sealed by removing the film
from the paper and sticking
the latter over the suction
opening.
(ONLY PAPER BAG)
After using, if the cloth filter bag is full of dust, clean the cloth filter bag and
use it again.
1) INLET-FILTER.
• Open the dust cover.
• After detaching the filter, wash it lightly
withwater, dry it in the shade, and then
insert it in its original position.
• Close the dust cover.
2) OUTLET-FILTER.
• To open the filter cover, press front and pull
it simultaneously.
• Remove and replace the dirty microfilter.
• Close the cover.
3) After removing the used dust
bag, insert the cardboard bag
collar of the new dust bag into
the carrying bag.
4) Press the dust cover down
gently until the clamper relocks.
DJ68-00097X(EN) 6/7/02 2:27 PM Page 7
1-7
EN
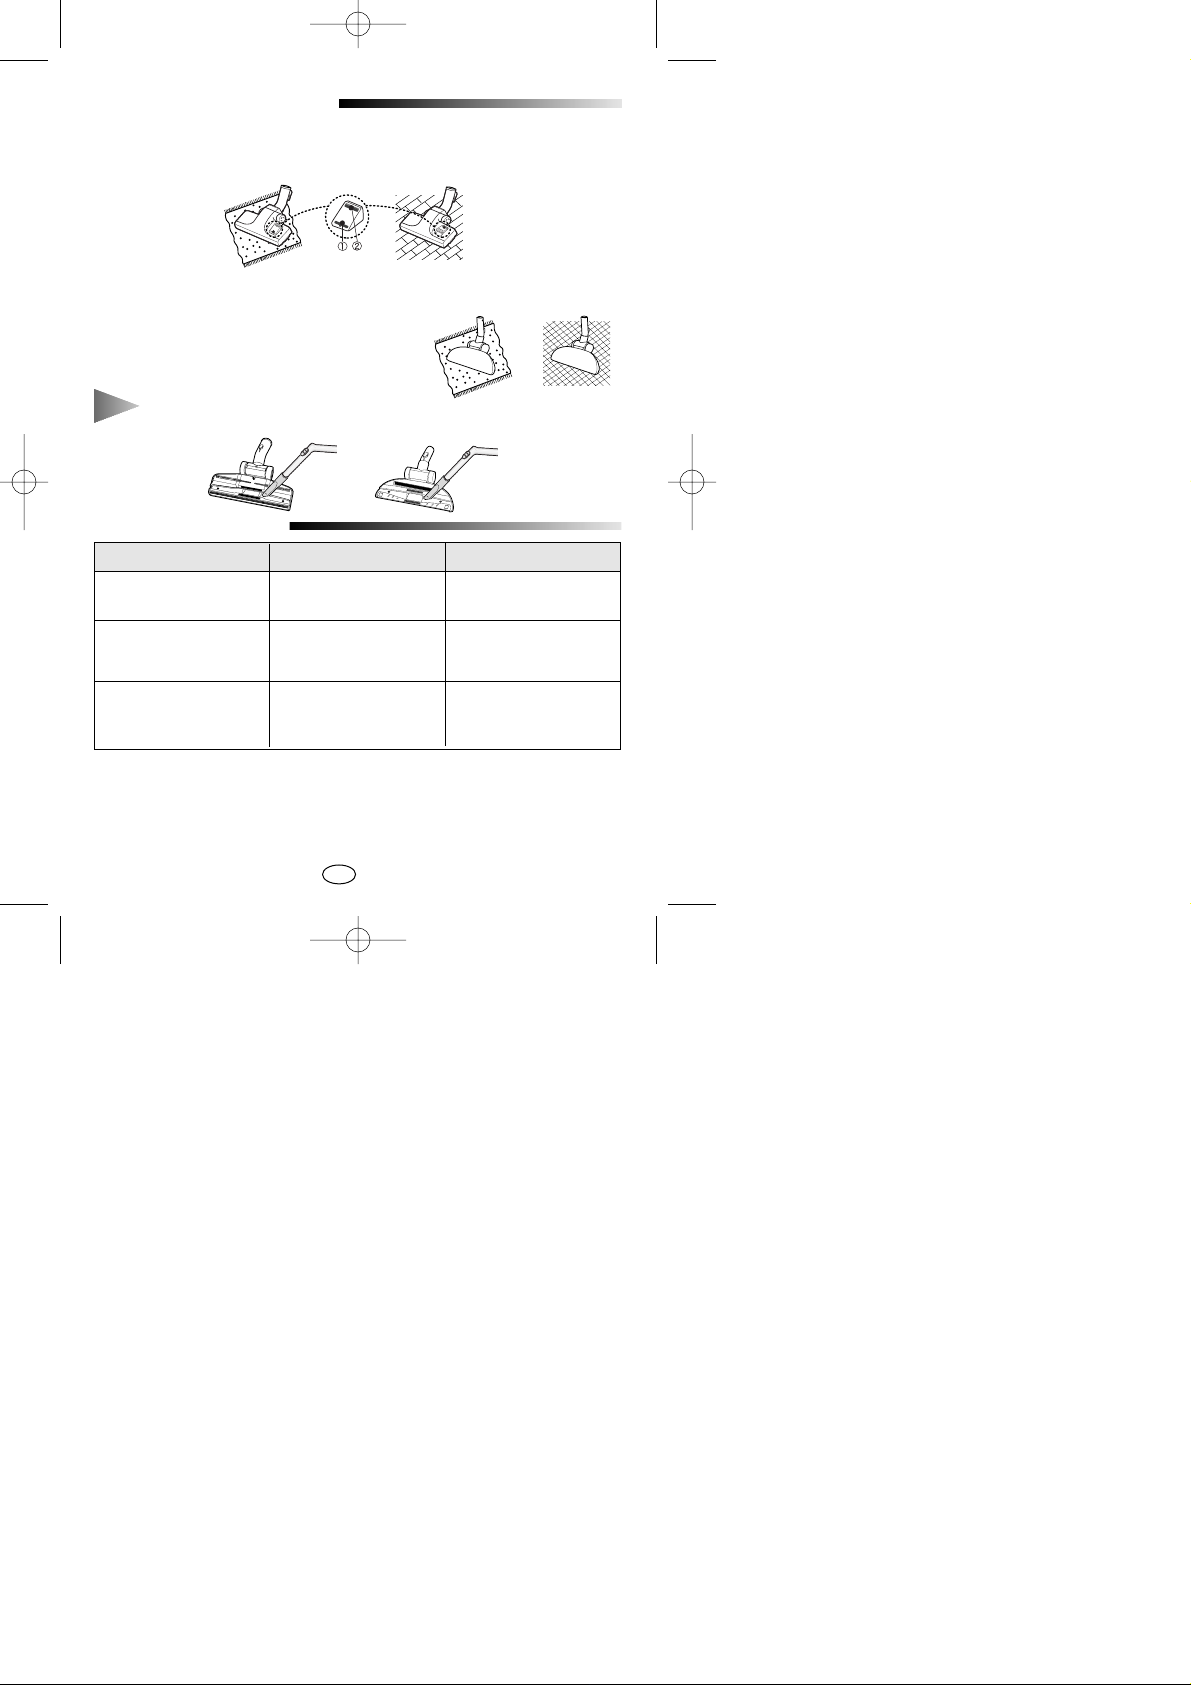
USAGE OF FLOOR NOZZLE
FOR RUG / FLOOR SELECTOR
Before use make sure that the position of the selector is in the right
position for the type of surface to be cleaned.
Select the carpet indicator ➀when cleaning carpets..
Select flat surface indicator ➁when cleaning the floors, tiles, etc.
FOR UNIVERSAL BRUSH
Use the floor nozzle for all cleaning surfaces.
NOTE :
For optimum efficiency, clean floor brush with crevice tool.
TROUBLE SHOOTING
PROBLEM CAUSE REMEDY
Motor does not start. No power supply. Check cable, plug and
socket.
Suction force is gradually Filter, nozzle, suction hose Remove the object.
decreasing. or tube is blocked.
Cord does not rewind fully. Check that the cord is not Pull the cord out 2~3m &
twisted or wound unevenly. push down the cord rewind
button.
This Vacuum cleaner is approved the following
EMC Directive : 89/336/EEC, 92/31EEC and 93/68/EEC
Low Voltage Safety Directive : 73/23/EEC and 93/68/EEC
DJ68-00097X(EN) 6/7/02 2:27 PM Page 8

2-1
SV
Den här apparaten måste anslutas till ett elnät med samma
spänning som typskylten visar.
Den här dammsugaren lämpar sig inte till att suga upp någon som
helst vätska.
Mattor som har rengjorts med någon form av vätska måste först få
torka innan man använder dammsugaren på dem.
Använd aldrig dammsugaren utan dammpåse.
Locket går inte och stänga om dammpåsen saknas. Stäng den inte
med våld.
Låt inte barn komma nära dammsugaren. Den får inte användas på
människor eller djur.
Använd aldrig apparaten för att ta upp tändstickor, aska med glöd i,
eller cigarrettfimpar. Undvik att suga upp hårda, spetsiga föremål
som kan skada apparaten eller dammpåsen.
Om det skulle uppstå något fel på din dammsugare, bör du
kontakta din el-handlare eller ett auktoriserat serviceställe.
Om elsladden skulle visa sig vara defekt, måste hela
kabelupprullningen bytas ut på ett auktoriserat serviceställe.
När du har packat upp apparaten, skall du inte bara kasta
emballaget i hushållsavfallet, utan i stället sörja för det enligt lokala
sopsorteringsregler, eller lämna in det på rätt uppsamlingsställe.
SÄKERHETSFÖRESKRIFTER
SKYDDA MILJÖN
▲
▲
▲
▲
▲
▲
▲
▲▲
▲
DJ68-00097X(SV) 6/7/02 2:29 PM Page 2

2-2
SV
BESKRIVNING A V DELAR
MONTERING AV DAMMSUGAREN SÅ ATT DEN ÄR KLAR FÖR ANVÄNDNING
1) Anslut sugslangen till röret. 2) Sätt samman rören (beroende på
modell).
3) Sätt munstycket på röret.
4) Sätt i slangfästet i själva
dammsugaren.
Tillval : Justera det teleskopiska
röret (beroende på modell).
▲
Delar markerade * kan variera beroende på modell.
KNAPP FÖR VAL
AV
MATT A/GOLV
SUGSLANG
DAMMINDIKATOR
KNAPP FÖR SLADDVINDA
EFFEKTREGLERINGSKNAPP*
PÅ-/AV KNAPP
ÖPNNINGSKLÄMMA FÖR
DAMMPÅSENS FACK
BÄR-
HANDTAG
GOLVMUNSTYCKE
KNAPP FÖR SUGSLANG
RÖR*
HANDTAG
SUGKRAFTSREGLAGE
DJ68-00097X(SV) 6/7/02 2:29 PM Page 3
2-3
SV
ELSLADD
PÅ- / AVKNAPP
SUGEFFEKTSREGLERING (ENDAST TYP MED VARIABEL REGLERING)
1) DRA UT
Elsladden är lång nog för att
kunna dras ut efter behov.
2) UPPRULLNING
När du är färdig med städningen,
skall du dra ut stickkontakten ur
vägguttaget och trycka lätt på
upprullningsknappen med tån.
Sätt på eller stäng av
dammsugaren genom att trycka
ned strömbrytaren lätt med sladden
i eluttaget.
Sugkraften kan anpassas till varje
situation med strömbrytarreglaget.
MIN = För ömtåliga tyger, som
exempelvis gardiner.
MAX = För hårda golv och mycket
smutsiga mattor.
OBS :
Ta tag om stick-kontakten och dra den ur vägguttaget.
Dra aldrig i sladden.
DJ68-00097X(SV) 6/7/02 2:29 PM Page 4
 Loading...